Featured Post

First Impressions: The Kingdoms of Men, Part II

Good morning gamers, NOTE: there has been an update based on a comment made below - the change is in red . I have not yet seen the War of th...

Monday, December 30, 2019

Magic: Top Five Anti-Casters

Good morning gamers,

In our series on heroes, we’ve looked at Uruk-Hai heroes from Isengard, Dwarf (and wizard and Hobbit) heroes from Thorin’s Company, and the top five ways to waste Might points in the game. Today, we look at the top five heroes that you can employ to resist enemy magic casters (and in preparing for this post, I was rather proud to know that I own most of them - good thing, since almost all of my armies run magic, huh?). :)

How to stop magic?
As I discussed in a previous post on Magic in MESBG, there are four ways to block magic:
  • Spend Will (one die for each point of Will you spend – any that get a “natural 6” are returned to your Will store);
  • Resistant to Magic (free die anytime you’re targeted by a spell – available whether you spend Will or not);
  • Heroic Resolve (free die anytime you’re targeted by a spell, but requires the hero who calls it to stay stationary); and
  • Fortify Spirit/Protection of the Valar (two free dice anytime you’re targeted by a spell OR immunity from hostile spells, but requires the hero who casts the magical powers to retain Will OR cast the magical power that turn).
No model has access to all of these innately and most heroes only have access to one or two. Since magic is out of favor for many players these days, you might not get much practice fighting against magic (which can be a nasty surprise). As such, let’s look at some of the qualities that makes a hero a good anti-caster option (in the odd event you run into a double-Ringwraith army).

Monday, December 23, 2019

Top 5 Ways to Waste Might Points: One Gamer’s Opinion

Good morning gamers,

In this series on heroes, we’ve covered an exhaustive reviewof the Dwarves in Thorin’s Company (and which variant is better – the Thorin’s Company ones or the Erebor Reclaimed ones) and revisited a taxonomy on Isengard heroes that we did a while back. Today, we turn to the use of Might, one of the most important resources you’ll have to manage in the Middle-Earth Strategy Battle Game. Some of the thoughts I have in this article have already crept up in some of my other articles, but I think they all bear repeating in one central place. And if you’re going to talk about heroes for a month, talking about Might is probably a good thing to add to the conversation.

The guiding rule we’re going to following today is this:

Might is a scarce and important resource – don’t risk wasting it!

If you accept this rule, everything I’m about to write makes sense (even if it galls us to have to admit in a game). While the purely analytical side of me agrees wholeheartedly with this, I often find myself drawn to violate the following five rules (so naturally, I’m going to caveat exceptions to all of them). :-) Okay, enough blather - let’s get into it!

Saturday, December 21, 2019

Tiberius Battle Company Log, Entry #1

Good morning reader,

Yep I know what you're thinking - Tiberius, what are you doing posting today? It's not Monday!?!?!?! I know, I know. That's because today's post begins an irregular series that I'm starting on Battle Companies.

This year's TMAT GT is going to be Battle Companies themed, where we all pick one (or more) Battle Companies, play against each other "regularly," and include one Battle Company that we developed this season to use in a larger army (points limit still TBD because people are lobbying for a higher points level, whether the alliance matrix is allowed is also being debated). All in all, it should be fun.

For my first battle company, I've decided to do the Last Alliance. Those of you who have followed the blog for a while know that I got started with Rivendell thanks to the White Council units (Elrond, Arwen, old Glorfindel model, Erestor proxy, thought about getting Cirdan for a while). I originally got a few High Elf Warriors just so I could run a handful of bodyguards around my Elf/wizard heroes because they were getting overwhelmed. That then led to a larger contingent that is now a full-fledged army.

Numenor took off at about the same time: I picked up a boatload of Numenor warriors from eBay (and traded/bought a bunch from some friends who were eager to get rid of the Numenoreans that came with their High Elves) and acquired Elendil and Isildur in a large hero lot on eBay. With a recently converted Captain of Numenor on horse and a lot of conversions to turn the all-sword-and-board army into a more diversified force, Numenor has been chomping at the bit to be used.I

Friday, December 20, 2019

Last Month on TMAT (November 2019)


November was full of other-life stuff (with personal travel for all of us), but we still got some content up! With our series on shooting continuing and a few workbench updates, there's a mixture of hobbying and tactics if you need to catch up!

Monday, December 16, 2019

Uruk Heroes: Taxonomy, Revisited

Good morning gamers,

Back in January 2013, I did a post on Uruk-Hai heroes, addressing the various builds for Uruk-Hai heroes that you can do, what categories they fall in (we identified four general categories), and how you could create an Uruk-oriented Isengard army that had elements of all four of these categories. In today’s post, we’ll be revisiting this topic since Uruk-Hai hero profiles have changed a bit since the previous version (not much, but some). I will note that since most of Isengard didn’t change in the newest release, most of Centaur’s thoughts on both Isengard heroes and Isengard warriors also apply, so check those out when you have a chance.

Uruk-Hai Heroes: A Brief Taxonomy
I should note that not all Uruk-Hai are found in Isengard. While Shagrat, Mordor Uruk-Hai Captains, and Black Guard Captains/Drummers are great and all, we’ll just be focusing on Isengard today. I’ve also noted in a previous post that Thyrdan is an excellent choice of Isengard commander (as is Saruman) – but as great as these guys are, we won’t be looking at them (though you should consider bringing them – they’re definitely worth taking).

For Isengard Uruk-Hai captains, you have the following categories (largely unchanged from past releases):
  • Rock:
    • Uruk-Hai Captain/Scout Captain with shield
  • Hatchet:
    • Mauhur
    • Uruk-Hai Captain/Scout Captain with two-handed weapon
  • Main-Stay:
    • Ugluk
    • Uruk-Hai Shaman with armor
    • Uruk-Hai Drummer
  • Arrow:
    • Vrasku
    • Uruk-Hai Captain with crossbow
    • Uruk-Hai Scout Captain with Uruk-Hai Bow
    • Uruk-Hai Engineering Captain/Siege Veteran with Isengard Assault Ballista
  • All-Around:
    • Lurtz
We’ll take a look at each group in turn – they still make a nice pattern of increasing the number of models included in each, don’t they?

Monday, December 9, 2019

Sizing Up Dwarves: Thorin's Company vs. Erebor Reclaimed

Good morning gamers!

For those who have been following our blog for a while, my last post showed how I re-did some models I converted for Thorin’s Company. Recently, I acquired all of the new Thorin's Company models (the Dwarves at any rate) and began to re-convert my Thorin's Company rangers to match the color scheme of the army. It was a great project to make my Dwarves look like those in the movies, but I really like the new models (plus, my son was reading the Hobbit at the time, so maybe that kept them on my mind)!

I do like that thanks to the errata, their army bonus gives all of them Heroic March – something they REALLY NEEDED when the rules were originally released. While there are many great things that make this army fun to use, we’ll be using this post not only to showcase how they look now, but also contrasting the Thorin’s Company version of each hero with his counterpart version in the Erebor Reclaimed list (which Rythbryt did a write-up on earlier in 2019). For the purposes of this post, we will only be comparing the profiles of the heroes themselves. I say this because the heroes from the Erebor Reclaimed list can lead Iron Hills Warriors and Iron Hills Goat Riders - both of which are amazing warrior units, as Rythbryt writes about here and here - but the comparisons get really muddy if we include the ability to take warriors vs. having to run as part of a single warband. With that said, let the pictures begin!

Monday, December 2, 2019

Shooting: Skirmish models, Revisited

Good morning gamers,

Today’s post is something special – today I'm joined by Centaur in talking about different skirmish lists in MESBG. The intent of this post is to highlight some of the tactical thoughts that go into using different lists. For our purposes today, skirmish lists will be focusing on dealing damage outside of melee in order to whittle down an opponent's force to a more manageable size. This generally requires movement, as skirmish troops don't want to be engaged right away.

Without further ado, let’s take a look!

Monday, November 25, 2019

Workbench Update: Kingdom of Moria

Good morning gamers,

So, the Dwarves were one of my first armies to collect – and by far have been one of the most fun to use. I’ve played many games on this blog with my Dwarves against all kinds of foes and was the first of our players to bring Dwarves to the attention of the group (where they’ve received much criticism for being “overpowered” ever since). While Dwarves certainly have their weaknesses, conventional charge-the-battle-lines-and-hack-them-down strategies aren’t one of them – Dwarves excel at getting their units locked in combat (especially their heroes) and cleaving enemy units quickly. Banners are great for these guys (and King’s Champion banners are the best way to get them) and since any Dwarf Warrior can carry a banner, keeping banners alive is actually quite easy (be it equipped on a bowman or a warrior with a shield).

Today we’re looking at two critical changes that happened around the time of the new rules release: first, without the rules for volley fire, I don’t need 10 Dwarf Warriors with Dwarf bows anymore to hail down S3 arrows on people 18-36” away (so the two guys I converted are becoming melee guys again, but we’re giving them shields this time), and second, we’re repainting our converted Thorin’s Company rangers because … we bought Thorin’s Company (more on them next week).

Monday, November 11, 2019

Workbench Update: HORSES! (Minas Tirith & Numenor, Part II)

Good morning gamers,

So, let's begin by acknowledging that today in the US is Veterans Day - thanks vets!

Let's also acknowledge that despite a holiday weekend, my fellow admins are busy, so our collaboration post on skirmishers is slipping a week. Instead, we're doing next week's workbench update today (and, coincidentally, it's about Veterans of the Osgiliath variety).

In June/July of this year, we did two workbench updates on Minas Tirith and Numenor, showcasing some of the basing, painting, and converting we’ve been doing on the models I own. Today, we continue that work by looking at a few new acquisitions: painting up 8 more Warriors of Minas Tirith, further conversions on Osgiliath Veterans, adding spears and shields to some of my bowmen, purchasing six Knights of Minas Tirith, and painting up two Rangers of Gondor (and painting up two Aragorns and two spare Numenoreans - but we're getting ahead of ourselves).

Monday, November 4, 2019

Last Month on TMAT... (October 2019)


October's in the books, which is hard to believe. If you, like me, found yourself with a busier month than you planned and haven't had a chance to catch up on TMAT's content, we've got it all for you in one convenient location!

Case Study: Goblin Archery Tactica, Revisited

Good morning gamers,

In our last post, we looked at how adding skirmish elements to a Kingdoms of Moria army can make it more flexible in dealing with enemy models than a pure line-em-up-and-hit-em list. Today, we’ll be doing the same thing, but looking at their primary antagonists: Moria. In a way, this will revisit a post we did back in June 2013 on Moria tactics. Things have really, REALLY changed for my Greenskins since then…

Moria: What Are Our Skirmishing Options?
Despite not having that many warrior profiles (and fewer hero profiles than many other factions), there are a surprising number of choices for skirmishing with Moria – let’s look at the Warrior choices first.

Thursday, October 31, 2019

Armies of Middle-Earth SBG: Moria in the Middle-Earth Strategy Battle Game

Image result for moria

Deep beneath the misty mountains lie the caverns of Moria. In ages past, the greatest kingdom of the dwarves gave way to foul goblin invaders. After the fall of Azog, the land lay quiet for years, until Balin's ill-fated expedition, and the Fellowship's own venture into this forsaken land, awoke an ancient malice...

Few armies in the Middle-Earth Strategy Battle Game have such a diverse list as Moria. From spammable cheap troops to elite, monstrous heroes, there is no such thing as a "standard" Moria force. So grab your torch, brush up on your elvish passcodes, and venture with us into the long dark of Moria.

Photo Credit: YouTube


Monday, October 28, 2019

Case Study: Dwarf Archery Tactica, Revisited

Good morning gamers,

Today we get to do a deep-dive into my beloved bearded fellows – the Dwarves of Moria! This post revisits a post I did back in August 2014 (and a post we did back in April 2011), where I talked about my Dwarves and the strategy for using them. Today, we’ll be using them as a case study to recap what we’ve talked about in the previous two posts in this series (one on shooting in SBG, one on using throwing weapons).

Dwarves of Khazad-Dum/Moria: Why Skirmish?
A few of the armies we looked at in the previous post don’t have access to spears at all – Rohan has throwing spears but not normal spears. Among those armies that don’t (really) have spears are the Dwarves of Khazad-Dum (Sharkey's Rogues is another one). Yes, if you get 1 Vault Warden team for each 1 archer you bring along, you’ll have a “traditional shield-wall” complete with spears, but that’s not only very expensive to actually acquire, but also very one-dimensional. And perhaps that’s not a bad thing.

Where the Dwarves of Khazad-Dum thrive is in their flexibility: while the Army of Erebor list is almost strictly melee in nature, the Dwarves of Khazad-Dum have many shooting choices that allow them to skirmish with their opponents very well. With ballista to force your opponent to move towards your ranks, two kinds of bowmen to lay down medium-range fire, and two options for throwing weapons (besides several hero choices), the Dwarves of Khazad-Dum are a surprisingly good shooting army.

While most of the units I’ll be highlighting in this post are Dwarf Warriors and Dwarf Rangers, I will say that the three more dominant choices of units (Khazad Guards, Vault Wardens, and Iron Guard) are solid elite warrior options. While Iron Guard will show up near the end of this post, I’m not going to talk about Khazad Guards or Vault Wardens except to say that they make great anvils for the rest of your armies. Dwarves are tough to kill – and this is especially true of Khazad Guards and Vault Wardens, so including some of these can help you bog down some of the enemy’s assault force while you harass the flanks (or come crashing through a part of the battle line that’s been softened by archery during the advance).

Monday, October 21, 2019

Throwing Weapon Theory: How to Make Them Work, Revisited

Good morning gamers!

In our last post, we looked at how shooting has changed in the new rules of the Middle-Earth Strategy Battle Game and what kinds of considerations you should think about when it comes to including archery in your army. In general, I think all armies benefit from having some kind of archery presence, but some definitely benefit more than others. While most armies have a limit of 33% of their models being able to carry bows, you can allow more of your army to contribute to shooting damage by including throwing weapons in your army (especially on your non-bow-armed models). That’s what we’ll be looking at today. This post revisits a topic we covered back in July 2015, for those who want to see what was written there . . .

How have throwing weapons changed?

There are three big changes that have come to throwing weapons since I got started playing the game back in September 2010. The first and foremost change is that the number of “throwing weapon types” has grown. While whips existed as a special rule and not a fully-fledged piece of gear, all other kinds of thrown weapons (be they daggers, axes, or spears) were the same – 6” range, Strength 3 hit. With the Hobbit Strategy Battle Game, a distinction between throwing spears (8” range) and all other kinds of throwing weapons (6” range) was added. This has been retained in the new rules, with some other throwing weapons (like whips) being canonized as gear items as well.

The second change is that unless you’re shooting your throwing weapon on the charge, you suffer the “scoot-and-shoot” penalty (see our last post for what this is). While only a small change to your To Hit roll, it makes running away from an assaulting force a bit less effective (which, in a game where 1 pip of difference a die can have huge consequences, is no small thing). Still, throwing weapons are still quite valuable despite this reduction – and the fact that you don’t suffer it when you charge means you should be charging into combat with these guys (because you might just get a lucky wound in!).

The third change (and perhaps the most nuanced of them) is the addition of Heroic March. When I did my last post, the Hobbit rules were introduced and Heroic March became a thing (but we didn’t adopt it in our gaming group until the new release). Heroic March allows infantry models to overcome the greatest problem with throwing weapons: getting extra movement to start the next round as close as possible to the enemy throwing weapon models. While Heroic March doesn’t allow you to charge anyone, the extra 3-5” of movement (which stacks with movement gained from a Drum, if your team can get one) is invaluable. Where Dwarf and Goblin teams were at a distinct disadvantage with 5” move against 6” throwing weapons, now they can clear 8” of ground in a single turn (which should be enough to stand just outside someone’s control zone OR make up ground if your opponent ran like mad away from you to buy himself more space). While this doesn’t make your soldiers more resilient against throwing weapons, it might take a turn or two less to close with them (which can be huge).

With these changes in mind, we’ll dive into what makes throwing weapons so great (and probably my favorite aspect of the MESBG game).

Monday, October 14, 2019

Shooting: Getting the Most out of Archery, Revisited

Good morning gamers,


This post begins a new five-part series on shooting in the Middle-Earth Strategy Battle Game. This is a part of the game that, until recently, has received mixed reviews in our gaming group because shooting has been viewed as unreliable by many of the  factions of our players. This post will provide an overview of how shooting works and some of the fundamental considerations you should think about when using it in the game (as well as re-doing a post we did back in February 2016). Our next posts will be an in-depth look at throwing weapons (a very particular kind of shooting attack), going through two case studies on emphasizing shooting in army lists with my beloved bearded folk (Kingdom of Moria) and their arch nemeses the Greenskins of Moria (showing in both of these lists how placing a greater emphasis on archery can make both of these factions more powerful than they would be otherwise), and wrapping up the discussion with some thoughts on how to employ skirmish units in your armies (with special guests!).

So, let’s get started by understanding shooting…

Wednesday, October 9, 2019

Armies of Middle-Earth SBG: Far Harad in the Middle-Earth Strategy Battle Game


Updated February 2024: We come at last to the final participants in the Battle of Pelennor Fields: the mysterious Mahud from Far Harad. While their fleeting limits of film glory are limited almost exclusively to running down Rohirrim astride their Mumakil, the Mahud in the Middle-Earth Strategy Battle game have more up their sleeves than giant elephants.

I try to flag excellent community resources up here whenever I can, and Far Mahud happens to have a great one: DCHL Devin's video on How to Play and Buy Far Harad (Mahud) is a fantastic introduction to the different units, strengths, weaknesses, and playstyles of this faction (updated for the new rules set, too!), so be sure to check that out. If you still want to know what we think, carry on...

Monday, October 7, 2019

Workbench Update: Isengard

Good morning gamers,

Over the past few months, we’ve been working through our workbench projects on the Forces of Evil I own (since they don’t get their own time in the sun much). With recent journeys to Angmar, Mordor, and Moria, our current travels take us to the tower of Orthanc where Saruman and his minions see some minor repairs and some new arrivals.

Wednesday, October 2, 2019

Axes and Shields: Easterling Tactics in MESBG

Hey Reader!

A few weeks ago we got a question on our Easterling army post from Memento, who noted that he was having trouble keeping up with kill count with Easterlings, as they have some of the fighting stats and capabilities of Gondor, but with less power units (and, when you consider the heroes that Gondor has access to, that makes a lot of sense). And truthfully, this has always been a problem in our gaming group, and I suspect across the globe: how do you kill stuff with Easterlings?

Some have just teamed in a power hero or an alliance (Shagrat has made an appearance in our group, and Khandish chariots are a natural choice), but in today's post I want to stick with a fully Easterling force for two reasons. First, I don't know what models you have access to, so I'll plan on you just having access to Easterling models. Second, I don't want you to think, "Easterlings have a massive flaw, so I need to supplement it": Easterling just fight differently from other forces, and that's something that it took me a while to discern.

Easterlings are a very forgiving army, with D6-7 on most of your units so you don't die easily (and even against units that wound on Courage, you're sitting on C4+ for everyone, and +1 after your army breaks). What frustrates Easterling players is that, while their army can hold in a slog against most everyone, they can't kill things very quickly, which results in a brutal loss after a valiant attempt to hold the line. And that's what we're going to address today.

So let's begin with the nuances of how Easterling combat differs from other groups, and then discuss some specific tactics and unit combos to make this happen.

Tuesday, October 1, 2019

Last Month on TMAT... (September 2019 Edition)


It's been a busy September here at TMAT. After kicking off with a workbench update on converting Morgul Stalkers and Black Numenoreans, we jumped straight into reviews of more factions who fought at Pelennor Fields (the Fiefdoms, the Dead of Dunharrow, the Easterlings, Khand, and the Serpent Horde), returned to the Fellowship of the Ring for an advanced look at how to get the most out of the Fellowship's unique units (tactical units, the hobbits, and its big beatsticks), introduced a new series ("Fly you Fools!") dedicated to exploring formation and maneuvering options for our beloved and beautiful (if not always overly-bright) models, and capped it off with a descent into Moria.


Monday, September 30, 2019

Workbench Update: Moria

Hello gamers,

When I got started in the Middle-Earth Strategy Battle Game in September 2010 (LOTR SBG back then), I bought the core game: The Mines of Moria. My first tradiditonal army (read, wasn’t composed entirely of heroes) was, therefore, Moria. Within a month of getting the core game, I picked up Durburz on eBay and converted one of my archers into a Moria Goblin Shaman. With 22 Goblin Warriors (lost one and never found it again), 2 Goblin heroes, and 1 Cave Troll, I had a very impressive 25 models in a 300 point force … or so I thought. At 300 points, it’s hard to get anything in your army, but the hardest thing for most armies to get are numbers. As my collection grew (Lothlorien, Khazad-Dum, and Isengard by the end of that year – and many more armies since), Moria has in many ways fallen on the wayside. This is true for a number of reasons:
  • They don’t have good magic casters and I love magic casters;
  • They don't have good archery and I love archery;
  • They don't have any decently priced powerful heroes and I love decently priced powerful heroes;
  • Cave trolls and other monsters don't resist magic well and I love magic casters;
  • Their basic troops get crushed by high-strength archery and I love archery;
  • They get lots of troops UNLESS they get powerful monsters, which means they don’t spam as well as some other civs that can field powerful heroes (and I love powerful heroes).
That’s a lot of reasons (really three reasons used twice each). So, today we try to rectify it by giving these Greenskins some love and helping them look a little better on the table (with the ultimate goal of making me want to run them more). This post will primarily focus on what you can do with Goblin bowmen models and in particular highlight how you can convert them into heroes.

Saturday, September 28, 2019

"Fly you Fools!": Rethinking Shield-Spear Combat


Image result for minas tirith shield wall combat

It's been a couple months since our last dedicated post on maneuvering, but after doing so many theory-crafting posts on army lists recently, and with Tiberius about to launch a new series on Shooting, I thought it was high time to dust off some models, move them around the table-top in a photogenic-esque fashion, and see if we could get them to do interesting or unexpected things.

We're kicking off the first post of our new series on tactical maneuvering with what tends to be (for most armies, at least) the default battle-line in the Middle-Earth Strategy Battle Game: a front rank of warriors with shields (and sometimes the occasional front-rank hero) backed up by a rank of warriors with spears. This Shield-Spear formation (not to be confused with a Viking Shield Wall formation, which lacks spears, or a Shieldwall formation, which also gets a +1 defense bonus based on its position when strikes are made) generally tends to be pretty static. But that needn't be the case. As with Shieldwall, your Shield-Spear formation can be a dynamic and flexible formation, setting you up for the next turn, frustrating your opponent's plans, and even transforming "unwinnable" combats into salvageable ones.

If that sounds intriguing to you, read on for five simple tactics you can employ to accomplish just that! (No, that doesn't sound click-baity at all...)

Warning: lots of text, photos, and maths ahead. But it's the weekend, so it's not like you have anything better to do, right? ;-)

Photo Credit: VaderFan2187

Wednesday, September 25, 2019

Armies of Middle-Earth SBG: The Serpent Horde in the Middle-Earth Strategy Battle Game


With the Easterlings and Khand behind us, we're moving down south to the land of the Haradrim. We'll begin with traditional Harad (rebranded the Serpent Horde in the new edition of the Middle-Earth Strategy Battle Game), before moving on to Far Harad and all their camels (so, so many camels) next time. Like any serpent, these guys move fast and strike fast, with venom dripping from their fangs. There may also be mumakil involved...

Photo Credit: upabovetodownunder.blogspot.com

Monday, September 23, 2019

The Fellowship: The Strength of the Company, Revisited

Good morning gamers,

In our previous two posts, we revisited the Fellowship's tactical units (Gandalf the Grey and Bill the Pony) and the Hobbit characters in the Fellowship (Frodo, Sam, Merry, Pippin, and Smeagol). Today, we wrap up our revisit of the Fellowship to the four characters who really do it all - not only the predominant kill generators, but also provide the well-roundedness the team requires to be truly frightening. At long last, we tackle Legolas, Gimli, Boromir, and Aragorn - Strider. This post revisits a post we did back in 2012 and will be quite different in some areas, but much of what was written there still holds true (so you should read that before you continue if you haven't already).

Sunday, September 22, 2019

"Fly you Fools!" - Formations and Maneuvering in the Middle-Earth Strategy Battle Game

Army lists, rules updates, and theory-crafting are all well and good, but as any experienced player knows (and any new player learns quickly), having troops with the greatest stat-line in the world won't save your force if it gets caught out of position, or can't bring its superior firepower to bear on the enemy. In a war game that exists in three-dimensional space, the ability to maneuver your troops into position, and adapt their position to meet the objectives around you and the enemy before you, is a critical key to success.


Saturday, September 21, 2019

Armies of Middle-Earth SBG: The Variags of Khand in the Middle-Earth Strategy Battle Game

Image result for khandish chariots

Our Pelennor Fields army write-ups are really starting to take shape now, after Centaur's review of the Dead of Dunharrow. Today, we resume our look at the evil armies of Pelennor with an army that got an even shorter-shrift in the films than the Easterlings (who at least got a cameo, albeit in the dark): the mysterious Variags of Khand.

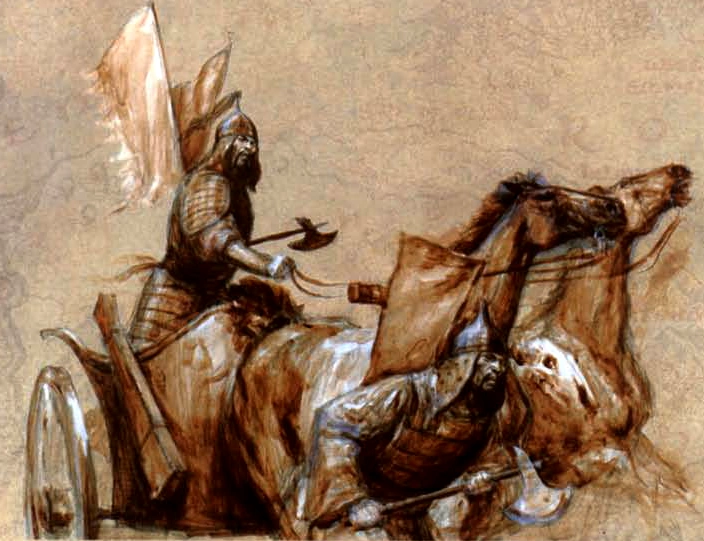
Almost nothing is known of this mysterious troop in the lore (apart from the fact that they were, in fact, there at Pelennor), but in the Middle-Earth Strategy Battle Game, Khand has taken the form of axe-wielding horse archers and charioteers, which gives them a unique place in the Middle Earth we inhabit. Khand received a number of buffs in the new edition (most notably to their chariots, which are surprisingly-inexpensive death carts if they get moving). They also seem tailor-made to take out enemy cavalry models, between their chariots (which do two Strength 4 impact hits to both horse and rider, plus have Monstrous Charge) and their generic horsemen (which are Fight 4 with bows and hand-and-a-half axes, for a laughably cheap points cost).

Full disclosure: this is not an army I've tried (though MinutemanKirk has run them with Easterlings, so I'll defer to him where he disagrees ;-) ), although I have watched them run down Uruk-Hai. It was rather brutal to watch. Given that Uruk-Hai always mess up my armies, I had mixed-feelings about that...

Photo Credit: LOTR Fandom


Thursday, September 19, 2019

Army of the Dead Army Review


Hey Reader!

In today's post we will be examining the Army of the Dead, a force that has existed for a while in the game, and has had a new addition with the Gondor at War book. So now that we have miniatures coming from Forgeworld, it's fitting that we should look at the Army of the Dead and what they offer your army.

The list is not as extensive as Rohan, Gondor, or the Fiefdoms (which we've shown recently on the blog - check out the links to those, as they are great reads!): there are only four profiles total for the army (2 heroes as of the release of Gondor at War, 2 warriors). So we will begin with a quick discussion on the profiles available to you, and then move on to the 6 strengths and weaknesses of the list (didn't plan for there to be six of each - just kinda worked out that way, but I'm not going to argue with it).

Monday, September 16, 2019

The Fellowship: Concerning Hobbits, Revisited

Good morning gamers,

The Fellowship is full of powerful heroes – heroes who are in many ways the top of their class for what they do. Who can kill as many models (no matter how high their Defense or Fight Value stats are) as Aragorn? How many archers can out-shoot Legolas? What heroes are as tough to crack as Gimli (okay, there are a few tougher than him, but none are at his cost level)? Who can out-Might Boromir (besides Aragorn and Azog on the White Warg – both of who cost a good bit more than Fellowship Boromir, by the way)?

Yes, the Fellowship has lots of powerful heroes. But these powerful heroes can only do so much – Aragorn will often use his free Might point each turn to call that needed Heroic Move or Heroic March or Heroic Strike, but he can’t call all of them for free in the same turn (and what if he needs to boost a die to win a fight?). Legolas can be lethal from a distance, but there are times when he’s going to let you down (either because the targets are tough or because terrain obscures the perfect shot). Gimli can deal a lot of damage and take a lot of damage, but eventually the crowds will press and crush him. Boromir is a great hero, but with Defense 6, 3 Wounds, and 0 Fate points, he can be incredibly fragile. To solve this problem, the Fellowship must rely on four (or five?) of its members: the Hobbits. While their profiles aren’t as impressive as the rest of the Fellowship, they fulfill an important part of the army’s need: something cheap to hold off part of the horde to allow your power heroes time to “do their thing.”

In many ways, the hobbits are my favorite part of a Fellowship army – not because of what they can do, but because they never cease to surprise me. Let’s take a look, shall we?

Saturday, September 14, 2019

Armies of Middle-Earth SBG: The Easterlings in the Middle-Earth Strategy Battle Game

Photo Credit: Warhammer Community

Updated September 2023: Having wrapped the forces of good at Pelennor Fields (MinasTirith, Rohan, the Fiefdoms, the Rangers of the North, and the Dead of Dunharrow [coming!]), it’s time to get evil again. While Mordor took center stage, they had a host of allies at their beckon call. Today we look at their heavily-armored allies from the north-east, the Easterlings of Rhun (even if they only made a single, brief cameo).

I’ve always liked the look of Easterlings aesthetically (like I’ve said before, I’m a sucker for heavily-armored infantry of any kind), red-gold color palate is remarkably rich. They’ve been a staple in the TMAT group for a long time (check out our pre-MESBG resources at the end), one of my sons has played them extensively in Battle Companies (chosen solely because of the Rhunish Drake), and in 2022 the faction got several major additions in the Defense of the North supplement... so yeah, they're in a really good spot now. Marshall the gleaming  horde!

Army Quick(ish) Hits
  • Strength: Combat Heroes with Renewable Might. There aren’t that many that can field multiple three-attack heroes, and the ones that can almost always have to field a bevy of expensive named legends. They’re the armies you expect: The Fellowship (Aragorn, Boromir, Legolas, Gimli), Thorin’s Company (Thorin, Dwalin, Gloin, Dori), Erebor Reclaimed (Thorin, Dain, Dwalin, Gloin, Nori, Dori), the Army of Thror (Thror, Thrain, young Thorin, Dwalin), Thranduil’s Halls (Thranduil (usually), Tauriel), the White Council (Elrond, Glorfindel, Celeborn, Galadriel), Azog’s Hunters/Legion (Azog, Bolg, and potentially Ogres/Trolls), the Three Trolls (all the trolls), Minas Tirith (Aragorn, Boromir), Rohan (Eomer, Theodred), Rivendell (Gil-Galad, Elrond, Glorfindel, the twins (sometimes)), Ents, Khazad-Dum (Durin + King’s Champions), Moria (Balrog, Dragon, Drake, Watcher, Cave Trolls), Isengard (Lurtz, Mahur), Barad-Dur (Sauron, Witch-King, Troll Chieftain, Mordor Trolls), The Serpent Horde (Suladan and Raza), Angmar (Witch-King, Burhdur, Cave Trolls, usually Ghulavar), and of course Mordor (Witch-King, Khamul on Fell Beast,** Shagrat, Zagdush, Mordor Troll Chieftains, Mordor Trolls, and Gorbag sometimes). The Easterlings are on that list, too, with Amdur, Lord of Blades, Dragon Knights (plus Khamul, if you take him on Fell Beast and take the +1 Attack buff each turn), and now Rutabi and the Dragon Emperor. Plus, the fact that Dragon Knights aren’t named heroes means you can take as many of those 3 Attack heroes as your points level will allow (most other lists can’t do that, though there are some exceptions). Amdur has a fantastic stat line for dueling enemy heroes: Fight 6, Strength 4, Defense 6/7 if mounted, 3 Attacks, 3 Wounds, and 3/3/1 Heroic Stats with Heroic Strike, plus an elven-made hand-and-a-half sword for winning those crucial drawn combats. The Dragon Knights have a pretty good stat line as well (Fight 5, Strength 4, Defense 6, with 3 Attacks, 2 Wounds, 2 Might, and Heroic Strike), and are very inexpensive points-wise even when mounted on armored horses (cash-wise is a different story). Unyielding Combat Stance is great on Amdur and the Dragon Knights in case they get charged by a cavalry model or have their horse shot out from under them (4+ save whenever knocked prone, even if Knocked Flying), but the star of the show is Blood and Glory, allowing them to regain a Might point any time they slay an enemy hero. Given their stat-line, a Dragon Knight should be able to deal with most generic captains with ease, and Amdur (who gets to counter-call Heroic Strikes for free, thanks to The Lord of Blades) is a striking machine. Last but not least, those 3 Attack Striking Dragon Knights can shield, even though they have no shield (Shield of Blades), which can make them very difficult to chew through.

Monday, September 9, 2019

The Fellowship's Tactical Units, Revisited

Good morning gamers,

This post kicks off a new series where we revisit a series we did back in 2012 on the Fellowship of the Ring – and we’ll be covering the Auric heroes of the fellowship first (old post here). Gandalf the Grey has already been covered on this blog (since the new rules were released, I covered him in the context of Thorin’s Company and Rythbryt covered him in his post on the Fellowship of the Ring), so we’ll only be covering his tactical uses briefly. While we covered Gandalf the White last time, he’s no longer part of the list. Whether this was the right call or not, we won’t be covering him (though those who like Gandalf the White should read our posts on him). We’ll be spending a good bit of time covering Bill the Pony and the tactics for using the “tenth” member of the Fellowship of the Ring.

Friday, September 6, 2019

Armies of Middle-Earth SBG: The Fiefdoms in the Middle-Earth Strategy Battle Game


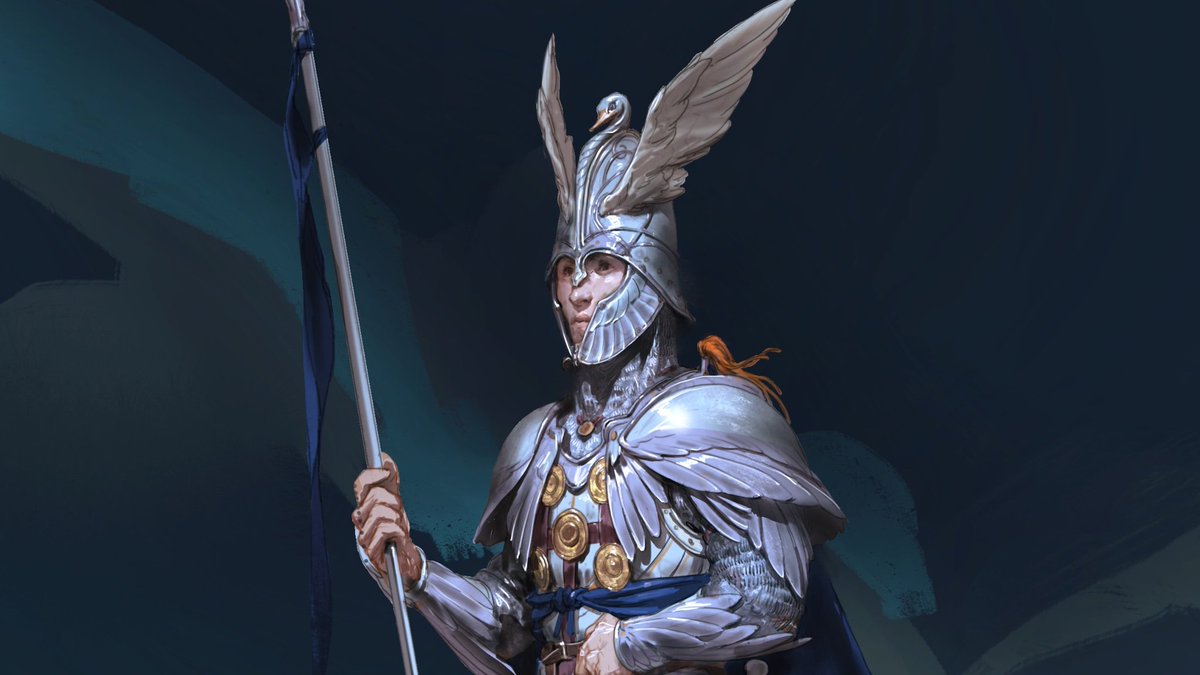
After the sprawling thematic tableaus that are Minas Tirith and Rohan, the Fiefdoms army list may seem a little... confined? But don't let that put you off your guard. This list is a power-house, packed with powerful named heroes, fantastic warrior profiles, great synergies, and so, so, so many Heroes of Valor. So gather your wing-crested helmet and mount your noble steed. To Gondor! (By way of Dol Amroth, of course.)

Photo Credit: Evan Amundsen

Monday, September 2, 2019

Workbench Update: Mordor

Good morning gamers,

I’ve been spending time recently updating my Rivendell and Numenor armies (giving them the tender loving care they deserve). Last time, we gave some tender loving care to my Angmar forces. Today, our attention turns to an army that I’ve enjoyed playing, and will enjoy using a lot more now: Mordor. Mordor is seeing a new model, as well as some conversions and weapon swaps, so let’s get into it!

Saturday, August 31, 2019

Armies of Middle Earth SBG: Rohan in the Middle-Earth Strategy Battle Game

Image result for rohirrim charge

---Updated April 2024---

So I tried to think of something clever or inventive or thematic to say when introducing our faction for this week, but in the end, I couldn’t find anything better than this iconic tune (although this one is a very close second).

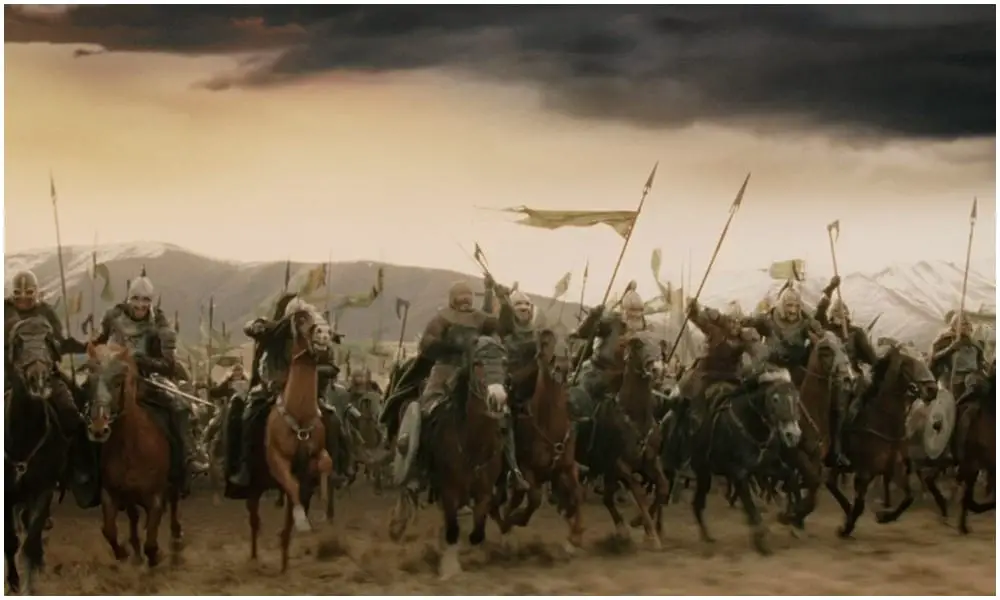
We’re talking, of course, about the second of the three heroic factions of men that fought at the Battle of Pelennor Fields (and other places, too, as it turns out): the Horse Lords themselves, Rohan. If you picked up the Battle of the Pelennor Fields box set when the Middle-Earth Strategy Battle Game was re-branded in 2018 (and didn’t sell off the model sprues for parts), odds are you have at least 12 of these guys, plus their fearless leader Theoden (more on him shortly—he’s kind of important to the army nowadays). 

The troop options in Rohan aren’t quite as diverse as what we have in Minas Tirith, but Rohan still features a plethora of iconic, powerful, and in many cases stupidly-cheap (in points, not necessarily cash) heroes to lead your riders into battle. Cavalry charges can be tricky in this game, and in some respects, Rohan is missing some core elements we’d expect to see if we want to recreate those smashing moments from Return of the King (high fight, lances, armored horses, etc.). Underestimate them at your peril…

As with Minas Tirith, I think it’s worth highlighting some of the fantastic community resources on Rohan that are especially worth checking out. James Clark from the GBHL was on Rohan early after the new edition came out, with a video on how Rohan’s changed in the new edition, and what their new rules could mean for their future. And I’d also be remiss if I didn’t direct you to Mik’s Fog of War entry on Rohan (which also features Mr. Clark) for some fantastic sample lists to get your creative juices flowing.

Now for wrath! Now for ruin! (And our thoughts, I guess?)

Photo Credit: The Fandamentals

Monday, August 26, 2019

Using/Fighting Spellcasters: Unlimited Casters, Revisited

Good morning gamers,

We come to the last post in this series – we’ve revisited a four-part discussion we did years ago on Combat Mages, Auxiliary Mages, Multi-Purpose Will Mages, and now we finally address Unlimited Mages. The original post is here. Of all the mages in the game, these types of casters have the potential for the most Will in the game (in aggregate) and are virtually the only casters who can be active at casting magic each turn for the entirety of the game. For our purposes, we’re following this taxonomy for casters:
  • Multi-Purpose Will Mages: Anyone with the Will of Evil rule (or a similar rule) and has spells (who uses Will to cast magic AND stay alive…and possibly other things);
  • Unlimited Mages: Anyone who gets “free Will,” has spells that can be cast, and does not fall in the previous category;
  • Combat Mages: Anyone with 2+ Attacks, has spells that can be cast, and does not fall in either of the previous two categories;
  • Auxiliary Mages: Catch-all for everyone else, usually limited casting with some kind of immediate/lasting benefit to the army.

Saturday, August 24, 2019

Armies of Middle Earth SBG: Minas Tirith in the Middle-Earth Strategy Battle Game


Warning: You are passing into the realm of Gondor…

After a brief sojourn into the Armies of the Hobbit and a long dalliance with the forces of Evil (plus a returning post from Centaur on the Rangers of the North--check that out, too, if you haven't already), we’re returning to the armies of Good with one of the most iconic armies in all of Middle-Earth: the defenders of Minas Tirith. I’ve always been drawn to heavily-armored troops (no doubt stemming from my fascination with armored knights since childhood), plus Gondor boasts the most powerful profile of my favorite hero from the books/films (Aragorn). So it has a lot aesthetically going for it. Plus, with the new additions in the new rule set, Army book, and Gondor at War supplement, they've received a power boost on the table-top, too!

I’ll preface our thoughts on Minas Tirith by saying that if you want an in-depth discussion of all this faction has to offer, I strongly recommend you check out The Green Dragon Podcast’s recent episode on revamped Minas Tirith, as well as David Clubley’s thoughts over on Blackmist’s Veni Vidi Double blog. Both are excellent (like, really, really excellent). With those ringing endorsements, if you still want to know what we think, read on. ;-)

Photo Credit: Hannibal & Kaemon

Friday, August 23, 2019

Workbench Updates

Profile discussions are fun and all, but they're even more fun when you're converting models! Here are some list building thoughts, tactical musings, and craft ideas as we try to clear our own workbenches. Maybe something will speak to you!


Thursday, August 22, 2019

Revisiting the Rangers of the North: Army Review

Hey Reader!

It's been a while since I've written an article for TMAT, though I'm sure you've enjoyed the content from Tiberius and Rythbryt as I have. In my defense, I've got a very good reason for being out for the past several months:

This Dunedain finally found his princess!
Huge thanks to Rythbryt for his sword.
Now that I've married my forest elf and settled us in our new house (with a mostly working microwave), I'm returning to some of our past army reviews to update them with the changes made with the new Middle Earth Strategy Battle Game release.

In today's post, in line with the ranger-themed wedding pic above, I'm pleased to begin my part of the revamp series with the Rangers of the North, as the changes are pretty substantial compared to what we had under the Warbands rules. You can find the old post on our blog here.

So with no further ado, let's look at one of my favorite armies to date.


Monday, August 19, 2019

Workbench Update: Angmar

Good morning gamers,

In our last workbench update (Numenor), I said we'd be going to Mordor next and talking about what's been going on for my Mordor army that I'm building. While I can say that Mordor has seen some work on the workbench, they were quickly eclipsed by my Angmar work. So...today we visit Angmar and see what’s been cooking up to help one of the weirdest factions in the Lord of the Rings game. While I’ve had some Ringwraiths, Wild Wargs, and Orc Warriors for a while (and even acquired some Barrow-Wights), Angmar as a civ has always evaded my attentions. Today changes all that: we focus hard on getting Angmar up to snuff with some enhancements that will help them sweep over the Elves and Men that challenge them. Some weapon swaps/additions will be at work, as will some conversions – lots of fun to be had, so let’s get to it!

Thursday, August 15, 2019

Armies of Middle Earth SBG: Goblin-Town in the Middle Earth Strategy Battle Game

Related image

Updated May 30, 2023: Thus far, we've been looking at armies with huge heroes and elite troops. Don't get me wrong--it's fun to play armies with beefy stat lines and heavy armor. But sometimes it's good to shake things up with a good ol' fashioned horde and drown your opponent in buckets and buckets of dice. 

Today, we're taking a look at the hordiest of horde armies: Goblin-Town, from the Armies of the Hobbit. Unlike the other armies we've looked at, Goblin-Town has very few profiles, and most of them (Grinnah, Goblin Captains, Gollum, and Goblin Warriors) have nearly identical statlines with just a few different characteristics between them. But don't let that fool you: playing this army demands a lot from you, and dishes a lot at your opponents.

Plus it has its own theme music!  One version is an awesome classic. The other... not so much.

Wednesday, August 14, 2019

Middle-Earth Strategy Battle Game: Army List First Impressions

It's a glorious time to be a member of the Middle Earth Strategy Battle Game community, with the re-branding of the game in 2018, and an influx of new support from Games Workshop and Forge World.

If you're just coming back to Middle Earth after years away, a lot has changed. New factions have been added, army lists have been reworked, and familiar characters have been given face lifts. If you're looking for a quick breakdown of what's changed in your long-neglected armies (and what's stayed the same), there's probably something here for you.


Monday, August 12, 2019

Using/Fight Spellcasters: Multi-Purpose Will Mages, Revisited

Good morning gamers,

Today we continue our series of revisiting old posts and updating them for the new rules set. We recently revisited discussions on Combat Mages and Auxiliary Mages. In this post, we turn our discussion towards mages who use Will both for casting magic and for fighting/staying alive/other things. As a reminder, here’s our magic taxonomy:
  • Multi-Purpose Will Mages: Anyone with the Will of Evil rule (or a similar rule) and has spells (who uses Will to cast magic AND stay alive…and possibly other things);
  • Unlimited Mages: Anyone who gets "free Will," has spells that can be cast, and does not fall in the previous category;
  • Combat Mages: Anyone with 2+ Attacks, has spells that can be cast, and does not fall in either of the previous two categories;
  • Auxiliary Mages: Catch-all for everyone else, usually limited casting with some kind of immediate/lasting benefit to the army.

Multi-Purpose Will Mages: What’s New?
While we looked at Ringwraiths in the original version of this post, the actual list of magical users who qualify is much larger. Behold, 13 profiles that fit this taxonomy:
  • Tom Bombadil & Goldberry (available in the Wanderers in the Wild list)
  • The Witch-King of Angmar (available to Angmar, Barad-Dur, and Mordor)
  • The Tainted/Dwimmerlaik (available to Angmar and Mordor)
  • The Knight of Umbar (available to the Corsairs of Umbar and Mordor)
  • Khamul the Easterling (available to the Easterlings and Mordor)
  • The Betrayer (available to the Serpent Horde and Mordor)
  • The Dark Marshal/Shadow Lord/Undying (available to Mordor)
  • Ringwraiths (available to Barad-Dur and Mordor)
  • The Necromancer of Dol Guldur (available to the Dark Powers of Dol Guldur)

While most of these models are Ringwraiths, there are several different spells that are available to some of these wraiths (and how difficult it is to cast said spells varies). So let’s get into it and start cracking on their strategy. For those who are keeping score at home, we’re also updating an old post I did during Riders in Black month where I went through each Ringwraith spell and talked about how to use it. Much of what was written there is still accurate today.

Before we dive into the spells themselves, let’s take a quick stop and talk about one other preliminary topic: apportioning your Will when there’s so much it can be used for.

Sunday, August 11, 2019

Tactics in Middle Earth SBG, Revisited

A lot has changed since the initial release of The Fellowship of the Ring rulebook in 2001. The core mechanics of the game have been refined over time, a host of new profiles have been added, and the game's designers continue to expand our beloved Middle Earth in miniature. Since the TMAT blog started in March 2011, we've seen four major movements in the game (Legions of Middle-Earth, the "Warband" supplements, the Hobbit Strategy Battle Game, and the Middle-Earth Strategy Battle Game).

Since the release of the core rule set for the Middle Earth Strategy Battle Game in 2018, the TMAT team has been working to update seven years of tactical discussions and bring them into the modern era. We hope you enjoy a good discussion of tactics as much as we do!