
It's been a couple months since our last dedicated post on maneuvering, but after doing so many theory-crafting posts on army lists recently, and with Tiberius about to launch a new series on Shooting, I thought it was high time to dust off some models, move them around the table-top in a photogenic-esque fashion, and see if we could get them to do interesting or unexpected things.
We're kicking off the first post of our new series on tactical maneuvering with what tends to be (for most armies, at least) the default battle-line in the Middle-Earth Strategy Battle Game: a front rank of warriors with shields (and sometimes the occasional front-rank hero) backed up by a rank of warriors with spears. This Shield-Spear formation (not to be confused with a Viking Shield Wall formation, which lacks spears, or a Shieldwall formation, which also gets a +1 defense bonus based on its position when strikes are made) generally tends to be pretty static. But that needn't be the case. As with Shieldwall, your Shield-Spear formation can be a dynamic and flexible formation, setting you up for the next turn, frustrating your opponent's plans, and even transforming "unwinnable" combats into salvageable ones.
If that sounds intriguing to you, read on for five simple tactics you can employ to accomplish just that! (No, that doesn't sound click-baity at all...)
Warning: lots of text, photos, and maths ahead. But it's the weekend, so it's not like you have anything better to do, right? ;-)
Photo Credit: VaderFan2187
The Set-Up
(Forces, Objectives, Deployment, and Initial Advances)
To illustrate these various tactics, I'll be using two run-of-the-mill shield-spear blocks. The first is a group of eleven Mordor orcs (a mix of regular and Morannons, led by Kardush the Firecaller) lined up in a standard 6x6 formation (6 shield orcs in front, 6 orcs with spears in back). Against them are ten Lake-Town militia (led by a Lake-Town Militia Captain), lined up in a 5x5 formation (5 shields, 5 spears).


For more on how this basic unit functions, its rules, and its basic probabilities, check up our discussion of standard infantry formations, under "standard shield walls."
Both forces are deployed roughly equidistant from a central objective (the as-yet-unpainted marker from the Three Hunters set) that they are trying to control. Their sole aim is to get to that objective as quickly as possible, to secure it.

Staring down the enemy.

Lake-Town is about 16" away from the objective...

… and begins its advance. Mordor does the same...

… bringing the two forces within 16" of each other.
Unless the winner of Priority calls a Heroic March and advances into charge range, each side should have at least one more turn of movement before the lines meet. Both forces are currently sitting just south of the objective as well, so they will likely have to shift northwards in order to fully screen off that objective from their opponent.
We begin the next turn, and Mordor claims priority. They advance, moving a full 6" northwards towards the objective, so as to contest it next turn.

The White dice show Mordor's (rough) position when they began the Move Phase, with the models showing their final position.

Lake-Town responds by advancing straight forward, meaning its battle line is off-center from Mordor's.
Both forces have advanced to the point that their entire battle-line is reachable by the opponent's entire battle line (6" charge range on both sides).


Engagement Tactic #1: Paired Engagements
Let's begin by assuming that both generals plan to use a very simple engagement tactic: if they win Priority, they plan to charge forwards past the objective, into the enemy ranks, and have one pair of their own shield-spear warriors charge one pair of their opponent's shield-spear warriors, on down the line, until one side or the other runs out of warriors. The idea is to get as many 2-on-2 fights as possible.
Here's how that charge looks if Lake-Town wins priority:

Lake-Town wins Priority, pushes past the objective, and charges forward into paired fights with Mordor.
And here's the final positions if Mordor wins priority instead:

Mordor charges forwards and southwards, screening off the objective and pairing off fights against Lake-Town.
Although the final position of both forces shifts depending on who wins Priority (the side who won Priority has their back to the objective, and their spears and shields between the enemy and the objective), the actual clash of battle lines is essentially the same. There are five fights total in either scenario. Four fights involve pure 2-on-2 combats. The fifth combat (at the south end of the battle line in the Lake-Town priority scenario; at the north end of the battle line when Mordor won priority) is a 4-on-2 that favors Mordor (because Mordor has two more models).
Although the numbers vary from game to game, this "pairing" scenario is a fairly common occurrence when two armies with shield-spear walls clash. There are several reasons for this. First, armies that feature shield-spear walls tend to advance their forces in precisely this formation (shields first, spears second, unless you're doing something out of the ordinary like "backwards" deployment in something like Hold Ground, to prevent an ambush from the board edge). Second, this almost always ensures that your higher-defense models are in the front, while your spearmen (who often don't have shields, although many of ours do in this particular example) are in the back. Third, there seems to be a common understanding that this is the best formation in which an army of warriors with shields and warriors with spears should fight.
That ordering (shields first, spears behind), of course, makes far more sense than putting your spear warriors in front (especially if they don't have shields) and your shield warriors in back (where, if they don't also have spears, they can't support the front rank). So there's certainly nothing wrong with this tactic on that score. The far more interesting tactical question is this: why are both generals so eager to pair the fights into a series of 2-on-2 combats?
Let's start with Lake-Town Priority. They charge straight forward, past the objective, and pair off the following fights (from north to south):
- Fight 1: Two Lake-Town Militia against two Mordor Orcs;
- Fight 2: Two Lake-Town Militia against one Morannon Orc and one Mordor Orc;
- Fight 3: The Lake-Town Militia Captain and one Lake-Town Militia against a Mordor Orc and Kardush the Fire Caller;
- Fight 4: Two Lake-Town Militia against two Morannon Orcs; and
- Fight 5: Two Lake-Town Militia against four Morannon Orcs.
Paired off fights...
Recall, of course, that Lake-Town had priority this turn, which gave it first movement. That's a huge advantage, but that advantage is wasted if Lake-Town does not use that early movement to get its warriors into a more favorable position. That hasn't happened here. Of the five fights described above, only one of them (the one involving the Militia Captain) actually favors Lake-Town (both sides have Fight 3, but Lake-Town has 3 attack dice to Mordor's 2). The other four fights favor Mordor, and favor Mordor significantly:
Lake-Town Priority: Kill Ratios by
Fight
|
|||||
Fight 1
|
Fight 2
|
Fight 3
|
Fight 4
|
Fight 5
|
|
Win %
|
38.97%
|
38.97%
|
59.54%
|
38.97%
|
21.07%
|
Kill %
|
21.65%
|
11.91%
|
41.90%
|
11.91%
|
6.44%
|
Death %
|
33.91%
|
33.91%
|
12.36%
|
33.91%
|
63.34%
|
Kill Ratio
|
0.64
|
0.35
|
3.39
|
0.35
|
0.10
|
For more on Kill Ratios and how to read these charts, click here.
Notice as well that even in the fight that favors Lake-Town, Lake-Town still has less than a 60% chance to win the duel (59.54% Win %), and only slightly over 40% odds (or a four-in-ten shot) at killing a Mordor orc. Mordor, by contrast, has a better than 60% chance of winning Fights 1, 2, and 4, and almost an 80% chance of winning Fight 5 (and a 63% chance of killing a Lake-Town warrior in that fight, plus a 34% chance of killing a Lake-Town warrior in each of the other three fights). In other words, Lake-Town has spent its precious Priority to charge into a perilous position.
Now let's flip the script, and see if Mordor did any better when it won Priority. Here are its fights (again, from north to south):
- Fight 1: Two Lake-Town Militia against four Mordor Orcs
- Fight 2: Two Lake-Town Militia against a Mordor Orc and Kardush the Fire Caller
Fight 3: A Lake-Town Militia Captain and Lake Town Militia against two Morannon Orcs- Fight 4: Two Lake-Town Militia against two Morannon Orcs
- Fight 5: Two Lake-Town Militia against two Morannon Orcs
As before, Mordor has preserved its advantage in four of the five combats. Only the fight with the Militia Captain favors Lake-Town. Mordor is significantly more likely to kill than be killed in the other combats (in Fight 1, more than 5 times more likely to kill than be killed).
Mordor Priority: Kill Ratios by
Fight
|
|||||
Fight 1
|
Fight 2
|
Fight 3
|
Fight 4
|
Fight 5
|
|
Win %
|
78.93%
|
61.03%
|
40.46%
|
61.03%
|
61.03%
|
Kill %
|
63.34%
|
33.91%
|
22.48%
|
33.91%
|
33.91%
|
Death %
|
11.70%
|
21.65%
|
37.49%
|
11.91%
|
11.91%
|
Kill Ratio
|
5.41
|
1.57
|
0.60
|
2.85
|
2.85
|
So if both forces decide to engage directly, shield-spear vs. shield-spear, and pair off fights, that tactic will favor Mordor significantly.
There are some other tactical issues as well. For one thing, the armies are pretty much lined up directly across from each other. This gives Mordor a slight edge in screening the objective (at least one side of their battle line extends past Lake-Town's battle line), but in most cases, there's nothing to stop Lake-Town from swinging around that battle line on the next turn and at least pressuring the objective (Lake-Town might even be able to do that this turn, if Mordor won priority and Lake-Town gets to move second). For another, by committing to these paired fights, each army that lost priority has essentially given up any chance to move their unengaged models (spear supports) in their own Move Phase, for the sake of supporting combats they're actually not all that likely to win. Both issues leave a lot to be desired.
Engagement Tactic #2: Warped Engagements
There are some situations where the layout of the battle board is such that a head-on, paired engagement is all you can do (i.e., the physical space between armies only allows for such engagements). But that isn't the case here: both forces have significant room to maneuver around each other's flanks if they so choose. So let's explore how each side can use that space to their advantage.
We'll begin with Mordor, and assume they once again have one Priority. They have an objective they want to screen, and can do so while also engaging Lake-Town to pin them away from the objective. In our paired engagements, Mordor charged directly into the front of Lake-Town's formation, and paired off fights that way. This time, however, our Mordor player notices that while the north side of his battle line is just barely within 6" of his opponent, the southern edge of his battle line is well within 6" of their enemies:
Mordor's front rank is within 6" of Lake-Town's front rank... well-within 6", in fact, since the back rank is also within 6"...
This opens up some options. Rather than pairing off directly in front of Lake-Town's line, the first orc at the end of the line does what I like to call "warping" -- he doesn't charge in a straight line, squarely into the enemy's ranks. Instead, he charges at the flank of the enemy's front line, and engages his target there:

Charging the flank of the front rank.

The spearman also charges the same enemy.
The next pair of shield-spear warriors also has a full 6" of movement to play with. The model in the front can get into base contact with the orc who is flanking Lake-Town's battle line, so he does so:


The warrior who was supporting him, can now get into base contact with the model who's charged the line head-on (who happened to be a former spear-supporting model).

Now, of course, this sort of staggered movement could result in some guys being in the front rank who don't have shields. Fortunately in this case it's not, because I have shields on these particular orc spearmen--I tend to think that giving your spearmen shields is an underrated list-building choice, because it really does open up a lot of tactical options, like this one, and makes your force more flexible. Something to think about (we'll return to it later).
From here, the rest of the Mordor battle line charges forward, pairing off against Lake-Town in similar (favorable) fights to what we saw last time:
- Fight 1: Two Lake-Town Militia against two Mordor Orcs
- Fight 2: Two Lake-Town Militia against two Mordor Orcs
Fight 3: A Lake-Town Militia Captain and Lake Town Militia against a Mordor Orc and Kardush the Fire Caller- Fight 4: Two Lake-Town Militia against two Morannon Orcs
- Fight 5: Two Lake-Town Militia against four Morannon Orcs

But even though the Fights are roughly paired off the same as last time, our orcs are in a stronger position (at least on the southern edge) because their battle line is now warping around the enemy's battle line, instead of just lining up squarely against it. This does a few things for us.
First, it creates the impression that the enemy is trapped. Now, of course, at the moment, no Lake-Town models are actually trapped, because their spear supports can make way. But for some players, this positioning will still make them nervous. At a minimum, the enemy player probably feels some pressure to win that fight on the edge, because if he does not, and has to back away (or worse, loses that model on the southern end of his front rank), he's going to have several unengaged Morannon orcs who can get to his spear supports on the next turn. That's great for us, because the math tells us that the Lake-Town player is very unlikely (only around 20% likely) to win that critical fight at the bottom, and is very likely (63% likely) to lose that front-rank model to our Morannons, which means the pressure will really be on.
The second thing warping does for Mordor is that it makes it harder for Lake-Town to get around Mordor's flank, say to try to get at that objective. Compare how the southern edge of the battle lines were lined up when we had a head-on engagement, and how that edge now looks since Mordor warped:
Paired engagement: the Lake-Town militia spear in the bottom-left has a pretty clear shot around the battle line
Warped Engagement: that same militia spear has further to travel before he can get behind Mordor's lines, because he now has to go around two orcs (one of whom is unengaged with a 1" control zone)
Some of you no doubt noticed that while Mordor has made it more difficult for Lake-Town to get around the southern edge of the battle line in our warped scenario, it is quite a bit easier to flank the Mordor line from the north. That's certainly true given how we decided to move the northern end of Mordor's battle line. But again, that need not be the case.
In our example, we had Mordor's northernmost pair of warriors charge squarely into the Lake-Town battle line. And our front-rank warrior basically had to do that, in order to get into base contact with his target. But his supporting warrior had some additional options within his allotted movement range:

6" of movement means he can move directly behind the orc at the top...

… or slide into base contact slightly to his right, extending Mordor's battle line slightly further north.
This accomplishes several goals. First, just as we did on the southern end of the battle line, we've placed another physical obstacle (with a 1" control zone) between our opponent and the objective, that our opponent will have to go clear around (or tie up this round, in order to go around next turn). Second, we can use the principles of making way and backing away that we explored in our discussion of the Shieldwall special rule to further "warp" our battle line to the north or south if we were to lose a fight on that side of our battle line:

The orc at the north end of Mordor's battle line loses a duel.

His spear support makes way by moving up to 1" backwards and to his right...

… allowing the front-rank model to either back away directly backwards (to plug a hole)…

… or back away to the right, extending the flank outwards.
You can do the same thing on the southern end as well, to make sure that you keep orcs between the enemy and the objective (or squishy models / heroes you have in your back rank):

The four Morannon Orcs pressuring the southern flank inexplicably lose their combat!

The Morannon spear support makes away backwards and to his left...

… and the Morannon in front of him does the same to shift the flank further south.
So what is the upshot of all this? While we haven't resulted in significantly different odds to win combats, we have maneuvered our battle line to both take advantage of a favorable combat turn (we're already flanking Lake-Town to the south, and a favorable outcome on that flank in the ensuing Fight Phase (which is very likely) will set us up nicely to get some actual traps the following turn) and we've set ourselves up to better-defend the objective, by making it more difficult for our opponent to approach it. Again, we have no idea if Mordor is going to win priority in the next turn (or any future turn for that matter), so when we do have Priority, it's in our best interest to try to leverage it for all we can. I think we've managed to do that here.
Now if only we could do the same for poor Lake-Town...
Engagement Tactic #3: Warped Peels

In our first example (paired engagements), Lake-Town was content when they lost priority to keep their models where they were, so as to create (mostly) 2-on-2 combats. But as we saw earlier, that's not exactly a great move by them, since Mordor (due to higher numbers, higher Fight, and in some cases higher Defense) is very likely to win all but one combat, and is significantly more likely to rack up kills than Lake-Town if the battle devolves into paired combats.
Now, let's assume our Lake-Town commander knows this (or at least has a sense that his lower fight, lower strength, and lower defense aren't going to do him any favors if he chooses to engage a Morannon battle line on its own terms). Instead, he takes advantage of a simple yet powerful fact that our first Lake-Town commander entirely overlooked: only half of his models are engaged (his front rank). Which means the other half of his models (his back rank) still have up to 6" of movement remaining.

Let's start with the spear support at the southern-most edge of the battle line. He's currently supporting a warrior who's engaged with two Morannon Orcs, backed up by two more Morannons with spears (not exactly a winning combination). We already know that if this militia spearman stays where he is, Lake-Town has only a 20% chance of winning that 4-on-2 fight (and the warrior in the front rank has a 63% chance of dying). So what does the spearman do? He evens the odds with a counter-charge that peels off two of those Morannons:

A timely counter-charge from our spearman turns a 4-on-2 combat into two 2-on-1 combats.
This results in three advantages for Lake-Town: two related to math, and one related to positioning. Let's tackle the positioning advantage first. Recall that the whole point of Mordor warping Lake-Town's battle line was to try to put pressure on that line and forcing it to buckle. A secondary objective was to make it harder for Lake-Town to flank that line, and pressure the objective. This counterattack negates both advantages. Mordor is no longer flanking Lake-Town; Lake-Town now controls the southern flank (or at least sets its outer edge). And that spearman on the flank has a relatively obstacle-free path around Mordor's battle line next turn (if Lake-Town wins priority, which in turn puts pressure on Mordor to prevent that from happening), especially if that militia spearman loses the duel and backs away to the south (instead of directly away, towards the west), giving him an additional 1" of movement to get around the Mordor lines, prior to the next Move Phase.
Next is a key math advantage: this counter-attack dramatically improves Lake-Town's chances of surviving this 4-on-2 combat without sustaining any losses. Because Lake-Town has the lower Fight Value, their best chance (really, their only chance) of winning a combat against these orcs is to roll a higher Duel result than Mordor rolls. If you checked out our discussion of duel probabilities in the context of Heroic Strike, you'll recall that the odds of rolling a high dice go up the more dice we add to our pool. If you roll a single die, your odds of rolling a 6 are just 16.67% (1-in-6). If you roll two dice, your chance of rolling at least one "6" jump from about 17% to over 30%. If you roll three dice, it jumps again to 42%, and if you roll four dice (as Mordor was doing before), you have a better than 50% chance of rolling at least one "6" (51.77%).
Odds of rolling at least one "6" on 1-4 d6
1d6
|
2d6
|
3d6
|
4d6
| ||
Highest Duel
Die Result
|
1 High
|
16.67%
|
2.78%
|
0.46%
|
0.08%
|
2 High
|
16.67%
|
8.33%
|
3.24%
|
1.16%
| |
3 High
|
16.67%
|
13.89%
|
8.80%
|
5.02%
| |
4 High
|
16.67%
|
19.44%
|
17.13%
|
13.50%
| |
5 High
|
16.67%
|
25.00%
|
28.24%
|
28.47%
| |
6 High
|
16.67%
|
30.56%
|
42.13%
|
51.77%
|
This is why Mordor's chance of winning that 4-on-2 combat is so astronomically high (77%): if Mordor rolls that "6," which it has a 51.77% chance of doing, the duel's over (and with it, probably our militia shieldman's life). Breaking the 4-on-2 combat into two 2-on-1 combats significantly reduces the odds that Mordor will get that "6" (from 51.77% to 30.56%), and with it, the odds that Mordor will win the combat or notch a kill:
Fight 5: Two Lake-Town Militia against four Morannon Orcs
now becomes...
Fight V: One Lake-Town Militia against two Morannon Orcs
Fight VI: One Lake-Town Militia against two Morannon Orcs
Lake-Town Kill Ratios by Fight
|
|||
Fight 5
|
Fight V
|
Fight VI
|
|
Win %
|
21.07%
|
25.46%
|
25.46%
|
Kill %
|
6.44%
|
4.24%
|
4.24%
|
Death %
|
63.34%
|
41.41%
|
41.41%
|
Kill Ratio
|
0.10
|
0.10
|
0.10
|
If you take a look at these updated stats, we can see the improvement. The orcs are still winning these 2-on-1 combats very often (almost 75% of the time), and our Kill Ratio hasn't budged at all. But our Death % has dropped more than twenty percentage points (or about one-third of its original size) and is now below 50% (always a good thing).
Unfortunately, things still aren't looking very good for our Lake-Town militia, because even though they're outnumbered less, they're still outnumbered. Mordor is still rolling 2 attack dice to Lake-Town's one, and has better defensive stats (Morannons are wounding the militia on 5s, while Lake-Town is only wounding on 6s). If only there was a way to get more Attacks on the Lake-Town side of things...
If only.
For most warriors (Lake-Town among them), the option to take a shield costs points (either we pay the points for a shield upgrade, or we're paying more points for the base profile because it comes with a shield). Now it's tempting to think that we're paying these points just for a +1 defense upgrade; that's certainly true, but it's also true that the +1 defense upgrade by itself isn't always meaningful. Against Morannon Orcs, the +1 defense on Lake-Town makes a difference (the orcs go from wounding on 4s against Defense 4, to wounding on 5s against Defense 5), and it would make a difference if our orcs were packing bows as well (Strength 2 bows wound Defense 4 on a 5+, but only wound Defense 5 on a 6), but it doesn't do jack against regular orcs (Strength 3 wounds Defense 4 and 5 on a 5+). Since most armies consist of varying strength amounts anyway (ranged weapons probably have different strength from warriors, who may have different strength from elite warriors, and usually also have a different strength from their faction heroes), it's very rare that a +1 defense boost from a shield will always make our models more difficult to wound. Anyone who's shelled out tons of points to buy shields for models that are base Defense 5 (bumping them to Defense 6), and then fought a Strength 4 army, knows exactly how this feels.
That's why the key bonus we get from a shield isn't the +1 defense; it's the ability to use Shielding to get an extra Attack die to win fights (and why there's still value in giving your archers shields, even though they don't get the +1 defense bonus). In our Lake-Town example, where Mordor has the numerical advantage, the option of shielding gives Lake-Town an important force-multiplier. We already know that Lake-Town's odds in 2-on-2 combats aren't all that great, especially when Defense 6 Morannons are involved--we had that exact scenario in Fights 2 and 5, when Lake-Town charged, and it turned out Mordor was almost three times more likely to notch a kill in those fights as Lake-Town was:
Lake-Town Priority: Kill Ratios by
Fight
|
|||||
Fight 1
|
Fight 2
|
Fight 3
|
Fight 4
|
Fight 5
|
|
Win %
|
38.97%
|
38.97%
|
59.54%
|
38.97%
|
21.07%
|
Kill %
|
21.65%
|
11.91%
|
41.90%
|
11.91%
|
6.44%
|
Death %
|
33.91%
|
33.91%
|
12.36%
|
33.91%
|
63.34%
|
Kill Ratio
|
0.64
|
0.35
|
3.39
|
0.35
|
0.10
|
We also know that our shield-spear guys who are facing off against four Morannons are unlikely to win, and the shield guy is unlikely to survive, with Mordor ten times more likely to notch a kill than to suffer a casualty. Yes, opting to shield in these fights would also eliminate our ability to notch kills at all (Lake-Town militia aren't able to strike after shielding, just like almost every other model that can shield), but to be fair, it's not like we're giving up astronomically-high odds of getting kills, either. Even in the most favorable 2-on-2 scenario (Fight 1 against two regular Defense 5 orcs), Lake-Town has only slightly better than one-in-five odds of getting any kills (21.65%). In the 2-on-2 fights with a front-rank Morannon, those odds plummet to around one-in-nine (11.91%), and against the four Morannons, it's down to one-in-sixteen (6.44%). These aren't exactly the sort of odds that build solid battle plans.
Now, of course, nothing prevents our front-rank model from shielding in a 4-on-2 fight, although he's not really incentivized to do so. In fact, the opposite is true: because you can't spear-support a shielding model (Rules p. 91), the militia spearman lined up behind him would essentially be wasted if the front rank decides to shield:
Shielding in this 4-on-2 combat makes no sense; you're rolling just two Attack dice either way if you're Lake-Town, only Shielding deprives you of any chance to make strikes if you win the duel.
So the Lake-Town commander keeps his spearman tucked behind his mate with a shield, and they chance it--on bad odds, as it turns out. And that poor front rank bloke is likely to die 63% of the time, before any dice are rolled, in exchange for a 6% chance at killing a Morannon Orc.
Now, let's consider that the Lake-Town commander (who, again, has the benefit of moving after Mordor is finished) decides that he's going shield with his front-rank shield guy. If that's his plan, it actually makes more sense to pull that spearman out of rank (where he won't be doing anything anyway) and put him somewhere he can do something. In this case, since he has a shield (again, paying that extra point to put a shield on your spearman makes your ranks so much more flexible), he peels off two Morannons all on his own:
So the Lake-Town spearman counter-charges, and breaks up that 4-on-2 fight into two 2-on-1 fights. As we already saw, the mere fact that we've reduced Mordor's dice pool from 4 dice to 2 already results in an increased chance that Lake-Town will win duels, and causes Lake-Town's odds of dying to drop significantly.
If Lake-Town then also shields in both 2-on-1 fights--assuming that we've given our spearmen shields--Lake-Town's odds of winning each of those 2-on-1 duels almost doubles from that initial 4-on-2 fight (from 21% in a 4-on-2 fight to 39% in a 2-on-1 fight), and their odds of dying are almost halved (from 63% to just 34%):
Lake-Town Kill Ratios by Fight
|
|||
Fight 5
|
Fight V / VI
|
Fight V / VI
[Shielding]
|
|
Win %
|
21.07%
|
25.46%
|
38.97%
|
Kill %
|
6.44%
|
4.24%
|
0.00%
|
Death %
|
63.34%
|
41.41%
|
33.91%
|
Kill Ratio
|
0.10
|
0.10
|
0.00
|
Lake-Town still isn't favored, but the odds are much more favorable to them. Salvaging an unwinnable situation and turning it into a "bad" situation seems like a pretty solid reward, and all from just 2" of unimpeded movement.
Finally, if these benefits seem underwhelming to you, consider this: Lake-Town still has lower Fight Value than these orcs, and is outnumbered. This often won't be the case. Most of the time, when you're outnumbered in spear-shield combat, it means you have the more expensive models who should have higher Fight Value (or at least equal Fight Value). Just to give you a sense of how much of a swing this divide-and-shield peeling tactic can make, here's how the numbers would shift if Lake-Town had the same Fight Value as the orcs (say, Bard was within 12"):
Lake-Town Kill Ratios (F3)
|
|||
Fight 5
|
Fight V / VI
|
Fight V / VI
[Shielding]
|
|
Win %
|
34.25%
|
33.80%
|
50.00%
|
Kill %
|
10.46%
|
5.63%
|
0.00%
|
Death %
|
52.77%
|
36.78%
|
27.78%
|
Kill Ratio
|
0.20
|
0.15
|
0.00
|
And again if they were Warriors of Numenor instead of Lake-Town Militia (Fight 4 instead of Fight 2--in this case, Numenor's Strength 4 doesn't factor in, because they are shielding instead of making strikes):
Warrior of Numenor Kill Ratios (F4)
|
|||
Fight 5
|
Fight V / VI
|
Fight V / VI
[Shielding]
|
|
Win %
|
47.43%
|
42.13%
|
61.03%
|
Kill %
|
26.35%
|
14.04%
|
0.00%
|
Death %
|
42.19%
|
32.15%
|
21.65%
|
Kill Ratio
|
0.62
|
0.44
|
0.00
|
Remember as well that any banners Lake-Town (or Numenor) have would also give them an Attack advantage when shielding in 2-on-1 fights (2 Attacks + 1 reroll, versus Mordor's two attacks). Our vanilla Fight 2 militia go from having a 27% chance of winning the fight (in that 4-on-2 scenario) to having almost a 50% chance of winning the fight (47.16%) once they get the 2 Attacks from shielding and combine that with the banner reroll, and their casualty rate drops from nearly 60% (58.52%) to under 30% (29.36%):
Lake-Town Kill Ratios (F2)
(+Banner)
|
|||
Fight 5 (4-on-2)
|
Fight V / VI (two 2-on-1s)
|
Fight V / VI (two 2-on-1s) [Shielding]
|
|
Win %
|
27.08%
|
38.97%
|
47.16%
|
Kill %
|
8.27%
|
6.49%
|
0.00%
|
Death %
|
58.52%
|
33.91%
|
29.36%
|
Kill Ratio
|
0.14
|
0.19
|
0.00
|
The odds only get better when we get to even-Fight Value (Lake-Town jumps from having about a 40% chance of winning the fight to almost 60%, with a casualty chance that plummets from 45% to 22%), and by the time we get to a Fight Value advantage (which most elite armies will have against most swarm armies), that banner makes the elite army significantly likely to win even the 4-on-2 fight (almost 60%), and almost a 72% chance of winning the 2-on-1 duels where we shield (while cutting our casualty odds in half, from 32% to 16%):
Lake-Town Kill Ratios (F3)
(+Banner)
|
|||
Fight 5 (4-on-2)
|
Fight V / VI (two 2-on-1s)
|
Fight V / VI (two 2-on-1s) [Shielding]
|
|
Win %
|
43.40%
|
50.00%
|
59.54%
|
Kill %
|
13.26%
|
8.33%
|
0.00%
|
Death %
|
45.42%
|
27.78%
|
22.48%
|
Kill Ratio
|
0.29
|
0.30
|
0.00
|
Warrior of Numenor Kill Ratios (F4)
(+Banner)
|
|||
Fight 5 (4-on-2)
|
Fight V / VI (two 2-on-1s)
|
Fight V / VI (two 2-on-1s) [Shielding]
|
|
Win %
|
59.72%
|
61.03%
|
71.93%
|
Kill %
|
33.18%
|
20.34%
|
0.00%
|
Death %
|
32.32%
|
21.65%
|
15.60%
|
Kill Ratio
|
1.03
|
0.94
|
0.00
|
Again, bring banners people! Even when your models are low fight, and especially when you have high-fight elite models who are likely to be outnumbered and are packing shields.
Now lest we get too enamored with shielding, there is an important caveat (which we discussed in our review of shielding): shielding is really only a stop-gap measure, to buy us some time in a contested spot. Shielding, for all its advantages, isn't a guarantee that we'll win a fight or save our model. At the same time, it is a guarantee that we won't kill any models because we can't make strikes (specialty models like Thorin's Oakenshield exempted, of course). So if we shield everywhere, all the time, that's not going to help us win an attrition war against a shield-spear wall (in fact, it'll probably do the opposite).
This means that to take full-advantage of the benefits of shielding, our Lake-Town militia not only need to use it to break-up combats where we're likely to die (as we've done here)--we also need to use shielding to hold down the fort in certain combats, so we can press our advantages in others.
How do we do that after we've been charged? One way is to again return to the concept of warping the enemy's line, this time with a renewed sense of aggression. Now that we've mitigated some of the more disastrous engagements, it's time to press (and create) advantages for the rest of our force.
Engagement Tactic #4: Warped Counter-Attacks
Let's return to our very brave Militia spearman, who has charged two Morannon Orcs to peel them out of a 4-on-2 combat with his mate. Having completed his charge, his movement is at an end, and we've turned that 4-on-2 combats into two 2-on-1 combats, where we intend to shield.

As we mentioned before, though, this spearman's movement still leaves four additional spearmen free to counter-charge. Since we know all but one of these (the one behind the captain) is unlikely to have good odds to win a fight or slay a foe, and since we know that we can usually get at least the same odds of winning a fight if we shield (albeit without the chance to wound), it's worth thinking about whether we can move any of them in a way that will get our brave Lake-Town militia into a better position. Let's start with the two spearmen who are closest. First, let's check their line-of-sight, to see if they're able to charge:

Both spearmen have line of sight to the two Morannon orcs on the right flank.
Our right-most spearman (well, spear-woman as it turns out) has line-of-sight to the Morannon who's spear-supporting on the very end (green mohawk orc). Pulling that orc out of his combat would convert that current 2-on-1 combat into two 1-on-1 combats, which would be advantageous for both this spear-woman and her brave mate. It would also pin that spearman in place, which would force our Mordor opponent (who has priority) to resolve that fight first, or risk trapping his front-rank Morannon orc.

Our spear-woman moves three inches to clear the far right flank...

… then, checking distance again...

… moves up to 3 additional inches and completes her charge.
The view from above reveals just how much this changes the deployment of forces at the end of Mordor's move phase:

Mordor has gone from having a single 4-on-2 combat, which it was almost certain to win, to what are essentially three toss-up combats:
Lake-Town Kill Ratios (F2)
(No Banner)
|
||||
Fight 5 (4-on-2) [Original combat]
|
Fight V (2-on-1) [Shielding]
|
Fight VI /
VII (Two 1-on-1s)
|
Fight VI /
VII (1-on-1) [Shielding]
|
|
Win %
|
21.07%
|
38.97%
|
41.67%
|
57.87%
|
Kill %
|
6.44%
|
0.00%
|
6.94%
|
0.00%
|
Death %
|
63.34%
|
33.91%
|
19.44%
|
14.04%
|
Kill Ratio
|
0.10
|
0.00
|
0.36
|
0.00
|
The beauty of this situation is that we're still in the Move Phase. We don't have to decide right now whether we're going to shield or strike. Instead, we can wait to see how things unfold when we get to the Fight Phase. Maybe Mordor's general misses the trap, and opts to resolve the 1-on-1 fight in the front rank first (if he does, Lake-Town's chance of wounding jumps up to 12.73%, versus a 19.44% chance the Lake-Town militia will be slain--not bad odds). Maybe the line is thinning elsewhere, and it behooves us to play more conservatively with shielding. Those are decisions we'll get to make later. For now, we've given ourselves more favorable options (whatever we decide), plus we have the not-insignificant fact that we've not only countered Mordor's attempt to flank our line, but we're also flanking his as well (and putting pressure on the objective). Speaking of which...

Take another look at Mordor's right flank (the one that, in our example, Mordor forgot to plug with a skewed spearman). As with the southern flank, we're currently in a situation where we have one winnable combat (the one with the Captain in the middle), and two 2-on-1 combats to his left where Lake-Town is still unlikely to win. Using the principles we used on our other flank, it's possible to leverage our un-engaged spearmen to redistribute those combats again, in a way that at least favors Lake-Town more than what we currently have.
We begin again by checking line-of sight for our spearmen on the left flank, who can see both the orcs on the end.

The outside spearman moves about 3" (passing within 1" of the orc in the front, who doesn't have a control zone because he's engaged) and charges the back rank orc spearman. The spearman next to him moves about the same distance (well within his 6" move allotment) and also tags the front rank orc:

This has converted two 2-on-2 fights that favored Mordor into the following:
- One 2-on-1 fight to the Captain's left, where one Lake-Town militia is squaring off against two regular Mordor orcs. This militia has a shield, though, so we're doing okay for now.
- One 2-on-1 fight to his left, where two militia have pinned one regular orc. If that orc were spear-supported (or if he had two attacks), it would probably be safer to keep our second charging spearman in a spear-support role, so he couldn't be wounded, but since this orc only has a single attack, no spear support, and our own spear-supporting model also has a shield (so neither militia is easier to wound), there's no added risk.
- Finally, we have one 1-on-1 fight, between a Lake-Town militia and a single regular Mordor orc. This fight should be fairly even odds (both sides wound on 5s, although the Mordor Orc has higher fight value), so we might be able to chance a real combat if we're Lake-Town or, if we're playing more conservatively, we can shield to give us pretty good odds of winning the fight.

This end-position offers several significant advantages over where we were before. To start with, we've gone from having these five (mostly negative) combats:
Lake-Town Priority: Kill Ratios by
Fight
|
|||||
Fight 1
(2-on-2)
|
Fight 2
(2-on-2)
|
Fight 3
(2-on-2)
{Captain}
|
Fight 4
(2-on-2)
|
Fight 5
(4-on-2)
|
|
Win %
|
38.97%
|
38.97%
|
59.54%
|
38.97%
|
21.07%
|
Kill %
|
21.65%
|
11.91%
|
41.90%
|
11.91%
|
6.44%
|
Death %
|
33.91%
|
33.91%
|
12.36%
|
33.91%
|
63.34%
|
Kill Ratio
|
0.64
|
0.35
|
3.39
|
0.35
|
0.10
|
To these nine combats:
Lake-Town Kill Ratios (F2) (No Banner)
|
|||||
Fight 1 (1-on-1)
|
Fight 2 (2-on-1) [Mordor Shields]
|
Fight 3 (2-on-1) [Lake-Town Shields]
|
Fight 4 (2-on-2) [Captain, Kardush]
|
Fight 5 (2-on-1)
[Lake-Town Shields]
|
|
Win %
|
41.67%
|
38.97%
|
38.97%
|
59.54%
|
38.97%
|
Kill %
|
6.94%
|
11.91%
|
0.00%
|
41.90%
|
0.00%
|
Death %
|
19.44%
|
0.00%
|
33.91%
|
12.36%
|
33.91%
|
Kill Ratio
|
0.36
|
oo
|
0.00
|
3.39
|
0.00
|
Fight 6 (2-on-1) [Lake-Town Shields]
|
Fight 7 / 8 (1-on-1) [Lake-Town Shields]
|
Fight 7 / 8 (1-on-1) [Mordor Shields]
|
Fight 7 / 8 (1-on-1) [No Shields]
|
||
Win %
|
38.97%
|
57.87%
|
25.46%
|
41.67%
|
|
Kill %
|
0.00%
|
0.00%
|
4.24%
|
6.94%
|
|
Death %
|
33.91%
|
14.04%
|
0.00%
|
19.44%
|
|
Kill Ratio
|
0.00
|
0.00
|
oo
|
0.36
|
|
We still have three combats that are effectively 2 dice on 2 dice, where our militia have only a 39% chance of winning and a 34% chance of dying (Fights 1, 2, and 4 originally; Fights 3, 5, and 6 now). We also have only a 39% chance of winning Fight 2, but since Mordor is shielding in that combat, it's essentially a risk-free combat for our militia. Fight 1 is a pure 1-on-1 fight that favors Mordor (42% chance Lake-Town wins, with a 7% kill chance vs. a 19% casualty chance), but we could flip that fight if we're worried by having our militia member shield instead (58% chance of winning, only a 14% casualty chance), and then our captain still has a healthy 60% chance of winning his fight (with a 42% kill chance, versus only a 12% casualty chance). If Lake-Town had a higher Fight Value, or a banner reroll nearby, or both if Bard was within 12", these numbers would only improve.
The second critical advantage comes from what our warping has done to Mordor's position. When Lake-Town's movement started, Mordor had taken the initiative by starting to wrap around Lake-Town's right flank. But now, Lake-Town has not only retaken the right flank, they've started to envelope Mordor's left flank as well, pushing ever closer to the objective:

If this objective happens to be something that will remain where it is for the next turn, and if we know for sure we'll have another turn to contest it, Lake-Town might well be satisfied with this final position. But let's say, for the sake of argument, that we're instead in a scenario that would reward Lake-Town for interacting with the objective in some way--perhaps Heirlooms of Ages Past (when searching this objective is likely to remove it from the board before Mordor wants to search it) or Capture and Control (where tagging this objective this turn would have earned Lake-Town some victory points. Our final shield-spear tactic returns to the concept of warping (again using our unengaged spearmen) in order to take advantage of exposed objective markers (or to claim physical space on the board that is important for any other reason).
Engagement Tactic #5: Warped Objective Captures
Let's start off this tactic by returning to Lake-Town's original position, after Mordor has won priority and charged, with an aim of enveloping Lake-Town's right flank. Once again, Mordor has failed to take advantage of the spearman on their right flank, positioning him square with the Lake-Town battle line instead of skewing him outside where he gets in the way:

In our previous two scenarios, Lake-Town's primary objective was to get rid of the nasty 4-on-2 combat on its right flank. This time, however, that uneven fight (while it will need to be dealt with at some point) is not Lake-Town's top priority. That priority is to reach the objective if at all possible. And realistically, the only possible way to reach that objective this turn is to focus on Lake-Town's left flank, not its right.
This means our left-most spearman is suddenly the most important model on the board. He can actually get a fair bit away from the actual fighting this turn, if he makes full use of his 6" move, which could put him in prime position to claim the objective next turn. But getting to the objective this turn will be a closer call:

Here's where our intrepid spearman would be if he moved his full 6"...
… and here's his position after using up half of his movement allowance (3").
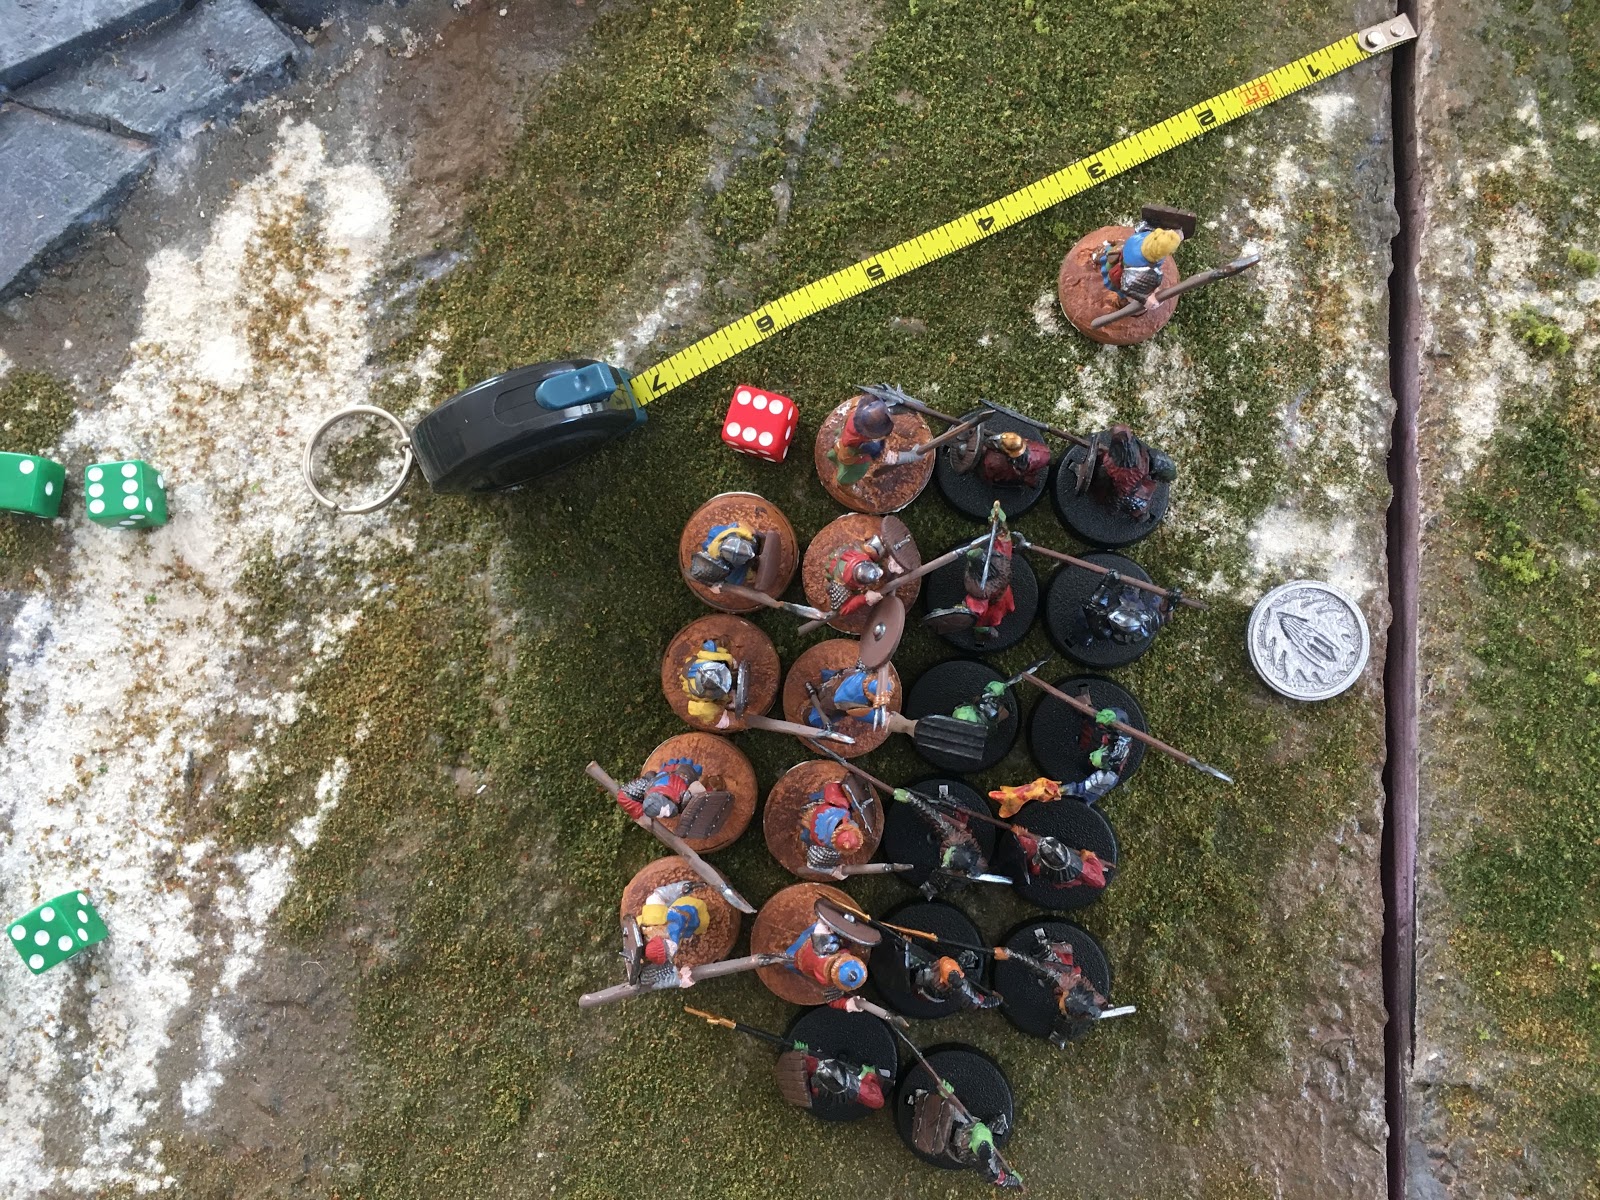
The first obstacle we encounter when moving this model is that the Mordor spearman in the back is unengaged, and thus still has a 1" control zone around him. Our spearman can clearly charge this orc if he has to, to get rid of the control zone (he did as part of a warping counter-attack), and of course could still do so here, but if he does so, he'll be giving up any chance to tag the objective this turn. So as this spearman uses his first 3" of move allowance, it's vital that he keep outside of this control zone (I have an upside-down 25mm base placed for reference, making sure to leave at least 0.04mm of space between it and our spearman to satisfy any technical metric purists ;-) ):

The question then becomes: can this model get into base-contact with the objective, by continuing around the orc's control zone, with just its remaining 3" of movement? As it happens, the answer is yes, but just barely:

3" movement is good...

… so long as we make sure we go around the orc's control zone...

… which we only just manage to do.
We start with the next two on the left. Checking line-of-sight, we notice that both can see the two orcs on Mordor's right flank. These, being regular orcs, are good "soft" targets: Defense 5 (instead of Defense 6) means we'll wound them on 5s, which should help us register kills. And of course, getting rid of those orcs would only help us in our efforts to further secure the objective on the next turn.

Having checked line of sight, we now have to check distance. Again, 6" proves to give us a fair bit of options, especially if we plan to charge that orc spearman at the back (to take out his control zone):

So long as this spearman charges the orc spearman in the back, he can get behind him a pretty good way...
The spearman moves a couple of inches, charges the orc, and then completes the "wrap-around" (continuing to move in the charged-model's control zone, so long as the militia doesn't get any closer to it until it completes the charge).

Approaching the orc...

… entering his control zone...

… and completing the wrap-around.
With both control zones out of the way, our next spearman has a clear lane to either orc. We prioritize the orc in the back, getting us close to a three-point trap:


Having fully committed to overloading Mordor's right flank, we have a couple of choices: we could use our remaining two spearmen to break up that 4-on-2 combat on Mordor's left flank, as we did last time. Best-case, however, this is likely to result in 2-on-1 combats where we'll be forced to shield which, while great, isn't going to help us whittle down the orcs near the objective. Instead, we'll look to put these spearmen in other combats on that flank to try to break it quickly, trusting our shielding models on the right flank to protect themselves.
There's still enough room for one infantry base to squeeze into combat with the front-rank orc on Mordor's right flank, but the distance is pretty close, as is line-of-sight.


If you can establish distance and line-of-sight, this would probably be the preferable move, as it really boxes in that orc and makes a trap very likely. But since it was such a close call, I've opted instead to have that spearman support the front-rank model engaged with that orc instead. He's well within his move allowance...


… while still getting that crucial second die into the fight (although if I had to do it again, I'd probably have him scoot as far over to the right as possible while staying in base-to-base contact with our front rank militia; while you can't charge a model you can't see (and I'm not certain this spearman could see that front-rank orc before charging), he could certainly get within less than an inch of that orc (who has no control zone anymore) and effectively box him in without the charge.
This leaves our last mobile spearman. Again, we could have her charge down and peel off two of the four Morannons who are engaged with the militia in front of her, and doing so would improve his odds of winning significantly (shielding in a 2-on-1, instead of shielding in a 4-on-1). The upside would be that there's an increased chance that militia survives; the downside is that we'd be committing to that right Lake-Town flank, when we really want to be shifting our power to the left flank, so we can capture and control that objective next turn. Sending our last spearman to the right flank doesn't help us accomplish that mission. Instead, I've opted to have her swing up and lend her spear in another 2-on-1 fight where, if we win, we have a good chance at taking out an orc.

As a secondary benefit, this choice also forces the Mordor commander to choose where to commit that purple spear orc who's second from the right. Moving our spearwoman up encourages the Mordor commander to commit that spearman to that fight. Otherwise, that spearman is best used to support the orc spear to his right, who is now engaged with two militia in a possible 3-point trap. That second fight is far more valuable for Lake-Town (because it's almost literally on top of the objective), so anything we can do to divert enemy resources out of that fight will only help us.

Lake-Town's final position after countering Mordor's move with a warped objective capture.
There is a cost to this strategy, of course. Our poor militia holding the right flank, while he can still shield, is still in a lot of danger and will probably be lost as a casualty. And the warrior to his left, also forced to shield most likely, has about a 1-in-3 chance of being lost as well. Our Captain now has even odds to win the fight (tied Fight Value, both sides with 2 attacks), down from his almost 60% odds when we had another spear support tucked behind him. And the militia to his left engaged in 2-on-2 (we hope) combat with orcs are still unlikely to win that fight, and could sustain casualties.
Where Lake-Town has picked up ground are in the two fights at the end of Mordor's right flank (2-on-1s in Lake-Town's favor). Yes, Mordor could still get better odds to win those fights, but only if the orcs shield (which means our militia get free swings at them without any chance of dying, so long as they don't get greedy and try to Stab!). In other words, we go from a situation where Lake-Town only had 1-in-5 favorable fights at the start of its Move Phase...
|
Lake-Town Kill Ratios (F2)
[Starting Positon]
|
|||||
|
Fight 1
|
Fight 2
|
Fight 3
|
Fight 4
|
Fight 5
|
|
|
Win %
|
38.97%
|
38.97%
|
59.54%
|
38.97%
|
21.07%
|
|
Kill %
|
21.65%
|
11.91%
|
41.90%
|
11.91%
|
6.44%
|
|
Death %
|
33.91%
|
33.91%
|
12.36%
|
33.91%
|
63.34%
|
|
Kill Ratio
|
0.64
|
0.35
|
3.39
|
0.35
|
0.10
|
… to having 3-of-6 favorable fights at the end of its Move Phase (Fights 1, 2, and 4), including the two fights that are most important to Lake-Town: Fights 1 and 2, nearest to the objective.
|
Lake-Town Kill Ratios (F2) (No
Banner)
|
||||||
|
Fight 1 (2-on-1) [Mordor Shields]
|
Fight 2 (2-on-1) [Mordor Shields]
|
Fight 3 (2-on-2)
|
Fight 4 (2-on-1) [Lake-Town Captain]
|
Fight 5 (2-on-1) [Lake-Town Shields]
|
Fight 6 (4-on-1) [Lake-Town Shields]
|
|
|
Win %
|
38.97%
|
38.97%
|
38.97%
|
50.00%
|
38.97%
|
27.08%
|
|
Kill %
|
21.65%
|
21.65%
|
21.65%
|
27.78%
|
0.00%
|
0.00%
|
|
Death %
|
0.00%
|
0.00%
|
33.91%
|
15.28%
|
33.91%
|
58.52%
|
|
Kill Ratio
|
oo
|
oo
|
0.64
|
1.82
|
0.00
|
0.00
|
Oh, and Lake-Town also controls the objective that Mordor was trying to screen. That seems important, too...
Concluding Thoughts
Thanks for sticking with what turned out to be a long post on shield-spear maneuvering. If you made it this far, you get a gold star. Hopefully some of these tactics will prove useful to you as your armies march to war. Please let us know what you think in the comments, and don't forget to follow TMAT if you like what you've read and would like to see more!
For more on maneuvering tactics, check out other entries from TMAT's Fly You Fools! series.
Glad to see Numenor show up - though the most intriguing thing I read was that shielding with a Warrior of Numenor against two F3 models, while helpful at winning a fight, doesn't help you as much as a banner does. That is really good to know...
ReplyDeleteAnd you should probably bring Bard...
DeleteI think that’s been the biggest consistent take-away from all the math simulations I’ve done. Banners are excellent in general, but if you have the Fight Value advantage as well, they become game-changing. Conversely, if you have the higher Fight Value and don’t have a banner when your opponent does, you’re making it much harder for yourself than you need to. Once you start shielding with the higher Fight Value and a Banner, you become very difficult to move.
DeleteBard is pretty much a must-take in a Survivors of LT army (even if you’re playing low points there’s not really a reason not to take him, as the rest of the profiles outside of Gandalf and Bilbo are so cheap). His kids you can take or leave (free Heroic Combats and F6 is great, having to charge the model who kills one of the girls is not, so very high risk/reward), but the 12” trifecta (Stand Fast!, +1 Fight Value, and Banner effect) makes Lake-Town a much better fighting force.
I really enjoyed this article until you went back and tried to take the objective. Personally I'm bothered when people take liberties with movement by bending measuring tapes. If you had moved your base fully out from behind the front line and then moved into charges you would not have gone so far. I've had several tournament games where players think it's appropriate to move 6" infantry like they're uruk marauders because they measure like that, but you feel like some sort of power gamer explaining to them how to play the game during a time tournament match.
ReplyDeletePersonally, I would disagree with this. I do not see how it is wrong to bend the measuring tape because it is still the same distance as it would be if you kept it straight and moved the mini 0.1 inches at a time or something similar.
DeleteQuote from the rules:
Delete"Models are not required to Move in straight lines, and can Move in any direction they wish – you will often find yourself moving models around corners, obstacles, other models and navigating complicated battlefields – though they may never Move more than their Move Value."