Featured Post

So It Begins, Part 4: The Deeping Wall Is Breached

Good morning gamers, We're revisiting a scenario from Fantasy Fellowships in our custom Helm's Deep campaign today. Despite the amaz...

Showing posts with label Bare Necessities. Show all posts

Monday, October 10, 2022

The Bare Necessities, Part XLVII: Grimbeorn and his Beornings

Good morning gamers,

With the release of Defence of the North, we have a new faction that you can ally with if you have a Forces of Good army: the Beornings. No, this isn't the new Legendary Legion (view our article from last week on that list) - it's "just Grimbeorn" and up to 15 Beornings. They lose a lot of rules, but they gain something valuable: the ability to ally with other factions. Do any of the other Forces of Good factions have anything to offer that rivals the boosts from the Legion? Let's dive in and find out - I think the answer might surprise you . . .

More gifs of daddy - Photo Credit: Tumblr 

Grimbeorn and the Beornings: How Important Are Army Bonuses, Anyway?
When it comes to the alliance matrix, running a pure list or a historical alliance has one advantage: you get to keep your army bonus. For most factions, though, you can live without it - it might help your army, but sometimes an alliance can get you as much or more than your army bonus does.

While a Convenient alliance makes you "just lose your army bonus" (and this would appear to be the best route for the Beornings to take, since they have no army bonus of their own), an Impossible alliance grants three additional penalties: first and foremost, heroic actions only affect models from the faction that's calling them. This can be bad, but can also mean nothing. Second, banners/banner effects are faction-specific as well. If you don't run banners, it's no big deal (and since Grimbeorn counts as a banner for his guys, bringing another banner will just help the other guys). So there we go - not much lost there.

Third, impossible allies break independently of each other. Giving up points for being broken can be really bad (3-5 VPs in some scenarios) or not that bad at all (1VP in some scenarios). Since there's only 12 VPs up for grabs in any given game, avoiding being broken is generally a good idea (and it causes many armies to avoid Impossible Alliances where possible - even if they have no banners or stand fasts that need to help the army as a whole).

Monday, November 1, 2021

The Bare Necessities, Part XLVI: The White Council

Good morning gamers,

Today is our last post in the Armies of the Lord of the Rings and the Armies of the Hobbit and we've come to an all-hero army that . . . isn't very popular (or WASN'T very popular until their new Legion was released). I should say, this is an army that isn't popular played pure, since it has a hero that everyone and their brother seems to ally into their army (if they don't mind losing their army bonus). Yes, today we're looking at the White Council - and while there aren't a lot of models in the list, you can find a little bit of everything to throw into your army.

Everyone's favorite ally . . . except for Numenor and Arnor, maybe.

The White Council: Making 50s And 100s (And Accepting Handicaps)
The White Council consists of seven hero profiles - all of which are powerful warriors or magic casters (and a few are both). When compared to other all-hero armies, they actually have some advantages over the others:
  • Unlike the Breaking of the Fellowship Legendary Legion, you have options for mounts on five of your heroes (not Celeborn or Galadriel) - though I will say that the Breaking of the Fellowship LL can move plenty fast with the free Heroic Marches from Aragorn. Still, with Hobbits moving 7" max, you don't get the freedom that comes from riding in on a horse, sleigh, or Eagle - and you don't get the increased damage when you charge (which is something none of the Good all-hero armies have);
  • Like Thorin's Company, you have a mix of high Defense (Celeborn, Glorfindel, and Elrond), average Defense (Gandalf, Radagast, and Saruman), and low Defense, but while Thorin's Company has mostly 2 Wound/1 Fate heroes in its army, all of the models in this army have 3 Wounds and 3 Fate (and almost half of them have rerollable Fate points - and TWO of the guys in this list can give you Wounds back); and
  • Like Erebor Reclaimed (which isn't exclusively all-hero - but can certainly be run that way), you have a mixture of high-powered combat heroes (Celeborn, Glorfindel, Elrond, Radagast on the Great Eagle, and arguably Galadriel) and less-powerful units (Gandalf and Saruman), but unlike this army, you have access to not one, not two, not three, but FOUR heroes who have Immobilize (Saruman on a 2+ and Gandalf/Radagast/Celeborn on a 3+), which can keep enemy heroes or monsters from smashing through your ranks (and greatly reduces your risk if you are already fighting them).
Yes, you have a LOT of tricks in this list . . . and yet you almost never see this army being run. Why? Well, the tricky thing about these heroes (and this has always been the case with the White Council - even when they included the likes of Erestor, Cirdan, Arwen, Legolas, and Thranduil) is that getting their points to line up is . . . well, quite difficult. Here's your line-up:
  • Galadriel, Lady of Light (130pts)
  • Celeborn (130-150pts)
  • Glorfindel (145-170pts)
  • Radagast the Brown (150-205pts)
  • Gandalf the Grey (170-180pts)
  • Saruman the White (170-180pts)
  • Elrond (170-190pts)
The tricky bit is getting your points to line up in 50s and 100s, based on your points level. At 700 points, you might say "I'll take Galadriel with Saruman for 300pts," you probably want Saruman to have a horse to get the most out of him - and that means you'd need to then take Elrond fully kitted out to bring you up to 500 points. Now that you have 200 points left, I guess you take Radagast on the Great Eagle (or on the sleigh with Sebastian).

Monday, October 25, 2021

The Bare Necessities, Part XLV: The Wildmen of Druadan

Good morning gamers,

We're on the second to last army to review in this series and today we're talking about a faction that most players don't even consider playing: the Wildmen of Druadan. This army, (which began as its own faction, then became part of the Wanderers in the Wild during the "Warband era", and are now their own faction again) has seen very little change in the profiles since their original release. Due to having average stats (except for below-average Defense), there doesn't seem to be much reason to try running these guys - and with only one historical ally and a 16-model limit if you ally conveniently, there are limited options for even using the army. But as is often the case, the army everyone thinks is garbage can have surprises for you on the tabletop - let's dig in. :)

If you're not in the movies, you don't get a GIF . . . unsurprisingly . . .

The Wildmen of Druadan: The Art of the Keep-Away Horde
I don't play Druadan - though I do like their Legendary Legion. Because I don't play them (I like my Wood Elves and think they're a better list), I decided I needed to reach out to an expert on how to think about the faction and get some tips on how to run them. I asked veteran player and American legend Tim Hixon to give me some feedback on a host of questions and boy did he pile on the feedback! Here is some of the information he passed on to me:

Tiberius: At first glance, Druadan has warriors that are both expensive (9 points/model), but with spears on every model and Stalk Unseen, it would appear that you'd want to use terrain to your advantage when engaging with the enemy?

Tim: Numbers are also a crucial thing to consider and since you pay for one hero to field this force it is very cheap in comparison to other forces. So despite their higher per model cost you are not paying the hero tax in a Green alliance.

Never take on a numerically larger force. You will need to trap opposing models in order to maximize your damage output. To that end, you want local superiority to overwhelm an opponent. Also remember to use those blowpipes at every opportunity. The entire force is range capable and have poisoned ammunition.

Monday, October 18, 2021

The Bare Necessities, Part XLIV: The Trolls

Good morning gamers,

I have fought the Three Trolls a LOT over the past few years. If you've never faced two or three of them, you will not understand at all. Sure, maybe you've faced a lot of monsters in the past, but these guys are different. VERY different. While you might be able to call a Heroic Defense against most monsters to keep their high-Strength benefits from coming into play, these guys have tricks up their sleeves that will leave your best heroes crying. Today, we're looking at how to use these amazing and iconic heroes in evil armies - let's dig in!


The Trolls: Who Needs Some Muscle?
I've written about the Three Trolls before and I've talked about them in the Monster podcast we did a long time ago. I happen to think that Bill the Troll and Tom the Troll are some of the best monsters in the game and they are incredibly dangerous to forces that need to rely on big heroes smashing things (instead of shooting or magic). Tom has a great mix of options for dealing with warrior spams (with his Stomp 'Em Into Jelly Brutal Power Attack) and heroes (with his Lingering Cold ability and the rest of his hero arsenal) - and if a spell-caster happens to show up to the fight, he can forego turns of using his Lingering Cold rule in order to resist magic (3 Will for the win). Tom is pretty great.

Bill is a REALLY good hero when it comes to dealing with big heroes, as he can Strike from F7 and can use his Mince 'Em Fine Brutal Power Attack to deal wounds (not hits - WOUNDS) to his opponent based on the Strength of the target (Bill's S7 + D6 vs. the target's Strength + a D6 from them). Most of the time, you'll be up by 3 Strength (S7 vs. S4), which means if you can just match the enemy D6 roll, you can outright kill most heroes in the game (and woe betides bigger heroes if they get a bad D6 roll). Bill is pretty great.

Bert is the "other one" - slightly more expensive than Tom and gifted with a highly situational Brutal Power Attack (Roast 'Em Slowly - sets someone ablaze if you can chuck them into a fire nearby). With the profile of a Mordor Troll and 2M/1W/1F and access to Heroic Defense, Bert has less tactical options but has a solid profile and is very difficult to take down. While his Brutal Power Attack options aren't as neat as his comrades, all three have access to the Save 'Em For Later Brutal Power Attack, which allows you to Paralyze one model you're fighting - great for dealing with that pesky hero who called Heroic Defense and is going to be hard to clear (though not as good as Mince 'Em Fine, which is probably the best Heroic Defense bypass in the game). In his own way, Bert is pretty good too.

All three Trolls come in at 400 points (plus 15 points for the Campfire if you don't run a pure Trolls list) - which is a lot to spend on three models that can't lead troops, but is on-par with what other factions pay for 3 monsters (and most of those factions are buying warrior monsters who don't have Might/Will/Fate). If you pair these guys with some moderately-costed heroes (50-75pts - though one will have to be a Hero of Valor), you can get 2-3 heroes and a slew of warriors to join them in most games that are 600+ points. Not bad, really. Some armies can do this easily, but we'll be looking at a list that is inspired by something Rythbyrt ran against Centaur recently (not that he needs any more ideas).

Monday, October 11, 2021

The Bare Necessities, Part XLIII: Radagast's Alliance

Good morning gamers,

We recently looked at both the Misty Mountains and Fangorn factions and today we wrap up the last of the Good all-monster armies (and the last of the participants in the Battle of Five Armies): Radagast's Alliance. Shockingly, this army isn't historical allies with the forces that were at the Battle of Five Armies - maybe because allying in Gwaihir historically into these armies would be broken, maybe because they didn't "officially" work with Erebor, Dale, or the Halls of Thranduil but arrived as an "enemy of my enemy." If you thought, though, that this army would just be a repeat of the discussion on the Misty Mountains, think again (well, sort of).

Photo Credit: Pinterest

Radagast's Alliance: More Than Just Eagles
The Misty Mountains faction is historical allies with a few factions (the Fellowship, Thorin's Company, and Radagast's Alliance) and convenient allies with everyone else in the game. This makes dropping a model like Gwaihir easy for virtually every army in the game (armies like the Fiefdoms or the Rangers probably want to keep their army bonuses, which is the only reason you'd want to forego allying in a F8/S6, nigh-unkillable-without-a-lot-of-effort monster into your force).

Radagast's Alliance may have the same lineup of models (and adds two more), but it doesn't have the same alliance structure. Instead, it can only ally with the Misty Mountains historically and can conveniently ally with the Elven factions (Rivendell, Lothlorien, and the Halls of Thranduil), a few all-hero/monster factions (Thorin's Company, Fangorn, the Wanderers in the Wild, the White Council, and the Rangers oddly enough), the men from the Armies of the Hobbit (the Army of Lake-town, the Survivors of Lake-town, and also oddly the Garrison of Dale), and some of the Dwarves from the Battle of Five Armies (the Iron Hills and Erebor Reclaimed). So basically . . . you gotta be from the Armies of the Hobbit (or Fangorn or the Rangers - who, as I've already said, probably don't want your help).

That's really limited as a set - and when looking for a balanced list to feature these guys, you have very few options that have a) actual banners (Elves, Dwarves, and Dale), b) fast troops besides Radagast's Alliance itself (Elves and Dwarves), and 30+ models (not the all-hero/monster lists). That made picking our list for today incredibly difficult.

And yet, the biggest question about this list is this: what kind of big hero (or maybe two) do you want to add to another faction to deepen its bench? Some of the factions listed above have a good selection of beater heroes (most notably Rivendell and Erebor Reclaimed, arguable case for Thorin's Company, the Iron Hills, and the Halls of Thranduil), but wouldn't mind having a F8 monster hero (or F7 monster warrior) to back up a hero or two of their own if they have the points for it.

When it comes down to it, this faction becomes more than just "another army of Eagles" - it gives you options. Not only do you have the ability to "just get Gwaihir," but you can also add in heroes like Beorn (who might be the most dangerous model against a single hero in the game) and Radagast (who has several tricks for shutting down heroes brought by your opponent - and can be dangerous in combat if he's equipped properly). While I could have talked about a faction that ran a handful of monster models, I felt like the list below showcases something this faction does well: gives you a better killing hero than what you have in your own list. To see how this works, let's look at today's list:

Monday, October 4, 2021

The Bare Necessities, Part XLII: The Survivors of Lake-town

Good morning gamers,

Today we're viewing the last of the Battle of Five Armies forces: we've already looked at the Halls of Thranduil, Erebor Reclaimed, and more recently the Iron Hills. Today we'll be looking at the "angry fishermen" in the alliance: the Survivors of Lake-town.

Photo Credit: Pinterest

The Survivors of Lake-town: Getting the Most out of Bard
A few weeks ago, we talked about the Army of Lake-town and in it we focused on how you could get a large body of troops for a relatively small number of points. In it, you could get two pretty mediocre heroes if you view their stat lines (the Master and Alfrid) and Braga (who is okay) and field a FLOOD of troops that, when augmented by these three heroes, are quite challenging to deal with (max of 39 warriors for 42 models total, coming in at ~350pts if you do 50% spears and 33% bows).

Well, as soon as Smaug burns their town, the refugees of Lake-town are . . . well, not the same kind of army. :-) Instead, your army bonus (and selection of units) makes Bard an auto-include if run pure/historically-allied (as he counts as a 12" banner and gives +1 Fight Value to most of the Lake-town models in this list WITHOUT having to spend Might like the Master of Lake-town does). For "only" 155 points when fully kitted out and a boost to a Hero of Legend, this seems like a cheaper and better version of Imrahil.

BUT when you factor in the ACTUAL cost of Bard, he's closer to 200 points, because he's probably joined by three Independent heroes: his daughters, Sigrid and Tilda, allow him to be F6 instead of F5 if one of them is within 6" of him and call free Heroic Combats so long as both of them are near him. Free Heroic Combats on a horse with F6? Sign me up! Alfrid the Councilor, demoted to an Independent Hero in this list, can still give Bard extra Might points (or give Might to Sigrid and Tilda if you don't want to risk losing Might by rolling the 1 for Dubious Counsel), which can turn him into a pseudo-Boromir hero (except with a larger radius for his banner/FV boost, free Heroic Combats, and lower Defense).

But once you've sunk nearly 200 points into Bard and his three attachés, the question is what ELSE do you put in a list to augment him? Naturally Bard is going to draw a LOT of attention and with only D5 and 3 Wounds/3 Fate (which is admittedly as good as a man-sized model can expect to be sans the Defense rating), so what else would keep him alive? Here are some ideas:
  • Gandalf the Grey is a Hero of Valor in this list - one of only two lists where Gandalf can lead troops. While his casting array is meh, he provides resilience to archery with Blinding Light, which is not only good for Bard himself, but is also good for Bard's horse, his daughters, Alfrid, Gandalf's horse (if he has one), and your Lake-town Militia (particularly those without shields).
  • Lake-town Militia Captains don't look like much, but within 12" of Bard, they're very cheap F4/S4 models with spears (which means they can support through a cheap grunt if they want to) and Heroic March (good for getting your infantry horde where it needs to be). They're not very expensive, so you might be able to get two or three of these guys into your army if you want to get somewhere fast for an extended period of time.
  • Bilbo Baggins, Master Burglar is kind of expensive, but as a Hero of Fortitude he can also lead troops and can make Bard not need to call Heroic Strikes if they're in the same fight and Bilbo has the Ring on (and Bard is near the girls). This could make calling Heroic Combats easier, since you'll have the FV advantage, knock-down who you're fighting, and then get extra movement out of your horse.
  • Historical Alliances with Erebor Reclaimed, The Iron Hills, and the Halls of Thranduil  provide some nice boosts for your Lake-town troops. Lake-town can get you a high body count for these elite forces, but the allies grant you stronger stat lines (that your Orc-like Lake-town guys can support). Excellent augments include Legolas (for his archery damage more than anything else), Mirkwood Cavalry or Iron Hills Goat Riders (for actual fast troops), Dain Ironfoot (and many of the things he can bring from the Iron Hills), Thorin (a second hero with free Heroic Combats) and any number of the Champions of Erebor (most notably Dwalin, Gloin, Dori, Nori, Kili, Fili, or Bifur).
It's important to note that one of the biggest advantages that comes from a historical alliance is that you get a second killing hero. The biggest challenge with Lake-town is that they have exactly one beater hero - Bard. Sure, you can make Captains do damage (and Percy can do some damage with archery), but for the most part, you've got Bard. And that's it. Allying with any one of Lake-town's Historical Allies gives you additional threats without weakening Bard's auric benefits to his team. And if you want, Bard doesn't have to be your leader, depending on who you choose. 

All that said, one of the Top 5 Ardacon lists relied on only Bard as its killer her and another used Lake-town Captains to support Legolas, so whether you need Bard in the list is also up to debate. Regardless of how you roll, you can't get everything we described above (not at any serious points level, that is), so here's a list that shows off some of the synergies you can get (we'll delve into others at the end of the post).

Monday, September 27, 2021

The Bare Necessities, Part XLI: The Dark Denizens of Mirkwood

Good morning gamers,

We've talked about a lot of armies in this series that have a variety of models available to them - fast units, banner-carrying units, etc. However, in today's post, we're looking at an army that has no problem being fast, but struggles with having low defense, no spears, large bases, and average Fight Value (for the most part). We're talking about the Dark Denizens of Mirkwood - an iconic monster-mash army (that has only one monster - but lots of scary things) that features creatures of all shapes and sizes. Can you make a balanced list with this army? Well, let's see what we can whip up, shall we?

Photo credit: Tumblr

The Dark Denizens of Mirkwood: What Creatures Do You Need (And How Do You Keep Them From Dying)?
The models available to the Dark Denizens of Mirkwood list has access to several different creatures and each has a different role to play in the army. The Spider Queen is your only hero option and she's a very offensive-heavy hero. Paired with a Bat Swarm, she's capable of toppling anyone's Fight Value if you can get the Spider Queen and a Bat Swarm in the same fight, so her Heroic Defense can be used as insurance against a bad match-up.

You have two other Spider options in your army: Mirkwood Spiders have a terrible Fight Value, but can use their Spider Webs to Paralyze warrior models (and hero models who have run out of Fate or fail a Fate save) and so skip straight to the wounding roll. Giant Spiders, by contrast, are F4 with a good Strength value - miniature versions of the Spider Queen and designed for getting locked in and smashing through things.

Bat Swarms and Fell Wargs have more tactical uses - Bat Swarms aren't great in fights on their own, but since they half Fight Values, they can be deadly when paired in a fight with a Giant Spider (since Bat Swarms half your Fight Value rounding down, your opponents will need to be F10 if they want to have a higher Fight Value) or the Spider Queen (who will always have the higher Fight Value). Even if paired with Fell Wargs (who are F3), enemy models will need to be F8+ in order to have the higher Fight Value - AGAINST WARGS!!!!

Speaking of Wargs, Fell Wargs are great for grabbing objectives, charging models that are hiding behind terrain, and theoretically are good for boosting your numbers. However, since they are your only 1 Wound model and only about half the cost of Spiders (and one-fourth the cost of Bats), your total wound count isn't much different by spamming Fell Wargs than it is spamming Spiders or Bat Swarms - and I think the tactical utility of these units is much better. Having a few of these guys to dig up Prizes/Heirlooms or sitting on objectives isn't a bad thing though, so use them appropriately.

This is a light bench and you're locked in at D4 or less (even on the Spider Queen), so your number one objective is to figure out how to keep your units from dying. You don't have any Historical allies and your Convenient allies list is short but has a surprising amount of options. While allying with Smaug is probably a pipe-dream, allying with Azog's Hunters, Azog's Legion, Goblin-town, Mordor, and Moria give you options for spamming numbers and adding in heroes who can distract from the Spider Queen's danger.

Monday, September 20, 2021

The Bare Necessities, Part XL: The Army of Lake-town

Good morning gamers,

Today we cover one of the most competitive armies for the Forces of Good in MESBG right now: the Army of Lake-town. If you're looking at running a list pure, this army . . . well, doesn't look very good. In fact, compared to their cousins (the Survivors of Lake-town, which we'll cover in a few weeks), it looks downright awful. But this army is one of the cheapest hordes that have access to spears you can find and this means you can get a healthy amount of numbers and have plenty of points to ally in big heroes. Lake-town doesn't have the suite of allies that you'll find from the Armies of the Lord of the Rings, but the options they have are solid. So how do we begin to piece together a good army from Lake-town? Let's dig in and see what we have to work with and you'll soon see.


The Army of Lake-town: Who Needs A Horde?
So when you think of horde armies, you generally think of evil factions - Goblin-town, Moria, and Sharkey's Rogues, for example. Some good factions qualify - like the Shire - but most good factions run average-cost models (or very elite/expensive models), which can keep them from "hording out" (though there are builds for Minas Tirith that can horde out by taking cheap heroes). Lake-town has only one expensive hero (Bard) and everyone else costs no more than 50 points - and with most of them (not Bard's children) able to lead 12-15 models and your warrior models costing 5-7 points each, you can get a full warband of guys for under 120 points. If you're getting that many guys for that kind of cost, you can easily get 65+ models in a 600pt game (and at 700, you're looking at over 70 models easily).

Monday, September 13, 2021

The Bare Necessities, Part XXXIX: The Garrison of Dale

 Good morning gamers,

Today we will be delving into the Garrison of Dale, the army that, until recently, had the fewest profiles of any army to date (except the Black Riders LL). With a new warrior profile and the option of 1-2 named heroes, this army might not have the depth that most competitive armies do, but you do get access to most of the common wargear options in the game (making your units fairly flexible, despite having only a few options). But this begs the question: what can you do to make this list a balanced list? Let's take a look at what is rapidly becoming my favorite army of Men from the Armies of the Hobbit book!


The Garrison of Dale: How Important is Your Army Bonus (and What's Coming Our Way)?
At the time of this writing, the models for Brand, Bard II, and the Knights of Dale were announced (and their working rules available), but with a Legion including them and the Erebor Dwarves imminent, who knows how the new profiles will be run. For our purposes today, we'll be viewing the Hobbit era Dale list and we'll come back and view these new profiles (probably in the context of whatever comes from War in the North) at a later date.

With three profiles to view, you'd expect this army to struggle at almost every points level. And yet, it doesn't. Why? Because the models that this army has, the equipment options available to these models, and the ally options this army has, give them a way to play that makes the army work at any points level.

The big question, though, is how important your army bonus is. On its face, if you compare the Garrison of Dale to Numenor (who is also profile-restricted), you have very similar profiles. Warriors of Numenor are F4/4+ (as are Warriors of Dale), S4 (+1S over Warriors of Dale), D4-5 depending on whether you have a shield or not (same as Warriors of Dale), and C4 with their army bonus (+1 over Warriors of Dale, same Courage base) for +1 point/model. This means that if you're considering allying the Garrison of Dale with Rivendell, you get either +1S or +1C for free by allying with Numenor instead of Dale.

Monday, September 6, 2021

The Bare Necessities, Part XXXVIII: The Misty Mountains

Good morning gamers,

Today we tackle an army that started off as its own army, then got melded into the Wanderers in the Wild during the warbands era, then got broken out into its own army again in the new edition (and is expanded in the Armies of the Hobbit book with Radagast's Alliance). While you might on first glance think that this army is unnecessary with the advent of Radagast's Alliance (I certainly did), the cool thing about this army is that it is Convenient Allies with almost everyone in the game (and Historical allies with some of the best all-hero armies in the game). While I think their army bonus isn't necessary to have (lots of competitive players agree), this army can provided much needed mobility to lots of armies (or firepower to a spam army). Let's dig in and see what's provided in this army (especially over Radagast's Alliance).

Photo Credit: Tumblr

The Misty Mountains: Built To Ally
Let's start by talking about Radagast's Alliance: with only the Misty Mountains as Historical Allies (which you'd only do to take Gwaihir as a Hero of Legend instead of a Hero of Valor), you're looking at pretty much all of the Armies of the Hobbit as your available Convenient Allies (and select others from the Armies of the Lord of the Rings): 
  • You have all three of the factions of Men from the Armies of the Hobbit (the Army of Lake-town, the Survivors of Lake-town, and the Garrison of Dale);
  • You also have two of the conventional Dwarf factions (the Iron Hills and Erebor Reclaimed - but NOT the Army of Thror . . . which is weird because you're convenient allies with the Garrison of Dale);
  • Like everyone, you have all three of the Elven factions (Lothlorien, Rivendell, and the Halls of Thranduil) and Fangorn; and
  • You have three all-hero armies (Thorin's Company, the Rangers, and the White Council). 
With the exception of the Misty Mountains, the Elven factions, and the Rangers, everyone from the Armies of the Lord of the Rings book are Impossible Allies with Radagast's Alliance. 

By contrast, the Misty Mountains are Convenient Allies with every faction except the Fellowship, Radagast's Alliance, and Thorin's Company (which are Historical Allies). This means that you only need to decide if your army bonus is worth keeping or whether you can live without it - no other considerations need be made. Some armies (like the Fiefdoms and the Army of Thror) play very differently without their army bonuses - and while they probably CAN live without them, you generally don't want to give them up (both have great historical allies they can take). Other armies (like Numenor or Minas Tirith) can live without their army bonuses - especially if you're allying in high-Courage, high-Fight/Strength models who can do most of your fighting for you (even trapping people by charging the back rank while you press with your grunt infantry).

In today's list, we'll be building a balanced list with a Convenient alliance (the only way we can get 30+ models and at least one actual banner). While there were lots of great ideas I had for this army (some will be included in this article, others will appear in future articles), I wanted the army we showcased today to have at least one Great Eagle. Many armies can benefit from "just adding Gwaihir" - but I feel like that alliance doesn't showcase the Misty Mountains well. So instead, I wanted an army that allowed me to get several Eagles, had enough staying power to hold out for the Eagles to do their damage, AND could get an actual banner (and some fast troops). In my mind, there was one clear choice - not a thematic choice, but a solid choice none the less. So here we go - darn theme and full-steam-ahead!

Monday, August 30, 2021

The Bare Necessities, Part XXXVII: Goblin-town

Good morning gamers,

Well, this is an army I've fought quite a bit and I can't say I've enjoyed any of those games. At all. So when it came to doing this series last year, I passed on reviewing Goblin-town because, frankly, I didn't know how everything worked and what was a good way to tick all the boxes. To be even more frank, I'm not sure you NEED to check all the boxes. 30+ models will basically be a given, but do you need fast troops with this list? What about an actual banner? Ways to buff your models? We'll get into all of that today as we review an army that has its own special place in the hearts of MESBG players.

Two great and annoying models . . .

Goblin-town: The Art of Fast Play
Goblin-town plays a game that several armies do: spam out cheap, horrible models and rely on your outlandishly high numbers to take the day. Unlike armies like the Shire and Sharkey's Rogues, you can support other models - and while your Defense is low (like the Shire and Sharkey's Rogues), the fact that everyone has the equivalent of a spear for basically the same price means you can get LOTS of die into your fights. And I mean LOTS of dice. So why doesn't everyone play this list?

I think the biggest reason is that this army takes FOREVER to take a turn. Moving 30-40 models CAN take a while if you're being super careful, but moving 60+ models takes a long time even if you're trying to move quickly. Movement trays can help, but even with trays it takes a long time. So how can you fix this so you can play within a time constraint?

There are two ways, I think, that this can be done. The first is to embrace the Goblin-town mindset and don't care about where you place things. Veteran gamers may cringe when I say this - but I'm serious: place models so they're backed up by a friendly model, but just move them. No planning, no worries, no strategy - just take up space! If you're moving in the right direction, you might be a bit out of position for one turn, but there will be another turn and you'll be in a spot that's just fine.

The second way (and I think the more competitive way) is to ally with someone else - other armies will be more expensive and will give you other ways of dealing with problems (like big heroes and devastating spell-casters). By bringing in a big hero or two (backed by average-cost to expensive warriors), you drop your model count and can take your turns faster.

So what's the right balance between a high model count and allying in what we need to make a balanced list? Well, we're turning to the Armies of the Hobbit army book and allying with an army that, frankly, would want to keep their army bonus in most cases. But it turns out, you can supplement a lot of Goblin-town weaknesses by just bringing one warband of models from another list.

Monday, August 23, 2021

The Bare Necessities, Part XXXVI: The Iron Hills

Good morning gamers,

We've already looked at the Iron Hills a little when we reviewed the Army of Thror - they make great allies for basically anyone in the Armies of the Hobbit book (Historical allies with the Army of Thror, the Halls of Thranduil, and the Survivors of Lake-town; Convenient allies with everyone else). With D7 infantry that can be D8 in shieldwall, D6 infantry who can wield either crossbows or two-handed pick-hammers, D6 cavalry that can knock enemy models over BEFORE fighting, chariots that deal three S6 impact hits, and those nasty ballistas that can deny enemy archery. While the list doesn't have a lot of hero options, the heroes it DOES have are very good. So where do we begin when looking to build a balanced list with this army? Well, we should probably begin with this guy . . .

Photo Credit: Rebloggy.com

The Iron Hills: What Do You Leave At Home (And What Can You NOT Leave At Home)?
All pure Iron Hills lists begin with Dain Ironfoot - and in most cases, he will be mounted on his war boar (though an article from Dwarf aficionado Ali King indicates that may not be necessary). Regardless of whether you have a pure Iron Hills army or a Historical Alliance, the addition of Master of Battle (4+) is great for Dain - so unless you're bringing a bigger hero than Dain (not many are), you probably want Dain in your army. For 160 points when mounted, he's expensive for a Hero of Legend, but not as expensive as two Heroes of Fortitude, so you won't suffer too much from bringing him.

With the exception of the mattocks (unfortunate, since they look really cool), all of the gear options for Iron Hills Warriors are amazing - shields by default, the option to trade the shield for a crossbow, a banner on anyone (maybe two banners?), and spears for shield-carrying or crossbow-carrying Dwarves is good. These infantry models form a good core for any army - and make a great anvil for this force in particular. Adding a few Goat Riders to support this army gives you slightly more speed (especially if you March them) - not necessary en masse, but a very dangerous pocket of power.

I don't think you leave home without a good block of infantry and some Goat Riders. The question becomes whether the siege weapons are important to your strategy. On the one hand, bringing a ballista can force almost any shooting army to come to you and engage you in melee (exactly what you want with your block of Dwarf heavy infantry), but similarly, ballista require you to be in a particular place (giving you less deployment flexibility and very little maneuvering once you've deployed). Sure, some scenarios may not require you to move, but if you need to get somewhere, a ballista could be a liability.

The Iron Hills Chariots are very expensive - and while they can do lots of damage, I'm not sure how useful they are without someone like Gandalf the Grey to knock everyone who has engaged the chariot over with a Sorcerous Blast. Chariots are even more expensive when equipped on an Iron Hills Captain (or in an Erebor Reclaimed list with the Champions of Erebor on it). They're powerful, but oh so very expensive. I know people like these things, but I just don't see them fitting in our list today - they cost too much.

Without further ado, let's look and see what we're doing with the Iron Hills in a balanced list . . .

Monday, August 16, 2021

The Bare Necessities, Part XXXV: Fangorn

Good morning gamers,

As we wrap up other factions in MESBG to review for balanced lists, we come to a faction that . . . honestly . . . you're probably NOT running with a balanced list in mind. Instead, this is a monster-mash army - and the first of three armies that we'll be covering that (when run pure) HAS to focus on low numbers, but strong models. Today we're going to be covering Fangorn - an army that is hard to ally with (even though they're Convenient Allies with all Forces of Good armies) since you have only one Hero of Valor/Legend profile. Once you add Treebeard to an army, each additional Ent makes the remaining points available to you much smaller - so how on Arda can you get a 700-point army with 4+ fast models, a banner, and 30 models when you're running at least one Ent!?!?!?!? The answer might surprise you - read on if you'd like to find out.

Fangorn: So You Like Treebeard, Huh?


There are many armies that have decent Heroes of Legend, but you don't REALLY want them being your army leader. Heroes like Theoden, Girion, Galadriel, or Gandalf the Grey can all be your army leader - and if the scenarios require just keeping someone safe, maybe it's fine to have them as your army leader. However, if you have the faintest chance of getting Contest of Champions and had the choice of a F5/6 1-2A hero or a F8 3A hero (who also is D8 with 3 Wounds and 3 Fate), which would you rather have? Well, you'd probably want the F8 guy - and for that reason, allying in Treebeard is a pretty good option for some armies.

Allying him in DOES come at a cost - not only does the non-Fangorn element lose a good 190-200 points of models, but you also lose the Fangorn army bonus (Fearless is good to have, but not necessary since your Ents have good Courage - it's the immunity to magical powers that would keep you from moving or knock you over that's the real appeal). The question is whether you NEED the model count at the points level you're playing at - if you don't need the model count (Contest of Champions, Lords of Battle, To The Death), maybe you can make due without all that other stuff and instead of rely on having a few models that are hard to kill (and good at killing things).

At the end of the day, I decided that this post was going to feature an army that had a Convenient Alliance between Fangorn and an army that could give it a real banner with pretty cheap troops and some mounted models. I also wanted the Fangorn contingent to be more than just Treebeard - two or more Ents would be good. So, that gave me only a few choices - and here's the list that we ended up with . . .

Monday, August 9, 2021

The Bare Necessities, Part XXXIV: The Serpent Horde

Good morning gamers,

We've looked recently at the Fiefdoms (renowned for their elite troops with average Defense and average Cost) and the Rangers (renowned for their ability to spam cheap mini-heroes to flood the board with Might). Today, we look at one of the most competitive armies in the game - and a long-time dominant army here at TMAT: the Serpent Horde. While I haven't played with this army, 50% bow limit (and lots of practice fighting it) makes it an army that I should begin playing soon. Thanks to the Quest of the Ringbearer sourcebook requiring two Mumaks, I know I'll be diving into the Serpent Horde eventually, but travel with me through my ever-entangled thoughts about what to pursue with this army. Let's dig in!

The Serpent Horde: Spam Vs. Troop Carriers?
Photo Credit: Tumblr

The Serpent Horde has the ability to spam pretty good troops - their Haradrim Warriors with bows, spears, or weapon-swapped axes are 7 points each, which means you can throw out a lot of these guys if you want to. The down-side to them is that they can't get shields, so your army is going to be vulnerable to archery of any kind (D4). To compensate for this, the army is flush with models who have poison (rerolling 1s to Wound) and you can take 50% of your models with bows (so you can outshoot most armies before they shoot you to death). With pretty cheap light cavalry that hit hard and a few non-poison models who can chop through enemy models with burly two-handed swords or multiple attacks, the army has no limit to good models you can spam out.

And it has Mumaks. Mumaks are some of the most iconic and coolest models in the game - complete with four pages of rules (two for the Mumak itself and two for war beasts), lots of impact hits, and good resilience against siege weapons (since it is explicitly called out as a siege target instead of a battlefield target - no auto-kills here, baby!).

Mumaks are incredibly expensive and often get in the way of spamming out warriors (though it will provide high Defense in-the-ways for those low-Defense troops standing in the howdah). So is it worth it to add a Mumak to your list or just buy a hero and a whole warband of troops? Most competitive players say leave the Mumak at home, but we'll delve into some Mumak lists later in the post. For now, let's look at a spammable Serpent Horde army that emphasizes one thing above all others: poisoned weapons.

Monday, August 2, 2021

The Bare Necessities, Part XXXIII: The Rangers

Good morning gamers,

We've already looked at two all-hero armies in this series (the Fellowship and Thorin's Company). Both factions behave similarly, so I reviewed them together. Both lists, no matter how you run them, are going to be constrained on model count - especially if you're going to include any kind of "good" heroes from the list. Today, we're going to look at the Rangers, who are capable (as I've recently come to find out) of having quite large numbers, despite everyone being "heroes". Let's look at what they do and what we need to think about when running them!


The Rangers: Allies, Pure, or Legendary Legion?
There are three ways you can run the Rangers right now: a) you can ally a few Rangers into an army (giving cavalry options and hitting power to a Shire force, for example), b) you can run the Grey Company Legendary Legion (which gives the list some extra army bonuses and trades Arathorn and Dunedain for Legolas, Gimli, and Elladan/Elrohir), or c) you can run "just the Rangers." As discussed in my review of the Grey Company, if you plan on running Aragorn, you should be running the Legendary Legion (just because you'd need to run 7+ Dunedain in order to make up for getting Anduril for free). Sure, you can't get horses in the Legendary Legion, but there are SO many points savings you get (not to mention a better array of power heroes to back Aragorn up). 

Allying with the Shire can give you numbers (we'll look at them at the end of this post), which is the one thing this army really struggles with - though the numbers they give you will be light troops and unless you splurge on Gandalf, you're not going to be protecting them from archery. Generally when you ally with the Shire, you feel like the allied contingent, not the main contingent. Similarly, you CAN ally with the Dead of Dunharrow, but this would require a) running Aragorn, and b) you're not getting troops that are THAT much cheaper (and you'll be investing 100 points on the King of the Dead). You can ally this way, but I'm not sure it's really worth it (unless you want D8 blockers for your archers).

Today, I wanted to look at a pure Rangers army (no allies), but we managed to get almost all of our criteria met at 700 points (despite not having allies):

Monday, July 26, 2021

The Bare Necessities, Part XXXII: The Fiefdoms

Good morning gamers,

Today we resume our series on list building with the "bare necessities" you need for an army to potentially score maximum victory points in any scenario. As a review, the five critical elements of list building are as follows:
  • Fast models (usually cavalry, minimum of 4);
  • At least one actual banner (the least necessary requirement if you're able to kill all of the enemy banners before the game ends);
  • Enough models (I have a "Rule of 30" at 700-points);
  • Ways to neutralize enemy models (especially heroes); and
  • Ways to augment your own models (especially heroes).
Today, we delve into the remaining factions in the Armies of the Lord of the Rings and Armies of the Hobbit and we begin with an army that I've looked through many times. The models look great, the theme of the army is wonderful, the allies of this faction are awesome - but the models THEMSELVES are REALLY EXPENSIVE (in actual money, sometimes points in-game). That's right, we're looking at the Fiefdoms!

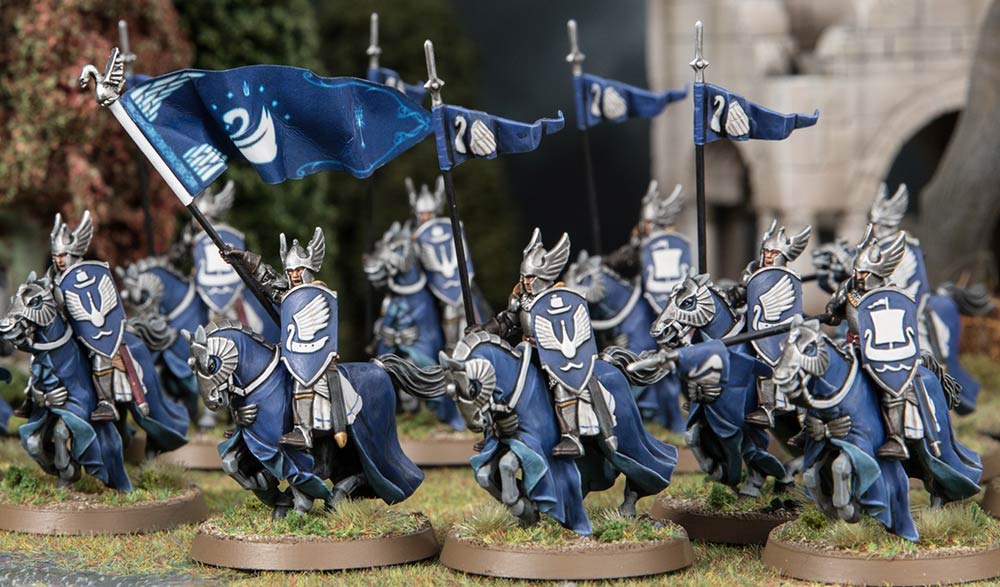
Photo Credit: lotr.fandom.com

The Fiefdoms: Balancing Hero Synergies And Masses of Troops
The Fiefdoms was the first faction that really emphasized hero positioning to take advantage of crazy good synergies. Like the Army of Dunland, where you place your heroes (and some supporting troops) matters a lot - it either makes or breaks your army. The Fiefdoms has one of the best spreads of named heroes - four Heroes of Legend/Valor - which means you can form a Horde with minimal investment in heroes. Two of those heroes (Imrahil and Forlong) are 3 Might heroes and by buying them, you not only get a War Horn to supplement your Courage (might be unnecessary - more on that later), the ability to reroll 1s to Wound for models within 6" of Forlong to augment your damage, F5 Knights of Dol Amroth and Men-at-Arms of Dol Amroth if they're near Imrahil (and F6 Captains of Dol Amroth), and a 12" banner buff from Imrahil (that doesn't count as a banner for the purposes of Victory Points). For 250 points (or less, I guess), you could certainly do worse.

The synergies from the other named heroes include a 6" Fearless buff from Angbor (who is treated as a banner by his fellow Clansmen of Lamedon - again, doesn't count towards Victory Points) and rerolling failed To Wounds for your Blackroot Vale Archers if a Heroic Shoot is called near them (and rerolling 1s To Hit with your Blackroot Vale Archers if Duinhir is nearby and the Archers don't move).

All of this is good - but buying all four of these named heroes will cost you over 350 points - which is a LOT invested in heroes for an average-Defense, average-to-above-average cost army. And none of these guys have March, so you might need a Captain of Dol Amroth in your ranks as well. Angbor and Duinhir only give you 2 Might each, so despite having four named heroes, you only have 10 Might (which is a lot, but not as much as you'd get if you allied with Minas Tirith or Rohan). As a result, if you desire numbers, you probably only need three of these heroes if you're running Pure Fiefdoms, while you could get away with two heroes if you wanted to ally with Minas Tirith and/or Rohan. There's a lot you can do with this army - hence why I avoided writing this post for a while.

Today's list will be a pure list, though we'll address some allied combos later in the post. The list I'm presenting today is something I wouldn't mind collecting (but it's definitely coming after I've wrapped up getting the models I need for the Quest of the Ringbearer sourcebook).

Friday, August 14, 2020

TMAT Series: The Bare Necessities

It's great when you know what your opponent is taking in advance. Or if you have the scenarios spelled-out in your tournament pack. But what if all bets are off, and you're flying blind? You know what faction you want to take, and how you like to play, but aren't sure whether you have what it takes to brave the unknown.

In this comprehensive series on balanced list-building, Tiberius (and occasionally some guests) tackle the sometimes tall-order of building 700-point lists that can take on all comers, in as many scenarios as possible. Everything is on the table, from synergies and special rules to bringing in some outside help via allied contingents. Plus you get some free list ideas, too!