Featured Post

So It Begins, Part 4: The Deeping Wall Is Breached

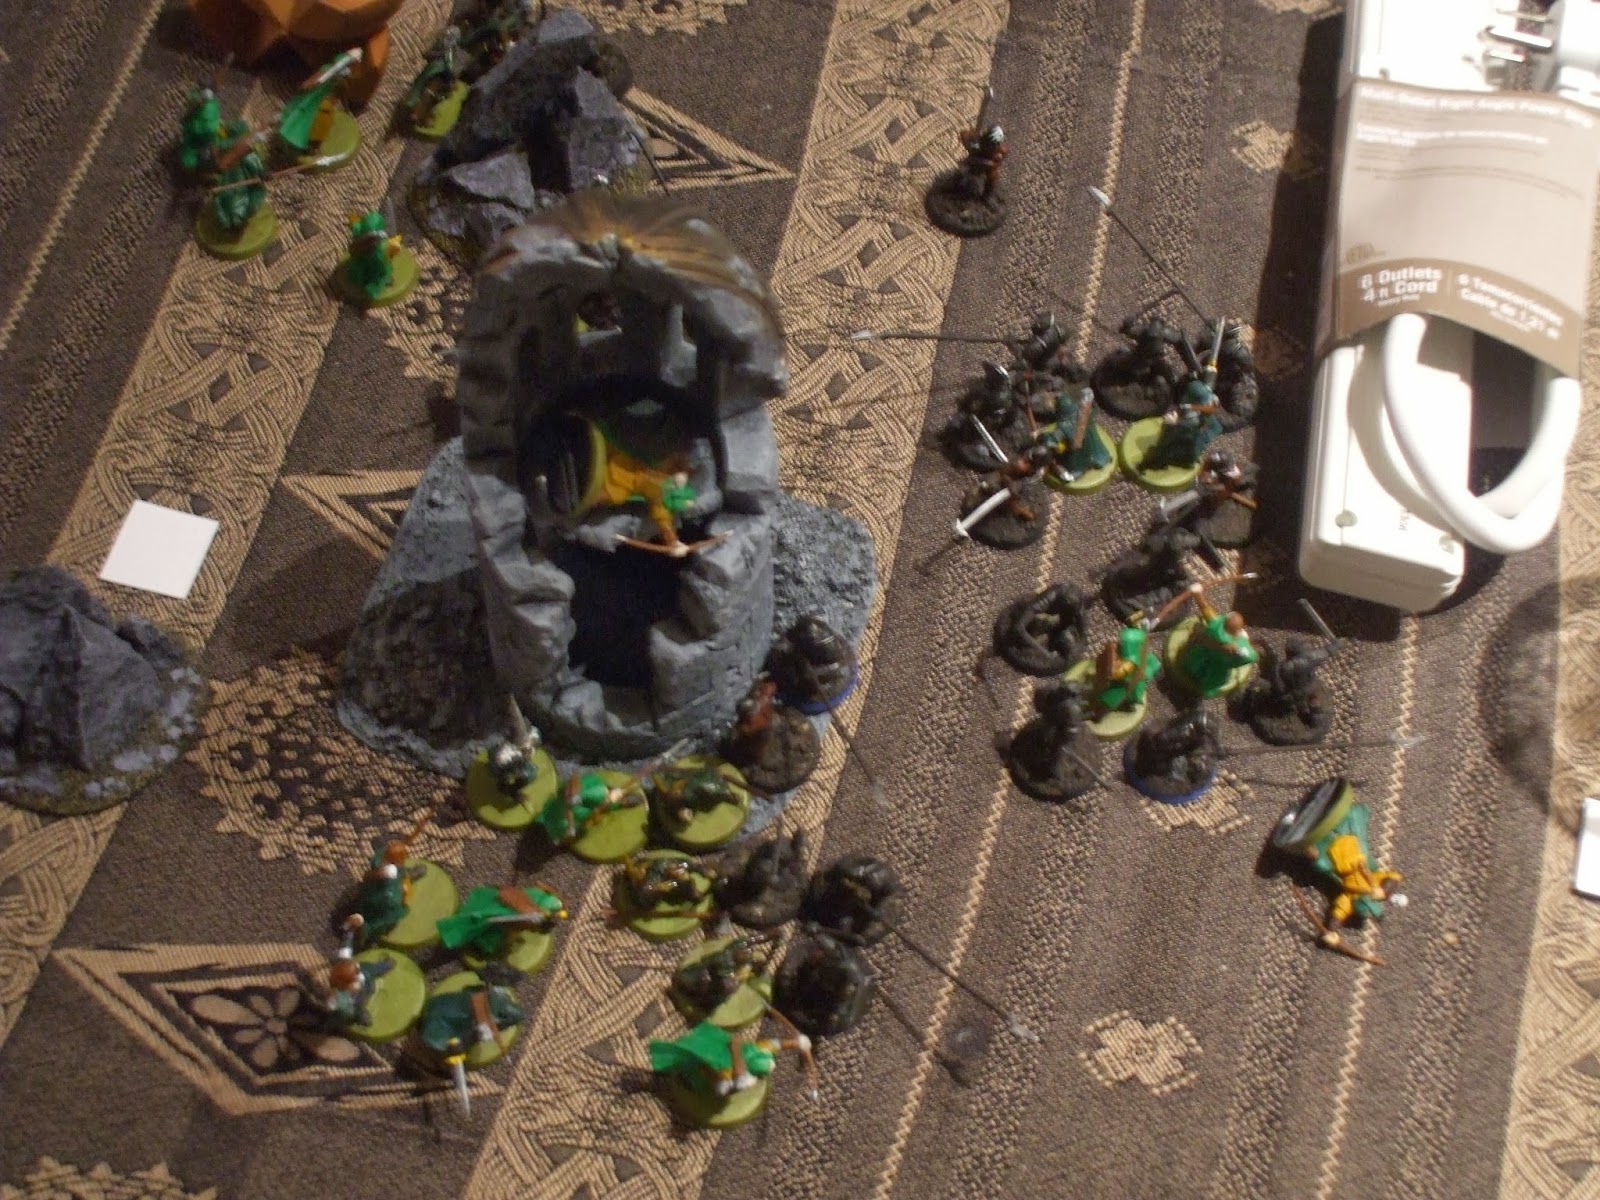
Good morning gamers, We're revisiting a scenario from Fantasy Fellowships in our custom Helm's Deep campaign today. Despite the amaz...

Showing posts with label Arnor. Show all posts

Thursday, June 4, 2026

Top 10 Hero Choices for the Realms of Men

All photos courtesy of GamesWorkshop


Hey Reader!

I've been playing around with the Realms of Men list recently (and took them to the TMAT GT this past May, where I finished with 2 Wins, 1 Loss, and 1 Draw), and as part of my experimenting with different iterations of the list, I decided to do a Top 10 post looking at the hero choices, because things are INTERESTING in this list.

There are quite a few heroes available to you (5 Kings, 6 Generic Captains, 2 specialists in the Knight of the White Tower and the Rohan King's Huntsman, and several siege captains), so all of them will make the cut! But how useful they are is another question. Before we start the review, let's look at what we'll be ranking in this assessment.
  • To start, you need to take a king to field their relevant captains and warriors, but we are not going to therefore say, "Ah yes: the king is automatically higher ranked because you need him to run the captains." We'll evaluate each individually for their usefulness in the list.
  • We will consider what kinds of warriors you get access to by taking a given hero, as unit options are part of why you'd consider taking a king/captain, and whether you should branch out into a second, third, or more factions because of what options will be unlocked.
  • We will assume that you are playing at a standard points range (600-800pts), so that there is no assumption of only having 1-2 kings: you can run as many as you want, which means that there are reasons to mix and match factions. So just because one faction may be stronger than another in terms of options, that doesn't automatically move them to the top (or bottom), though it may give a reason for pushing deep into one or the other.
  • Kings do have access to Heroic Strike; this will naturally lend them to being taken, and does make them inherently valuable. But Heroic Strike on its own does not necessitate "Top 5 Status."
So with no further ado, let's jump into the list!

Monday, May 25, 2026

The New Age Is Begun: The Battle of Fornost Army List

Good morning gamers,

Editor's Note: Before we begin the formal post, I just wanted to say that we just passed the 5 million view mark - we're so happy that you guys read our stuff and we'll keep doing what we can to provide accurate information and thoughtful articles about the game we all love!

One of the last games I played in the old edition (not including the practice leading up to our throw-back tournament we did last year) was with the Battle of Fornost. I had to proxy Earnur with Elessar, but golly was the list fun to use. In this edition of the game, the Battle of Fornost remains a powerhouse list, with a very unique flavoring of different factions that is probably only rivaled by the Battle of Five Armies, the Legions of Mordor, or the Defenders of the Pelennor. Of all the Rivendell-style armies, this one has the most warrior diversity by far and also has a really interesting array of heroes. Let's see what this list brings and why it seems to be a good list in the competitive scene.

The Battle of Fornost: Changes for 2025

Profile Selection

This list is composed of three elements: Gondor, Arnor, and Rivendell. The "Arnor" section is incredibly fragmented, but this also makes for some very interesting options for your list building. The Arnor heroes include Aranarth (Valor) and Rangers of the North (Minor or Independent) and all of these guys can lead Hobbit Archers (more on this later in the post).

The Gondor contingent is Earnur (required, Legend) and Captains of Minas Tirith and they can lead Knights of Minas Tirith and Warriors of Minas Tirith (pretty restrictive, but really all you need). The Rivendell contingent includes Glorfindel (required, Legend), Cirdan (Fortitude), and Rivendell Captains (Fortitude) and they can lead Rivendell Warriors. Thirteen total profiles doesn't seem huge (and is less than the total number of heroes available to any of those omnibus lists I mentioned earlier!), but it has an incredible array of models to choose from - heavily-armored men (foot and mounted), heavily-armored Elves (mostly on foot), unarmored Hobbits (on foot, obviously), and hero-warrior Rangers (all on foot).

Monday, January 27, 2025

First Impressions: The Kingdoms of Men, Part III


Hey Reader!

Welcome back! We're back reviewing more of the armies from the new edition, and today we're looking at the profiles for Arnor (including the new ones that came in the Rise of Angmar) and the 4 profiles for the Army of Dale that are in the Armies of the Hobbit book.

I have reason to believe that there will be more profiles for Dale coming in the Armies of Middle Earth book (Knights of Dale, Windlances, and who knows: maybe something new? We'll see), so this is not a holistic look at Dale (very probably). Arnor is likely present in its totality, so this is likely our full review of your options for Arnor. We'll start with Dale, and then we'll do a deeper study of Arnor.


Dale Overview: How Have They Changed?

There have been several changes to Dale - some of them are pretty small, but some of them are pretty big, completely changing how you use a specific profile.

King Brand and Bard II have to wait for the Armies of Middle-Earth supplement before they can be used again, along with Knights of Dale. So we'll cruise past those.

And Warriors of Dale haven't really changed: still a F4 warrior, still has a great Shoot Value, and still has access to those S3 longbows, so you can get "elven archery for cheaper" because you're not paying for F5 and better Courage. You also get Hatred (Dragon) which...if you find yourself fighting a dragon it's nice to get a bonus to your wounding roll, especially when you're looking at S3 (in close combat or at range with an Esgaroth Bow). But when you're starting at S3, and you're looking to wound something that's like D9, it's not a major boon: you're still headhunting a hard roll.

Now, that being said, if someone were to take a D7 Dragon with Moria, for example (assuming a profile similar to what we saw in the last edition), that would be 5s to wound, which means if you have reason to believe you'll be facing a Dale army (not unreasonable, as Dale has performed pretty well so far in the new edition tournament scene), taking an upgrade to improve the Defense of your dragon may be a really, really good idea. Because wounding it on 5s could be very bad for your health. Just a thing to think about.

Thursday, December 12, 2024

The Stuff of Legends: Army of Arnor

Hey Reader!

We're back, looking at more legendary legions, and today we're starting our deep dive into the Army of Arnor from the Rise of Angmar supplement. This legion is similar to some of the other legendary legions that have come out where they are "the legendary legion for that small minor army, so that all of them get at least one," and yet it's not for reasons that we'll discuss below. But if you are getting Army of Dale / Chief's Ruffians / Army of Dunland vibes from this legendary legion, I don't blame you!


Part 1: What Do You Need?

The Legion requires you to take Arvedui, Last King of Arnor, which is only 80pts. This is one of the smallest "Legion Taxes" for any legendary legion (Sharkey's Rogues, Wolves of Isengard, and Ugluk's Scouts come in lower, but this is still quite impressive), meaning you can technically play this legendary legion at almost any points level.

Of course, in reality, you need more than that: two of your three legion bonuses are tied to Malbeth the Seer, so effectively you need to take another 70pts to actually use all of your legion bonuses. That being said, a 150pt "True Tax" is not bad at all for a legendary legion.

Beyond this, you need "Arnor" models: Warriors of Arnor, Rangers of Arnor, the new Knights of Arnor (I recommend taking a mix of all three of these), and you can even throw in Dunedain and Rangers of the North if you like. 

You can also include Aranarth (the son of Arvedui) and Argadir (the right-hand man of Arvedui, and an auto-include in my book), and Captains of Arnor (which I'd take at least one of these guys if you can) to round out your hero choices.

Monday, December 9, 2024

The Stuff of Legends: The Battle of Fornost

Good morning gamers,

Before we get started with today's post, I just wanted to note that thanks to viewers like you, this little blog just passed 3,000,000 page views . . . so from all of us here at TMAT, thanks so much for your viewership - it means the world to us!

When we here at TMAT heard that the Rise of Angmar supplement was going to drop shortly before the new edition of MESBG was going to come out, we were like, "Yeah, there's no way we can review all of the changes that have come with this before the new edition drops." As a result, we decided to close out 2024 with an homage to the outgoing edition of the game, getting in all of the Legion reviews and army updates based on the changes that were provided for this beloved edition of the game. More old-school MESBG will follow in 2025, but intermixed with the new stuff.

We're starting off this seven-part series with a review of the Legion that I was most surprised by in the Rise of Angmar book: the Battle of Fornost LL. Obviously, this list was going to be in the book - that wasn't the surprising bit - but I was rather stunned by the options available for list building. While there are some elements of the army that I don't like, the list itself is . . . actually quite interesting. Let's take a look at what you need to run this list and what list building styles you can do with it.

Part 1: What Do You Need?

Legion Tax: 245-290pts

This list has one of the highest Legion taxes in it, since you have to take Earnur (who is probably mounted with a lance - but doesn't have to be) and Glorfindel (who is probably mounted with the Armor of Gondolin - though he doesn't have to be). On foot and with Glorfindel in his pajamas, these two heroes come in just shy of 250 points - maxed out, however they "only" cost 45pts more, so it's probably a safe bet that both will be mounted and armored.

Both are Heroes of Valour and unlike other Legendary Legions with required heroes that are the same tier (like Cirith Ungol or the Return of the King LL), you have the full flexibility of picking which of these heroes will be your army leader. Glorfindel has 3 Fate points, Fortify Spirit, an Elven-made weapon, and Lord of the West, which makes him a pretty compelling choice for your army leader, but without the lance and as the better stall-someone-who-is-big option, his place as army leader might not be a given.

Thursday, May 23, 2024

Is Arnor Just "Lame Minas Tirith"?

Hey Reader!

Recently when I did my post talking about my predictions/hopes for the new Arnor supplement, one of our commenters made an interesting (and I don't think altogether wrong) comment that "As is, it's hard to see it as anything other than 'lame Minas Tirith'."

And to be honest, YantheMan makes a good point: not only should each army feel different from the others (Mordor and Angmar share a lot of profiles, but they feel very different and are run very differently despite overlapping so much), but there should be a reason to field an army like Arnor over and against Minas Tirith (which will likely always be a more fleshed out faction in the game, and rightly so).

But as someone who has run both Minas Tirith and Arnor, I wanted to spend a few minutes just mulling over whether this claim is actually true, whether this is the right comparison we should be making, and then ending with some thoughts on how the game designers could flesh out Arnor in a way that is satisfying and cool and different without having to invest tens of thousands of dollars into new sculpts (because let's be real: it's not going to happen).


Monday, May 6, 2024

Top 5 Predictions (Hopes?) for the Arnor Supplement

Hey Reader!

As you probably know, there's a new supplement coming out for the Middle Earth Strategy Battle Game, and it's going to center around Arnor (and likely Angmar, considering the history), so of course we have to do a quick talk on what we anticipate will be in the new supplement! So after a few weeks of pulling together thoughts and ideas, here's my predictions (or probably hopes, to be honest) of what we'd love to see in the new book.

It's worth noting before we begin that I'm the resident Arnor player (and one of the resident Angmar players) in our group, and I've always been a bigger fan of the northern kingdom than the southern kingdom. So I'm pumped that we're getting a new supplement, and want it to be the best one they've ever made (though surpassing Scouring of the Shire is going to be hard).

So with no further ado, our top 5 hopes for the new book!


#5: New Scenarios Tied to Arnor's History

In the Ruin of Arnor supplement from back in the day, there were 6 scenarios, spanning the initial invasion of Arnor through to the death of Arathorn and the rise of Aragorn as chief of the Dunedain. And these scenarios were fine - like many of the old scenarios they are pretty sparse, but good on them for integrating more than just the Angmar and the Arnor models into the mix: you get Dunlendings, Dwarves, and Hobbits as well, all of which is great.

I'd love to see this expanded to include a scenario where the Great Plague is spreading to Arnor, the first incursion of Angmar against Arnor which sacks Amon Sul and causes all of Rhudaur to fall into the hands of Angmar, another scenario with the sacking of Fornost and the driving of Arvedui toward Forochel while his son and most of his people flee west of the Lune, and then the arrival of Earnur from Gondor with reinforcements to aid Arnor and Cirdan of the Grey Havens in pushing deep into Angmar to crush the Witch-King and his minions.

I'd also love to see a scenario showing Aragorn (and possibly also Arathorn) holding the thin line against the forces of evil, showing the desperate plight of those that held to the honorable task of protecting the ancient kingdom of evil things. This would make for a very interesting and exciting set of narrative scenarios that would be awesome for a game day and possibly an intro to the game for new players (which we absolutely love).


Thursday, July 14, 2022

An Apologetic for the Stun Special Strike

Hey Reader!

So in his recent ranking of the five special weapon strikes, Tiberius came down pretty hard on my main man Stun, so I thought I'd take a minute to beat a dead horse that probably no one cares about by talking about why this special strike is better than you imagine (and should at least be above Bash on Tiberius's list, if not higher). 

I know, no one asked for this post, but I was sick on a Wednesday morning and was off from work, and this is what my mind decided to fixate on, so I don't know what that says about me, but here we are, :P

I want to first walk through why the Stun special strike is so advantageous compared to the other special strikes, and then walk through how the armies that field this special strike compliment it well, as I think the faction context (short of paying for a weapon swap) is the part that a lot of people miss when evaluating this special strike.


I.  Stun: The Irresistible Special Strike

The first and most important part about this special strike is that it's not an opposed roll: your opponent can do nothing about your attempt to stun them. There's no roll-off like you have with Bash, there's no reduction to your Defense if you lose like with Piercing Strike, no penalty to your fight value like you have with Whirl and Feint, and no fear of damaging yourself like you have with Stab.

So in that respect it's the best special strike: nothing hurts you if you fail to win the fight, and your chances of winning the fight aren't diminished either.

Furthermore, you stun human-sized models on a 5+, and you stun monsters on a 6+. It doesn't matter what the target's Defense value, Strength value, Wounds value, or anything else is: it's a 5 or a 6 based on the type of creature you're targeting. And do you know what's great about that? Melee wounding rolls are overwhelmingly done on...a 5 or a 6, or worse than that, especially with the S2 and S3 models that overwhelmingly have clubs and staves (there are also wizards who are S4, but those are rare, and them using the Stun special strike is even rarer, in part because the two "battle wizards" among them either can get lots of attacks thanks to sleighs or they have a S5 sword and often choose to use that instead). So it's not harder to stun someone than it is to wound someone in the vast majority of cases.

Thursday, July 1, 2021

Fleshing Out the Faction: Arnor

Hey Reader!

As you probably know, not all of the factions in the Middle Earth Strategy Battle Game have the variety of choice as the "big factions" like Mordor, Minas Tirith, and Isengard. And while that's not necessarily bad (in truth I'm amazed we have some of the factions we do have in the line, as they get little time in the books and less to no time in the movies), it would be nice if some of those smaller factions got a bit more love to make them more playable on the table.

Today our posts is one of those attempts to correct this, offering homebrew options for new warriors and heroes for the faction of Arnor.

The ideas for these units can also be found in our new adventure module, The Dark Age. It covers the rise of the Witch-King of Angmar to prominence in the north and the fall of Arnor, with the players serving as agents of the Witch-King as he conquers the lands of men. For more on this and to download the free module, visit the downloads page here.


I.  Three Kingdoms: Arthedain, Cardolan, and Rhudaur

By the early Third Age, the Kingdom of Arnor was comprised of three regions: Arthedain to the west, Cardolan to the south, and Rhudaur to the east. The topography varies for each of them, resulting in variance in military development and needs for each portion of the faction. This will serve as the basis for our development of the faction: each of these will provide different units for Arnor.

Currently Arnor gets access to three warrior choices: the Hobbit Archer (which technically comes from west of these regions), the Warrior of Arnor (which will come from Arthedain), and the Ranger of Arnor (which will come from Rhudaur).

For the new models, we make the following assumptions based on the history of the region. First, Arthedain had the largest cities, giving them option to lots of trade, metalworking, and strong leadership (which is why it lasts the longest of the factions). The remnant of Arthedain would become the Dunedain that we know so well from the travels of Aragorn.

Second, Rhudaur is on the frontier against the Ettenmoors, with watchtowers but no major settlements, and their people are primarily guardians along the road leading east to Imladris. With woods and frequent troll incursions, all of their warriors are prepared to meet large, bulky threats in the field. Third, Cardolan is primarily hill country and downs, with few large settlements or industry. This means Cardolan units will be more lightly armed, and will be almost completely devoid of armor.

The captains will be similarly built, following the same guidelines. You'll have a mix of lesser captains and "Kings of Men"-style profiles, but no new named characters.

So with this in mind, here's our crack at fleshing out the Arnor faction.

Monday, June 22, 2020

The Bare Necessities, Part XXV: Arnor

Good morning gamers,

Today we cover a faction I don't really have an interest in collecting: Arnor. I certainly am not interested in buying the GW Warriors of Arnor, who make up the core of the list - $5/model in three-model increments is steep (but if you're just going to use this army in casual games, you could get Roman Auxiliaries or Early Imperial Legionnaires from Warlord Games as Warriors of Arnor if you wanted).

Thankfully, my fellow TMAT admin Centaur has been using Arnor for a while (converted a bunch of Warriors of Minas Tirith into Warriors of Arnor a while back - the conversion is pretty easy). I've played against him a lot with it (though not in a while and not under the new rules) and Arnor probably has a special place for him, because it not only allows him to run his favorite Good Support Hero (Malbeth the Seer), but also allows him to get his beloved Hobbit Archers into yet-another-army. :-)

Arnor is commonly derided in the community groups as a poor choice in large-points-match games. At/below 500 points, they're considered very strong because of their relatively-cheap F4/D6 spear-armed troops with a 5+ save to keep anyone who does get wounded from actually dying. No cavalry, lack of killer heroes, and limited warrior choices are often cited for their inability to be competitive at higher points levels. This sounds like a proper challenge for the TMAT team. :-)

So today, we'll be reviewing a 700-point list for Arnor that tries to meet all of our normal list building requirements. Before we dive into the list, here are Centaur's thoughts on the five elements of list building for Arnor and some interview questions I gave to Centaur to answer.

Arnor List Building Principles with Centaur
  • Fast Models: Naturally, you don't have any of these - there should be a medal for "zero mountable models," but alas, here we are, :-P I will say this: you can forego this by 1) using Heroic March, or 2) compensate for speed with range attacks if you choose not to ally with a faction that has fast models. It's not as effective, but it will do the job: you can dismount/remove a good number of enemies with archery, as you have a lot of solid 3+ Shoot models in the army. If you do choose to ally, any of the Elf factions can provide you with excellent cavalry support.
  • Banners: Arnor has cheap banners, so you can get away with 1-2 in your army easily. I personally don't run two, but that has more to do with my philosophy of spamming Arnor warriors - more on that in a bit.
  • Models: Since your warriors cost 5-9pts each, getting to 30+ models is easy to do even at lower point levels. I recommend taking both of your named heroes (as Arvedui and Malbeth both provide useful bonuses for the army), but you could even get away with 55pt captains if you needed to, as they are very good as-is.
  • Ways to Neutralize Enemy Heroes: Truthfully, you have almost nothing to neutralize heroes. The big tool you have, though, is Malbeth's Foresight rolls, as they can (with relative ease) make a Heroic Combat unsuccessful by keeping your men alive, reducing casualties, protecting weak units by keeping D6 models on the table and preventing wounds to D3-4 models, and mitigating enemy archery (so the Legolas/Bard/etc. characters suddenly don't do nearly as much as they thought they would). (Ed: I'd also include a mention of Arvedui's Heroic Defense option here, should your opponent try to take a big hero and squish him. ~Tiberius)
  • Ways to Augment Your Models: basically the only way you can do this is a massive Stand Fast from Arvedui and the same Foresight save from Malbeth, so yeah...that's all you have, :-P I'm sorry, :-P
Interview with Centaur on Arnor

T: When building an Arnor force, what's the balance that you choose between Rangers of Arnor and Hobbit Archers?
C: So, they provide two different things for your force. Hobbit archers provide the exact same level of ranged capability for half the cost of a ranger, but it 1) has a lower FV, and 2) cannot take a spear, so they are less useful in melee. So I recommend taking a 2:1 ratio of hobbits to rangers. You are primarily bringing hobbits for shooting (so this maximizes your shooting).

T: Is there ever a reason to take Captains of Arnor with bows?
C: No. Unless you're guaranteed to be defending in a fight so you don't ever move and shoot, the 4+ Shoot makes it so that you'll rarely use the bow for anything in the match. If you cost less than 50pts that would be one thing, but since you cost 55 pts, you're on the more expensive side for captains, and that means I tend to find the shield more useful, as you'll need them for holding down big foes.

T: Do you need allies with this list?
C: No, though allies are very useful. Your special rule is okay but not great, and you can live without it. So my recommendation is scratch it and choose another army to complement you well to round yourself out. Personally I'd go with Khazad Dum (F4 D7 front line of Khazad Guards backed up by D6 spearmen with ballista support? That's a tough nut to crack, especially when the front line are D7 and the second rank is D6 with a 5+ save) or Rivendell (supporting magic, cavalry, and a F5 D6 frontline with D6 spearmen who have a 5+ Save), but you have a decently wide set of options including, ironically, Fangorn - not a bad choice if you need some anti-hero breaking power. Personally, though, I don't think you need to ally in allied forces. You have cheap ranged attacks to pick off enemies, and with incentives to take captains you will have a lot of deployable warbands, allowing you to counter the deployment of your enemies if you have a Reconnoiter or similar match where speed is victory. You have a solid fighting line that is hard to kill combined with large numbers, making it hard to break you, which does two things for you. First, you don't give up VPs for being broken, and you don't see the effects of the low Courage on your army nearly as much as you would otherwise. Naturally high terror armies will cause trouble, but that just means shooting them to death before they come. And heck, worst case scenario, you Schiltrom and let them charge you. No high-Terror model has good ranged attacks (save Smaug), and even if you do get hit you have a 5+ chance of shrugging off the damage if you play it right. So screw terror models, :P And with lots of ranged attacks, high numbers, and a lot of F4, you'll have a lot of chances to deal damage and won't actually suffer as much as you'd think.

Thanks for the insights Centaur - we won't be getting into Fangorn today, but we'll see what we can do with the other allied factions later in the post. :-) For now, let's see what Centaur cooked up for us today.

Thursday, August 22, 2019

Revisiting the Rangers of the North: Army Review

Hey Reader!

It's been a while since I've written an article for TMAT, though I'm sure you've enjoyed the content from Tiberius and Rythbryt as I have. In my defense, I've got a very good reason for being out for the past several months:

This Dunedain finally found his princess!
Huge thanks to Rythbryt for his sword.
Now that I've married my forest elf and settled us in our new house (with a mostly working microwave), I'm returning to some of our past army reviews to update them with the changes made with the new Middle Earth Strategy Battle Game release.

In today's post, in line with the ranger-themed wedding pic above, I'm pleased to begin my part of the revamp series with the Rangers of the North, as the changes are pretty substantial compared to what we had under the Warbands rules. You can find the old post on our blog here.

So with no further ado, let's look at one of my favorite armies to date.


Friday, December 14, 2018

New Rules, Part VI: The Kingdoms of Men, Part I


Good morning gamers,

It’s been a while since our last post, but we’re now turning to the Armies of Good from the Lord of the Rings. With the release of the Armies of the Hobbit, expect posts of those armies (Good and Evil) coming out early next year. As we did with the Armies of Evil from the Lord of the Rings, I’ll be using the old Warband books as the means of binning the armies that we have now. In my last post on the Armies of Evil, I said we’d do the Free Peoples as two posts and the Kingdoms of Men as one post, but the more I poured over the armies, I said, “Nope, each of these books gets two posts.” As mentioned in our previous posts, you should also check out Mik's Veni Vidi Vici blog for thoughts from the “experts” (the only army not covered in this post at the time of this writing is Arnor).

1) The New Lists: The Rangers, Numenor, Arnor, and Rohan

I chose in this post to delay covering the four Gondor civs (Minas Tirith, The Fiefdoms, and the Dead of Dunharrow, and the Wildmen of Druadan who live in the northern parts of Gondor that might technically be Rohan...can't remember). The armies we’ll be covering today have changed in some significant ways from their Warbands versions, but have returned to the fundamentals of their older Legions of Middle-Earth armies (so the changes aren’t THAT radical).


Sunday, September 28, 2014

The White Council: Forty-Man Lists

Good morning gamers,

Today, we're continuing our discussion on the White Council and its utility to add valuable heroes to conventional army lists. While in our last White Council post we added two members of the White Council to various Free People's Lists, in this one we're going to add a single member of the White Council to four thematic lists. Note that with these army lists, you will not be able to capitalize on the army special rule that increases your rolls to resist magic spells, as you need at least two units from the White Council list in order to do that.

As with the last post, I'll only be posting lists that follow the warband creation rules for the new sourcebooks (and mostly be working out of the Free People's sourcebook), but I will be the first to say that an LOME list (following the constraints we place on our tournaments) will probably be more powerful than these, since you can upgrade your units/heroes pretty far by dropping one hero from each list.

Friday, October 4, 2013

Battle Report: Grey Company v. Host of Rhovanion


Hey Reader!

This is Centaur with another battle report!  As I mentioned in my previous post, I'm playtesting my list for the upcoming Hunters Red October Tournament, and last night I met up with Donatello to play an Arkenstone game (as it's one of the four scenarios for the THRO Tournament), using the following lists:

Friday, September 27, 2013

Battle Report: Grey Company v. Arm of the Angrenost


Dear Reader,

This is Centaur with another battle report!  So, I owe you all an apology: it's been almost two months since my last battle report. :(  I suppose I could blame scheduling craziness on the part of myself and my gaming buddies, but the truth is I've just been woefully lax in putting up battle reports recently.  I hope to change this as we prepare for the Hunters Red October Tournament in four weeks!

In preparation for the THRO Tournament, I decided to playtest my Grey Company list that I'll be using in the tournament, in part so that I can get comfortable with the feel of Grey Company again (as it's been a while since I've played them), and also so that I can showcase some of the terrain and board ideas I'm thinking up for the tournament.  I met up with Zorro last Friday night, in part so that I could test out the new stockpile rules for terrain, but also because he wanted to test one of the armies he is considering bringing to the tournament.  The lists looked like this:

Monday, August 12, 2013

Conversion: Mounted Rangers of the North

Dear Reader,

Slight pause on Operation Tuckborough: I was clearing space on my desk so that I'll have the necessary space to work on Brandywine Bridge (which is going to be over 16" long; I'm pretty stoked, :) ), so I decided to attempt a model that I've thought about using for my Grey Company army, but the Perry brothers have not made yet: mounted Rangers of the North!  When doing my research on the conversion, I found two examples of people who had converted RotN into mounted models, one using a plastic model, and one using a metal RotN model.  I wanted two different poses, and decided to strike out on my own for this project.

In this post, I want to show the conversion process, and in the next post I'll highlight a bit about tactics and utility in an army (along with two other Ranger of the North conversions I'm working on, and the other 8 Rangers of Arnor I've added to my crew).

Monday, August 5, 2013

Conversion Projects: Knights of Dol Amroth and Warriors of Arnor

Hey Reader!

Greetings again from the Forge!  The boys over here at the How have been pretty busy clearing space on the workstation so that there's enough room to work on the terrain projects I promised in my last post.  To clear space on my desk, I finished up some long-term projects from a purchase I made several months ago, namely, what to do with a pack lot of over 30 Numenorian Warriors I purchased off eBay.  In line with Tavros' decision to convert swordsmen into Knights of Dol Amroth, I followed suit and crafted a number of Dol Amroth Knights as well, and I also came up with a creative use for all of those spearmen that came with them.

Friday, April 19, 2013

Battle Report: Rager's Raiders v. Defenders of Osgiliath

Dear Reader,

With this month being devoted to my new Uruk Tracker force, I took the opportunity on Sunday night to get together with Donatello to playtest my boys.  Per an insane last week of work, it has unfortunately taken over five days to get this post up, and for that I apologize to our loyal viewership.  My hope was to get it up on Monday, but life has a way of thwarting seemingly simple plans like posting on a blog, :P

But I digress. :)  As we talked about which force he'd like to use, I mentioned in passing a Gondor force that I had been dabbling with, and it caught his eye.  So in this battle report, I'll be using my Rager's Raiders list, and Don will be testing my new Defenders of Osgiliath list.  You can find the breakdown for each team below:

Tuesday, January 1, 2013

Grey Company - Strategy and Tactics

Dear Reader,

Greetings again from the Forge!  Following the last article on the Dunedain, I wanted to tie together a number of the things we discussed about each unit, and outline a few of the combinations that can be effectively used by a Grey Company or Arnor player.  I will preface with the typical warning of any gamer:

This is only my opinion.  Others will disagree with some of my assessments, but I believe that these are good tips to keep in mind, blah-blah-blah...

Okay, now that that's out of the way, let's talk strategy, :)  In this post, I want to focus on not only the units that I use (and have found effective over the past year), but also on some helpful tips that a Grey Company player should keep in mind to increase the longevity and effectiveness of his units, as that is the primary sticking point for any GC army.  I will also be including some thoughts about Arnor-specific armies, especially for those who run LOME lists, and want to stick with a "Grey Company v. Arnor" paradigm.

Strategy Overview

There are three things that are useful to discuss before launching into specific strategies: the strengths of this list, the weaknesses of this list, and how to spot a crisis scenario for your units.  As mentioned one of my previous posts, a lot of the strategy for a Grey Company player comes "in the moment," just as the battle is getting hardest, so knowing when things are just not working and a need comes to reform and reinvent your list in the midst of battle is paramount to success with this army.

1.  Strengths of the Grey Company: Damage Per Round

Warning: Targets in line of sight may
be closer than they appear.  Results
of archery may vary.
If there are only two civs in the LOTR SBG that are designed almost exclusively for damage over defense (which, I would argue, there are more, but not many that are as apparent as these two civs), it is the Wood Elves and the Grey Company side of Arnor.  As mentioned in the last post, the vast majority of your units are D4, so survivability will always be on your mind, especially against S3 and S4 units.  What you shouldn't have to worry about, though, is damage per round.

Optimize your kills every round.  In a 500-600 point game, you should be doing at least 2-4 kills every round, especially before reaching close-combat.  As mentioned before, you can do this through lots of S2 archery (even with multiple volley lines to target different divisions of the enemy army), quick sally charges with S4 hero units, and some of the tactics mentioned later in this post.  In close combat, you should easily meet this quota - get creative with your archery to maximize kills at range.

2.  Weaknesses of the Grey Company: Sustainability

Daerdan and two Rangers of Arnor,
all D4, are beset by Hunter Orcs
There are three things that GC armies should take to heart in providing sustainability for their warriors.  First, as much as possible, avoid bare places, not open spaces.  As you scratch your head over my last statement, consider the strengths of the Grey Company: lots of archery, a good Fight value, and the chance to move through difficult terrain with ease if you field Aragorn, Isildur's Heir.  What you want to avoid is being a sitting duck with D4 (the worst possible place to be), but you don't want to embrace a Goblin Town/Osgiliath-style map either, which will restrict your archery and logistical options through tunnel or urban fighting (the next worse possible place to be).  Thus, avoid bare places (where there is no strategic advantage to deploying units), but don't aim for close spaces - aim for open spaces that give you options for tactical deployment, but do not leave you completely exposed.

Second, take stock of your opponent's army upon deployment, and carefully determine which portions of the army must go down first, and which you would prefer to take down first.  I may be dreading facing that troll that Zorro is fielding, or I may be terrified (literally) of the hero that Tiberius is fielding.  That's not what's important: what's important for my force is to determine what must go down in order to preserve my warriors.  While that S5 hero may cause problems at close combat, those Uruk crossbows that the General Will is fielding are going to cause a problem well before the others do, and will likely punch serious holes in my lines before we draw swords (as he did at the last tournament).  Make your priorities based on survivability, not on what you would prefer not to fight.

Finally, the Roman maxim of "march divided, fight concentrated" is helpful to remember here.  Teaming and ganging on elements of the enemy army (especially in a warband game), even if only in your archery, will do wonders in leaving elements of the enemy army impotent against your force.  Again, aim for kills, but also reduce your opponent's force to unhelpful components (as opposed to destroyed components), as it will save your units and (likely) the victory as well.

3.  Crisis Scenario: The Long Haul

What all Arnor forces dread - Grey Company and Arnor proper - is the long game.  Anything beyond 8-9 rounds (especially with the new warband deployment rules) will likely spell single digit survivors, if any, for Arnor.  With low Courage values for your heavy infantry and low Defense values for your strong courage units, Grey Company units thrive on breaking enemy armies in 5-6 rounds, as their high Fight value and wide spread of Might points helps you in 1-1 situations in Rounds 7 and onward.  If your force is in Round 7 or 8 and the enemy is not broken, be very careful in watching your victory conditions, and rake them in as quickly as possible, or you will lose (as Game I at the Red October Tournament showed - lots of damage, but no victory).

Strategy and Tactics

With all that discussed, I want mention four specific strategies that may be helpful for you in combat.  Some will no doubt say, after reading this post, "Glenstorm, you forgot to mention the 'stay-back-and-shoot-them-all-until-Orome-returns-again' strategy, which is obviously what GC is designed to do!"  A few notes on that:

1) That's not how I play: because I do not believe in the "ever falling back" approach to combat, I don't recommend it on this blog. :)  I view archery as a means of softening my enemy's ranks as I advance, not the primary attack I resort to before hitting my opponent's line in a last ditch effort to break him.  Maybe I'm the only player that does this - I'm okay with it, :)  I will warn you in advance, though, that the strategies below come from my approach to playing, not the "ever-shooting" mindset, so make adjustments to what I say as you read to complement your style of gameplay.

2) People don't like it when you play like that, so I'm not going to recommend it on a blog: If there is one thing that irritates a player in Warhammer, it's an enemy he cannot catch, and an opponent that knows that you cannot catch him, and does it anyway. :)  I believe in tactfully using your surroundings, but also realizing the importance of drawing closer to the enemy each turn so that I can ensure a solid melee combat match-up, rather than the run-shoot-hide strategy that a lot of people recommend with Arnor-based civs.  But most importantly...

3) Maybe that strategy is just so obvious that I don't need to blog about it? ;)  Yeah - I'll leave it there, :)  In the next section, I'll be discussing four tactical strategies you can use that are not intuitive to this list, and thus may be of help to you when thinking through deployment and approach at the start of a game, up until you start slogging through melee combat.

1.  The Wheel
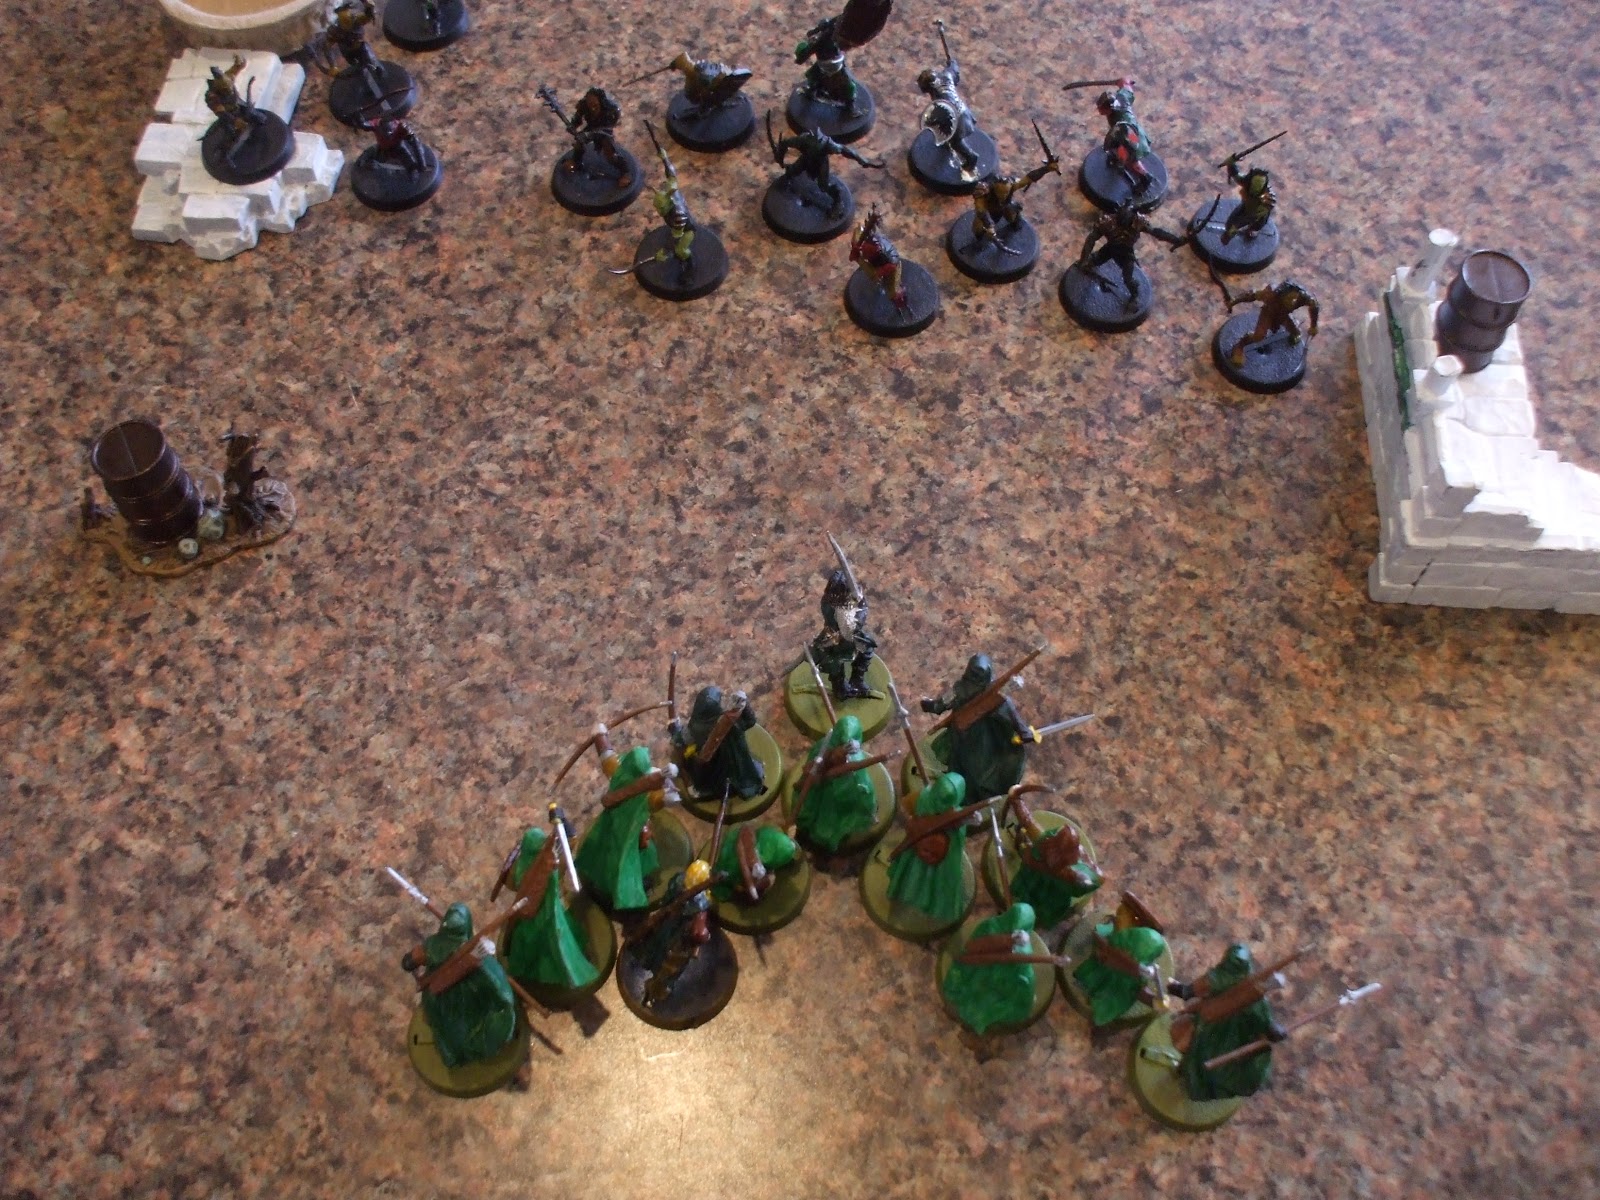
A body of rangers wheels from their
cover behind the ruins
All of our Warhammer Fantasy players are familiar with the term "wheeling," as are any readers that have at all studied medieval battle tactics.  Maneuvering a block of warriors allows you to cover weak units, provide strength as needed, and meet enemy advances from places of strength on the battlefield.  

This strategy is most helpful when you are meeting a two-deep block of infantry, especially blocks that are less that seven models wide.  Grey Company forces offer spears that are also archers, giving you a chance to both support your front rank and attempt to take out your opponent's spear support after the fight has been declared.  Optimally, you will also have banner support (either from Halbarad Dunadan with the Banner of Arwen Evenstar or Aragorn, Isildur's Heir) to assist you in winning the fights.  Once the first round of combat is finished, take stock of the deployment, check for possible assistance from your opponent to this block of men, and engage as many of your warriors around the flanks of the formation as possible.  Once the corps is consumed, reform, and wheel yourself in position to strike again.

2.  The Bullpen

I'm actually not making a baseball reference here - I'm making a rodeo reference.  I had a chance to see a rodeo in-person about 18 months ago, and while I really enjoyed the barrel riding, steer chasing, and bronco riding, I was also captivated with the bullpen for very different reasons.  I had conceptual thoughts for a Grey Company force at the time (hadn't paid up for the army yet), and I noticed the similarities between fielding a GC army and the place where they keep the bulls at a rodeo (nerd, I know...).

At a rodeo, there are two things that the staff are looking for: 1) mad bulls that will have a lot of energy when they come out, and 2) no goring of man or beast before, during, or after the event.  For bulls, this means a tight place where they cannot run around (as that will tire them out), but with enough space that they will not kill each other or any unfortunate cowboy/hand who goes to fetch them.  This is the same predicament for a Grey Company player, and I recommend you find the balance that the cowboy has: with a bullpen.

Here is a recommendation on how not to do it:

The standard "Killbox" Formation

Why do I recommend against this?  It is way too obvious to your opponent, and he will attempt to buck against it (by flinging toward a side) and bring in extra help from outside units against the exposed flanks of your outermost elements (and Too Many Bulls + Not a Lot of Space = Dead Cowboys, remember?).  I recommend this deployment:

A variation of the "Bullpen" Formation in its most basic form

Much less threatening, right?  You almost feel as if it will be too easy breaking this GC element - until you think about charging it.  How many units are in their front rank?  How many are in yours?  There is a guarantee that they will reach your flank, peel off toward your weaker units (in this case, a bannerman), and if there are Heroic Combats (with 2 Rangers of the North in the front rank ready to call them, this is a highly likely scenario), carve holes through your lines to enfeeble your unit.

Setup a bullpen with units in a close block, then fan them out just before charging begins, and watch as your opponent begins to count the cost of charging if he has underestimated your force.  I have used a modified version of this tactic based on the terrain around me in every game I've played with the Grey Company, and it never fails to throw a body of infantry into confusion, as there are too many targets to engage without stretching yourself too thin.  This is because there are very few infantry in the game that like to fight in solo combat - most would prefer to have (and reach their full potential when given) spear support behind them.  Rangers of Arnor benefit from spear support, but their high Fight value moves the extra dice from "necessary" to "helpful," which gives you options.  One of these options, I'd contend, is the Bullpen.

Now, everyone is likely taking a step back and saying, "Can't we just call it a 'Killbox'?  What's wrong with a killbox-style of engagement (like we saw in the first picture), since the list clearly works with that style of fighting, too?"  A few things.  First, who in their right minds walks into a killbox other than Dwarf heroes, a Mumakil, a dragon, or maybe a gang of trolls (all of which you don't want in your killbox, by the way)?  Your opponent will not take the bait, and even if he did, turning to engage the flankers in LOTR SBG is much easier than in Fantasy, weakening the effectiveness of such a tactic.

Second, and more importantly, a Killbox formation opens up the flanks of your killbox to attacks from other elements of the opponent's force.  Unless you are playing a massive game, you won't have this many warriors available to you to trap your opponent with, unless what he sends into the killbox is his entire force (in which case, you're preempting my next tactic).  If he does send in reinforcements, you will soon find your men outnumbered and out of reach of help.

Finally, when I run a Bullpen, I'm not aiming for a dead bull - I want a controlled bull that can still charge, buck, and bray.  I am perfectly fine with a good portion of my opponent's force - maybe even most of his force - arriving alive to close combat.  What I want him to do is feel secure in that force's ability to take on this element of my army, so that I don't attract additional reinforcements.  The trick to a Bullpen is feigning weakness, and then striking your opponent in ways he does not expect.  It takes a lot of practice to run a successful Bullpen, but when it works, you'll discover that your force can clean up an enemy detachment with close to no casualties, and in only 2-3 rounds.  I highly recommend the Bullpen.

3.  The Flying Columns Formation

Three Grey Company elements (Aragorn's force, Halbarad's
force, and the Twin force) envelope an Uruk force
I've mentioned the Flying Columns Formation when discussing my Rohan force in a previous post, though I'll caveat its utility here: it works better for civs with throwing weapons (Rohan, Wood Elves, and Dwarves especially) more than it does an archer-based civ.  Whereas units with throwing weapons can move their full distance and then fire, archer units make a choice between great speed around a flank and damage to said flank in a given round.  The one exception to this rule are cav archers, but ditto the comment from my last post about all of the Arnor lists lacking cavalry, and the hindrances that this gives to your unit options, :)

For Arnor, the Flying Columns gives you a chance to wrap around an enemy force through a bait-and-switch method of luring in an opponent, and then crushing down on him from all sides.  Unlike the Bullpen and the Wheel, however, you are attempting to engulf and engage the entirety (or close to the entirety) of the enemy force, and your aim is not to eliminate an enemy element: your aim is to punch holes in as many of your opponent's elements as possible to make them all impotent for his purposes.  The one advantage that the Grey Company has over Rohan in running this tactic, though, is the option of spear support, which makes crunching through enemy elements more palatable in regards to risk factor to your warriors, if not easier in breaking through enemy lines.

4.  The Spearhead/Wedge Formation


Basic Wedge: Firepower up the sides (weighted toward the
front), with spear support and banner support in the center
The Wedge Formation is an ancient tactic, primarily employed by Northern and Western European nations (with the Saxon Shield Wall as the notable exception), and was especially efficient at breaking blocks of infantry.  The Romans encountered this a lot during their invasions of Germania and Britannia, with the Picts and the Germans employing it most effectively.  The formation is very simple: your power units form the front of the "spear," with a few competent heroes/elite units near the end of the "spearhead" to protect the flank.  Place your spear support in the center to protect your heroes (and options for additional close-combat firepower, if things get rough near the front), and, if possible, include banner support as well (in the picture above, Aragorn, Isildur's Heir fills this role as well as the power hero at the front of the "spearhead").

One of the strengths of using this formation with the Grey Company (and its noticeable absence from my Rohan tactics post mentioned earlier) is that you have a power hero with a banner that does not receive the banner penalty: Aragorn, Isildur's Heir.  This means that you do not have the difficult situation of a weaker attacker near the front of your spearhead, as most other civs would have (the Easterlings have a good option in Amdur as well, in case you're thinking of building an Easterling force), or a swordsman in the center of your spearhead, doing nothing beyond providing banner support.

The Wedge is most effective at taking down large, clunky bodies of infantry that require the formation to hold in order to maintain its strength.  Large bodies of heavy Uruk-Hai warriors with three-deep pike support, Easterling cohort formations, etc. (possibly even some Gondor formations, now I think about it; hm, I'll have to try that...) are the prime targets for a Wedge, as a wrap-around strategy to take on your "spearhead" actually plays to your strengths by reducing their pike/halberd support to 2-1 (and on-par with you), spreading out an enemy that would otherwise be able to fight in a concentrated block unit.

Other than that, though, I honestly do not recommend the Wedge - it is highly unwieldy, lacks the firepower and quick engagement options granted by a Wheel or a Bullpen, and centers a lot of points in a very small, contained portion of the map, which could have terrible consequences for your forces across the rest of the board.  Wedges also have the high probability of trapping the unit at the tip of the "spear," so if you do run a Wedge, make sure that your front man wins his fights (insert the pitch for banner support here).

Wedge formations also don't work well where archery is in play: placing all of your best units in prime archery target practice range is...not advised, :)

Conclusion

Now, within each of these strategies, there are multiple maneuvers that you can perform, including the Feign (fake a hero/elite unit one way to get a nemesis-style unit, like a caster, to move that way, and then pull back and replace him with another hero/elite unit), the Wag (crushing toward one side of the enemy force, breaking it, then swinging back toward the other side, and lather-rinse-repeat until an enemy force is defeated), and other maneuvers that you have seen on this site.  What these four tactical plans are designed to do is to get your momentum rolling as a player, and then, when the battle gets thick, step back and command your forces as they enter combat.

You will also notice that a number of these maneuvers can be easily and effortlessly combined - why not run each of your columns in a Flying Columns Formation like a Bullpen, enticing your opponent to peel off and engage your columns, freeing up your main body?  You could run Flying Columns off of a Wedge Formation against an Uruk-Hai Warrior force, or you could hide one of your columns around terrain to prepare for a Wheel when your opponent is exposed or seeks you out.  The ability to mix and match these formations is one of the reasons that I provided them here, and also speaks to the strength of the list.  As mentioned at the beginning of this set of posts, the Grey Company cannot do everything, but what they do, they can do very well.  Test them out sometime - you'll discover that it is highly versatile, amazingly durable, and quite capable when put to the fire.

This January, I'm dedicating the month to my Angmar forces, reinvigorating them and innovating my strategies by employing a new hero (Dwimmerlaik!!!) and a new set of forces to team them with (which you have already seen here and there in the post so far).  May I be the first to introduce you to my current work in progress, the newest civ added to the LOTR SBG and the TMAT blog - the Misty Mountains List!


Watching the stars,

Glenstorm

"I watch the stars, for it is mine to watch, as it is your's, Badger, to remember." ~ Glenstorm

Monday, December 24, 2012

Grey Company - Army Summary

Dear Reader,

Hope you enjoyed the last post!  I've really enjoyed taking a step back and thinking about my favorite army, and I look forward to the next two posts as we further discuss the unique civ we call the Grey Company.  In the last post, we discussed the named heroes of the GC force.  In this post, we will discuss the unnamed heroes (that work a lot like regular units), and the limited supply of units available to Arnor.

It is worth noting upfront that when it comes to units, Grey Company players need to take two factors very seriously.  First, you do not have a lot of units in your list.  This means that 1) your strategies are limited, as you only have certain options available to you by the nature of the list, and 2) most of those strategies can be predicted by your opponent well before the match.  This means that most of the tactical work for a Grey Company player is going to come in the spur of the moment - and for those of us who primarily play Warhammer for the adrenaline kick, we wouldn't have it any other way, :)

Second, almost all of your units (with the exception of the Warriors of Arnor, which I'll discuss later) are D4, and will be quite...squishy...in melee combat if they do not win the fight, so you can quickly rake up losses if you are unwise or indifferent in picking your combats in a given battle round.  Since you will likely have one of the lower numbers of units in a given tournament, a low break point can spell disaster for your force if you are careless with your units.

Unnamed Heroes

Ranger of the North
The Ranger of the North is probably the "rank-and-file" hero of every Dunedain force, primarily because, for 25 points, he does almost anything you could ask for a ranger.  Good shoot value, good fight value at F4, and S4 for killing blows when you need it.  Couple that with D5 and the 1M/1W/1F profile, and you have a hero that can provide a tactical advantage in crisis scenarios.  Heroes like this will never replace the need for an Aragorn or Halbarad, but they provide good all-around support for the list as rank-and-file heroes.

The Ranger of the North is also unique, in that it is the only unit in the game that can purchase the armor upgrade (from D4 to D5) for 1 point - all other heroes purchase it for 5 points.  The Ranger of the North is exactly the same as the Dunedain hero, with this exception: Dunedain are D4, and Rangers of the North are D5.  For those familiar with the Gondor list, picture Damrod (whom you can get for 20 points) with Courage 5 (instead of 4), and the ability to take a horse (6 points) and a spear (1 point).

As a general rule, I would not recommend taking the horse for these models (waaaaay too tempting of an archery target), though I can see the utility in mounting them for greater mobility, the charge bonus, and knocking enemies over when you win the fight.  GW doesn't sell a model for mounted Rangers of the North, so you're on your own as far as that goes, :)

To conclude, these are my favorite units for Grey Company - I highly recommend them in every GC force you build.

Grey Company

I...honestly don't know why this unit exists on the GW website, :)  Except that maybe 1) GW wanted to make a new model for a limited army list, 2) they wanted a Ranger of the North-style unit that had chainmail already cosmetically equipped, or 3) the Perry brothers were just plain bored. :)  Interesting enough, in the new Kingdoms of Men sourcebook, the Rangers of the North profile uses a Grey Company model picture, which seems to indicate that they have been lumped together into one unit: the Ranger of the North.

This unit is the original version of the Rangers of the North (being released a few months before the Rangers of the North blister was released), and have the exact same stat line as the Rangers of the North: 6" Movement, F4/3+, S4, D5, 1A, 1H, C5, with 1M/1W/1F for 25 points (26 with a spear, and the possibility of a horse for 6 more points).  Their usage is exactly the same as a Ranger of the North, because...they're exactly the same as a Ranger of the North, :)


Dunedain
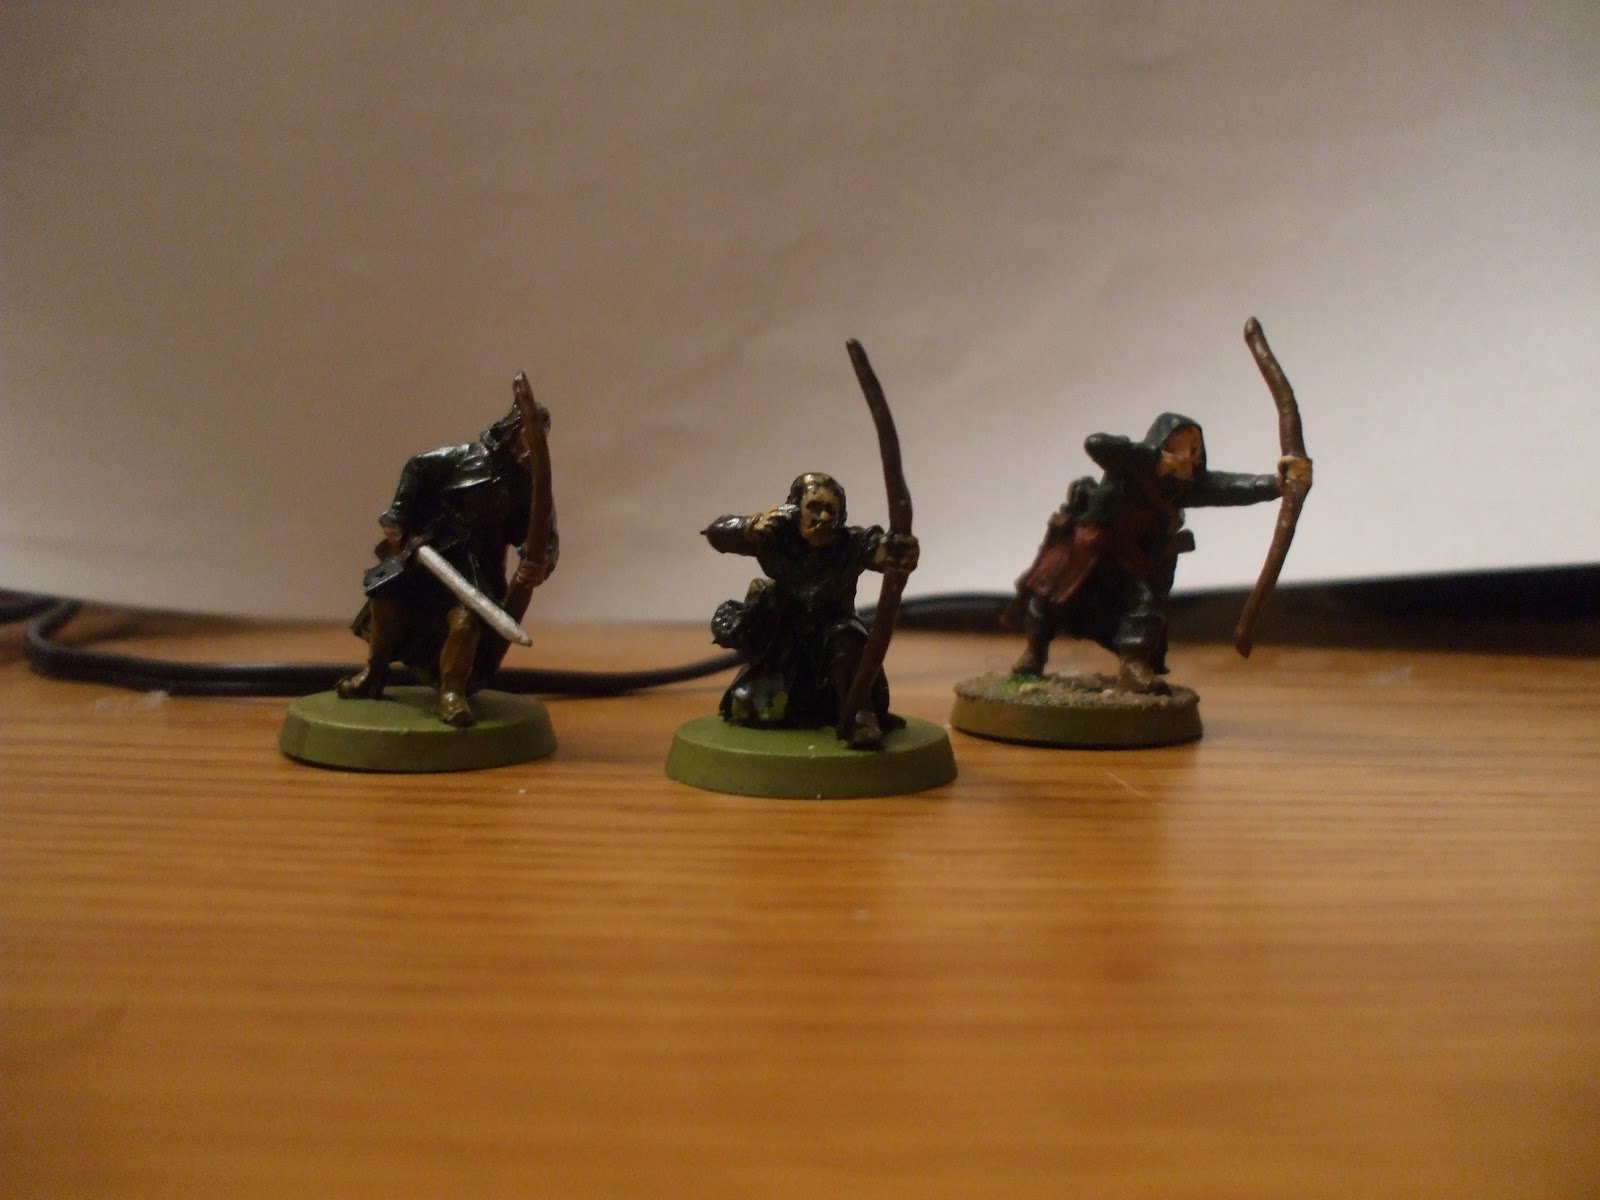
A few of my Dunedain models.
If you want to save 1 point by having a D4 version of the Ranger of the North/Grey Company model, the Dunedain is your man.  At 24 points, the Dunedain is the exact same model as the Ranger of the North, except that it is a D4 unit instead of a D5 unit.  Is there an advantage to this?  Yes - if you are fighting an army that is primarily S3, they will be wounding D4s and D5s on the same roll, so there is no strategic advantage to being D5.  This is especially the case if you find yourself fighting Elven armies (we'll get to their heroes later), where both their archery and their hand attacks are at S3 - when S2 bows (human bows or orc bows) or crossbows at S4 are being used, there is a definite advantage to being D5, as your enemy will wound on 6s instead of 5s for bows, and 5s instead of 4s for crossbows.

In the unlikely scenario that you face Elven heroes, Dunedain (and Rangers of the North/Grey Company can also fall under this as well) have one simple rule:

You shouldn't.

If at all possible, you should attempt to avoid engaging them.  There are a few reasons for this.  First, you have a lower Fight Value, and only 1 wound with 1 Fate Point: chances are, you will not live to see the morning.  Your higher tier heroes may survive (Aragorn and the Twins come to mind), but remember: these units are very expensive, are usually only D5, and in the case of the Twins, they're elves, so I'm not counting them here, :)

In most cases, I use Dunedain as my spear units, paying 25 points for Rangers of the North, and 25 points for Dunedain with spears, giving me more options for spear support, and incentivizing my strategy of keeping them in the second rank for archery protection.  This also allows me to save their Might points for melee combat, which is where I prefer to use them.  Dunedain also cannot take horses, so they are limited to infantry-style units (unlike their Ranger of the North counterparts).

These heroes, unlike the ones mentioned in the last post, form the core of your army's staying power and longevity in a fight, and serve as the glue that keeps the team together.  With all of that before us, let's examine your unit choices in light of these heroes.

Captain of Arnor

The Captain of Arnor is a basic captain: at 50 points, he resembles his Gondorian counterpart, with a F5/4+, S4, D6, 2A, 2W, and the 2M/1W/1F profile.  He is uniquely Arnorian in both his Fight Value (5, instead of the Gondorian and Rohan F4), and in his Courage value (3, instead of 4).  He can be given a bow (for an archer commander) or a shield (for a front-rank commander), which, when coupled with his heavy armor, makes him a capable captain.  If you are looking for a low-cost hero, he may be a good option, though watch his Courage tests: he will not be the most reliable hero for "Stand Fast!" purposes.

Units

Rangers of Arnor
Rangers of Arnor defending a ruin.
For rank-and-file infantry, Rangers of Arnor are a very light unit that can pack a punch.  They boast the typical S2 bow for men, are S3 like most other non-heroes of the race of men, and wear light armor, making them D4.  At 8 points (with the opportunity to use a spear for 1 point), they offer you a very versatile rank-and-file unit.

Unlike most infantry, the Ranger of Arnor has the ability to both shoot at enemies with a 3+ to land a hit, and also boasts the coveted F4, allowing them to beat most Evil infantry, and tie most Evil cavalry and heavy infantry.  Because these units are D4, it is most important for your survival as a Grey Company commander that you keep casualties to a minimum, thus matching up units according to Fight Value - and preferably with banner support.  I'll discuss this further in my next post on tactics, but suffice it to say, keeping your Rangers of Arnor in statistically strong match-ups is a necessity for winning the scenario.

Rangers of Arnor also offer you an opportunity to field both a cheap volley line that can also hold its own in close combat, and the opportunity to field a much larger (or multiple) volley lines.  With 10 units with the same bow required to volley, most civs can only purchase one.  Since every unit in the Grey Company has the same bow, you can easy have over 20 bows in a given scenario, allowing you to fire from very long range at multiple parts of the board.  With your forces then rolling at a 3+ when your enemy closes distance, the Rangers of Arnor becomes a powerful force for whittling an enemy down before they hit your line.


Warriors of Arnor


I have caveated the Warriors of Arnor several times in the last post, and it is high time I explain why.  Warriors of Arnor are the exception to virtually everything in an Arnor force, and while this means that they can fill in gaps that are caused by your other units, they are also highly unwieldy as allies to most GC lists, and are thus not commonly used with them.  You are more likely to see them used in a strict Arnor force than teamed into a Grey Company force, and there are a few reasons for this, which we will discuss under their weaknesses.

Warriors of Arnor work pretty well with Aragorn, the Twins, Arathorn, and Halbarad, but all of those heroes are more independent in their nature, and thus work well with almost any unit.  If you are looking for infantry that will support your heroes, "these aren't the droids you're looking for" would not be a mind trick in this situation.

What is more, the units are...clunky...in their contributions to the army.  All Warriors of Arnor come with spears, which is exceptional for easy spear support for your soldiers (as they cost only 8 points, which is the same as a Ranger of Arnor without purchasing a spear).  They have F4, just like the rangers, so there is no reason not to place them in the back...except that they are your D6 units, too.  This means that you will always either waste the spear, or waste the armor.  They don't work well in economizing your points for your force.  Just...yeah.  They don't work well with this list.

What is more, they are less dependable than your other units.  With Courage 2, the chances that a Warrior of Arnor runs is on par with orcs and goblins.  Now, as someone who routinely uses orcs, they don't run as much as I thought they would, but in an army of orcs, your numbers are almost always still okay if 5-6 guys run in one round.  In an Arnor army, though, everyone counts - losing more than a few warriors to courage testing could result in catastrophe in a close game.

Not surprisingly, Warriors of Arnor work best with King Arvedui, primarily because of his 12" "Stand Fast!" to keep them all in line, and his D6 to match them.  Other than that, they will primarily offer you a chance at D6, but that's about it.  They lack a ranged option, so you will take a cut to your maximum bow count if you field them, but that is honestly a fair trade-off for a much higher defense value.  The question really comes down to whether or not you want more firepower at range or more longevity in close-combat.

Hobbit Archers
Originally part of the Grey Company list in LOME, the new sourcebooks have removed the hobbit archers from the army list.  This is bittersweet for GC players for a few reasons.

First, at 4 points per model, a hobbit archer has a 3+ archery value with a S2 bow - which is to say, a Ranger of Arnor for half the cost....  Yeah, take that in for a moment.  On defense (especially in melee combat) this becomes inaccurate, but in firepower at range, there is no difference between the Ranger of Arnor that costs you 8 points and the Hobbit Archer that costs you 4 points.  This is worth remembering.

Hobbit Archers have two major weaknesses, in addition to a third that stems from teaming them into a Grey Company army list.  First, apart from their bows, Hobbit Archers traditionally have been unarmed, meaning that they receive the -1 penalty to winning their fight.  My understanding is that this has changed (thanks for the comment, Tiberius!), so this weakness may have been remedied.  They are still D3, though, have a low Fight Value, and have an even lower Strength Value, which is still an incentive to keep them out of close combat as much as possible, and a serious weakness for a Grey Company force that doesn't have a lot of expendable soldiers for bodyguarding.

They are also not affected by any of the Grey Company-specific special abilities, which creates a problem if you intend to move your forces out as a concentrated unit.  Whereas most GC lists can remain at range and then fight concentrated, Hobbit Archers are primarily restricted to only ranged combat - this means that if your opponent covers his spear support and archers well, you could have units that are virtually useless to you when the fighting gets fiercest.  Be aware of this.

Finally, since they are no longer part of the Grey Company list, Hobbit Archers do not benefit from the unrestricted bow limit of a GC force.  This means that you will need to have non-archer units at a 2-1 ratio in order to field them with your army.  If your aim is to add cheap units, this may not be a problem.  If you are attempting to add durable firepower...this may not be the best unit for you.

As you can see, the list is very limited: most of a Grey Company player's choices come from his heroes.  Probably the biggest tactical disadvantage for this civ (which I'll discuss in-depth in the next post) is that you have no real cavalry options - all of your units are infantry, except for select heroes.  Losing the ability to move forces quickly around the map is something you will have to think through when you play with them, especially if you are used to using wargs, Riders of Rohan, or Gondorian Knights.

That said, though, the units in this list have an amazing knack for survival.  I would encourage you to experiment with different builds/uses for countering different types of forces (archer-heavy civs, cav-heavy civs, horde-based civs, mage-heavy civs, etc.), just to see how resilient the Grey Company list is - for having very "meh" stat lines, this force has a tendency to just not want to die, even against hard-hitting foes.  Take them out for a spin - they just might rock your world.

Watching the stars,

Glenstorm

"I watch the stars, for it is mine to watch, as it is yours to remember." ~ Glenstorm