Good morning gamers,
In simple terms . . .
It would be far better to use the Might point to boost the To Wound roll (which is our lowest score) and while the increase you see isn't that spectacular, it is much higher than boosting the To Hit roll (Pkill_shield = 0.67 x 0.5 x 0.33 = 0.11; Pkill_pike = 0.67 x 0.5 x 0.5 = 0.17; Pkill_total = 0.28). This also makes sense, because if you’re using Might to boost the final result, you know that what you’re doing is getting you a Wound (not just the chance of one). Put simply:
THE EXCEPTION: Rohan heroes near Maximum-Gamling (oh, and
Aragorn). Heroic Strikes are one of
the riskiest ways to spend Might (you know, besides boosting To Hit rolls in
shooting, calling Heroic Accuracies, and channeling D3 spells). There are some
heroes, however, who can regenerate their Might points over time and so can
treat their “limited Might” as less limited because they know they will “just
get more.” Rohan heroes near Gamling with the Royal Standard of Rohan are like this: every turn, they can begin with a new
Might point so long as they start the turn without any Might. Now this comes
with a catch: if you choose to use your Might point to call a Heroic Strike,
you can’t boost any of your rolls, so if you run into a hero who chooses to let
you Strike and instead focuses on boosting, you could be in some trouble. None
of this changes the math – it just makes it less likely that you “waste” a
Might point (since you’ll just get it back at the start of the next round). Aragorn is, yet again, a special case - he can call a Heroic Strike for free, saving his actual Might to boost rolls (dueling rolls or wounding rolls, whatever suits his fancy).
In this series on heroes, we’ve covered an exhaustive reviewof the Dwarves in Thorin’s Company (and which variant is better – the Thorin’s
Company ones or the Erebor Reclaimed ones) and revisited a taxonomy on Isengard heroes that we did a while back. Today, we turn to the use of Might, one of the
most important resources you’ll have to manage in the Middle-Earth Strategy Battle
Game. Some of the thoughts I have in this article have already crept up in some of my
other articles, but I think they all bear repeating in one central place. And
if you’re going to talk about heroes for a month, talking about Might is probably a good
thing to add to the conversation.
The guiding rule we’re going to following today is this:
Might is a scarce and important resource –
don’t risk wasting it!
If you accept this rule, everything I’m about to write makes
sense (even if it galls us to have to admit in a game). While the purely
analytical side of me agrees wholeheartedly with this, I often find myself
drawn to violate the following five rules (so naturally, I’m going to caveat
exceptions to all of them). :-) Okay, enough blather - let’s get into it!
#5: Don’t Boost To-Hit Rolls When Shooting
I started playing MESBG (back when it was LOTR SBG) with the Mines of Moria starter
set – and right away, I fell in love with Legolas. True, I misread his
auto-hit rule to be an auto-Wound rule (something my local GW store cleared up
quite nicely for me), but even after I learned how to use him right, Legolas is
a fun hero to use. Every now and again, though, he’ll miss a shot. So, when
your awesome hero fails to hit something (getting a 2 when you need a 3), a
player might ask himself, “Should I spend a Might point to hit my target?”
No.
“Why not?” you say.
Because math.
The longer answer goes something like this: hitting your
target is one of three steps you might have to do in order to deal a Wound when
you shoot (and with very few exceptions, at least two of those steps are required every time you shoot):
- To Hit (what we’d be improving with Might);
- In-The-Way(s) (which might or might not be present - and might have multiple rolls required to hit the intended target vs. something or someone else); and
- To Wound (what actually results in someone taking a Wound).
 |
| Case study #1: Legolas trying not to die to a horde of Uruk-Hai...an all-too-common scenario in my experience... |
Let’s say that you have Legolas shooting at some Uruk-Hai
Warriors as shown in the image above (some pikemen behind some shield-toting guys): naturally, with a
Strength 3 bow, Legolas wants to shoot at the pikemen (wound on 5s) instead of
the shield guys (wound on 6s). This is made even more appealing because Legolas will Wound both kinds of Uruk-Hai on 5s in melee (so thin the weaker models with your bow, why don't ya?). So, Legolas stands still, aims his bow, and
shoots and gets a 2 to hit on his first of three shots. Does he use Might to boost the roll to a 3?
To answer this, let's look at the likelihood of Legolas dealing a Wound through archery without spending Might (as our baseline):
- Legolas shoots (spending no Might):
- On a 1-2, the shot misses (Pfail = 0.33).
- On a 3+, the shot hits (Psuccess = 0.67), and now Legolas needs to see if he hits the shield guy instead of the pikeman:
- On a 1-3, the shot hits the shield-guy – now Legolas rolls to Wound the shield-guy:
- On a 1-5, the arrow doesn’t wound (Pfail = 0.67 x 0.5 x 0.83 = 0.28).
- On a 6, the arrow wounds! (Psuccess = 0.67 x 0.5 x 0.17 = 0.06).
- On a 4+, the shot hits the pikeman – now Legolas rolls to Wound the pikeman:
- On a 1-4, the arrow doesn’t wound (Pfail = 0.67 x 0.5 x 0.67 = 0.22).
- On a 5+, the arrow wounds! (Psuccess = 0.67 x 0.5 x 0.33 = 0.11)
- End result: if we add the two probabilities of success listed above, we learn that Legolas has a 0.17 probability (or 1/6) of dealing a wound to somebody with each shot he makes this round without spending Might.
Assuming Legolas stands still (to keep the 3+ shoot value) and shoots three times each round, he should kill an Uruk every
other round if the stats play out. However, boosting the first number (our
highest number) will have a very marginal impact on the probabilities of
killing either Uruk (Pkill_shield = 0.83 x 0.5 x 0.17 = 0.07; Pkill_pike = 0.83
x 0.5 x 0.33 = 0.14; Pkill_total = 0.21).
In simple terms . . .
Boosting the To Hit roll has increased our chances of successfully killing someone by 4%.
It would be far better to use the Might point to boost the To Wound roll (which is our lowest score) and while the increase you see isn't that spectacular, it is much higher than boosting the To Hit roll (Pkill_shield = 0.67 x 0.5 x 0.33 = 0.11; Pkill_pike = 0.67 x 0.5 x 0.5 = 0.17; Pkill_total = 0.28). This also makes sense, because if you’re using Might to boost the final result, you know that what you’re doing is getting you a Wound (not just the chance of one). Put simply:
You’re not taking the risk of
wasting Might by boosting the To Wound roll – you are if you boost the To Hit
roll.
But this goes back to our original theory: Might is a scarce
resource. You should only spend Might if what you’re doing with it makes a big
difference (like, taking a Wound off an important piece or removing a unit that
is holding an important position). Just spending Might tends to lead to
situations late in the game where you feel like, “I wish I had one more Might
point!” When compared to late-game advantages, the potential for possibly hitting someone with your archery just isn't that good. So, don’t boost your To Hit
rolls when shooting – your Might is precious!
 |
| Aragorn: ever the exception to the rule... |
THE EXCEPTION: Aragorn (and Narzug). Aragorn and
Narzug both have a free Might point each round (Narzug gets a free Might point for shooting-related rolls only). If it’s
early in the game and Aragorn is leading a pack of Rangers, chances are that they’ll
find a perch where they want to shoot at the enemy and whittle down the enemy
ranks. Assuming that Aragorn and his ranger buddies have decided to stand still
and draw arrow to ear, Aragorn probably didn’t spend his free Might point in
the Move phase (calling a Heroic Move/March is common, Heroic Resolve is less
common), so unless he needs it to call a Heroic Shoot/Accuracy, he probably has
a free Might point lying around. And if he gets a 2 on his To Hit roll with
nothing else to spend that Might on…he might as well boost his To Hit roll. Narzug can find himself in the same boat: if you're making a Shooting roll and have nothing better to do with a free Might point, you're saying "no" to a free Might point if you don't boost your roll - so boost it.
In both Aragorn’s case and Narzug’s case, these Might points aren’t scarce
anymore – this is your last chance to use it! So, we might as well use it (despite
the probabilities - and see what I did there with the word "might"?).
#4: Don’t Call Heroic Accuracies (Like Ever)
In my post on heroic
actions, I made the case that Heroic Accuracy was too niche of a heroic
action to spend a Might point calling. After playing a few games, I stand by
this assessment – of all the heroic actions in the game, Heroic Accuracy has
the most nuanced benefits of them all (bar none). Let’s see why that is:
- Heroic Move affects the cadence of a round, while Heroic March saves your models time spent crossing the battlefield to important positions (early in the game or late in the game).
- Heroic Challenge either pairs you off into a secluded fight with another hero (and potentially restores lost Might) OR deprives the target hero of Stand Fast/group heroic action capabilities.
- Heroic Channelling can provide (in some situations) much bigger benefits than normal casting (a channeled Nature’s Wrath does damage in its area of influence, a channeled Panic Steed becomes an area of effect mount-panicking spell, etc.).
- Heroic Combats allows you to slingshot your mega hero from attacking a single model (maybe two if mounted) into more models – or just getting extra movement to get to a place that’s more important. Like Heroic Move, there’s a change of cadence with this heroic action.
- Heroic Defense is most commonly employed when you’re pretty sure you’re going to get crushed by something (perhaps a big monster or Aragorn or …). Being able to say “No, Mr. Balrog, you don’t wound me on 3s – you wound me on a natural 6, thank you very much!” is so much fun and very, VERY useful (even if you end up winning the fight, you feel much safer while you're making your Duel roll).
- Heroic Resolve is a heroic action that can trade mobility on the hero calling the heroic action to save low-Will models from getting their heads bashed in by enemy magic casters. Like Heroic March, there’s a boost given to friendly models in the form of a free Will point to resist any magical powers that target it this turn.
- Heroic Strike is one of those heroic actions that sounds really good when you first look at it, and after you play a few games, you see cases where it’s really useful (against models who can’t counter-call Heroic Strike, for example), but you also see cases where it isn’t all that great. Read Rythbryt’s thoughts for more info.
- Heroic Strength is less straight-forward than Heroic Strike, but is still pretty simple: I need to get my Strength higher so that I’m more likely to wound my opponent OR so I’m not affected by certain things (like being bowled over by cavalry/monstrous mounts or to make Rend less appealing for a monster). Rythbryt has more great thoughts on this.
- Heroic Shoot isn’t that useful UNLESS you’re facing an opponent who can out-shoot you (and is vulnerable himself to shooting). Like Heroic Move (and in some ways, Heroic Combat), you’re affecting the cadence of a round, so there’s immediate utility in that.
 |
| You can call a Heroic Accuracy with Haldir, but what is it actually getting you? A second chance of hitting your target, sure, but you still need to Wound after that? |
Unlike all of the other heroic actions (except Heroic
Defense), you’re not guaranteed to use Heroic Accuracy – especially if
your shooting values aren’t very good. In order for a Heroic Accuracy to even
be employed, models have to first pass a To Hit roll – and if you hit on a 5+
(either because you’re a stationary Orc/Moria Goblin Warrior who has a 5+ shoot
value OR you’re a “normal” archer with a 4+ shoot value and moved this turn),
only one-in-three archers will actually hit (probabilistically). Taking a
chance on Heroic Accuracy is only good if LOTS of guys hit their targets (best
employed by Rivendell if they’ve kept – and are using – their army bonus, since
almost everyone will hit their targets…other teams, not so much unless they’re
packing a LOT of bows).
Heroic Accuracies would be much better if they also allowed
you to reroll other shooting elements (To Hit or To Wound – both would qualify
as “accuracy”), but rerolling in-the-ways alone is only going to come into play
when you’re shooting past multiple pieces of terrain or lots of models to get
to an important model. Even if you hit what you’re trying to hit, it’s still an
uphill battle. When shooting past enemy models, it’s generally going to be a
similar difficulty to Wound them as your original target, so it’s not a huge
loss if you fail the in-the-way. So, don’t call Heroic Accuracies.
THE EXCEPTION: Shooting at Vault Warden Teams.
It’s very rare for armies to have a great discrepancy between the Defense of
their front-line troops and their back-line troops (unless it’s an allied
contingent or you’re mixing Galadhrim and Wood Elves). Even with Galadhrim Warriors
with shields standing in front of Wood Elf Warriors with Wood Elf Spears, you
only see a jump from D3 to D6 (which is only a jump from 5s to 6s with S2 bows,
though it is a jump from 4s to 6s with S3-S4 ranged weapons). Vault Wardens, despite being a
+3 Defense jump as well (D6 back-line behind a D9 front-line), have a
front-line that’s wounded on 6/6+ on the front-line troops while wounding on 6s on their back-line troops for
S2 bows (and wounding on 6/5+ vs. 6s for S3 bows). This means there is a HUGE
difference between whether you wound or not determined solely by who you hit.
In this one case – and this one case only – you should call a Heroic Accuracy.
Special note on
fortifications: it may seem like calling a Heroic Accuracy to hit a target
behind a strong fortification (5+ to pass the in-the-way roll) is worth it – and I’ll admit
there might be some situations where it might be good to call a Heroic Accuracy
to hit said model (the only model in range of an objective or a model
attempting to exit a board edge, for example). On the whole, to spend a Might
point to increase your likelihood of hitting the target (which goes up from a
0.33 probability to a 0.55 probability per shot) but not wounding your target
doesn’t seem like a good idea to me. It’s also best employed when using models
that are hitting on a 3+, since models that hit on a 4+ (or worse) will mean
fewer models even get to the in-the-way shots…
#3: Don’t Channel Spells That Boost a Bonus/Reduction To
D3
I talked about this in my post on Magic
in MESBG back in February: there are several different things that can
happen when you channel spells, and some of them are always worth it, some are
sometimes worth it, and some are
risky-but-occasionally-worth-it-but-sometimes-a-waste. I won’t go through
whether I think any of these spells are worth channeling in this post (see the
post above for that), but to summarize, here’s a taxonomy of the spells
available in the game that have a D3/D6 boost to the spell effect:
- Banishment (vs. Spirit models: deal 1 Wound -> deal D3 Wounds)
- Black Dart (one S9 hit -> D3 S9 hits)
- Blessing of the Valar (regain 1 Fate -> regain D3 Fate)
- Drain Courage (-1 Courage -> -D3 Courage)
- Renew (regain 1 Wound -> regain D3 Wounds)
- Sap Will (-D3 Will -> -D6 Will)
- Strengthen Will (+1 Will -> +D3 Will)
- Wither (-1 Strength -> -D3 Strength)
 |
| Characters who have to decide to channel these spells include Galadriel (Blessing of the Valar), Radagast (Renew), The Witch-King of Angmar (Black Dart, Drain Courage, Sap Will), and Gandalf the White (Banishment, Strengthen Will). |
These spells all go from doing “one” thing to “D3” things
(or doing “D3” things to doing “D6” things) – and on the whole, this means your
Might point “should” be getting you more of whatever you’re doing (on average,
you’d expect a D3 roll to give you a result of 2, rather than the original
value of 1). In the case of Wither/Drain Courage, I actually recommended that
you channel them against high Strength/Courage targets (respectively) because
the Might point will a) make your opponent more likely to spend his limited
Will store to resist the spell (instead of other spells), and b) save you a turn
or two of casting the spell so you can cast the same spell (or other spells) against other people. I’ve since come to
find out that Banishment tends to draw out the same benefits – particularly
against Angmar armies (Barrow-Wights, Shades, and Ringwraiths don’t like to die
before they get to do “all the things” – I image Gulavhar is the same way,
though I’ve never faced him with Banishment in an MESBG game).
To convince you of the risk, let’s look at the complicating
factors for casting magic in the game that makes the use of a Might point risky
“simply to channel”:
- First, you have to actually cast the spell. Some spells (like Drain Courage or Blinding Light) are cast on a 2+, so you’re all-but-guaranteed to cast it successfully without spending Might points or more than 1 Will point. Channeling these makes sense when you look at the casting difficulty. However, if you cast a spell on a 5+ (most people who cast Sap Will or Black Dart require a 5+), you’re likely to have to spend 2-3 Will points AND might need Might to boost your highest die result AND any failure to cast the spell results in a lost Might point thanks to choosing to channel. That’s a risk too far for me (I’m willing to hear a case for a 3+ cast, as you’re supposed to get it off on 1 die more often than you should fail).
- Second, your target needs to not resist the spell. Granted, most warrior models (and even some Hero models) have no innate ability to resist magical powers. While the most common ways to be able to resist magic is to either use Will points (in general, this means heroes - though Warriors can get Will from the Strengthen Will spell) or have the Resistant to Magic rule, any model in the army can get at least 1 die to resist a spell if a hero nearby has access to Heroic Resolve (which was discussed in brief above). If the highest Resist die ties/beats the highest casting die, the spell doesn’t go off – channeled or not channeled. Of course, augmenting spells (like Blessing of the Valar or Strengthen Will) don’t target an enemy model, so you can skip this step for those magical powers as the friendly model won’t (or shouldn’t?) try to resist the spell.
- Third, you have to get a 3+ on your D3 roll. As I noted in my post on Magic (and in other posts since then), channeling something that gives you D3 bonus results will sometimes give you the same benefit as an unchannelled roll (on a 1-2, you still only get “one” of something). What you’re using your Might point for in this case is the potential to get +1 or +2 of something (in the case of Sap Will, this can get you up to +3 more than you could have gotten normally).
 |
| To Dart or Not To Dart (the banner-bearer)? |
If you’re thinking about channeling a spell that targets an
enemy model AND has a high casting value (we’ll look at Black Dart from a
Ringwraith on a Wood Elf bannerman), here’s the math you’re looking at:
·
A Ringwraith channels Black Dart on a 5+ (1/2
Might spent), targeting a Wood Elf Warrior from a Lothlorien list who has Resistant to Magic:
- If the Ringwraith spends 2 Will points to cast Black Dart, he has a 0.55 probability of casting without spending Might (0.75 probability of casting if he uses his second point of Might to boost a cast of a 4+ to a 5).
- If cast successfully on a 5 (0.25 OR 0.44 if boosted), the target has a 0.33 probability of resisting the spell on a single die, which brings our probability of successfully casting the spell past the resist roll to 0.17 (OR 0.30 if boosted).
- If cast successfully on a 6 (0.31), the target has a 0.17 probability of resisting the spell on a single die, which brings our probability of successfully casting the spell past the resist roll to 0.26.
- Our total probability of casting the spell and “doing something” is then 0.43 (or 0.56 if boosted). But, we’re not done yet…
- If the Ringwraith spends 3 Will points to cast Black Dart, he has a 0.7 probability of casting without spending Might (0.88 probability of casting if he uses his second point of Might).
- If cast successfully on a 5 (0.28 OR 0.45 if boosted), the target has a 0.33 probability of resisting the spell on a single die, which brings our probability of successfully casting the spell past the resist roll to 0.19 (OR 0.30 if boosted).
- If cast successfully on a 6 (0.42), the target has a 0.17 probability of resisting the spell on a single die, which brings our probability of successfully casting the spell past the resist roll to 0.35.
- Our total probability of casting the spell and “doing something” is then 0.54 (or 0.65 if boosted). But, we’re not done yet…
Casting a 5+ spell past a single die to resist (without it
spending Might) on a 0.43 or 0.54 might seem pretty good, but there’s some
other considerations here: first and foremost, in the worst case (casting on 2
Will without boosting), we’ll only “succeed” in casting the spell in four-out-of-ten trials (and we only make the D3 roll after we've successfully cast it). I’ve only cast 10 Black Darts in a few games (mostly
when I took an all-Ringwraith army to a THRO tournament back in 2013) and only
getting 40% conversion is not good.
Second, in the best case (casting on 3 Will with boosting),
we’re not only (potentially) out of Might, but we’ll only “succeed” in casting in two-out-of-three trials. If you have three Ringwraiths doing
this, sure you should get two successes, but that third guy is going to feel
awful (not the least reason being that he might be out of Might).
Finally, the probabilities above only tell us that we cast the spell successfully - not the probability of dealing more than one S9 hit (remember that we do one S9 hit normally and do D3 S9 hits when channelled) – the benefit that we get from
channeling is only felt after we see the result of the D3 roll: on the 0.43 to
0.65 spectrum, 0.29
to 0.49 trials will get some benefit from the channel (3+ on the D3 roll) – which means that we’re spending
a Might point for something that might come in into play every other time we
channel (if the stats play out AND we're willing to spend both Might points to get the spell to go off).
In other words, 50-70% of the time you channel a spell like this, you’re wasting a
Might point. This isn’t a good idea – don’t do it.
THE EXCEPTION: Augment spells. As I mentioned
above, augments skip the resist step, which increases their likelihood of
success dramatically (and makes sure your opponent has no say in whether you
succeed or not – not letting your opponent have a say in something is rare in
MESBG, by the way). The augment spells available to us that work this way are Renew (restores lost Wounds), Blessing of the Valar (restores
lost Fate), and Strengthen
Will (which gives the target Will
– even beyond its starting value). Each of these spells is cast on a 3+ by
those that can cast them, so they’re fairly reliable spells to channel. Other spells that augment (like Blinding Light and most Enchanted Blades spells) are great to channel as well, due to having low casting values.
Some augments, as I pointed out in a previous post, don’t need to be channeled
(Aura of Command/Dismay) unless you find yourself covering a large portion of
the battlefield. One may want to cast Aura of Command if you’re fighting the
Dead of Dunharrow or Angmar, but in most cases, getting a 12” radius of
auto-passing Courage is not that much more necessary than a 6” radius (but the
few heroes who can cast Aura of Command have better things they can be doing
with their Might, in my opinion).
THE OTHER EXCEPTION: Low Casting Values and/or Rerollable
Attempts/Free Dice. While I could make an additional exception for
people who can get Might back by allying in Tom Bombadil or Bill the Pony,
let’s not get into that today. Some spells that target enemy models (like Drain
Courage and Wither) are good to channel NOT because they skip the resist stage (they don't),
but because they have a high probability of passing the casting stage due to having a low casting value. These
spells are also intended to panic your opponent into spending resources, so the
goal in channeling these spells is to get your opponent to want to spend more
resources stopping them than you spend casting them. Low casting values help
with this, but rerollable casts (available to any version of Saruman, as well
as the Witch-King with the Crown of Morgul) also reduces the amount of Will you
need to spend (you get the benefits of the 3 Will chart above but only need to
spend 2 Will to do it).
While I’ve been hard on 5+ spells in this post, the benefit of casting these is that when they do go off, your opponent has to get a 5 (or perhaps a 6) in order to resist them – so that’s going to drain resources. Sometimes, an otherwise innocuous spell (like Drain Courage) can make sure that precious Will points are spent before the melee battle begins so that a later-game Transfix/Compel can be cast against a target that has no more Will. But in general, this is a risk – you might waste Might (see what I did there?).
While I’ve been hard on 5+ spells in this post, the benefit of casting these is that when they do go off, your opponent has to get a 5 (or perhaps a 6) in order to resist them – so that’s going to drain resources. Sometimes, an otherwise innocuous spell (like Drain Courage) can make sure that precious Will points are spent before the melee battle begins so that a later-game Transfix/Compel can be cast against a target that has no more Will. But in general, this is a risk – you might waste Might (see what I did there?).
#2: Don’t Counter-Call Heroic Strikes When Starting Fight
Values are Nearly Equal
As I mentioned in the previous point, Heroic Strikes are fun
for new players to use – who doesn’t want to have a hero be Fight 10 every now
and again? But as Rythbryt
points out, while getting higher Fight Value is very helpful, it’s more
helpful to get more dice in the fight than improving your Fight Value (this is
shown in the case
study Rythbryt wrote up too). In practice, most players ignore the math
anyway and “want to have the higher Fight Value” – mostly because we’ve all
lost a fight simply because our opponent rolled a 6 and had the higher Fight
Value. There are a few scenarios when we call Heroic Strike – we’re going to
focus on the last one today:
- Your hero is facing an enemy model that has a higher Fight Value but can’t call Heroic Strike;
- Your hero is facing an enemy model that has a higher Fight Value and can call Heroic Strike (but hasn’t yet);
- Your hero is facing an enemy model with an equal Fight Value but can’t call Heroic Strike;
- Your hero is facing an enemy model with an equal Fight Value and can call Heroic Strike (but hasn’t yet); and
- Your hero is facing an enemy model with roughly the same Fight Value who has already called Heroic Strike.
Cases #1 and #3 are the simplest uses for Heroic Strike:
your opponent is at the ceiling of its Fight Value and can’t get any higher –
if you can beat their number, you’ve got the higher Fight Value and the Might
point has a chance of not being wasted.
Case #2 is harder, but since you’re already losing on Fight
Value, it’s very tempting to “just Strike” so that you have a chance of getting
to the same (or higher) Fight Value. This ignores the benefits of boosting your highest die roll, but is very tempting nonetheless.
Case #4 is less difficult, since you could “just leave your Fight Value” and count on a roll-off. Still, in most cases, it’s tempting to “just Strike,” perhaps tempting your opponent to spend a Might point to Strike as well.
Case #4 is less difficult, since you could “just leave your Fight Value” and count on a roll-off. Still, in most cases, it’s tempting to “just Strike,” perhaps tempting your opponent to spend a Might point to Strike as well.
Case #5 is different from the others: in this case,
you know that your opponent has called a Heroic Strike – and as a result, you
know that you don’t know his Fight Value ceiling. There are a few things about
a +D6 boost to your Fight Value (capping out a Fight 10) that one should
consider:
- The closer a model starts to Fight 10, the more likely he or she is to reaching Fight 10 after calling Heroic Strike;
- Similarly, the closer a model starts to Fight 10, the more likely he or she is to waste a Might point calling Heroic Strike against a model that starts below your Fight Value;
- Because the bonus is a D6 roll (vs. a D3 roll), there’s a great deal of variability in the results you can get – and so while some models could reach Fight 10, models with less than Fight 6 are unlikely to reach Fight 10 when they Strike; and
- Even if you reach Fight 10, you still need to tie high-rolls in order for the Fight Value boost to matter.
This is probably the heart of Rythbryt’s series on Fight
Value: high Fight is valuable, but you still need to get the high dice in order
for it to matter. While additional Might points can be used to boost rolls, you
still need to have a good die roll in order for Heroic Strike to be of any help. Most
heroes rely on piling in more warriors (a spear-support at least), having a
banner nearby, taking a mount, or any mix of these options just to get more dice rolling (and higher chances of getting a 6).
 |
| I would have used my mounted Witch-King model, but thanks to my kids, he's in the repair shop. Pretend this Ringwraith is the Witch-King with the Crown of Morgul, okay? |
So what happens when you’re facing someone who is around
your Fight Value and declares he’s calling a Heroic Strike? For most players,
we say, “Okay, I guess I’m counter-calling Heroic Strike too!” While this might
work for you, there’s a huge risk of wasting Might with this. If we have Boromir
of Gondor who is charged by the Witch-King (with the Crown of Morgul and Morgul
Blade) and the Witch-King declares a Heroic Strike, here’s what happens when you
call a Heroic Strike in response with Boromir:
The
Witch-King (base F5)
|
|||||||
Boromir (base F6)
|
Die
Rolls
|
+1
(F6)
|
+2
(F7)
|
+3
(F8)
|
+4
(F9)
|
+5
(F10)
|
+6
(F10)
|
+1
(F7)
|
Tie -> Win
|
Loss -> Tie
|
Loss -> Loss
|
Loss -> Loss
|
Loss -> Loss
|
Loss -> Loss
|
|
+2
(F8)
|
Tie -> Win
|
Loss -> Win
|
Loss -> Tie
|
Loss -> Loss
|
Loss -> Loss
|
Loss -> Loss
|
|
+3
(F9)
|
Tie -> Win
|
Loss -> Win
|
Loss -> Win
|
Loss -> Tie
|
Loss -> Loss
|
Loss -> Loss
|
|
+4
(F10)
|
Tie -> Win
|
Loss -> Win
|
Loss -> Win
|
Loss -> Win
|
Loss -> Tie
|
Loss -> Tie
|
|
+5
(F10)
|
Tie -> Win
|
Loss -> Win
|
Loss -> Win
|
Loss -> Win
|
Loss -> Tie
|
Loss -> Tie
|
|
+6
(F10)
|
Tie -> Win
|
Loss -> Win
|
Loss -> Win
|
Loss -> Win
|
Loss -> Tie
|
Loss -> Tie
|
|
In this “discrete probability” chart, you can see that in 9
of the 36 cases (0.25 probability), Boromir’s boost in Fight Value will result
in him having a lower Fight value after calling a Heroic Strike than the
Witch-King (which is where you were before you called Heroic Strike). Instead
of tying in 6 out of 36 cases, Boromir is now tying in 9 of the 36 cases (0.25
probability). The other bit of the time (18 out of 36, 0.5 probability), you’re
getting the higher Fight Value, which is basically the same as getting the
higher Fight Value half of the time (and wasting your Might the other half of
the time).
You’ll see a great narrative of the following in Rythbryt’s
case study on Heroic Strike, but here’s a summary of three options Boromir
could do:
- Using discrete probabilities (like the table above), each side has 216 unique combinations when rolling three dice for what their high dice is going to be. Whoever ends up with the higher Fight Value has a 0.65 probability of winning the fight, while the loser has a 0.35 probability of winning the fight - taking a 50/50 chance to get a 0.65 probability of winning the fight is tempting, but it’s leaving a lot to fate if you do so.
- If Boromir chooses not to Strike and instead chooses to Shield (and doesn’t spend any Might to boost his rolls), then he has a 0.47 probability of winning the fight (while the Witch-King only has a 0.53 probability). This approach relies on having the lower Fight Value (or a tied Fight Value if the Witch-King gets a 1 and Strikes up to F6), but rolling more dice than the Witch-King does (counting on him not getting a 6).
- If Boromir chooses not to Strike and instead chooses to Shield and uses 1 Might to boost, then he has a 0.55 probability of winning the fight (while the Witch-King only has a 0.45 probability).
The first case is the best for Boromir half of the time – if
he gets the higher Fight Value, he’ll have a 0.65 probability of winning (the
other half of the time, the first case is the worst case with a 0.35
probability of winning). The third case is the next best case for Boromir –
save the Might point to boost a roll instead of getting a higher Fight Value
and shield away! While 0.55 isn’t as good as 0.65, it’s pretty close AND it’s
not dependent on beating the Witch-King’s Strike roll. The middle case is the
least likely case for Boromir to win, but it also doesn’t cost any Might – and
it’s really part of the third case, since there are situations where you won’t
have to spend Might to beat a bad roll from the Witch-King.
What’s important to realize here is that a Strike-off is a
risky proposition – even if you start with a slightly higher Fight Value. If
you want to be “more likely” or “about as likely” to win the fight as an
opponent who’s calling a Heroic Strike, save your Might to boost a roll and
find ways to up your dice (like shielding). Against most heroes, you can use
this strategy to burn through their Might – and once they can’t Strike, you can
just beat them on Fight Value (or Strike yourself if you start at the same
Fight Value or slightly below). Heroic Strike-offs are risky and Might is a
limited resource – don’t do it.
 |
| Like doing Strike-offs? Consider taking Gamling with Eomer OR just take Aragorn (who remains ever the exception). |
#1: Don’t Counter-Call Heroic Moves
Now, I’m willing to wager that this is going to be
contentious, but hear me out: one of my most common uses of Might is for Heroic Moves – especially when you’re using cavalry/throwing weapon factions.
Sometimes, you need to be able to move first, choosing how the match-ups work
out, making sure your mounted models are on the charge, and guaranteeing that
your fragile augmenting characters (like Cirdan, Galadriel, or Arwen) are protected. While
having priority is nice, you’ll have turns when you need priority and don’t get
it.
 |
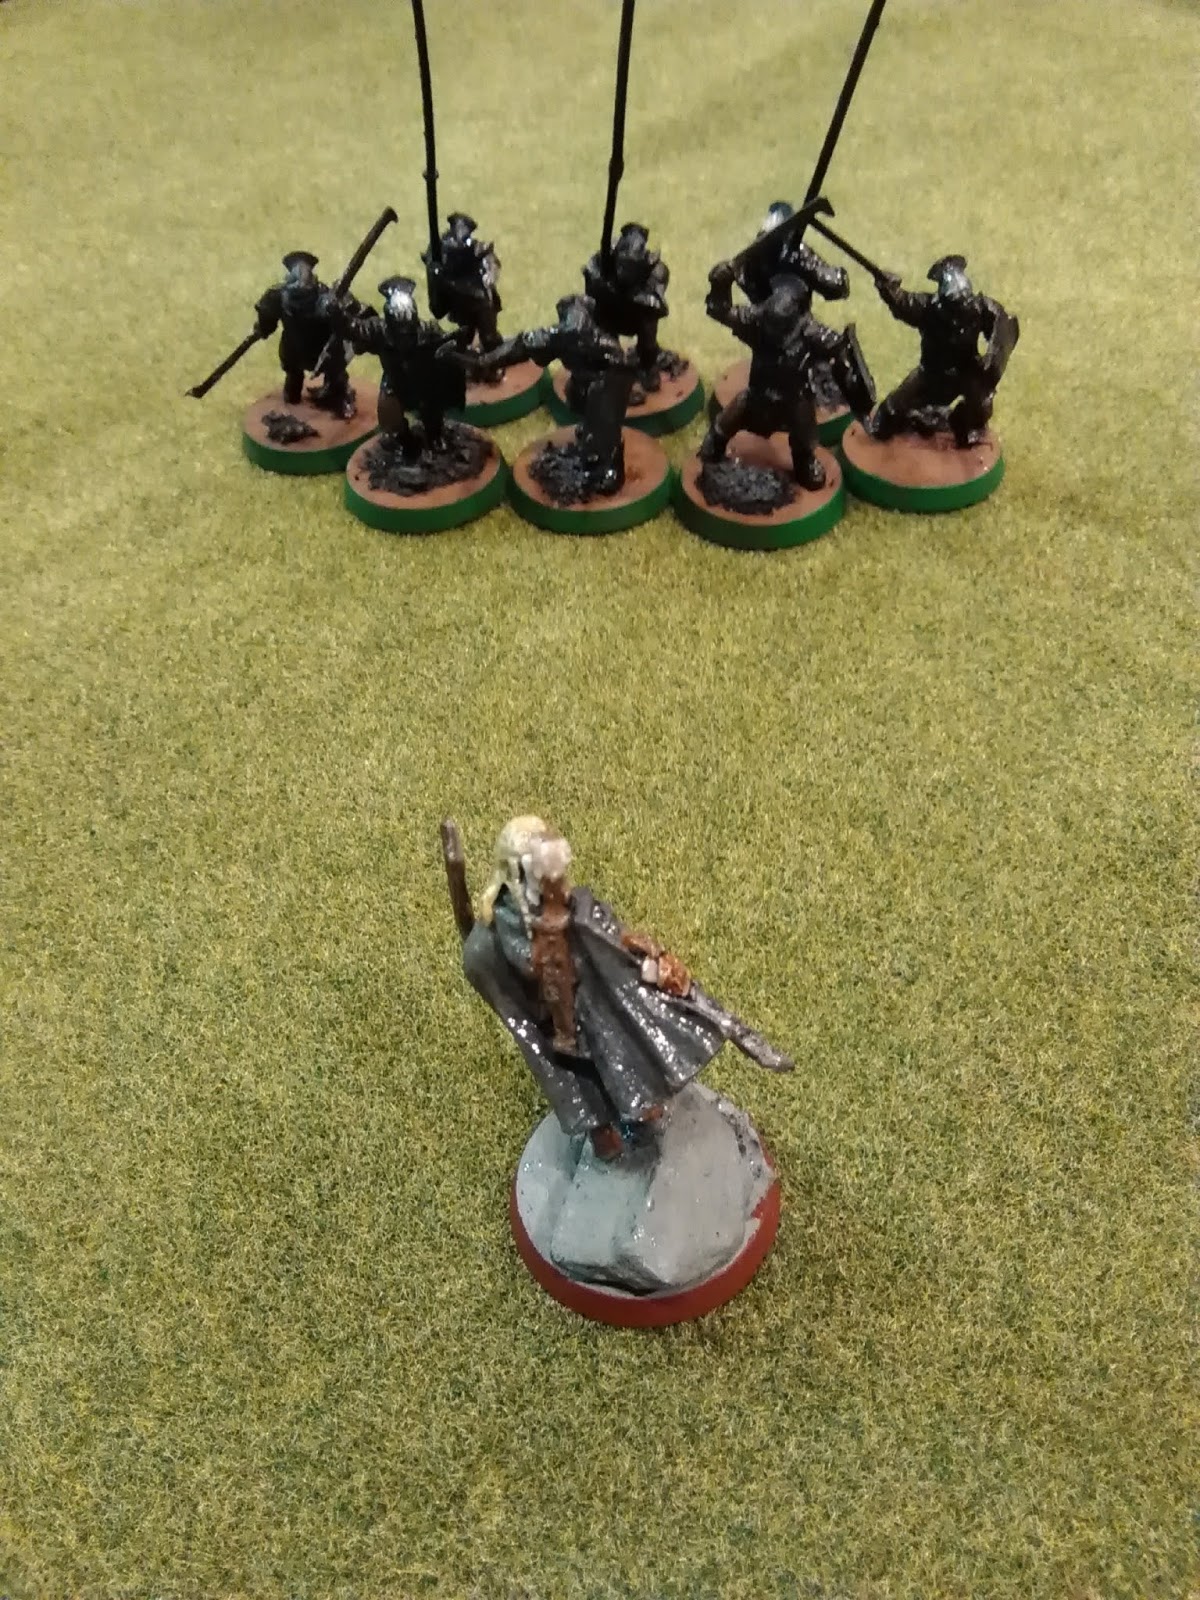
| Strawheads vs. Uruk-Hai: whoever moves first is going to have a distinct advantage... |
Let’s say, however, that you’re running some Riders of Rohan
escorting Eomer and you’re facing an Isengard force with Lurtz in it. The turn
after you charge into battle, you get priority again and Lurtz calls a Heroic
Move. What do you do?
For most generals, you’d just counter-call a Heroic Move.
Like the Strike-off we looked at above, this makes the effectiveness of the
Might point you spent dependent on a 50/50 roll-off. That’s really risky. But
what else can you do?
Of all the ways I waste Might points, I think I waste the
most on Heroic Moves. I learned pretty quickly not to boost To Hit rolls when
shooting, I don’t think I’ve ever called a Heroic Accuracy, I rarely channel
spells unless they do something game-altering, and I’m learning not to
counter-call Heroic Strikes. But I ALWAYS call Heroic Moves. Here’s what
calling a Heroic Move gives you:
- Heroic Moves alter cadence (as we discussed previously) – it gives an immediate benefit to your team of being able to move at least a part of a force (if not the whole thing in the case of small/tightly-packed armies) before they’re supposed to.
- Heroic Moves also restrict how far/where models can move – since everyone within 6” has to end within 6” of the hero who called the Move (and anyone who doesn’t move forfeits their movement for the turn), Heroic Moves don’t allow you to spread across the field – it only allows you to move a block of units to a different place.
- Heroic Moves might give your mounted models the charge (or help them get to safety), but you’ll find your hero down a Might point half of the time with nothing to show for it. With Might being a scarce resource, is the long-term game affected by a one-turn bonus?
In the example posed above, the riders would definitely be
in a better position if they were charging (or getting the heck out of there),
but if they fail, Lurtz has it in for Eomer – or some of his buddies. If Eomer
has 2-3 Might left, he might be okay losing 1 Might to call a Heroic Move (maybe), but he’ll
be severely limited in boosting any of his rolls (Duel roll or Fate roll in
particular) should the Heroic Move go against him.
By contrast, if Eomer saves his Might for boosting (or calling a Heroic Move next turn when Isengard is likely to have priority), he has given up a one-turn tactical advantage in hopes of getting a longer-term advantage over several rounds against Lurtz. Like waiting for a model who’s calling Heroic Strikes to run out of Might, you can do the same kind of drain with Heroic Moves. It requires planning for your army, but you can do it (some Riders of Rohan who are outside of Uruk-Hai charge range but able to charge in themselves would be nice). And each turn you don’t spend Might is a turn later in the game where the Might will help you.
By contrast, if Eomer saves his Might for boosting (or calling a Heroic Move next turn when Isengard is likely to have priority), he has given up a one-turn tactical advantage in hopes of getting a longer-term advantage over several rounds against Lurtz. Like waiting for a model who’s calling Heroic Strikes to run out of Might, you can do the same kind of drain with Heroic Moves. It requires planning for your army, but you can do it (some Riders of Rohan who are outside of Uruk-Hai charge range but able to charge in themselves would be nice). And each turn you don’t spend Might is a turn later in the game where the Might will help you.
Now before you gripe about this, I’ve had heroes die with
all their Might left – and it bites. A lot. But I’ve also had heroes depleted of Might who ended up needing Might on a later turn. In the most recent TMAT GT that we
had, I had 1 Might point on Galadriel who was about to be charged by both
Elrond and mounted Elladan. I had priority, they called a Heroic Move, and I
counter-called a Heroic Move. The High Elves won the roll-off, Galadriel got charged, she was beaten in combat by Elrond and Elladan, she got knocked down, and she got butchered. Had I kept my Might, I could
have called Heroic Defense – and with 3 rerollable Fate points, I probably
wouldn’t have been butchered (and I had Elves around for the next fight –
including a near-max Might Haldir). Sometimes, it hurts to burn your Might on
counter-calling Heroic Moves. So (no matter how much we want to) don't do it.
THE EXCEPTION: Catching Skirmish Cavalry. We used cavalry as an example above - if Eomer and his Eored got caught by Lurtz and his Uruk-Hai, he'd be in for a rough go. With proper positioning of support troops, other Riders of Rohan might be able to charge into the flanks, peel off supporting models, or tag-team into important fights. A good general would try to have a contingency plan for not having priority - especially if he doesn't want to risk wasting a Might point with a stalled Heroic Move.
But what if the tables are reversed? Let's say we're playing as Isengard and we get Priority and Eomer calls a Heroic Move? He and all his Eored would be able to dance out of our range and pelt us with shots for another round, not trusting to their small numbers to beat our larger force. If we let him get away, we risk getting pelted for at least one more turn (maybe more) and getting our numbers cut down to a more manageable size.
In this case, counter-calling a Heroic Move is actually a good idea - because we know the Might point won't be "wasted." If we know the enemy is going to retreat and not charge us, we might move second, but we'll still get to move out of cadence (perhaps swarming models that we're not close enough to Eomer before we move the rest of our troops). Granted, moving first would be better (and moving second doesn't give us THAT much benefit over moving during the normal cadence), but the point isn't wasted - we can still use it. That might be a distinction without a difference, I don't know...
Conclusion: Positive Thoughts
Everything I've written so far emphasizes what not to do - so I thought I'd rephrase each of them as positive encouragements that capture the heart of each one (and might make them higher principles that can be followed):
- Boost rolls that will guarantee a result (like boosting a To Wound roll vs. a To Hit roll).
- Call heroic actions that will get you something (not just give you the opportunity to do something).
- Channel spells that will make a difference.
- Call Heroic Strike when it actually matters.
- It's okay to move second.
I hope this was informative for you - and I'm sure you have comments! Leave them below - I'm curious if you've seen other cases where Might is commonly wasted (or if you disagree with my thoughts above). In our next post, we drill-down on magic and look at five heroes (plus honorable mentions) that stand out against the rest of the pack for most versatile anti-magic-casters in the game. Think you know which hero/heroes reign supreme? Find out next week - until then, have a merry Christmas and happy hobbying!
I'd say counter-calling heroic moves is actually highly circumstantial. You give the exception of catching skirmish cavalry, but there are also times (aside from protecting heroes) when you *really* need to pin something down/make something move (chariots, mumakil, etc.), or getting to objectives before something else. I get that might in the long run is impacted, but if the entire game might be won or lost in a turn or two I'll burn it every time.
ReplyDeleteLong time no chat! Yes, I agree - and as I highlighted in the post, this is the one I struggle with the most. The example I provided was a case where "I needed to move first" (keeping Galadriel from being charged by Elrond and one of the Twins), but spending my Might to do it doomed my Army Leader to either live or die based on whether or not I won the roll-off. While there are probably still times when calling a Heroic Move would be "a good idea," I think it's too risky of a way to spend a Might point. Hurts to say it, though. . . .
DeleteHaha, indeed it has been a while! Been busy getting resettled, but now that I am I've had a little more time to dedicate to miniature things.
DeleteFair enough, to each their own. :)
Glad to see the extended discussion on Strike-offs. The only thing I’d add is that the presence of an elven-made weapon is an important factor, since it changes the probabilities for tied FV. If an opponent has an elven-made weapon and Strikes, I would be very hesitant to counter-call (something like Heroic Defense is probably more useful if you might die, otherwise boosting duel dice). If I have the elven-made weapon, I’d be much more likely to counter-call.
ReplyDeleteOn the heroic move-offs, I agree these are hard to think thru in the moment. Ideally I’d plan far enough ahead that a round/game would never come down to that roll-off, but I don’t game ideally nearly enough. :-P
This is a great blog and I love reading it, but I just have to say you really should improve your painting. Honestly just a wash can really improve paintjobs, which, no offense, really need improving! Anyway, big fan
ReplyDeleteMy wash dried out - I'm making a new one...more on that in an upcoming post.
DeleteI fully understand your point on not calling Heroic Accuracy, but I recently read something that made me think of a use for it. Evil models could use it so they do not risk shooting their own models in some situations. Other than that I completely agree with what you said though.
DeleteYou're right - since you can only reroll a failure to hit your intended target, avoiding your own models as Evil would be valuable . . . if only more than two Evil models had it . . .
DeleteYeah I was playing a Pelennor fields game and I think a very valid time to counter a heroic move is when otherwise Eomer and all my riders of rohan get squished by a Mumakil. I did it the first turn and won the roll off. But then next turn I lost priority declared a move and got countered lost the roll off and had half my models squashed and proceeded to lose the game.
ReplyDeleteAgainst Mumaks you need to win movement.
This is a good exception - especially now that you need to charge them with more Strength than the Mumak has to tie it down. I didn't play with Mumaks back when I wrote this article, but have used them a few times since and it's very true.
Delete