Featured Post

The New Age Is Begun: the Defenders of the Pelennor Army List

Good morning gamers, This month is "Pelennor month" and we've covered the Fiefdoms (lots of Gondor units with special take-thi...

Showing posts with label Tactics. Show all posts

Thursday, July 3, 2025

Unexpected Military Formations: The Irolas "Shieldwall"

Good morning gamers,

Editor's Note: anytime you play a game for a while, double check your work - to get the speed you want in the list below, you need to run a Captain of Minas Tirith with or without Irolas (as Irolas doesn't have March anymore). What's provided below is still accurate if you have both in your list - consider swapping out for Warriors of Minas Tirith with shields and spears if you leave Irolas at home.

We had a reader reach out to us via Facebook (https://www.facebook.com/tmatsbg) and ask us about a doubles tournament he's headed to and for some advice on a Defenders of the Pelennor list. I sent several suggestions to support an Army of the Dead contingent led by Aragorn (for his doubles partner), but I recommended taking the following warband from Minas Tirith:


The event is, apparently 800pts, which means there's 400pts up for grab for each player - and this warband comes in at just under half of one of the lists, so there's plenty of room to expend (especially in the Defenders of the Pelennor list!). After presenting this idea, however, I was asked "how do you play it?" And instead of trying to use words to describe why you'd want to use this for doubles and how this formation works, I decided to just turn it into a post with pictures. :) I still have to convert 2 Numenoreans into Citadel Guard to have the models, so ignore the two Numenor guys standing in for Citadel Guard in the pictures below.

Why Run This Formation?

To understand why this is a good warband for doubles games, we need to understand how doubles deployment/scoring works in the six scenarios we had in the previous edition (yes, I know the new Matched Play Guide is out, but I don't have a copy yet and I don't think those scenarios are going to change very much). Previously, the rule for doubles (and I assume it will still be true in the new edition) is that speed is king. Most of the time, both allied forces will deploy in separate parts of the board, usually with 24" to cross to get to the other person's army (sometimes more, sometimes less). This means that two armies that have foot-slog across the board at 4-6" speed are unlikely to meet up and if your opponent has two fast armies, they can both engage one force, beat it to a pulp, and then about-face and take on the other force. This . . . is a recipe for disaster.

If you're not going to run all-cavalry, then you want Heroic March in your list - and Irolas has Heroic March. He doesn't have 3 Might anymore, but he's got 2 Might and if he's pushing up a wall of infantry - possibly in tandem with a Captain of Minas Tirith and MORE infantry - then he's doing his job and making sure your units arrive alive.

Friday, May 3, 2024

Tournament Time: Rythbryt's Army Thoughts (Grand Tournament 2024)

Edited May 6, 2024, with tournament results
Bonus post this week. Must be something special going on... ;)

As faithful readers of the blog know, TMAT's annual GT is coming up this weekend. I generally don't post articles on the armies I'm running (I leave that to Tiberius, who's far more practiced--be sure to check out his article from yesterday, if you missed it). Nor do I generally recap how the tournament went (Centaur's your man... er... horse-man... for that). But I'm making an exception this time, for several reasons:
  1. I've been light on generating content recently (and feel somewhat guilty about that);
  2. I owe Tiberius at least two podcasts on tournaments that have long since wrapped (and, again, feel somewhat guilty about that);
  3. I really liked a number of the lists that I batted around (and felt like sharing them); and
  4. Perhaps because I really liked these lists, I actually locked into a list earlier than the final day they were due (actually, almost 2 full weeks before they were due), which meant there was actually time to write a prospective post on it. :-P
Along the way, there were twists and turns and trepidations (well, okay, actually less trepidation than usual). So yeah... if you want some musings about heavy/all-cavalry armies (or their equivalent), with a heavy dose of strategy (and maybe some obsession-bordering-on-neurosis), read on. :)

This may be a spoiler...
Photo Credit: cbr.com

Factual Background (because all of life is a story, right?)

First, a digression that's not really a digression.

About two months ago, TMAT hosted a winter "mixer" tournament designed to be a fun, pseudo-competitive way for the people in our gaming group to play some games (always fun), while also introducing new/newer players to MESBG. Because of that, we had a pretty small tournament by most standards: a 350 point cap (4-model minimum), with 5 games in one day (45 minutes per game). The five scenarios were pre-selected (though not their order), and all opponents were randomized. (For about a 72-hour period, we also thought this was going to morph into a funsies doubles-event, but we did end up having enough players for a full singles event--10 players altogether, which is also a weird number for doubles :-P).

For those of you who are familiar with the Matched Play guide, you know that 45 minutes is... kind of tight for a 350 point game (the guide recommends 1 hour 15 minutes for a game of that size, so this was definitely on the "fast" side). The pool of scenarios for the tournament (Hold Ground, Capture and Control, Destroy the Supplies, Lords of Battle, Divide and Conquer) also offered a mix of "capture objectives" and "kill models outright/around objectives," which posed some... interesting choices given the 45-minute time limit. For objective games, you wanted lots of models (and, in general, I think you want more models than less in MESBG). But more models equals longer phases, which means less rounds (which means less moving, less shooting, less fighting, less botching, etc.). And taking an army composed of slower models (goblins? hobbits?), shooting models (a 6-second shoot phase vs. a 10-minute shoot phase makes a huge difference), or models that last a long time but have trouble wounding standard (D6) shieldwalls (S3/D7 dwarves, for instance) could further complicate things.

So with those issues in mind, as I mulled my options for the tournament (and all told, I think I mulled some 200 different list ideas/variations), I kept finding myself drawn to lists that could move fast, kill very quickly, take a beating... and do all the above without relying on a lot of shooting/time-intensive roll-offs. And ultimately, it worked. I won all five of my games at the GT with a list that consisted of the Dark-Marshal on Fell Beast (F6 wraith who casts normally, on a flying monster, who can also be a 6" banner in a pinch), leading eight Morgul Knights (who I've always loved, and never brought to a tournament before), and four Black Numenoreans on foot (which I have brought to tournaments before, and never disappoint me) for a grand total of 13 models at 350. 

A portend of things to come?

Monday, March 25, 2024

Armies of Middle-Earth SBG: Countering Angmar, Part 4 -- Avoiding (Avoidable) Mistakes on the Table

What?!?! Back for more tricks?!?!
Photo Credit: Hint--I'm a creature of habit (it's me again)

Editor's Note: This article is part of a larger series on dealing with Angmar. Click the links for Part 1Part 2Part 3, and Part 4.

* * *

The semester's over, so I'm back baby! (Raise your hand if you had an article from me on your bingo card for today ;-P )

As some of you may recall, over the Summer we explored strategies to counter Angmar (if you missed it, or need a refresher, you can check out the previous articles on dealing with Terror, maintaining control over our own pieces, and weathering magic spells by clicking the links). In terms of list-building, these are the primary tactical issues that we'll want to make sure we address, or at least think about. And as we discussed at length, most armies have at least some tools available to counter these tactics (or at least make things harder for the Angmar player).

What I want to talk about in this fourth and final discussion, however, is something that often gets lost in all the tactics: mental overload. I touched on this some in my write-up of the Angmar faction proper, but playing with and against Angmar lists (especially optimized Angmar lists of the magic-heavy variety) is a taxing thing for both sides. And in taxing situations, it's easy to forget things that should be obvious, scrap our game plan because we think we see "ghosts,"* and make mistakes. So here's the big-picture idea:

Whenever Angmar has a lot of nasty debuff pieces, you want to make their job harder (not easier) by planning ahead, avoiding simple mistakes that play into their hands, and pressing on. 

Admittedly, that's easier said than done, especially against an experienced Angmar player. But here's a few "meta-tactics" (plus a few practical tactical tactics) that can help us accomplish that primary goal.

* Although when playing against Angmar, you may in fact be seeing actual ghosts...


Reminder 1: Playing Angmar does typically make risk-taking more dangerous, so plan accordingly. We've all done them--those risky, "Hail Mary" plays that put all our chips on the table. A hero calls a heroic combat in a fight where the opponent has one more model than we'd prefer; we do a cavalry charge knowing that everything will come down to the 50-50 roll-off next turn; we march 15" into the line of fire, knowing that if we can just weather this turn of shooting, we'll catch them in the open next turn; we call 4-10 heroic combats in a singe fight phase, hoping to evaporate the enemy's battle line. We'd like to think that every game can be won with planning, precision, and patience. But we know there's games that come down to daring, guts, and dumb luck.

The reality is that Angmar has lots of ways to muck up those risky plays, and then to capitalize on any mistakes we made (especially if you're moving first and Angmar moves second). And an Angmar player wants us to think that because of that fact, we shouldn't take risks like we normally would. Just play it safe--conservative. Now there's certainly something to be said for conservative play against Angmar (if nothing else, that style tends to commit fewer of the "stupid" mistakes that Angmar can really capitalize on, which we'll talk about at the end). But you can certainly take risks against Angmar--you just need to take Edna Mode's advice, and have a plan in place should the risky play fail.

Sage advice, that.
Photo credit: pinterest.com (not me this time... I'm not this creative)

So how do we do this? Here's a couple of practical questions to ask ourselves at the start of the game (and periodically as the game progresses):

What's my target priority this round and next round (at least)? One of the best tips for combatting mental fatigue is taking the initiative (i.e., taking control of things you can control), and pressing your advantages. Think of it as being active/positive-minded ("What am I going to make happen?") instead of passive/negative-minded ("What nasty thing is going to happen to me next?"). After all, we are a participant in the game (not just a passive observer), same as the Angmar player. So we should participate.

Threat assessment is an important part of any game, and games against Angmar are no exception. But Angmar armies often have more threats than we're used to dealing with at once, so we need to be constantly assessing and re-assessing what's the most dangerous thing to us, as well as what weakness(es) we're going to exploit to buy us some breathing space. If it's Gulavhar, am I going to avoid him? Try to bait him over to a far flank? Pour every available shot into him, and try to scare him off? Or am I going to ignore him because he'll have trouble causing my Terror-causing Black Numenoreans (or because my big hero can deal with him later, as long as I can eliminate his supporting Barrow-Wight in the first two turns)?

Now again--this kind of in-game calculus feels like it takes on added significance in a match-up with Angmar (because the threats are more varied, and in some ways more subtle). But the calculus itself isn't any different from what you would typically do against any other opponent. And that's sort of comforting, if you think about it long enough. 

Monday, November 13, 2023

Nemesis: How to Fight Against Legolas

Good morning gamers,

We're back to the Forces of Good and this time, we're looking at one of the first heroes I used in the game (and a hero who remains one of my favorites to put on the board): Legolas Greenleaf. Legolas has two profiles in the game (one for the Fellowship and a "slightly better" profile in the Halls of Thranduil - more on this later) and appears in SIX Legendary Legions (the Grey Company, the Return of the King, the Men of the West, the Breaking of the Fellowship, the Defenders of Helm's Deep, and the Rangers of Mirkwood) - and with the Halls of Thranduil being Historical or Convenient allies with basically everything in the game (a Halls of Thranduil list without Thranduil will be Impossible Allies with Grimbeorn and his squad of Beornings . . . why?!?!?!?!), it's not hard to see Legolas at an event or on the other side of the table, regardless of your points level.

The famed archer who was epic in the Lord of the Rings films and defied all natural laws in the Hobbit films is easily the best archer in the game (though I ranked the Bolt Thrower higher when we did our Sniper podcast) and knowing how to beat him is something every general should know. What makes this guy such a powerful piece, such a great leader for an allied contingent, and so annoying in certain scenarios? Well, let's take a look at this Elf among Elves and find out . . .

What Makes Legolas So Hated?

Photo Credit: Warhammer Community 

It should come as no surprise that Legolas is most dangerous when he's shooting. Shooting has been critiqued by various crowds in MESBG as contributing to a negative play experience, mostly because your opponent has no say about it once he's done moving his models. There's no opposed dueling roll, there's no resist test, and there's no armor save (for most units - some units grant saves of various kinds and heroes might have Fate points) - once you're done moving models, the other guy gets to shoot at you . . . and you have to take it. Legolas does this better than any other model, since his Deadly Shot special rule allows him to either perform three shots hitting on his normal Shoot Value (3+ if he hasn't moved, 4+ if he's moved up to half his max movement) OR perform a single shot that hits on a 2+ and ignores all modifiers (to include the move-and-shoot penalty, negative modifiers like Blinding Light, in-the-way rolls, and even the rule that prevents a Good model from shooting into a friendly combat). Yes, Legolas can do the shooting thing all the time.

While getting 3 shots each turn would appear to be his most deadly quality (and I've killed 2-3 models in a single turn plenty of times with him), it's the second part of his Deadly Shot rule that gives most competitive players pause. Usually, if you have an important support piece that you don't want to lose (a Goblin Scribe, a Dead Marsh Spectre, or a low-Defense/low-Wound army leader), you just tuck them behind 3-4 guys or a wall/rock and you're feeling pretty good about them not getting hit from enemy archers. But if Legolas can see the model, he can hit the model on a 2+ - even if he's moved that turn! Furthermore, if Legolas wants to hit the MOUNT of a big hero, he can choose which part of the model to target with the 2+ To Hit and if he's willing to spend Might to make it work, there are very few mounts in the game that can survive for long when Legolas is on the other side of the board. This is particularly true for any of the multitude of heroes who lacks Horse Lord and has no way to prevent wounds on their mounts. Oh, and Blinding Light won't make that mount any more safe . . . it's annoying.

Monday, November 6, 2023

Nemesis: How To Fight Against Ringwraiths

Good morning gamers,

So far in this series, we've looked at specific monster models (that usually show up in a single list, maybe two) or specific Legendary Legions that everyone seems to hate fighting. Today, we're turning to a model type that's pretty ubiquitous across the forces of Evil and units that don't look all that dangerous until they're neutralizing your heroes and chewing them up. Yep, it's time to turn to the Witch-King of Angmar and all his Ringwraith friends! I love these models (and have written quite a bit about them), so let's go in-depth today (fair warning, this post is LONG) and look at all the grisly bits about Ringwraiths, shall we?

What Makes Ringwraiths So Hated

Photo Credit: Warhammer Community

Part 1: An Overly Pedantic Study of Ringwraiths

You can't start talking about Ringwraiths without going over a brief taxonomy of the ten Ringwraith profiles that we have and how they're usually fielded. Despite there being nine Ringwraiths in total, the generic "Ringwraith" profile (which you can actually take nine of - you don't have to run the Witch-King!) provides a nice "blank slate" version of a Ringwraith for you to customize to your liking. These guys have decent-not-good combat stats (F5/S4/1A with 0-2 Might) and decent-not-good defense stats (D8/1 Wound/0-2 Fate). As far as Heroes of Fortitude for Evil go, they are great for keeping your army in the field should you break with Courage 6 and with 7-14 Will points, they have the potential to cast magic and/or fight for a long time (but don't think this means they have a lot of Will - read my post on Multi-Purpose Will Casters for more information on this). Though they look fragile, the Terror-Harbinger-of-Evil combo (something we've talked about before) can make charging them particularly difficult.

Besides the Might/Will/Fate on these guys, you can also take mounts for your Ringwraiths in the form of horses (10 points - a good cheap option for increased speed, slightly increased damage when you charge, and an easier time getting the casting direction/look-angle you want on a target), Fell Beasts (50 points - slightly more speed with more maneuverability options, greatly increased damage when you charge, and opportunities to get casting directions/look-angles that are not present when you're on a horse), and Armored Fell Beasts (70 points, which just seems like too much to pay for +1 Defense on your Fell Beast . . .). While you "can" field these guys for 55 points each, I think it would be unwise to leave home without adding 2 Might points, at least 1 Fate point, and a horse (which brings these guys up to 80 points). Personally, I normally throw in 2 extra Will points (9 total) for a tidy 90 points, but 7 Will can be just fine (it just means you're casting for one fewer turns).

When you compare these basic Ringwraiths to the "named" Ringwraiths, there are some differences. First and foremost, each of the named Ringwraiths is a Hero of Valour (or Hero of Legend in the case of the Witch-King in the Mordor/Angmar army lists, as well as in the Black Riders Legendary Legion). While generic Ringwraiths have both Heroic March and Heroic Channelling for their specialized Heroic Actions, most of the named Ringwraiths just have Heroic Channelling. The Witch-King and Khamul are exceptions to this - both have Heroic Strike, and the Witch-King also has Heroic Resolve, Heroic Strength, and Heroic Challenge. For most players . . . yeah, you're probably sticking to Heroic Strike/March and the occasional Channel.

Monday, October 30, 2023

Nemesis: How to Fight the Assault on Lothlorien Legendary Legion

Good morning gamers,

Last time, we looked at the much-feared Assault Upon Helm's Deep Legendary Legion and some strategies you can employ to fight it. Today, we turn to the other "Assault" legion (the Assault on Lothlorien) to see what the hype is about this list . . . and some things you can employ to fight against it. Yes, it shoots things - and yes, it has crazy shenanigans that the Helm's Deep list doesn't quite have - but it also plays very differently and can be beaten with some other methods of attack. Let's dig in and see what all the fuss is about (especially now that they've changed a bit).

What Makes The Assault on Lothlorien Legion So Hated?

Photo Credit: Warhammer Community 

The first thing that annoys players about fighting this Legion is that it's a horde list - this critique isn't unique to the Legion, but any time you can get a large number of models at basically any points level, someone is going to gripe. Sometimes bringing a horde to the board (I'm a poet, I know) is fine - no one seems to complain that much when there's a Denethor-led Minas Tirith spam list on the board - and there are plenty of lists that run "just a lot of Orcs or Goblins" that no one things is oppressive. It's not like this list is spawning new models from behind your lines like Goblin-town or has +10 or +15 models on you at the start of a game (though it might).

What makes this list annoying is that it's a horde list with other stuff. The list has access to Moria Goblins (5-7 points depending on what gear you give the Moria Goblin Warriors and your opinion of Moria Goblin Prowlers), Orc Warriors and Trackers (5-10 points depending on the gear you give them, potentially more if you invest in a banner), and Wild Wargs (which all heroes can lead and are very cheap fast infantry). If you spend 250-300 points on these things, you can easily field 40 warriors at most points levels, so long as you have the heroes to lead them.

Enter the shamans in this list: on the named front, you've got Druzhag and Ashrak (at least one of them is required), who come in at 50-90 points, but fielding both is certainly possible at 500+ points. You also have Muzgur (who is required along with one of these Goblin guys - and now has to be your army leader), who at 70 points is one of the cheapest Heroes of Valour in the game (normally he's Fortitude, but in this list he's Valour). Pick up all three of these guys (or two of these guys and one other hero) and you can horde out pretty easily.

On the generic hero front, you have both Moria Goblin Shamans and Orc Shamans (45 or 50 points, respectively) who are able to lead 12 warriors in their warbands, thanks to the promotion to Fortitude status in the Legion. Which one you prefer used to depend very much on your view of Orcs - are they just a handful of spearmen behind the Goblins or are they a proper shieldwall (half shield, half spear-and-shield). Now that you have to have fewer Goblins than Orcs, it'll be hard for any player to have exclusively Goblins in their shieldwalls, but I have always liked the picks that can help the Orcs reach S4 (which you can get with Moria Goblin Prowlers who have to fight two-handed, but not Moria Goblin Warriors) and the flexibility of not having to have these guys arrive near the Goblin lines. I used to be in the minority opinion on this - time will tell how the new meta for this list will shake out.

Monday, October 23, 2023

Nemesis: How to Fight the Assault Upon Helm's Deep Legendary Legion

Good morning gamers,

The Assault Upon Helm's Deep Legendary Legion has been rocking the meta (or should I say piercing the meta? Bombing the meta?) since its release in War in Rohan. It's a Legion that isn't constructed around a top-tier hero (it's got no named heroes at all), but instead gives greater reliability to its siege engines and allows you to run more Uruk-Hai than you usually would be able to with Heroes of Fortitude/Minor Heroes.

Many competitive players have identified this as a list that's unfun to play against - stand back and shoot at the horde of Uruk-Hai and you get torn up by crossbows and ballista. Try to close with the ranged units? You get blow up with a bomb team (and have to face a pike block with whatever's left). When you as a player feel caught between a rock and a hard place, it's hard to have fun (unless you like a good challenge and don't mind losing . . . like I do . . . most of the time).

I've fielded this list a few times (though I don't run more than 2 ballistas/1 demo team on principle) and one of our resident Isengard enthusiasts here (Red Jacket) has run it at several of our events with different configurations. Having had to play Red Jacket's Assault Upon Helm's Deep list at 623 points at the TMAT 2023 Grand Tournament earlier this year, I have to say the two ballistas backed by nine crossbows was nasty and awful (and naturally, I had to play against it in Lords of Battle where my Orcs and Barrow-Wights needed to close in fast . . . and he killed more with his ballistae once I got within 12" of him than from farther away).

But there's got to be a way to crack the code - how does one beat up a list like this? I mean, the list has been out for ages - surely, there's a proven method for beating them? Well, there are several strategies you can use - but before we get into them, let's break down what about this Legion makes it feared.

What Makes The Assault Upon Helm's Deep Legion So Hated?

Photo Credit: Warhammer Community

The first thing you'll hear people gripe about are the long-range threats in this list. The list begins with Isengard Assault Ballistas, which are probably too cheap for what they do. When compared to other siege engines, you get a comparable crew size, a comparable Strength/Defense, the Large Siege Engine requirement (which makes you a siege target - very handy when fighting other siege engines, but does place a requirement of 2+ unengaged crew to fire it), and good rules (Accurate/Piercing Shot, 6" minimum range) - for a discount bargain price of 65 points. You can see the full comparison below:


If the ballistae weren't enough to make you gag, each ballista comes with 1 siege veteran (Minor Hero) and 2 crew who don't have shooting weapons, so you can take +1 Uruk-Hai Warrior with crossbow for every ballista you take - that's 76 points for a S9 ballista and a S4 crossbow. Sheesh, that's rough. Add into this that you can field 13 Uruk-Hai Warriors - 8 with pikes/shields, 5 with crossbows - for 135 points, and it's not hard to see why the pairing of crossbows with ballistae would drive people nuts. Sure, you have to field 1 Uruk-Hai Captain (who can lead 18 Uruk-Hai) for every ballista you want to take, but that's not a high tax.

Monday, October 16, 2023

Nemesis: How to Fight Beorn and Grimbeorn

Good morning gamers,

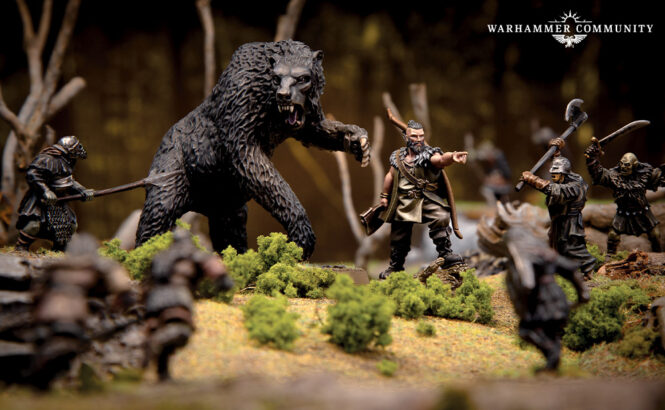
This is our fourth article in this series on how to fight "bad" or "mean" models and today we're tackling Beorn and Grimbeorn, two of the toughest monsters in the game right now. With a new Legendary Legion released in the Defence of the North supplement giving new life to Beorn (and a profile to Grimbeorn - at long last), the bears are a real danger you could see on the tabletop. But how bad are these guys - and what can you do to fight against them? Let's dig in and see what all the hullabaloo is about . . . did you catch the "Baloo" reference there?

What Makes "The Bears" So Hated?

Photo Credit: Warhammer Community 

Since the rules update in 2018, Beorn has had one of the strongest profiles for the Forces of Good (and to be honest, he has one of the toughest profiles in the game period). Despite having incredibly good stats while in bear form (F8/S8/D8 with 3 Attacks/Wounds/Might/Will/Fate and C6 with Fearless), Beorn wasn't nearly as prolific on the tabletop as other Good monsters like Gwaihir or Treebeard. Armies of all-Eagles and all-Ents have been seen throughout the world at tournaments (for the Ents, this was particularly true after the release of War in Rohan), but Beorn only made an appearance here or there.

If I had to guess, this is probably due to two reasons: first and foremost, he's a 200-point hero who couldn't lead troops cheaper than 100 points (Great Eagles) - and most players aren't going to dump 200 points into a hero who can't lead troops unless they've already got a heap of models (and why do that when you could run Gwaihir or Treebeard or just more guys?). Second, Beorn isn't as fast as Gwaihir (8" move isn't bad, but it isn't a 12" Fly), doesn't give you three models towards your army size like Treebeard (for the same cost as Beorn), and doesn't have the alliance options you get with either of these other two monsters. Third, there were the occasional games where Beorn would just not want to change from a man into a bear (getting a 4+ can sometimes be elusive). To be fair, Beorn in man form is no slouch - he's really good - but he's not nearly as resilient as he is in bear form - and he doesn't have Brutal Power Attacks (most particularly Crushing Strength). Yep, there are ample reasons to take someone other than Beorn in your army.

Monday, October 9, 2023

Nemesis: How To Fight Gwaihir

Good morning gamers,

As we continue our series of examining good models that can really wreck your day, we're turning to one of the most feared Good models in the game right now: Gwaihir. This is a monster that has incredible agility thanks to Fly, a very impressive combat profile (with only one caveat), and is incredibly survivable. But like most models in the game, there are options available to you when you see this guy on the other side of the board - none of them will be easy, but we'll review some of the tools you can use to counter him. Let's dig into why this guy is so good!

What Makes Gwaihir So Hated?

Photo Credit: Warhammer Community 

To understand why Gwaihir is such a threat, we need to begin with his alliance matrix (or two, actually). Gwaihir appears in two lists - he's a Hero of Legend in the Misty Mountains and a Hero of Valour in Radagast's Alliance. When fielded in Radagast's Alliance, he has no historical allies (since their only historical ally is the Misty Mountains - and since Gwaihir is the only hero in that list, you can't run it), but has a few Convenient Allies (all of the armies in the Armies of the Hobbit book, as well as Lothlorien, Fangorn, and the Rangers, oddly enough). If you're running one of these lists and want Gwaihir to be your grenade hero instead of your army leader, you can certainly take him from this list.

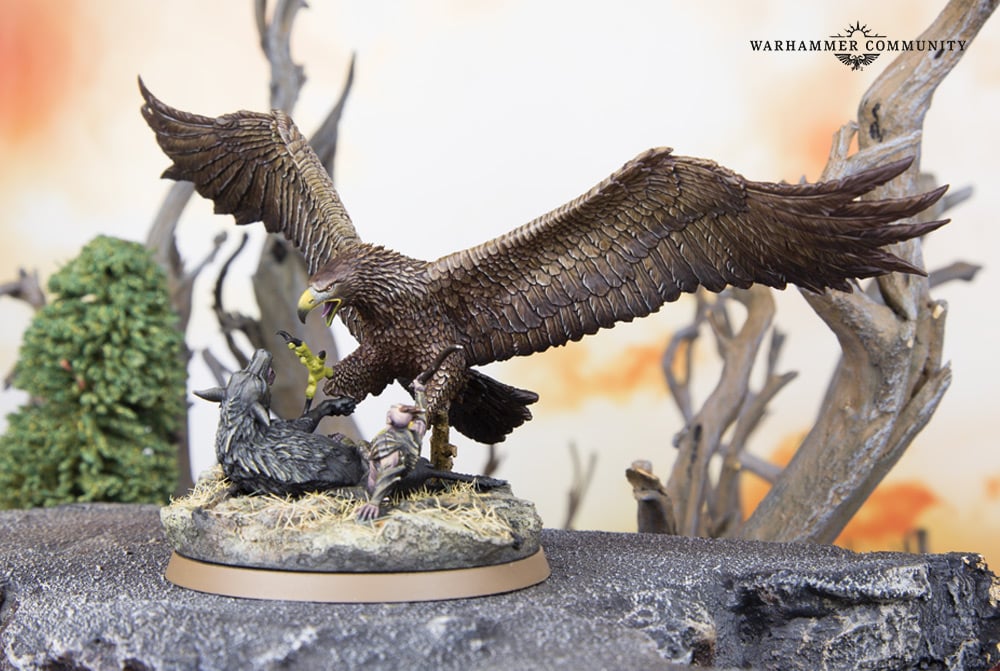
Most competitive players will field him from The Misty Mountains, however. In that list, he's a Hero of Legend (almost certainly your army leader) and he's at least Convenient Allies with every faction (and he's Historical Allies with the Fellowship, Thorin's Company, and Radagast's Alliance as was mentioned above). While the Fellowship and Thorin's Company can certainly benefit from adding Gwaihir to their ranks, most of the time you're going to see Gwaihir appear either in a pure Misty Mountain list (where you're counting on lots of flying monsters to trash enemy warriors), a monster-mash army where Gwaihir and some Eagles ally with either Ents or Bears (or both), or as a one-model drop into a more conventional force that wants a hard-hitting slayer for the low-low price of 150 points. This last one is the usual way you see Gwaihir in competitive play.

Since he can ally with everyone, what is it about this guy that makes him an attractive option (especially when compared to Elven heroes who can also ally with everyone)? For starters (as was just mentioned), Gwaihir is "only" 150 points - which is admittedly a lot to pay for a hero who probably isn't bringing any warriors to the table, but relative to the cost of other heroes, it's a steal. As the cheapest of the eight members of the F8+ club (which features Treebeard/Beechbone from the Fangorn list, Gil-Galad from the Rivendell list, Beorn in bear form from Radagast's Alliance/the Beornings LL, Smaug from the Desolator of the North list, The Dark Lord Sauron from the Barad-Dur list, and the Balrog from Moria/The Depths of Moria LL), Gwaihir is likely to have a higher Fight Value than most opposing models once everyone's out of Might. But his offensive firepower isn't just limited to a great Fight Value: with S6 (S7 on the charge if he's got either of his army bonuses - which he usually doesn't) and 2 Attacks + Monstrous Charge, it's quite likely that he's wounding troops on 4s if not 3s - and that's a lot of dead troops if he's charged into them.

Monday, October 2, 2023

Nemesis: How To Fight Gulavhar

Good morning gamers,

Last time, we looked at the Balrog and various approaches you could use to deal with him. Today, we're looking at another feared Evil monster: Gulavhar, the Terror of Arnor. Gulavhar is like the Balrog in many respects - but he's also unlike anything else in MESBG. As a staple unit in a long of competitive Angmar builds, there's a decent chance that you'll see him at a competitive event - so let's see what's up with this guy and how we can build our lists to be able to counter him.

To help me with this venture, I asked for some input from Angmar aficionado and Gulavhar fan-club-member Evan Iverson from the Unexpected Podcast team to add thoughts on the article and provide emphasis on things that needed more help. He also pointed out what wouldn't scare a Gulavhar player, which was even more useful.

What Makes Gulavhar So Hated?

Photo Credit: Warhammer Community 

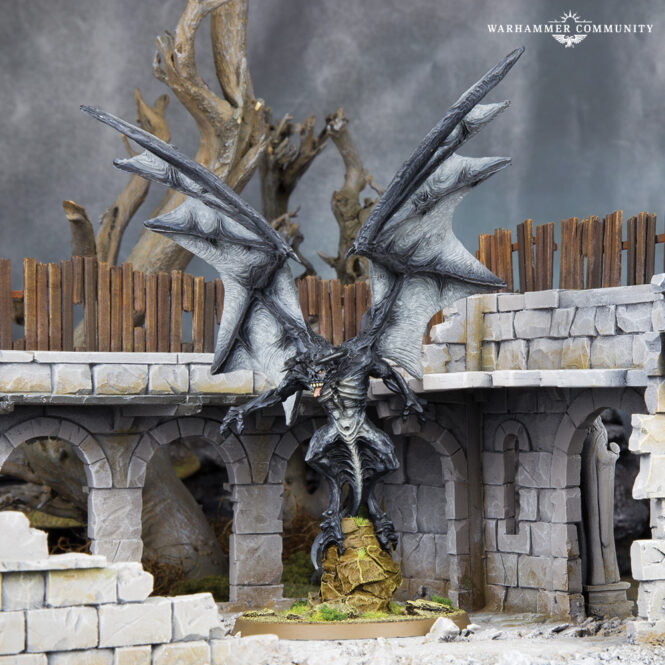
Like the Balrog, Gulavhar has good offensive stats - he's F7/S8 on offense and has Attacks equal to his remaining wounds (which starts off at 4 - same as the Balrog then). Unlike the Balrog, however, Gulavhar has Monstrous Charge, so not only can he get to 5 Attacks on the charge (more than the Balrog), but he also knocks down models that are S7 and below . . . which is pretty much anything. I'm not sure that most players would do this, but Gulavhar does have access to Heroic Strength, which would allow him to knock down other things that are on the cusp of not-being-knocked over (Treebeard is S8 and will be knocked over regardless of what Gulavhar gets, the Balrog is S9 and will be knocked over on a 3+), but these models are often at/above F7 innately, so doing so is a risk for sure.

Gulavhar's defensive stats aren't great (more on that later), but with 3 Might and access to Heroic Defense instead of Heroic Strike, it's pretty common to see Gulavhar players ask the question, "Do I feel worried about this fight?" If yes, they call Heroic Defense; if no, they don't. Pair this with the ability to regain wounds by killing enemy models (so a scratch here and there are easily cured if you can pounce on a lone warrior or two) and boy does his defensive profile not look nearly as condemning.

Finally, Gulavhar has Fly (for that oh-so-important-positioning), the Terror-Harbinger of Evil combo (have to test for Courage to charge him and he applies a -1 penalty to enemy Courage values within 12" of him), 3 Will and Resistant to Magic to put up some resistance to enemy spells, and the Spirit keyword to give Terror to nearby friendly Orc models if you kept your army bonus and boy is this guy where it's at. He's a monster among monsters and one of the most feared models in the game. But he's also one of the biggest glass cannons in the game - so let's talk about how to beat him.

Monday, September 25, 2023

Nemesis: How To Fight The Balrog

Good morning gamers,

We're kicking off a new series here at TMAT today: Nemesis! I've been planning this series for a while now and it was born, actually, out of the In Defense Of series (where we take models that lots of players think are worthless or "bad" and explore how valuable they can be/how to make them work).

Nemesis tries to do something similar: we're going to be looking at models that lots of players say are "too good" or "unfun" or "unfair" or "overpowered" or "pick-your-favorite-phrase-that-means-there's-something-insanely-too-good-about-it" and explore how to beat those models. Sometimes these models will have a Legendary Legion, an army bonus, or an alliance that causes them to go from "fine/fair" to "too good/overpowered" and when that's the case, we'll flag it in the article.

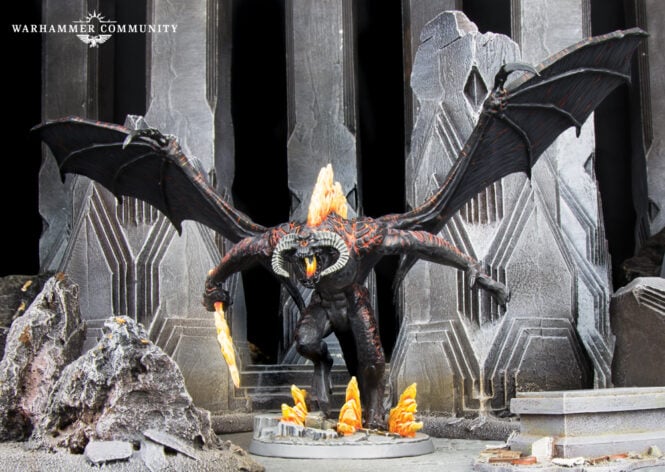
Our first stop happens to be one of my favorite models and one that, when run well, can REALLY ruin your day. Yes, it's Devin Moreno's least favorite model in the game: the Balrog. This guy is not only one of the most expensive models in the game (and tied for most expensive model available to the Moria faction), but he's also the figurehead of one of the most feared Evil Legendary Legions in the game. Let's see what's up with this big guy that makes playing against him so unfun.

What Makes The Balrog So Hated?

Photo Credit: Warhammer Community 

The Balrog begins with unparalleled stats: he's F10 (innately higher than any other model in the game), he's S9/D9 (so Rending doesn't help enemy monsters wound him more easily and he's wounded on 6s or worse by basically everything in the game), he's got 4 Attacks (on-par with most big heroes when they're mounted and on the charge, better than most other heroes), 10 Wounds (less than Smaug, sure, but on-par with Mumaks and better than anyone else), 10 Will and Resistant to Magic (because locking down monsters with magic is a good idea), and C7 with Fearless (because, you know, why not have both).  His only real "down-side" in his core stats is his 6" movement, which is "fine" on a 60mm base, but can mean that getting his positioning requires some thinking. Not having any Might points or Fate points is also a knock to the profile, but as we'll see in a moment, there are mitigations for this.

Monday, July 31, 2023

Armies of Middle-Earth SBG: Countering Angmar, Part 3 -- Weathering Overwhelming Magic

Ooooo... spooky!

Photo Credit: Me

Editor's Note: This article is part of a larger series on dealing with Angmar. Click the links for Part 1Part 2Part 3, and Part 4.

We left off last time talking about how list-building is only part of the picture when it comes to countering what Angmar can do: there are definitely list-building choices that help (and some that decidedly don't), but at the end of the day this is a game that is (usually) decided on the tabletop, by tactics and movement (and, of course, dice). 

As we transition to dealing with the third of Angmar's core strengths (magic), there will still be important list-building decisions for us to think through. But we'll be talking more and more about those list-building decisions in the context of how they are likely to play out (and even affect what happens) on the tabletop. That's important, because as we'll see (1) not every list has equal list-building counters to magic, and (2) almost no list has a fool-proof answer to magic on the scale to which Angmar can (and usually does) marshal it. 

The raw output of Angmar's magic attack is overwhelming, and its potency is debilitating.

Before delving into the potential solutions, let's have a quick refresher about the way magic works. If you're new to the Middle-Earth Strategy Battle Game, played under the old rule-set and want a quick summary of what's changed, or if you've been playing for a bit but magic is not common in your area, I recommend that you push "Pause" here and check out Tiberius's primer post on Revisiting Magic. While Tiberius and I don't agree on all aspects of MESBG, he's thought about magic a lot more than I have, and his knowledge of how it works (and, by extension, how to counter it) is, at best, second to only a very few. Plus, your reading his article saves me a lot of typing.

Monday, July 24, 2023

Armies of Middle-Earth SBG: Countering Angmar, Part 2 -- Repelling the Shut-Down

Still evil! Still spooky! Still mine!
Photo Credit: The author, himself

Editor's Note: This article is part of a larger series on dealing with Angmar. Click the links for Part 1, Part 2, Part 3, and Part 4.

If you're just joining us, this is an ongoing series about how to build forces that would feel reasonably comfortable countering Angmar. While there are definitely certain lists that have advantages against Angmar (more to come on that score in parts 5-8), my goal with this particular series is to help identify the tools that every faction (or at least almost every faction) has to deal with Angmar. Some have more tools than others, certainly; but when you dig in and drill down, it's surprising how many factions actually have multiple tools they can draw upon.

In Part 1, we talked about how to get around the Terror that Angmar generally brings to the table (as it turns out, there are a lot of strategies we could try). This time, we're turning to what may be the most oppressive aspect of an Angmar list: it's ability to shut down or take out your army's key pieces. We're focusing primarily on the non-magic ways Angmar does this, but don't worry: we still have plenty to talk about (plus, countering the magic is coming next time, so I've got you).

If you have a model that's essential to your army, Angmar can probably affect it, shut it down, or take it out before it does what you need it to do.

One of the many practical problems that players face when facing Angmar (especially if it's your first time playing against Angmar) is that if you have something essential to your army, Angmar can probably take it out (and usually quickly). Exactly how it does this takes many different forms (depending on what exactly is in Angmar's list, and how many of a given profile are in it), but here's some of the many ways Angmar can mitigate / take out / depower your key models: 

  • Terror front line Harbinger of Evil / Drain Courage against low-courage heroes (so they cannot charge without burning Might or Will);
  • Magical spells like Transfix / Paralyze to incapacitate a hero;
  • Compel / Spectres to pull targets out of position / into dangerous positions; 
  • Monsters (often flying monsters) to challenge enemy heroes, deal huge damage, and / or disrupt the opponent's battle lines; and
  • Heroes who either neuter your heroic actions (the Tainted) or drain your resources (the Dwimmerlaik, Shades, and Barrow Wights)
Fortunately, Angmar can't take all of these things in a single list unless you're playing at absurdly high points levels. But Angmar can take most of these things at most points levels, and therein lies the problem. Most army lists have some sort of way to avoid, incapacitate, or assassinate at least one priority target in the opponent's army (even if that way is "Strike and hope"). If Angmar can take this model out of the equation through one (or multiple) of these mitigation tactics, however, your force may not be able to deal with everything else that Angmar has.

In the same vein, if you over-build your force to address one particular problem posed by Angmar, you may not have enough in your force to address other problems Angmar poses. By way of example, Terror is the primary problem that most opponents need to solve against Angmar. But if your entire game-plan is keyed around charging Terror models (especially if your solution rests on a single model sticking around), you may not have the tools you need to keep Angmar from assassinating that target (thereby depriving you of the tools you need). By the same token, most armies' solution to dealing with big enemy heroes is to have their own big hero deal with them. But if Angmar can tie up your own big hero with one or two of their smaller ones (i.e., a couple of Barrow Wights spend four turns casting two Paralyze spells a turn at your Aragorn), you may find yourself without any answers to Angmar's own big heroes (and there are some big heroes in Angmar which, left unchecked, will wreak havoc on most opponents).

Monday, July 17, 2023

Armies of Middle-Earth SBG: Countering Angmar, Part 1 -- Dealing with Terror

Photo Credit: ME!!!! (Thanks, me!)

Editor's Note: This article is part of a larger series on dealing with Angmar. Click the links for Part 1Part 2Part 3, and Part 4.

It's still summer (which means I still have time to write :-P), so I'm back with another Armies of Middle-Earth! 

As you probably gleaned from the title, this one's a little special: instead of doing our usual blow-by-blow of a particular faction (there are a couple more of those in the pipeline that I think I'll get out before I start teaching again in the fall), this series will zero-in on how to counter a particular faction that seems to cause an inordinate amount of headaches for many players: Angmar.

If you're not familiar with Angmar (unlikely since you're reading this article, but still...), I'll be referring throughout to concepts that I discuss in our write-up on Angmar proper. If you need a refresher on the faction (and have an hour or so that you can devote to reading), I'd at least recommend looking at the discussion of strengths and weaknesses at the start (although the list of recommended community resources at the end may prove useful if you're interested in learning more about the faction). 

Finally, while this series will be keyed towards countering Angmar specifically, a lot of the list-building concepts and ideas we'll discuss will have applications beyond Angmar. So I hope it helps to get your creative juices flowing.

Attacking the Weak, Avoiding the Strong

One of Sun Tzu's great principles in The Art of War is to attack where the opponent is weak, and to avoid where the opponent is strong. I often think about this principle when I'm thinking through list-building ideas for competitive play: is there anything I can throw into this list that will be able to exploit at least one weaknesses in common, competitive armies while perhaps blunting something that they typically excel in? Since Angmar is an army with a lot of strengths and weaknesses, I think this approach gives us a good chance of identifying both army lists and in-game tactics that can give us a competitive edge against most Angmar forces.

Over the course of these write-ups, we'll be working our way through several strengths that Angmar brings to the table. Using our original Armies post as a starting-point, and assuming that most Angmar lists you'll face will be what I will call "typical" Angmar lists (i.e., a pure force with the Army Bonus, at least one Ringwraith, 1-3 Barrow Wights, 1-2 Monsters, some Specters, and a decent chunk of Orcs who cause Terror -- as opposed to something weird like, say, Buhrdur with ten Cave Trolls), here's the strengths we'll be targeting:

  • TERROR: There will likely be a lot of Terror (probably buffed by Harbinger of Evil). 
  • SEEK, CONTROL, DESTROY: If you have a model that's essential to your army, Angmar can probably affect it, shut it down, or take it out before it does what you need it to do.
  • MAGIC: The volume and potency of Angmar's magic attack is overwhelming and debilitating.
  • MENTAL MISTAKES: Angmar has so many tools at its disposal, that it's easy to feel "oppressed" or "frustrated," resulting in avoidable mental mistakes.

We'll cover all of these strengths in upcoming articles (along with some articles on a taxonomy of heroes and the best factions for good/evil to combat Angmar), but I wanted to start the discussion today with Terror because it's the most obvious aspect (and, in some ways, the aspect that's easiest to deal with) of what makes Angmar such a hard match-up for many armies. 

Thursday, March 2, 2023

Cavalry Charge: The Wag and the Battle of Val-es-Dunes

Good morning gamers,

Last month, we looked at some of the basic principles for using cavalry in MESBG and today we're going to look at one of the most common tricks a cavalry army has up its sleeves: the "wag". The term is used regularly here by Centaur and showcases how a cavalry force (usually down-handed in the model count comparison to other armies) can utilize the mounts they've paid so much for when faced with overwhelming odds. To see this, though, we're going to look at a battle fought by William the Conqueror in the Eleventh Century which showcased Duke William's great command of cavalry and strategic battlefield control. Let's take a look.

The Battle of Val-es-Dunes

You can learn more about this battle here and you can view two different visuals of this here and here. Almost 20 years before the battle of Hastings in 1066, Duke William of Normandy (later to be known as William the Conqueror) found some of his vassal nobles preparing to revolt and petitioned the King of France (Henry I) to support him in suppressing the rebellion. Henry would support William in this conflict, though would later fight against William before he departed for England. William and the King managed to rally about 10,000 men to fight the rebel nobles, who had amassed for themselves about 25,000 men - this didn't look good. William and Henry advanced to Caen and began to engage the rebels (though at least one noble changed sides from the rebels to the crown's forces before the battle began and launched a treacherous surprise attack).

William had his cavalry engage in small fights with the enemy, maneuvering and coordinating his forces to fight in one area, then retreat to break another division of the enemy army. With this hit-and-run method, the royal forces were able to rout the rebels and they pursued their retreat to kill many more. The victory was attributed to both the tactical acumen of William and the skill of the King's knights and secured William's holdings in Normandy in the immediate future (though he'd be putting down rebellions and invasions of Normandy for many years).

In MESBG, we pay a lot of points for our cavalry models and if we're not careful with them, we'll miss out on the most important benefit of these models: their increased speed. Let's take a look at how we can use our increased speed to our greatest advantage - and we'll do this by showing off "the wag."

Thursday, January 5, 2023

Fyrd Formations: The Battle of Maldon

Good morning gamers,

Today we're going to look in this formation post at a battle that occurred in Northern England during the tenth century, which featured a "gambit-gone-right" by the Norse against the English: the Battle of Maldon. You can check out an excellent visualization of it here as well as read about it further here. Depending on when you read this, you may also have access to a re-released translation that Tolkien did of the Battle of Maldon for Oxford (check out the announcement here). Many players seek to use shieldwalls to their advantage in SBG and this battle has some interesting insights into how to use shieldwalls effectively - and what to very much avoid at all costs. Let's take a look!

The Battle of Maldon

In 991 AD, the English lord Bryhtnoth prepared an army of Fyrdmen to resist an invasion by a Viking lord believed to be Olaf Tryggvason (the eventual king of Norway) near the town of Maldon, which controlled a major riverway into Nuthumbria. Bryhtnoth held his troops on the mainland, while Olaf's forces were encamped on an island that would be soon connected to the mainland when the tide ebbed. From the translation of the old poem by Karl Seigfried, we read:

The tide went out; the seamen stood ready, Vikings many, eager for battle. The protector of the warriors then commanded the war-­hard warrior to hold the bridge, he was called Wulfstan, brave with his kin, that was the son of Ceola, who shot the first man with his spear who stepped there most boldly on the bridge. There stood with Wulfstan warriors unafraid, Ælfere and Maccus, two bold men, who would not take flight at the ford, but they steadfastly defended against the enemies, as long as they were allowed to wield weapons.

That last bit seems ominous . . . anyway, an initial assault by Olaf when the land bridge emerged was repulsed by Bryhtnoth, but Olaf issued a challenge to Bryhtnoth, requesting that his troops be allowed to cross the passage to fight on equal terms. From Seigfried's translation (emphasis added):

When they perceived and readily saw that they found bitter bridge-­wardens there, the hateful strangers began to use guile, asked that they might have passage to land, to fare over the ford, to lead the foot-troop. Then the nobleman began because of his overconfidence to allow too much land to hateful people.

Then the son or Byrhtelm began to call out over the cold water (warriors listened):

“Now a way is opened to you, walk quickly to us, men to battle; God alone knows who may control the place of slaughter.”

The slaughter­-wolves waded (not mourning because of water), the Viking troop, west over the Pante, carried shields over gleaming water, ship-men bore shields to land. Byrhtnoth with his warriors stood there ready against the hostile ones; he commanded them to form the battle-­wall with shields, and to hold that formation fast against the enemies.

Thursday, August 4, 2022

Unexpected Military Formations: The Gear Tooth Formation


Hey Reader!

In my last post I talked about the Army of Dale legendary legion, and near the end I had an offhanded comment about how I think you can maximize your use of the Wall of Blades special rule on your Knights of Dale and Bard II through an effective formation, and that is what we're going to discuss today! Look at me actually completing a project. Hyperfocus ADHD for the win.

I'll be presenting two variations on the "Gear Tooth" formation, the first being the one that I suspect the designers of the game had in mind (or at least it's a standard deviation from what the game designers had in mind), and then I'll follow up with what I think is actually a more effective version that does all of the same things but better.

Now it's worth noting before we go into this that the Gear Tooth formation is really only effective as a defensive formation, which makes sense since Wall of Blades can only be used when you are charged. So keep in mind that if you're looking for an offensive formation there are better options out there, like the Boar Snout or a similar formation.

Monday, May 30, 2022

In Defense of: Castellans of Dol Guldur

This is a sweet paint job (not mine...)
Photo Credit: Azazel's Bitz Box

Tiberius: Today Rythbyrt is back with a defense of one of his favorite units: Castellans of Dol Guldur. I know what you're thinking: Castellans are horrible heroes who can't be defended - not even by the TMAT team. While I could attempt a defense of the units, my experience has been tied to fighting them, not running them. So, I leave you to Rythbyrt to learn how these guys work.

Rythbryt: I'll be honest: when Tiberius asked me to do this write-up, I had two instant thoughts:

1. Absolutely, 1000% YES!

2. Wait, people don't like Castellans?

Apparently, people don't like Castellans. And I'm not sure why. They're one of the most unique profiles in the game. They're incredibly flexible. They pack a surprising whallop. They're spooky. I think the models are dope (although I admit the one with two blades is a tad flat). And they even have their own fight song!* So why all the hate?

No idea. But if your local meta isn't a fan of Castellans, yet loves all sorts of stupid, popular list ideas (like pretty elves, slogged dwarves, a mounted horse king, massed rangers, or five magical wizards storming a spooky castle), have I got some a LOT of thoughts for you!

(Gosh, I've missed this...)