Featured Post

The Scouring of the Shire, Part 2: The Ruffians Arrive

Good morning gamers, We're back for scenario two of the Scouring of the Shire campaign and today Bill Ferny is back, leading a ragtag ba...

Saturday, September 30, 2023

Fantasy Fellowship Deep Dive, Part 6

Good morning gamers,

We come to it at last, the big battle of our time! Indeed, in Fantasy Fellowships, the saga of the siege of Gondor is actually split into four missions (all of which are found in Gondor at War and NOT in Quest of the Ringbearer). While our last segment focused on the journey of Frodo and Sam through the Dead Marshes, Ithilien, the pass of Cirith Ungol, and the plains of Gorgoroth, our journey today returns to the six other living Fellowship members and their part in the struggle at Minas Tirith. Let's dig into it!

Part 6: The Pelennor Sequence 


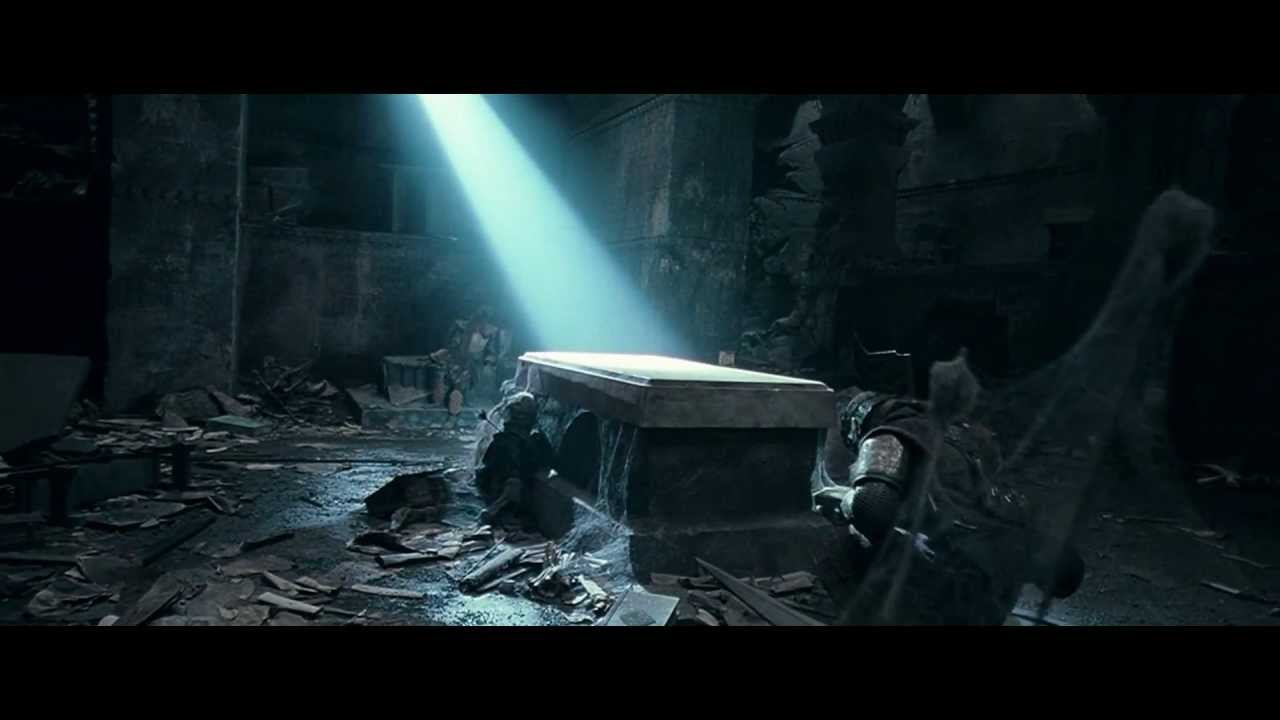
Photo Credit: Gondor at War

We're almost done with Fantasy Fellowships and this part, like Part 3 (the Amon Hen to Helm's Deep missions) basically has 1-2 missions for different groups of your Fellowships. As such, this is one of the few parts where your scenarios can be played out of order and everything is fine (just remember to play Atop the Walls before Denethor's Madness). Certain scenarios in Part 3 can be played out of order (whether you do Warg Attack before Ambush at Night doesn't actually matter) and you can play Eomer's Return from Part 4 before the other two scenarios if you want to (The Deeping Wall is Breached and Ride Out), but Part 6 is by far and away the most flexible - which is good if you need to juggle tables among several players. Our four scenarios are (mostly) filled with allies and we get to use the following models: 

  • Merry (1 scenario) 
  • Pippin (2 scenarios) 
  • Aragorn (1 scenario) 
  • Legolas (1 scenario) 
  • Gimli (1 scenario) 
  • Gandalf (2 scenarios) 
  • ALLIES: 
    • Irolas (1 scenario) 
    • Beregond (2 scenarios) 
    • Theoden with everything (1 scenario) 
    • Eomer with everything (1 scenario) 
    • Dernhelm (1 scenario) 
    • Gamling with everything (1 scenario) 
    • Deorwine (1 scenario, probably supposed to have a horse) 
    • Elfhelm with everything (1 scenario) 
    • Captain of Rohan on horse (1 scenario) 
    • The King of the Dead (1 scenario) 
    • 24 Warriors of Minas Tirith (standard gear) 
    • 24 Riders of Rohan (1 scenario, standard gear) 
    • 20 Warriors of the Dead (1 scenario, no war gear) 
    • 6 Riders of the Dead (1 scenario) 

That's a lot of guys - most of the scenarios have 24+ warriors and all have 1+ allied heroes. The foes we'll be facing are (mostly) F3 warriors and F4 heroes (mostly without Heroic Strike): 

  • Zagdush (1 scenario, F4 with Strike) 
  • Gothmog (1 scenario, F5 with Strike) 
  • Gothmog's Enforcer (1 scenario) 
  • 2 Orc Captains with shields (1 scenario) 
  • 3 Morannon Orc Captains with shields (1-2 scenarios) 
  • Denethor (1 scenario, F5 without Strike) 
  • Guritz (1 scenario) 
  • 36 Orc Warriors (1 scenario, standard gear) 
  • 36 Morannon Orcs (2 scenarios, standard gear) 
  • 4 Citadel Guard (1 scenario, F4) 

Thursday, September 28, 2023

Thoughts on the War in Rohan Siege Scenarios

Good morning gamers,

The Matched Play scenarios give players a lot of different ways to play an MESBG game - with eighteen scenarios in the Matched Play Guide, you can have scenarios where you try to control parts of the board, kill off certain heroes, or "just kill things." No matter what your preferred style of play is, there's a scenario that's probably going to work out well for you.

But the one kind of scenario that isn't available in Matched Play is a siege scenario. There are rules for fighting sieges in the main rulebook and additional rules that were provided in the War in Rohan supplement, which included two scenarios - but the Matched Play experience is siege-free, and I think most players like it that way. I mean, the walls can make things really one-sided, right?

Well, I decided to test this theory by running a tournament using the siege rules/scenarios provided in the War in Rohan book (with a few modifications) and after MANY games of defending walls and villages (and attacking them), I have quite a few thoughts on how siege games work, what really doesn't work in a siege game, and ideas for how to take what GW has given us and turn it into a fun tournament-play experience. Let's dig in!

Siege Scenarios

There are two siege scenarios in the War in Rohan supplement - one for attacking a wall-less village (Defend the Village) and one for attacking a city with a wall (The Grand Siege). The fact that there are two scenarios you can play (one with a wall, one without one) is incredibly good, as it allows all-cavalry armies to participate in siege events without having to worry about dismounting to carry battering rams or climbing walls.

If you plan to run a siege event, I would highly recommend that you change the scoring requirements - the Grand Siege scenario is not optimized for event play and minor tweaks to the Defend the Village scenario would be recommended as well (though they are much less necessary).

Monday, September 25, 2023

Nemesis: How To Fight The Balrog

Good morning gamers,

We're kicking off a new series here at TMAT today: Nemesis! I've been planning this series for a while now and it was born, actually, out of the In Defense Of series (where we take models that lots of players think are worthless or "bad" and explore how valuable they can be/how to make them work).

Nemesis tries to do something similar: we're going to be looking at models that lots of players say are "too good" or "unfun" or "unfair" or "overpowered" or "pick-your-favorite-phrase-that-means-there's-something-insanely-too-good-about-it" and explore how to beat those models. Sometimes these models will have a Legendary Legion, an army bonus, or an alliance that causes them to go from "fine/fair" to "too good/overpowered" and when that's the case, we'll flag it in the article.

Our first stop happens to be one of my favorite models and one that, when run well, can REALLY ruin your day. Yes, it's Devin Moreno's least favorite model in the game: the Balrog. This guy is not only one of the most expensive models in the game (and tied for most expensive model available to the Moria faction), but he's also the figurehead of one of the most feared Evil Legendary Legions in the game. Let's see what's up with this big guy that makes playing against him so unfun.

What Makes The Balrog So Hated?

Photo Credit: Warhammer Community 

The Balrog begins with unparalleled stats: he's F10 (innately higher than any other model in the game), he's S9/D9 (so Rending doesn't help enemy monsters wound him more easily and he's wounded on 6s or worse by basically everything in the game), he's got 4 Attacks (on-par with most big heroes when they're mounted and on the charge, better than most other heroes), 10 Wounds (less than Smaug, sure, but on-par with Mumaks and better than anyone else), 10 Will and Resistant to Magic (because locking down monsters with magic is a good idea), and C7 with Fearless (because, you know, why not have both).  His only real "down-side" in his core stats is his 6" movement, which is "fine" on a 60mm base, but can mean that getting his positioning requires some thinking. Not having any Might points or Fate points is also a knock to the profile, but as we'll see in a moment, there are mitigations for this.

Thursday, September 21, 2023

Thoughts on the German Scoring System

Good morning gamers,

As a preliminary note, the blog just passed the 2 million (reported) page views mark - from all of us here at TMAT, thanks for taking the time to read what we're posting! 

This past June, we here at TMAT ran our annual Grand Tournament and we decided to use the "German Scoring System" for awarding tournament points instead of our usual 2-to-10 system for major/minor wins/losses (more on this later). The German Scoring System was different and had some very interesting take-aways from our tournament. While there are certainly other players who could weigh in more on how valuable this system is, I wanted to present my review of the system based on the 16 games we had at our event and provide some observations about it. Let's dig in!

What Are The Distinctives of the German Scoring System?

To be pedantic, in most tournaments (especially those in America), players compare their victory points (VPs) and are awarded a victory or loss based on whether one player has more VPs than the other (a victory) or fewer VPs than the other (a loss). These are either "major wins/losses" if one player has double the number of VPs of the other or "minor wins/losses" if one player has more but not double. In many tournament settings, a major victory is only awarded if the winning player scores more than X number of VPs to encourage them to "actually play the scenario". I have recently been implemeting this in our tournaments, requiring 6 VPs to be scored to get a major victory. Without this limitation, a 2-1 victory is awarded the same number of Tournament Points (TPs) as a 7-2 victory or a 12-0 victory.

Depending on whether you get a major/minor victory/loss, you get a certain number of TPs. How many TPs you get for a major/minor win/loss or a draw depends on your tournament, but we here at TMAT have traditionally done 10 points for a major win, 8 points for a minor win, 6 points for a draw, 4 points for a minor loss, and 2 points for a major loss.

If you compare this to the MESBG Matched Play Guide, you'll find on page 5 that it's recommended that a win (any margin) is awarded 3 points, a draw is awarded 1 point, and a loss gets you no points. VPs are used to break ties (first by VP differential, then by total VPs scored). Further tie breakers are recommended here as well, including most enemy army leaders killed, number of secret objectives completed, or favorite opponent rankings. This is different from what we do, mostly because I feel it has less granularity (and because ending your day with 0 TPs sounds cruel to me).

With the German Scoring System, however, there are 20 points up for grabs and they're allocated between the players based on how many Victory Points they receive in the round. Here's what the grid looks like (and for more information on this grid, check out the Unexpected Podcast episode on this subject - it's excellent):


As you can see, the scoring for this is going to be . . . huge. Very huge - especially if one side dominates and the other gets slammed. But what advantages are there for this kind of system? Well, let's take a look at some of the reasons that we found . . .

Monday, September 18, 2023

Armies of Middle-Earth SBG: The Kingdom of Moria in the Middle-Earth Strategy Battle Game

And they say Gimli wasn't in Moria...
Photo credit: Quora.com

Something something something BALIN!!!

So there's more to this list than just Balin, of course (FLOI!!!). But if you're opting for the Kingdom of Moria instead of a generic Khazad-Dum list, you're by definition opting for Balin (and his mates) instead of Durin (and his mate). As we'll discuss in the rest of this write-up, that's not a bad thing (Balin is good, and a couple of his mates are great). But that's the trade-off.

Having said that, apart from the changes to the hero suite (two subtractions, five additions) and alliance matrix (which is all Red), you don't lose really any of the options in Khazad-Dum... which means that if you came over here after reading our army summary of Khazad-Dum, you're going to see a lot of repetition. I've tried to front-load some of the differences to save you time... but as much as I love you guys, I wasn't going to re-write everything I've already rewritten.

Baruk Khazâd! Khazâd ai-mênu!

Army Quick(ish) Hits
  • Strength: A solid (though restricted) suite of heroes. Believe it or not, Moria actually has a better suite of heroes than Khazad-Dum does. Yes, your top-end talent is limited (Kingdom of Moria has no power-curve equivalent to Durin), but apart from Durin, the only other model you absolutely can't take is Mardin... and let's be honest, even most Khazad-Dum players weren't going to take Mardin unless the points level is very high. Every other hero, however, is on the table. Dwarf Captains provide that all-important Heroic March, which you will usually want because (a) dwarves move only 5" base, (b) this particular dwarf army has no cavalry options, and (c) Durin, unlike Balin, doesn't have access to Heroic March for some reason. At Fight 5, Strength 4, and Defense 7 base (8 with shield), they're also reliable tanks when they aren't pushing your army from place to place. If you'd like to double-down on your support role to get both speed and magic defense, Dwarf Kings have access to Heroic March and Heroic Resolve, with an extra point of Will (2/2/1 Heroic Stats), higher Fight (F6), and base Defense 8. Plus, with the errata, they're now Heroes of Valour, with the ability to bring up to 15 warriors (and ally with other yellow/red factions... which is all of them). The Dwarf Shieldbearer offers a way to buff your force's global courage in the absence of Bodyguard, while also offering a buff to some of your combat pieces with his ability to call free Heroic Combats sometimes (In Defense of the King). Last but not least, the King's Champion is one of the best generic heroes in the game, capable of slaying heroes or troops (F6, S5, 3 Attacks, and Heroic Strike with 2/1/1 Heroic Stats) or tanking something really nasty (2 Wounds, D7-9, and 1-5 Fate, depending on where his supporting Heralds are). Oh, and he comes with two heralds with two 3" banners included in his points cost, for fewer points than a Great Beast of Gorgoroth. Finally, Kingdom of Moria gets access to four additional heroes to help take the "sting" out of losing Durin (and Mardin): 

Saturday, September 16, 2023

Fantasy Fellowships: The Erebor Reunion, Part 5c

Good morning gamers,

This post was supposed to go up last weekend, but the impending arrival of Centaur's newest "colt" required a delay. We're wrapping up Part 5 of Fantasy Fellowships right now and we're tackling both the Cirith Ungol mission and the Plateau of Gorgoroth. After two big defeats in the last few missions, I get to use . . . potentially none of my Fellowship members in this first mission! The second mission will probably prove to be quite difficult to win (though a draw is quite easy to get), but we'll see how it goes. Let's get into a scenario where I get to use some of my favorite Mordor units - Mordor Uruk-Hai!

Cirith Ungol

We deployed our models one at a time, keeping our new models at least 2" away from a deployed enemy model (more on this later). The castle proper was pretty packed, as you can see:


Let's get into Turn 1!

Turn 1: Priority Good

I charged into as many guys as I could, focusing on securing the top level. My goal was to stall out his guys on both of the second tier flanks and then bunker up on the top tier. A lowly grunt picked up the coat and the dogs entered Cirith Ungol.


In the Shoot Phase, an Orc archer on the outer wall didn't hit anyone. In the Fight Phase, I declared a Heroic Combat with Shagrat (1/3M), who diced up the guys he was fighting and moved towards the ramp where Gorbag is:

I probably could have gotten Shagrat into combat again . . . but I forgot . . .

The fighting went pretty well for me - I lost a few fights, but only lost 3 models! In trade, I killed 5 Orcs (7 if you count Shagrat's Combat). 


With an initial model count disparity of 9 models, we're closing the gap nicely!

Thursday, September 14, 2023

If Tiberius Were King For A Day: Top 5 Heroic Action Changes I'd Make

Good morning gamers,

This is the last post in this mini-series where I talk about small changes I'd make to MESBG that I think would have good impacts. It's also our eight-hundredth post ever . . . wow, we've been busy. :-) One of the distinctives of the MESBG system (and part of what I think makes it the best tabletop game in town) is the heroic resources you get for your heroes - specifically Might points. Will and Fate are great and all, but Might points allow your heroes to be more heroic when you need them, and nowhere is this more visible than in the specialized Heroic Actions that heroes can have. 

Unfortunately, not all heroic actions are equal - some are viewed as incredibly niche and others border on completely unusable (and that's from a generous point of view - some players definitely DO see some of the heroic actions as pointless or a waste of time). Today I've taken five heroic actions that I think need a little help and offer a simple fix to each that I think would make them go from eh-to-ooh - let's see what they are!

Heroic #1: Heroic Accuracy

This is probably my least controversial heroic action to change, since some players already see this is a great heroic action. I've heard critique on my post where I talk about Heroic Accuracy being a waste of Might, claiming that the opportunity to hit a priority target past multiple in-the-ways makes the heroic action incredibly good. While many competitive players are in agreement that Heroic Accuracy can help you immensely, I can't get past the fact that in order for it to take effect, you need to a) hit with a shooting attack first, b) have in-the-ways between you and your priority target, c) have to fail in-the-way rolls that then turn into successes, and d) have to wound that target after you pass the rerollable in-the-ways. If any of these conditions aren't met, the Might point spent on Accuracy is wasted (for more on this, read the post linked above).

Monday, September 11, 2023

Back to Basics: The One Ring in MESBG

Good morning gamers,

This is our last post in this round of "back to basics" and we're covering one of the most exclusive pieces of wargear in the game: the One Ring. You can't have a game based on the Lord of the Rings without the Ring in it and it's perhaps fitting that the Ring has several pages of rules dedicated to it. I've written two articles on the One Ring since the updated rules came out in 2018 (one in 2019 and one in 2021), but both of those articles were focused on how the Ring had changed from previous editions - or as a means of bringing together previous FAQs into one place. What our focus will be in this article is to summarize the rules for the Ring, breaking things down so someone who's new to the game can get their head around how the Ring works. With that, let's talk about the Ring!

Who Can Wear the One Ring?

There are only a handful of models who can wear the One Ring - we all know that the main stories of the Hobbit and the Lord of the Rings focus on Bilbo and Frodo. We also know from the story that other characters have carried the One Ring, including Sauron, Isildur, and Gollum. In MESBG, this translates into seven profiles that can carry the One Ring: The Dark Lord Sauron (who made it), Isildur (who took it from Sauron), Gollum (who "was given it" after Isildur lost it - but this is not the Smeagol profile), Young Bilbo Baggins (from Thorin's Company - he "stole" it from Gollum), Bilbo Baggins-Master Burglar (from the Survivors of Lake-town), Old Bilbo Baggins (from either the Shire or Rivendell - not sure which is more common on the tabletop), and Frodo Baggins (who, of course, destroyed it . . . sort of . . . he was heavily involved in its destruction, at any rate).

At first blush, you might think, "Well, how often am I going to fight these guys? I mean, they're only from a few factions, right?" Well yes - and often times these guys won't be allied with too many people because their alliance matrix stinks (Barad-Dur and Numenor are basically Impossible Allies with everyone) or because they themselves are really expensive and don't feel like they're worth taking "just" to get the Ring (like Bilbo in Lake-town or Frodo in the Fellowship). One would think this is a set of rules you don't need to know.

And yet, many players view the benefits of the Ring as highly valuable in a competitive setting - Numenor may have a very restrictive alliance matrix, but a F6 Isildur with the Ring is not something you want to trifle with (more on that in a bit) and can be allied historically with Rivendell to make up for some of the list building limitations of Numenor. Barad-Dur might not have allies, but since they have most of the profiles available to Mordor, they're pretty well developed on their own. The Fellowship usually doesn't see Frodo allied around, but if you're playing at lower points levels, the likelihood of running into either the Breaking of the Fellowship LL or the Rangers of Ithilien grows dramatically.

Thursday, September 7, 2023

Cavalry Charge: The Importance of Reserves and the Battle of Tinchebray

Good morning gamers,

Today we're wrapping up (at least for now) our series on cavalry by talking about the most important principle for using cavalry in MEBG: reserves. If cavalry models can get the charge in MESBG, they can be absolutely devastating - often doubling their Attacks when dueling and doubling THOSE dice when fighting most infantry models. A well-timed charge can be absolutely crushing for an enemy force, but it's that NEXT turn that can really seal the deal. If you commit all of your cavalry on one big charge, you may be forced on the following turn to risk several Heroic Moves just to have the chance of getting in a few charges. Since counter-calling Heroic Moves can be a waste of Might points, it's better to have some cavalry who can't be charged on the following turn so that someone can get charges in if you don't get to move first. To illustrate this, we turn to an important battle in history - the Battle of Tinchebray!

The Battle of Tinchebray

As usual, you can find a great visual summary of the battle on the BazBattles channel on YouTube - I absolutely love their stuff! In 1100, the ruling King of England, William Rufus, the son of William the Conqueror, was killed in a hunting accident. With no heir of his own, the bid for the rule of England was up for grabs between his brothers Robert Curthose of Normandy (who was on the First Crusade at the time) and Henry Beauclerc (who was in England at the time and was crowned in Robert's absence). When Robert got back to England in 1101, Robert got some concessions from Henry, but also identified lords who were unhappy with Henry's rule. Robert had difficulties managing his duchy and from 1105-1106, Henry "invaded" Normandy and took various castles from Robert. When Henry besieged Tinchebray castle in 1106, Robert mustered his nobles to drive Henry off.

Robert formed two lines - one with a mix of heavy cavalry and infantry, the other with infantry held in reserve. Henry formed three groups - one with dismounted knights, one with infantry reserves, and the final with heavy cavalry in deep reserves. As Henry's first corps began to falter, the infantry reserves were ordered to support the main line while the heavy cavalry swept around the exposed flanks of Robert's line. Robert saw that his forces were being flanked and called in his reserve forces - but seeing the losses mounting up on Robert's side, his reserves decided not to engage and fled the field. This led to a rout of Robert's forces, but Robert himself was taken captive and imprisoned for life.

We talk about this a lot in these formations posts, but real life isn't always reflected well in MESBG. However, the importance of cavalry reserves is a HUGE deal in MESBG and historically. It's very tempting when you have cavalry to commit them all in one big charge - but that isn't always the best plan. In this formations post, we're going to look at several different formations that will give you cavalry reserves so that you can make sure you get in a good charge on two consecutive turns. Let's take a look!

Monday, September 4, 2023

Back to Basics: Siege Engines in MESBG

Good morning gamers,

Today we're continuing our "back to basics" series and going over the rules for siege engines in MESBG. Like monsters and war beasts (which are technically monsters), the siege engines of Middle-Earth are some of the most iconic things you'll see in the films - whether it's the ballistas and bombs of the Uruk-Hai at Helm's Deep, the trebuchets and catapults during the siege of Minas Tirith, or the "twirlie whirlies" of the Iron Hills, it's undeniable that the game would be worse off aesthetically if these models didn't exist in some form.

But siege engines aren't like other shooting units (for the most part) and they have their own list of dos and don'ts that can give newer players (and old veterans) pause before fielding them (not to mention a negative play experience if you're not expecting their damage output or special rules). In fact, very few FAQs have been issued where at least one siege engine wasn't addressed in some way (indicating that how a siege weapon is used or how it interacts with other units is up for debate by both new and long-time users).

Furthermore, as I was preparing for this post, I realized that while there are "rules for siege engines," every SINGLE rule for how a siege engine works is broken by at least one siege engine - there is so much diversity amongst siege engines, that the rules for siege engines aren't even universal! So today, we're breaking it down (and get used to the phrase "for the most part" - it's already come up and it's going to be coming up a lot more) and trying to make the rules for siege engines clearer for everyone. Let's dig in!