Featured Post

Nemesis: How to Fight Against Isildur

Good morning gamers, This year in this series, we've looked at Gil-Galad, Elendil, and Elrond as the major heroes from the Last Alliance...

Saturday, December 29, 2012

Let It Snow: Battle Board Revisited

So, we're starting "Hobbit month," where I'm going to be focusing on my Dwarf and Goblin armies (and the battle board) in preparation for the new movies. I'm not going to have "Goblin Town" in the titles of the subsequent posts, as I'm going for a Dwarf hold, not a Goblin slum. The work on the board is coming along nicely, as you will be able to see in the pictures below.
The board has been mostly covered in white wall spackle (this 4'x4' panel took up about half of the spackle paste that I had), which will not only protect the styrofoam underneath from the primer to be added later in the month, but also gives the floor an uneven texture. Most of it is smoothed out, but there are some rough patches here and there. You'll also notice that the coating of spackle has left some parts of the styrofoam exposed...this is to get some small depressions from the primer that will later be filled with water effects (we'll see how that turns out).
Not all of the board, though, has been covered in styrofoam. I saw the effect of spray-on primer on a small styrofoam block a few weeks ago, and am hoping that the two trench portions of the map will depress but not wholly disappear. The next update will show the results, once they've gotten everything else covered adequately.
I glued down the town centers, making those portions of the board "civilized" by the terrain. Alternatively, if I place my battle mat on the board, there will be permanent hills/elevated ground. Generally, though, I don't plan on having this covered.
Next week, I hope to have the board primed and I'll show you some of the work done on the units and modular terrain. As a spoiler, I've also been working on some carts and shops for the civilized sections. These can be used as barriers on the town centers, adding some mobile terrain and a good break-up to the monotony. In the unit-department, Thorin's Company (as this is Hobbit month) has finally gotten the rocks on their bases painted. Some of the units who got their names on their bases last time have had them redone (want these to look nice), and a few got some painting fixes done after the bases were painted. A few small modifications have been made to Bifur and Oin, after seeing these characters in the movie (despite their small roles). You'll also see a modification of Ori, who will now be firing a slingshot, instead of looking like he's shooting his throwing axe (yeah, I may or may not have gotten a lot of comments on that conversion). All this and more (like the current look of Groblog) will be yours next week. Until then, happy hobbying and a joyous new year!

Friday, December 28, 2012

What Fun It Is to Ride and Sing a Slaying Song Tonight!

Battle Report: Angmar v. Rohan


Dear Reader,

Merry Christmas!  I hope that this post finds you and yours stuffed to the max after an amazing time with family, friends, or wherever your travels took you.  From all of us here at TMAT, we wish you all a Merry Christmas and a Happy New Year!

I went over Wednesday morning to Donatello's house (because he lives near me) for some festive experimenting, especially in preparation for making some judgment calls in how to use my Angmar forces, in light of my new addition to my Angmar army, courtesy of a Christmas gift from Zorro (thanks, Buddy!  I hope to use him in my next battle report! :) ).  I'm taking a short break from posting on the Grey Copmany, and instead wanted to bring you a special Christmas game: because it seems to fit the Christmas cheer found in the title of this post, we got together to do what no one on this blog has ever done before - a game involving a 100% mounted force.  I will be commanding the Rohan force (as I am the only person dumb enough to do it with this list, ;-D ), and Don will lead the Angmar detachment in a 250-point game (on account of me not owning more cavalry - which I'm okay with, :) ).

Glenstorm's Force: The Dunharrow Detachment (252 pts)
Warband 1:
-Eomer, Knight of the Pelennor Fields with Armored Horse (Army Leader: 130 pts)
-2 Sons of Eorl (Stand-in: Riders of Rohan clearly marked): 44 pts
-6 Riders of Rohan: 78 pts

Donatello's Force: The Chill of Angmar (252 pts)
Warband 1:
-Barrow Wight #1 (Army Leader): 50 pts
-4 Orc Warriors with shields: 24 pts
-4 Orc Warriors with shields and spears: 28 pts
-1 Orc Warrior with banner: 30 pts
-1 Orc Warrior with 2H weapon: 6 pts

Warband 2:
-Barrow Wight #2: 50 pts
-4 Orc Warriors with shields: 24 pts
-4 Orc Warriors with shields and spears: 28 pts
-2 Orc Warriors with bows: 12 pts

Scoring:

Today we will be playing a To the Death game, with the following rules:
  • The game ends when one side is reduced to 25% of its starting force
  • A team receives 1 point if they break the enemy force, and 3 points if they break the enemy force and are not broken when the game ends
  • A team receives 1 point for wounding the enemy army leader, and 3 points if they kill the enemy army leader
  • A team receives 1 point if they have a banner present at the end of the match, and 2 points if they have a banner and their opponent does not when the battle ends
A To the Death game should give us both a chance to see how much firepower each list can pack against each other.  It will also help me test the killing power of each list, which is primarily why I am playing this game.  As both of these armies are looking for a bit more of a biting edge than a tactical/support boost, this will be helpful for me in determining how I use cavs for Rohan and other units and what I accompany my standard Angmar force with in the future.

Glenstorm's Strategy: Okay, in full honesty, I don't know how this is going to go.  I have used cavalry before, but they primarily work only as flankers/harassers, due to spear support making up for the charge bonus.  For today's fight, I'm testing out the Sons of Eorl (as potential accompaniment to Eomer), who will be playtested today by the cavs marked with the "Force" markers on their bases, shown here:


My force today - none of my cavalry are fielding throwing spears in this scenario.
As I have only mounted units, and only 6 of them have bows, I will likely attempt to draw the orcs away from my Riders of Rohan with my Sons of Eorl and Eomer, and will then swing them around to catch the casters, archers, and spears from behind.

Donatello's Strategy: I thought of taking the Dwimmerlaik, as he potentially could make Eomer's Might points less effective (and make Glenstorm think twice about those Heroic Combats he loves to call), but I am opting for the Barrow Wights instead.  Since he only has 3 Will points on Eomer, I'm going to attempt to paralyze the horsemen (which will dismount them), keep Eomer on the ground as much as possible, and then kill 7 guys to end the game.  Simple plan: stay together, guard the casters, kill 7 riders.  Pretty straightforward.

Deployment:

For our game today, we chose a setting on the outskirts of an abandoned town, with a large plain to the South.  It looks like this:


We rolled for placement, and I won, so the placement order worked like this: Eomer's warband, Barrow Wight #2's warband, Barrow Wight #1's warband.  The deployment of our forces looked like this:


And with that... ("Onward, for death and glory!")

Turn 1: (Priority: Good)

The armies move toward each other, with Eomer and the Sons of Eorl out in front, and the Riders of Rohan coming up behind, moving 5" or less, and drawing arrows to fire.  Don charged both warbands forward, aiming for the cover from the ruins.  In the Shoot Phase, my riders were pathetic, and only landed 1 arrow (out of 6) on target, with no wound caused.  With no fights, we moved on to Round 2.

Turn 2 (P: Evil)

Sorry - no pictures this round.  After Don's forces moved up toward the first piece of cover in the ruins (which, I'm guessing, is where his archers will be hiding), I moved Eomer and the Sons of Eorl across the closest piece of terrain, gunning for the far side (in hopes of flanking or forcing a divergence of one of the two warbands).  In retrospect...I probably should have run them behind the ruin instead of in front of it, for reasons that you will see in the next turn.  My Riders of Rohan continued to fan out toward the western portion of the map, and let loose another round of archery that did absolutely nothing useful, :-/

Turn 3 (P: Evil)

Okay: the one thing I did not properly plan for was Paralyze range in the event that I did not get priority.  After moving up his minions (and thankfully being out of charge range, Barrow Wight #1 successfully cast Paralyze on me (2/5W) on a 4.  I risked 1 Will point from Eomer, and successfully dispelled it (1/3W):


So... ("Because it is in style right now...") Barrow Wight #2 also decided to cast Paralyze on Eomer (2/5W), and successfully cast it on a 5.  I used my last 2 Will points to dispel it, and succeeded, as shown below:


The funny thing was dispelling both rolls with exactly the same roll they used (in the second case, the same roll on both dice).  Unfortunately, though, my entire team is now out of Will points, which leaves us completely vulnerable to the remaining 6 Will points present on the other team.  Oh.  Joy...

So, I did what any self-respecting anti-caster army does when they are out of Will points: "Charge!!!"  Eomer engaged one of the Orc Warrios from the northern warband, accompanied by one of the Sons of Eorl, and the other engaged the southern warband, as two of the Riders of Rohan gang up on a spear-supported orc and the rest of the horsemen fan out and form up on the far side, preparing to charge from the rear.

In the Shoot Phase, my archers continue doing absolutely nothing against the enemy, even though 1) their backs are to us, and 2) we have a few D4 targets worth shooting at.  I'm...a bit upset with them right now, :-/


In the Fight Phase, my boys overall make me proud.  Eomer calls a Heroic Combat (1/3M), wins the fight on a 6 (which is important, since he has a banner nearby, and I don't have one), and kills his orc in spades.  He then move on to engage 2 more orcs.  In the rest of the Fight Phase, the Son of Eorl that accompanied Eomer loses his fight against the orc with spear support, and instead of choosing to aim at the D6 Son of Eorl, Don opted (wisely, in my opinion) to attempt to wound the D5 horse.  He rolled a 5 on his To Wound roll, and successfully killed the horse.  Falling from the horse, the Son of Eorl rolled a 6, and with his shield up and a battle yell, prepared to meet his enemies on foot.  Eomer then follows up by killing both of the orcs (who were spear supported in this fight) in his second combat.

Against the southern warband, the Son of Eorl won his fight and killed his spear-supported orc, while the two Riders of Rohan not only lost to the two orcs, but the orcs successfully wounded both of them, killing the riders, and causing the horses to flee (as I have no infantry to keep them on the field).  Not.  Good.


Casualties: 4/22 for Angmar (7 to break point), 2/9 for Rohan (3 to break point)

Turn 4: (P: Evil) ("You've GOT to be KIDDING ME!!!")

Okay - I hate doing this when I only have 2 Might points remaining and I will only include 3 units total in the radius, but I needed the charge to preserve my troops.  I called a Heroic Move with Eomer, and my Sons of Eorl and their fearless leader charged into the enemy.  Barrow Wight #1 then successfully cast Paralyze on Eomer on a 5 (4/5W), and Barrow Wight #2 successfully cast Paralyze on one of my Riders of Rohan on a 6 (3/5W).  The rest of the orcs engaged, and the only Rider of Rohan that was not engaged failed his Courage Test to charge Barrow Wight #2, so he is rooted in place.  The fights looked like this:


("...I've seen better matchups...")  In the Fight Phase, Eomer automatically loses his fight, so Don opted to start with that one.  The orcs deal 2 wounds (interestingly enough, the 2H weapon orc, who only needed 5s, missed on both of his), both of which were saved by Fate (2/3F).  The mounted Son of Eorl won his fight, and successfully killed both of the orcs in base contact with him.  Both of the Riders of Rohan in this shot lost their fights, though no wounds were dealt.  All told, very few casualties this round.


In the End of Turn Phase, the Rider of Rohan failed to dispel Paralyze, and Eomer rolled a 5, which he promoted to a 6 using his last Might point (3/3M).  ("Rise, mighty warrior!!!") ("...That was supposed to hold you long enough for me to kill someone!  GUYS!!!  What's going on!?!?!!?")


Casualties: 6/22 for Angmar (5 to break), 2/9 for Rohan (3 to break)

Turn 5 (P: Good) ("Yay!!!")

There is one good thing about an opponent who takes no heroes with Might points - no worries about Heroic Moves. :)  My horsemen had the advantage of the charge this round, so the Rider of Rohan charged Barrow Wight #2 (to shut down his remaining 2 Will points for a round), my other units engage, and all of the excess orcs gang on the paralyzed Rider of Rohan ("Get the kill guys - just get the kill.").


Barrow Wight #1 attempts to cast Paralyze on Eomer, and fails it with a 1 ("Finally - a spell that doesn't work...") ("That's bad news..."), and charges Eomer.  The orc archers follow suit and join the melee, and the board looked like this:


In the Fight Phase, the men of Rohan must have gotten mad or something, because they were winning fights everywhere, even past banner support.  Eomer wins his fight, and wounded Barrow Wight #1 on a 5 - which is the joy of charging with an Eomer that becomes S5 when on the charge, :)  The dismounted Son of Eorl won his fight, and wounded one of the orcs in his fight.  The mounted Son of Eorl won his fight against an archer, spearman, and 2H orc, put all 3 on the ground, and successfully wounded all three of them. ("...Wow: I was counting on winning that fight.") (*Blank stare*) ("I...didn't see that one coming either...")

Next to him, the Rider of Rohan lost the fight to the shielding orc spearman ("Thank you for contributing, soldier - now, next turn, please kill the rider!"), and while the Rider of Rohan won his fight against the Barrow Wight (and put him on the ground), he failed to wound him.  The orcs killed the paralyzed Rider of Rohan (Orc spearman: "Death without honor, Strawhead!!!"), but the victory was a fleeting one.  Near them, the Rider of Rohan not only won the fight, but successfully wounded both of the orcs in the fight.  The fights ended like this:


Casualties ("Do I want to see the tally from that round?"): 13/22 for Angmar (broken force), and 3/9 for Rohan (2 to break).

Turn 6 (P: Evil)

Donatello Strategy: Okay - we have a serious problem.  Thankfully, I have unhorsed one of the Sons of Eorl and Eomer, but the rest of these horsemen are going to ride right over us in a turn or two unless we can take them down.  He just scored 3 points by killing my Army Leader (well played there, Glenstorm), and he is two soldiers away from killing my banner as well, which is potentially 2 points for me if he survives.  With an additional 1 point from breaking my force, I need to break his army, or he will be up on me 6-2.  Simple plan: I'll paralyze the mounted Son of Eorl, which will get rid of the horse, and then I'll gang him and the rider on the end, assuming that enough of my men stand their ground after we courage test.  That will break his army, and force his men to courage test to stay in the game.


Barrow Wight #2 passed his Courage test (Outcome: 10), got up for 3" of his movement, and successfully cast Paralyze on the mounted Son of Eorl (4/5W) before moving to a central location where everyone could see him.  The two spearmen on the far western part of the map were out of range, and one of them chose to run ("Oh well - there goes my ganging strategy on the far horseman.").


In the Fight Phase, Eomer won his fight against the spearman that tagged him, and wounds him.  The two westernmost Riders of Rohan lost to the orcs, but both of them failed to wound their targets ("GUYS!!?!?!?!?").  The Rider of Rohan near the well won his fight, knocked the spearman to the ground, and wounded him.  The Son of Eorl failed to wound the spearman in his fight, and - lo and behold - the spearman and bannerman failed to wound the paralyzed Son of Eorl ("This game is going down - I give up on these guys...").

In the End of Turn Phase, the Son of Eorl fails to roll a 6, and thus is still paralyzed.

Casualties: 16/22 for Angmar (1 to 25%), 3/9 for Rohan (2 to break)

Turn 7 (P: Evil)


Barrow Wight #2 passes his Courage Test (Outcome: 10), and fails to cast Paralyze on Eomer with his last Will point (5/5W).  One of the orc spearmen ran away, and others tagged as many men as they could around the paralyzed Son of Eorl.  With this orc counting as a casualty, though, Donatello's force is at 25%, meaning that we will finish up the round, and the game will end.  One of my Riders of Rohan failed his Courage test to charge the Barrow Wight, so he was rooted in place; his blood brother charged the bannerman that had engaged the paralyzed Son of Eorl, leaving the board looking like this:


In the Fight Phase, the Barrow Wight failed to wound the paralyzed Son of Eorl (*Drops head*), and the Rider of Rohan knocks over and kills the bannerbearer.  Just below them, the orc archer wins the fight and slays the rider ("Whoa - where did that come from?!?!?!") ("A little too late, guys - this fight's over.").  Both Eomer and the Son of Eorl lose their fights to the shielding spearmen, and with that, the battle is ended.

Final Casualty Count: 18/22 for Angmar (less than 25%), 4/9 for Rohan (1 to break).

Final Score for Rohan: 3 points (break enemy force without being broken) + 3 points (kill enemy Army Leader) + 0 points (no banner at the end) = 6 points

Final Score for Angmar: 0 points (enemy army not broken) + 0 points (no unsaved wounds on Eomer) + 0 points (no banner at the end) = 0 points

Final Count: 6-0 for a Major Victory for Rohan

Post-Game Assessment by Glenstorm: Well, I anticipated a bumpy ride, but I had no idea it would turn out like this!  The truth is, the entire game was a display of grace on my forces.  Eomer got up after only 1 turn of paralysis, and the 2 wounds dealt in that round were saved by Fate with no Might points required.  My Sons of Eorl were not pasted by overwhelming fire.  Critical rounds saw no magic coming out against my force.  In retrospect, though, as much as I needed to save my Son of Eorl, I should have left his banner alone and let him finish the game 6-2.  I will likely never run a full cav force in a tournament, but using it every now and then in games like this is very...invigorating...and keeps me on the edge of my seat, :)

Post-Game Assessment by Donatello: The strategy started well - we forced Rohan to commit when only a handful of their men could actually engage my force, and we even started off melee combat with 2 kills.  The two turns that followed that round were horrendous, though, and that's what lost us the game.  Had we been able to capitalize on stunting the riders, tying down the hero/elite units, we could have easily overran them.  I'd definitely be up for a rematch in the near future.

Stellar Unit for Rohan: Son of Eorl.  These guys, at D6 with Armored horses that can move 12" provide you with a 2-attack unit (3 dice on the charge when mounted) that can pack a punch against enemy infantry, and wins fights in scenarios like this off of their F4.  I don't know how this game would have turned out if he had playtested an uruk force (Rematch, Glenstorm? ;) ), but for this game, they were exactly what my force needed when they needed them.

Stellar Unit for Angmar: Orc Spearman.  Since the Barrow Wights are heroes, I'll forego picking them for this post, even though they paralyzed four units and stunted two charges through failed Courage tests.  Orc spearman with shields offer you a D5 option that allows you to counter horsemen with more dice without the risk of being bowled over by them if you lose the fight.  This was best seen in Turn 3 when we trashed the Riders of Rohan that engaged my lonely orc swordsman.  They also give you a chance to tag heroes/elite units to tie them up long enough (hopefully) for your units to capitalize on other weaker units.  I really like them.

My tactics post for the Grey Company should be up over the weekend, so keep an eye on the site!

Watching the stars,

Glenstorm

Monday, December 24, 2012

Grey Company - Army Summary

Dear Reader,

Hope you enjoyed the last post!  I've really enjoyed taking a step back and thinking about my favorite army, and I look forward to the next two posts as we further discuss the unique civ we call the Grey Company.  In the last post, we discussed the named heroes of the GC force.  In this post, we will discuss the unnamed heroes (that work a lot like regular units), and the limited supply of units available to Arnor.

It is worth noting upfront that when it comes to units, Grey Company players need to take two factors very seriously.  First, you do not have a lot of units in your list.  This means that 1) your strategies are limited, as you only have certain options available to you by the nature of the list, and 2) most of those strategies can be predicted by your opponent well before the match.  This means that most of the tactical work for a Grey Company player is going to come in the spur of the moment - and for those of us who primarily play Warhammer for the adrenaline kick, we wouldn't have it any other way, :)

Second, almost all of your units (with the exception of the Warriors of Arnor, which I'll discuss later) are D4, and will be quite...squishy...in melee combat if they do not win the fight, so you can quickly rake up losses if you are unwise or indifferent in picking your combats in a given battle round.  Since you will likely have one of the lower numbers of units in a given tournament, a low break point can spell disaster for your force if you are careless with your units.

Unnamed Heroes

Ranger of the North
The Ranger of the North is probably the "rank-and-file" hero of every Dunedain force, primarily because, for 25 points, he does almost anything you could ask for a ranger.  Good shoot value, good fight value at F4, and S4 for killing blows when you need it.  Couple that with D5 and the 1M/1W/1F profile, and you have a hero that can provide a tactical advantage in crisis scenarios.  Heroes like this will never replace the need for an Aragorn or Halbarad, but they provide good all-around support for the list as rank-and-file heroes.

The Ranger of the North is also unique, in that it is the only unit in the game that can purchase the armor upgrade (from D4 to D5) for 1 point - all other heroes purchase it for 5 points.  The Ranger of the North is exactly the same as the Dunedain hero, with this exception: Dunedain are D4, and Rangers of the North are D5.  For those familiar with the Gondor list, picture Damrod (whom you can get for 20 points) with Courage 5 (instead of 4), and the ability to take a horse (6 points) and a spear (1 point).

As a general rule, I would not recommend taking the horse for these models (waaaaay too tempting of an archery target), though I can see the utility in mounting them for greater mobility, the charge bonus, and knocking enemies over when you win the fight.  GW doesn't sell a model for mounted Rangers of the North, so you're on your own as far as that goes, :)

To conclude, these are my favorite units for Grey Company - I highly recommend them in every GC force you build.

Grey Company

I...honestly don't know why this unit exists on the GW website, :)  Except that maybe 1) GW wanted to make a new model for a limited army list, 2) they wanted a Ranger of the North-style unit that had chainmail already cosmetically equipped, or 3) the Perry brothers were just plain bored. :)  Interesting enough, in the new Kingdoms of Men sourcebook, the Rangers of the North profile uses a Grey Company model picture, which seems to indicate that they have been lumped together into one unit: the Ranger of the North.

This unit is the original version of the Rangers of the North (being released a few months before the Rangers of the North blister was released), and have the exact same stat line as the Rangers of the North: 6" Movement, F4/3+, S4, D5, 1A, 1H, C5, with 1M/1W/1F for 25 points (26 with a spear, and the possibility of a horse for 6 more points).  Their usage is exactly the same as a Ranger of the North, because...they're exactly the same as a Ranger of the North, :)


Dunedain
A few of my Dunedain models.
If you want to save 1 point by having a D4 version of the Ranger of the North/Grey Company model, the Dunedain is your man.  At 24 points, the Dunedain is the exact same model as the Ranger of the North, except that it is a D4 unit instead of a D5 unit.  Is there an advantage to this?  Yes - if you are fighting an army that is primarily S3, they will be wounding D4s and D5s on the same roll, so there is no strategic advantage to being D5.  This is especially the case if you find yourself fighting Elven armies (we'll get to their heroes later), where both their archery and their hand attacks are at S3 - when S2 bows (human bows or orc bows) or crossbows at S4 are being used, there is a definite advantage to being D5, as your enemy will wound on 6s instead of 5s for bows, and 5s instead of 4s for crossbows.

In the unlikely scenario that you face Elven heroes, Dunedain (and Rangers of the North/Grey Company can also fall under this as well) have one simple rule:

You shouldn't.

If at all possible, you should attempt to avoid engaging them.  There are a few reasons for this.  First, you have a lower Fight Value, and only 1 wound with 1 Fate Point: chances are, you will not live to see the morning.  Your higher tier heroes may survive (Aragorn and the Twins come to mind), but remember: these units are very expensive, are usually only D5, and in the case of the Twins, they're elves, so I'm not counting them here, :)

In most cases, I use Dunedain as my spear units, paying 25 points for Rangers of the North, and 25 points for Dunedain with spears, giving me more options for spear support, and incentivizing my strategy of keeping them in the second rank for archery protection.  This also allows me to save their Might points for melee combat, which is where I prefer to use them.  Dunedain also cannot take horses, so they are limited to infantry-style units (unlike their Ranger of the North counterparts).

These heroes, unlike the ones mentioned in the last post, form the core of your army's staying power and longevity in a fight, and serve as the glue that keeps the team together.  With all of that before us, let's examine your unit choices in light of these heroes.

Captain of Arnor

The Captain of Arnor is a basic captain: at 50 points, he resembles his Gondorian counterpart, with a F5/4+, S4, D6, 2A, 2W, and the 2M/1W/1F profile.  He is uniquely Arnorian in both his Fight Value (5, instead of the Gondorian and Rohan F4), and in his Courage value (3, instead of 4).  He can be given a bow (for an archer commander) or a shield (for a front-rank commander), which, when coupled with his heavy armor, makes him a capable captain.  If you are looking for a low-cost hero, he may be a good option, though watch his Courage tests: he will not be the most reliable hero for "Stand Fast!" purposes.

Units

Rangers of Arnor
Rangers of Arnor defending a ruin.
For rank-and-file infantry, Rangers of Arnor are a very light unit that can pack a punch.  They boast the typical S2 bow for men, are S3 like most other non-heroes of the race of men, and wear light armor, making them D4.  At 8 points (with the opportunity to use a spear for 1 point), they offer you a very versatile rank-and-file unit.

Unlike most infantry, the Ranger of Arnor has the ability to both shoot at enemies with a 3+ to land a hit, and also boasts the coveted F4, allowing them to beat most Evil infantry, and tie most Evil cavalry and heavy infantry.  Because these units are D4, it is most important for your survival as a Grey Company commander that you keep casualties to a minimum, thus matching up units according to Fight Value - and preferably with banner support.  I'll discuss this further in my next post on tactics, but suffice it to say, keeping your Rangers of Arnor in statistically strong match-ups is a necessity for winning the scenario.

Rangers of Arnor also offer you an opportunity to field both a cheap volley line that can also hold its own in close combat, and the opportunity to field a much larger (or multiple) volley lines.  With 10 units with the same bow required to volley, most civs can only purchase one.  Since every unit in the Grey Company has the same bow, you can easy have over 20 bows in a given scenario, allowing you to fire from very long range at multiple parts of the board.  With your forces then rolling at a 3+ when your enemy closes distance, the Rangers of Arnor becomes a powerful force for whittling an enemy down before they hit your line.


Warriors of Arnor


I have caveated the Warriors of Arnor several times in the last post, and it is high time I explain why.  Warriors of Arnor are the exception to virtually everything in an Arnor force, and while this means that they can fill in gaps that are caused by your other units, they are also highly unwieldy as allies to most GC lists, and are thus not commonly used with them.  You are more likely to see them used in a strict Arnor force than teamed into a Grey Company force, and there are a few reasons for this, which we will discuss under their weaknesses.

Warriors of Arnor work pretty well with Aragorn, the Twins, Arathorn, and Halbarad, but all of those heroes are more independent in their nature, and thus work well with almost any unit.  If you are looking for infantry that will support your heroes, "these aren't the droids you're looking for" would not be a mind trick in this situation.

What is more, the units are...clunky...in their contributions to the army.  All Warriors of Arnor come with spears, which is exceptional for easy spear support for your soldiers (as they cost only 8 points, which is the same as a Ranger of Arnor without purchasing a spear).  They have F4, just like the rangers, so there is no reason not to place them in the back...except that they are your D6 units, too.  This means that you will always either waste the spear, or waste the armor.  They don't work well in economizing your points for your force.  Just...yeah.  They don't work well with this list.

What is more, they are less dependable than your other units.  With Courage 2, the chances that a Warrior of Arnor runs is on par with orcs and goblins.  Now, as someone who routinely uses orcs, they don't run as much as I thought they would, but in an army of orcs, your numbers are almost always still okay if 5-6 guys run in one round.  In an Arnor army, though, everyone counts - losing more than a few warriors to courage testing could result in catastrophe in a close game.

Not surprisingly, Warriors of Arnor work best with King Arvedui, primarily because of his 12" "Stand Fast!" to keep them all in line, and his D6 to match them.  Other than that, they will primarily offer you a chance at D6, but that's about it.  They lack a ranged option, so you will take a cut to your maximum bow count if you field them, but that is honestly a fair trade-off for a much higher defense value.  The question really comes down to whether or not you want more firepower at range or more longevity in close-combat.

Hobbit Archers
Originally part of the Grey Company list in LOME, the new sourcebooks have removed the hobbit archers from the army list.  This is bittersweet for GC players for a few reasons.

First, at 4 points per model, a hobbit archer has a 3+ archery value with a S2 bow - which is to say, a Ranger of Arnor for half the cost....  Yeah, take that in for a moment.  On defense (especially in melee combat) this becomes inaccurate, but in firepower at range, there is no difference between the Ranger of Arnor that costs you 8 points and the Hobbit Archer that costs you 4 points.  This is worth remembering.

Hobbit Archers have two major weaknesses, in addition to a third that stems from teaming them into a Grey Company army list.  First, apart from their bows, Hobbit Archers traditionally have been unarmed, meaning that they receive the -1 penalty to winning their fight.  My understanding is that this has changed (thanks for the comment, Tiberius!), so this weakness may have been remedied.  They are still D3, though, have a low Fight Value, and have an even lower Strength Value, which is still an incentive to keep them out of close combat as much as possible, and a serious weakness for a Grey Company force that doesn't have a lot of expendable soldiers for bodyguarding.

They are also not affected by any of the Grey Company-specific special abilities, which creates a problem if you intend to move your forces out as a concentrated unit.  Whereas most GC lists can remain at range and then fight concentrated, Hobbit Archers are primarily restricted to only ranged combat - this means that if your opponent covers his spear support and archers well, you could have units that are virtually useless to you when the fighting gets fiercest.  Be aware of this.

Finally, since they are no longer part of the Grey Company list, Hobbit Archers do not benefit from the unrestricted bow limit of a GC force.  This means that you will need to have non-archer units at a 2-1 ratio in order to field them with your army.  If your aim is to add cheap units, this may not be a problem.  If you are attempting to add durable firepower...this may not be the best unit for you.

As you can see, the list is very limited: most of a Grey Company player's choices come from his heroes.  Probably the biggest tactical disadvantage for this civ (which I'll discuss in-depth in the next post) is that you have no real cavalry options - all of your units are infantry, except for select heroes.  Losing the ability to move forces quickly around the map is something you will have to think through when you play with them, especially if you are used to using wargs, Riders of Rohan, or Gondorian Knights.

That said, though, the units in this list have an amazing knack for survival.  I would encourage you to experiment with different builds/uses for countering different types of forces (archer-heavy civs, cav-heavy civs, horde-based civs, mage-heavy civs, etc.), just to see how resilient the Grey Company list is - for having very "meh" stat lines, this force has a tendency to just not want to die, even against hard-hitting foes.  Take them out for a spin - they just might rock your world.

Watching the stars,

Glenstorm

"I watch the stars, for it is mine to watch, as it is yours to remember." ~ Glenstorm

Wednesday, December 19, 2012

Grey Company, Part I - Hero Summary

Dear Reader,

Greetings again from the Forge! I've had greater opportunity to catch up on my painting projects at the How recently, and this week I want to showcase my Dunedain army again. Of all of the armies I play with, I love this one the most, even though they are the most difficult to use, and have the greatest "wildcard" factor to terms of strategy and tactics.  This will be the first of a three-part series on my Grey Company force discussing the various named heroes, non-unique heroes, and units that you can use in a Grey Company and Arnor force, in addition to more of the strategy involved with playing Grey Company, which is arguably one of the most tactical civs in the game.

These posts will also allow me to showcase some of the work that I've been doing on my force in terms of customization.  Some of the pictures are taken from the GW website or a sourcebook, while others (which will be clearly marked) are from my personal model collection.  If there is no caption giving credit for the picture, it comes to you courtesy of our friends at the GW website.

Grey Company: History and Strategic Overview

The Dunedain (from "Dunadan," or "Man of the West," in the Elvish tongue) were the silent, unknown defenders of the Northern Kingdoms of the Free People, including the Shire, the remnant of the ancient Kingdom of Arnor, and the wilderness territories between the Free Peoples and the dark Kingdom of Angmar. Every time I picture the Dunedain, I immediately think of men that are worn by the elements and war, lightly armored, serving in a thankless position against unthinkable odds. And there are times where I feel the same is true for my poor plastic and metal pieces on the tabletop. :)  It's a crazy ride when you roll with the Grey Company, but it's an amazing ride, and well worth the journey.

Most of the lighter civs, likes Rohan, Wood Elves, and Umbar, have good skirmishing options with throwing weapons that do S3 damage at range to soften up the enemy before meeting the enemy in close combat.  You have no throwing weapons with this force, which means your skirmish tactics will involve the "Three-inch Shuffle Boogie" tactic prevalent in the soften-envelope-dispatch strategy that everyone expects of an archer-heavy civ.  That said, your units are capable with their swords (armor is another question), and it is to these that every GC force will ultimately turn when battle rages fiercest.  Remember this.

Grey Company: Units and Heroes

While their army list is very limited in the "Units" category (as we will see in the next post), Arnor boasts a large assortment of heroes, both named and unnamed.  That said, the list is not hopelessly impaired, and the few things that the Grey Company does they do quite capably.  This post will discuss the many routes you can take with the named heroes of the crew, and then we'll discuss the more rank-and-file units that accompany them in the next post.

Heroes
Aragorn, Strider


Aragorn leading a detachment of my rangers.
Though not technically part of the Arnor List under the new sourcebooks, the Fellowship Aragorn is probably the most common ally for any Grey Company army (because, let's face it: sometimes you want an Aragorn that's D6).  I've included him here 1) because he provides an alternative to the Isildur's Heir model, and 2) because he has traditionally been an option for Grey Company armies (ditto the note on Hobbit Archers in the next post).

Aragorn is your typical bruiser hero, able to sustain a good amount of damage, pack a punch against his enemies, and sustain prolonged melee combat with flying colors.  With a free Might point each turn, it is not uncommon to see Aragorn calling Heroic Moves, Heroic Combats, or wounding lots of enemies on a given turn while engaged in melee combat (I have almost never seen him use his free Might point in ranged combat, but it has happened).  As an all-around hero, his F6/3+, S4, D5, C6, 3A, 3H profile makes him a highly formidable opponent even before considering his 3M/3W/3F combination.  Add on the free Might point each turn, and you have a very adept warrior - probably one of my favorite warriors in the game.

Aragorn starts at 175 points, and may be given armor (for 5 points to raise him from D5 to D6), a bow (for 5 points, 24" at S2), an Elven Cloak (to protect him from enemies charging/shooting/casting at him for 10 points), a horse (for 10 points, and makes him more maneuverable, gives him a charge bonus, and knocks enemies over when he wins a fight on the charge).

This Aragorn also sports the chance (unlikely chance, but a chance nonetheless) of using Anduril, Flame of the West: a 75-point upgrade that changes Aragorn's weapon from a hand weapon to Anduril, which is a hand weapon that wounds all enemies at least on a 4+, regardless of their defense value.  I have never seen anyone buy this, though if someone fields a Mumakil, you'd better believe I'll at least try it for kicks and giggles. :)

Aragorn, Isildur's Heir
Most Grey Company players prefer to use Aragorn, Isildur's Heir, and I am no exception.  This Aragorn is more expensive (200 points), and cannot receive the bow (already in his profile), armor, horse, or Anduril upgrades that Strider can.  He can be given an Elven cloak (for 10 points), though I usually don't - frankly, because with as small an army as you will have if you run Grey Company, I'd rather have the extra Ranger of Arnor.

This Aragorn also appeals to Grey Company players because he comes with two very helpful special rules:

  • Chieftain of Forgotten Arnor: Aragorn counts as a banner for all Arnor units within 3" of him, but he does not receive the -1 penalty to your roll to win the fight like other banners do (very similar to Amdur, Lord of Blades in this respect).  This is very good for Arnor commanders, as there is no banner upgrade for any of your standard units (other than Warriors of Arnor, which I'll discuss later).
  • Master of the Wilderness: Aragorn eliminates movement reduction on difficult terrain for those on foot within 6" of him for all Arnor units.
Both of these rules provide a substantial tactical bonus for your force, but I will add this caveat:

It is less effective to team in an allied force with this version of Aragorn.

All of the bonuses just listed will not apply to a Rohan force, Gondor force, Elf/Dwarf detachment, etc.  You still get the advantage of teaming Aragorn with that force (which is a kingly gift to the allied force, no pun intended...actually, maybe it was...), but the two special rules will not apply to them.  They apply only to Grey Company and Arnor forces.

For a pure Grey Company force, though, it doesn't take long to realize the inherent value in a unit like this - being able to move your men like Elves and Dwarf Rangers (all rolled into one rule) across the map is an amazing ability.  Add onto that the fact that you get a 3" banner radius without the -1 to your role to win the fight that usually accompanies a banner is an amazing gift, especially for an archery-heavy civ like the Grey Company.  In the third post in this series, I'll post a few thoughts on tactics and strategy, but for now, suffice it to say that Aragorn, Isildur's Heir is likely one of my favorite heroes for any Grey Company force, and is probably the most useful.

Halbarad

Halbarad Dunadan is one of Aragorn's kinsmen (cousin, I believe), and the only other named Dunedain Ranger in all of Tolkien's lore that makes the journey with Aragorn to Minas Tirith.  He is also one of the cheapest heroes for the Grey Company at 65 points, though he can also take a spear (for 1 point) or a horse (for 10 points), and one other upgrade, that we will take about in a bit.

Halbarad boasts an above-average captain-style stat line: F5/3+, S4, D5, 2A, 2H, C5, with 3M/2W/1F with armor and a bow, making him a powerful attacker, but less durable than your typical rank-and-file captain for most other civs in sustained combat.  What Halbarad sports that they do not, however, is mentioned in the next profile, as I want to dedicate some time to discussing the trade-offs and advantages in upgrading him.

Halbarad (Bearing the Banner of the Evenstar)
Halbarad, a Dunedain (right) and a Ranger of
the North taking positions on a rampart.
At 125 pts, Halbarad with the Banner of the Evenstar is one of the most expensive banners in the game.  That said, paying the extra 60 points is often well worth the investment for two reasons.  First, Halbarad's banner has a 6" radius, which is very rare in LOTR SBG, and when you are fighting with primarily D4 units that have a good fight value (F4), this is very helpful in both keeping your men alive and thinning out the enemy ranks.  The second advantage is that he is the only banner unit that can also use a bow simultaneously (mad skillz for that boy!).  I'll talk a bit about teaming specific heroes with Halbarad in the tactics post, but for now, let me reiterate that this is a good call for virtually any Grey Company army.

The trade-off to the banner upgrade, as you can expect, is that...

He's holding a banner.  

Unlike Aragorn, Isildur's Heir, Halbarad receives a -1 penalty to his roll to win the fight, which means that he cannot contribute a 6 to your rolls without expending a Might point.  His F5 helps to mitigate the effects of this disadvantage, but when facing Uruk-Hai, hero units, and other heavy-hitting characters, the presence of this disadvantage can make the difference between living and dying, so be aware of this.

He also cannot take a spear if he takes a banner, so while he is most effective as a banner in the second rank (increasing his radius over your units), he will do virtually no good (save as a ranged option) unless he is in the front rank, and usually near the middle of your battle line.  Again, this is not necessarily a problem (especially if you team him up with the next duo of heroes, as he can hold the center while they hold the wings), but be aware of this.

In short, this is the tactical version of Halbarad - the other version is the cheaper version, and a better warrior in close combat.

Elrohir and Elladan


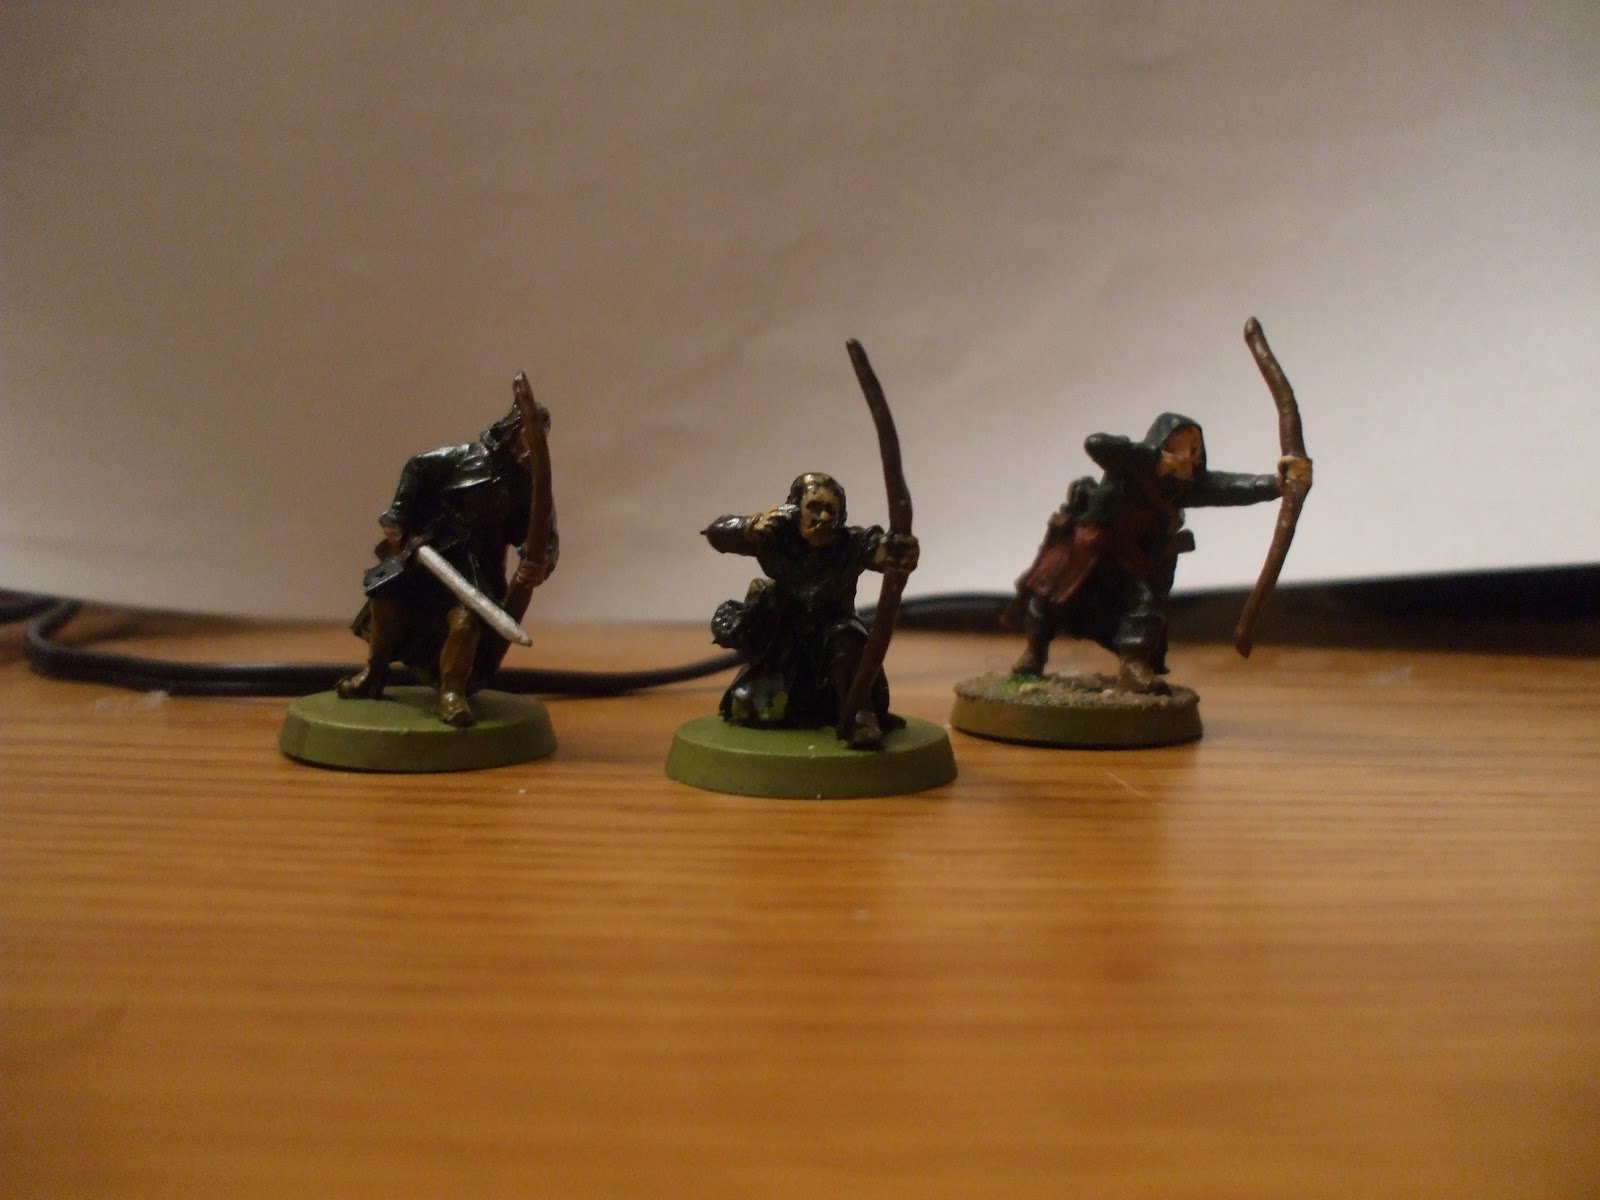
My Elrohir and Elladan in their light ranger garb.
As a twin, I've always loved the sons of Elrond - and in LOTR SBG, they are well worth buying.  They are one of three hero sets you much purchase as a pair (along with Murin and Drar from Durin's Folk and Sharky and Worm from Isengard), and any upgrades that you buy for one you must buy for the other.  They boast the standard profile for an Elven hero with F6/3+, S4, F6, D5, C6, 2A, and 2H, and the 3M/2W/2F profile of good (but not amazing) close-combat warriors.  For 140 points, they're a good purchase.

You can upgrade them with heavy armor (for 10 points for both models, raising them from D5 to D6), elven bows (for 10 points for both models, giving them a S3 attack at 24", and the chance to volley fire with other elven bows), elven cloaks (for 20 points for both models), and horses (for 20 points for both models), which gives them a lot of options for your force.

They also have three helpful rules that make them unique within a GC force:

  • Woodland Creature: Like all elves, the Twins do not suffer a movement penalty for movement in a wooded area.  This can be further enhanced in proximity to Aragorn, Isildur's Heir, to include all difficult terrain.
  • Twin Elven Blades: Elladan and Elrohir may chose to use two blades (giving them 3 attacks instead of 2), an Elven Blade (counts as a 2H weapon), or parry (giving the unit the shielding rule).  The Twins are not required to declare the same weapon in a combat - so one could use two blades for the additional attack, while the other uses an Elven Blade for a 2H weapon for wounding power.
  • Unbreakable Bond: If one of the Twins dies, the other twin is guaranteed to pass all courage tests, raises his strength to S5 (instead of S4), and lowers his defense to D4 (instead of D5 or D6 - I am unsure whether this is just a -1 penalty to armor, or whether a Twin would fall to D4 from D6 if they have the heavy armor upgrade).  The remaining twin must 1) charge the nearest unit(s) who killed his brother if possible, and 2) will attempt to kill that unit whenever possible.  He will also charge the nearest enemy unit when the unit that killed his brother has been killed.

There is a lot of versatility in these abilities, though care is advised in working with this pair, as an enemy could draw the Twin far away from the main battle (or an objective) if the conditions surrounding his brother's death are right.  Just be aware of that.

These units are scrappers: your aim is to get them into quick combats that they can win, taking advantage of their high fight value and solid attack numbers, and keep them chomping through the enemy lines.  They are not bruisers, however - with only 2 wounds and 2 Fate points at D5 or D6, they are not nearly as sustainable in close combat as your bruiser-class heroes (think Glorfindel, Celeborn, Elrond, etc. who are around their same cost), and, if ganged, they will fall.  You are forewarned.

The other thing to watch out for (and probably a greater concern, depending on your opponent's army list) is that they only have 2 Will points.  This creates a problem when playing against a heavy spellcaster army (especially Barrow Wights), who can cause an otherwise dynamic duo to be an impotent waste of points.

Malbeth the Seer
My Malbeth the Seer with an archer troop
led by Torchirion (Ranger of the North)
Before discussing Malbeth as a hero, a quick note needs to be made on him in regards to army listing.  If you are an LOME-only player, Malbeth is an allied hero to a Dunedain force, as he technically falls under the Arnor list. If you are a Warband player, Malbeth is part of the Arnor list, and is a hero for a GC army.  Knowing how you construct your army lists, and especially what your opponent is using to build his/her army lists, is important in regards to this unit.  Be proactive in mentioning that you are fielding him, and be ready to work with your opponent to work out potential differences in opinion in the creation of army lists.

With that said, let's discuss Malbeth, :)  First of all, Malbeth the Seer is not a caster: he has no offensive spells, and is not a wizard.  Thus, he does not have a staff of power to grant him a free Will point each turn (like Radagast, Gandalf, and Saruman have).  Malbeth is a man, and thus boasts a standard human stat line: F3, S4, D5, C5, 1A, 2H, and 1M/2W/1F.  As you can tell, Malbeth is not a close-combat warrior by any stretch of the imagination.  That said, he provides an amazing special rule for a Grey Company army:

  • Gift of Foresight: Any unit within 6" of Malbeth the Seer who takes a wound may roll a dice: the wound is ignored on a 5+ (just like a Fate save).

We discussed earlier that one of the great fears of any Dunedain army is its durability and survivability, since most of its units are D4, and most of its heroes are D5.  Malbeth gives a chance (small, but a chance nonetheless) for greater survivability.  For only 80 points, Malbeth is a good option for a support hero, especially in tandem with some of the other support heroes that this list offers.  I don't know too many reasons not to take him, and would highly recommend him for pretty much any Good army as an ally.

King Arvedui, Last King of Arnor


Like Malbeth, a note must be made regarding army listing for Arvedui.  If you are an LOME-only player, Arvedui is an allied hero to a Dunedain force; if you are a Warband player, Arvedui is part of the Arnor list, and is a hero for a GC army.  I cannot reiterate this enough, but be sure to be proactive in alerting your opponent that you are fielding him, and be sure to check on their desires in regards to creating army lists.

Arvedui will likely not cause as great a raucous from your opponent as Malbeth will, because the gaming world as a whole recognizes that Arvedui is a weak hero.  There are very few things that Arvedui does well, though he does certain things better than other units in the GC list.  Especially following the combination of the Grey Company and Arnor lists under the Warband rules, the Last King of Arnor is becoming less and less common in army lists.

Like most human unique heroes, Arvedui has a F5, S4, D6, and C5.  His high defense value is one of his greatest assets in an otherwise overwhelmingly D4 or D5 army, and is not to be ignored when building a GC force.  He also has the standard 2A and 2H, as is typical for a named hero in the 70-point range.  One of Arvedui's weaknesses, however (and probably underscoring the fact that he is the last King of Arnor), is that while he has 3M/2W, like most heroes in his respective range, he has 0 Fate points, which, when you only have 2 wounds and 2 attacks with no chance to shield, dramatically reduces a hero's longevity (even if he is D6).  Other heroes are D6 and lack Fate points (Boromir of Gondor comes to mind immediately), but even Boromir has 3 attacks, a F6 (which should win him ties 9 out of 10 fights on the battlefield), and the shielding rule (not to mention the insane 6 Might points that this guy boasts - what a beast).  For 35 more points, it might be worth it to skip on Arvedui for an army, and bring in Boromir instead as an ally.

One of the reasons to take Arvedui, though, is that he is the only hero in the Arnor lists that boasts the 12" "Stand Fast!" rule, instead of the usual 6" radius for heroes.  Every civ has a 12" "Stand Fast!" hero, and Arvedui is the hero for Arnor.  Thus, Arvedui should be treated like a more fragile captain-style unit for combat purposes, but is much more useful for the tactical role of keeping an army standing once the break point has been reached (and, trust me, friend: chances are you will at least flirt with your break point, if not pass it).  If this is a foreseeable scenario for your GC list, definitely consider Arvedui.

Arathorn
Next we have Arathorn, the father of Aragorn who was killed by orcs, causing Aragorn to be raised in Rivendell.  Arathorn's profile is very similiar to that of Arvedui, and they highlight each other's strengths and weaknesses very well.  In general, I would consider Arathorn to be more of the warrior-class unit, while Arvedui is more of the tactical unit.  Both are comparable in cost (Arvedui is 70 points while Arathorn is 75 points), but they offer different advantages to your list.

Like Arvedui, Arathorn boasts a F5, but also has a bow at a 3+ shoot value, which makes him more helpful in adding to the kill count for a Grey Company force.  At S4, D5, A3, 2H, and C5, he plays like the rest of the Dunedain, though he has 3 attacks compared to Arvedui's 2 attacks.  Arvedui is D6, though, so against S3 opponents, Arvedui has the defensive advantage.  Both are at 2 health, though Arathorn has the advantage of a 3M/2W/1F profile, which gives him a bit of added durability (if a wound should slip through).

From a defensive perspective, the question is whether you want a higher defense value to stop damage, or if you want the Fate point for wounds that slip past the lower defense rating and another dice in combat to attempt to win the fight.  The only other differences between these units is that one can contribute to archery (including volley fire), and the other has a 12" "Stand Fast!" (compared to the normal 6") to keep the troops in line.  You can use either to meet deficiencies in your army list, or to bolster some of the focuses of your list (higher defense value, maximum archery, etc.).

As you can see, each hero for the Grey Company has a purpose - some are more useful than others, but all of them have a use within the context of the list.  In the next post, I'll focus on the units and minor heroes that support the heroes featured in this post, but before I depart, I want to caution you with this warning:

Don't overdo it on the heroes.

There is a tendency to use too many heroes in a Grey Company force.  I would not recommend more than 1-2 of the guys listed in this post, primarily because at the end of the day, you will need killing power through numbers to avoid being trapped and overwhelmed by sheer numbers in a battle.  You are free to experiment, but as a fellow ranger, I will encourage you to place great trust in the units I'll mention in the next post, because they have earned their keep in every game I've played.  They are dependable, so take advantage of it.

Until the next post,

Glenstorm

"I watch the stars, for it is mine to watch." ~ Glenstorm

Friday, December 14, 2012

Domination: Dwarves vs. Goblins

So, with White Council month behind us, we're going back underground for "The Hobbit" month, where we're going to work on underground terrain and play a few games with Dwarves and Goblins in preparation for the Hobbit movie coming out (can't wait!). I'll start by saying with Games Workshop releasing the new models for the new movie, I'm really happy I made my own set of Rangers for the Unexpected Company (as I'm not interested on paying of $100 to get a bunch of premium Dwarves, Goblins, and wizards). This game will be between my Dwarves and my Goblins (under the control of my good mate Gaius, who has agreed to test out my new Groblog model - a must-have for any Goblin army now). Here are the forces:

The Host of Erebor: 599 points

Gimli, Son of Gloin - 90 points
Balin, Son of Fundin with Durin's Axe - 85 points
Dwarf Shield-Bearer (Gimli) - 60 points
6 Khazad Guards (Gimli) - 66 points
8 Dwarf Warriors with shields - 72 points
1 Dwarf Warriors with banner - 33 points
10 Dwarf Warriors with Dwarf bows - 90 points
4 Dwarf Rangers with throwing axes - 40 points
1 Dwarf Ranger with throwing axes and two-handed axe (Thorin Oakenshield) - 11 points
4 Dwarf Rangers with two-handed axes - 32 points
2 Dwarf Rangers with Dwarf longbows - 20 points

39 units, 10 Dwarf bows + 2 Dwarf longbows + 6 thrown weapons, 3 heroes

The Denizens of Moria: 600 points

Durburz, Goblin King of Moria - 60 points
Groblog, King of the Deeps - 55 points
2 Goblin Shamans (one stand-in: Goblin Warrior with Orc bow and blue token) - 90 points
1 Cave Troll - 80 points
1 Bat Swarm - 35 points
16 Goblin Warriors with shields - 80 points
16 Goblin Warriors with spears - 80 points
12 Goblin Warriors with Orc bows - 60 points
Ally: Ringwraith with 1M/7W/0F - 60 points

51 units, 12 Orc bows, 5 heroes

The scenario we will be playing is a Domination game on a board that is 48" x 48". We're playing on the in-progress battle board which has five objectives: a broken-down armory (the one with walls), two markers in the open, and two market centers. For the purposes of scoring, any unit who is touching the steps of the market centers (generally, there are a few points where they don't quite reach), within 3" of the markers, and within the walls (not even the doorway) of the armory, they will "contest" an objective. Archers cannot volley over the armory and units cannot be deployed in the chasm - I didn't notice that I was deploying my units there until after I took the picture...thanks Gaius.
I'm excited to see how the Dwarves do against the new-resilience of the Goblins. I'm excited to see how the heroes do against Goblins with a 5+ Fury save, but thankfully the save can be negated by beating (or killing) the Shamans, as opposed to Malbeth's Foresight save, which you can see here.


Turn 1: (Priority - Goblins)

No pictures of this round: both Goblin Shamans cast Fury (1/3W, 1/3W). No Shoot phase, as the Dwarf volley team is behind the armory and the Goblins have split their volley team to support their offensive campaign.


Turn 2: (P - Dwarves)
The armies continue to move and the volley team can fire at the end of the Goblin advancing battle line this turn. Gimli and his warriors cross over a bridge and come to take the wave of Goblins head-on. The Bat Swarm is lying down, by the way, on the top left of the frame.
The Dwarves volley, score 3 hits, and cause 1 wound, which is then saved by Fury (1/1M).
One of the Dwarf Rangers with longbows targets a Goblin Warrior with Orc bow and scores a wound, which is not saved by Fury (the shaman is the base at the top-right of the screen).
Kill Count: Dwarves: 1/51, Goblins: 0/39


Turn 3: (P - Goblins)

No pictures this round, as both armies continue to push towards each other, both shoot and fail to kill anyone. The Bat Swarm stayed laying down, avoiding visibility from the Dwarves.


Turn 4: (P - Goblins again)
Our first fights will be here next round and a lot of stuff happened. Balin was transfixed by the Ringwraith (1/7W). Balin decides not to resist the spell (cast on a 6) and will not be throwing his axe this turn. The Bat Swarm also go up and moved a little, benefiting from a Goblin screen.
In the Shoot phase, one of the Dwarf Rangers lands a hit on the Cave Troll and successfully gets the 6 to wound (1/3H). Hopefully, this will help me take it down quickly.
The Dwarf Warriors with Dwarf bows manage to kill a Goblin Warrior with shield as well (fury fail).
Kill Count: Dwarves: 2/51, Goblins: 0/39


Turn 5: (P - Goblins yet again...)
The fights are joined and a lot happened. The Ringwraith cast Transfix on Balin again (2/7W) and gets a 5 on the roll. Balin uses 2 Will points to resist and scores a 6 (2/3W). So, I can fight this turn...yaye. In the other fights, the Dwarf Shield-bearer came to join Gimli on his side of the field and both are in range of the banner-bearer.
In the Shoot phase, the Dwarves killed a Goblin Warrior with spear (on the left side) with a throwing axe and a Goblin with shield (right side) with a Dwarf bow. 
The Dwarf Shield-Bearer and Gimli both call Heroic Combats and both kill their opponents (Gimli: 1/3M, wins with banner reroll, 1 Fury save after Gimli deals 2 wounds, no Fury save against Shield-bearer). They then move on to take on new foes, with my Shield-Bearer trying to sneak around the back of the battle-line to reach the Shaman quickly. Gimli consequently cuts up the middle and tries to free up his comrades from their fights.
Balin and two Khazad Guards trapped the troll, beat him, and the dice you see are Balin's wounding dice. Yes, he died very, very badly (I love that Cave Trolls are wounded on 4s by Balin when he totes Durin's Axe).
In the other fights, the Dwarves took a beating: one Dwarf Warrior with shield, one Khazad Guard, and a Dwarf Ranger with throwing axes were killed by the Goblins and in return, one of the Dwarf Warriors with shields wounded the Bat Swarm. A few more rounds of this, and we could be in some real trouble (especially if this Ringwraith has a field-day on Balin).
In the other fights, Gimli and the Khazad Guard killed two Goblins - Gimli used his two-handed axe on a spearman, wounding him on 3s and scoring two wounds, neither of which were saved. The Khazad Guard slew a shield-carrying Goblin, who failed his save.
Kill Count: Dwarves: 9/51, Goblins: 3/39


Turn 6: (P - Dwarves)
The armies continue to press each other. Thorin used his throwing axe to wound the Bat Swarm (2/4H), but otherwise nothing of interest happens. Notice that the Dwarf Warriors with Dwarf bows are fanning out to batter Durburz and his archers in the center of the map.
And the Dwarves unleash their arrows and slay two Goblin Warriors with Orc bows...yeah, not enough shamans everywhere if you want more-killy heroes.
The Shield-bearer calls another free Heroic Combat, wins the fight easily, wounds both of his foes (1/1M), and...as luck would have it, both survived with their Fury saves. Oh well...I really need to get to the shaman - just out of frame in this picture, marked by the blue token).
On the left side,a lot changed: the shaman saved one wound with Fury (1/1M), while Balin killed a Goblin spearman and a Khazad Guard killed the Ringwraith (beating him with a 4 to win the fight and getting the needed 6 to wound him without using his two-handed weapon - thank heaven for Strength 4 and wounding Nazgul on a single dice). No other units were killed, but the Goblins are being hard-pressed on the actual scoring mound. Groblog is arriving with his 3 Might points, but with Fight 3, he's a rather unthreatening hero to this army.
On the right side, Gimli and his crew dealt nearly even blows with their enemies: Despite Gimli and his men landing five wounds on the Goblins, three were saved by Fate and so two Goblins died (a spearman to Gimli and a shield-Goblin to a Khazad Guard). In return, the Goblins killed a single Ranger with two-handed weapon.
Kill Count: Dwarves: 15/51, Goblins: 4/39. The Goblins are 11 units away from breaking, while the Dwarves are 16 units away...I'll also add that the armies are nearly even in numbers (36 Goblins and 35 Dwarves) - I'd say things are going pretty well.


Turn 7: (P - Dwarves again)
In the Move phase, the Dwarves have rushed towards most of the objectives and have charged both shamans. Gimli successfully wounded the Shaman he charged with his throwing axe, but the wound was saved by Fury.
Durburz killed a Dwarf Warrior in the center (1/3M), as did another Goblin Warrior. The other Dwarf of the expeditionary force killed the archer he was fighting, but I'm going to need to pull other units away from their shooting hay-day.
In the Shoot phase, a few Dwarf Warriors are still able to shoot (not in combat yet) and took down one of the Goblin Warriors at the far objective. I'm kind of hoping that I can kill them from a distance instead of charging them, but we'll see if I can wing that with the other archers and Durburz at the center objective.
The Dwarf Shield-bearer called yet another free Heroic COmbat, won the fight, but failed to wound (rolled snake-eyes). That's a bummer. In the other fights, though, Gimli beat the Shaman (no more Fury), the final Fury save failed, and the wound was then saved by the Shaman's Fate point (1/1F). In the other fights, two Dwarf Rangers killed Goblin spearmen and two Goblins killed a Dwarf Ranger and a Dwarf Warrior with shield.
The Groblog and the Goblin Shaman won their fight (a great shout arose from Gaius) and they killed the Khazad Guard to boot. In the other fights, Balin killed a Goblin archer and wounded a Goblin with shield (1/3M) who was saved by Fury.
Kill Count: Dwarves: 22/51, Goblins: 9/39. 


Turn 8: (P - D.W.A.R.V.E.S.)

The game is drawing to a close as the Goblins attempt to hold the center objective, challenge the armory objective, and maintain their own. During the Move phase, Thorin wounded the Bat Swarm with his throwning axes (3/4H), so I'm kinda hoping that I can kill him this round.
In the Shoot phase, the Goblins get their first kill - a Dwarf Ranger who just missed them with his throwing axe (he rolled a 4 to wound instead of a 5).
In the Fight phase, the Shield-bearer called another free Heroic Combat but again lost the fight. He wasn't wounded, but still, kinda sad he lost. But, Gimli promptly killed the Goblin Shaman (no Fury up this turn) and the Dwarves killed two other Goblins this turn. In return, the Goblins killed a Dwarf Warrior with shield.
Balin wounded the Shaman twice (2/3M), the Goblin failed his Fury rolls (and the Fury spell disappears) and saves one of the wounds with a Fate point (1/1F, 1/2H). Nearby, one of the Dwarf Warriors with shield wounded Groblog, who saved the wound with his Fate point (1/1F, 2/3M). In the other fights, a Goblin with shield was killed and Thorin slew the Bat Swarm (ROOOAAARRR!).
Durburz killed one of the Dwarf Warriors with Dwarf bow (2/3M) and the Dwarves paid back the wound measure for measure by killing one of the Goblins present. The objective is solidly in the hands of no one.
Kill Count: Dwarves: 29/51, Goblins: 12/39. The Goblins are broken and have no Fury spells up...that's really good for me and really not good for Gaius. :)


Turn 9: (P - Goblins)
With the Goblins finally getting priority, their heroes test: Durburz stayed handily and that was the good news. Groblog passed his test with the aid of his Will point (1/1W), which was okay. Two Goblins fled - a spearman and a swordsman - which was unfortunate. But most unfortunate of all was that the Shaman (with no Fury, you will remember) failed his Courage test by 2 points and as he had no Might point left, he needed to spend his last two Will points to stay in the game. Ergo, no more Fury. To capitalize on this loss, Thorin charged one of the Goblins who jumped on the stairs and slew him with his throwing axe. Onward to victory, bearded fellows!
The fights went very well: the Shield-bearer called yet another Heroic Combat (do you see why I like these guys?), handily killed him (not hard when you wound on 4s and there's no Fury around), and he helped Gimli CRUSH his foe. In the other fights, the Goblins killed two other Dwarves and suffered two casualties in return. The Dwarf with Dwarf bow was not killed: the banner-bearer was killed and the Dwarf archer picked up the banner to keep up the offensive machine.
In the center, absolutely no one died. Yes, very fun...moving on...
On this part of the field, two Goblins were killed and one was beaten backwards and tripped on the stairs (the Goblin with shield and the dice next to him). The Goblins lost most of their fights, but so did Balin, who was wounded by the Goblin Shaman and saved the wound with his Fate point...yeah, kinda embarrassing (1/1F).
Kill count: Goblins: 14/39, Dwarves: 38/51, Goblins are 1 unit away from losing the game, so we called it here (as they have quite a few who are not within a hero to SF and we'd be ending the game soon).

Final points:
  • The Dwarves score 3 points for breaking the enemy and not being broken.
  • The Northwest objective gives 1 point to the Dwarves as a contested objective (9-5).
  • The Northeast objective gives 3 points to the Goblins as an uncontested objective (2-0).
  • The Southwest objective gives 3 points to the Dwarves as an uncontested objective (2-0).
  • The Southeast objective gives 1 point to the Dwarves as a contested objective (9-2).
  • The Center objective gives 1 point to the Dwarves as a contested objective (4-3).
  • Neither army leader was killed, so 0 points awarded to both armies.
Final score: Dwarves win a major victory (9-3)


Conclusion:

Assessment by Tiberius:

Playing with shield-bearers is SO-MUCH-FUN!!! Free heroic combats for the win - they certainly helped in getting around the Goblin lines and it made Gimli not need to call as many heroic combats for himself. Balin got lucky against the Troll and I love the number of Will points he has. By far, I liked how the board is coming together - I've got some great work in store as we press through Hobbit month!

Assessment by Gaius:

10 Fury saves...that's better than these shamans have ever done. The extra resiliency that Groblog adds to the army makes him a must-have for any army (though his 3 Might points and 2 Attacks are the only offensive capabilities he adds). Balin's force did a real number on my men, forcing me to break off a portion of Durburz' army to defeat them - and most of it was raw luck (the Ringwraith dying during his first combat, the Cave Troll botching his roll entirely, and the Bat Swarm getting slowly cut down by Thorin). Rough game, but the new board pieces are fun.

Stellar unit for the Dwarves: Khazad Guards

These guys don't get the award very often, but I love them so much. Strength 4, Defense 7, and automatically passing Courage tests makes them superb Nazgul hunters and their ability to choose a hand weapon or a two-handed weapon is a nice touch when they're assisted by someone else (even another Khazad Guard). In this game, they killed their share of Goblins and assisted in trapping the Cave Troll and killing the Ringwraith...hard to not give it to them in this fight.

Stellar unit for Goblins: um...anyone?

It's hard to pick a "stellar" unit not because the Goblins didn't do well, but because it's hard to pick one unit. The Goblin Warriors with Orc bows challenged two objectives (center and the armory) and held the only Goblin uncontested objective. The Goblin Warriors with spears or shields not only held down heroes, but scored most of the wounds against the Dwarves (either working together or individually). I'd also be tempted to give the victory to any of the Goblin heroes - the shamans and Groblog for cumulatively saving 10 wounds or Durburz for killing most of the archers at the center objective. So today is a team award, not recognizing the talents of any one class, but the contributions of every class (except the Troll, he's left alone today).