
Photo Credit: NewStatesman.com
Updated for 7th Edition (July 2025)
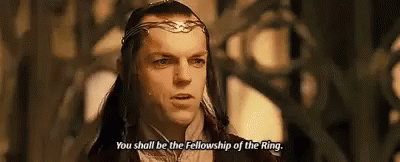
In a story known for its heroes, there is no more important collection of heroes than the Fellowship of the Ring. Every member was defined by their role in the Quest of Mount Doom, though many of them took different roads ere the Quest was completed.
In the Middle Earth Strategy Battle Game, the members of the Fellowship can be fielded in several armies, and are also included in a myriad of other forces. There are a ton of special rules to master, and the list demands an incredible attention to detail. But every game with the Fellowship plays out like a mini-story, making them extremely memorable.

In the Middle Earth Strategy Battle Game, the members of the Fellowship can be fielded in several armies, and are also included in a myriad of other forces. There are a ton of special rules to master, and the list demands an incredible attention to detail. But every game with the Fellowship plays out like a mini-story, making them extremely memorable.
Army Quick(ish) Hits: Strengths and Weaknesses
- Strength/Weakness: All-Hero list (mostly). At its core, the Fellowship of the Ring is a small band of exceptional heroes (not necessarily exceptional in combat... some of them were selected for other things). And in the Seventh Edition, the core Fellowship list (appropriately named... The Fellowship) continues that spirit with nine companions and a faithful pony. As with most all-hero armies, you have a more extreme trade-off of strengths and weaknesses. On the one hand, you get access to some of the best profiles in the game (Aragorn, Legolas, Boromir), plus Gimli, at pretty bargain prices. And depending on the list, you may also get access to magic (Gandalf), or combat buffs that improve these heroes even further. At the same time, these are all low-model count armies... and in the Fellowship's case, you have at least three models (Merry, Pippen, and Bill... plus, in some circumstances Frodo and Sam) who are pretty fragile and not exactly stellar in combat, which will accentuate the model count discrepancy even further. The Fellowship's two variant lists (Breaking of the Fellowship and Road to Rivendell) can help offset these issues somewhat by allowing you to bring some conventional troops, too (as long as your event allows Legacy models). But even at their best, your model count will be capped at 24 models for 800-900 points... which means you'll still be outnumbered most times, potentially by a lot. To compensate, you'll need to master the Fellowship's special rules, synergies, and above all their heroic stats... and of course, some favor from the Valar wouldn't hurt either.
- Strength: Heroic Resources. As an all-hero force, the Fellowship starts with significant heroic resources, which as actually increased this edition (mostly in the form of extra Fate points for Gimli, Merry, Pippen, and Bill, and some extra attacks for Sam and Gandalf). Collectively you can squeeze up to 19 Attacks, 44* Wounds/Fate Points, 20* Will, and a whopping 22* Might into the list if you take all ten members (don't forget about Bill!). Most standard armies with full warbands at the 800-1000 point range will be looking at around half that total Might (and quite a bit less Will, wounds, and Fate on their heroes), so if you pressure them to spend those resources at the same rate you're spending them (countering your Heroic Moves, counter-calling Heroic Strikes or Heroic Combats, etc.), they'll find themselves out of those resources very quickly, while you still have some to spare. You'll find you actually can pressure opponents thanks to Aragorn's Mighty Hero special rule, perhaps the best special rule in the game (and absolutely the most important special rule to a Fellowship that has a metric ton of special rules). The ability to spend one free Might point per turn (which Aragorn can spend on every Heroic Action except Channel, or to boost his own stats in combat, resist spells, etc.) is great at any point in a game: in the early game, it puts real pressure on your opponent to spend their own (finite) resources to match your own (infinite) resources; in the mid-game it means you can still perform a clutch Heroic Move, Strike, Combat, duel boost, or +1 to-wound even as your own Might store dwindles; and in the late-game it means you can control the initiative well after both sides have run out of Might. Don't underestimate Bill the Pony's Second Breakfast special rule, either (one Fellowship member per turn can recover 1 Might, Will, or Fate--their choice--on a 5+). And if you run the Road to Rivendell variant, you can up your wound/stat regeneration up to 11 (or more), thanks to Arwen, Barliman, and Tom and Goldberry,
- Strength: Magic. Few army lists have access to real Magic (either offensive or defensive) without allying someone in. In their pure list, the Fellowship has access to both (of pretty good quality), thanks to Gandalf the Grey. He's not quite as potent a caster as he is in his reincarnated form, but with Blinding Light, Immobilize, Strengthen Will, Protection of the Valar, and Foil Magic, he's got great utility spells to keep the Fellowship safe from archers or monsters, while holding enemy wizards (or Ringwraiths) at bay... at least in small numbers. Against groups of enemy spellcasters, Aragorn's ability to call a free Heroic Resolve each turn can be a life-saver, especially if paired with the Hobbit's Resistant to Magic special rule (for 2 free dice to resist spells, before any Will points are spent). The Breaking variant trades Gandalf for Fortify Spirit on all your Fellowship members (and a 3+ chance at Blinding Light if you control Frodo), while Road brings a different take on "magic" with Arwen (Renew, Wrath of Bruinen) and the magical songs of Tom and Goldberry.
- Strength/Weakness: The One Ring. It's changed from last edition, and is no longer the broken combat piece that it once was. That said, Frodo is a pretty essential component to both the Fellowship and Breaking lists, and the Ring is still exceptional at getting him out of tight spots (which, in a low-model count army, will probably happen more likely than you'd like). The problem, of course, is when Frodo fluffs his roll and the opponent takes control of him. At the risk of stating the obvious, that's bad. So yeah... deploy the ring at your peril. Or at least selectively/strategically?
- Strength/Weakness: Movement. As a collection of various free peoples, the Fellowship is one of the few army lists where its members move at up to five different speeds: 4" for the hobbits; 5" for Gimli; and 6" for everyone else, except Bill (who moves 8")... unless you also mount Boromir (10"... in the one list where he can bring a horse). A 4" maximum move for the group (if you play defensively to protect the hobbits) would make the Fellowship easy targets for even full infantry armies (to say nothing of cavalry forces). Thankfully, as long as you don't have to charge anything during the round, Aragorn can Heroic March the group around the board at a 7" clip (faster than standard infantry), using his free point of Might. Just watch out for enemy Compels/Commands, as your men/elves can be forced to move up to 4.5" away if they were affected by a Heroic March (7.5" away if they're mounted).
- Strength/Weakness: Fantastic, Integral Synergies. The Fellowship always sported a lot of synergies, and some of these have been buffed further in the 7th Edition. There's Frodo's connection to Sam (allowing Sam to call Heroic Combats for free each turn), Boromir's connection to Merry and Pippen (who can now spend Boromir's Might as if it's their own, and give Boromir Fearless and rerolls on his to-wound rolls, if they're within 3" of each other), everyone's synergy with Bill (who they treat as a banner, and who can restore lost heroic stats), and of course, Legolas and Gimli (whose friendly competition at the expense of your opponent results in +1 shoot value or +1 to wound, respectively). Then you have the more subtle synergies: Gandalf's ability to shield a low-Will/no-Fate Boromir from incoming spells or arrow fire ; Aragorn's ability to boost the speed of the hobbits through Heroic March; and the Fellowship's army bonus, which centers around Frodo (Fearless and cannot be broken while he is alive). The degree of synergy is impressive, but as with all synergy lists, losing even one member of the Fellowship can mess with those synergies, and seriously reduce the list's effectiveness. Take away Aragorn, and the list is slow; take away Gandalf, and the list is vulnerable; take away Boromir, and your hobbits are now extremely easy to deal with; take away Frodo, and everyone is affected.
- Weakness: List Options. I'm going to try to not pick at this scab every time I do one of these write-ups. But I do think the Fellowship suffers more than most lists this edition from a lack of options. And I don't necessarily mean my general dislike of this edition shunting players towards about a hundred individual lists (most of which strike me as highly selective, limited, and cookie-cutter). Actually, the bigger problem is the inability to take most wargear options on your Fellowship members (in their Fellowship lists, or really any lists). Aragorn is probably the most glaring example. On paper, the Strider profile's options are amazing: a bow (24" range, S2), armor (D6), an elf cloak (Stalk Unseen), a named hero horse (Brego), and of course Anduril. The problem for the Fellowship is that the list of upgrades on Strider's profile is extremely misleading. In the three Fellowship-centric lists where you can take Aragorn (Fellowship, Breaking, Road to Rivendell), you have the option of taking a grand total of one option: the bow (in Breaking, Aragorn also gets an elf cloak for free... but I don't know that that counts as an option). No horse. No armor. And no Anduril. Now I get that this edition is leaning heavily into the movies for their inspiration. And I suppose I could understand not having access to a horse in a Fellowship-centered list, for lore reasons (don't get me started on the Grey Company, though). But no option for Anduril? When he clearly has it in the books during at least the time that the Fellowship and Breaking lists are set? Like, really? Oh, and Gandalf, Legolas, and Gimli have basically no options, either... but somehow Boromir can take a horse in a Fellowship list? Don't get me wrong--I'm glad Boromir actually has a list where he can use that horse option. But seriously... what are we doing here? Anyway, *end rant*
- Strength: Psychological Warfare. There's a certain inevitability to the Fellowship, especially when they get going. First off, Aragorn is always able to spend free Might to move the fellowship faster/further than it has any right to go, and the only way you can challenge it (for most armies, at least) is by countering his free Might with real Might of your own (which gets old real fast). Then there's Gandalf shielding the Fellowship from ranged attacks with Blinding Light, while Legolas, Aragorn, Gimli (throwing axes), and the hobbits (throw stones) pelt you from afar with their own ranged attacks (and eventually Gandalf with a transfix, compel, or even a Sorcerous Blast). When you catch them, even the hobbits are decent Fighters (now that all of them have access to Might, plus a banner reroll from Bill), and of course there's enough Might to call several turns of Heroic Combats. All while Aragorn is regenerating Might (for Heroic Moves), Boromir is blowing his horn, Gandalf is transfixing your hero or monster during Aragorn's Heroic Move, your own models are trying to charge Frodo and failing their Ring tests, and while the wounds your opponent manages to score in the few fights he/she manages to win are being cycled through the Fellowship's combined 40+ wounds and Fate. Eventually Sam sneaks into a fight with Aragorn, calls a free Heroic Combat because Frodo is in trouble, launching a Fight 10 Aragorn into your army leader who was charged by Boromir and transfixed by Gandalf. At which point, you just don't feel it anymore...
- Strength: Combat. For all the reasons stated above. Unless you have lots of heroes yourself, or can overwhelm them with traps and a bucket of dice, you're unlikely to overcome the Fellowship in a straight-up brawl. And the speed that they can cut through enemy troops and monsters--especially now that Aragorn and Boromir got bumped to F7--can be breathtaking.
- Strength/Weakness: Scenarios and Victory Points. In a straight-up Fight, the Fellowship is surprisingly difficult to take on. But there are certain scenarios where they'll struggle (though you probably don't want to draw them in Lords of Battle). Domination is an issue for any small all-hero force, although the Fellowship at least has infinite Heroic Marches from Aragorn and Fearless hobbits you can deploy on far-flung objectives, a mega-archer to shoot any single models your opponent leaves on a far-flung objective, and enough combat heroes (and synergies) to take out a significantly larger force on a main objective. Capture and Control can be done, depending on how the Fellowship sweeps from objective to objective. Hold Ground is tricky--Maelstrom isn't an issue (you deploy as a group) and getting to the middle/killing things once you get there isn't all that complicated either, but if you break the enemy while they have more models than you in the center, your win or loss will come down to whether the die at the end of the round rolls a "1" or a "2." Contest of Champions can be hard as well if Gandalf is matched up against a combat leader on the other side (unless you run one of the variants where Aragorn is a Hero of Legend, and thus probably your leader). Thankfully, two of the three Fellowship lists (Breaking and Road) now have ways to bring real banners (as long as your Road list can bring Legacy Gildor and his wood elves). And the option to bring some elf troops in those two lists can also help quite a bit in general objective-capture or get-off-the-board scenarios, too.
- Strength/Weakness: Demanding Playstyle. In some respects, the Fellowship is easy to play: you only have 7-24 models, depending on your list choice and points limit, and they're all very recognizable heroes with pretty consistent playing styles. But boy do they have a ton of special rules you have to learn. Playing all-hero armies also means you have to be more thoughtful in how you place your models, since you're more susceptible to being trapped and separated. But at least you have Aragorn for a free chance at a Heroic Move if you lose priority, and combat heroes who can tie-up 2-3 models in the Move Phase and still have a pretty good chance of winning their fights. And if you go with the Breaking or Road variants, you can also build forces that kind of feel like conventional armies (albeit really hero-heavy armies).
- Strength: Low cost. Last advantage is the cost (in actual money, not points). You can get the whole Fellowship (sans Bill) in a single box set from Games Workshop, with enough points to get to around 800 (more if you could actually use their wargear options... if you can't tell, I'm still salty about this). Plus you have the option for alternate sculpts of all the fellowship members, if you want to feed your inner hobbyist.
So with those general thoughts in place, let's talk about their updated profiles!
Composition of a Fellowship
- Frodo Baggins {AoLotR}: The lynchpin of the Fellowship, especially in its two "pure" army lists (The Fellowship and The Breaking of the Fellowship, where every member is Fearless, and the force cannot be Broken, while Frodo is alive--even if he moves off the table). As with all hobbits, he comes with Resistant to Magic and Throw Stones (8", S1) baked into his profile. Combat is not his forte (Fight 3, 1 Attack, S2 or S3, depending on if he has Sting), but he's pretty survivable with Defense 6 (if you bring the Mithril coat), two Wounds, three Fate, 2 Might, an elven-made weapon (if you bring Sting), and access to Heroic Defense. He also has access to the One Ring, which doesn't confer the same buffs in combat as it did in the last edition, but does help improve Frodo's survivability significantly. Keep him off on his own, and he's immune to arrow fire and spells, and very difficult to charge by melee fighters. And if he is charged, the Ring gives him some measure of help. Just watch out for that 1 or 2 on your Ring test... Frodo's tough, but not invincible, and losing control of him--even temporarily--can become really problematic, especially in a pure Fellowship force where models are scarce to begin with.
- {AoLotR} The Fellowship (Fortitude): Woodland Creature; Mountain Dweller; may reroll a single failed to-Wound roll if within 3" of another Fellowship member
- {AoLotR} The Breaking of the Fellowship (Fortitude): Light of Earendil (roll a 3+ upon Activation to cast Blinding Light); Fearless while Frodo is alive; Fortify Spirit; elven cloak for free
- {AoLotR} The Shire (Fortitude): may reroll failed Courage Tests; Courage Tests cannot be reduced by enemy magical powers or special rules; may benefit from Gandalf's Stand Fast; may reroll failed Fate rolls and passes on a 3+
- {AoLotR} The Road to Rivendell (Fortitude): Woodland Creature if activated within 6" of Aragorn; may start the game as a passenger on Asfaloth if Arwen is in the list; may choose to play the scenario at night
- {AoLotR} Garrison of Ithilien (Fortitude): must take Mithril Coat, Sting, Elven Cloak; may be part of Faramir's warband or a separate warband with Sam and Smeagol; worth extra VPs if still alive at the end of the game
- Samwise Gamgee {AoLotR}: This edition, Sam also picked up a second attack to pair with Fight 3, two wounds, and 2/2/2 heroic stats. His Strength 2 is not good... but at least you can still wound something D6 or below on a "6" or better (which, in good vs. evil matches, is all evil troops at least). You also have access to Heroic Strength (and Strike) if you need it, although generally I suspect you'll want to use his Might to win fights and wound things. His primary role in a Fellowship list, however, is as Frodo's bodyguard, who can call free Heroic Combats if Frodo is fighting in another combat within 6" of him. If the combat is successful, Sam has to move into Frodo's combat (or as close to it has he can get)... but anyone else in the Heroic Combat is free to move wherever they wish. So you really want him in cheeky combats with Aragorn, Boromir, or Gimli, where his free Heroic Combat will give them another chance to lop off more orc heads. Also, he unlocks the Bill the Pony power upgrade, which is awesome.
- {AoLotR} The Fellowship (Fortitude): Woodland Creature; Mountain Dweller; may reroll a single failed to-Wound roll if within 3" of another Fellowship member
- {AoLotR} The Breaking of the Fellowship (Fortitude): Light of Earendil (roll a 3+ upon Activation to cast Blinding Light); Fearless while Frodo is alive; Fortify Spirit; elven cloak for free
- {AoLotR} The Shire (Fortitude): may reroll failed Courage Tests; Courage Tests cannot be reduced by enemy magical powers or special rules; may benefit from Gandalf's Stand Fast; may reroll failed Fate rolls and passes on a 3+
- {AoLotR} The Road to Rivendell (Fortitude): Woodland Creature if activated within 6" of Aragorn; may start the game as a passenger on Asfaloth if Arwen is in the list; may choose to play the scenario at night
- {AoLotR} Garrison of Ithilien (Fortitude): may be part of Faramir's warband or a separate warband with Frodo and Smeagol; worth extra VPs if still alive at the end of the game
- Gandalf the Grey {AoLotR}: The Leader of the Company (well, in the Fellowship list at any rate), due to his status as a Hero of Legend (and probably some thematic reasons, too). Against certain lists, you won't have much of a chance without Gandalf. While his spells (like most magic) have been reworked in the 7th Edition, he still provide a ton of utility for your band of heroes: magic protection (Protection of the Valar 3+, Foil Magic 5+, plus the ability to call Heroic Resolve), an archery shield (Blinding Light 4+), resource regeneration (Strengthen Will 4+), and a couple of combat spells (Collapse Rocks 5+, Sorcerous Blast 5+). His Staff of Power still generates a free Will each turn for casting spells, and with 3/6/3/ heroic stats (plus access to Heroic Channel to guarantee a "6" cast), he can still get most spells off pretty reliably with just a single "real" Will point. He's also received some nice combat buffs. He is still Fight 5, but has picked up a second attack to go with Strength 4 base (Strength 5 when using Glamdring), and access to Heroic Strike. On the defensive side of things, his average Defense (D5) is compensated by three wounds, three rerollable Fate points (Narya), and access to Heroic Defense--which is huge. Unfortunately you can't take his horse or cart options in the Fellowship list (and he's completely absent from Breaking and Road). But if you're running the pure Fellowship, I think you'd be hard-pressed not to bring him now at most point levels (and he's in a surprising number of Hobbit armies, too.
- {AoLotR} The Fellowship (Legend): Woodland Creature; Mountain Dweller; may reroll a single failed to-Wound roll if within 3" of another Fellowship member
- {AoLotR} The Shire (Legend): may reroll failed Courage Tests; Courage Tests cannot be reduced by enemy magical powers or special rules; friendly models may benefit from Gandalf's Stand Fast; may use two fireworks in each Shoot Phase instead of one (different fireworks must be used, and each must target a different model); passes Fate rolls on a 3+ (rerollable)
- {AotH} Survivors of Lake-town (Legend): No bonuses (but may actually take a horse)
- {AotH} The Battle of Five Armies (Legend): No bonuses (but again, may actually take a horse)
- {AotH} The White Council (Legend): may activate (and attempt to cast most magical powers), even if engaged in combat; gains the Dominant (3) special rule; gains +1 to any Resist Tests if within 6" of a friendly White Council model; may reroll 1s to cast if within 3" of Saruman; may move through difficult terrain without penalty if within 3" of Radagast; gains Resistant to Magic if within 3" of Galadriel; treats Elrond as a 3" banner
- Aragorn - Strider {AoLotR}: The engine that makes the Fellowship go (and probably most other lists he's in... which is a metric ton). Aragorn is one of the big winners in the 7th Edition. He's still got all the things that made him unique last edition: 3 Attacks, 3 Wounds, and 3/3/3 heroic stats, bolstered further by Mighty Hero (a free Might per turn) and basically every heroic action in the game (except Channel). He remains one of the best combat models in the game, getting a buff to Fight 7 to go with 3 Attacks, Heroic Strike, and (sometimes)a bow, an elven cloak, a named horse (Brego), and of course Anduril (although I'm disappointed to say that you can't take Anduril in any of the Fellowship lists anymore... which is not at all lore-correct, in addition to being very, very lame). Defensively, his base D5 (without armor--basically the equivalent of a dwarf lord), 3 Wounds/Fate, and Heroic Defense (plus sometimes an elf cloak) were already quite good in the previous edition. On paper, his wargear options are all solid (bow, armor, elf cloak, Brego, and of course Anduril)... although in practice, there's actually NO list where you have access to all of them (which seems... well, really dumb, frankly). Finally, this edition has addressed Aragorn's primary weakness: magic resistance. Like his Numenorean ancestors, he's pciked up Resistant to Magic, giving him an opportunity to resist magic even if his 3 Will store runs out. And if he somehow fails to resist a spell (with his 3 Will, Resistant to Magic, and potentially that free Might point to boost rolls), the Ring of Barahir gives him one final chance after failing a resist test to shrug off a magic spell on the roll of a "6." Is rolling a "6" reliable? No. But again--this is yet another way to resist magic (after a Resistant buff), which like Resistant lasts for the entire game regardless of Aragorn's resources. Plus, for resisting magic spells (especially given the rework to Heroic Channel), you need a "6" a decent amount of the time anyway. All told, Aragorn is probably the most important member of the Fellowship because of how extremely responsive he is to how the game is unfolding: you can move faster, shoot more accurately, shrug off magic spells, and even challenge the enemy's biggest bruiser--all without spending any real Might. In a limited model-count list where most of the models are either one-dimensional combat heroes (Legolas, Gimli, Boromir) or their exact opposite (Merry, Pippen, Bill), that sort of flexibility (sans your ability to choose upgrade options) is really great.
- {AoLotR} The Fellowship (Valour): Woodland Creature; Mountain Dweller; may reroll a single failed to-Wound roll if within 3" of another Fellowship member; may take a bow, but no armor, elf cloak, Brego, or Anduril (boo!)
- {AoLotR} The Breaking of the Fellowship (Valour): Elven dagger (elven-made weapon with Uruk-haibane special rule--and yes, that's how the rules spell it); Fearless while Frodo is alive; Fortify Spirit; elven cloak for free; may take a bow and gets an elf cloak for free, but no armor, Brego, or Anduril option (boo!)
- {AoLotR} The Road to Rivendell (Legend): Woodland Creature because he always activates within 6" of himself; may choose to play the scenario at night; may take a bow, but no armor, elf cloak, Brego, or Anduril option (okay... this one I grant is lore-accurate... but it's the only one)
- {AoLotR} Road to Helm's Deep (Valour): if dismounted, may mount a friendly Warrior's horse; must take Brego (and bow), but no armor, elf cloak, or Anduril (boo!)
- {AoLotR} Defenders of Helm's Deep (Valour): must take armor, but no bow, elf cloak, Brego, or Anduril (boo!)
- {AoLotR} Ride Out (Valour): whilst mounted, +1 Strength on the charge and may reroll 1s during a Duel Roll; once per game, at the start of any Move Phase, may trigger the Horn of Helm Hammerhand to gain Terror after charging; Fearless must take Brego (and armor), but no bow, elf cloak, or Anduril (boo!)
- {AoLotR} Return of the King (Legend): must be the General; friendly Dunharrow Warrior models within 3" of Aragorn gain +1 Fight; gets Anduril for free (finally!), and may take an elven cloak (but no bow or armor or Brego--boo!)
- {AoLotR} Defenders of the Pelennor (Legend): may declare a Heroic Combat once per game for free; may take Anduril and an elven cloak (not for free), but no bow, armor, or Brego (boo!)
- {AoME} The Grey Company (Valour): must be the General; not slowed by any difficult terrain of any type; gets Anduril for free (finally!), and may take an elven cloak and bow (but no armor or Brego--boo!)
- Legolas Greenleaf {AoLotR}: Like Aragorn, Legolas has gotten some major love in the 7th Edition. While his combat profile is still above-average (Fight 6, S4, elven-made daggers, and 2 Attacks, with 3/2/3 heroic stats and Heroic Strike), his real prowess is in the Shoot Phase. He's inherited Thranduil's 2+ Shoot Value from the last edition (which is pretty sweet), which he now pairs with Sharpshooter and also a +1 to-wound buff to his shooting attacks (essentially making his bow S5) if Gimli has more kills than he does (Final Count, 42). (or one auto-hit, even into combat, on a 2+). Finally, he has his core two special shooting rules from last edition, both of which have gotten some glossy updates. Deadly Shot allows him to still make three shooting attacks (instead of just one), following all the normal rules of shooting... except that he doesn't suffer the -1 penalty for shooting as long as he's on foot, and he can shoot while he's engaged in combat (and can in fact shoot at the model(s) he's engaged in combat with, without taking any in-the-ways). But yeah--other than that, he follows the normal rules of shooting. :-P And if that doesn't float your boat, Pinpoint Shot still allows Legolas to make a single shooting attack at an enemy who is engaged in combat with a friendly model, without needing to take any in-the-ways (if he hits, he hits). This is an invaluable skill against mounted enemy heroes, whom he can either counter-charge (if you happen to take him in the handful of lists where he can be mounted) or auto-hit their mounts when they charge into combat, thanks to the synergy of this rule and Sharpshooter (backed up by 3 Might, your odds of de-horsing that opponent--and with it, potentially eliminating their ability to make any strikes against Legolas's mates, is quite good). He's still pretty fragile (2 Wounds and 3 Fate with a D4 base, or D5 with armor--although that's a pretty rare upgrade option for him), although the elven cloak can be really helpful if you plan to keep him at range most of the time. But add excellent Courage and Intelligence (both 4+), and you have one of the better profiles in the game, who I expect to be a mainstay in a ton of lists.
- {AoLotR} The Fellowship (Valour): Woodland Creature; Mountain Dweller; may reroll a single failed to-Wound roll if within 3" of another Fellowship member; no armor or elf cloak
- {AoLotR} The Breaking of the Fellowship (Valour): Bow of the Galadhrim (may reroll failed to-Hit rolls while within 3" of a friendly Lothlorien model); Fearless while Frodo is alive; Fortify Spirit; elven cloak for free (but no armor)
- {AoLotR} Road to Helm's Deep (Valour): if dismounted, may mount a friendly Warrior's horse; may take elf cloak; must be mounted, may take Gimli as a passenger
- {AoLotR} Defenders of Helm's Deep (Valour): shooting attack range increased by 6" if he does not move when activated; may take armor (D5) and elf cloak, but no horse
- {AoLotR} Ride Out (Valour): whilst mounted, +1 Strength on the charge and may reroll 1s during a Duel Roll; once per game, at the start of any Move Phase, may trigger the Horn of Helm Hammerhand to gain Terror after charging; Fearless; must be mounted with armor (D5)
- {AoLotR} Return of the King (Valour): No bonuses
- {AoLotR} Defenders of the Pelennor (Valour): may declare a Heroic Combat once per game for free
- {AoLotR} Men of the West (Valour): once per game, may get a +1 Fight buff and reroll to-Wound rolls of 1 if within 6" of Aragorn; auto-passes any Courage Tests while Aragorn is alive; may take a horse if there are no Eagles in the list;
- {AoME} The Grey Company (Valour): not slowed by any difficult terrain of any type
- Gimli {AoLotR}: Ah, Gimli... I would love to say that Gimli has improved in this edition, but alas--with the exception of an extra Fate point (which is nice), he's exactly the same as he was in the Sixth Edition (except for his 6+ Intelligence stat... which is frankly kind of insulting). At fight 6, with 2 attacks and Heroic Strike and Strength (to go with 3/2/3 heroic stats), he remains a serviceable combat model, and his Master-Forged dwarf axe allows him to punch up to S6 (albeit only with two strikes), which can be helpful against high-defense targets and monsters. His best combat output, however, depends on how Legolas has been doing at shooting. If you can get Axes of the Dwarves (Gimli can use his two hand-axes instead of his great axe, for 3 Attacks) to coincide with I Myself and sitting rpetty on 43 (Gimli gets +1 to-Wound on strikes if Legolas has killed more models than Gimli), you can actually get an extra attack at effective S6 (or potentially two attacks with a +2 to-Wound). That's certainly not bad, but it's also not on-par with what Legolas or Aragorn will give you, especially since he's slower than both of them (5" move--although thankfully, he has throwing axes built into his base profile, so none of this edition's upgrade-hijinks come into play). Finally, he remains a very solid tank on paper, (Defense 8, two wounds, and now 3 Fate), although with the explosion of +1s to-wound (and even worse, stacking +1s to-Wound), the lack of Heroic Defense is... well, it's dumb (and possibly criminal). Is Gimli good? Yes. Is he still probably the 4th or 5th model that you're choosing in a Fellowship list? Yeah, he probably is.
- {AoLotR} The Fellowship (Valour): Woodland Creature; Mountain Dweller; may reroll a single failed to-Wound roll if within 3" of another Fellowship member
- {AoLotR} The Breaking of the Fellowship (Valour): Galadriel's Locks (may reroll a single duel die, up to 3 times in a game); Fearless while Frodo is alive; Fortify Spirit; elven cloak for free
- {AoLotR} Road to Helm's Deep (Valour): may take elf cloak; may be taken as a passenger if Legolas is in the list (but cannot steal a friendly warrior's horse and remount if dismounted)
- {AoLotR} Defenders of Helm's Deep (Valour): No bonuses (as his throwing axes are specifically excluded from the Give them a Volley special rule)
- {AoLotR} Ride Out (Valour): whilst mounted, +1 Strength on the {AoLotR} Return of the King (Valour): No bonuses
- {AoLotR} Defenders of the Pelennor (Valour): may declare a Heroic Combat once per game for free
- {AoLotR} Men of the West (Valour): once per game, may get a +1 Fight buff and reroll to-Wound rolls of 1 if within 6" of Aragorn; auto-passes any Courage Tests while Aragorn is alive
- {AoME} The Grey Company (Valour): not slowed by any difficult terrain of any type
- {AoME} Army of Erebor (Fortitude): may declare a Heroic Combat once per game for free; may reroll failed To Wound rolls if within 3" of Gloin
- Boromir of Gondor {AoLotR}: Unlike Aragorn and Legolas, I can't help feeling like Boromir of Gondor is one of the big losers from this edition. Yes, he did make the jump to Fight 7 (which, paired with the nerfs to Heroic Strike, is very nice), and the Horn of Gondor is now a War Horn (which gives him Dominant (2), and also offers some redundancy in case your Frodo dies and the Fellowship loses Fearless). He also retained his core "Boromir" features, including his boss combat stats (S4, 3 Attacks, and 6 Might with access to Strike, Strength, March, and Defense), along with his fragile defensive stats (3 Wounds, but only 1 Will and 0 Fate). And he still has synergies with Merry and Pippen (which actually work in both directions now--Merry and Pippen can still use his Might points, while Boromir gains Fearless and can reroll failed to-Wound rolls when within 3" of the hobbits). The problem, unfortunately, is that Boromir is one of just a handful of heroes who can only be taken in two lists: the Fellowship and Breaking. Don't get me wrong--he's great in those lists--maybe even as good as your third buy (after Aragorn and Legolas, but ahead of Gimli and Gandalf? Does that seem right?) And the fact that you can take Haldir and some wood elves in the Breaking list means that you can still include him in a semi-conventional "army" like you could last edition. But this is one of those situations where I miss the flexibility that last edition brought to list-building, because it just feels wrong to me that a profile as iconic as this one is relegated to just a couple of lists (at least one of which, unfortunately, just doesn't seem viable at the points levels you need to field it). On the plus side, though, he can at least take his horse option in the Fellowship list (which is weird, since no one else can--and again, probably why he's your third buy in that list). And I am happy that he didn't lose his shield option in Breaking (just bring Haldir along, say it was before Ammon Hen, and you're good... except for the gift thing--but that's okay, because in Boromir's case, his gift kind of sucks :-P).
- {AoLotR} The Fellowship (Valour): Woodland Creature; Mountain Dweller; may reroll a single failed to-Wound roll if within 3" of another Fellowship member; weirdly, may take a horse!
- {AoLotR} The Breaking of the Fellowship (Valour): Golden Belt (gains Woodland Creature); Fearless while Frodo is alive; Fortify Spirit; elven cloak for free
- Merry and Pippen {AoLotR}: Two more deceptive-looking profiles. Yes, with Fight 3, Strength 2, and one Attack they aren't the most reliable of combat models; and they're still pretty squishy (D3, 1 wound), although the second Fate point for basically no points increase is a nice touch. But apart from their speed (4", which Aragorn can remedy), they aren't bad at scoring objectives (especially if they have their elven cloaks behind some terrain), and their ability to spend Boromir's Might in a pinch (while also buffing Boromir's combat prowess) can make them surprisingly tough outs, especially if they're deployed strategically around or between other combat heroes. Also, their ability to throw rocks (combined with Gimli's throwing axe, Aragorn's bow, Gandalf's Sorcerous blast, and Legolas's upgraded shooting rules) can be kind of annoying on a turn where you get caught in no-mans land trying to close on them.
- {AoLotR} The Fellowship (Independent): Woodland Creature; Mountain Dweller; may reroll a single failed to-Wound roll if within 3" of another Fellowship member
- {AoLotR} The Breaking of the Fellowship (Independent): Daggers of the Noldorin (elven daggers, may reroll failed to-Wound rolls); Fearless while Frodo is alive; Fortify Spirit; elven cloak for free
- {AoLotR} The Shire (Independent): may reroll failed Courage Tests; Courage Tests cannot be reduced by enemy magical powers or special rules; may benefit from Gandalf's Stand Fast; may reroll failed Fate rolls and passes on a 3+
- {AoLotR} The Road to Rivendell (Independent): Woodland Creature if activated within 6" of Aragorn; may choose to play the scenario at night
- Bill the Pony {AoLotR}: The secret sauce, who's gotten some really nice improvements this edition. Instead of just providing a banner reroll to hobbits, he now serves as a banner for all your Fellowship members, which is really nice (especially if you're outnumbered and your opponent starts splitting combats on you). If you can engage your opponent in detail, he's also great on the periphery, close enough to the action so he can give your heroes banner rerolls, or so a big bad like Aragorn or Boromir can end their charge on the enemy toughing his base (for a chance to restore a juicy Might point on a 5+). Or, if you're worried about him dying, you could just keep him 20" away from the fray in base contact with Legolas (so he can replenish his Might store over time as he's peppering the enemy with three bow shots a turn). And while he can't charge (Fearful), his 40mm base is big enough that you can really get in your opponent's way if you need another control zone in a pinch. I don't know that I'd ever recommend that, but in a small army list where you're likely to be outnumbered, I don't know that you'll always have a choice... and at least with his additional Wound (2) and Fate (2), he has much better odds of surviving than he did last edition. Don't sleep on the fact that he moves 8", either. In the Fellowship, he's probably your best chance (after Boromir on horse) of racing to an objective you absolutely have to have. And that 8" move synergizes sneaky-well with a Road to Rivendell list if your event allows you to Legacy-in Gildor Inglorion and his Noldorian Exiles (who also move 8", and can get up to 11" of movement per turn if they're within range of Aragorn's free Heroic March).
- {AoLotR} The Fellowship (Independent): Woodland Creature; Mountain Dweller; may reroll a single failed to-Wound roll if within 3" of another Fellowship member
- {AoLotR} The Road to Rivendell (Independent): Woodland Creature if activated within 6" of Aragorn; may choose to play the scenario at night
Supporting Cast
In addition to running the Fellowship as a distinct unit, the 7th edition's emphasis on "thematic" forces (ala Legendary Legions in the prior edition) also expands their group to include other profiles that interacted with the Fellowship's core members at one point or another.
For the sake of time, space, and sanity, I'm not going to include profiles here that are primarily part of other factions (so no additional Hobbits, like old Bilbo and Rosie; no Gondorian heroes like Faramir and his Ranger captains; and none of the myriad Rohan, Gondor, Fiefdom, and dead heroes that the Three Hunters fought with). Instead, we'll focus just on the models that show up in the two "core" Fellowship lists (Fellowship and Breaking), and the niche Road to Rivendell list... plus everyone's favorite corrupted river hobbit, of course.
- Barliman Butterbur {AoLotR}: Barliman plays a largely supporting role to the Fellowship in The Road to Rivendell. His combat stats are bad (F3 with one S3 Attack), and he's not exactly durable (D4 with 2 wounds, although 2 Fate isn't awful). So if you're taking him, you're taking him because of his two special rules. The first, Barliman Butterbur, at your service, allows him to end his move in base contact with a friendly Fellowship model, and restore a single Wound on a 4+. The second, Well fed, and ready to fight, grants friendly Fellowship models within 6" the Dominant (2) rule, which is helpful in objective capture scenarios. And if worst comes to worst, he does have 2 Might that he can use for Heroic Defense or Resolve (plus whatever else you might need to use Might on).
- {AoLotR} The Road to Rivendell (Minor): Woodland Creature if activated within 6" of Aragorn; may choose to play the scenario at night
- The Gatekeeper of Bree {AoLotR}: RIP to Harry Goatleaf. But his legacy lives on in the now-unnamed (although somehow still unique?) "Gatekeeper of Bree." Like Barliman, he's also bad in combat and really fragile (F3, S3, D3, 1 Attack, 2 Wounds, 7+/8+, and 1/3/1 heroic stats), so his primary value is in his special rules. A Light in the Dark makes any area within 6" of the Gatekeeper count as daylight--which could be good if the opponent wants to make you fight at night, and completely useless or counter-productive if you want to trigger Road's special rule about playing scenarios at night (fortunately Road allows you to toggle this special rule off, if you wish). As a side-effect, enemy models cannot charge your other models if they could charge the Gatekeeper... because I guess enemy elves are drawn to lights like moths to the flame? His other rule, Gatekeeper, kind of does the opposite: at the end of the Priority Phase, you can spend a will, choose a single non-Monster and Infantry model within 6", roll a 3+, and prevent that model from moving at all during its activation (though it may otherwise act normally)... because I guess people actually halt when told to do so in the dark, by a strange man holding up a lamp? I dunno... if I'm honest, I'm not sure why this bloke got a profile, a Forge World model, and a name change, when Anarion didn't get anything at all. But perhaps I'm the only one who feels a need to suspend disbelief whenever he's fielded.
- {AoLotR} The Road to Rivendell (Independent): Woodland Creature if activated within 6" of Aragorn; may start the game as a passenger on Asfaloth if Arwen is in the list; may choose to play the scenario at night
- Arwen {AoLotR}: Arwen is one of several models from last edition who got a nice glow up in the 7th Edition. She's slightly more expensive now (90 points if mounted), but retains her ability to take 12" move Asfaloth (usually, unless Glorfindel is around) and Spirit-wounding elven-made Hadhafang (usually, unless Elrond is around). She still has Expert Rider and Woodland Creature as part of her base profile, and has picked up an extra attack (2 Attacks) and +1 Strength (S4) to go with Fight 6 and an elven hand weapon, for some noticeable added "punch" in combat (especially when mounted). She is still only D4 with 2 Wounds, but she's picked up an extra Fate (and Might) for 2/4/2 heroic stats, while retaining Heroic Defense (in addition to Resolve and Channel). In addition to Wrath of Bruinen (on a 4+), she has also picked up Renew (on a 3+), which means you can replicate (or duplicate) Butterbur's healing abilities in a Road list. Lastly, in the Road list, you can start Frodo off as a passenger on Asfaloth, which allows her to use Frodo's 2/3/3 heroic stats and gives her an extra Attack (3 base, 4 on the charge, 8 dice to wound)... which, given that she's now S4 (and potentially more, if you're charging something Spirit-y with Hadhafang) is kind of bonkers.
- {AoLotR} The Road to Rivendell (Fortitude): Woodland Creature if activated within 6" of Aragorn; may choose to play the scenario at night
- {AoLotR} Rivendell (Fortitude): +1 bonus to Courage Tests; may trigger Invoke the Bruinen once per game (place a 25mm marker within 12" and line of sight, roll a D6 for all enemy models within 3", and if the D6 equals or exceeds the target's strength it suffers a S4 hit and is knocked prone)
- Haldir {AoLotR}: Haldir is basically unchanged from last edition. His combat profile remains good, not great, although with Fight 6, an elven-made hand-and-a-half-sword, and access to Heroic Strike (with 3 Might), he'll almost certainly benefit from Heroic Strike being reduced to a D3 and becoming rarer (plus he remains one of only a handful of 3/1/1 heroes from last edition to retain those heroic stats). In the Breaking list, he loses access to his heavy armor (D4, 2 Wounds, 1 Fate), and theoretically can be fielded without his elf bow... although with Expert Shot and a 3+ shoot value (plus Sharpshooter), I doubt you'll ever go that route. Heroic Strength and Accuracy (in addition to Strike) round out his heroic suite, and he can still make one final S4 strike on any enemy models he was in combat with, if he is slain (One Final Blow). He's clearly not your best combat model in this list (Aragorn, Boromir, Gimli, and Legolas are clearly a cut above), but as your fifth combat hero he's perfectly serviceable (if a bit fragile). But like Gildor in the Road legion, his primary benefit in Breaking is as a conduit for up to 15 Lothlorien Warriors ("wood elves" in the previous edition), who can take elf bows, throwing weapons, wood elf spears (elven made and can be used to shield), and even a banner for those important VPs. Oh, and he also gets Fortify Spirit and a free elf cloak in this list, so that's nice.
- {AoLotR} The Breaking of the Fellowship (Valour): Fortify Spirit; elven cloak for free
- {AoLotR} Defenders of Helm's Deep (Valour): treats Aragorn and Theoden as 6" banners; auto-passes Courage Tests and reroll failed to-Wound rolls within 6" of Aragorn or Theoden; shooting attack range increased by 6" if he does not move when activated
- {AoLotR} Lothlorien (Fortitude): Resistant to Magic; reroll 1s when shooting at models that cannot see them
- Gildor Inglorion {Legacies}: Gildor is an elf wanderer, and offers a cheaper magic aspect to the Road to Rivendell list. His combat profile identical to last edition, with Fight 6 (with plus an elven-made sword, though not a hand-and-a-half one), S4/D4, 2 Attacks / Wounds, and 1/4/1 heroic stats (plus 4+/5+ Courage/Intelligence). He also retained all four of his heroic action options from last edition (March, Channel, Defense, and Resolve), although in a Road list you're unlikely to ever use his March if you have Aragorn in the list (which I strongly suspect you always will). Like basically all elves, he comes with Woodland Creature, and also picks up Terror (which is handy). His 4 Will also means that he can make use of his spell suite, with both a 3+ Immobilize (12") and the new spell, Writhing Vines, which he can cast on himself on a 4+. Lastly, he has an improved Move value of 8", and can bring up to 12 Noldorin Exiles in his warband, which are Lothlorien Warriors (these were "Wood Elves" last edition, not the armored Galadhrim warriors) with the Rivendell keyword and an 8" Move. While these warriors are fragile (D3, 1 wound), they come equipped with elf cloaks in their basic profiles, and there are no restrictions in Gildor's rules for the wargear you can give them (which means you could give them throwing weapons, elf bows, wood elf spears (elven weapons that they can use to parry in a pinch), and even a banner--which is pretty great. If your event allows legacy models, these are a great way to up your model count, your speed at capturing objectives (as they'll move 11" with a Heroic March), and to get some additional dice into combats (or protect your primary heroes from being surrounded).
- {AoLotR} The Road to Rivendell (Fortitude): may choose to play the scenario at night
- Tom Bombadil {AoME}: Technically, Tom is a bona fide member of the Armies of Middle Earth crew, and thus tournament-legal in every setting... but he's always had a bit of a reputation, so make sure you check your event's rules before slotting him in, in case he ended up on a "banned" list. :-P Assuming you can take him, he's changed slightly from last edition (with a 6" move, 0s for all his stats, and 0/12/0 heroic stats--down from 0/15*/0 last edition). Like his previous profile, Tom still treats all terrain as open ground, counts as rolling a "6" on any jump/leap/climb tests he has to take, can't be targeted by anything (abilities, special rules, magical powers, brutal power attacks, or shooting attacks), and cannot be charged by any model without his consent. He has lost his control zone (so that's nice, I guess), and can still charge enemy models if he wishes (at which point he auto-wins the fight, his side can't make any strikes, and he coughs up a Will point). He also cannot carry objectives in scenarios, and can't be chosen as a "Hero" in scenarios where you have to choose one for an objective (Tom is the Master). Unlike his previous incarnation, he can no longer spend Will points to cast magical powers. But he can spend Will to sing a song each turn (and sometimes more than one song per turn, if you have sufficient Will), which is arguably better (as there's no roll involved--it just happens). Tom's song options allow you to restore a lost wound (Hey! Come Merry Dol!), give friendly models within 6" an extra 3" of movement and immunity to all difficult terrain (Hop along, my hearties!), cleanse a friendly model within 6" of any magical effects and grant magic immunity for the rest of the turn (Wake now my merry lads!), cause all friendly models within 6" to auto-pass their courage tests (Ring a dong dillo!), or deal a wound to a Spirit model (Get out, you old wight!). Lastly, you can bring Goldberry along only if you take Tom... which is definitely not a change, and is actually something you might do this edition, because...
- {AoLotR} The Road to Rivendell (Independent): may choose to play the scenario at night
- Goldberry {AoME}: A cheaper, and more pared-down version of Tom (6" move, 0s for stats, and 0/8/0 heroic stats), with basically all the same mechanics under different names (River-Daughter and Sing a Jolly Song). The latter allows her to sing songs as well, at the cost of 1 Will each, which cover slightly different territory than Tom's songs (and without all the exclamation points!). In addition to restoring a single wound on a friendly model (Supper is Ready), she can also prevent an enemy model from activating (Have Peace Now) and cause a friendly model to auto-pass any courage tests it needs to take, plus get a +1 Fight buff if charging an enemy model (Heed No Nightly Noises). Again, you have to take Tom to field Goldberry (and either will leave the battle as a casualty if they are reduced to 0 Will). But if your event allows them, there's no denying they're a potent addition to a force that can include Aragorn and elves.
- {AoLotR} The Road to Rivendell (Independent): may choose to play the scenario at night
- Smeagol {AoLotR}: Last but not least is Smeagol, who is a rare inclusion in the Fellowship (he can only be brought in the Garrison of Ithilien list, and only if you take both Frodo and Sam). Smeagol's base profile is basically unchanged from last edition (F4, S4, D4, 2 Attacks/Wounds, and 1/0/1 heroic stats), but he did pick up Mountain Dweller (in addition to Cave Dweller) and also improves his Courage from 7+ to 5+ he is within 6" of Frodo. In addition, he also doesn't halve his Move while moving through difficult terrain (and if Frodo and Sam activate within 6" of him, neither do they). All in all, he's a useful (if niche) piece in a niche army list.
- {AoLotR} Garrison of Ithilien (Independent): may only be included if your force includes both Frodo and Sam; may be part of Faramir's warband or a separate warband with Frodo and Sam; worth extra VPs if still alive at the end of the game
On those Army Lists…
Just to be clear--this is not a detailed write-up on all the army lists that can field Fellowship units... because that'd take forever to write and read through. But I did want to include a brief summary of what sort of lists let you field at least most of the Fellowship's members, and where those members play a critical role. With apologies to the Defenders of the Pelennor and Men of the West lists (which do feature most of the Fellowship's members, but mostly alternative profiles for Gandalf, Merry, Pippen, and even Aragorn), there are three lists that are mostly Fellowship lists:
- The Fellowship [Armies of the Lord of the Rings]: No surprise here--the OG list is still the only way that you can field every member of the Fellowship (Gandalf through Bill), and you get some nice quality of life buffs for your troubles: the entire force is Fearless and can't break if Frodo's alive; they each count as banners for each other (so you'll get rerolls on your duel rolls for at least most of the game); and you get to meld Aragorn's flexibility and Gandalf's magic with the raw kill power of Legolas and Boromir, Sam's cheeky heroic combats, and the shenanigans of Bill's breakfasts... plus Gimli and Merry and Pippen are there, too (poor Gimli)). That said, there's also some limitations here. The biggest is model count, which caps at 10 (for a very random 815 points max). At 800 points (where you'd normally expect to see lists in the mid-30s to 50s), that's a significant model count disadvantage (why this list didn't get some sort of Dominant rule is beyond me). The list also has to deploy in a single warband, which is sometimes okay and sometimes will set you back pretty badly. Half the force is also very slow (the hobbits and Gimli). Yes, Boromir can be mounted, Bill can move 8", and Aragorn can spend his free Might to call Marches. But if you've never tried to March a force that moves at five different speeds (4", 5", 6", 8", and 10"), you should sometime... it's quite the experience. Finally, I'll just note that the options for most of the Fellowship members are really bad. With the exception of Boromir (horse and shield), your only options are a bow for Aragorn, and Sting and the Mithril Coat for Frodo. Like, literally, that's it (and while I understand them not having access to elven cloaks for lore reasons, that's a huge loss competitively for a list that only caps out at 10 models anyway, most of whom are really susceptible to enemy bowfire). If you want to play Fellowship on "hard mode" (or really, really want to play with Gandalf the Grey), then this is the list for you. But if you're looking to break into the Fellowship more slowly (or, frankly, want something pseudo-competitive), either of the other Fellowship lists are a much better bet. For more on this list, check out Tiberius's 7th Edition write-up here!
- The Breaking of the Fellowship [Armies of the Lord of the Rings]: This list trades Bill the Pony and Gandalf the Grey for a ton of buffs (most of which are static, Frodo's sketchy Blinding Light excepted), and a huge buff to model count (with the addition of Haldir and his
wood elvesGaladhrim Warriors). All of the Fellowship's members get individual buffs based on their gifts in Lothlorien; and while not all the gifts are created equal (Legolas's is amazing; Aragorn and Frodo's are pretty good; Sam and Boromirs are pretty situational), the fact that you get these buffs for free (plus elven cloaks for free--again, a huge boon given how susceptible all the members are to bowfire), sets this list ahead of the Fellowship list from the get-go. Add that all your Fellowship members retain Fearless while Frodo is alive (in addition to the force being unable to break), and also pick up Fortify Spirit, and you have a much more resilient Fellowship as the backbone for your force. Augment them with F6 Haldir (who's not a great lead combat hero, but is very overqualified as your fifth combat hero) and up to 15 F5 Galadhrim Warriors (with access to their entire compliment of upgrades--wood elf spears, elf bows, throwing daggers, and even banners), and you've got the ability to field up to 24 models at somewhere between 800-875 points (depending on how many upgrades and banners you bring along). Yes, that's still very elite--but if you start the game down only 2-1 instead of 3-1 to 5-1, that's a noticeable improvement. For more on this list, check out Tiberius's 7th Edition write-up here! - The Road to Rivendell [Armies of the Lord of the Rings]: This list is probably the weirdest of the three, because on its face it looks like it takes a major step back when it comes to combat (no Legolas, Gimli, Boromir, Gandalf, or Haldir). Really, only Aragorn looks like a traditional combat hero (and he's great, of course, but he can only be in one place at a time). That said, if your event allows you to use Legacy models, this list offers some pretty clear advantages over either of the other lists, because of the number of ancillary heroes you can pack in. Start with Arwen (mounted on Asfaloth, with Hadhafang), who gives you a second solid beater, with 4 Attacks on the charge (8 dice to wound, at S4) if you mount Frodo as a passenger on her 12" move horse (seems pretty smart to me). But her ability to cast Renew to restore Wounds (with 4 Will points, and
potentiallyprobably more) may be even more valuable, and actually synergizes really well what what I think is probably the real strength of this list: infinite... well, everything. Between Arwen's Renew (3+, 12" range), Barliman's At your service (4+, base contanct), and Tom and Goldberry's healing songs (6", auto-success), you can restore up to 4 wounds per turn to keep your heroes alive and churning. Aragorn's free Heroic Marches, combined with the 8" moves on Bill, Gildor, and the Noldorin Exiles, means that a good chunk of this list can move surprisingly fast. Gildor also brings some cheeky Terror and some magic support (Writhing Vines and Immobilize), in addition to another serviceable combat hero (Fight 6, elven made sword, 2 attacks at S4). Barliman randomly gives your Fellowship members Dominant (2) (yeah, it's just Aragorn and the four hobbits... and of course if you take Aragorn, he has to be your General, so he'll get Dominant (3) anyway... but hey, it's something!). You've got Harry Goatleaf's avatar doing lore-bending feats of startle-dom with his lamp. You can force your opponent to fight in the dark (and decide if you want to dim the avatar's lamp). And you can actually clear 900 points with this list if your event allows Legacies, with up to 24 models to show for it (two of which are broken cheat-code models). I have no idea if this list is actually competitive... but it's got to be one of the more fun soup lists to play... and probably the weirdest to play against, too. For more on this list, check out Tiberius's 7th Edition write-ups here and here!
For Further Reading
And with that, our look at the revamped Fellowship of the Ring is complete. As always, you'll find links to additional community resources below. And if you've been playing the Fellowship for a while (or are just trying them out this edition), please let us know your thoughts in the comments!

More from the TMAT Team:
- The New Age is Begun: The Road to Rivendell Army List (7th Edition, June 2025)
- The New Age is Begun: The Breaking of the Fellowship Army List (7th Edition, June 2025)
- The New Age is Begun: The Fellowship Army List (7th Edition, June 2025)
- Thematic List Building Challenge: The Road to Rivendell (7th Edition, December 2024)
- Top 5 Profile Changes - Fellowship Edition (6th Edition, October 2024)
- Nemesis: How to Fight Against Legolas (6th Edition, November 2023)
- In Defense Of: Merry and Pippen (6th Edition, January 2022)
- In Defense Of: Smeagol (6th Edition, January 2022)
- Quest of the Ringbearer Inspired Lists: The Breaking of the Fellowship LL (6th Edition, November 2021)
- It Has Come To Me (Again): Thoughts on the One Ring (6th Edition, September 2021)
- Updates It has Come to Me - The One Ring: Thoughts on the Ring (and how it's Changed) (6th Edition, June 2019)
- The Stuff of Legends: The Breaking of the Fellowship (6th Edition, April 2021)
- The Bare Necessities, Part XVI: The Fellowship and Thorin's Company (6th Edition, April 2020)
- The Fellowship: The Strength of the Company, Revisited (6th Edition, September 2019)
- Updates The Fellowship: The Strength of the Company (July 2012)
- The Fellowship: Concerning Hobbits, Revisited (6th Edition, September 2019)
- Updates The Fellowship of the Ring: Concerning Hobbits (July 2012, *Pre-MESBG)
- The Fellowship's Tactical Units, Revisited (6th Edition, September 2019)
- Updates: Carrying the Weight of the World: The Fellowship's Tactical Units (August 2012, *Pre-MESBG)
- Battle Report: Fellowship vs. Isengard (Hold Ground) (6th Edition, July 2019)
- A Pocket Full of Power Revisited (6th Edition, June 2019)
- New Profiles, Part IX: The Free Peoples, Part II (6th Edition, January 2019)
MESBG Community Resources:
- VIDEO: Fellowship Army Review (STF Wargaming, 6th Edition)
- VIDEO: Fellowship Army Review (Top Table Gaming, 6th Edition)
- PODCAST: Episode 60: Themed List Challenge (The Green Dragon Podcast, 6th Edition) [Fellowship discussion begins around the 58:00 mark]
- PODCASTS: Know Thine Enemy: Aragorn, Gandalf, Gimli, (The Green Dragon Podcast, 5th Edition)
- PODCAST: Mustering an Army Episode 20: Heroes Finale (The Green Dragon Podcast, 5th Edition)
I have a 650 event this weekend. How do you think Frodo (with mithril coat), Gandalf, Aragorn (with Anduril), Boromir (with shield) Legolas and Gimli would do? I imagine sticking the ring on Frodo and hiding him a corner would keep the army bonus safe and you'd need to carefully target who you fight with the rest of the army.
ReplyDeleteYou should wait for Rythbryt to comment, but personally if you plan on putting the Ring on with Frodo, I think at 650 you don't need the Mithril mail - you'd be better served (I think) by putting armor on Aragorn/Legolas, maybe giving an Elven cloak to someone or Sting to Frodo (giving him roll-off advantage against any F5/6 models that do manage to charge him). While Aragorn/Legolas are very powerful, the promote for Aragorn from D5 to D6 (and the promote for Legolas from D4 to D5) is huge.
Deletejlmbarnes, thanks for your question! My first thought is that you may have a list that's over 650 (I believe Frodo, Gandalf, Aragorn, Boromir, Legolas, and Gimli, without any upgrades, are 685). Did you perhaps mean 750? If so, I think the six heroes you've chosen are the ones to roll with, as they offer a good mix of shooting, offensive/ defensive magic, and combat power. If not, you will probably have to drop a hero to fit, which would hurt.
DeleteIf you’re thinking about tweaks, here are some I’d consider:
* Adding Sam. He's another control zone with multiple Might, wounds, and Fate, and his free Heroic Combat ability synergizes well with Aragorn, Gimli, and Boromir to keep them moving. At 750, taking him means dropping Anduril, or swapping a beat-stick hero (Gimli or Boromir in all likelihood) for Sam, Merry, Pippen, maybe Bill, plus more upgrades. Between those two alternatives, I'd lean towards dropping Anduril myself (keeping both Boromir and Gimli), and picking up Sam because I think his free Heroic Combat each turn is that good. But I concede dropping Anduril is a very, very painful drop, and if you wanted to keep Anduril over adding Sam, I wouldn’t blame you.
* Dropping the Mithril Coat for more upgrades. As Tiberius rightly points out, Armor and elven cloaks are very good upgrades, especially on Aragorn and Legolas. If you are playing at 750, you actually have 5 points left, so you could take one set of Armor or one elven cloak without dropping anything. If you drop the Mithril Coat you could give Aragorn armor, Legolas armor and cloak, and then either give Boromir a cloak or give Frodo Sting (which is another elven-made weapon to help you get an advantage on tied duels, wound the Goblin King, etc.). All are attractive upgrades.
* Dropping the Mithril Coat for Merry and Pippen. Two more control zones, potentially with Might from Boromir. Since you’re currently 5 points under 750, you could drop the Mithril Coat to add both (plus Sam if you drop Anduril), which would give you 8 (or 9 with Sam) models. 9 models are deceptively hard to surround, especially if you keep them moving with Heroic Moves/ Marches/ Combats. I personally think you’ll get more mileage out of Merry and Pippen than you would out of having the Mithril Coat (they’re Fearless objective holders if nothing else), especially if you plan to wear the Ring a lot.
* Keeping the Mithril Coat. Using the Ring to assassinate big targets (like Gil-Galad, Glorfindel, the Balrog--things you'd normally need to spend Might on for Heroic Strike) is very valuable, so if you’re more comfortable doing that when Frodo is D6 instead of D3, take the Mithril Coat. The army is way more powerful the longer he survives, so there’s nothing wrong with making him as tanky as possible. The other thing about the Mithril Coat is that while the Ring offers the best protection against magic and ranged attacks, there is a 33% chance (on a 1 or 2) that Frodo will be moved by the opposing player whilst wearing the Ring, which can get him into trouble (especially if you’re Marching a lot). To avoid this, I’ve tried waiting to put on the Ring until you get close to combat, in which case having D6 is huge against shooting attacks (especially elf-bows, which go from wounding on a 4+ to wounding on a 6). But if you can find other ways to keep Frodo from being sniped by archers (putting the Ring on, keeping him behind terrain, Gandalf's Blinding Light), you can do a lot with those extra 15 points.
* A horse or two (probably for Aragorn, with three Fate and Horselord, or Gandalf, because mounted wizards are fantastic). Having at least one hero mounted significantly increases his damage potential and gives you a way to compete in scenarios where you have to get to a set location very, very fast (*cough* Seize the Prize *cough*) where the Fellowship can really struggle. It's less themey in a pure Fellowship list, but offers lots of advantages.
As far as how the army will do, unless someone is running something like Saruon and wraiths, spam trolls, or a Balrog-Moria monster mash-up, you should expect to be outnumbered heavily. I'd recommend practicing with the Fellowship to get a feel for being outnumbered, and to practice their special rules (there are a lot). You have to be a bit more meticulous in your movement, but there are several strategies that I've found useful in holding off a significantly larger force at bay (beyond "roll 6s"):
Delete* Always keep the objective in mind. Some are harder than others (Reconnoitre), but even objective-based missions can be won by the Fellowship (though it usually requires traveling in a group and taking out enemies on each objective one at a time before moving on to the next objective, and having Legolas snipe enemies off far-flung objectives until they break and start fleeing), especially if you get some luck on the "roll-a-1-or-2-to-end-the-mission" missions.
* Free Heroic Marches from Aragorn is your best friend. It lets you close on all-shooting armies (very dangerous, especially for Boromir and Legolas), it allows you to keep your final approach/position more secretive, and if you march side to side searching for an opening, it can really mess with your opponent's shieldwalls, pike formations, etc. (especially if you're getting second priority, and get to March 7" to the right after they've moved 6" to the left).
* Against all-shooting armies, try to utilize terrain (if you have it) to reduce the damage you'll take from enemy arrows. Marching where the enemy can't see you is fantastic, especially if you intend to March again next turn.
* Try not to commit to combat (at least at first) until after your opponent has moved, like a cavalry army would try to do. This will let you pick the combats you want, so you can charge Aragorn, Boromir, and Gimli into two models each, without having to worry that they'll be counter-charged and surrounded by 5-6 models. If you get priority and are in a position where you feel you may be counter-charged and surrounded if you charge, you can always Heroic March, move 7+" away, and set-up for the next hit-and-run charge.
* Don't rush into the middle of an enemy formation where their flanks can surround you--try to hit them on their own flank and work inwards with heroic combats.
* Heroic Combats are key: they’re force-multipliers for your combat heroes (each gets to fight twice per Fight Phase instead of once), and they keep your army moving (since every hero gets to make a full move during their Heroic Combat), so you can Heroic Combat into a great position, or out of a bad one. Don't forget you can also Heroic Combat one hero into the Heroic Combat of another; the hero that moves into the Heroic Combat can't move again, but he does get to help the second hero kill models he's engaged with (or pull other models he was engaged with out of that fight), so the second model has a better chance of getting his Heroic Combat to fire (allowing him to Heroic Combat into a third model's Heroic Combat, and so on).
* Once you are locked in combat, don't be afraid to call free Heroic Marches from Aragorn (to disengage) or free Heroic Moves from Aragorn (to get the first-move). Remember that your opponents are usually going to play a short game against you: because your heroes are so powerful individually, they have to attack you and wound you quickly; once you start killing their models (and that can happen very quickly, in droves, especially if you’re daisy-chaining Heroic Combats), their chance of victory slips away. You have limited models, so you’re trying to play the long-game: the longer your heroes survive, the more powerful they become, so don’t be afraid to withdraw using a Heroic Move/Heroic March combo if the enemy is about to overwhelm your position. As long as you have Aragorn, you always have Might, so you can afford to be aggressive (but not reckless) with it.
Strategy suggestions, cont. (Blogger’s character limit kicked in :-P):
Delete* Play the long game with your Heroiic Resources, too (Might especially, but also Fate and even Wounds—more on that next). Using Aragorn for free Marches/Moves puts a lot of pressure on your opponent to match you by spending their Might (which, unless they have a Taskmaster, isn’t going to be free). This is a problem, since most opposing forces can't spend as much Might as the Fellowship can. Once the enemy is out of Might, they can't (normally) Strike, counter your Heroic Moves, keep up with you if you March, boost their duel rolls, call Heroic Defense against Aragorn, etc., at which point you have a definite advantage. So if you can bait them into spending their Might early (say, throwing Aragorn with Anduril into a hero with Heroic Defense), that makes the long game easier for you.
* Don't be afraid to "cycle heroes" to take advantage of their Wounds/Fate to keep them on the table. If Boromir is fighting Azog, and Azog deals two wounds to him, it's to your advantage to pull Boromir out of that fight and substitute him with someone like Aragorn while Boromir beats up on Azog's bodyguard for a turn; if Aragorn sustains damage, cycle him out for Gimli (Aragorn joins Boromir in beating up on Azog's bodyguard); when Gimli takes damage (which may be never...), you can cycle Frodo's two wounds and three Fate into Azog (probably with some help), while Gimli joins Aragorn and Boromir in (presumably) mopping up Azog's bodyguard. Yes, it’s risky seeing big heroes get low on wounds and fate; but it’s better than seeing them die (because once you start losing models, especially big heroes, the game tends to snowball against you quickly). Finally, if you can't cycle, don't forget you can work in an Immobilize from Gandalf against big scary things, too, to reduce the amount of incoming damage a wounded hero will take.
* Before you leave for the tournament, write or print an enormous table card for yourself, preferably in bright colors, that reads as follows: “CAST SPELL WITH GANDALF,” “TERRIFYING AURA,” and “BLOW THE HORN OF GONDOR.” Put the sign somewhere prominent on your table where you'll see it every single turn, then cast every single move phase (if Gandalf is unengaged), enforce Terror tests against Gandalf (if he’s charged), and blow the horn in every fight (if Boromir is surrounded). If you're outnumbered, you'll need every possible advantage, and these are three enormous advantages when you’re outnumbered.
Last suggestion, but probably the most important one: if you take the Fellowship to a tournament, you should expect to have a pretty uneven performance: they do very well against certain lists and in certain scenarios, against/in others you may be in almost an auto-lose situation from the start, and the games almost always feel super-close. The good news is that win, lose, or draw the tournament match, you're the Fellowship of the Ring, which means you're central characters in an epic story. Plus there's also an unwritten rule that any scenario the Fellowship plays where Frodo survives until the end counts as a "win" (even if it's reflected in tournament standings as a "loss"). ;-)
Sorry for the tome. I hope at least some of it was helpful. Please do let us know if there's anything here that was unclear, and how it goes if you do end up taking the Fellowship to the tournament!
That was some amazing stuff, thanks guys! Luckily, it's a friendly event so I can really trywhat you mentioned out. It is actually 650 points but I can't add up properly. With that in mind, I've come up with the following using Lonely Knight's army builder:
ReplyDeleteGandalf the Grey; Frodo; Sam; Aragorn - Strider with Armour & Horse; Boromir with Shield; Legolas with armour or Gimli.
In light of that, I think choosing Gimli over Legolas might be a good idea as he could be left behind and taken out easily as he's a shooty character. My other option is to drop Aragorn's armour and buy Boromoir a horse! I'll think about all your advice and let you know my final list and how I did. Cheers guys!
Awesome stuff. Choosing between Gimli and Legolas is a tough call--there are games when Legolas won't do much, and then games when he's fantastic and a life saver. He is definitely squishier than Gimli, though, so if you're looking to try them out, Gimli will definitely be more forgiving.
DeleteLooking forward to hearing how it goes!
A very good list - though because of the new synergies between Gimli and Legolas, I'd actually recommend taking Gimli and leaving Boromir at home. Boromir is great, but if Legolas gets a single kill at archery, your opponent is looking at Gimli hitting his ranks with F6 S4 A3 with +1 to Wound (which will wound most things on 4s) OR F6 S4 A2 with +2 to Wound (which will wound most things on 3s). That's ... really terrifying and if you get 3 wounds on the reduced difficulty, that's like spending 3 Might points to make something work - which solves for the -3 Might deficit that Gimli has behind Boromir. Gimli's also a lot more survivable than Boromir is, brings throwing axes to the table (6" range with 8" march movement for 14" potency), and is only 1" slower than Boromir...but then again, I thought Gimli was the best hero in the game under the Legions/Warbands rules, so I might be a bit biased. ;)
DeleteThat's true: the synergy between Gimli and Legolas is very good, and losing it would hurt. A few potential counters to think about:
Delete* While Boromir lacks the survivability stats that Gimli has (namely the 2 Fate and Defense 8), in practice he's often just as survivable (against low courage spam armies, at least) because of the Horn of Gondor.
* Boromir is the only other model in the Fellowship (besides Aragorn) who can call Heroic March. Ideally you'd call it with Aragorn if possible (because it'd be free), but there are occasions where you might want to double-call Heroic March and Heroic Move, so you can disengage 7+" away to set-up another hit-and-run attack (or to get to an objective, or flank an enemy force, etc.) Having only Aragorn would mean having to call the March with him, so someone else would have to eat the Might for the Heroic Move. With Boromir in tow, either of them can call either Heroic Action, and none of them feels the loss of the Might (Aragorn because his is free, Boromir because he has so much).
* As you noted, swapping Boromir for Gimli reduces our Might store by 3. While Gimli does probably get the equivalent of that Might in his +1 to-wound rolls, that's a much more limited use of Might (he can't use it for modifying his duel roll, for example, or to call Heroic Moves). 16* Might is still a ton, but with 19* Might, there isn't much you can't do if you really want to.
* Lastly, if you do opt to take the horse on Boromir, so long as he charges (which, with Aragorn, you'll always be a threat to do), he'll be wounding things at a higher clip than even Gimli boosted by Legolas is likely to do (Horn of Gondor, then 4 dice to win the duel, then 8 to-wound dice at Strength 4).
None of this is to poo-poo Gimli, who's fantastic (especially when paired with Legolas). But I can see why you'd forego those synergies (if you had to) to take Boromir instead. :)
Hey guys. I've done a little write-up about my experiences with the Fellowship in light of your article. Just to set the scene, Matt King, who's prominent on the Great British Hobbit league scene, organises monthly meet ups in Cardiff, South Wales for Middle Earth players, these are pretty well attended and everyone who turns up is great fun. This little event was 650 points and my Fellowship list consisted of Gandalf, Aragorn (mounted), Boromir (mounted), Legolas, Frodo and Sam.
ReplyDeleteFor the first game I was drawn against Jordan who'd brought the Dol Guldur list with the Necromancer, Witch King, two Castellans and a few Wraiths. Before we started, though, our game was swapped as my buddy Rich was drawn against his dad, John, who always play together, so I ended up taking on one of my best mates, Rich (more on Jordan later ...), with his Rohan army, which included Theoden, Eomer, Gamling and Theodred. The scenario was Hold Ground, about which I wasn't too confident. The terrain around the centre of the table consisted of three buildings positioned in a rough 'C' shape, to the north of the centre of the board, with the centre point to the south at the back of the middle building and a rocky hill, in turn, to the south of that. We ended up coming on from opposite edges (apart from Theodred and three riders, who I later opted to deploy at the same point as the rest of his army to buy me some time) and, as he made his way directly across the board, I used Aragorn's free Might to Heroic March round the easterly edge of the bottom building, hoping to entirely circle it and bottleneck him once he reached the buildings (he only had four riders on the far side), then smash my way through the gap between houses to the objective. Legolas stayed behind to take some shots but ended up only getting one Rohirrim before being swamped on about turn 4. This wasn't a great outcome but it had the advantage that Rich forgot about the rest of the Fellowship. It also provided a distraction as bar one of the Riders inside of the 'C' shape of buildings all moved through the gap to get to Legolas, leaving the rest of the Fellowship just one guy to deal with in that space. As a general summary, the rest of my army got around the building and about a fifth of his army had gone too far south to get Legolas to then effectively follow the Fellowship around the corner. That did leave about twelve miniatures, including all of his heroes, near the gap for me to cut through, though. Aragorn and Boromir charged the lone rider near them, called a Heroic Combat then ploughed into the models in the gap between buildings. This is where it started to go a bit wrong. Over a few turns, I managed to get Boromir paired off with Theodred by letting Rich dictate the combatants on his priority, losing the potential advantage of the Horn of Gondor; I shot Sorcerous Blast at Theoden but he resisted it; I tried to sneak Frodo and Sam into Boromir or Aragorn's fights to get 'free' heroic combats/buffs but lost priority, meaning Theodred and Eomer could easily charge them as they could easily pass the morale test despite the One Ring. In the end, though, Aragorn was the sole survivor thanks to the time limit, but he only just managed to sneak six riders including some characters into range for the objective win. As a summary, I don't think I did too much wrong - Gandalf pulled off Blinding Light, protecting his companions from shooting, and I managed to lure a large part of his army away from a winning position. In hindsight, though, I should have been cleverer with Frodo & Sam and snuck them somewhere unchangeable but within 6" of the board centre, as well as using Gandalf to take out warriors rather than hoping to wound characters. Lesson learnt, onto the second game!
The second game was against organiser Matt with an all-Wood Elf Lothlorien army, including Rumil, Legolas and four Sentinels, with about seven of the warriors carrying bows. This game was To The Death. I deployed to the south-east and he deployed in a line at the 12" limit of his deployment zone. I ran up the edge of the table, popping Legolas behind a wall about 12" in and halfway up the table where he proceeded to put one wound on his counterpart but then got killed by a few turns' volleys from all of the bow-armed models. Frodo popped on the Ring and he and Sam hid behind a wall bordering the other edge of the field Legolas was in, about 6" in from the table edge. Once I was halfway up the table, I ran Boromir and Aragorn behind a lone tree in the centre of the table and Gandalf - who cast Blinding Light - about 5" behind them, hidden behind a wall, all three out of sight of the archery mob on the other end of Matt's lines. The next turn, I charged Boromir into the (from my perspective) right-most part of Matt's lines, moved Aragorn up and then Commanded an elf into combat with him to save Aragon from multiple bow shots. This was stupid as I should have cast Command to pull the elf (or even Rumil, who wasn't far away) into charge range, keeping my cavalry charge bonus. I ended up rolling down his line with Boromir and Aragorn, getting caught by clever deployment so that I couldn't break through to Rumil, who, with a bunch of elves, wandered over to Gandalf and promptly murdered him in a couple of turns. By the time Aragorn chopped through to Rumil with Boromir's help (Boromir being unseated in the process) - it was too late. Aragorn got into combat with Rumil and a few Elves, spent his free Might point on Heroic Fight ... then rolled a five, bested by a 6 from his opponents. With no Might left for Aragorn to bump hi roll up, the game ended on the time limit there and I'd earned victory points for breaking his army but not for killing his general. Why did I lose? Game management! That classic line for MESBG comes back to haunt me - play the objectives. I'd failed to try and munch Rumil, even though I think Matt was playing softly as he's a better player.
ReplyDeleteThe final game was a 50 pointer To The Death on a 2'x2' board crammed with buildings, which Jordan and I played. He brought a Castellan; I had Sam. I'd used the Breaking of the Fellowship Sam miniature, which is running a away, and that's pretty much how it went. Sam got off two thrown stones over the course of the game, neither of which hit let alone wounded, and nagaed to win a few combats using Heroic Fight (I think that's what he has?) plus saved a wound with Fate, even using it to avoid death by Mogul Blade, but, in the end, he was run down and cruelly murdered. Everyone else was running 50 point armies with multiple minis but the death of that single Hobbit earned Jordan 10 VPs, bumping him up to 5th out of 10 in the final standings! I languished at 9th.
Thoughts? First off, I didn't quite keep my eyes on the prize in either game. I could have moved the Hobbits (and/or Gandalf) into a safe, unchargeable position near the objective and didn't. I could have positioned Legolas better - in the first game, there were stairways on the buildings near the objective, which would have earned him some shooting time and saved him from Combat. In the end, I panicked, though, casting inappropriate spells (or, conversely, using spells inappropriately) with Gandalf when I could have been a bit smarter. Again, in the first game, I could have brought Theodred on near my force and munched him and his small warband then just gone through the gap in the buildings to split Rich's army, rather than wandering around not killing anyone for three or four turns. In future, I'd probably mount Gandalf and Legolas and maybe still take Frodo, or drop the Hobbits and take Gimli as a bodyguard for Gandalf and Legolas (Gimli wasn't available for this tournament as I'd lent him to my mate along with my Dwarf army - he's a wargamer - though not MESBG - but managed to come third due to giving Rich's dad John a kicking in the 50-point game!).
ReplyDeleteI refuse to criticise myself for Sam's battle against the Castellan.
Awesome write-up. Thanks for sharing! Mounted armies and elves are among the tougher draws for the Fellowship, but given you were outnumbered, it sounds like you did admirably. Gimli is difficult to crack through, so adding him would increase your toughness significantly, and I still struggle to figure out which spells to cast with Gandalf, and when to have Legolas charge in and when to have him sit back. Way to go Sam for going toe to toe with a Castellan (for a while), that's pretty epic!
DeleteNot sure there's anything you could have done differently - in many ways, having a Mounted Boromir was probably good so Aragorn didn't have to go riding on his own (especially in the second game). Protecting Gandalf/Legolas is always hard, since they're the best pieces at handling enemy units from a distance and the worst at fighting them in melee (besides the Hobbits).
DeleteWhile dumping the Hobbits for Gimli might seem like a good plan, recall that the Fellowship loses Fearless if Frodo's not around, and if you can keep Frodo out of harm's way, you won't pass up points for being broken. This can be hard to do, but is VERY valuable if you can pull it off.
Playing all-hero lists is tough, but it seemed like you had a good time. As someone who took 5 Ringwraiths to a tournament years ago and fought Berserker-heavy Isengard/Erkenbrand-boosted Rohan/Shaman-encouraged Moria, I can tell you it's tricky but can be very rewarding (no matter how the score turns out).