Featured Post

The Scouring of the Shire, Part 2: The Ruffians Arrive

Good morning gamers, We're back for scenario two of the Scouring of the Shire campaign and today Bill Ferny is back, leading a ragtag ba...

Thursday, March 30, 2023

Fall of the Necromancer: What Models Do You Need?

Good morning gamers,

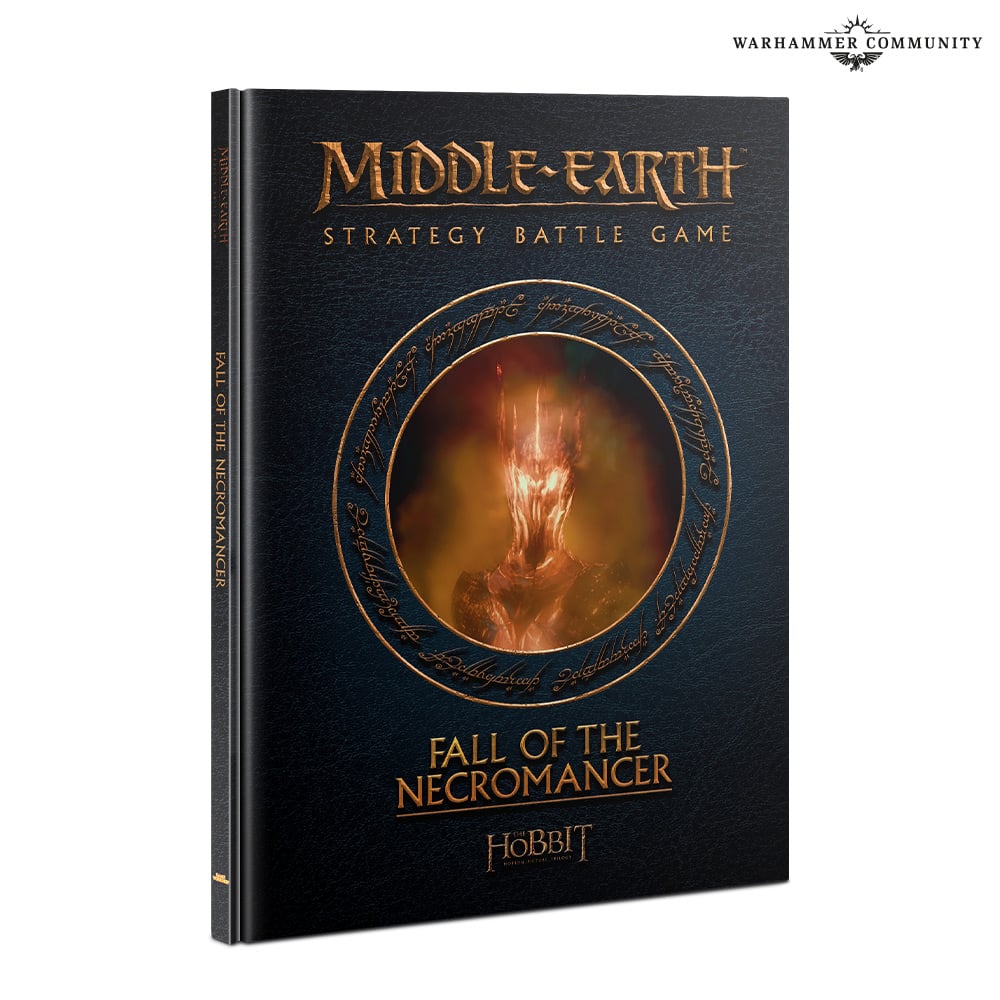
We're starting our way through the fifth sourcebook released for the Middle-Earth Strategy Battle Game, which is a follow-up to an older sourcebook from a previous edition of the game (also bearing the same name): The Fall of the Necromancer. While the original book was inspired by Elves and Wizards who would have been around during the time of the Necromancer (to include Cirdan and Arwen . . . you know, because THEY would be larking about in Mirkwood during the time of Thorin's epic journey to Erebor), the current rendition follows the storyline of the Hobbit trilogy, including some interesting missions which appeared off-camera but were mentioned in the film franchise.

Photo Credit: Warhammer Community

The book is also critiqued for being VERY thin compared to other sourcebooks of similar pricing - the book is similar in size to the Scouring of the Shire supplement, which is priced a lot less than the other supplements that have been released to date. The other limitations to this sourcebook will be viewed as we go through it, but let's get this out of the way first: this was the first supplement released that featured Armies of the Hobbit models in the scenarios - and while Defence of the North also features some models from the Armies of the Hobbit, Fall of the Necromancer is the only sourcebook to date that contains exclusively Armies of the Hobbit Legendary Legions (there are two in Defence of the North - one of which might be redundant). While we'll be focusing on the scenario side of the house, this sourcebook has released Legions that have been dominant on top tables (both before and after nerfing was done) at a variety of different points levels and is still valuable for both Matched Play enthusiasts and scenario-driven players. Let's dig in!

Part 1: The Founding of Dol Guldur to Lurking in the Shadows

In the first four scenarios, we have quite a few models - they'll form the basis for most of the campaign. While most of the scenarios will involve models from the Armies of the Hobbit, we begin, actually, with a few from the Armies of the Lord of the Rings. Let's see what we need.

Purchase #1: Rohan Command blister (or Rohan Mounted Command blister)

It's funny that, in a book devoted to the Armies of the Hobbit, we start off with some Rohan models. :) While profiles could have been made (even if just for scenario play) for the woodmen of Rhovanion, we are just using nomadic Rohan guys . . . okay, fine.

Personally, I think giving us "Mirkwood Woodsmen" with a basic profile akin to the Bree Villagers we saw in the Scouring of the Shire (and incorporated into our Watchers of the Roads LL last December) would have been great. As it happens, because we only need a Captain of Rohan on foot, you can get either the foot Command blister or the mounted Command blister - whichever you like better (or think you'll use).

Purchase #2: 12 Warriors of Rohan (or the Rohan Battle Host)

Well, look at that - we also need 12 Warriors of Rohan to join our Captain. Funny, in order to get 12 of these guys, we need to get 24 of them. But if we're willing to pay ~$45 for the Warriors of Rohan and ~$50 for the Command blister . . . we could save some cash and use Eomer as our "Woodsman Chieftain" (or paint up one of our extra Warriors of Rohan to look more elite than the others) and 12 Warriors of Rohan and just get the Rohan Battle Host and get some Riders of Rohan for free. Chances are good we'll want a Battle Host if we want to get started in Rohan anyway, so while it's a pricey bit of kit, it's actually a far better value for us than trying to get the exact models we want (though adding the Rohan Mounted Command blister to the Rohan Battle Host is a really good option too).

Since we only need these woodsman for a single scenario, I still think giving us custom profiles for a Woodsman Chieftain and Woodsmen for the scenario (like they did for Bree Villagers) would have been the right call. Just saying . . .
Monday, March 27, 2023

War in Rohan Inspired Lists: The Riders of Eomer LL Revisited

Good morning gamers,

This is our last post in this series on War in Rohan and I've chosen to close it out with a list that I've been running a lot lately: the Riders of Eomer. This Legion is often touted as one of the WORST Legions in the game - right down there with the post-nerf Vanquishers of the Necromancer LL and the ever-avoided Men of the West LL (both of which I happen to really like - what can I say, I love me a good hopeless case). The models we have in War in Rohan to use for this Legion are quite expansive, mostly because there's a whole scenario centered around these guys:
  • Eomer, Marshal of the Riddermark on horse with shield (note that none of the War in Rohan scenarios give us access to throwing spears on Eomer)
  • Gandalf the White on Shadowfax
  • Erkenbrand, Captain of Rohan on horse
  • Captain of Rohan on horse with shield
  • 16 Riders of Rohan
  • 8 Riders of Rohan with throwing spears
  • 1 Rider of Rohan with banner (because we have the mounted command blister)
I'm going to say this right now: for the purposes of this article, I plan to upgrade as many guys as I want to Westfold Redshields even though this upgrade wasn't given to anyone in the scenarios. Why? Because I can - and this list needs a few of those guys, okay? Before we dig into the list, though, let's look at what the critiques of this Legion are - and then look at how I've been running this list at 600 points (and been enjoying my games with them).

Photo Credit: War in Rohan

The first point of contention for most players is that we've lost too many hero and warrior options. Most Legendary Legions pair down the models you have access to - and some of those Legions are incredibly popular and viewed as quite competitive at least at certain points levels (most notably Theodred's Guard, Ugluk's Scouts, Cirith Ungol, and the Assault Upon Helm's Deep). Usually this is because what's left in the Legion gets a big benefit (for example, in Theodred's Guard, you get Sworn Protector/Fearless on everyone, the infantry get Fight in Ranks, and your Riders of Rohan, Rohan Royal Guards, and Captains of Rohan transfer their Arise, Riders of Theoden rule to Theodred). This Legion . . . doesn't really do that. At all. Instead of Strength +1 on the Charge from the normal Rohan army bonus, you get Strength +1 on the Charge when you're within 12" of Eomer (weaker) and a once-per-game ability to have a global -1 penalty to all enemy dueling rolls if Gandalf is in your army (which is pretty good . . . once . . . and if you don't roll poorly on your dueling rolls). These rules just don't seem like enough to justify running the Legion, especially when paired with a second critique: not getting the rules you'd want.

There are two big changes that I'd recommend for this Legion that would take it from obscurity to at least part-way competitive: first, let your Captains/Riders of Rohan transfer their Arise, Riders of the Theoden rule to Eomer. This would give you F4/S4 on the Charge when within 12" of Eomer, which make your cavalry much more of a threat (especially after you've used the Look to the Sun rule). Additionally, Eomer should either be F6 on the charge or have the Arise, Riders of Theoden rule himself (if the Legion transferred this rule to Eomer) so he can be F6. If Eomer hit a little harder (to make up for all the heroes you're missing) and if the cavalry supporting him hit a little harder, this Legion would be much, MUCH better. Alas, we don't have those rules - and of all the Legions we could make Eomer F6 in without breaking the game, THIS is the Legion for it. Oh, and the fact that literally every other list with Riders of Rohan in it can have F4 Riders of Rohan and this one that relies PURELY on them is stuck with F3 Riders of Rohan . . . an utter travesty, I tell you.

But despite all this (and maybe because I like to make things hard for myself and love a good underdog story), I love this Legion - it's fun to run, it's easily underestimated, and it rewards creative play. Oh, and it also plays Rohan the way Rohan used to be played - it's very skirmishy and wants to charge in once and then get out. Oh, and you get Gandalf the White - who I happen to like very much. So how do we take our collection from War in Rohan and turn one of the worst Legions in the game into a game winner? Well, we don't go above 600 points and we do something like this . . .

Saturday, March 25, 2023

Fantasy Fellowships: The Erebor Reunion, Part 2b

Good morning gamers,

We're back - my poor broken Fellowship fled Balin's Tomb and is running down some questionable stairs. We're starting pretty battered as you can see:

With a need for five members (including Old Bilbo) to get through the gap at the end, we'll see how quickly our short legs will carry us - let's get into it!

Mission #3: The Dwarrowdelf


We deployed within 6" of the western board edge, putting Dwalin and Dori in front while Gloin and Nori (both of whom were hurting from the last mission) held the rear. Bifur (free Heroic Moves) and Bofur (lots of Might) backed up the leaders, with Gandalf and the Hobbits scrunched in the center with the dogs. We advanced quickly:

Turn 1: only one Goblin shows up . . . great start . . .

I'm going to summarize turns 2-3 very simply - I got priority on the first three rounds, I got off one Strengthen Will on Gandalf (4 Will), I walked down the stairs, and a few Goblins showed up to challenge us (1 warrior, then 2 warriors, then a Captain and a warrior):

Turn 2 - some more Goblins show up . . .

Turn 3 - a Captain and another Goblin shows up . . .

Thursday, March 23, 2023

Thoughts on 3D Printing Your Models

Good morning gamers,

Warning: There will be references to Spiders in this post (and a picture below). Mythopoeia, stop reading now - you've been warned!

3D printing has been around for a while now and we here at TMAT have been introduced to 3D printing primarily through Centaur and Red Jacket. Centaur has worked on a variety of printing projects, ranging from D&D miniatures and substitute sculpts for the Middle-Earth range to terrain features of various kinds (both in resin and FDM). 3D printing is not a straightforward art form, though, and in today's post we're going to look at the things 3D printing is good for - and when you should just buy the real thing.

Disclaimer: I'm going to reference a lot of people that are creating/selling things that you can use - and none of them are sponsors of this post. In fact, the links I've provided give me no kick-backs, there's no affiliation/advertising going on - everything you see below are things I've admired, used, or seek to use in the future. Support them if you want - I just wholeheartedly believe in what they're doing!

Why Do We 3D Print Stuff?

3D printing has advanced a lot over the last few years and with STL creators like Loot Studios and Medbury Miniatures (along with a host of other creators on My Mini Factory) creating incredible sculpts to print, printing hobbyists are able to print models now that fit the aesthetic they like. The usual appeal for 3D printing begins with the expense: assuming everything prints right (and you invest the capital in a printer), you usually pay pennies per model for the materials used (resin/filament) instead of dollars per model.

You also gain the control to print as much as you want of the models you want instead of being dependent on model availability. While price can affect how much of something you get, there are rampant cries of models being unavailable in the GW webstore (usually right when you need them for an event). Printing what you want does assume that you or someone else has made the sculpt you want and that you have the right equipment/the material needed/the know-how to actually do it, but on the whole, you have the power to choose. Oh, and you probably need to plan ahead and give yourself enough time to make them all too.

Finally, 3D printing sometimes gives you more dynamic poses for really, really old sculpts (some of which have very flat designs because of how they were cast decades ago). Having an army that pops off the board more is great for the players of the game and if it encourages you to paint/play with the army, so much the better.

Monday, March 20, 2023

War in Rohan Inspired Lists: Khand Revisited

Good morning gamers,

Today we're back to studying one of the most expensive factions in the game - and one of the things that pushed War in Rohan over the edge as the most expensive supplement we've looked at so far: Khand. If we look strictly at the one scenario in the appendices that requires Khandish units, we have the following units to work with:
  • 1 Khandish King on Chariot
  • 1 Khandish Chieftain on Chariot
  • 3 Khandish Charioteers
  • 12 Khandish Horsemen
  • 18 Khandish Warriors (6 with bows)
While I could build a 500-point list with just Khandish units, I opted today to showcase how you can get much of the punch from Khand allied into a more reliable anvil from a different faction. Let's dig in!

The List

Photo Credit: War in Rohan

The tricky thing about War in Rohan for evil alliances is that the only ACTUAL heroes we have in the scenarios are Heroes of Fortitude. Thrydan becomes a Hero of Valour in the Army of Dunland Legendary Legion (see our recent article for info on what that might look like - and check out our review of the Legion for additional details on the list), but he's normally a Hero of Fortitude. Thanks to the way the PURCHASES have to be made for the heroes we need, we actually do have a Hero of Valour from Isengard that we can tap into: Lurtz. Here's the list:

Saturday, March 18, 2023

TMAT Talks: Episode 21 - Ranking (Good) Legendary Legions (Sorta...)


It's a new year, and a new season for TMAT!

Tiberius, Centaur, and Rythbryt are back to talk about MESBG like only they can. And they're kicking off the new season with a topic near and dear to Tiberius's heart: legendary legions.

Personal preference controls in this snake-draft style discussion that's sure to entertain (we hope). Which legion will be selected first? Which will be left standing at the altar? And is a conversation Centaur had in an elevator single-handedly responsible for the state of the Dale legendary legion in Defense of the North? The answers to these burning questions--and more--lie within. So pick up a brush, get those drinks ready, and prepare to scream at your phone.

Now available on Anchor, Apple Podcasts, Google Podcasts, Spotify, and wherever you listen to podcasts!

Music: Happy Haunts by Aaron Kenny


Thursday, March 16, 2023

Workbench Update: What Do You Do With 60 Morannons?

Good morning gamers,

Today we're answering that age old sailor's shanty:

What do you do with 60 Morannons?

What do you do with 60 Morannons?

What do you do with 60 Morannons early in the morning?

When the Pelennor Fields box set dropped, Centaur got a copy and sold me his Morannons (36 in total). I went in with him last December on the new Battle of Osgiliath box set and picked up 24 more. With a whopping 60 Morannon Orcs at my command . . . what do I do with them all? In most Matched Play games, you'll never have this many - with over 500pts of warriors that require 4-5 heroes to field, you'd need to be playing at the 750-800 point level at a minimum. So what do you do? Well, you get your conversion hat on and try to (at least temporarily) save yourself some money. Let's see what we're doing!

Level 1: 48 Morannon Orcs

This part is easy - and by "easy," I mean you have to batch paint 48 Orcs (in my case, 2-5 of each sculpt). This can be really monotonous, so it's "easy" from a conversion point of view (read, you don't need to convert anything), but drudging up the will to do it is hard. Because I need 12 of each type of Morannon for Fantasy Fellowships (no gear, shield only, spear only, spear and shield), I need to keep 48 Morannons as-is - you could probably get by with less if scenarios aren't your thing (but if you plan to run the Army of Gothmog or the Black Gate Opens, you should at least consider keeping 48 of them as-is).

These guys are very much still in progress . . . but they're pretty impressive, huh? My daughter painted the wildly colorful one . . .

Monday, March 13, 2023

War in Rohan Inspired Lists: Fangorn Revisited

Good morning gamers,

We've looked so far at four Legendary Legions in this series on the War in Rohan supplement (Theodred's Guard, Assault Upon Helm's Deep, the Army of Dunland, and the Defenders of Helm's Deep), but today, we're turning away from the Legion section and looking at a list with no Legions for it: Fangorn. These guys are some of the nastiest models you'll ever have to face - hard to beat in a fight, hard to kill, and with their army bonus, they're immune to a good many magical powers (see my article for how this breakdown works). Thanks to a very few scenarios, we have the following models available to us:
  • Treebeard with Merry and Pippin
  • Quickbeam
  • Beechbone
  • 3 Ents
Photo Credit: War in Rohan

With 860pts of Ents, it would be easy to say "take everything except Beechbone" - but with only Treebeard having access to Heroic Strike/Defense, this 7-model army would find it pretty difficult to deal with a lot of different threats (multiple Strike heroes, control scenarios against Fearless foes, perhaps Maelstrom scenarios). As such, while you could certainly run that list with my blessing (it's a bear to fight), I've opted for a convenient alliance instead, that will not only get our numbers up but ALSO help us deal with multiple hero threats.

Saturday, March 11, 2023

Fantasy Fellowships: The Erebor Reunion, Part 2a

Good morning gamers,


We're back with the next set of scenarios in Quest of the Ringbearer, beginning with Wolves in the Night and going through the (notorious) Bridge of Khazad-Dum. The missions begin with a Rest Point in Rivendell and we will have the full Fellowship for these four missions. Because these scenarios are much longer, we're only going to cover the first two today (Wargs in the Night and Balin's Tomb), while the other two will have to wait two weeks. Let's see how we did!

Mission #1: Wargs in the Night

So in this scenario, I started with my six Dwarves on the exterior, my dogs and Gandalf near the center, and Bilbo/Maggot ready to support Bifur and Bofur. For the first two turns, I forgot to take pictures, but it's fine, since the Wargs stayed away from us as we drifted towards the eastern board edge. Gandalf cast Strengthen Will on himself on Turn 1, getting a 7th Will point, and cast Sorcerous Blast on the Wild Warg Chieftain on Turn 2 (2/3 Might, 5/6 Will), but the Chieftain resisted on a 6. On Turn 3, things looked like this:

Yes, I have nine Ringwraiths standing in for some Wargs . . . it's a thing . . .

The wargs had priority and while I could have called a free Heroic Move, I needed to respond to his charges, so I let the wargs charge. The only models in danger were Wolf (fighting two wargs) and Bofur (who was facing down both the Wild Warg Chieftain and a warg), so Bilbo put on the Ring and pulled one of the wargs off Wolf and Gandalf cast Sorcerous Blast (3/6 Will left) on the warg who charged Bofur and threw it into another warg (unengaged), and most importantly, knocked Bofur and the Wild Warg Chieftain over: the target warg died, while the other warg was knocked prone:


Thursday, March 9, 2023

Top 5 Things For Aspiring Content Creators

Good morning all,

Disclaimer: I am a content creator and I would love to say that the TMAT blog is the most influential resource out there for MESBG - but I can't. Granted, in print, we publish more than anyone out there on the MESBG scene (best I can tell, it's not even close - and I follow a lot of written content creators, links on the right-hand side), but TMAT isn't the Green Dragon Podcast or An Unexpected Podcast or Battle Streams in Middle-Earth or Zorpazorp. We're also not the painting/converting geniuses that you see over at Benji's Hobbies, Miniac, Ninjon, Lyla Mev, or Squidmar Miniatures. And yes, I love all of these content creators and read/listen/watch them all - and you should too!

Photo Credit: Stock Photo, I think

But I've been at this for a long time - this blog got started just over twelve years ago in late February 2011 (with our first battle report on March 8, 2011 - I count that as our "real" anniversary) and with a slight lull during "the dark years of SBG", I and some local friends who have ebbed and flowed over the years have been generating content hoping the internet would care for a long time. And it would appear that starting in mid-2019 (and certainly after the COVID-19 global shut down drove many players to seek as much MESBG content as they could find a year later), this little blog has seemed to gain some traction. With two active channels contacting us about blogging before their jump into the action (check out the Castellan's work and Sharbie's work if you haven't already), I figured I'd share some advice with all of you on the "secrets of the trade" when it comes to generating content (in case you were thinking of getting in the game as well). While I, again, don't feel like we are the mainstream here at TMAT, you'll see these same strategies employed by other content creators - most of whom are linked above and throughout the article.

Monday, March 6, 2023

War in Rohan Inspired Lists: The Defenders of Helm's Deep Revisited

Good morning gamers,

We talked about Dunland last week, which makes up a large part of the Isengard models from the War in Rohan supplement who aren't Uruk-Hai and today we turn to the faction of Lothlorien, who make up most of the models that Good has access to that aren't from Rohan. While Rohan dominates most of the scenarios, those Elves are going to see a lot of use when you get into the Helm's Deep scenarios and are showcased in one of the most cinematically memorable scenes from the Two Towers film.

Photo Credit: War in Rohan

Lothlorien in Matched Play is one of those factions that can be really good in the hands of a skilled player and provides an affordable point of entry for new players who want to play with Elves since their light infantry, heavy infantry, and cavalry are older plastic sculpts and many of their heroes are readily available for quite affordable prices from both GW and the second -hand market. Guards of the Galadhrim Court got pricier with their migration to ForgeWorld, but they're still available and can be lethal when used well. Our Lothlorien units in War in Rohan, however, are much more restrictive:
  • Celeborn and Haldir (for Haldir)
  • Galadhrim Command blister:
    • 1 Galadhrim Captain
    • 1 Galadhrim Captain with Elf bow
    • 1 Galadhrim Warrior with banner
    • 1 Galadhrim Warrior with Elf bow and war horn
  • 24 Galadhrim Warriors:
    • 8 vanilla
    • 8 with spears and shields
    • 8 with Elf bows
If you just look at this collection of 30 models, you actually CAN run everything in it for 703 points, which means at 700pts, you could drop all the shields on the spearmen and get a shield on your vanilla Galadhrim Captain. No matter how you swing this, I think the list feels like it's missing something (probably Galadriel and Galadhrim Knights but definitely Guards of the Galadhrim Court).

So instead of trying to shoe-horn in a pure Lothlorien list, I decided to cover a FOURTH Legendary Legion in this series - one that I love and have played with a lot. Here the Elves will be playing a supporting roll, but the list is plenty dangerous and a pain to play against (and since it's me and I love Lothlorien, I naturally couldn't give you just one list) - let's dig in!

Saturday, March 4, 2023

Tiberius's Recap: The 2023 Winter Whirlwind Tournament

Good morning gamers,

Last weekend, I competed with 7 other people at the 2023 Winter Whirlwind tournament - something Centaur threw together last minute to get people who are new to the game or who have disappeared from the game acquainted with it (making "whirlwind" very appropriate). As I talked about last week, I brought a 300-point Theodred's Guard LL list that I thought was capable of playing all the scenarios well:
  • Theodred, Heir of Rohan on horse with throwing spears and shield [ARMY LEADER]
    • 5 Rohan Royal Guards with throwing spears
    • 4 Warriors of Rohan with throwing spears and shields
    • 1 Warrior of Rohan with throwing spears, shield, and banner
    • 5 Riders of Rohan
When the deadline for army registrations was over, Centaur sent out the list of forces that would be competing - here's what I was looking at (with 5 random rounds):
  • Centaur: 14-model Army of Dale LL with Brand, a Captain, and 12 Warriors of Dale
    • To avoid having an odd number of players, Centaur dropped and ran the tournament only.
  • Alfredo: 13-model Defenders of Helm's Deep LL list with Theoden, Haldir, 7 Warriors of Rohan, and 4 Galadhrim Warriors
  • Gorgoroth: 14-model Dead of Dunharrow list with the King of the Dead and 13 Warriors of the Dead
  • Red Jacket: 10-model Rohan list with Eorl the Young, 4 Sons, 3 RRGs, 1 Rider of Rohan with banner, and 1 Outrider
  • The Black Prince: 12-model Rohan list with Elfhelm, Dernhelm, and 9 Riders of Rohan with throwing spears (his usual fare)
  • Ambassador Kellar: 15-model Kingdom of Moria list with Balin, a ballista, 2 Khazad Guard, 3 Iron Guard, and 7 Dwarf Warriors
  • Tyler: 15-model Isengard list with Lurtz, a drummer, 4 Berserkers, 9 Uruk-Hai Warriors
  • Ethan: 16-model Halls of Thranduil list with Legolas, 8 Mirkwood Elves, 5 Mirkwood Rangers, and 2 Wood Elf Sentinels 
Feeling like I had a shot (and loving the fact that I wasn't running the event and wouldn't have to fight two of these guys), I got locked into Round 1!

Round 1: Divide and Conquer vs. Ambassador Kellar's Kingdom of Moria 


Well, the ballista set up staring at the center of the map and the Dwarves advanced slowly towards the center objective. We were there to challenge them and got locked in quickly (with one Royal Guard and a horse being lost to the ballista - I will take that). Theodred romped through a few Dwarves, but got tagged by a Heroic Combat from Balin as the game was closing in on the last five minutes. One 6 from Balin and a mess of wounding dice later and Theodred fell. 

Balin got tagged on the next turn as I threw models into the center, but one last Heroic Combat from Balin saw the Dwarf lord reach the center to tie the objective. I lost 2-5 (sole control of 1 objective each, I was barely broken and lost my army leader), which could have been a 5-5 draw if I had killed one more model in the center - and a 5-3 victory if Theodred hadn't been killed (Ambassador Kellar almost charged into some grunts instead). The game was super fun and I spent a good deal of time explaining the nuances of the rules set, since my opponent hadn't played the game in close to seven years (kinda glad I had him first)!

Thursday, March 2, 2023

Cavalry Charge: The Wag and the Battle of Val-es-Dunes

Good morning gamers,

Last month, we looked at some of the basic principles for using cavalry in MESBG and today we're going to look at one of the most common tricks a cavalry army has up its sleeves: the "wag". The term is used regularly here by Centaur and showcases how a cavalry force (usually down-handed in the model count comparison to other armies) can utilize the mounts they've paid so much for when faced with overwhelming odds. To see this, though, we're going to look at a battle fought by William the Conqueror in the Eleventh Century which showcased Duke William's great command of cavalry and strategic battlefield control. Let's take a look.

The Battle of Val-es-Dunes

You can learn more about this battle here and you can view two different visuals of this here and here. Almost 20 years before the battle of Hastings in 1066, Duke William of Normandy (later to be known as William the Conqueror) found some of his vassal nobles preparing to revolt and petitioned the King of France (Henry I) to support him in suppressing the rebellion. Henry would support William in this conflict, though would later fight against William before he departed for England. William and the King managed to rally about 10,000 men to fight the rebel nobles, who had amassed for themselves about 25,000 men - this didn't look good. William and Henry advanced to Caen and began to engage the rebels (though at least one noble changed sides from the rebels to the crown's forces before the battle began and launched a treacherous surprise attack).

William had his cavalry engage in small fights with the enemy, maneuvering and coordinating his forces to fight in one area, then retreat to break another division of the enemy army. With this hit-and-run method, the royal forces were able to rout the rebels and they pursued their retreat to kill many more. The victory was attributed to both the tactical acumen of William and the skill of the King's knights and secured William's holdings in Normandy in the immediate future (though he'd be putting down rebellions and invasions of Normandy for many years).

In MESBG, we pay a lot of points for our cavalry models and if we're not careful with them, we'll miss out on the most important benefit of these models: their increased speed. Let's take a look at how we can use our increased speed to our greatest advantage - and we'll do this by showing off "the wag."