Good morning gamers,
Last time, we looked at the much-feared Assault Upon Helm's Deep Legendary Legion and some strategies you can employ to fight it. Today, we turn to the other "Assault" legion (the Assault on Lothlorien) to see what the hype is about this list . . . and some things you can employ to fight against it. Yes, it shoots things - and yes, it has crazy shenanigans that the Helm's Deep list doesn't quite have - but it also plays very differently and can be beaten with some other methods of attack. Let's dig in and see what all the fuss is about (especially now that they've changed a bit).
What Makes The Assault on Lothlorien Legion So Hated?
 |
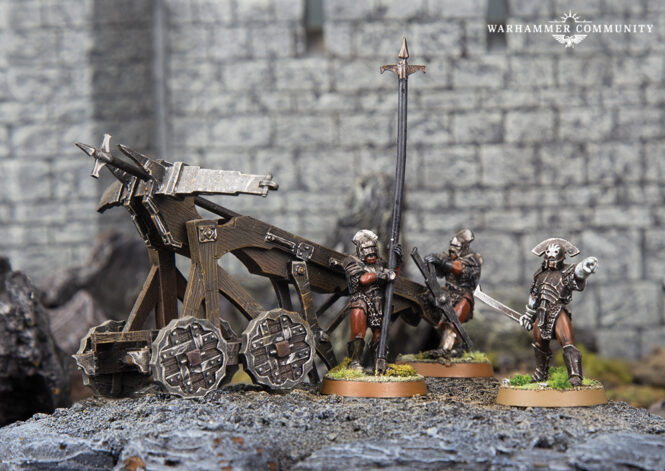
| Photo Credit: Warhammer Community |
The first thing that annoys players about fighting this Legion is that it's a horde list - this critique isn't unique to the Legion, but any time you can get a large number of models at basically any points level, someone is going to gripe. Sometimes bringing a horde to the board (I'm a poet, I know) is fine - no one seems to complain that much when there's a Denethor-led Minas Tirith spam list on the board - and there are plenty of lists that run "just a lot of Orcs or Goblins" that no one things is oppressive. It's not like this list is spawning new models from behind your lines like Goblin-town or has +10 or +15 models on you at the start of a game (though it might).
What makes this list annoying is that it's a horde list with other stuff. The list has access to Moria Goblins (5-7 points depending on what gear you give the Moria Goblin Warriors and your opinion of Moria Goblin Prowlers), Orc Warriors and Trackers (5-10 points depending on the gear you give them, potentially more if you invest in a banner), and Wild Wargs (which all heroes can lead and are very cheap fast infantry). If you spend 250-300 points on these things, you can easily field 40 warriors at most points levels, so long as you have the heroes to lead them.
Enter the shamans in this list: on the named front, you've got Druzhag and Ashrak (at least one of them is required), who come in at 50-90 points, but fielding both is certainly possible at 500+ points. You also have Muzgur (who is required along with one of these Goblin guys - and now has to be your army leader), who at 70 points is one of the cheapest Heroes of Valour in the game (normally he's Fortitude, but in this list he's Valour). Pick up all three of these guys (or two of these guys and one other hero) and you can horde out pretty easily.
On the generic hero front, you have both Moria Goblin Shamans and Orc Shamans (45 or 50 points, respectively) who are able to lead 12 warriors in their warbands, thanks to the promotion to Fortitude status in the Legion. Which one you prefer used to depend very much on your view of Orcs - are they just a handful of spearmen behind the Goblins or are they a proper shieldwall (half shield, half spear-and-shield). Now that you have to have fewer Goblins than Orcs, it'll be hard for any player to have exclusively Goblins in their shieldwalls, but I have always liked the picks that can help the Orcs reach S4 (which you can get with Moria Goblin Prowlers who have to fight two-handed, but not Moria Goblin Warriors) and the flexibility of not having to have these guys arrive near the Goblin lines. I used to be in the minority opinion on this - time will tell how the new meta for this list will shake out.