Featured Post

The New Age Is Begun: the Defenders of the Pelennor Army List

Good morning gamers, This month is "Pelennor month" and we've covered the Fiefdoms (lots of Gondor units with special take-thi...

Showing posts with label White Council. Show all posts

Monday, May 26, 2025

First Impressions: The Free Peoples, Part III

Good morning gamers,

This is my last post for now in the First Impressions series and today we're finishing sort of where we began: with the Free Peoples. While we've already looked at the members of the Fellowship, their associates in Bree, the Ents, and the Hobbits of the Shire, our focus today is largely on the White Council - three of the strongest wizards that the Forces of Good have access to and one fairly erratic Dwarf (who is surprisingly reliable in the new edition).

I'd like to begin this discussion with a brief review of the previous edition and the role these characters played in shaping the meta and many of the rules changes we saw in the semiannual rules updates. When the MESBG revamp happened in 2018, it didn't take long for a lot of people to find out ways you could abuse the alliance matrix to include characters like Cirdan, Arwen, and Shades in your lists - and the inclusion of these characters in basically everything not only added the list building restriction that you needed a Hero of Valour/Legend to ally conveniently/impossibly, but some heroes underwent heroic tier changes (like Cirdan/Arwen becoming Minor heroes, but also Haldir/Dwarf Kings/other Kings becoming Heroes of Valour to make most thematic list building dilemmas work).

While this initial wave of changes didn't involve the members of the White Council, it was the limitation of Cirdan from the "easy alliance" choice that made many competitive players look to Galadriel, Lady of Light as the new default - a Hero of Valour who could ally with just about anyone conveniently and brought good anti-archery, good anti-magic, and a decent combat buff to your army. I mean, with very few exceptions, a strong competitive list began with Galadriel (and Rythbyrt even won one of our GTs with Galadriel+).

As a result, Galadriel herself got reduced to a Hero of Fortitude so you'd have to bring her with another big hero (which you could certainly do, but it came at the cost of using other big heroes - like Gwaihir - or dumping a budget hero and 10+ warriors from your list). At about the time that Lady of Light players were driven to sadness, the Vanquishers of the Necromancer Legendary Legion dropped and players figured out that they could cast Nature's Wrath/Wrath of Bruinen on their own fights while engaged in combat to knock EVERY enemy model prone and never take damage. The heroes who didn't have access to these spells could also rely on things like Sorcerous Blast to knock people into the right fights and knock all THOSE people prone, preventing anyone from being able to do reliable damage in melee unless they had very strong magical resistances on EVERY model in their army (which basically no one else had). Oh, and the list was very strong against magic and archery because Galadriel was in it.

This Legion got nerfed in various ways, not the least of which was the requirement to have 470pts of heroes in it (Saruman, Galadriel, and Gandalf), which meant you probably weren't running it below 650 because you wanted Elrond in the list (unless you were crazy like me - I was fine at 500 with those three characters), but also the heroes were prevented from casting their knock-Prone spells while engaged in combat. This made the Legion still show up in some events, but it was certainly never as strong as it was when it was released.

So with all this as background, let's look and see what's become of some of the characters who have shaped the meta at various times and see if they're still as good as they were or if they've fallen a bit by the wayside.

Thursday, December 8, 2022

A Season of Giving: The Light of Caras Galadhon Fan-Made Legendary Legion

Good morning gamers,

We're continuing our list of custom Legendary Legions today (for the running list, check out the House Rules page) and we've come to one of the Legions that I thought was sorely lacking from Defence of the North: a defence-of-Lothlorien Legion! There was a lot of chatter on the Facebook pages predicting that we'd get a "shape-shifting" Galadriel that allowed the 1A Hero of Legend to NOT be the Army Leader and when we didn't get that, I decided that this HAD to be one of the Christmas(time) presents we gifted to you all - so let's dig into what the Legion provides!

Why Make This Legion?

DOWNLOAD THE RULES HERE!

Let's face it: we have three mini-campaigns in Defence of the North (Dale/Erebor, Mirkwood, and Lothlorien) and of those three campaigns, we got 2 Legions for the first, one Legion for part of the second (Beornings), and NO Legion for the third - #Travesty! You can't start talking about why this Legion is needed without acknowledging that, if the movie timeline is to be taken as canon, we need a Legendary Legion that keeps us from running Haldir in a Lothlorien list.

There are three common critiques of Lothlorien that you'll find everywhere in the community: first and foremost, we already mentioned that needing to make Galadriel (your only Hero of Legend) your army leader can be a real pain in 1-2 scenarios (Contest of Champions, possibly also Fog of War). While I think she's perfectly fine as an army leader in Contest of Champions, a lot of people struggle to do well with her (so I get it). Many Lothlorien players take this one step farther though: since Galadriel, Lady of Light was downgraded to a Hero of Fortitude in a recent FAQ, and since one of the first FAQs requires that a Hero of Valor/Legend be used to ally between two Convenient factions, and since (for reasons unknown) the White Council is Convenient Allies with Lothlorien (despite having 2/7 members in the White Council list), you can't get Galadriel, Lady of Light into a Lothlorien list without bringing along someone else (like, say, her husband). This is a problem - you should be able to get Galadriel, Lady of  Light into a Lothlorien army and she should not have to be your army leader by default.

Monday, August 22, 2022

The Stuff of Legends: The Vanquishers of the Necromancer

Good morning gamers,

Today we're continuing our review of Legendary Legions from Fall of the Necromancer - and I know people asked when we'd be reviewing these in print, but for this Legion in particular, boy am I happy I waited until after the February 2022 FAQ. :-) Yep, today, we're dealing with the Vanqiushers of the Necromancer Legion, something that was smashing tables with Prone-inducing spells until the Middle-Earth team made two very dramatic changes. I still think the list is good, and we'll see why in a moment. Let's dig in!

Part 1: What Do You Need?

Photo Credit: Tumblr
Legion Tax: 470pts

Thanks to the February 2022 FAQ, in this list you now need to take not one, not two, but THREE heroes - Saruman the White (who will always be your army leader), Galadriel, Lady of Light, and Gandalf the Grey. With the addition of Gandalf to this line-up, this Legion has the highest official Legion tax in the game (470pts - though if you run the Grand Army of the South, you're probably spending well over the 375-400pt minimum once you fill out the howdah of the required Mumak).

What you ACTUALLY need to take is Elrond (and probably Radagast) as well - which means the army really functions well at 650pts, 800pts, or 850pts. Elrond not only gets free Heroic Strikes in this list, but he also counts as a banner for everyone else - which means your F5-6/3A heroes can win more fights by increasing their likelihood of getting a good dueling roll. He's also able to two-hand without the need to burn Might on Strikes - so he's a lot better than the other models in your list at actually two-handing so you can kill stuff.

Monday, November 1, 2021

The Bare Necessities, Part XLVI: The White Council

Good morning gamers,

Today is our last post in the Armies of the Lord of the Rings and the Armies of the Hobbit and we've come to an all-hero army that . . . isn't very popular (or WASN'T very popular until their new Legion was released). I should say, this is an army that isn't popular played pure, since it has a hero that everyone and their brother seems to ally into their army (if they don't mind losing their army bonus). Yes, today we're looking at the White Council - and while there aren't a lot of models in the list, you can find a little bit of everything to throw into your army.

Everyone's favorite ally . . . except for Numenor and Arnor, maybe.

The White Council: Making 50s And 100s (And Accepting Handicaps)
The White Council consists of seven hero profiles - all of which are powerful warriors or magic casters (and a few are both). When compared to other all-hero armies, they actually have some advantages over the others:
  • Unlike the Breaking of the Fellowship Legendary Legion, you have options for mounts on five of your heroes (not Celeborn or Galadriel) - though I will say that the Breaking of the Fellowship LL can move plenty fast with the free Heroic Marches from Aragorn. Still, with Hobbits moving 7" max, you don't get the freedom that comes from riding in on a horse, sleigh, or Eagle - and you don't get the increased damage when you charge (which is something none of the Good all-hero armies have);
  • Like Thorin's Company, you have a mix of high Defense (Celeborn, Glorfindel, and Elrond), average Defense (Gandalf, Radagast, and Saruman), and low Defense, but while Thorin's Company has mostly 2 Wound/1 Fate heroes in its army, all of the models in this army have 3 Wounds and 3 Fate (and almost half of them have rerollable Fate points - and TWO of the guys in this list can give you Wounds back); and
  • Like Erebor Reclaimed (which isn't exclusively all-hero - but can certainly be run that way), you have a mixture of high-powered combat heroes (Celeborn, Glorfindel, Elrond, Radagast on the Great Eagle, and arguably Galadriel) and less-powerful units (Gandalf and Saruman), but unlike this army, you have access to not one, not two, not three, but FOUR heroes who have Immobilize (Saruman on a 2+ and Gandalf/Radagast/Celeborn on a 3+), which can keep enemy heroes or monsters from smashing through your ranks (and greatly reduces your risk if you are already fighting them).
Yes, you have a LOT of tricks in this list . . . and yet you almost never see this army being run. Why? Well, the tricky thing about these heroes (and this has always been the case with the White Council - even when they included the likes of Erestor, Cirdan, Arwen, Legolas, and Thranduil) is that getting their points to line up is . . . well, quite difficult. Here's your line-up:
  • Galadriel, Lady of Light (130pts)
  • Celeborn (130-150pts)
  • Glorfindel (145-170pts)
  • Radagast the Brown (150-205pts)
  • Gandalf the Grey (170-180pts)
  • Saruman the White (170-180pts)
  • Elrond (170-190pts)
The tricky bit is getting your points to line up in 50s and 100s, based on your points level. At 700 points, you might say "I'll take Galadriel with Saruman for 300pts," you probably want Saruman to have a horse to get the most out of him - and that means you'd need to then take Elrond fully kitted out to bring you up to 500 points. Now that you have 200 points left, I guess you take Radagast on the Great Eagle (or on the sleigh with Sebastian).

Monday, September 20, 2021

The Bare Necessities, Part XL: The Army of Lake-town

Good morning gamers,

Today we cover one of the most competitive armies for the Forces of Good in MESBG right now: the Army of Lake-town. If you're looking at running a list pure, this army . . . well, doesn't look very good. In fact, compared to their cousins (the Survivors of Lake-town, which we'll cover in a few weeks), it looks downright awful. But this army is one of the cheapest hordes that have access to spears you can find and this means you can get a healthy amount of numbers and have plenty of points to ally in big heroes. Lake-town doesn't have the suite of allies that you'll find from the Armies of the Lord of the Rings, but the options they have are solid. So how do we begin to piece together a good army from Lake-town? Let's dig in and see what we have to work with and you'll soon see.


The Army of Lake-town: Who Needs A Horde?
So when you think of horde armies, you generally think of evil factions - Goblin-town, Moria, and Sharkey's Rogues, for example. Some good factions qualify - like the Shire - but most good factions run average-cost models (or very elite/expensive models), which can keep them from "hording out" (though there are builds for Minas Tirith that can horde out by taking cheap heroes). Lake-town has only one expensive hero (Bard) and everyone else costs no more than 50 points - and with most of them (not Bard's children) able to lead 12-15 models and your warrior models costing 5-7 points each, you can get a full warband of guys for under 120 points. If you're getting that many guys for that kind of cost, you can easily get 65+ models in a 600pt game (and at 700, you're looking at over 70 models easily).

Thursday, September 9, 2021

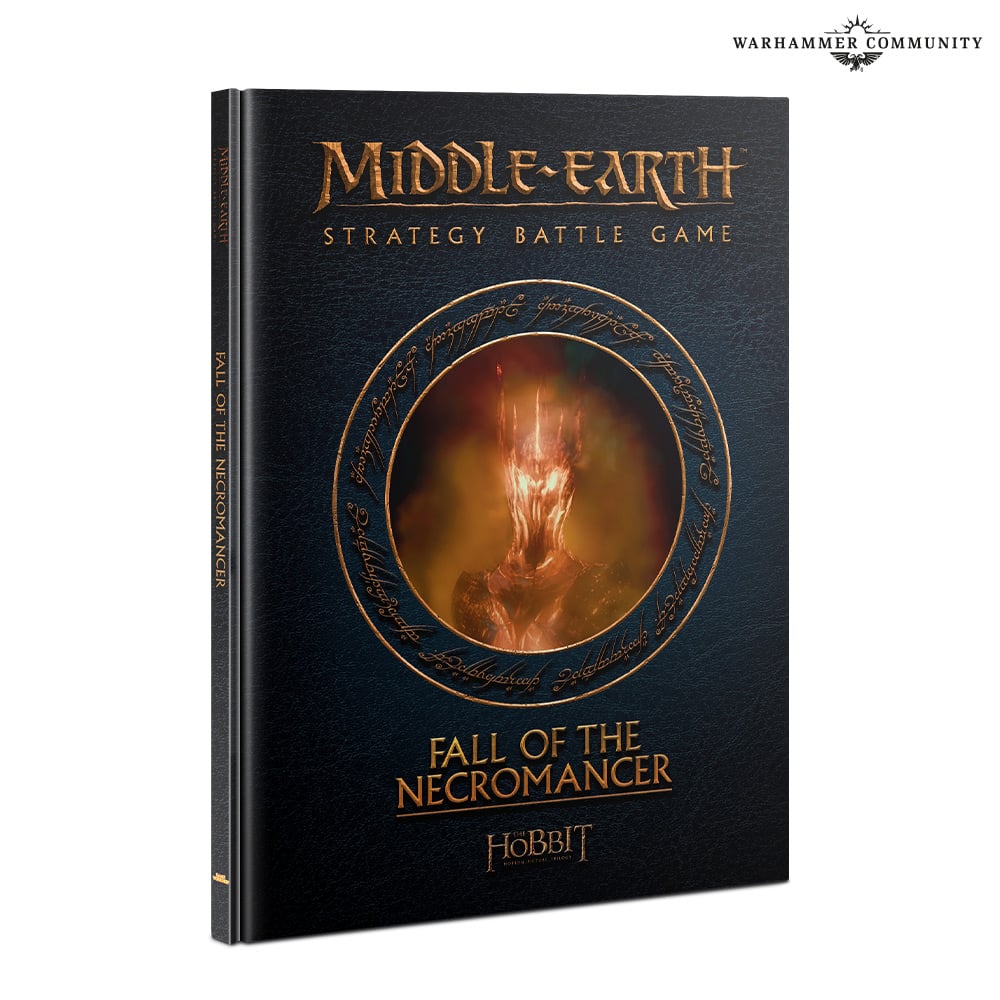
Fall of the Necromancer: What I Want To See In The Legendary Legions

Good morning gamers,

Less than a month ago, we got a preview from Games Workshop about the next supplement coming to the Middle-Earth Strategy Battle Game: the Fall of the Necromancer. Unlike other supplements, there are no new models being released with this supplement - instead, the game designers have developed a scenery kit for Dol Guldur and are bringing back older sculpts back to the range (including the much-sought-after White Council blister which has the very-rare Galadriel, Lady of Light sculpt - why did I buy the old Lady of Light sculpt when it was MTO?!?!?!?!). 

Photo Credit: Warhammer Community
Another supplement I didn't know I wanted . . .

They also announced that alongside the 13 narrative scenarios (an upgrade over the 7 scenarios from the original Fall of the Necromancer sourcebook released in the early 2000s) there would be four Legendary Legions in this book with a bit of a spoiler about what they are. Like I did with Quest of the Ringbearer, let's dig in today and make our predictions for the next supplement!

Monday, October 26, 2020

Mastering Magic: Augmenting Damage Spells

Good morning gamers,

We've only got two more posts left in this series - and today we have some really fun spells: BladewrathEnchanted Blades, and Enrage Beast. These three spells are held by only five models - three with Enchanted Blades and two special models who alone have Bladewrath and Enrage Beast. While we've looked at spells that do damage (either as a blast, in an area, or to a single model), restore stats/resources, remove stats/resources, protect friendly models from magic, breaking items, neutralizing enemy combatants, scattering models, and provide auric benefits (either by enhancing nearby models/the caster OR by scattering models), today's spells are the only ones that make you more lethal in combat (though I guess a channelled Shroud of Shadows counts as well).

Fair warning, I only have two of the models in this list, so pictures will be scarce . . .


What Do These Spells Do?

The most common of these spells is Enchanted Blades. When cast normally, the caster picks a friendly model within range (6" for all of them) and if cast successfully, the model is allowed to reroll all failed To Wound rolls it makes. When channelled, the target model also receives a bonus of +1 To Wound (which is cumulative with similar rules, such as the bonus provided by using a two-handed weapon or having the Backstabbers/Hatred special rules).

Bladewrath allows a caster to pick a friendly model within range (6" as well) and that model makes Strikes in the Fight phase at Strength 6. If channelled, this is improved to Strength 10. It's important to note that the model itself doesn't become S6/S10, but rather resolves Strikes at S6/S10 (otherwise, this would be a great counter to the Rend/Hurl Brutal Power Attacks or special rules like Monstrous Charge).

Finally, Enrage Beast picks a friendly Bat, unridden Warg, or Spider model within range (12" this time) and increases the target model's Fight, Attacks, Strength, and Courage values by 2 until the End phase. Because this boosts the model's characteristics, this IS a good counter to the Rend/Hurl BPAs and rules like Monstrous Charge. When channelled, the target's characteristics are increased by 3 (instead of 2). While this is a powerful augment, the friendly model then suffers a S10 hit at the end of the round because of how exhausting being awesome can be (most models will be wounded on 3s - which still means a 33% chance of avoiding any damage at all).

All three of these spells are useful - especially if you are using units that "have problems wounding." Adding someone who has these spells can increase your overall damage, but picking the right model to augment is often the difficulty with these spells (and making sure they stay within range). To help with this, let's understand who has these spells and how best to use them.

Monday, October 19, 2020

Mastering Magic: Call Winds and Instill Fear

Good morning gamers,

Well, we've been plowing through magical spells for a while now, but we come today to the last spell in the arsenal of MANY evil spell-casters (causing us to wrap up a LOT of models today). While Ringwraiths (and other evil casters) have neutralizing spells in the form of Transfix/Compel, a precision damage spell in Black Dart, and the ability to reduce enemy resources/stats via Sap Will and Drain Courage (the Witch-King also has access to Your Staff is Broken), Ringwaiths have a very iconic spell in the game that can scatter enemy models: Instill Fear.

While Instill Fear is a good scattering spell, we'll be talking about a more precise scatter spell as well: Call Winds (which is only available to Galadhrim and High Elf Stormcallers).

Nazgul: "I'm casting Instill Fear - SCREEEEEEEEECH (or is that Transfix now? oh well, whatever!)!"

What Do These Spells Do?

Instill Fear is an area-of-effect scatter spell that affects all models within 3" of the caster (not because the spell says it's 3", it's just always 3" for all the models that have it). All enemy models within 3" of the caster have to pass a Courage test or make a full move directly away from the caster (or until they run into something/someone) and are afterwards unable to move (basically, they run in fear). If channelled, the models that test for Courage have to roll three dice and use the lowest two dice (which, if you haven't seen the math for it, is pretty brutal for anything that is below Courage 5 - and even C5 models are only 60% likely of passing). Add to this that most models with Instill Fear have some kind of Harbinger of Evil/Ancient Evil special rule attached to them, models really have to be Courage 6 to have a better-than-not chance of passing this channelled spell . . . ouch.

The models test in the order the caster wants, so it's pretty common to test with the models furthest from the caster first, then working your way inward. You can cast this spell a few milimeters from a model (aka within an enemy model's control zone), but after the scattering, you will need to complete the charge against whatever model you entered the control zone of first.

Call Winds is a precise scatter spell, targeting a single model and pushing that model back D6" (2D6" if channelled). The model stops if it hits an obstacle (but not models) and is Knocked Prone. Unlike previous versions of the game, models aren't forced to stay on the ground for the rest of the turn (which is sad). Like Sorcerous Blast, the Strength of your target doesn't dictate whether the model can be knocked Prone - anyone is fair game. This spell is different from Sorcerous Blast in two ways, though: first, this spell doesn't knock any other models Prone if they're in the path of the scattered model. Second, no damage is done to the target (or anyone else the model would pass through - even when channelled). While not a damage spell, it certainly changes the way an enemy model can behave for the round (and usually the next round as well).

Monday, September 28, 2020

Mastering Magic: Precision Damage

Good morning gamers,

Today is our seventh post in our series on magic and we turn our attention to spells that do precision damage (that is, damage to a single target). While we've already covered Sorcerous Blast and area-of-effect spells, these spells require a lot of thought to use well - just plucking off a Wound here and there or sniping a random warrior could leave you drained by the end of the game without doing enough for the cost you pay. The spells we'll be covering today are the feared Chill Soul, the deceptively alluring Black Dart, the cool (mostly for Kardush) Flameburst, the very-much-hated Paralyze, and . . .

BANISHMENT!!!! Credit: Quora.com

As I was preparing this post, I didn't see a lot of places that needed pictures, so I've passed on them again. Call me lazy, I guess.

What Do These Spells Do?

Two of these spells do Wounds: Chill Soul does 1 Wound against whoever the target is (need to specify if the mount or rider is the target if the model is a cavalry model), while Banishment does 1 Wound against a target Spirit model. If Chill Soul is channelled, you add 6" of range to the spell, which means you'd only want to do this if you need that range (more on this later). Banishment moves from doing 1 Wound to doing D3 Wounds against your target. This could mean one-turn-killing many Spirit models in the game (even if they pass all their Fate). As has been discussed in previous posts, sometimes that D3 roll will still result in a single Wound - whatever.

Two of these spells do Strength-something hits: Flameburst does a Strength 6 hit (which is a pretty decent hit - any model in the game will be wounded on a single die, most warriors will be wounded on a 3+ or a 4+, heavily-armored troops and most combat-oriented heroes will be wounded on a 5+), while Black Dart deals a Strength 9 hit (which will wound most things on a 3+, really tough things on a 4+, and Sauron on a 5+). While you have to specify the mount or rider for Black DartFlameburst damages both mount and rider.

When channelled, the Black Dart deals D3 hits instead of one hit, which (again) means that sometimes your channel will do absolutely nothing because you will roll a 1 or 2 and end up doing 1 S9 hit. Flameburst, when channelled, adds Set Ablaze to the target (mount and rider), which deals an extra S9 hit and a S5 hit at the end of each turn until the model a) lies down and crawls (aka, chooses to be prone for a turn), b) walks through water (aka, risks drowning or is entering difficult terrain), or c) dies. This can be REALLY useful at forcing an enemy hero to step away from the fighting for a turn or two, but more importantly, this will make whoever you're facing think twice about whether their hero can just press through and kill stuff. 

Finally, Paralyze on its own doesn't do any damage, but functionally, models that are Paralyzed will take damage from whoever charges them. As we discussed in our podcast on evil spell-casters, when you choose to cast Paralyze, you need to make it count - charge that model with strong stuff, beat the model into a bloody pulp, and move on. Paralyze, at the moment, cannot be channeled - it's channelled version is cool, but not game-altering (each turn the model is Paralyzed, they take a S5 hit - this would be really good in some cases, but since most of the targets for Paralyze tend to be big models that you don't want to deal with, you probably aren't wounding on better than a 5+ each time).

Monday, September 21, 2020

Mastering Magic: Magical Protection

Good morning gamers,

Today we start our sixth post in our "masterclass" series on Magic in MESBG. We've looked at Sorcerous Blast, Immobilize (et al), auric spells, restoration spells, and area-of-effect spells. Today we turn our attention to some of the most useful spells a caster can have when facing an army with a spell-caster of its own (or multiple spell-casters - THE HORROR): Fortify SpiritProtection of the Valar, and Shroud of Shadows. While we'll only be looking at five models today (three Forces of Good, two Forces of Evil), several of these heroes (Galadriel, Lady of Light from the White Council, Gandalf the Grey from several lists including the White Council, and Ashrak from Moria) can ally with all but four factions in the game either Conveniently or Historically (woe to Arnor, Numenor, Barad-Dur, and Sharkey's Rogues). This means that understanding what these heroes do - and why they might be slapped into a list - is good for any player to know.

Pre-warning: no pictures in this post, mostly because I only own the two Gandalf models and have photographed them a lot already in this series. Call me lazy.

What Do These Spells Do?


Two of these spells are quite straight-forward: Fortify Spirit gives a friendly model (which could be the caster himself) not one but TWO free dice when you make a Resist test against a magical power - and yes, this stacks with other free dice that might come from Heroic Resolve, Resistant to Magic, or a Staff of Power, and they don't require you to spend a Will point of your own to use them. They're just free. When channelled, the highest Resist die also gets +1 to its result (meaning you can automatically resist any spell that is cast against you on the roll of a 5 or 6 - wow-zahs). This spell is an Exhaustion spell, so once cast, you want to make sure the caster (not the person who is the target of the spell) retains 1 Will in their Will store to keep it up.

Protection of the Valar is also straight-forward in that the friendly model that is targeted by the spell is immune to both magical powers and weird special rules for the round (I'm looking at you Golden King of Abrakhan and Dead Marsh Spectres!). When channelled, this spell affects the target and all friendly models within 3" of the target, which can make A GROUP of heroes immune to any magical barrage. Unlike Fortify Spirit, however, this spell isn't an Exhaustion spell, so you need to cast it every round in order to make it work (the opportunity cost is certainly higher, but not being affected by magic for the round is guaranteed).

Shroud of Shadows is the most nuanced of the spells and also the most powerful. Based on the most recent Designer Commentaries, the friendly model that is targeted by the spell is not only immune to magical powers (except from Ringwraiths, maybe Sauron), but is also invisible (granting all kinds of movement benefits) and is immune to shooting attacks and requires a Courage test to charge the model with a reduction of Courage based on the distance the model is from the target. As clarified in the most recent FAQ, models that fail this Courage test get to move normally and aren't rooted in place. When channelled, any enemy models in base contact with the target halve their Fight Value (rounding up). While definitely useful at keeping models from being targeted by spells, this spell ALSO makes it hard to shoot or charge them - perfect for keeping a very important model safe.

Monday, September 14, 2020

Mastering Magic: Area of Effect Spells

Good morning gamers,

Today we start our fifth post in our "masterclass" series on Magic in MESBG. We've looked at Sorcerous Blast, Immobilize (et al), auric spells, and restoration spells. Today we look at some of the most fun spells in the game: area-of-effect offensive spells! As fun as rooting a model in place can be, as great as regaining heroic resources is, and as awesome as augmenting models around you is, we REALLY want to do massive damage. While you can do that with Sorcerous Blast under certain conditions, it's easier with some other spells - or is it? The spells we'll be covering today are: Collapse Rocks, Wrath of Bruinen, Nature's Wrath, Panic Steed, and Tremor.

What Do These Spells Do?


These spells can be grouped together in different ways, but here's the basics of each spell:
  • Panic Steed removes the mount of the target (becomes an area-of-effect when channelled);
  • Nature's Wrath knocks enemy models Prone near the caster (and deals S2 hits when channelled);
  • Wrath of Bruinen also knocks enemy models Prone near the caster, but also inflicts a S2 hit (channel for higher Strength on the hits);
  • Collapse Rocks deals a S5 hit to a target model that is near a rocky piece of terrain (becomes an area-of-effect when channelled); and
  • Tremor deals a S6 hit and knocks models Prone who are on a D6" line away from the target model.
All of these spells have the ability to affect an area of the board - but some require you to channel them in order to get the area of effect to occur. Wrath of BruinenNature's Wrath, and Tremor all affect a given area of the board (3" around the caster for Wrath of Bruinen and Nature's Wrath, D6" line away from the target for Tremor). Collapse Rocks and Panic Steed become area of effect spells when channelled (2" around the target for Collapse Rocks, 3" around the target for Panic Steed).

Most of these spells also knock their targets Prone: any hostile figure within the affected area of Wrath of BruinenNature's Wrath, or Tremor are Knocked Prone (with cavalry suffering from Knocked Flying instead of rolling on the Thrown Rider chart). Collapse Rocks and Panic Steed don't innately Knock Prone, but Panic Steed does require a roll on the Thrown Rider chart.

Most of these spells do damageWrath of Bruinen does Strength 2 hits (Strength 3 if channelled, Strength 8/9 if the target is in a water feature) to all affected models, Collapse Rocks does a Strength 5 hit to all affected models (so long as the targets are near a rocky piece of terrain), and Tremor does a Strength 6 hit to all affected models. Panic Steed removes the mounts of the affected models, but otherwise doesn't do any damage. Nature's Wrath does no damage innately, but does a Strength 2 hit to all affected models if channelled (basically becomes Wrath of Bruinen without the water feature rule).

Finally, most of these spells affect only enemy modelsWrath of BruinenNature's Wrath, and Panic Steed only harm enemy models (which makes them great spells to cast when your opponent charges one of your battle lines). Collapse Rocks and Tremor have to be used more carefully, since their damage (Strength 5 and Strength 6 hits!) are suffered by both friendly and enemy models.

For those of you who like charts, here's the visual summary of what is described above:
  Collapse RocksNature's Wrath Panic Steed  TremorWrath of Bruinen 
 Area of Effect?X*
 Knock Targets Prone? **
 Damage Spell?** 
 Affect Only Enemy Models?  
* Channelled version meets the requirement
** Models that get a 1 on the Thrown Rider chart will be Prone and take a S3 hit

Monday, September 7, 2020

Mastering Magic: Restoration Spells

Good morning gamers,

We're continuing our "masterclass" series on magic today by looking at spells that regrow heroic stats (Might, Will, Fate, and Wounds - which is technically not a heroic resource, except that heroes tend to be the only ones with more than one of them . . . though not always . . . if you ignore monsters . . . and Half-trolls . . . you get the idea though).

We've already looked at spells like Sorcerous Blast, Immobilize (and all its lil' friends), and auric spells - all of which are included in the casting arrays of some of the best casters in the game (Saruman and Gandalf in all their various forms). The spells we'll be looking at today - Blessing of the Valar, Renew, Refreshing Song, and Strengthen Will - might not look like much, but in many ways, they have a tendency to be the go-to spells for those turns where "you don't have anything to do." Their impact, however, can be game changing.

What Do These Spells Do?


Two of these spells do the same thing as each other, just targeting a different heroic resource: Blessing of the Valar restores 1 Fate point that was previously spent (or D3 Fate if channelled), while Renew restores 1 Wound that was previously lost (or D3 Wounds if channelled). Since many heroes have 2 Wounds and 1 Fate point, I doubt either of these spells would be channelled much - plus, one-out-of-three times you channel it you get the exact same result as an unchannelled version . . . so why take the risk of wasting a Might point (see my post from February 2019 on magic and my post on wasting Might points for more info)?

Refreshing Song restores 1 Might, 1 Will, 1 Fate, AND 1 Wound that were previously spent/lost. This spell currently can't be channelled (neither caster who has these spells has Heroic Channelling - and neither has any Might anyway), but if it could be channelled, it would restore all lost Wounds (which makes it pretty much like Renew - which you probably won't channel). This is a really powerful spell (even unchannelled - I think it's the best spell in the game) because it can refresh 4 stats simultaneously. If used on a caster (who is likely burning through Might and Will to cast channelled spells, and possibly also Fate and Wounds if he's being attacked), you can turn 1 Will point from Tom Bombadil or Goldberry into more than one heroic resource on someone else. This is great!

The final spell is Strengthen Will, which on paper looks to be the Will-equivalent of Blessing of the Valar and Renew. But there's a key difference: 

Strengthen Will doesn't restore a Will point that's been lost in the fight - it gives the target a Will point.

This small difference allows the target model to have Will if they didn't start with any Will OR allows them to increase their Will above their starting amount. This is a key difference and goes into the strategy of some of the heroes who have this spell.

One final note on these spells: they can all be cast on the caster instead of a different model nearby (since all models are considered friendly to themselves). This is huge, since getting Will points back on a caster, restoring Wounds on an expensive hero, or regrowing Fate points on an important model is huge. The exception to this is casting Refreshing Song, since the casters who have these spells can't be affected by magical powers.

Monday, August 31, 2020

Mastering Magic: Auric Spells

Good morning gamers,

In our last few posts, we looked at how to best use Sorcerous Blast and Immobilize (and Transfix, Command, and Compel). Today, we continue our discussion on magical powers and cover four auric magical powers: Terrifying AuraBlinding LightAura of Command, and Aura of Dismay. I will note that there is another very important auric magical power (Fury), but we're going to give that spell its own post (mostly because the spells in this list aren't very controversial and Fury has both avid fans and avid haters both in the community at large and here at TMAT). Instead of trying to cram that discussion into this post, it made more sense to give it its own time in the sun. :)

What do these spells do?

Shoot at me if you dare - you can't touch this!

Terrifying Aura is one of the simplest (and most reliable and useful) spells in the game: cast on a 2+ by all of the models that have it (the wizards - Saruman in all three of his guises, Gandalf in both of his guises, and Radagast the Brown), the spell makes the caster cause Terror (simple enough, right?). Against some armies, this won't matter - either because they have high Courage OR because they have a special rule that makes them automatically pass Courage tests (most commonly Bodyguard or Sworn Protector). This spell is an exhaustion spell, so once cast, it remains in effect so long as the caster has Will in his store (and since all of the models that have this spell also get a free Will point per turn (except Sharkey and Radagast if he takes an Eagle as his pet), you can get this spell off reliably "for free" (more on this later).

When channelled, this spell makes models that wish to charge the caster take a Courage test on three dice and discard the highest die. I made a chart that compared the success probabilities for each Courage level in a post I did on Gandalf the White in April 2019 - check it out for what that looks like. Long story short, when you don't channel Terrifying Aura, models that are C3 or above are more likely to succeed at charging you than failing to charge; when channelled, you need to be C5 or above to be more likely to succeed (very, VERY few people have Courage that high - even some heroes won't be able to reliably charge your wizard).

Blinding Light was one of the first spells I learned to use in MESGB (it was LOTR SBG back then) and it has both a simple effect and a more complicated (though often irrelevant) effect: models within 6" of the caster are only hit by shooting attacks on a 6 (simple, right?) and a 12" radius around the caster is illuminated (which matters in exactly one scenario). When cast normally, this spell lasts for one turn only. Unlike every other spell in the game, this spell becomes an exhaustion spell (lasts until the caster runs out of Will) when you channel it. For most models that have this spell, channeling it is a given if your opponent has any archery to speak of.

Aura of Command is simple in its rules: all friendly models within 6" of the caster automatically pass Courage tests they have to take. The irony of this spell is that the models who have it (Celeborn, Cirdan, and Saruman the White) are in army lists that already have great Courage! While auto-success is better than the chance of failing, the greatest utility of this spell is when you ally into another list (see the discussion on Arnor between Centaur and me in our list building series for more info). This spell is also an exhaustion spell. When channelled, the radius of this spell is increased to 12", which is often irrelevant, unless you NEED to pass courage tests all over the board. I probably don't need to say this, but this spell is also a good counter to Terrifying Aura (channelled or not).

Aura of Dismay is the last of the spells we need to cover and it is the yin to Aura of Command's yang. When cast, friendly models within 6" of the caster cause Terror. This is possibly the strongest buff of the spells we have to cover today because while some factions might not care about archery or may not rely on terror, most armies need to charge people - so making that harder is just rude. Like Aura of Command, the radius of this spell increases when channelled - given that this spell is hard to cast, I don't see this happening very often (plus, how often do you need to cover a 12" radius in Terror?). Aura of Command might not be as glamorous a spell as Aura of Dismay, but as was mentioned above, it's a pretty good counter to this spell as well.

Monday, August 24, 2020

Mastering Magic: Immobilize (and its various kin)

Good morning gamers,

In our last post, we looked at how you can get the most effective use out of Sorcerous Blast. Today, we turn to the most ubiquitous spells in the Middle-Earth Strategy Battle Game: Immobilize (or Transfix). While your damage potential can be quite large with Sorcerous Blast (even given the newest changes that limit how far a model can be thrown), Immobilize focuses instead on one particular model and takes away a lot of that model's capabilities. While not as good at one-turn-killing a hero as it used to be, it is able to take a hero out of the action for an important round (or out of the game if cast on successive turns). 

Immobilize/Transfix: What Does It Do?


If you've used a spell-caster in MESBG, chances are you've used Immobilize or Transfix before. Whether you're using a wizard (Gandalf, Saruman, Radagast), a Ringwraith (named or unnamed), an Elven mage (Galadriel, Celeborn, Gildor - but not Elrond, Arwen, Cirdan, the-other-Galadriel, storm callers, or Thranduil), or some big magic-powered monster model (Smaug, Dragon with Wyrmtongue, Sauron, and the Necromancer - who isn't technically a monster), you've probably had Immobilize or Transfix in your arsenal (which one is often determined by whether they are a Forces of Good model or a Forces of Evil model).
Pro tip: if you wait to start casting Immobilize until your opponent is this close, you're in for some trouble . . .
When I first got started in MESBG, Immobilize/Transfix was frowned upon in our group because if it was successfully cast, your Fight Value was reduced to 1, your Attacks were reduced to 1, and you couldn't make Strikes (in addition to other things, which we'll cover in a minute). That was  . . . too powerful (especially when cast on a 3+ or a 2+ by most models that had it). In the current edition, Transfix doesn't affect your stats unless you channel it.

To understand what Immobilize does now, let's take a quick look at the rules (factoring in the Designer's Commentaries for the main rulebook):
  • You pick an enemy model to target;
  • You roll to cast the spell and the target can attempt to resist the spell;
  • If cast successfully...
    • The target is unable to call Heroic Actions or use active abilities.
    • In the Move phase, the target cannot move, call a Stand Fast, or cast spells. 
    • In the Shoot phase, the target may not shoot. 
    • In the Fight phase, the target may not makes Strikes if they win a Duel.
  • If the spell was channelled, the Fight Value and Attacks of the target model are halved, rounding up.
So what does this mean practically? It means that Transfix can be used to do the following kinds of things:
  • Prevent casters who haven't acted yet from casting spells;
  • Prevent fast models from charging you;
  • Prevent supporting models who haven't moved yet (such as banner-bearers, shades, Cirdan, Gamling) from moving with their battle line and providing their auric boosts;
  • Prevent archer models from being able to shoot for the turn;
  • Prevents a powerful model from getting the benefits of their Heroic Actions (like Heroic Strike) or Active Abilities (such as Lord of the West).
  • Prevent combat models from killing things.
This post will be focusing primarily on Immobilize/Transfix, but keep in mind that everything we cover here also applies to Command/Compel (with the exception that this spell is usually +1 pip harder to cast and adds a half-move to the target before it's not allowed to move again). There are tactics that you can use with Command/Compel that you don't get with Immobilize/Transfix, so we'll cover those that at the very end (but by and large, they will do the same thing and can be used in similar strategies).

Monday, December 30, 2019

Magic: Top Five Anti-Casters

Good morning gamers,

In our series on heroes, we’ve looked at Uruk-Hai heroes from Isengard, Dwarf (and wizard and Hobbit) heroes from Thorin’s Company, and the top five ways to waste Might points in the game. Today, we look at the top five heroes that you can employ to resist enemy magic casters (and in preparing for this post, I was rather proud to know that I own most of them - good thing, since almost all of my armies run magic, huh?). :)

How to stop magic?
As I discussed in a previous post on Magic in MESBG, there are four ways to block magic:
  • Spend Will (one die for each point of Will you spend – any that get a “natural 6” are returned to your Will store);
  • Resistant to Magic (free die anytime you’re targeted by a spell – available whether you spend Will or not);
  • Heroic Resolve (free die anytime you’re targeted by a spell, but requires the hero who calls it to stay stationary); and
  • Fortify Spirit/Protection of the Valar (two free dice anytime you’re targeted by a spell OR immunity from hostile spells, but requires the hero who casts the magical powers to retain Will OR cast the magical power that turn).
No model has access to all of these innately and most heroes only have access to one or two. Since magic is out of favor for many players these days, you might not get much practice fighting against magic (which can be a nasty surprise). As such, let’s look at some of the qualities that makes a hero a good anti-caster option (in the odd event you run into a double-Ringwraith army).

Monday, August 26, 2019

Using/Fighting Spellcasters: Unlimited Casters, Revisited

Good morning gamers,

We come to the last post in this series – we’ve revisited a four-part discussion we did years ago on Combat Mages, Auxiliary Mages, Multi-Purpose Will Mages, and now we finally address Unlimited Mages. The original post is here. Of all the mages in the game, these types of casters have the potential for the most Will in the game (in aggregate) and are virtually the only casters who can be active at casting magic each turn for the entirety of the game. For our purposes, we’re following this taxonomy for casters:
  • Multi-Purpose Will Mages: Anyone with the Will of Evil rule (or a similar rule) and has spells (who uses Will to cast magic AND stay alive…and possibly other things);
  • Unlimited Mages: Anyone who gets “free Will,” has spells that can be cast, and does not fall in the previous category;
  • Combat Mages: Anyone with 2+ Attacks, has spells that can be cast, and does not fall in either of the previous two categories;
  • Auxiliary Mages: Catch-all for everyone else, usually limited casting with some kind of immediate/lasting benefit to the army.

Wednesday, July 3, 2019

Workbench Update: Rivendell

Good morning gamers,

Today our travels take us to Rivendell, where we catch up on what we’re doing for my High Elves. Those who follow our blog know that I took a Last Alliance list to Brawler Bash this past January, taking the power of Elendil and Elrond to fight all comers. Had a bit of a rough go against a full-Rivendell list (Elendil and Gil-Galad had a not-so-epic show-down), had a good time though overall.

There are three big projects that have been in the works for Rivendell since that time: a) adding spears to some of my guys (can’t rely on Numenoreans being in position to support), b) converting a Cirdan model out of an old Celeborn model (because Cirdan is awesome and I didn’t want to pay a ridiculous amount of money to get the made-to-order one that was released recently), and c) making a banner for them (as well as one for Lothlorien).

Wednesday, June 26, 2019

A Pocket Full Of Power, Revisited


Good morning gamers,

A long time ago (almost seven years ago now), I put up a post on different allied contingents you could get from the White Council to add to a traditional force in order to compensate for weaknesses or just include some White Council characters into an existing army (in that case, I looked at Minas Tirith, though in the comments I noted that you’d get a more thematic feel from Rivendell or Mirkwood). Today, we’re coming back to this idea of allies from a slightly different tact:

Given the historical/convenient army restrictions of the Middle-Earth Strategy Battle Game, what are some heroes/warbands you can ally into your army that would compensate for some key weaknesses without being an overly-large burden on points?

We’ll be going beyond the White Council today, but I’d very much like to hear the allies you like to use. The requirements I’m providing for this post are that they can’t be more than half of your army’s point value (we’re playing 700-pts right now on TMAT, so for me that’s 350). I will note that the Forces of Evil will not show up prominently here, since most evil armies are Impossible Allies with each other (and so you suffer a LOT by spending points on models that won’t be able to call heroic actions/Stand Fasts that affect models from another contingent). That said, you will see some evil models here, though they may not trait as high as you want. Without further ado, here we go:

Thursday, March 21, 2019

Armies of the Hobbit, Part V: The "Other" Armies of Good

Good morning gamers,

In our last post, we looked at the armies of the Dwarves from the Hobbit. Today, we turn our attention to the armies of men. While I don't think any of these lists are as impressive (or competitive) as the Dwarf armies we looked at, they do spam more, so if you can advantage of those numbers, you have the opportunity to best lists that are composed of "better" units.

1) The New Lists: Radagast's Alliance, The White Council, and Thranduil's Halls (and a hat-tip To Rivendell and the Misty Mountains)

There are technically five lists in the Armies of the Hobbit dedicated to non-Dwarf/non-Men lists, but two of them are re-prints from the Armies of the Lord of the Rings. This write-up will focus on the three we haven't covered yet - please view our other pages for write-ups on Rivendell and the Misty Mountains

I will say this, though, about the Misty Mountains list: if you own the Armies of the Hobbit book, unless you're looking to ally your eagles with Thorin's Company (or the Fellowship if you have the Armies of the Lord of the Rings book), it's better to run Radagast's Alliance - you get the same units (though Gwaihir does drop a heroic tier) with additional hero options and the exact same army bonus. If you're not running allies, there's no real reason to run the Misty Mountains list. As such, we're going to focus on the Radagast's Alliance list (but know that most of what we say about it also applies to the Misty Mountains list).


Friday, March 15, 2019

The Armies of the Hobbit, Part IV: Men

Good morning gamers,

In our last post, we looked at the armies of the Dwarves from the Hobbit. Today, we turn our attention to the armies of men. While I don't think any of these lists are as impressive (or competitive) as the Dwarf armies we looked at, they do spam more, so if you can advantage of those numbers, you have the opportunity to best lists that are composed of "better" units.

1) The New Lists: Garrison of Dale, Army of Lake-town, and Survivors of Lake-town

All three of the lists provided here revolve around spam units - the warrior options are incredibly limited (both in the number of warrior choices available, as well as the equipment provided. Like Numenor, this means that weapon swaps can be useful to provide some flavor to your army (and supplement weaknesses). It also helps to have some kind of power hero in your list to do extra damage (whether that's a hero from the list itself or an allied hero). All told, the relative inexpensiveness of the warriors in these lists allows for many weapon swaps and bringing expensive heroes. Since all of these lists can also get spears/bows, you can get a pretty "normal" army to support said heroes.