Good morning gamers,
For new players, having multiple attacks and great stats on most of your models has great appeal (not to mention Might/Will/Fate and often multiple Wounds - and named characters that they love from the movies). While these armies can be hard to use, the enjoyment factor that comes from using powerful, named heroes can be a great way to get immersed into the hobby (and allow you to figure out what is important in conventional armies that you might want to collect).
In our sixteenth post in our series on list building, we’re
departing from the “conventional” armies I’ve collected and are now turning to
the “unconventional” armies I’ve collected – namely, hero armies instead of
hero-and-warrior armies. If you’ve seen the movies (Lord of the Rings or the
Hobbit), there are two groups of heroes that you’ve followed for over 9 hours
and come to love: the Fellowship of the Ring and Thorin’s Company. Today, our
discussion will cover both of these armies.
The Fellowship and Thorin’s Company: Who Do You Leave At
Home?
If you ever play a points match game with either the
Fellowship or Thorin’s Company at less than 800 points, the main question you
ask is this:
A pure Fellowship army benefits greatly from having Frodo in it (don’t give up VPs for being Broken so long as he’s alive AND all of your models are Fearless), while Thorin’s Company (or their Erebor Reclaimed verisons, which we won’t talk about in this post) benefits a lot from having Thorin around (rerolling 1s to Wound is nice – keeps you from having to Feint). Other choices appear to be givens – you probably want to include Aragorn, Legolas, and Gimli in a Fellowship army, while Dwalin and Gloin are auto-includes in a TC army.
So who am I going to leave at home today?
A pure Fellowship army benefits greatly from having Frodo in it (don’t give up VPs for being Broken so long as he’s alive AND all of your models are Fearless), while Thorin’s Company (or their Erebor Reclaimed verisons, which we won’t talk about in this post) benefits a lot from having Thorin around (rerolling 1s to Wound is nice – keeps you from having to Feint). Other choices appear to be givens – you probably want to include Aragorn, Legolas, and Gimli in a Fellowship army, while Dwalin and Gloin are auto-includes in a TC army.
But then you have the hard questions. For the Fellowship,
this includes:
- How important is it to get the free Heroic Combats from Sam (since we’ll have Frodo in the list)?
- If we can’t afford both Gandalf and Boromir, which do we take (or does Boromir take Gimli’s spot)?
- How important is it to include Bill vs. Anduril (if the points limit doesn’t let me take both)?
- Are Merry and Pippin even worth taking (cheap objective holders/screeners for Boromir)?
- Now that Arwen is available to us (if we run Aragorn), should we include her?
For Thorin’s Company, these questions become even more
difficult (as if that were possible):
- Do I need Kili and Fili so I have some good shooting on my team?
- Is Ori worth taking?
- If I only have enough points for one mid-level killing hero, do I take Nori or Dori?
- When do I include Bilbo?
- How important is the banner reroll and healing that Oin provides?
- Does Thorin need Orcrist and/or the Oakenshield?
- Is Bombur worth taking if I’m not running Gandalf or Balin?
- Is it better to have 2 Might coming from Bifur or Bofur or 1 Might from Oin if I can only take one of those heroes?
- How useful is the priority reroll from Balin?
- What Dwarf have I forgotten?
- How the heck am I supposed to bring Gandalf with all these other models crowding me out?
- Are ponies any good?
There are other discussions we could have had as well for
each of these lists, but I think the point is made: the debate is often not in
which models you bring, but in which models stay behind. Both lists have
incredible modularity (and as far as spending money to start playing the game,
you can get both armies for relatively low expense). So, assuming you have a full Fellowship
and Thorin’s Company in front of you, which models should you bring to have an
army most adept at scoring victory points? Here are some thoughts for 700-point lists (prepare to
disagree with me):
The Lists
 |
| The Fellowship - well, sort of... |
- Gandalf the Grey [Army Leader]
- Aragorn – Strider with Anduril and armor
- Legolas Greenleaf with armor
- Gimli, Son of Gloin
- Arwen Undomiel
- Frodo Baggins
 |
| Thorin's Company: complete with pack horses... |
- Gandalf the Grey [Army Leader]
- Thorin Oakenshield
- Kili the Dwarf on Pony
- Fili the Dwarf on Pony
- Dwalin the Dwarf
- Bombur the Dwarf
- Ori the Dwarf on Pony
- Oin the Dwarf
- Gloin the Dwarf on Pony
Before we get into our evaluation of each list, let’s
compare a few things:
- While there are 4 mounted models in the Thorin’s Company list, we have no mounted models in the Fellowship list. We do have lots of March in both lists, so speed will be tricky, but not impossible.
- We have no banners (for the purposes of VPs) in either list – though Oin can grant one person a banner-like reroll once each round. This means that we need to kill enemy banners in the few scenarios that give VPs for that wherever they may show up (and with Legolas or Ori in the lists – to say nothing of the plethora of melee heroes – that’s not too hard to do).
- We don’t have a high model count, but we do have a high Wound/Fate count. Recall in my post on numbers that giving up numbers to increase your Wound count isn’t a bad thing necessarily – both of these lists take that to heart and run with it. While our Fellowship army has only 6 models in it, we have a whopping 15 Wounds and 14 Fate points (that’s not too far below what you’d see in other armies). Thorin’s Company outdoes the Fellowship with a smashing 21 Wounds and 14 Fate points – that’s on-par with many traditional armies! Sure, if you’re counting models on an objective, you’ll need to clear out the enemy quickly, but you’ll have about the same number of Wounds as he does (when you factor in the Fate, that is).
- If you need to neutralize enemy heroes, both lists have Gandalf and some good shooters. Don’t underestimate the effectiveness of Frodo in the Fellowship list to cut a hero down to size if he has the Ring on (especially if he’s got a big hero like Aragorn or Gimli beside him). On the other side of the coin, Ori is a great hero for plucking Wounds off enemy heroes – and if he’s near any of his allies who are carving up heroes/monsters, he can give them a heroic resource point back! Nearly everyone in our Thorin’s Company list can shoot, so you’ve got a good chance of dealing a wound or two on your opponent’s heroes (which might make him play more conservatively with his heroes).
- Need to augment your own heroes? Well, both of these teams have augments everywhere. Whether it’s the tandem mini-contest between Legolas and Gimli, place-swapping between Kili and Fill, the Fearless boost from Frodo, the Feint-like boost from Thorin, the restoration of Will/protection from magic from Gandalf (in either list), free Heroic actions from Aragorn, or healing/banner rules from Oin, you’ve got TONS of augmenting synergies in both lists.
Army #1: The Might of the Fellowship
So let’s begin with this: Rythbryt is already yelling at the
screen that we don’t have Bill the Pony in this list (and as the only
pseudo-banner in the Fellowship list, it makes sense we’d want him). But since Bill
requires you to also bring Sam, Bill’s opportunity cost is 65 points – which is
basically the cost of Arwen and 1 piece of defensive gear. In my mind, trading a so-so combat hero with a nasty magical power (and regrowable Will from Gandalf) isn’t a good enough trade (but don’t fear,
Bill-the-Pony-fans, read to the end and you’ll see Bill getting his time in the
sun).
We’ve included in this army five of the strongest members of
the Fellowship (and Frodo): with Gandalf the Grey as our army leader, we have
good anti-archery protection (which is good, since only Gimli is “resilient”
against archery), good anti-magic protection (either by using Immobilize on enemy casters OR
through Protection of the Valar on one friendly model or all friendly models near Gandalf), and decent magical damage to supplement the
decent archery damage and LOADS of melee damage this team provides. On a turn where you can’t cast
against enemy troops and you’ve already gotten up the buffs you care about, be
sure to cast Strengthen Will on Gandalf so he gets Will back (you can also cast it on Arwen if she's been casting Wrath of Bruinen OR on any hero that's been targeted by a magical barrage and has depleted Will). For an in-depth review of Gandalf, read my post on Gandalf in Thorin’s Company.
You’ve also got Aragorn in this team, who I identified in my revisiting of the Fellowship heroes (and Rythbryt identified in his Armies of Middle-Earth review) as the workhorse of the team. His free Might
point each turn can be used to March the team towards whatever objectives it
needs. While this is an all-infantry army, it moves very quickly. I also decided to take Anduril instead of taking Sam - because if you're going to use Aragorn, you want him to kill things. I'm not entirely sold on taking Anduril over taking 4 horses (for Aragorn, Legolas, Gandalf, and Asfaloth for Arwen), but I'm going to go with this for now.
We have a single beat-stick supporting hero in Gimli to support Aragorn, who should be used
to clear warriors out of the way (Gimli’s bonus +1 To Wound for being out-killed
by Legolas will be best employed against warriors who are naturally easier to
kill). If you do find yourself up against a big hero,
Frodo’s not a bad character to have around, as he can slip on the Ring and give
the Fight Value advantage to his ally (while adding an extra die to the
attack). As I've said in various places on the blog before, I tend to favor Gimli over Boromir, but most people see the extra Might as a good trade for lower Defense and no Fate points. For me, it was the synergies with Legolas that sold me on Gimli, but feel free to swap these guys freely.
Keeping Gimli and Aragorn alive is Arwen. While you could drop her and Anduril to add Boromir with shield to your team (and prior to the February 2020 errata that brought Arwen into this list, I would have always taken Boromir), I think Arwen does something important for your team: she helps them deal with spams of troops that might be trying to run around your big heroes. If one of your heroes gets overwhelmed, Arwen can move nearby and put all of the models that have surrounded your hero on the ground, which not only will keep the hero from taking any wounds that round, but will also make killing these models much easier. Pair this spell with Anduril and you've got a POWERFUL combo!
Keeping Gimli and Aragorn alive is Arwen. While you could drop her and Anduril to add Boromir with shield to your team (and prior to the February 2020 errata that brought Arwen into this list, I would have always taken Boromir), I think Arwen does something important for your team: she helps them deal with spams of troops that might be trying to run around your big heroes. If one of your heroes gets overwhelmed, Arwen can move nearby and put all of the models that have surrounded your hero on the ground, which not only will keep the hero from taking any wounds that round, but will also make killing these models much easier. Pair this spell with Anduril and you've got a POWERFUL combo!
Legolas has the option of running with the team (he’s fine in melee
combat if it comes to that), but more often than not, he’ll probably be perched
in a safe spot with good visibility and shooting for most of the game. While he
lacks the epic-hero 3 Attacks, he gets to shoot 3 times each round on a 3+ OR
shoot once and hit his target (ignoring basically everything) on a 2+. Many a
warrior has been killed by this famous archer, though his primary goal will be
to pluck horses out from under their riders to keep fast models from scoring
too quickly in certain scenarios.
Finally, we have Frodo, who is run with the bare minimum of
gear so that we can invest the points elsewhere. Frodo gives the team Fearless,
as well as keeps you from coughing up points for being Broken so long as Frodo
is alive. While the Ring will certainly help you stay alive (assuming you have
it), be wary of enemy Ringwraiths.
Army #2: Thorin’s Company
I did a post on Thorin’s Company last year – this list is
very similar in many respects. We have Gandalf leading this team as well, since
his boosts to the team (being the army leader included) helps the team be more
effective at what it needs to do: kill things. Gandalf can keep your
predominantly D4-5 army from being shot to pieces, he can neutralize important
enemy pieces (allowing your combat heroes to smash things), and he is really
hard to charge when Terrifying Aura is channeled.
Supporting him are the three auto-includes: Thorin, Dwalin,
and Gloin. While I didn’t give Thorin any extra gear (wanted 4 ponies), Thorin
remains a good offensive piece without Orcrist or the Oakenshield, while Dwalin and Gloin pile on the damage.
While the Defense on these heroes is good (Dwalin is D6, Gloin/Thorin are D7),
two of them are fairly fragile (Gloin has 2 Wounds and 1 Fate, while Dwalin has
2 Wounds and 2 Fate). Thorin is a very defensible hero (Defense 7 with 3 Wounds
and 3 Fate), so alongside Gandalf, it’ll take a concentrated effort to take him
down. Gloin is also mounted because he has throwing axes (gives him 8-13”
movement + 6” range, depending on whether he Marches or not).
We have four mounted models for objective claiming in the
form of Gloin (who we already talked about), Kili (our bowman), Ori (our
slinger), and Fili (who has throwing weapons and should keep up with his
brother). While these three models can race to objectives if required, the
primary advantage that comes from putting them on ponies is that if someone on
the team calls a March, they can move 6.5” each turn and still shoot (while the
rest of the army is moving 8-9” each turn). This makes it easier for them to
keep up with the army while you race for the center. Fili can advance farther
than this, actually, as his throwing axes don’t require him to move at half
speed (because THROWING WEAPONS!).
To cap off the team, I’ve included Oin and Bombur – in my
original post, I didn’t have any ponies, so I had Nori here instead of Bombur
(and had Orcrist). The desire to have four mounted models got the better of me
on this rendition, so I’ve ignored the debate about whether Dori or Nori would
be better to include and instead I’ve taken Bombur (for two-rounds of Heroic
Defense and lower Defense/higher Wounds). Bombur also allows Oin (or Gandalf)
to get Will back, which means we’ve got the full complement of Will-oriented
support heroes (and they can help each other as needed). Oin is really
important, granting the closest thing we have to a banner, as well as healing
heroes who have taken a hit (though with most of our heroes having 2 Wounds and
a single Fate point, they tend to either be alive or dead).
Scenario Overview
Let’s take a look at each of the available scenarios and see
some thoughts/considerations for using the Fellowship list:
- Domination: No matter which army you bring, this scenario will be hard: leaving models behind isn’t that difficult (Legolas doesn't really mind getting left behind, so long as he's got someone to shoot at). When trying to clear objectives, you’ll probably need to split your team up to take 2-3 objectives at the same time. While Legolas can stand on one objective and hopefully lay down fire on another objective (you’ll want to place your objectives as close as possible to each other to make this happen), your power-house heroes (Aragorn and Gimli) can split up the other objectives and move there as quickly as possible (with Aragorn calling Marches if required). Frodo, Arwen, and Gandalf should provide as much assistance as possible without getting overwhelmed – this will take a lot of practice. I recommend that Aragorn and Frodo stay together, just because Aragorn is the best at protecting Frodo. Gimli can benefit a lot from Arwen and Gandalf's magic (and might have increased damage output if Legolas is out-killing him).
- Capture and Control: Harder than Domination because your opponent can tag an objective after you’ve moved away from it, but you want to use Legolas in this one to keep fast troops away from your objectives. The plan is to hold 3 objectives at the end of the game and be contesting the other two, so be sure to get Legolas and Gandalf to the center so they can shoot (each in their own way) at models drifting too close to other objectives. Aragorn, Gimli, and Arwen will be getting their workout running around from objective to objective and a sneaky Ring-wearing Frodo can move towards any objectives they leave behind that you can't protect with Legolas or Gandalf.
- Hold Ground: Rough scenario, though the free March from Aragorn each turn should see you getting to the middle at nearly the same time as your opponent (unless your opponent has marching cavalry). If he does, Sorcerous Blast, Wrath of Bruinen, and Legolas’s arrows ought to see them sent flying and buy you time for Aragorn or Gimli to get into the center. Holding the center will be hard, but your goal is to win the scenario with 3 people in the center (Legolas, Gandalf, and Frodo) while your other models charge into anyone who gets close and Heroic Combat into more grunts to keep them away from the center. Eventually, your opponent will have to throw everything he’s got at the center – which is when you’ll want your mega heroes smashing as much as they can. Beware of early-game Might burning, as you’ll need it later.
- Seize the Prize: Another hard scenario, but again, it will come down to whether Gandalf and Legolas can keep enemy mounted models from getting to their desired objective. If you manage to get the Prize, hand it off to Frodo and March him towards the enemy board edge at 7” each turn. Keep a screen of blockers (Aragorn, Arwen, Gimli) to keep him safe. Legolas and Gandalf will be used for control late in the game (sniping anyone trying to get away with the Prize, or Immobilizing them so your other heroes can jump on them - though don't discount the delay a Wrath of Bruinen can deal as well).
- To The Death: Your second favorite scenario – keep the team together and charge at the enemy, softening them up with Legolas, but don’t be afraid to get locked in quickly. Be sure to snipe enemy spell-casters before the battle gets raging, as Aragorn and Gimli need to be calling Heroic Combats to even the numbers out quickly. Because you don’t count as Broken so long as Frodo stays alive, you have a good shot at getting the maximum points for breaking your opponent without being broken yourself. As much as you can, keep Gandalf from taking Wounds, but if you make sure your opponent doesn’t have a banner and Frodo is alive, you can win the game even if Gandalf dies.
- Lords of Battle: Your actual favorite scenario – because your Wounds/Fate are fairly low, it’ll be hard for your opponent to outscore you (especially if Aragorn, Legolas, Gimli, and Arwen via Wrath of Bruinen are killing things). Since you can start on the center line, Aragorn, Gimli, and Arwen (after she casts Wrath of Bruinen) should get locked into combat quickly (unless your opponent holds back), in which case you want to use Gandalf and Legolas to start getting kills early, then get Aragorn/Gimli/Arwen rolling after a turn or two. If your opponent sits in the way back, call those Marches with Aragorn until you are right up against his force.
- Contest of Champions: With Gandalf as your leader, you don’t have a “bad” army leader, but you don’t have a particularly good one either. Thankfully, Gandalf can Immobilize the enemy leader and Arwen can knock him down with Wrath of Bruinen, so you should have enough guys to kill him quickly. Because your opponent gets points for kills, your lack of models (and high Wound/Fate count) will help a lot here. Just remember that any Sorcerous Blast kills won’t boost Gandalf’s kill count in this game - he needs to use Glamdring to deal the wounds that count.
- Reconnoitre: A truly horrible scenario, as you’ll need to patrol 48” of space with 6 models. March will help, Legolas will help, Gandalf will help, Arwen will help, throwing axes on Gimli will help, getting Frodo off the board edge will help. But mostly it’s going to be an uphill battle.
- Storm the Camp: Another hard scenario, as getting models into the enemy camp will be tricky and keeping them out of your own will be tricky. Still, do your best to engage the enemy in the center of the map and where possible march Aragorn with Frodo towards the enemy camp so you can kill whoever’s there and hopefully get some good points. Don't underestimate the ability for Arwen or Gandalf to knock enemy models that are racing for your objective to the ground - and Gimli's threat range with his throwing axes is quite good.
- Heirlooms of Ages Past: Not as rough a scenario as the last two, but still hard: because you are a single warband, you don’t have to worry about starting separated, but it also means you’ll have problems getting to more than one heirloom unless you place as many heirloom drop-points as possible in one area and happen to walk onto the board from that side. If you don’t get the heirloom, march towards it and carve through anyone who stands in your way (using Frodo to pop past enemy ranks and sneak up on whoever’s got the heirloom). Sorcerous Blast and Wrath of Bruinen are critically important here, as they can be used to knock whoever has the Heirloom to the ground, giving Aragorn and Gimli the time they need to get to the model to kill them (if they're not killed by the spell that hits them).
- Fog of War: Pick a piece of terrain near the center because you’re not fast. Pick Frodo to protect because you need him for other reasons. Your opponent will probably not pick Frodo (though he might), but instead will probably pick Arwen or Legolas (the two other squishy characters, since Gandalf isn’t an option), so protect them at all costs. When picking an enemy hero, pick someone Legolas can shoot to death if possible – otherwise a hero who is unlikely to survive a brutal encounter with Aragorn or Gimli.
- Clash By Moonlight: You don’t have great shooting, but Legolas is good. Gandalf can make that fatal archery hit less often, but you want to get locked in as quickly as possible. So do that – and hope Legolas doesn’t fall too quickly. Gimli's throwing axes will be more lethal on the charge than normal, so you might see his wound tally increase faster, making Legolas even more lethal with his 3 shots each turn than normal.
- Domination: With 9 models (4 of which are mounted), this is easier with Thorin’s Company than with the Fellowship. Use the four mounted models (all archers) to race from forgotten objective to forgotten objective, picking off enemy warriors as you go. At the end of the game, you can send them in teams to clear any stragglers off far-flung objectives OR send one to each objective to clear whatever’s there. Besides Ori, they’re all pretty good fighters in melee (2 Might each with Strike), and while the ponies won’t give them an extra attack/knock-down, you will get an extra 3” of movement and a larger base to help you clear models out. The rest of your fighting force should stick together (only 5 models), relying on Gandalf’s magic to weaken the enemy for Thorin, Dwalin, and Bombur to kill (Oin can fight, but mostly he’s there to heal and grant rerolls). Gandalf isn’t bad in a fight either, but like Oin, you don’t want him to get overwhelmed.
- Capture and Control: Similar strategy to Domination, but in this one your cavalry should work as a team to rout the enemy from objectives, tag them, and then move on. Ideally, you want Ori to sit and shoot with his slingshot (more chances to get a natural 6 that way), but the others should be racing from objective to objective, clearing out any lone models that sit there. The other five models advance towards the main enemy force and engage – focus on winning the far-flung objectives, since your hopes of taking out a lot of models with your main contingent will be low. Gandalf can help control enemy models and keep them from racing around your main group to get to objectives that are further away. Sorcerous Blast would be good against any enemy cavalry to dismount them.
- Hold Ground: With everyone having March, you can get your four riders in quickly, but the rest of the army won’t be far behind. The main question is who to call March with: Bombur isn’t a bad option if you don’t think you’ll need to call Heroic Defense. You’ve got Heroic Strike options on Thorin, Fili, Kili, Dwalin, Gloin, and Gandalf, so using some of their might wouldn’t be bad either (since you should still have some Might to use for Striking across the army). Since Oin and Ori both have 1 Might, I’d think calling it with them would be less valuable, as they might need it later (see what I did there? Yeah, that one never gets old). Once you’ve arrived, hunker down with your infantry and harass with your cavalry, keeping everyone within 6” of the center if possible. As a note, you don’t have to worry about getting the charge with your cavalry, as they don’t get the normal cavalry bonuses from their ponies anyway - they just have better movement and larger area denial with their increased base size.
- Seize the Prize: A hard scenario, but with 13” movement on four pony-riders – each of which has a shooting attack – you should be able to contest the center quickly. With the arrival of Gandalf and the melee Dwarves, you should be able to duke it out and keep the Prize if you manage to dig it up (need to dismount someone to pick it up - I recommend either Fili or Gloin). Where possible, you want to get the Prize to one of your mounted models, ideally shielded by Gandalf’s Blinding Light and using the other Dwarves as a screen. Without Horselord, you could be in for some serious trouble, so save Might on whoever picks it up so they can use it to call Heroic Moves/Marches to get further towards the goal.
- To The Death: This would be your favorite scenario if you had a banner – as it stands, your most important objective (besides breaking your opponent) is to kill any enemy banners that are standing around. Against armies that brought a banner on a hero, you actually have an advantage, since you have many heroes who can Strike and a wizard who can Immobilize that hero so they can’t counter-Strike against you. With Dwalin wounding D7 heroes with his two-handed hammer on 4s, even high-Defense heroes carrying banners (like mega-Boromir) can be slain with relative ease. While getting another hero in the same fight would be ideal, you’ll probably need your other heroes to tie down enemy models. Your mounted models (with 40mm bases) are great for making your battle line longer – and most of those heroes are pretty good in melee (not Ori).
- Lords of Battle: This scenario is straight-forward, but not easy: with relatively low Defense (the ponies are D3, three models are D4, three models are D5, and the other three are D6-7), getting wounds on you will be easy, though they will have to beat your models first. With most of your models at F5-6, losing fights will not come easily at first, but they will come if the fighting becomes prolonged. As a result, you need to keep your models from getting hemmed in and trapped, or they’ll fall very, VERY quickly as soon as they lose a fight (which often happens when they run out of Might). Thankfully, your losses to enemy archery should be pretty limited thanks to Gandalf being able to focus on channeling Blinding Light on the first turn.
- Contest of Champions: As discussed with the Fellowship, this scenario is actually pretty good for you because Gandalf isn’t bad at fighting and your other Dwarves are hard to kill (Ori and Oin are squishy, but it’s kill count). Have Gandalf deal killing blows early on and you should have a good chance at outdoing the enemy army leader in kills (especially if you’re Transfixing him). Let Thorin, Dwalin, and Gloin loose in melee to kill things, use Bombur to lock down the enemy Army Leader (call Heroic Defense and Bash – that way you will be hard to kill if you lose and have a chance to knock the enemy army leader prone if you succeed).
- Reconnoitre: You’ve got the requisite four mounted models, but like the Fellowship, this is going to be an uphill battle, because you can’t make a Thin Red Line to limit your opponent’s means of racing models off the board. Your ponies need to be used to get yourself in good firing lanes to take down enemy flankers, but your five infantry won’t be enough to hold the main body without leaving large gaps to be overwhelmed. As a result, it might be good to get 1-2 models (pony-riders) off early and then race to be quartered. Kill as many of the enemy as you can (prioritizing Heroic Combats over Heroic Strikes because you’ll need the kill count and movement more than the higher Fight value) and hope you kill enough that you don’t lose (if you can end the game after getting 2 models off and your opponent kills all of your other models, you'll get a draw if you didn't wound/kill his army leader and didn't break him - draws are fine in this scenario).
- Storm the Camp: Another uphill scenario, though the two mounted throwing weapon heroes (Fili and Gloin) are prime candidate for getting into the enemy camp and causing havoc. With 8-13” movement and 6” throwing axe range, these guys can clean up a camp pretty well if your opponent doesn’t leave a lot of defenders. The other models will be needed to engage the enemy as far away from your camp as possible (with the other two mounted models and Gandalf catching any stragglers that head for your camp).
- Heirlooms of Ages Past: Like the Fellowship, you benefit from deploying in one place – though with the ponies and Heroic March on everyone, you’ve got a good chance of being able to split into two groups to find the Heirloom without much loss. If you get it, race that model away from the fighting as quickly as possible and do your best to survive!
- Fog of War: Unlike the Fellowship, I recommend picking a terrain piece that’s far from the center and using your four riders to claim it. Tricky commanders will send their pony-riders to four different terrain pieces just to throw off their opponents, then using the speed/shooting capacity of the riders to whittle down whatever models are sent to claim important objectives.
- Clash By Moonlight: Not a great scenario for you, despite having Gandalf for Blinding Light and lots of shooting weapons. While this all might look like an advantage, the low Defense of your army (predominantly D3-5) means you’ll probably we wounded on 4s by most archery (maybe 5s), which means you’ll be plowing through Fate points and Wounds pretty quickly. While Gandalf can help mitigate some of that, enemy forces with lots of archery will still do a number to you. Still, with Kili/Fili/Gloin all having S3 range weapons with +1 To Wound, you’ll see them get good mileage out of their ranged weapons. Ori’s slingshot will still want to get 6s to hit whenever possible, but otherwise, that S1 slingshot will be wounding D4/5 models on 5s now – which will be a very welcome change.
Personally, I’m not convinced that the Thorin’s Company list
needs much improvement, but there’s certainly room for change in the Fellowship
list. Let’s look at a few themes that might make you choose different units/mixes:
- Get More Gear – If you’re going to get more gear for the Fellowship, you’re looking at dropping either Arwen or Gimli (getting you 60-100 points) OR dropping Anduril – you need Gandalf to keep your models from getting shot to pieces, you need Aragorn’s Might for all kinds of things, you need Frodo for the army bonuses, and you need Legolas for shooting (all kinds of things). This means one of your two supporting heroes for Aragorn gets sacked (either the spellcaster or the tank). Personally, I’m more inclined to keep Gimli. For Thorin’s Company, the only gear options you have (besides getting stuff for Thorin) are ponies (or a horse for Gandalf), so dropping 1 model means equipping more models with mounts and potentially upgrading a different model to someone better. Still, by gaining 100 extra points, you can get lots of gear for your team (and occasionally other characters) – something like this:
- The Fellowship:
- Gandalf the Grey [Army Leader]
- Aragorn – Strider with Anduril, armor, bow, and horse
- Legolas Greenleaf with armor
- Gimli, Son of Gloin
Arwen Undomiel- Frodo Baggins with Sting
- Samwise Gamgee
- Thorin's Company:
- Gandalf the Grey [Army Leader] with Horse
- Thorin Oakenshield with Orcrist and Pony
- Kili the Dwarf on Pony
- Fili the Dwarf on Pony
- Dwalin the Dwarf with Pony
Bombur the Dwarf- Ori the Dwarf on Pony
- Nori the Dwarf on Pony
Oin the Dwarf- Gloin the Dwarf on Pony
- Get More Models – If you find that you just don’t have enough models to be everywhere, both lists can “get a little more” by dropping an expensive model and taking some other models instead. The Fellowship does this very well, since many of the models we omitted on the first-go-around are cheap (note that we can modify the Fellowship list easily to an 800 point list by adding Gimli back in). Thorin’s Company struggles a lot with this approach, since the only expensive models you have are also models that provide a lot of benefits to your team (Gandalf, Thorin, Dwalin):
- The Fellowship:
- Gandalf the Grey [Army Leader]
- Aragorn – Strider with Anduril, armor, and bow
- Legolas Greenleaf with armor
Gimli, Son of Gloin- Arwen Undomiel with Asfaloth
- Frodo Baggins
- Samwise Gamgee
- Meriadoc Brandybuck
- Peregrin Took
- Bill the Pony
- Thorin's Company:
Gandalf the Grey [Army Leader]- Thorin Oakenshield with the Oakenshield [Army Leader]
- Kili the Dwarf on Pony
- Fili the Dwarf on Pony
- Dwalin the Dwarf
- Bifur the Dwarf
- Bombur the Dwarf
- Ori the Dwarf on Pony
- Dori the Dwarf
- Oin the Dwarf
- Gloin the Dwarf on Pony
- Bilbo Baggins with Sting (and the Ring)
- Known Scenarios/Opponents – If you know that you’re not going to be doing Reconnoitre/Storm the Camp/Seize the Prize, but instead are going to be playing some kind of kill-count scenario (To The Death, Lords of Battle, Clash By Moonlight), there are certain things we’ve included that you just don’t need. You may also know what kind of list you’ll be fighting (e.g. your friend just got a new batch of shiny Iron Hills Dwarves and wants to give them a go), so you can say that you won’t need certain heroes (like Gandalf – who covers a multitude of sins, but costs a TON of points). As a result, if you knew you were playing against a non-magic, low-shooting army with a kill-count scenario in mind, here’s how the lists might change:
- The Fellowship:
Gandalf the Grey [Army Leader]- Legolas Greenleaf with armor [Army Leader]
- Aragorn – Strider with armor
Anduril - Gimli, Son of Gloin
- Arwen Undomiel
- Boromir of Gondor with shield
- Frodo Baggins with Sting and Mithril Coat
- Samwise Gamgee
- Meriadoc Brandybuck
- Peregrin Took
- Bill the Pony
- Thorin's Company:
Gandalf the Grey [Army Leader]- Thorin Oakenshield with Orcrist and the Oakenshield [Army Leader]
- Kili the Dwarf
on Pony - Fili the Dwarf
on Pony - Dwalin the Dwarf
- Bombur the Dwarf
- Ori the Dwarf
on Pony - Nori the Dwarf
- Dori the Dwarf
- Oin the Dwarf
- Gloin the Dwarf
on Pony - Bilbo Baggins with Sting
For new players, having multiple attacks and great stats on most of your models has great appeal (not to mention Might/Will/Fate and often multiple Wounds - and named characters that they love from the movies). While these armies can be hard to use, the enjoyment factor that comes from using powerful, named heroes can be a great way to get immersed into the hobby (and allow you to figure out what is important in conventional armies that you might want to collect).
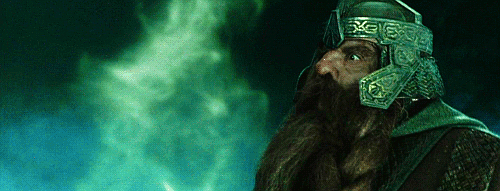 |
| Credit: Tumblr |
In our next post, we discuss an army I’m still in the
process of testing out – the Dead of Dunharrow! While Centaur has used
Dunharrow for a while (his “All Saints Day” army), Dunharrow is one of those
factions that saw a massive resurgence after the release of the core set (read Centaur's write-up here), since
everyone now has tons of Warriors of the Dead to use (or sell) and they got a
cool Legendary Legion to boot (which only requires the acquisition of the King of the Dead and his Heralds plus the Three Hunters to get going)! While the Legendary Legion appears to be a popular choice for new players sharing their lists on Facebook groups, the list I’ve chosen to focus on is very, VERY different.
Intrigued? Take a look next week and as always, happy hobbying!
The Boromir disrespect is unreal! Hes better than Gimli or legolas, though both combined are probably better than Boromir
ReplyDeleteHey Jack,
DeleteI do come down hard on Boromir - when I first got started in the game, I loved the guy a lot (more than anyone else in the Fellowship). Without Fate though, he's a risk in an army with limited models - siege engines that get a hit on him will auto-kill him if they wound, models with Morgul Blades/Drain Soul will also auto-kill him - and with the proliferation of the Dead of Dunharrow/Return of the King Legendary Legion as well as the Witch-King in Angmar/Mordor, facing an army with Drain Soul or a Morgul Blade is a real consideration.
Boromir is also vulnerable when he's trapped by lots of models and at least one of them has high Courage (or is Fearless - or is a hero with Will points that are likely to be spent on passing Courage tests). Boromir is forced to burn through his Might in order to not lose a fight since losing a fight will see him very, VERY dead. Gimli has much better resiliency (and killing power - especially if Legolas is present, giving him +1 To Wound).
I will note that you can swap him with GImli if you want to (though the 11-14" potency on that throwing axe adds to the appeal of Gimli besides the resiliency he has over Boromir). Legolas is ace and very necessary in some scenarios where your opponent can try to play keep-away or out-shoot you as you approach.
As noted in the post, you can get Boromir AND Legolas AND Gimli by dropping Arwen and Anduril - while this will make Aragorn less effective, you'll get increased resiliency and more melee power from Boromir than you will from Arwen (and a second person with March). I personally think that Wrath of Bruinen is very helpful when your numbers are small, but up until a week or so ago, I had Boromir here instead of Arwen.
At least when bozza is trapped by many models you still have the horn.
ReplyDeleteI'm taking fellowship to a tournament in October. Fully themed and for a two day job. Will take gandalf, legolas, Aragorn, bozza, gimli, hobbits as a "before Moria" list. Then on day two we loose our leader and have to replace him with a different but lower tier dude. I'm going for unarmoured Celeborn and a small elven host as a "breaking of the fellowship" leaving lothlorien theme.
I often play fellowship but struggle to make best use of gandalf. No arwen. I'm quite looking forward to backing up hobbits with elven spears.
I'm not sure I'd ever leave home without heavy armor on Celeborn, but for theme, I guess it's alright. :-) I assume he has a blade though?
DeleteGandalf is tricky to use - after his two static buffs are cast, I predominantly use Immobilize if there's something big nearby or Strengthen Will on Gandalf himself if there's nothing threatening.
Nope. He is going to be the unarmed, unarmoured model :)
DeleteDitto pre-Moria fellowship will be without elven cloaks etc!
Gandalf I just can't use right. Gandalf the grey or white. Invariably I feel that for his points he needs to be killing stuff but then he gets bigger in combat so can't cast etc. Fellowship in general is a tricky to use army, but leaving gandalf at home makes it easier. And his cart compares badly with a khandish chariot for the same points.
Gandalf is much harder to use than Boromir, Legolas, Gimli, or Aragorn - and I agree that for his cost, you expect him to kill more. BUT if you run into an army that can shoot all day long (Rangers of Ithilien, Isengard, Serpent Horde, Azog's Hunters), you will feel in the back of your mind the desire to have some kind of protection. Some of that protection might be granted through Elven Cloaks, but it's easiest with Gandalf.
DeleteGandalf is also very much missed if you're facing 3+ Ringwraiths or Saruman - all of your power heroes lack Will (1 for Boromir, 2 for Legolas/Gimli, 3 for Aragorn) - and unless you're good at rolling 6s, you won't last for more than 2-3 turns.
The cart might not be the best choice for Fellowship, but it's great in a Shire list - you need a larger bubble for Blinding Light to protect your poor blokes (and a free shooting attack even when your engaged is welcome).
Question for the TMAT team: If you are running Gandalf and Boromir together, what's the best way to protect Boromir from magic? Channeled strengthen will? Multiple free-will-point-spending-only strengthen wills before engagement? Keeping Gandalf nearby to cast protection of the valar? (This one I don't like, if enemy has priority the protection fails.) Also like Captain Fantastic I'm wondering how to make Gandalf pay back his points.
ReplyDeleteAppreciate I am not on the team but the best way to protect bozza from magic is an elven cloak. If facing area effect keep a Hobbit nearby. Then with six might and one will you auto pass one resist roll.
DeleteIf all else, while their 200 point Sauruman is immobilising your 100 point bozza, your Aragorn and gimli will be getting to work with chained heroic combats to cut him to shreds.
If you've charged Boromir into combat, Protection of the Valar is a good spell - just makes you immune for the turn. Strengthen Will isn't a bad spell to channel, but 1/3 times, you'll get the exact same outcome as an unchanneled spell. I like casting it normally with just your free die on Gandalf (though you can do it on someone else if you want) because it can turn a free Will point into a permanent Will point.
DeleteIf you want Gandalf to kill things, you'll almost always be disappointed - with 1 Attack, he's really limited. Mounting him on a horse can up his damage some, but you're still going to struggle to keep up with the other members of the Fellowship.
In my mind, you don't use him to do damage - you use him to let your OTHER heroes do damage. Aragorn/Boromir/Gimli are all beasts in combat - fighting someone who's Immobilized might allow them to avoid calling a Strike (or even take on a more dangerous target than would otherwise be possible, since they don't risk retaliation). Sorcerous Blast is hard to cast, but you can get models on the ground (even if they don't die), which can give Merry/Pippin manageable targets (again, they can't die that round) OR allow you to proc a Heroic Combat with Aragorn/Boromir/Gimli really easily. Ultimately, you include him for the protection he gives your team that you can't get from anywhere else. There's a post in this article for an in-depth review of Gandalf the Grey in the context of Thorin's Company - I highly recommend you check that out!
Took a 600pt fellowship of Aragorn, legolas, gimli, bozza, arwen and assorted gear. While admittedly she did fluff it then die, I'd take arwen and wrath of bruinen over gandalf. Infact, I'd ally in Elrond over gandalf. That area effect really help stop you getting swamped.
ReplyDeleteArwen is a great addition to the team - really happy for that thematic change that they made. I agree that Elrond is a beast - I imagine that against Serpent Horde/Assault on Helm's Deep armies, however, you'll be wanting Blinding Light somewhere in your army. Lots of armies can do decent archery too, and with Aragorn/Boromir capping out at D6 and Legolas capping out at D5, you're quite likely to get shot up (your horses are all D4 as well) if you don't have some kind of protection. Elven cloaks can help to an extent, but only if you've got plenty of terrain on the board. At 600 points, though, I could see you running without Gandalf (he's a good quarter of your points).
Delete