Good morning gamers,
Today we resume our series on list building with the "bare necessities" you need for an army to potentially score maximum victory points in any scenario. As a review, the five critical elements of list building are as follows:
- Fast models (usually cavalry, minimum of 4);
- At least one actual banner (the least necessary requirement if you're able to kill all of the enemy banners before the game ends);
- Enough models (I have a "Rule of 30" at 700-points);
- Ways to neutralize enemy models (especially heroes); and
- Ways to augment your own models (especially heroes).
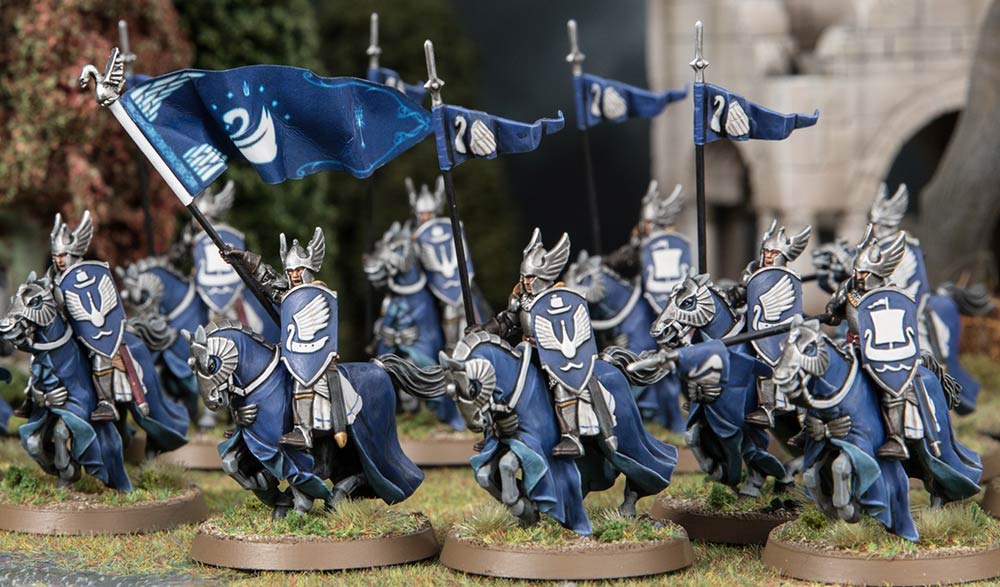
Today, we delve into the remaining factions in the Armies of the Lord of the Rings and Armies of the Hobbit and we begin with an army that I've looked through many times. The models look great, the theme of the army is wonderful, the allies of this faction are awesome - but the models THEMSELVES are REALLY EXPENSIVE (in actual money, sometimes points in-game). That's right, we're looking at the Fiefdoms!
 |
| Photo Credit: lotr.fandom.com |
The Fiefdoms: Balancing Hero Synergies And Masses of Troops
The Fiefdoms was the first faction that really emphasized hero positioning to take advantage of crazy good synergies. Like the Army of Dunland, where you place your heroes (and some supporting troops) matters a lot - it either makes or breaks your army. The Fiefdoms has one of the best spreads of named heroes - four Heroes of Legend/Valor - which means you can form a Horde with minimal investment in heroes. Two of those heroes (Imrahil and Forlong) are 3 Might heroes and by buying them, you not only get a War Horn to supplement your Courage (might be unnecessary - more on that later), the ability to reroll 1s to Wound for models within 6" of Forlong to augment your damage, F5 Knights of Dol Amroth and Men-at-Arms of Dol Amroth if they're near Imrahil (and F6 Captains of Dol Amroth), and a 12" banner buff from Imrahil (that doesn't count as a banner for the purposes of Victory Points). For 250 points (or less, I guess), you could certainly do worse.
The synergies from the other named heroes include a 6" Fearless buff from Angbor (who is treated as a banner by his fellow Clansmen of Lamedon - again, doesn't count towards Victory Points) and rerolling failed To Wounds for your Blackroot Vale Archers if a Heroic Shoot is called near them (and rerolling 1s To Hit with your Blackroot Vale Archers if Duinhir is nearby and the Archers don't move).
All of this is good - but buying all four of these named heroes will cost you over 350 points - which is a LOT invested in heroes for an average-Defense, average-to-above-average cost army. And none of these guys have March, so you might need a Captain of Dol Amroth in your ranks as well. Angbor and Duinhir only give you 2 Might each, so despite having four named heroes, you only have 10 Might (which is a lot, but not as much as you'd get if you allied with Minas Tirith or Rohan). As a result, if you desire numbers, you probably only need three of these heroes if you're running Pure Fiefdoms, while you could get away with two heroes if you wanted to ally with Minas Tirith and/or Rohan. There's a lot you can do with this army - hence why I avoided writing this post for a while.
Today's list will be a pure list, though we'll address some allied combos later in the post. The list I'm presenting today is something I wouldn't mind collecting (but it's definitely coming after I've wrapped up getting the models I need for the Quest of the Ringbearer sourcebook).
The List
- Prince Imrahil of Dol Amroth on armored horse with lance [ARMY LEADER]
- 1 Knight of Dol Amroth on armored horse with lance
- 4 Axemen of Lossarcach
- Forlong the Fat on horse
- 3 Clansmen of Dol Amroth
- 1 Axeman of Lossarnach
- 4 Men-at-Arms of Dol Amroth
- Captain of Dol Amroth on armored horse with lance
- 3 Clansmen of Dol Amroth
- 1 Axeman of Lossarnach
- 4 Men-at-Arms of Dol Amroth
- Duinhir
- 4 Blackroot Vale Archers
- 5 Blackroot Vale Archers with spears
- 1 Blackroot Vale Archer with spear and banner
The purchases required to get these units are as follows:
- You'll need Imrahil - though since we also need Knights of Dol Amroth on foot and mounted, you could just buy 6 Knights of Dol Amroth from Games Workshop and 6 Knights of Dol Amroth from Forge World and have the two bare heads "be Imrahil";
- You'll also need the Heroes of the Fiefdoms - and probably a conversion job to get a suitable Forlong the Fat on a horse (magnets wouldn't be a bad option if you're trying to save money);
- You'll need two packs of the Warriors of the Fiefdoms;
- You'll need two packs of the Men-at-Arms of Dol Amroth; and
- You'll need one pack of Rangers of Middle-Earth (convert one into a banner guy).
Warband #1: The Prince and His Knights
Leading our army is Prince Imrahil with a Knight of Dol Amroth and some Axemen of Lossarnach. Imrahil is a very good hero, with 3 Attacks/Wounds/Might/Will/Fate and a great Fight Value with Strike for winning fights and a lance with S4 for killing things when you win. Having fought Imrahil for years, I can say without a doubt that he is a VERY powerful hero (who will attract ALL spell-casters for miles when he's preparing to charge).
Knights of Dol Amroth are a bit overpriced (whether on foot or mounted) UNLESS they're near Imrahil. You can find cheaper F5 cavalry, but when you factor in the banner buff they get, as well as their D5 mounts, these models can be pretty cost-competitive with most heavy cavalry. If they're not near Imrahil, they're at least 1 point too expensive, so keep them near Imrahil! We've gone with 1 Knight and piled on the elite infantry instead of getting more Knights.
Warband #2: The War Horn
Forlong the Fat is one of the best heroes in the game when evaluating points for cost: with a War Horn in his profile (normally a 30-point investment), you're paying 50 points for a F5/S5 hero with a war spear/lance, 2 Attacks and 3 Wounds, with 3 Might that can't be used for Strike (but can be used for Heroic Moves/Combats and occasionally Heroic Shoots for your Blackroot Vale Archers). Forlong is probably your best hero to call a Heroic Move, since his 6" "reroll 1s when making Strikes" helps your battle-line a lot (especially your Axemen and Clansmen). Oh, and he's got a war horn, so all of your models on the battlefield are Courage +1. As a secondary hero, he's pretty great.
Supporting Forlong are eight elite warriors: three Clansmen, one Axemen, and four Men-at-Arms. You can run this as a four file, (nearly all) two-rank block OR as a pike block with a few guys guarding the flanks (the pikes should support two Clansmen). None of these warriors are D6, so you're vulnerable to S3 bows and sustained attacks from the enemy, but if you need to hold a line while Forlong punches a hole through some warriors, you can certainly do it with this squad. Forlong's ability to reroll 1s means your Clansmen don't have to Feint and your Axeman can reroll 1s while getting +1 To Wound if they two-hand (and they can use Piercing Strike).
Warband #3: The Marching Anvil
It was a hard choice between Angbor and a Captain of Dol Amroth - with all of the average Defense (and average numbers), I wanted the speed in this army. Angbor is great, but this guy can dump his warband (carbon copy of Forlong's warband above) and tag along with Imrahil, which gives you a great combat hero (by generic hero standards). With F5 normally (F6 when within 3" of Imrahil), 2 Attacks base (3 Attacks on the charge with a banner reroll when within 12" of Imrahil), and S4 with a lance (rerolling 1s if you're within 6" of Forlong), you've got some great killing power in this list from this guy.
As mentioned above, we have a carbon copy of the previous warband, so the two warbands together give you 6 Clansmen, 2 Axemen, and 8 Men-at-Arms - you can double pike-support four of your Clansmen and spear-support the remaining Clansmen OR you can choose to double pike-support two fewer models and give everyone at least one supporting model. This can be a HUGE battle line, hopefully chopping through whatever's in front of you because of all the attacks you have.
Warband #4: All The Bows
In most armies, you'd want to distribute your bows across your warbands so that you'll always have shots available. In this army, because there are really good synergies with Duinhir that affect your Blackroot Vale archers, you'll want as many of them as possible in his warband (and not really in anyone else's warbands). This warband also has the only ACTUAL banner in this army and sports 11 shots that can hit on a 3+ (rerolling 1s if Duinhir is nearby and the archers are standing still) and rerolls failed to Wounds (if Duinhir or Forlong call a Heroic Shoot). As I discussed at the start of the year, this means your 11 bows can expect to do ~8.5 hits on turns when they stand still (hit on 3s and reroll 1s) and will do ~4.7 wounds to D3-4 models and ~2.6 wounds to D5-6 models when benefitting from a Heroic Shoot (which you can call twice with Duinhir and twice with a Captain of Dol Amroth if you don't need to March anywhere).
Scenario Overview
Let’s take a look at each of the available scenarios and see some thoughts/considerations for using this list:
- Domination: Okay, so let's start with this: we have a clump of archers that we want to sit on an objective (ideally the center objective), so make sure you have Forlong with the big infantry block to clear the center and follow up with your archers. Imrahil and "his boyz" can clear the outer objectives - you should have enough banners in the rest of the force that it doesn't matter if Imrahil is out of range (though 12" is pretty big). Holding the objectives will be hard with Imrahil and his men, but ideally you can clear an objective and ride on to the next, leaving behind some infantry you don't need (axemen) to get to the objectives that are left behind (and shooting anyone who tries to sneak back onto them with your archers).
- Capture and Control: Forlong and the Captain deploy first in the very center, ready to contest the center objective. Duinhir and his archers should deploy with some space between them and one of the side objectives so they can't be charged but can advance towards the objective to hold it. One or two archers should retreat to your back objective to hold it. Imrahil and his boys should deploy near the other objective (same side of the board as your Captain), out of charge range so they can slam into that flank and take the objective on their terms. If you can drift infantry over to that objective after Imrahil and the Knight and Captain have cleared it, then Imrahil can slam into the flank of the enemy troops in the center OR race to the rear objective.
- Hold Ground: Maelstrom deployment could see your army all over the place. You have March on one warband, so move the rest of your troops towards the center as safely as you can. Even if you show up second with most of your troops, you've got plenty of archers to whittle down the enemy as they approach and Imrahil and the Knight and Captain to clobber models as well. Watch out for killing your opponent too early though - if the game ends without you having models in the center (and your opponent does), you could lose the game by a lot.
- Seize the Prize: Imrahil and the Knight should race towards the center, but not DIRECTLY to the center. Your archers should form up with a clear shot forward at the center - don't move on the first turn with them and keep their firing lanes clean so they can rake through anyone who races to the center quickly. Imrahil and the Knight should sweep in from one side, while the infantry blocks with Forlong and the Captain approach from the other side (Marching is good). If your opponent wants to charge in and get it, that's fine - you can shoot them to pieces. If your opponent takes it slowly, your infantry can close and make it a close fight in the center. After the first turn, move your archers up 3" each turn to close the trap - you'll give up the rerolling of 1s To Hit and will only hit on a 4+, which isn't THAT big of a deal (5.5 expected hits each turn, you're getting ).
- To The Death: You have great archers and probably no reason to rush towards your opponent. Unless you're facing an army with an anti-archery bubble (like Blinding Light), you're probably out-shooting your opponent (or can if you put D5 infantry in front of your archers). With a banner in your army, you have a 2-0 lead at the start of the game (or a 1-1 draw if your opponent also has a banner), so your opponent will probably have to come to you. When he does, attack en masse and work quickly to break him.
- Lords of Battle: So this scenario is about killing things: start on the center line if you're concerned about being shot to death (D4-5 isn't great) and start further back if you have the archery advantage. Blackroot Vale Archers aren't GREAT in combat (only F3), but you have mid-30s for model count and so throwing as many of your models into the fight early will be important. Kill count is key here - get Imrahil, Forlong, and the Captain working quickly.
- Contest of Champions: You've got Imrahil - that's not bad at all. Slam into combat on the first turn if you can, but I recommend you use a Long Fangs formation with your mounted heroes so it won't matter whether you get priority on the first turn or not. After that, get 5+ kills with Imrahil and do your best to stall the enemy army leader from slaying things (you could use Imrahil to try to one-shot him early OR you could use Duinhir to stall for two turns with Heroic Defense). Kills with Imrahil matter a lot, but the faster you plow through your opponent, the faster the game can end (and that means fewer kills for your opponent's leader) - and with lances, two-handed swords, and the Captain/Forlong to call Heroic Combats, you've got some CRAZY good killing power (oh, and three banner radiuses - forgot about that).
- Reconnoitre: You have four mounted models and want to get them off the board. With March to move your infantry blocks, you need your archers to find good firing lanes shoot anyone who races for your board edge (you don't need everyone near Duinhir if you can't cover the board from one position). Imrahil, Forlong, the Captain, and the Knight can travel together to punch through a weak point in your opponent's line. Don't race ahead of your infantry though - you need your infantry blocks to tie the enemy down so your cavalry can get away. Advance your cavalry behind your infantry ranks so you can keep their horses alive (D5 on most of them is pretty good, but still vulnerable to certain kinds of archery) until you need a burst of speed. Heroic Combats with Forlong and Imrahil (ideally with your Knight and Captain in those fights) will do wonders for getting extra speed on your mounted models.
- Storm the Camp: Getting to the enemy camp? Hard. Keeping your camp clear of enemy troops? Pretty easy. So focus on breaking the enemy (worth up to 3 points) and killing their army leader (worth up to 3 points). If you can do this, the worst you'll do is a draw, but you'll probably win if you can keep your opponent's troops out of your camp. Even if he gets models into your camp, so long as you have all of your archers there, you can probably outnumber him and STILL pull a win. Now if you can get Imrahil into the enemy camp, clearing it could be quite simple. :)
- Heirlooms of Ages Past: Another maelstrom scenario, this time with a need to pick up objectives. You don't want your mounted models to dismount, so if Imrahil and the Knight and Captain show up near an objective, leave it until an infantry model can approach it. Your archers should arrive near an objective (if possible) and hopefully you'll get a 6. If you get the Heirloom, retreat! Hide! Turtle up with your forces and make your opponent wrench it from you! If you don't get it, run over with your 5 cavalry models as quickly as you can (support with your infantry as soon as possible) and get that heirloom out of their control! While trying to get the Heirloom (or keep it), make sure you kill any enemy banners (and keep your banner on your Blackroot Vale Archer alive).
- Fog of War: THIS scenario will be tricky. Your opponent will probably choose to kill either the Captain, Forlong, or Duinhir - each has its own drawbacks. Forlong will probably be near the front of the fighting and exposed, but he has more wounds than the other two. Duinhir is likely to be in the rear and has Heroic Defense, while the Captain will probably be very close to Imrahil. I think it'll be a toss-up for which one he tries to kill. I would choose Duinhir to keep alive - and then keep him far away from the action. - with a clump of archers who reroll failed rolls To Wound near him, I think you can keep him safe. Imrahil and his knights should focus on securing a terrain piece that's far from the action (though you could also choose to control a piece of terrain that is close to the center so you can turtle up there). When looking for a hero to kill, choose someone who can be run over by Imrahil or Forlong - this decision may be made for you, though.
- Clash By Moonlight: Well, your archers are going to be good here - when they can shoot. S2 bows that reroll failed To Wounds with +1 To Wound are going to be awesome, but D4-5 troops are going to fall to pieces. So, determine if you can win a shooting war against your opponents and if not, take cover! You want to keep your heroes alive in this scenario if possible, so make sure Duinhir and the Captain are safe (Forlong and Imrahil should be safe too, but they're a bit more resilient). Engage and break your opponent quickly if you don't think you can win the shooting war - and pray (lots and lots of praying going on).
There are lots of modifications you could make here:
- Drop Duinhir - Duinhir makes your archers better, and that's about it. Rerolling failed To Wounds is huge - no doubt about that. However, if you want to grow your army by 5-6 models, you could drop him and instead count on having your archers do more on their own. You can still call Heroic Shoots with Forlong if you want the rerolling failed To Wound rolls, but frankly I think you're doing this because you want more numbers to enable Imrahil/Forlong/the Captain to kill more things:
- Prince Imrahil of Dol Amroth on armored horse with lance [ARMY LEADER]
- 1 Knight of Dol Amroth on armored horse with lance
- 3 Clansmen of Lamedon
- 2 Men-at-arms of Dol Amroth
- 3 Blackroot Vale Archers
- 4 Blackroot Vale Archers with spears
- Forlong the Fat on horse
- 7 Axemen of Lossarnach
- 3 Blackroot Vale Archers
- 2 Blackroot Vale Archers with spears
- 1 Blackroot Vale Archer with spear and banner
- Captain of Dol Amroth on armored horse with lance
- 4 Clansmen of Lamedon
- 8 Men-at-Arms of Dol Amroth
- Ally with Rohan - Knights of Dol Amroth are expensive - Rohan Royal Guards with Theoden can also be F5 models and with S4 on the charge, they can do the same damage as Knights of Dol Amroth against even-Defense models for 3-5 points less. Their horses are not as durable (but that will not matter against odd-Strength attacks), but otherwise, you're looking at "better" cavalry. This list includes an alliance between a token Rohan force and some Fiefdoms models to up the model count and hold the ground that the Riders leave behind. This list has 36 models (+2 over the Pure Fiefdoms list we reviewed in this post), has 9 Might (instead of 10), and has 8 cavalry models (instead of 5) - not a bad list:
- Prince Imrahil of Dol Amroth on armored horse with lance [ARMY LEADER]
- 6 Clansmen of Lamedon
- 6 Men-at-Arms of Dol Amroth
- 2 Blackroot Vale Archers
- Forlong the Fat on horse
- 6 Axemen of Lossarnach
- 4 Blackroot Vale Archers
- 4 Blackroot Vale Archers with spears
- HISTORICAL ALLY - Rohan: Theoden, King of Rohan on armored horse with shield and heavy armor
- 4 Rohan Royal Guards on horses with throwing spears
- 1 Rohan Royal Guard on horse with throwing spears and banner
- Ally with Minas Tirith - Imrahil is a great hero - but if he's the only real beater in your army, he's going to attract a lot of fire. Allying with Minas Tirtih gives us options to either a) bring in a combat hero who is "better" than Imrahil (like Aragorn or Boromir) or bring in Gandalf the White to support Imrahil and keep him from getting drowned by enemy magic. Taking Imrahil is great because he's cheaper than Aragorn and Boromir and does "about the same amount of damage," so you an afford to bring someone like Gandalf and "not suffer on the damage front." This list includes Boromir with his banner and some Knights of Minas Tirith, who have the same damage impact as Knights of Dol Amroth (without the F5), but are MUCH cheaper. You can also have F6 Men-at-Arms of Dol Amroth in your pike block if they're within 3" of Imrahil and 6" of Boromir - which is crazy good. The final list has 10 Might, 34 models, and 12 bow shots (all the same as our initial Pure Fiefdoms list), but gets Boromir instead of the Captain and Forlong and Anborn instead of Duinhir - note that there is no March in this army, so you could be in for a tough slog against shooting-heavy lists:
- Prince Imrahil of Dol Amroth on armored horse with lance [ARMY LEADER]
- 6 Men-at-Arms of Dol Amroth
- 6 Clansmen of Lamedon
- 3 Blackroot Vale Archers
- 3 Blackroot Vale Archers with spears
- Boromir, Captain of the White Tower on horse with shield and Banner of Minas Tirith
- 6 Guard of the Fountain Court with shields
- 2 Knights of Minas Tirith with shields
- Anborn, Ranger of Ithilien
- 2 Rangers of Gondor
- 3 Rangers of Gondor with spears
- Ally with Minas Tirith AND Rohan - Imrahil is great, but you don't NEED him if you're allying with Minas Tirith and Rohan. Heavy hitters can be found in both Legions OR you can spam better without him! In this list, we're using four pretty cheap Heroes of Valor/Legend across the three factions (Forlong the Fat, Hurin the Tall, Theoden, and Denethor) so that we can pump the army full of models (42 total). With Rohan Royal Guards for your cavalry, Forlong giving a war horn Courage boost to Clansmen/Axemen backed by Men-at-Arms, and a Shieldwall of Warriors of Minas Tirith backed by Rangers of Gondor to lend the F4 to the ranks, you've got a gnarly brawl in store for whoever taunts your battle line:
- Forlong the Fat on horse
- 3 Clansmen of Lamedon
- 3 Axemen of Lossarnach
- 6 Men-at-Arms of Dol Amroth
- Denethor, Steward of Gondor [ARMY LEADER]
- 5 Warriors of Minas Tirith with shields
- 5 Rangers of Gondor with spears
- Hurin the Tall on horse
- 6 Warriors of Minas Tirith with shields
- 2 Warriors of Minas Tirith with shields and spears
- 1 Warrior of Minas Tirith with shield, spear, and banner
- 3 Rangers of Gondor with spears
- Theoden, King of Rohan on armored horse with shield and heavy armor
- 4 Rohan Royal Guards on horses with throwing spears
So that's the Fiefdoms! You can see some great playing of the Fiefdoms by Australian player Oree Schmidt on the Zorpazorp YouTube channel for some practical use (our list looks a bit different from his - he didn't have Duinhir) and listen to the Unexpected Podcast review of the Fiefdoms for some expert advice. In our next post, we'll be going into a list that we used to see regularly here at TMAT in the last edition and has basically disappeared from the competitive scene: the Rangers. I mentioned in my review of the Grey Company LL that you should basically only run a pure Rangers force now with Arathorn - if you want to run Aragorn, you should just run the Grey Company. So what is the draw of the Rangers? And how balanced of a list can you actually run with an all hero army? Tune in next time to find out - until then, happy hobbying!
No comments:
Post a Comment