Good morning gamers,
We've come to one of the most involved factions in the Defence of the North book scenarios: the Halls of Thranduil. While there is an entire section of the scenarios dedicated to the defense of Mirkwood in Defence of the North, the Halls of Thranduil appear in the final scenario of the Lothlorien campaign (the assault on Dol Guldur) as well as two of the scenarios in the Appendices (the Defense of Dale and the Battle of Five Armies). This faction is important - and thanks to Legolas being a Hero of Valor, it's pretty common to see at least some Halls of Thranduil models in a Matched Play Game.
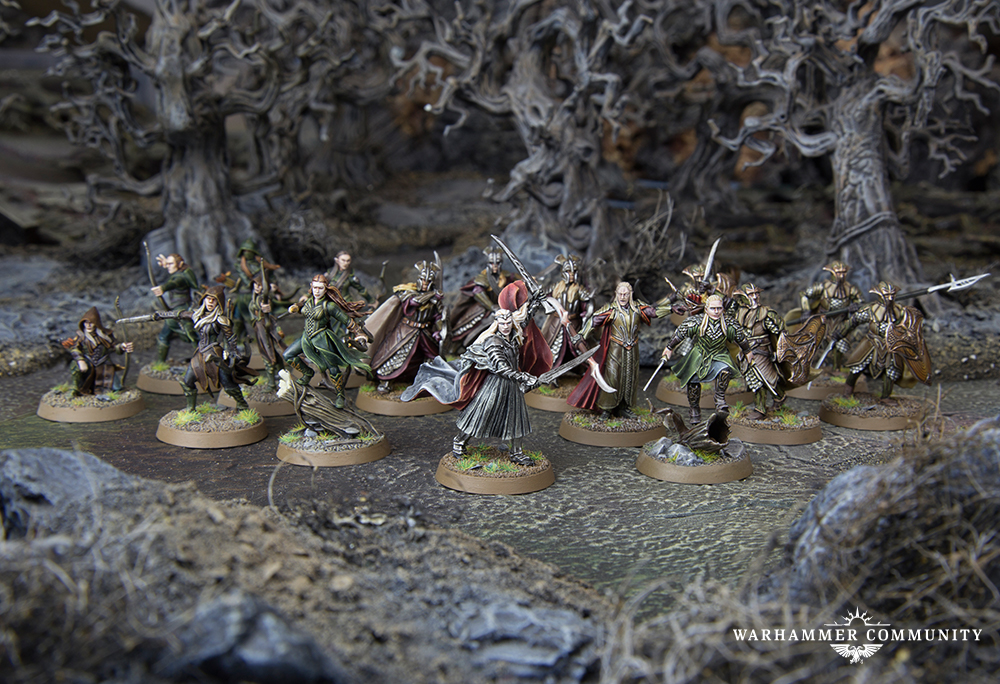 |
| Photo Credit: Warhammer Community |
For most of the posts in this series (and specifically for this sourcebook), we've seen important models for Matched Play being left on the side lines for scenarios - not so with this faction. In fact, with one exception, you not only get all of the models you'd hope to have for Matched Play, but you also get a LOT of those models for Matched Play. Here are the models we have:
- Thranduil, King of the Woodland Realm with Elk, heavy armor, and extra sword (based on two scenarios)
- Legolas (possibly mounted with Orcrist) and Tauriel
- 1-2 Mirkwood Captains (depending on whether you want to proxy the second Captain)
- 1-2 Palace Guard Captains (based on whether you chose to proxy)
- 1-2 Mirkwood Ranger Captains (based on whether you chose to proxy)
- 36 Mirkwood Elves (12 shields, 12 Elven Glaives, 12 Elf bows)
- 10 Mirkwood Rangers (though actually 20)
- 10 Palace Guard Captains (though actually 20 - at least 4 shields, 2 shields and spears, and 4 spears)
- 3 Wood Elf Sentinels
This is quite the list of models - and with the exception of Mirkwood Cavalry, this is pretty much all you really need for a solid Mirkwood collection. Expensive though it be, good job scenario writers!
Being Elves, however, there's always going to be the question of whether your list would be better with allies - and as it happens, there are FOUR historical allies we can choose from: the Survivors of Lake-town, the Iron Hills, Erebor Reclaimed, and the Beornings. Let's see what they have to offer us:
- The Survivors of Lake-town:
- Bard (on foot and mounted)
- Bard's kids
- Alfrid
- Gandalf the Grey (to be scenario-specific, he should be on foot, but we probably have the option for a horse)
- Bilbo Baggins, Master Burglar
- 36 Lake-town Militia (12 shields, 12 spears, 12 bows)
- The Iron Hills:
- Dain Ironfoot on war boar
- 2 Iron Hills Captains (1 shield/spear, 1 mattock)
- 38 Iron Hills Dwarves (12 spears, 12 mattocks, 12 crossbows, 1 banner, 1 banner and mattock)
- Iron Hills Chariot
- Erebor Reclaimed
- Everything in the Iron Hills list above (the Chariot would need to be upgraded to the Champ-chariot)
- Thorin Oakenshield, King Under the Mountain (technically without Orcrist, definitely without goat)
- All 12 Champions of Erebor (no goats either)
- The Beornings
- Grimbeorn
- 12 Beornings (8 two-handed axes, 4 great bows)
Well, this is quite the list! It only seems fitting that, instead of just saying, "well, I chose to use this one," we'll walk through some of the decision trades that are in play here, because like the Isengard post we did for War in Rohan, I don't think the "best list" is a given - let's dig right in!
It seems fitting that we start with the Beornings: these guys pack a punch and with up to 12 Beornings, we could get quite the offensive punch indeed. Of course, the downside is that in order to be a Historical Alliance (instead of an Impossible Alliance), we need to bring Thranduil - and once you've paid 360pts for him and Grimbeorn, you don't have a lot of points for 10pt+ Elves let alone 20pt Beornings. So understandably, our model count is low in this list - but the list would hit HARD:
- Thranduil, King of the Woodland Realm on Elk with extra sword and heavy armor [ARMY LEADER]
- 3 Mirkwood Elves with shields
- 6 Mirkwood Elves with Elven Glaives
- 4 Mirkwood Elves with Elf bows
- HISTORICAL ALLY - The Beornings: Grimbeorn
- 6 Beornings with two-handed axes
- 4 Beornings with great bows
700 points, 24 models, 4 Elf bows hitting on a 3+ AND 4 great bows hitting on a 4+, 5 D6+ model, 1 cavalry and 1 fast infantry (bear form), 6 Might points
I can't say that this is a good list though - it's got low Defense, is low on numbers, doesn't have that much archery, and is VERY low on Might. We can get good defense and +10 models if we ally with the Iron Hills - Dain is the obvious hero choice since he has incredible hitting power AND Heroic March (and it could free up Thranduil to be our non-Leader heavy-hitter - your choice as to which one you want as a grenade):
- Thranduil, King of the Woodland Realm on Elk with extra sword and heavy armor [ARMY LEADER?]
- 6 Mirkwood Elves with shields
- 3 Mirkwood Elves with Elf bows
- 2 Palace Guards with shields and spears
- 4 Palace Guards with spears
- 3 Mirkwood Rangers
- Dain Ironfoot, Lord of the Iron Hills on war boar [ARMY LEADER?]
- 3 Iron Hills Dwarves with mattock
- 4 Iron Hills Dwarves with crossbows
- 7 Iron Hills Dwarves with spears
700 points, 34 models, 6 Elf bows hitting on a 3+ AND 4 crossbows hitting on a 4+, 15 D6+ model, 2 cavalry and 3 Might for Heroic March, 6+ Might points
You could go pure, though, and get what I think are the three best heroes in the Halls of Thranduil list: Thranduil (obviously), Legolas (for killing important enemy models/mounts from a distance), and a Palace Guard Captain (for F7/March) - though your numbers are only going to be about the same as if you ran Thranduil and Dain:
- Thranduil, King of the Woodland Realm on Elk with extra sword and heavy armor [ARMY LEADER]
- 8 Mirkwood Elves with shields
- 2 Mirkwood Elves with Elven Glaives
- 2 Mirkwood Elves with Elf bows
- 2 Palace Guards with shields and spears
- 4 Palace Guards with spears
- Legolas Greenleaf, Prince of Mirkwood on horse
- 6 Mirkwood Elves with Elf bows
- Palace Guard Captain with shield
- 3 Mirkwood Elves with shields
- 2 Mirkwood Elves with Elven Glaives
- 3 Mirkwood Elves with Elf bows
700 points, 35 models, 11 Elf bows hitting on a 3+, 15 D6+ model, 2 cavalry and 2 Might for Heroic March, 8 Might points
The Survivors of Lake-town are usually only allied into Mirkwood lists for numbers - Thranduil is a more self-sufficient killing machine than Bard is (and Bard gets pretty expensive when you add in the cost of Alfrid and the girls). If you want to capitalize on numbers, you'd normally want to grab a Lake-town Captain with shield and 12 guys to flesh out the line (maybe 8 spears and 4 bows and spears). Since we don't have any Lake-town Captains, our cheapest option is Bilbo, which gives us something really useful besides a boost to our numbers: a Ringbearer to go along with potentially two F7 heroes:
- Thranduil, King of the Woodland Realm on Elk with extra sword and heavy armor [ARMY LEADER]
- 6 Mirkwood Elves with shields
- 2 Palace Guards with spears and shields
- 4 Palace Guards with spears
- 6 Mirkwood Elves with Elf bows
- Palace Guard Captain with shield
- 2 Mirkwood Elves with shields
- 3 Mirkwood Elves with Elven Glaives
- 3 Mirkwood Elves with Elf bows
- HISTORICAL ALLY - The Survivors of Lake-town: Bilbo Baggins, Master Burglar
- 6 Lake-town Militia with shields
- 6 Lake-town Militia with spears and shields
700 points, 41 models, 9 Elf bows hitting on a 3+ AND 1 thrown stone hitting on a 3+, 13 D6+ model, 1 cavalry and 2 Might for Heroic March, 8 Might points
But Bilbo is kind of expensive for his combat profile (F3/S3/1A) - if we wanted more killing power out of a similarly-costed model, we could go with Legolas (5pts more) or Champion Gloin (same cost). This brings us to our last alliance option - and that's to go lighter on the Halls of Thranduil and turn Thranduil and that expensive Ringbearer into more cost-effective damage heroes:
- Legolas Greenleaf, Prince of Mirkwood* on horse
- 3 Mirkwood Elves with shields
- 5 Mirkwood Elf with Elven Glaives
- 5 Mirkwood Elves with Elf bows
- HISTORICAL ALLY - Erebor Reclaimed: Thorin Oakenshield, King Under the Mountain [ARMY LEADER]
- 1 Iron Hills Dwarf with mattock
- 3 Iron Hills Dwarves with crossbows
- 7 Iron Hills Dwarves with spears
- 1 Iron Hills Dwarf with banner
- HISTORICAL ALLY - Erebor Reclaimed: Bifur the Dwarf, Champion of Erebor
- 4 Iron Hills Dwarves with crossbows
- 5 Iron Hills Dwarves with spears
700 points, 37 models, 6* Elf bows hitting on a 3+ AND 7 crossbows hitting on a 4+, 26 D6+ model, 1 cavalry, 8 Might points
This list is a little bigger than what we'd get by allying with the Iron Hills or running a pure Halls of Thranduil list and only marginally smaller than allying with Lake-town - and since almost three-quarters of our models are D6+, we're pretty resilient (though we don't have access to Heroic March). Oh, and this is the first list where we could actually afford a banner! For all these reasons, this will be the list we're viewing today.
 |
| Photo Credit: the Armies of the Hobbit |
What's interesting about this list, however, is that it's the only list of the ones we've viewed where our army bonuses aren't going to help us much. The Halls of Thranduil army bonus is only useful if a) Thranduil is in your list or b) if you've taken advantage of having Mirkwood Rangers not count towards your bow limit. Not only have we left Thranduil at home, but we've relied more on the Dwarves than on the Elves and don't have a single Mirkwood Ranger in the list. With only Bifur treating Thorin as a banner, we don't need our army bonuses - but we have them nonetheless. Let's see what the list can do!
Army Theory
Let me start off by saying that the only hero I wish I could have gotten was a March Captain. Bifur (65pts) is almost as much as a Mirkwood Captain (we could drop 1 model to do the swap) OR we could drop 15pts of warriors along with Bifur to get a Palace Guard Captain or an Iron Hills Captain (would probably mean 1 model along with some gear options elsewhere). Ultimately, I didn't like how the list was changing (potentially free Heroic Moves and an extra model) over what it was getting - Palace Guard Captains lose a lot of their stock value if Thranduil isn't around, Mirkwood Captains just don't seem as good as Iron Hills Captains, and the Master of Battle (5+) doesn't seem as reliable as the free Heroic Moves after Bifur gets his axe-head out. So, yes, I'm happy with this list (but I could see swapping Bifur for the Iron Hills Captain if you REALLY thought March was necessary).
Thorin is really the star of the show - as the only Hero of Legend, he has to be our army leader (and we're just fine with that). While he's F6 with Heroic Strike, we actually want him plowing through troops with that free Heroic Combat each turn. While everyone seems to dump on mattock-carrying Dwarves (and I've had my problems with them too), if we can't get Thorin a goat, we definitely want a mattock-wielding Basher model in his fight! Alternatively, Thorin can tag-team with our only cavalry model, which leads us to . . .
Yeah, we opted for Legolas - because he's annoying and difficult to deal with. As I've said numerous times before, Legolas makes the ideal assassin character in Assassination and can really change the way your opponent plays (whether it's taking out a big hero's horse or plucking lone models off objectives). He's a nasty bit of work and I love having him. He's also just over 100pts in this list and is bringing 13 Elves to the fight (including 5 more Elf bows to supplement his already impressive archery).
Finally, we have Bifur - and he's got a crossbow team that's backed by spears (Thorin has a similar warband construction, though his can become a skirmish triangle of crossbows with a 9-man melee kill squad). This little 10-man line of battle is a BEAR to deal with, what with the S4 ranged damage from afar and then F4/D6 warriors backed by spears later. The crossbows can be left behind if need be, with Bifur leading the 5 spearmen in a small 2x3 shieldwall formation to clear a nearby pocket of troops - or support the models Legolas is leading (giving those Glaives some high-Defense models to support). Our numbers are great in this list and they pack a PUNCH in combat.
The plan with the army is simple: pump out archery into the enemy early, hiding behind our high Defense models to make them engage with us, then rush forward and squish whatever's left. Focusing your archery fire in a specific region is the best approach to making this work, as you can cripple a flank to be trashed by Thorin after a few volleys (7 crossbows that hit on 4s and wound on 5s are expected to get ~1.17 wounds/turn, 8 unmodified Elf bow shots that hit on 3s and wound on 5s or 6s are expected to get 0.9-1.8 wounds/turn - so expect to get 2-3 wounds each time you shoot). If Thorin and Bifur are working to clear out the enemy, you're in good shape.
Okay, let's talk scenario-specific strategies with this list!
Gameplay Strategy
Maelstrom & Object Missions (Pools 1 & 3)
Without a March hero, our warbands will need to walk at a normal pace to get to the center - and that's fine. None of the warbands need to be near each other, but we probably want to arrive together as much as possible. Thorin is our army leader, but he needs his Might the least of the three heroes (since Legolas will want to be able to boost important wounding rolls to snipe horses/critical models and Bifur will want that axe-head wound to work). Deploy Thorin last so you can get him near at least one of your warbands.
In Hold Ground, we want to advance towards the center as fast as we can, but know that the shooting we have in this army can do a lot to slow our opponent's advance. When picking deployment points, make sure that your archers arrive where there's a good firing lane towards the center objective so you can force models that race there to take cover. Your melee troops should advance as quickly as possible there with your crossbows legging it if they're going to run out of firing lanes. Yes, getting in crossbow shots is great, but these are swordsmen and they're far better used parked on the center objective shooting outwards than stuck in the middle of nowhere, unable to support the fighting where it really matters.
Command the Battlefield is the opposite: you want your archers to spread out. If you can appear on two board edges that are adjacent to each other (e.g. north and east), you can have your crossbows defend one quadrant and lay down cover fire on the two adjacent quadrants. Your melee troops can then advance through the middle of the board (or perhaps just outside of 12" of the center) to pursue enemy units in the cat-a-corner quadrant, leaving your Elf bowmen to assist the crossbows in the harassment. Bifur and Thorin will want to work together so that Bifur's eventual free Heroic Moves can make sure Thorin gets the placement he wants for his free Heroic Combats. Given enough time to work, these two can tear apart a formation and drive the enemy away (and into the crossbow fire).
Heirlooms of Ages Past is . . . not going to be fun if you don't get the Heirloom. Legolas is better than most at head-hunting whatever model picks up the Heirloom, but Dwarves are not good at pursuing the enemy. If your opponent huddles up around the heirloom, you'll need Thorin to Heroic Combat his way to the heirloom and swarm it with models to contest control of it if the Heirloom gets dropped. If you get the Heirloom, however, you can circle up around it with crossbows backed by spears/glaives and present one of the most daunting bulwarks in the game - and your enemy will not be pleased to try to crack you open.
As we move to the object missions, we get full control of the placement of our warbands - and that helps us a lot. In Seize the Prize, we want our crossbows (with the Elves behind them) all staring at the center, threatening to pin-cushion anyone who advances towards the center. Without March, we'll be advancing slowly with our infantry, but Legolas can move 5" and still shoot to support our melee wall of Dwarves and Elves. Bifur's warband can travel with Legolas's warband while Thorin's warband closes off the other flank. While not as threatening as the Isengard host we talked about a few months ago, this army will present the enemy with a difficult choice: split to fight both flanking forces, exposing their supporting models to bows and crossbows, or drive hard at one side, leaving the other to reach the center uncontested. You're fine with it either way, so long as you can pick up the Prize and hand it off to Leggy (who legs it for the enemy board edge . . . you saw that one coming, right?).
Retrieval and Destroy the Supplies will be played very similarly: crossbows and bows defend our 1-3 supply markers while our melee troops (and Legolas) advance forward. We can have two impressive shieldwalls with Thorin's warband (10 models, including the banner) and a joint effort between Bifur and Legolas's melee units (15 models, including Legolas). Legolas will likely need to be our hitter, but if he's getting free Heroic Moves from Bifur, we can use the Knock Down he's providing to deal some serious damage to the enemy. Legolas might not be doing much shooting, but that's fine - if he's supported by a good shieldwall, he can do plenty of work in melee. Legolas isn't an Expert Rider, so we can't rely on him picking up the Flag in Retrieval, but he's plenty good at destroying supply markers and providing covering fire for any Elves we can have pick up the flag. Thorin's warband will want to draw as much attention as possible, weakening any enemy forces that are advancing for our flag or supply markers (our archer corp is quite large and we can rely on them to last for a while if we can manage how many models are slipping past our ranks).
Control Missions (Pools 2 & 5)
Big armies love control missions - and with just shy of 40 models, we're feeling pretty good! Like so many other armies in this extend series, we want our Dwarves right up on the center line - where else? Domination, Capture and Control, and Breakthrough are all going to be played the same way: line up on the center, drive the enemy back, use our Elf bowmen to hold any rear objectives we start with, and pummel the enemy with Dwarves backed by or supporting Elves. Legolas will want to pick off models that are trying to sit back on rear objectives held by the enemy to weaken their defenses against whatever Elves or Dwarves we can get to them.
The getting places missions are going to be much harder - and our gameplay is going to focus on getting the points we can, not necessarily all the VPs available in the scenarios. In Reconnoitre, Legolas is the only model that has any real chance of getting across the board edge - we're just too slow to move up the board quickly and we have so many models that even if we play fast, we probably won't make it. As a result, our goal is to break the enemy without being broken (3 VPs) and kill the enemy army leader (2 VPs) without letting our opponent get more than 1 model off the board (which will get them 3 VPs if they get one guy off and 5 VPs if they get 2 guys off). Even if Legolas were to get off the board, if two enemy models get past us, the best we can do is a draw - so don't let that happen! Thorin should be working to break/quarter the enemy with his free Heroic Combats, hopefully positioned by Bifur's free Heroic Moves. Legolas can play guard duty both because he has a horse (increased mobility) but also because of his 1-3 shots/turn that he can unleash based on who the crossbows/Elf bows don't kill.
Storm the Camp is going to be a similar strategy: break the enemy, kill the leader, don't let Thorin die or ourselves get broken. If we can get someone into the enemy camp, great - we plan to have our crossbows parked somewhere near the center, fighting if they have to and shooting if they can. The Elf bowmen will be playing flex-defense to protect our camp and harass anyone trying to get past our flanks. In this scenario, we can have Legolas ride wide of the flanks to get in a good position early, allowing him to move 5" each turn while still shooting (hopefully clearing out models from the enemy camp). If the camp is cleared, he should press hard to get into the camp (even if it means foregoing shooting).
Finally, we have Divide and Conquer - and I would have Bifur be with one of the other two warbands. We've seen in other scenarios that his warband complements Legolas's warband really well, but having him near Thorin is also quite useful. As such, deploy Bifur first in whatever corner you want two warbands to appear. Then, with the knowledge of 1-2 enemy warbands, pick one of the other warbands to push from a corner alone. This won't be great insight into what the enemy has to offer, but it's something.
Killing Missions (Pools 4 & 6)
With D7 (potentially D8) Dwarves, we have the luxury of knowing that our crossbows and Elf bows probably have the advantage against most enemy shooting. As such, we're going to try to hold back as much as we can and make the enemy come to us. 24" crossbows and 24" Elf bows in the numbers we're packing is oppressive - and when the enemy comes struggling into combat with us, they'll find one of the toughest anvils in the game. To The Death (since we have an actual banner) and Lords of Battle shouldn't be too hard.
Contest of Champions should also be pretty easy - you've got Thorin's free Heroic Combats working for you, so hopefully he can start with a Bashed model to spring into a fight with someone else. Legolas should use his sniping abilities to put an arrow every turn into the enemy army leader (targeting his mount, if he has one). In a pinch, Bifur can turn into a road-block hero (F4 with Strike and D8 with 2 Wounds is pretty difficult for most heroes to crack through - and very difficult for most heroes to Heroic Combat through). If you happen to run into Sauron or the Balrog (or, of course, Smaug), you may have some trouble - but otherwise, I don't think you're worried.
The hero-slaying missions should also be pretty straight-forward: if you get Clash by Moonlight, you're going to pound your opponent's force with archery once you're within 12" (and a D7-8 front line is gonna be pretty hard for S2-3 archery to take down). You want to be pressing the attack, though, since your main killing power (and breaking power) is going to be in melee - only sit back and shoot if your opponent doesn't have a credible archery threat. Legolas will be key in this scenario, since he can work down enemy heroes that are trying to hide from your other shooting weapons.
Fog of War will be very interesting - your opponent will either try to kill Legolas or Bifur, and I think both are equally likely. You definitely want Bifur in the action, so you should try to keep Legolas alive. Pick a piece of terrain that you can park your spearmen on with Thorin, bringing your Elves up to support them. Your crossbows will want to have firing lanes to guard approaches to different terrain pieces your opponent may want - and once he commits somewhere, use Legolas and the crossbows to flush him out (charging if you can't get good archery shots on him). If you can break the enemy, keep Legolas unwounded, and can contest his objective (and get at least one wound on the enemy target hero with Legolas), you have a good chance of winning.
Assassination will be similar - Legolas might be the target of your opponent and he should ALWAYS be your assassin. Use your Dwarves to shield him from assault, deploying on the center line to press the enemy hard from the beginning. Use your crossbows and Elf bows (not Legolas) to soften up the enemy advance and work down the enemy army leader if he presents himself. Thorin should have his match ups guarded so he doesn't get wounded and should be carving through the enemy if he can. Similarly, have Bifur get into one well-managed fight, get the axe-head out, and then bring him back to play a more tactical support game. Don't break and keep Legolas and Bifur healthy and you should be fine.
Conclusion
This is a fun list - it pairs the tough defense of the Dwarves with the high Fight Value of the Elves (and brings the nasty firepower of both). With lots of free heroics and the best Good archer in the game (well, maybe behind the Bolt Thrower), this list is a daunting prospect for anyone to have to play against. In our next post, we look to a surprise guest to the Defence of the North sourcebook, featured only in the appendices, but boy does it make a splash in those. Check here next week for tactical play on a whole different level - and until then, happy hobbying!
No comments:
Post a Comment