Good morning gamers,
At its core, the War in Rohan supplement is about two factions: Rohan and Isengard. Last time, we looked at the MANY units we have at our disposal from the War in Rohan scenarios to bring to Matched Play for various Rohan lists and today we look at the other big faction available: Isengard.
One of the first factions I started collecting in MESBG (back then the Lord of the Rings Strategy Battle Game) was Isengard - I had 18 Uruk-Hai Warriors with shields, 16 Uruk-Hai Warriors with pikes, a Captain with shield, and a banner guy. A few chop-shop sessions later, and I had a few crossbows converted up (including a Captain) and over the last twelve years, I've accumulated many, many Uruk-Hai models and Dunlending proxies (historical Saxon Thegns from Warlord Games - and with all the spears that box set came with, it is easily one of the best purchases I've made for the hobby, period). As I've documented throughout this blog, it took me a long time (and forcing myself to use Saruman) to get me to love Isengard - and when the faction got a revamp in the new edition (mostly to Saruman), I REALLY started to enjoy using them.
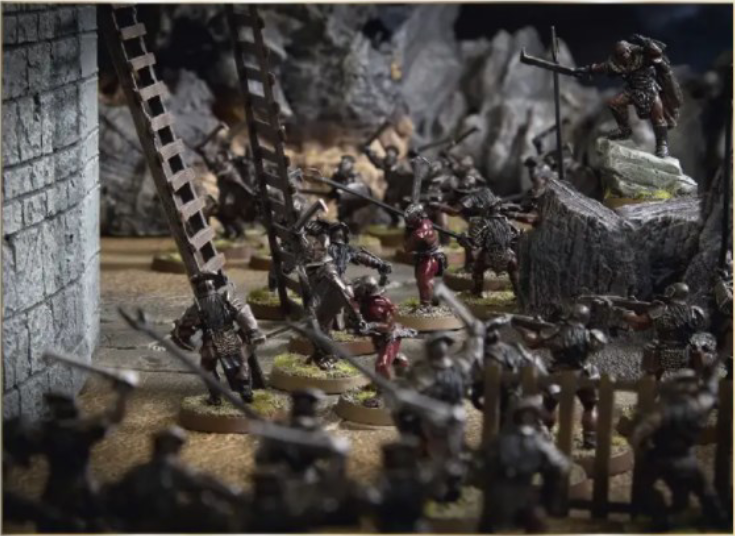 |
| Photo Credit: War in Rohan |
In War in Rohan, our Isengard collection is wide open - especially if you took my advice and bought a Battle Host box:
- Heroes:
- 8 Uruk-Hai: Vrasku, 5 Uruk-Hai Captains with shields, Ugluk, Mauhur
- 7 Dunlendings: Gorulf Ironskin, Frida Tallspear, The Wild Man Oathmaker, Thrydan Wolfsbane on horse, 3 Dunlending Chieftains
- 8 Orcs: Grishnakh, Snaga, Sharku on Warg, 1 Orc Captain on Warg, 4 Orc Captains with shields
- Warriors:
- 125 Uruk-Hai: 24 Uruk-Hai Scouts (8 shields, 8 Uruk-Hai bows, 8 vanilla), 85 Uruk-Hai Warriors (35 shields, 35 pikes, 12 crossbows,3 banners), 16 Uruk-Hai Berserkers
- 40 Dunlendings: 12 Wild Men of Dunland, 16 Dunlending Warriors (6 shields, 6 bows, 4 two-handed axes), 6 Dunlending Huscarls, 6 Dunlending Horsemen
- 66 Orcs: 18 Warg Riders (6 shields, 6 Orc bows, 6 throwing spears), 48 Orc Warriors (16 shields, 16 spears, 8 Orc bows, 8 two-handed weapons)
- Siege Weapons:
- 5 Uruk-Hai Demolition Teams
- 1 Isengard Assault Ballista
With almost 300 models at our disposal (plus Saruman, Grima, and Lurtz if you buy the Isengard Battle Host and the Lurtz and Ugluk sets), we certainly have enough models to run a variety of lists, including the Army of Dunland Legendary Legion (which I decided to give its own post - we'll go into that next week), a vanilla Isengard list, an Ugluk's Scouts list, or at low points levels a Lurtz's Scouts list or a Wolves of Isengard list. Today, though, we'll be looking at one of the most competitive armies in MESBG right now: the Assault Upon Helm's Deep Legendary Legion. As dominant as this Legion is, our list will look a lot different from the way most people do it because . . . well, we will have a maximum of one ballista.
Thanks to the big Helm's Deep scenario, we have exactly ONE Ballista - and in the Assault Upon Helm's Deep Legendary Legion, these things can be really useful tools for killing enemy heroes (especially of the big-flappy-monster variety). That scenario also gives the Uruks access to banners, which is really nice (and absent from the other scenarios). We're actually going to look at FOUR lists today because frankly, I couldn't help myself. The usual alignment you see at competitive tournaments is 3 Captains with 3 Ballistas at 800+ points - and in the supplement, we can get close with 3 Captains and 1 Ballista:
- Uruk-Hai Uber-Captain with shield [ARMY LEADER]
- 6 Uruk-Hai Warriors with shields
- 6 Uruk-Hai Warriors with pikes
- 1 Uruk-Hai Warrior with banner
- Uruk-Hai Captain with shield
- 6 Uruk-Hai Warriors with pikes
- 6 Uruk-Hai Warriors with crossbows
- 1 Uruk-Hai Warrior with banner
- Uruk-Hai Captain with shield
- 6 Uruk-Hai Warriors with pikes
- 6 Uruk-Hai Warriors with crossbows
- Uruk-Hai Siege Veteran
- Isengard Assault Ballista
- 2 Crew (one with ballista bolt/pike)
700 points, 44 models, 12 crossbows hitting on a 4+ AND 1 ballista hitting on a 4+ (reroll on the To Hit and Scatter rolls), 9 D6+ models, no fast models but 6 Might for Heroic March, 7 Might points
Interestingly enough, it's the ballista that's the biggest problem in this list: since we only have one, our opponent is likely going to be able to side-step it and its effectiveness will probably be board-dependent and scenario-dependent. So what would happen if we moved from having 1 Ballista to having 2 Bomb Teams (and traded a Captain for a Shaman):
- Uruk-Hai Uber-Captain with shield [ARMY LEADER]
- 7 Uruk-Hai Warriors with shields
- 7 Uruk-Hai Warriors with pikes
- 1 Uruk-Hai Warrior with banner
- Uruk-Hai Captain with shield
- 5 Uruk-Hai Warriors with crossbows
- 6 Uruk-Hai Warriors with pikes
- Uruk-Hai Shaman with armor
- 2 Uruk-Hai Warriors with shields
- 2 Uruk-Hai Warriors with pikes
- 2 Uruk-Hai Warriors with crossbows
- 2 Uruk-Hai Demolition Teams with +4 Flaming Brands
Our model count has dropped slightly (41 models) and we've gone from having a very nasty long-range threat (12 crossbows/1 ballista) to having a more concentrated close-range threat (only 7 crossbows, but 2 bomb teams). We've also lost 2 Might points but gained Fury (which is not only excellent if we happen to face Terror, but also essential in my opinion to getting Bomb Teams to work). Oh, and if we can detonate the bombs with the Uruk-Hai Warriors in the siege crews instead of the Berserkers, then we've gained two Berserkers.
Given our lack of ballistas, I don't think there's anything wrong with this list - two bombs will definitely dictate how your opponent plays (and could see you winning Contest of Champions pretty easily if you can get a double-detonation near the enemy army leader), but if you're not enamored with the bomb teams (or just think they provide a negative game experience), you could lean hard into the ~100 Uruk-Hai Warriors/Berserkers we have (thanks to the big Helm's Deep scenario):
- Uruk-Hai Uber-Captain with shield
- 5 Uruk-Hai Berserkers
- 6 Uruk-Hai Warriors with pikes
- 1 Uruk-Hai Warrior with banner
- Uruk-Hai Captain with shield
- 3 Uruk-Hai Berserkers
- 2 Uruk-Hai Warriors with shields
- 8 Uruk-Hai Warriors with pikes
- 2 Uruk-Hai Warriors with crossbows
- Uruk-Hai Captain with shield
- 3 Uruk-Hai Berserkers
- 8 Uruk-Hai Warriors with pikes
- 4 Uruk-Hai Warriors with crossbows
In case you missed it, this list has 3 Captains and 11 Berserkers - and 50% of our army has either a pike or a banner, allowing each of those Berserkers to fight with a pike behind it (or if you run an open phalanx, one can fight on his own while the other gets two pikes supporting him). These guys are D5 and a bit pricey, but they're solid troops for sure (and in large numbers, they can be absolutely devastating). However, this is far from 120 models, so what if we turned our 11 Berserkers into MORE guys? Well, it might look something like this:
- Uruk-Hai Uber-Captain with shield
- 5 Uruk-Hai Warriors with shields
- 8 Uruk-Hai Warriors with pikes
- 3 Uruk-Hai Warriors with crossbows
- 1 Uruk-Hai Warrior with banner
- Uruk-Hai Captain with shield
- 3 Uruk-Hai Warriors with shields
- 8 Uruk-Hai Warriors with pikes
- 4 Uruk-Hai Warriors with crossbows
- Uruk-Hai Captain with shield
- 3 Uruk-Hai Warriors with shields
- 8 Uruk-Hai Warriors with pikes
- 4 Uruk-Hai Warriors with crossbows
And this is the list we're going to look at today - 50 models of pure, unwashed, Uruk-Hai glory! 50's a lot of guys (especially when they're all F4/S4) and when you also factor in the near-max crossbows and the pike supports, this can be an absolutely devastating army to fight (without all the siege weapon trappings).
Army Theory
Usually, an Assault Upon Helm's Deep LL force is going to rely on its ballistas (and/or bomb teams) to pound through the enemy heroes while the Uruk-Hai Warriors carve up the rest of the enemy force. Bomb teams can sometimes fizzle out and ballistas can sometimes not have good firing lanes, but if you're able to sit back and shoot, these things can really mess up someone's day.
Your own views of the unsportsmanlike conduct that a set of ballistas or bomb teams brings to the table aside, there is something equally threatening from a proper horde of Uruk-Hai - and something strangely thematic about it too. The Uruks didn't pound the walls of Helm's Deep with their ballistas to make the Rohirrim and Elves come out (though that certainly would have worked, albeit after a very long time) and their bombs weren't trying to assassinate enemy heroes (though it quite nearly did result in the deaths of Aragorn and Gimli). No, the Uruks charged with a huge press of bodies towards the defenders and brought them to the end of their line with sheer weight of numbers. And 50 Uruks in MESBG are a VERY threatening prospect (and roughly one-third of them are D6-7 models). 45 models with Berserkers would also be quite scary (as would 44 models with a ballista or 41 models with two bomb teams), but there's something about 50 models that . . . just SEEMS scarier.
And that's where we start: we have 11 Uruk-Hai with shields and 3 Uruk-Hai Captains with shields to form our aggressive front-lines, along with 14 Uruk-Hai with pikes or a banner to back them up. I would recommend doing an open phalanx with these guys, as the unsupported shields can defend by shielding when engaged, giving you three dice in any fight where the pikes are double-supporting and two dice in any fight where you're shielding (and more dice, naturally, if a hero is in the mix). The banner should be standing in the "third rank", ideally touching another third-rank pikeman, granting an extra dice to as many fights as possible (and covering any heroes that are in your battle line).
We also have 11 Uruk-Hai with crossbows and 11 more pikes to back them up. These guys can form loose phalanxes if you have all of your units on the center line together, but they won't be very long phalanxes if separated from the shield Warriors, so you could also just support in a line-of-battle formation OR have the pikes go off on their own, leaving the crossbows on objectives. It's important to remember that crossbows are lethal ranged weapons, but the Uruk-Hai Warriors carrying them are also very competent combatants, so while shooting from the rear is a useful strategy with these guys, they are also swordsmen and should be used in combat too.
The main concern for this army is fighting Terror - but that's what the pikes and crossbows are for. Your army won't suffer much harm from enemy bow fire (especially of the S2 variety) while able to pump out quite a bit of archery of its own. Most Terror-heavy lists aren't good in the shooting department anyway (the Dead of Dunharrow have no innate shooting, Angmar has very poor shooting, Black-Numenorean-heavy Mordor/Corsair lists might have good shooting), so if you do happen to face a Terror army, you can usually wait for them to engage, using your crossbows to pluck as many Terror models off the board as possible. Your Captains aren't great heroes, but for mid-tier heroes, they're very good (and affordable). If Terror is common in your meta, you might do better with the 45-model Berserker-heavy list or the 41-model double-bomb-team list (thanks to the Shaman).
But this underlines an important way to think about this army: your warriors are going to do your killing, not your heroes. Yes, your heroes will hopefully rack up some kills - but as Rock heroes, one of their biggest advantages is that you can use them to stall out big heroes (who might have problems wounding a D7 2 Wound/1 Fate hero). I wouldn't use your Uber-Captain as a speed bump (army leader and all), but in most other scenarios, the other two can do just fine holding up someone big while the rest of your army plows through the warriors provided. At the same time, any 2A hero who gets charged by an Uruk-Hai Captain that's backed by 2 pikes is likely to only have an even-chance of winning the duel to ~85pts of guys EVEN if he Strikes up to F6+ . . . and if he loses the duel, he's probably taking damage. I've been using Uruks for a long time and I'll say that when I've faced hero-heavy lists, it's always the D5-6 Uruks who can consistently get 8+ dice in the fight that bring those big heroes down (first by forcing Might out to boost dueling rolls, then losing a desperate fight and dying because they're facing 16+ wounding dice). Yeah, it's the warriors that are the real star of the show here - exactly as it should be, considering what Legion we're looking at.
Okay, with these thoughts out of the way, let's see what the list does.
Gameplay Strategy
Maelstrom & Object Missions (Pools 1 & 3)
We have three warbands that are all virtually the same, and like the Mordor-Serpent Horde alliance we looked at in the Gondor at War series, all three heroes have March. So we don't really care where we show up in any of the maelstrom scenarios - we're all dangerous, we're all strong, and there's TONS of us everywhere. So whether we're Marching to the center in Hold Ground, posturing to control board corners in Command the Battlefield, or digging up the heirloom in Heirlooms of Ages Past, we just want to have control of our deployment - we don't need to show up together (unless we want to dispatch a clump of enemy combatants quickly).
When it comes to the Object missions, we want to rush the center objective in Seize the Prize while having the cover fire of 11 crossbows (two ranks of them, no pikes with them) on the first turn. By Marching up the flanks, we position ourselves for a strong second turn, even if the enemy does manage to pick up the prize before we can get there. If we can pancake the enemy force between two large walls of Uruk-Hai (with crossbows firing in between), we stand a good chance of decimating the enemy and keeping the prize from getting anywhere.
In Destroy the Supplies, we have three mini-gunlines that can defend our supplies while our shields-and-pikes can form up to advance on the enemy positions. We won't have any fast guys to sweep in to destroy things, but all we need is a turn or two to break away some of our pikes to get to the supplies the enemy has. If our pikes who would normally support the crossbows come with, we'll have nearly 40 models pressing for the enemy - that may be more models than he has! Similarly in Retrieval, we'll have our 11 crossbows circle up around our "flag" and have our remaining 39 models pressing forward as hard as possible to try to grab and move the flag. Our Captains can try to Heroic Combat through F1-4 troops to punch some holes, but mostly we want our lines to stay intact so we have a solid wall of open phalanxes to keep the enemy away from our side of the board.
Control Missions (Pools 2 & 5)
As we've seen with so many armies in the past few months, we're going to play all three of the control-based scenarios the exact same way: in Domination, Command and Control, and Breakthrough, we're starting on the center (with some crossbows maneuvering for rear objectives) and pushing the attack ever northward. This is what Uruk-Hai do - and if we can keep the enemy from whittling us down, we can dominate by sheer weight of numbers (and their elite status).
When it comes to getting somewhere, we're relying on March: in Reconnoitre, we can't know who's going to show up and when, but since each warband has Heroic March, we can March on Turn 2 with whoever has arrived and push them hard up the center to get up the board as fast as possible. If we get all three of our warbands on during the first turn, great! Otherwise, it's fine. The crossbows will eventually be left behind to cut down stragglers (probably spreading out a bit to keep the enemy constantly under threat), but everyone else presses for the front as fast as possible (relying on Heroic Combats late in the game to get some extra movement). In Storm the Camp, we know we can get everyone in the camp on the first turn, so we March up on Turn 1 (and probably Turn 2), with the crossbows still providing mid-field cover support while the melee troops swarm for the enemy camp.
In Divide and Conquer, we want to start by deploying our two non-Leader warbands in opposite corners, then deploy the leader in reaction to how our opponent has placed 2-3 of his warbands. Because our warbands are all nearly identical, it doesn't really matter what corner we take from a force perspective - know your terrain and choose which corner you want most of your army to arrive in and deploy in that corner first. After you've deployed, March to the middle and fight, fight, fight!
Killing Missions (Pools 4 & 6)
Killing things isn't hard with this army - so we're good with these missions . . . mostly. In To The Death and Lords of Battle, make the determination of whether you can win the shooting game. If you can, sit back and shoot. If you can't, move up quickly and get engaged. Killing 26 of your models should be pretty difficult, so you can lose a few models on the approach without much danger.
Contest of Champions requires managing your match-ups pretty well: use your non-Leader Captains to speed-bump the enemy army leader, while your Uber-Captain chews through 1-2 models each turn (don't bother with Combats unless you have an overwhelming advantage). Your goal, though, is to kill as many models as you can with your warriors so that your enemy's army leader gets exposed to lots and LOTS of dice and so the game ends quickly. Make sure there's a path for your uber-Captain to sustain his kill count, though - don't kill everything around him so he sits idle for a turn!
In the hero-slaying scenarios, Clash by Moonlight will either be a feast (dominant shooting with those crossbows) for famine (enemy archery wounding us on 4s or 5s). You probably want to rush the enemy, getting positions for your crossbows only if you have models you can target that you don't want to run down. Your crossbows will always be less effective than your pikes, so don't worry about trying to shoot all the time.
In Assassination and Fog of War, you've got some hard choices to make: in Assassination, neither of your normal Uruk-Hai Captains have crossbows (which would be awesome for an assassin), so you'll have to do your killing up-front. Personally, I'd just shoot at any enemy heroes with your crossbows, happily getting 1 or 5 VPs for wounding/killing them with someone who isn't your assassin. Keeping all three of your heroes alive (perhaps safely in the backfield while your warriors burn through enemy resources) is going to be far more valuable than a few more VPs (since it should deny your opponent 1-7 of the VPs he was counting on).
In Fog of War, at least one of your normal Captains should be holed up in the back, but you probably want both holed up since you have a 50/50 chance of picking the same hero to keep alive as your opponent is trying to kill - but it's equally likely that the hero you send out to fight because "he's not worth any VPs to me" is exactly the guy your opponent wants to kill. Your Army Leader is entirely expendable in this mission, so send him in to kill stuff!
Conclusion
This isn't the way most people run the Assault Upon Helm's Deep Legendary Legion, but it's fun - trust me, it's fun. And honestly, there's something that can be more competitive in some missions when you have 50 Uruks and no siege weapons than if you have 40 Uruks and several siege weapons. If you have thoughts on how else we could have done this (or if you think there's a better list we could have covered), let me know in the comments below! Until next time, happy hobbying!
No comments:
Post a Comment