Good morning gamers,
One of the most popular Legions from Defence of the North is the Host of the Dragon Emperor, featuring shiny new models that have revolutionized a faction that everyone loved to look at and no one thought was competitive on its own. If the measure of success for a Legion is making an uncompetitive force competitive, this Legion has clearly succeeded.
One would think that, if you were looking to take your scenario-play armies into Matched Play, the Easterlings would be a pretty good place to start (and since you won't have Amdur or Khamul in your force, you might as well run the Legion) - but when you ACTUALLY look at the models you need, you'll find there are a few problems in your usual list building choices. Let's see what we have to work with:
I can't do anything about the lack of a war drum (not within the constraints of this series), but I did get lucky on the pike front. I knew right away that I was going to "cheat" and say, "I need two boxes of Easterling Warriors, so I'm going to use 8 shields and pikes instead of just 6." This is "better," but still not good. As I mentioned in the what-models-do-you-need post, however, I got a second boon on this front: in the second scenario, we need 12 Easterling Warriors with shields, 5 Easterling Kataphrakts, and 1 Easterling Captain with armored horse, shield, and sword - and THAT means we need 18 shield and sword guys. How many shield guys do we get in two boxes of Easterling Warrirors? Only 16. So . . . if we want all dismounts for all our Easterlings . . . we need a third box. :-) And THAT means we actually have . . . 12 pikes. With 21 total pikes to work with, let's see what kind of list we can build!
- Brorgir the Conjurer and Rutabi, General of the Dragon Legion
- Easterling Command blister
- 30 Easterling Warriors (12 shields, 6 shields and pikes, and 12 bows)
- 5 Kataphrakts and 1 Easterling Captain with armored horse, shield, and sword
- 18 Black Dragons (9 shields, 9 shields and pikes)
- 12 Dragon Cult Acolytes
- 4 Rhunish Drakes
- The Dragon Emperor
There are several things that we'd usually want in an Easterling Legion army that we don't have here - most notably, we have only 15 pikes and we don't have a war drum on any of our Kataphrakts (and none of them have been upgraded to Black Dragons). Like I did when I was preparing for the Defenders of Erebor post, I looked at this list of models and thought to myself, "Self, we have no drum and we need more pikes - this isn't going to work."
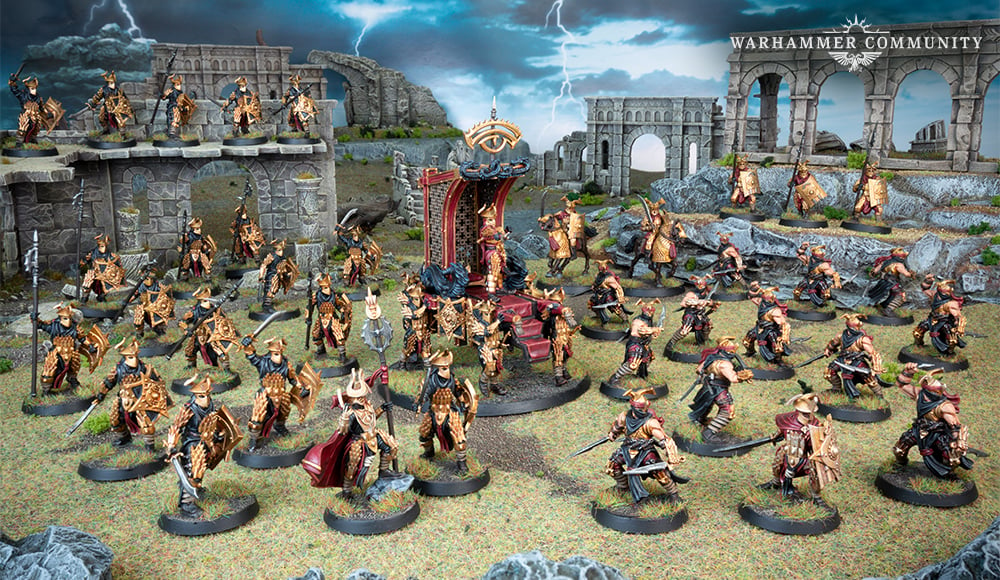 |
| Photo Credit: Warhammer Community |
I can't do anything about the lack of a war drum (not within the constraints of this series), but I did get lucky on the pike front. I knew right away that I was going to "cheat" and say, "I need two boxes of Easterling Warriors, so I'm going to use 8 shields and pikes instead of just 6." This is "better," but still not good. As I mentioned in the what-models-do-you-need post, however, I got a second boon on this front: in the second scenario, we need 12 Easterling Warriors with shields, 5 Easterling Kataphrakts, and 1 Easterling Captain with armored horse, shield, and sword - and THAT means we need 18 shield and sword guys. How many shield guys do we get in two boxes of Easterling Warrirors? Only 16. So . . . if we want all dismounts for all our Easterlings . . . we need a third box. :-) And THAT means we actually have . . . 12 pikes. With 21 total pikes to work with, let's see what kind of list we can build!
I really wanted to get a bunch of Dragon Cult Acolytes - and there may be a place for that, for sure. I, however, decided that most Easterling players would probably want to maximize on model count - and the list you'll see below does just that. It has sacrificed a little for speed, but I've opted for an unconventional third hero to make up for the lack of war drum:
- The Dragon Emperor [ARMY LEADER]
- 9 Black Dragons with shields
- 9 Black Dragons with shields and pikes
- Rutabi, General of the Dragon Legion
- 11 Easterling Warriors with shields and pikes
- 3 Easterling Warriors with bows (or shields)
- 1 Easterling Kataphrakt
- Easterling Captain on armored horse with sword and shield
- 1 Easterling Warrior with shield and pike
- 7 Easterling Warriors with bows (or shields)
700 points, 44 models, 0-10 bows hitting on a 4+, 34-44 D6+ models, 2 cavalry and 2 Might for Heroic March, 8 Might points
Our last army reached 40 models - and this army reached 44 models, which is incredibly good at 700 points (especially if you've got a F5 pike block). I will start off by saying that I've given you an option for either Easterling Warriors with shields or bows - if you like having a D6-7 army, take the shields (I think most Easterling players would choose this). I, however, prefer to have flexibility in my game play - so I will be reviewing this list today assuming that you have the bows. What can I say, I don't Easterling the way anyone else Easterlings. :-)
I've also only included 1 Easterling Kataphrakt - I did this because our Easterling Warriors are 8pt models and since we don't have any Black Dragon Kataphrakts, we'd be wasting points (or have to seriously drop models and pikes) in order to get more Kataphrakts in our army. Additional Kataphrakts could be procured by dropping warriors (and if we dropped enough models, we could have relied on Kataphrakts or War Drakes for speed and gotten Brorgir), but this causes us to lose a few models (including all of our bows) - and makes most of our army slow to engage:
- The Dragon Emperor [ARMY LEADER]
- 9 Black Dragons with shields
- 9 Black Dragons with shields and pikes
- Rutabi, General of the Dragon Legion
- 1 Easterling Warrior with shield
- 6 Easterling Warriors with shields and pikes
- 3 Easterling Kataphrakts
- Brorgir the Conjurer
- 6 Easterling Warriors with shields and pikes
- 2 Easterling Kataphrakts
700 points, 39 models, no bows, 38 D6+ models, 5 cavalry, 8 Might points
There's nothing wrong with this second list - it's opted for +4 Kataphrakts and a caster instead of 5 other models, and this might be a better trade overall. I don't like being predominantly 6" move, however, without any archery to hit the enemy with, so I've opted for the first list instead. Let's see what it does.
Army Theory
This army has no war drum, so our strategy begins with our Easterling Captain: in scenarios where we'll have to travel somewhere quickly, the Captain will need to be in the center to March our army as fast as possible to where it can engage. We have reviewed a few different March-oriented formations (the Pac-Man/Millenium Falcon formations and the Bow-tie formations are the most likely to relate to what you'll be running) and when you need speed, set up in one of these formations straight away to get your forces mobilized quickly. This is particularly necessary if you've swapped all the bows in this list for shields.
Of second positional importance is the Dragon Emperor: a 12" banner is pretty forgiving, but the Dragon Emperor will probably have to be near the center of your battle line. The 6" Fight Value boost is pretty forgiving too, but only if the Dragon Emperor is near your lines (you only need to clip the rear model of each phalanx file, but drift too far and you'll create weaknesses in your flanks).
To assist in your damage potential, we have Rutabi - she will want to work in concert with the Easterling Kataphrakt in her warband to get enemy models trapped/killed (since Rutabi will get to reroll wounding dice this way). While she can be pike-supported, I'd only opt for that if she's challenging a hero - and if she wants the help of a Kataphrakt, that'll probably be on the edge of the enemy battle line. With Master of Battle (3+), she might be able to get some free Heroic Combats if enemy heroes near her try to Combat through your Phalanx - and if she's on the edge of a battle line, she can use the speed to get into the enemy supporting models (along with the Kataphrakt) in order to help your phalanx crush that flank quickly.
Speaking of your Phalanx, you have 9 Black Dragons with pikes and 11 Warriors with pikes in the warbands of the Dragon Emperor and Rutabi, which can provide a three-rank deep 10-file phalanx when paired with the 9 Black Dragons with just shields and Rutabi. With the Dragon Emperor, a single Kataphrakt to lock down Rutabi's flank, and a skirmish triangle of bow-armed Easterlings to lock down the other flank, this warband can advance slowly towards the enemy if it needs to, with an optional split of the phalanx into two 5-file phalanaxes with a path for the Dragon Emperor to engage in the center if desired.
The Captain's warband has no phalanx, but if you split the phalanx in two (as just mentioned), the Captain can sit in between the phalanxes with his bows forming up behind them. This gives you some optimal March positions (especially if you plan to use a Millenium Falcon formation). This can help you engage quickly, getting maximum use of your melee models as early as possible.
Gameplay Strategy
Maelstrom & Object Missions (Pools 1 & 3)
In the maelstrom missions, we want the Dragon Emperor and Rutabi to show up together (that way we have our fully-formed pike block together). Our Captain's warband can operate on its own, moving to where the scenario will require. In Hold Ground, we want the Dragon Emperor to go down first, arriving with gaps so Rutabi's warband can form up among the Emperor's models. The Captain can then come on wherever - though if we have the choice, we'd like all three warbands to arrive together so we can March the phalanx forward. If we can park in the middle, we stand a good chance of keeping more models within the objective range than our opponent.
In Command the Battlefield, we still want the Dragon Emperor and Rutabi to arrive together - and wherever they arrive, they want to make their way to wherever the enemy's strongest presence is. The Captain will need to play to the scenario, leaving bowmen in whatever quadrants the phalanx is unlikely to be fighting. In Heirlooms of Ages Past, we similarly want the full phalanx to move to wherever the enemy has a large block we can fight, while the Captain Marches his models to claim objective tokens. If we don't get the heirloom, we'll have no other option but to try to break the enemy formation protecting it with our phalanx . . . I'm not very optimistic about how that will turn out.
Our options look a bit better in the object scenarios - in Seize the Prize, we can start with our phalanx split in two, leaving space for our Easterling Captain to sit in the middle and March our phalanx towards the middle. On Turn 2, we'll be able to have Rutabi call a Heroic Move if we need to in order to push the formation forward - she'll want to be in one of the inside files near the Captain so he can join her and get the knock-down against whoever they fight (or so they can fight side-by-side - either way). If we can meet the enemy near the middle and grind them down, we can at the very least keep them from getting to the Prize (if not get it ourselves). Digging it up requires an infantry model picking it up - and thankfully, we have a lot of those! If we can hand it off to our Kataphrakt, great - otherwise, we just need to move it across the centerline into the enemy's board half and we have a good chance of winning the game.
In Destroy the Supplies, we're probably going to have to split up our phalanx, but with 10 files, we can have two 3x3 phalanxes and one 4x3 phalanx, hopefully all of which will be within 12" of the Dragon Emperor (who should be pressing up the middle). While I'd generally recommend all three heroes staying together, you'll probably need Rutabi leading one of the 3x3 phalanxes and the Captain supporting the other - if any of these phalanxes lack Might on their side, they're going to be side-stepped easily and models will be breaking through to our back field. With 10 bows in our army, we can have a skirmish triangle at each of our supply markers, hopefully buying time from anyone who rushes to get to one while we get our infantry to respond.
Retrieval is our favorite, though: here we can form up our phalanx and just hedge our flag with all nine of our bows while the phalanx pushes for the enemy flag as quickly as possible. Our strategy is simple, but we'll need to make sure our Captain and Kataphrakt are able to flex to defend our flag, but still threaten around the enemy flank to reach their flag. Depending on how aggressive our opponent is will determine what we do.
Control Missions (Pools 2 & 5)
Centerline deployment again - I mean, we all saw that coming, right? 10-file phalanx in the center (often on a center objective), bows to leave at the rear and side objectives, while we press hard to drive the enemy away from the objectives. We may need to break up our phalanx into 2-3 pieces (either two 5-file phalanxes or two 3-file phalanxes and one 4-file phalanx, like we've had to do before). Depending on our opponent's desire to fight us in one place, we'll need to be flexible in splitting up our formation. In Capture and Control and Breakthrough, we know we'll have objectives on our sides at the beginning, so we may need to split the phalanx in those missions for sure. Domination is, in many ways, much better for us - we have some say on where the objectives will be placed and we can centralize as many of them as possible close together so our phalanx can move as one unit.
When it comes to getting places, we're kind of on the back foot, but we still have options. Two Marches from the Captain in Storm the Camp can get us up the field pretty quickly, but once the Marching is over, we'll want the Captain and our Kataphrakt to move out the way to be able to sweep into the enemy camp. The phalanx wants to lock in with the enemy as quickly as possible - with bows guarding the flanks and being able to harass anyone who gets around us towards our camp.
Reconnoitre will be pretty difficult - but our primary objective is to break the enemy and kill their army leader - not necessarily get models off the board. Yes, we might be able to get our Captain and our Kataphrakt off, but in all likelihood, we're probably not getting anyone off. If we can keep the enemy from getting anyone off too, however, we can get a narrow win easily if we can break the enemy without being broken.
Finally, in Divide and Conquer, we want our phalanx to show up in one corner with the Captain's warband Marching to the middle and get some positioning for our archers. If we can use our bows to slow the enemy advance, our phalanx can show up to contest the middle before the enemy is entrenched. Frankly, I'm not sure our archery will be good enough to do much, so using our archers as swordsmen to slow the enemy down (unless the enemy uses Heroic Combats) might work a lot better.
Killing Missions (Pools 4 & 6)
Our favorite kind of mission - we're finally done with the "tactical, get-somewhere" stuff and just have to focus on good, clean fun. Our phalanx should be formed up with the flanks protected and we race to get as many kills in as possible. Marching will be essential in three of these scenarios (To the Death and Clash by Moonlight, since we need to break the enemy, but also Fog of War because we'll need to get to a terrain piece as well as break the enemy who will be starting far from us). The other three scenarios allow us to deploy on the centerline, so that's exactly where we plan to be.
In Lords of Battle and To The Death, our primary goal is to get locked in as fast as possible and rack up the kills. With three ranks and a reroll (sometimes additional dice if Rutabi or the Captain are present), we have a good chance of getting a 5-high or 6-high where we can focus our attacks. Our bows will want to hold the flanks of the phalanx so we can punch a hole in the center of the enemy as quickly as possible. If we can get the Dragon Emperor in to get some kills, do that.
In Clash by Moonlight, we have some bows, but not enough to pose a serious threat to anyone who has invested in archery and D5+. Still, it's something - and if we can use it to dismount horsemen (who could wreck the flanks of our phalanx) or kill a hero, so much the better for us. March towards the enemy once we're almost in archery range and hope enough of our forces are intact to cleave through the enemy. This is easily the hardest of these scenarios for us - if the enemy focused on archery.
In Contest of Champions, we want our phalanx to be split with a path for the Dragon Emperor to get locked in quickly. Rutabi should be right next to him to support him against anything big and to stall out the enemy army leader. If we can, we want our phalanx to roll up the enemy quickly - breaking the enemy and keeping up with the enemy army leader's kills could see us get a narrow win in a few rounds.
In both Fog of War and Assassination, our Captain is likely to be picked as the target of our opponent - so he's going to find something very interesting to do FAR from the action. Yes, he and the Kataphrakt can be used to race to a far off objective, but if the enemy pursues them, we really don't want him to take any damage. When we're looking for someone to kill, we want to pick someone who wants to be locked in combat as quickly as possible - and then use Rutabi and the Dragon Emperor (or the press of pikes) to kill them. Rutabi makes a decent assassin, though they'll see her coming for sure. Break the enemy if you can and kill the army leader as well (not worth VPs in Fog of War, but it'll get you something in Assassination).
Conclusion
This is far from a competitive way to run the Host of the Dragon Emperor Legion, but I have to say it's still quite dangerous. More pikes would be nice, as would a drum, but this list is pretty straight-forward in how it plays and poses a real problem to anyone who charges into it. Next time, we're looking at another very popular Legion from this book: the Assault on Lothlorien Legion. This shooting-heavy Legion has really shaken up the SBG meta, but without access to some of their most popular pieces, how would one take the models from the scenarios into matched play? Find out next time - and until then, happy hobbying!
No comments:
Post a Comment