Part 2: The Moria Sequence
 |
| Photo Credit: Quest of the Ringbearer Our first mission doesn't actually start in Moria - and it's kind of a chaotic mess! |
We actually have a wide variety of models we'll be facing in these missions - and while most of them are garbage, we have four scenarios with no rest points between them (Wargs in the Night, Balin's Tomb, Escape from Dwarrowdelf, The Bridge of Khazad-Dum), so this is going to be a grind fest where we need to conserve resources as much as we can. We'll be facing the following models:
- 1 Wild Warg Chieftain (1 mission)
- 18 Wild Wargs (1 mission)
- 2 Moria Goblin Captains (no extra gear, 3 missions)
- 24 Moria Goblins (standard gear, 3 missions)
- 1 Cave Troll (with everything, 2 missions); and
- The Balrog (1 mission)
In all four scenarios, we have all nine members of our Fellowship - and in the first scenario, we also get Bill the Pony. First and foremost, we want our models to be F4 if possible and at least a few of them should have Heroic Strike. We'll be fighting F3 Wargs and F2 Goblins/F3 Goblin Captains - being F4 gives us an advantage against anything except "the big boss" from each mission (the Wild Warg Chieftain, the Cave Troll, and of course, the Balrog). F4 is good enough, so that's what we should shoot for. In the previous path, F4 is handy against the Barrow-Wights and pretty reachable for most of our "four Hobbit" slots. Anyone who isn't F4 should try to be F3 so they get at least a roll-off chance (if not a slight advantage against a single Goblin and about even odds against two Goblins).
 |
| Photo Credit: Quest of the Ringbearer If you're wounding D4-5 models, being S3 is just fine . . . but S4 with +1 To Wound would be much, MUCH better. |
Second, our opponents will be D4-5 (unless they're D6/D9), so we want our heroes to be at least S3 but it would be better to be S5 (or S4 with +1 To Wound). We talked about this last time, but it remains true here: wounding on 5s is really good - and if we can wound the grunts on 4s (or possibly 3s), even better. We want to be able to save our Might for calling important things - boosting wounding rolls isn't what we want draining our resources!
I should note that at the end of each mission, your heroes might regain stats - but we can't assume that anyone is going to get ALL their Might back (one hero can regain D6 stats, one or more might not regain any, and the rest will regain D3 stats) - so let's just be able to wound things well from the beginning, okay?
You really don't want to be burning Might points to wound EXCEPT maybe in the first mission, because we get Bill the Pony. Bill can change everything - if you have a single Fellowship model that he's escorting who is sniping Wargs as they approach, burn a Might point - you might get it back for free. Bill is a great banner for your Ringbearer (all are Hobbits - and Hobbits treat Bill as a banner) and possibly other members of your Fellowship, so if your Ringbearer is getting into a tight spot, you can always try to use "old Bill" to get him out of whatever pickle he's in. Now if Bill is in your Fantasy Fellowship as Merry, Pippin, Gimli, or Boromir, you have this option in every mission (depending on the heroes you want to bring, this is an interesting option indeed - remember, they have to be from the Fellowship list or Barliman Butterbur to benefit from the Second Breakfast rule). :-)
 |
| Photo Credit: Quest of the Ringbearer Walking down the stairs could be a slog . . . but having free Heroic Combats makes it much easier to handle. |
Third, free Heroic Combats (and sometimes Heroic Moves/Marches) are gold. In Balin's Tomb, we're going to be outnumbered 3:1 and on the stairs, we'll be outnumbered 3:1 with greatly reduced maneuverability. Being able to call free Heroic Combats allows you to chop through an enemy model or two and get extra ground in the Dwarrowdelf scenario or rescue a model that's being swarmed without spending any actual resources in Balin's Tomb. Aragorn is great for this, but so is Thorin, King Under the Mountain (who is very affordable and quite killy if given Orcrist).
Fourth, Terror/Aura of Dismay is also gold. This has been covered by Sharbie before - and it will extend the time your games take, but picking models that cause Terror (or that can cast Aura of Dismay) is bonkers. The Balrog can make the Goblins in his scenario auto-pass Courage tests and the wargs in the first mission are all Fearless, but in the other two scenarios, you're looking at C2 Goblins and C3 Goblin Captains/Cave Trolls failing to charge into your models. It's wild - and with 80-150pt heroes like Radagast, Cirdan, and Thranduil with the Circlet of Kings that can be taken in your Gandalf slot, you could give yourself a real leg-up in your fights just by having them nearby. The harder you lean into Elven lords, the more likely you'll have Terror automatically too . . . there's that option, though it's pretty expensive.
Fifth, put the Ring on when it matters. Yes, thematically, you'd never want to do that, but seriously, you're not facing Ringwraiths in this section, no one is going to be able to charge you (see the previous point), and you don't have to call Heroic Strike against any of the "big bosses" if you've got a Ringbearer in the fight. Got a F6 hero in the mix? You're winning the fight, baby, and if you can position the Ringbearer to help you get a trap in, even better.
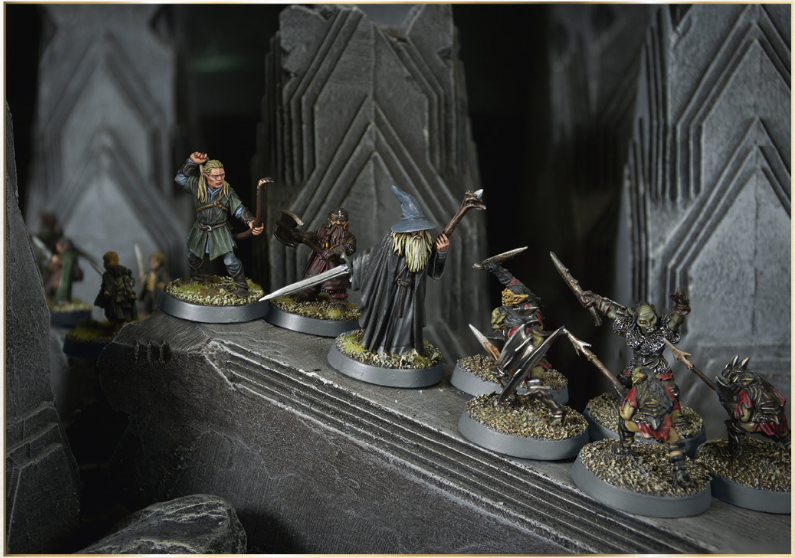
 |
| Photo Credit: Quest of the Ringbearer This guy is either going to be REALLY scary . . . or really not . . . |
Finally, have several models that can wound the Balrog when he arrives. Thematically, you should be fleeing from the guy - but our universal experience is that it's easier to kill the Balrog if you wait for him to show up and then gronk him when he arrives. Remember what I said about being S5 (or S4 with +1 To Wound)? Yeah, that all comes into play here - a S5 model can wound the Balrog on "just 6s" and a S4 model with +1 To Wound wounds on 5+/3+ (which is actually a little BETTER than 6s) - and if you've got 3-4 models trapping that guy (with the other 5-6 guys running interference on the Goblins), chances are good you can kill him in 1-2 rounds. And as was just said, if you have that Ringbearer in the fight, you don't even need to spend Might Striking up against him. Then, mosey on over to the bridge, get everyone across, and break it. Job's a good one (albeit a boring one - and possibly a hard one if your caster has limited Will to break the bridge).
Pulling this off will require mass killing Goblins early on - and as we've already said, free Heroic Combats can be really great for that. Because this is a scenario where the Goblins don't come back when they die, if you're able on the first turn to hammer through some Goblins, you might be able to clear out enough breathing space to divert a few heroes to dealing with the Balrog. Do it if you can, tie him down for a turn with someone if you need a little more time, and recognize that this IS a hard scenario to win (even though I just talked about it as if it were easy).
How Do Our Fellowships Compare?
So how does my Fellowship compare to this advice? Let's see . . .
- F4+ on everyone?
- Gorgoroth: Bilbo's F3, Maggot is F3, the dogs are F3, but everyone else is F4 or above.
- Centaur: Same.
- Tiberius: Bilbo isn't F4, but he has the Ring (and we're wearing it when we need it). Maggot isn't F4 (and neither are his dogs), but being F3 is acceptable in these missions (and with the exception of Smeagol/a Striking Hobbit, you can't have your Companion be F4). He and his dogs are wounded pretty easily, so we'll just want to make sure there are F4+ heroes near these guys to take any heat they're drawing. Everyone else is either F4 (Bifur and Bofur, though Bifur has Strike), F5 (Nori, Gandalf, and Dori, though Nori and Gandalf have Strike), or F6 (Dwalin and Gloin).
- S3+ on everyone?
- Gorgoroth: Bilbo now has Sting, so yes, everyone is S3 or higher.
- Centaur: Frodo has Sting and thanks to having Maggot, everyone is S3 or higher.
- Tiberius: Thanks to starting with Sting and having a S3 companion (with S3 helpers), we're all S3 or above (with Nori/Dori/Gloin being S4 and Dwalin/Gandalf being S5 - and most of those guys having the option for +1 To Wound). I've got this one in spades (see the last question below for additional insights).
- Free Heroic Combats/Marches?
- Gorgoroth: Between Mighty Hero on Elessar and the free Heroic Combats with Thorin, we should be just fine.
- Centaur: Aragorn solves a lot of problems, doesn't he?
- Tiberius: Nope, I don't have this one - my Combats will be costly, but thankfully, all 6 of my Dwarves are pretty good fighters, Maggot is a decent fighter, the Dogs are okay, and Bilbo/Gandalf are surprisingly fine. My hope is not to have to rely on Combats as much as "just hewing Goblins." As for Heroic March . . . yeah, I'm gonna miss that Thorin's Company army bonus. :( I already have Bifur calling free Heroic Moves, though, so at least I can get where I want to go without burning through resources.
- Terror?
- Gorgoroth: Thorin has Terror against the Goblins (when the Balrog isn't around), but everyone else is easily charged.
- Centaur: Terror on Gildor is nice, but everyone else is normal.
- Tiberius: When I originally built my list, I had Radagast in it and I was going to lean hard into Terror. When I decided to revert to Gandalf, I lost Terror on basically everyone (I mean, it's just Gandalf now). So no, I don't do this - and yes, I will miss it in all of these missions except the Bridge of Khazad-Dum once the Balrog shows up.
- Wounding the Balrog Easily?
- Gorgoroth: Elessar, you're up - wounding on 4s is great, but Thorin can two-hand, Dori can two-hand, and of course Maggot can two-hand, so everything should be fine.
- Centaur: Aragorn has Anduril already, so wounding isn't that hard. If the Elves can supplement the damage coming out, everything should be fine.
- Tiberius: Yes we can - Gandalf is S5 with the option for +1 To Wound, so he can wound the Balrog on 5s. Dwalin is S5 with potentially +1 To Wound, so he can wound the Balrog on 5s as well. Gloin is S4 with a Piercing Strike weapon that can give +1 To Wound, so he can wound on 5s. Dori is S4 with +1 To Wound, which wounds on 5+/3+ if he doesn't call Heroic Strength (which could bring it to 5s or 4s). Bofur is S4 with the ability to Piercing Strike and gets +1 To Wound, so he's a wound-on-5s option as well. Bifur can choose to Piercing Strike to get to wound-on-5s also. My other models (Bilbo, Maggot, the dogs, and Nori) aren't as good at wounding the Balrog, but we'd probably want Bilbo in the mix for the halving-Fight-Value benefit (not the wounding on 6/5+) while the other five hold off any Goblins nearby (though Bofur and Bifur could easily help). I think if I have Bilbo and any three of Dwalin, Gloin, Gandalf, Dori, Bifur, or Bofur, I'll be okay.
Conclusion
Great deep dive, I love the analysis here and always enjoy the Fantasy Fellowship content. I don't always get the time to leave a proper comment, but I'm following with bated breath!
ReplyDeleteOne thing I'd push back on slightly with these scenarios in particular is the emphasis on killing power. Obviously killing stuff is generally a good thing, and bonuses to wound etc are great things to include in a Fantasy Fellowship. But in 2/4 of these particular scenarios, killing stuff can range from meaningless to actively harmful. I've found that in Warg Attack, if the Fellowship is clustered up tightly enough then generally there will be heaps of excess Wargs prowling around waiting for a gap. In that context, killing Wargs makes functionally no difference, because the gap will be filled next turn by a different Warg and a replacement will be in charge range next turn.
Balin's Tomb is actually even worse, because when you kill Goblins they get quite a lot of deployment flexibility. One of the ways that Good can actually do best in that scenario, in my experience, is to not kill many Goblins in the first couple of turns. That means that there won't be an overwhelming horde of them clambering up the well or out of the trapdoors to charge straight into the Hobbits. In that context it's sometimes worth heroes not two-handing etc at the start to try and slow down that surge.
Obviously killing power is still good on your combat heroes in the other two scenarios, and when you're up against the Cave Troll or Warg Chieftain. But I think as far as sets of scenarios, this is one where it's overall a bit less critical and things like durability may increase in relative value
That's an interesting point I hadn't thought of - you'll see what happened in the first two scenarios next time (the two you mentioned where killing power can bite you) and I'll say from experience that you're right - killing things early does give them deployment options (and that can hurt a lot). I will also say that taking Maggot can seal up those trap doors pretty well too. :-)
Delete