Featured Post

First Impressions: The Kingdoms of Men, Part II

Good morning gamers, NOTE: there has been an update based on a comment made below - the change is in red . I have not yet seen the War of th...

Monday, December 28, 2020

Heroic Heroes: Top 10 Heroes for Heroic Strike

Good morning gamers,

Well, we're closing out the year with the specialized heroic action you've been waiting for: Heroic Strike! Ah, Heroic Strike - the specialized heroic action that seemed so stupidly powerful when my mates and I looked at the Hobbit SBG rules that we said, "No thanks - we'll stick with the Legions rules and the big blue rulebook." In the new edition, Strike isn't available to all heroes and so becomes an interesting part of list building theory and meta-gaming. But how useful is it anyway? For more on this topic, you should check out Rythbryt's series on Heroic Strike, where he delved into how useful this heroic action really is (and covers a lot of other things too - things that can make your Heroic Strikes more powerful AND things that can make countering Heroic Strike easier without having to call a Strike in return).


What Does the Heroic Action Do?

Heroic Strike, like Heroic Defense and Heroic Strength, is pretty straight-forward: the hero who calls Heroic Strike in the Fight phase increases his Fight Value by D6. Like all heroic actions, Heroic Strike is called at the start of the Fight phase, but your increase in Fight Value isn't determined until the fight involving that hero is selected to be resolved. This is important because if a F3 Meriadoc, Captain of the Shire calls a Heroic Strike against someone like the Witch-King of Angmar, the Witch-King will need to decide whether to counter-call a Heroic Strike BEFORE knowing if Merry got a 1-2 and retained a lower/tying Fight Value to the Witch-King's original Fight Value of 5. Counter-calling a Strike might be the "safe" way to go, but it would also mean foregoing a Heroic Combat (something the Witch-King is likely to succeed in pulling off if he's on the charge with the Crown of Morgul - and certainly possible if he's riding a Fell Beast).


This increase in Fight Value is also determined before the players choose whether or not they are using any special strikes - so a model armed with a sword or dagger (most models with Heroic Strike have these kinds of weapons) can Strike up to a high Fight Value and then choose to Feint to lower their Fight Value if they're fighting warriors (or low-Fight heroes) in order to not only get a higher Fight Value, but also reroll 1s on their To Wound rolls. Neat, huh?

Thursday, December 24, 2020

Overly Pedantic Stats: Best Elven Faction?

 Hey Reader!

We're back with another episode of Overly Pedantic Stats, and this post was prompted by the fact that I'm revisiting Rohan, and as I started thinking through the Helm's Deep legendary legion, it got me to wondering whether it was worth it to purchase Lothlorien models, as I've never run Lorien before.

Now, in the last iteration of the game (and I've mentioned this in the past on this blog), I thought that the Galadhrim were a terrible model, failing to be as cheap as wood elves, as resilient as high elves, or as deadly as mirkwood elves. But with the newest iteration of the game where 1) the Galadhrim now have heavy armor instead of just armor, and 2) you can only get wood elves in a Lorien list or a Gildor Inglorien warband for Rivendell, I was curious to see how good Lorien is now.

And that meant it was time for overly pedantic stats analysis. We'll be looking at five elements of the army: killing power (both in melee and at range), duel winning ability, resilience to damage, mobility, and overall cost. Inasmuch as magic factors into these rankings (Blinding Light helping with resilience, Nature's Wrath helping with killing power as it deals wounds and traps targets that are on the ground, etc.) we have also considered magic, but do not have a dedicated "Magic" category, and that will highly favor the fleshed out army lists over the less fleshed out lists.

We will discuss each of them in order from weakest to strongest, looking at the following factions: Rivendell, Lothlorien, Halls of Thranduil, and the Helm's Deep Legendary Legion contingent of Galadhrim.

Monday, December 21, 2020

Heroic Heroes: Top 10 Heroes for Heroic Strength

Good morning gamers,

Two more specialized heroic actions left in this series and today we're tackling the not-as-glamorous of the two: Heroic Strength. If you've been with us for a while, you know that Rythbryt came to the defense of Heroic Strength when the new rules dropped, doing a long series on Heroic Strength and how awesome it is (check out the list of posts here). Heroic Strength doesn't appear to be that useful, but it turns out some heroes can get REALLY good use out of it.


What Does the Heroic Action Do?

Heroic Strength looks pretty simple: a hero can call Heroic Strength at the start of the Fight phase and increases his Strength by D3. In its most direct use, this can be used to increase your wounding potential by +1 (or sometimes +2), making it easier to wound a high Defense model you're fighting (or REALLY smash through a low Defense model you're fighting). However, the actual implications of increasing your Strength can have other uses too. Let's look at a few.

Thursday, December 17, 2020

Shire Melee Tactica

Hey Reader!

In our last post we talked about how to use Shire archery effectively, and in this post we wanted to address arguably the most important thing you can do when playing Shire: building a cohesive, holistic approach to melee fighting. This will determine what you do in your Move Phases, how you position and array your troops, how you determine the composition of your warbands, which heroes you take, when and how to engage the enemy - basically everything except shot selection at range (hence the last post), as your plan for melee fighting will dictate a lot of how you play the game.

And in preparation for taking Shire to a tournament next year, I feel like now is as good a time as any to discuss it, as I'll likely be playing with them in some of our battle reports in the future, :) So with no further ado, let's look at how to beat your opponent in melee combat with a Waistcoat Brigade.

Monday, December 14, 2020

Heroic Heroes: Top 10 Heroes for Heroic Defense

Good morning gamers,

Today we visit yet another clutch and beloved heroic action: Heroic Defense. For many people, this is a great heroic action - anytime you can keep a Troll from Rending you, Azog from smashing your face in, or ignore the benefits of that burly two-handed hammer, you're a happy man. But is Heroic Defense all that it's cracked up to be? And how do you know when to punt on offense and throw your heroic action into defending yourself? Well, that's what we're going to look at today!


What Does the Heroic Action Do?

Heroic Defense is pretty straight-forward in its rules: the hero who calls Heroic Defense in the Fight phase is only wounded on a "natural 6" (that is, a die that "gets a 6" and isn't boosted to a 6 with Might, two-handed-weapon bonuses, special rules, etc.) during that Fight phase. Brutal Power attacks and modifiers don't come into play at all. If the hero would be wounded on a 6/4+ or worse, then you need to get a natural "6/6+" (which is, needless to say, quite difficult). Simple, right?

Thursday, December 10, 2020

Quest of the Ringbearer: What Do You Need To Buy?

Good morning gamers,

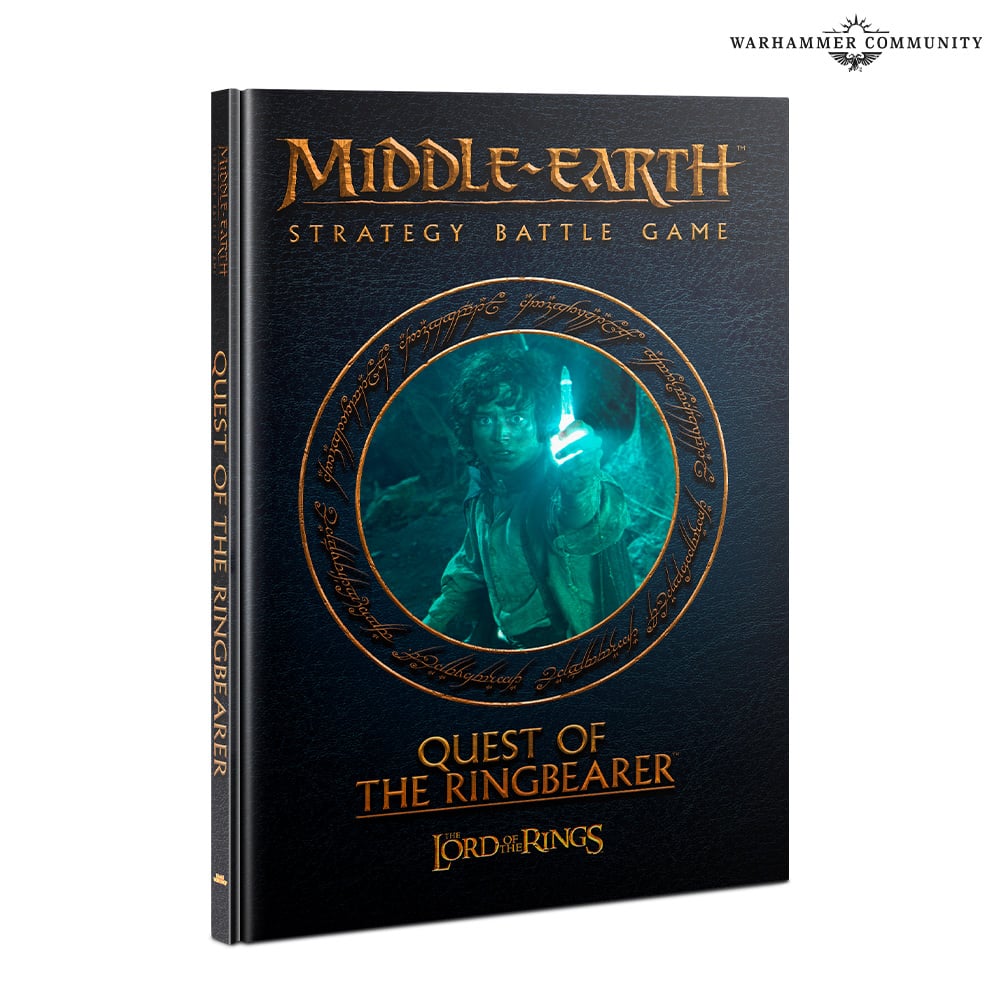
Photo Credit: Warhammer Community

I recently acquired the Quest of the Ringbearer supplement - and boy am I excited! As great as sourcebooks that showcase Minas Tirith, Rohan, and the Shire are, following the storyline that we all love is incredible. What I was overwhelmed by when I was thumbing through the book was the sheer amount of money that would be required to buy all of the models required for the book. But when I thumbed through it a second time, it occurred to me that there were quite a few repeat models. As I passed through it a third time, I thought, "Someone should put together a post that explains everything you need for the scenarios in this book." And that someone is me . . . and here's where we're doing it. :)

With Christmas around the bend, maybe this will be useful in helping you shape what's on your wishlist this year. I'm going to assume from the start that you already own the Pelennor Fields Box Set, the Armies of the Lord of the Rings sourcebook, and the Quest of the Ringbearer supplement. This means you'll have the following models which will be important for this campaign:

  • Actual models:
    • Ringwraith on Fell Beast
    • 36 Morannon Orcs
  • Proxy-able models:
    • Mordor Troll
    • 19 Warriors of the Dead
    • 9 Riders of Rohan

While this might not seem like much, since the cost of buying the Ringwraith, the Morannon Orcs, and the Rulebook on their own is the same as the cost of the entire box set, might as well buy it (and get rulers, dice, cool scenarios to play besides what we're doing, and start Rohan/Dunharrow/Mordor armies). Okay, so with all this in play, let's start by going through the book and see what you'll need!

DISCLAIMER: I get no kick-backs from Games Workshop for this post - but I'm going to do a lot of advertising anyway (because I, like Games Workshop and Forge World, have your finances in mind). :-)

Monday, December 7, 2020

Heroic Heroes: Top 10 Heroes for Heroic Challenge

 Good morning gamers,

We're half way through our series on specialized heroic actions and we've only got a few specialized heroic actions left. Today, we address what is probably the least loved heroic action in the game (behind Heroic Shoot and maybe Heroic Accuracy): Heroic Challenge. What is, I think, the coolest idea for a heroic action, is also the largest gamble - and because models are limited to one heroic action each phase, calling a Heroic Challenge comes at a high opportunity cost. The trick, though, is to find a hero that is dangerous enough not to be left running around on his own, but not THAT dangerous that you're worried about him killing whoever he challenges. To understand more about this, let's look at what this heroic action does and how to use it.

What Does the Heroic Action Do?

Heroic Challenge is a mouthful of text, which is probably enough to scare most people away from using it. Let's break down what happens:

  • At the start of the Fight phase, a hero who has Heroic Challenge must be in base contact with a hero of the same or higher tier (one exception, which we'll address later);
  • The challenge can be accepted or declined:
    • If accepted, the challenger and the challengee fight in single-combat against each other, forced to charge each other if they can, until one of them dies;
    • If accepted, other models may not support the challenger/challengee, may not charge the challenger/challengee, provide their Fight Value/roll dice/make Strikes in any way;
    • If declined, the challengee will not be able to affect other models with their Heroic Actions (such as Heroic Moves or Heroic Marches) and cannot declare a Stand Fast!
  • Whichever hero slays the other gains D3 Might points - which can put them above their starting Might level.

Pretty simple, right? Declare a challenge and either get Might back OR deny your opponent the ability to call Stand Fasts or effective Heroic Moves. What's not to like? Well, for most people, there's a lot to not like. Let's get into why . . .


Thursday, December 3, 2020

Overly Pedantic Stats: Improving Minas Tirith

 Hey Reader!

Welcome back to the blog! I spent some time tracking the performance of Minas Tirith armies at our tournaments over the years, and it didn't surprise me to find that pure Minas Tirith armies (and even allied Minas Tirith + Fiefdoms armies) didn't perform well in our meta. So I got to thinking, "Why is that? Gondor is such a strong faction with so many options and lots of heroes to round them out, so why don't they win more often?" I can't chalk it up to lack of skill because the players who have used them performed well in other tournaments, so I my puzzlement grew.

And that's when I cracked out the overly pedantic stats spreadsheet, because that's what nerds do.

And would you believe it - I found some answers that might help. The purpose of this post is to help you think through how you can improve your Minas Tirith game purely based off of stats: strategy will matter as will objectives, but since those are intangible variables we won't be factoring those into the stats. Instead we will be looking at small changes you can make to increase the overall effectiveness of the profiles in your army to set you up for success.

And with that, join me in my descent into overly analyzed math.

Monday, November 30, 2020

Heroic Heroes: Top 10 Heroes for Heroic March

Good morning gamers,

We're on our fourth specialized heroic action today - and it's my personal favorite: Heroic March! I started playing this game with (what is now) the Kingdom of Khazad-Dum, Moria, Isengard, and Lothlorien and ALL of these factions like to use Heroic March (the Dwarves and Goblins in particular). With many, many, MANY factions wanting access to this heroic action (and all but three factions actually having it), it makes you wonder who does it the best for Good and Evil? Before getting into who's "the best," let's get a little reminder of what Heroic March does - ultimately, Heroic March is how . . .


Sorry, I couldn't resist. Back to the action . . .

What Does the Heroic Action Do?

Heroic March gives the hero who calls the heroic action and is unengaged when he begins his move (and models within 6" of him when he begins his move) 3-5" of additional movement, depending on whether they are infantry or cavalry models. In exchange for increasing their max speed, the hero who calls the heroic action (and models that are within 6" of him when he begins his move) cannot charge this turn. Like Heroic Moves, any models that benefit from Heroic March need to end their movement within 6" of the hero who called Heroic March. Models that haven't moved before the Heroic March and choose not to participate in the Heroic March can't move at all during the Move phase.


There are a few nuances in this heroic action that bear mentioning before we go on: first and foremost, this is different from a War Drum. Some models (Uruk-Hai Drummers, Black Guard Drummers, Orc Drummers, Easterling Kataphrakts with the War Drum upgrade, Mordor/Isengard Trolls with the War Drum upgrade) can grant a similar increase in speed to friendly models, but it functions differently in a few respects. Since the extra movement from Heroic March and the War Drum are coming from different sources, they stack with each other (giving you an additional 6-10" of movement to friendly models that are in range of both of them). Speaking of being in range, War Drums cover a 12" radius instead of a 6" radius, granting more of your army access to increased speed. While Heroic March requires you to end within a certain distance of the hero who called Heroic March, the War Drum has no such stipulation, so your army can split up if required. Perhaps the best thing about the Drum is that you don't need Might to activate it (though you usually pay 20-30 points for the benefit of the drum).


So does this make War Drums "just better" than Heroic March? Not necessarily. While War Drums are quite valuable, they come with a major drawback: their restriction on models not being able to charge takes place at the start of the Move phase - not when the hero who declares the Heroic March begins his move. This means that if any friendly model within 12" of the drum (which is a HUGE area) wishes to charge, the drum can't be played at all.


Furthermore, War Drums have keywords for the models that can use them. In the case of Easterling Kataphrakts and Mordor Trolls, the keyword is so general ("Easterling" and "Mordor" respectively) that a pure list will find everyone benefitting. Others (like Orc/Uruk-Hai Drummers) are more restrictive ("Mordor Orc" and "Isengard Uruk-Hai" respectively) and so will only affect part of your army if you have mixed races. Obviously, if you are running an alliance (Easterlings and Mordor, for example), only part of your army will benefit - again, this could be a big problem. Heroic March has the advantage of benefitting all friendly models, regardless of their keywords - and while it comes at the cost of Might, it is quite useful that way.


Monday, November 23, 2020

Heroic Heroes: Top 10 Heroes for Heroic Resolve

 Good morning gamers,

So far in this series on heroes, we've looked at Heroic Accuracy and Heroic Channelling and who are the best heroes (for Good and Evil) to call these heroic actions. Today, we're returning to a very niche heroic action - and the heroic action that is the hardest to deny your opponent the benefits of: Heroic Resolve. This heroic action isn't held by most heroes - and some armies have only a single model with access to it. With the limitations that come with it, is it worth using? Well, that's what we'll discuss below!


What Does the Heroic Action Do?

Heroic Resolve is declared in the Move phase and allows the hero who calls it to grant friendly models within 6" (and the hero himself) to get a free die to resist magical powers during the round. In trade, the hero may not move. In order for this heroic action to take effect, the hero needs to just not die during the Move phase (which would require some kind of impact hit or throwing weapon charge).


For you rules-smiths out there, it is unclear to me whether a model that calls a Heroic Resolve can be moved by an enemy model (either with a Command/Compel or with a special rule like a Fell Light is in Them or the Eldamar Madrigal). We have no FAQ on it, but we do have an FAQ that says the following with regard to Heroic March:


Q: If a model has declared a Heroic March, can they be Compelled/Commanded to charge an enemy model? (p.70 & 97) 

A: No. A model that has declared a Heroic March may not charge that turn, even if moved by another model.


It stands to reason that if Heroic March says a model can't charge and rules that might make that happen are not allowed to make you charge, a model that calls Heroic Resolve would similarly be immune to rules that would make them move. It does seem a bit broken that it would stop things like a Hurl or Barge though, so it probably merits an FAQ submission. For the purposes of this article, I'm assuming that this heroic action grants immunity to spells/special rules that would cause them to move in the Move phase (where the action would be more-or-less voluntary), but not immunity to spells/special rules/brutal power attacks that do an involuntary move (like Hurl, Sorcerous Blast, or Call Winds).


Heroic Resolve is a rare heroic action and has a very niche use: giving you a better chance of resisting enemy magic. If you face armies that have area of effect magical powers (or Sorcerous Blast), this can be a great way to make sure your troops have some kind of resistance to the magical power (though one die to resist a spell that is cast on a 4+ or 5+ isn't a reliable defense). Paired with Resistant to Magic (which would grant you two free dice to resist magical powers), you can provide a real deterrent to enemy casters who are determined to score some quick kills with their magic. While shutting down area of effect spells is great, keeping a hero from being Transfixed (or a warrior from being Compelled towards an enemy hero for a heroic combat) can also be mitigated more by calling a Heroic Resolve.


One final note: last December, I did a post on the best anti-caster models in the game and one of the categories that helped you get on that list was access to Heroic Resolve. If you'd like to see the list of models that have Heroic Resolve (might have had one or two new ones that have been added since then), check it out hereAlight, let's look at some of the nuanced conditions for using this heroic action.


Monday, November 16, 2020

Heroic Heroes: Top 10 Heroes for Heroic Channelling

Good morning gamers,

In our last post, we looked at the heroes who can get the most out of Heroic Accuracy. In today's post, we'll be looking at the Top 5 heroes for using a far more ubiquitous heroic action: Heroic Channeling. Like Heroic Accuracy, I've talked about Heroic Channelling as one of the Top 5 ways to waste a Might point - and this is driven in no small part by how niche the increased effects of a channelled spell might be. Some spells (like Blinding Light) become a TON better when channelled, while others only have marginal benefits (like Immobilize or Chill Soul). Still others often provide D3 of something instead of 1 of something (like Strengthen Will or Banishment), but these spells can end up doing nothing more than the unchannelled version.

Before reading any further, I highly recommend you catch up on our recent series on magic, where I went through all of the magical powers in the game by topic to showcase how you can use each of the spells - and in each post, there's a discussion for when to channel and when to cast normally (spoiler alert: there are some spells that are just not worth channelling. Like ever).

What Does the Heroic Action Do?

Heroic Channelling is declared in the Move phase and allows the hero who calls it to use the "channelled" version of a spell that he/she has in his/her list of magical powers. In order for this heroic action to take effect, a caster needs to:

  • Not be charged before they cast a magical power;
  • Successfully cast the magical power they wish to channel; and
  • If the spell targets an enemy model, the enemy model needs to either not try to resist the magical power OR needs to fail to resist the magical power.

If any of these situations aren't met, then the Might point is wasted and cannot be used. It should be clear that models that have this heroic action need to have magical powers in their profile AND need to have Might points. That said, there are a few models (Thranduil with the Circlet of Kings, Tom Bombadil, Goldberry, and Barrow-Wights) who have access to magical powers, but DON'T have Heroic Channelling in their profiles. For Thranduil, this is because (I presume) his magical powers are once-per-game and come from an item, while the other three lack Heroic Channelling because (again, presumption) they don't have any Might.

Friday, November 13, 2020

TMAT Challenge - Episode 5: Bandobras "Bullroarer" Took


Not every warrior of Middle-Earth is chiseled from stone or as tall as a mountain. Sometimes it is the smallest folk that strike the truest blows for freedom!

Centaur brings the legendary Bandobras "Bullroarer" Took to the monster arena, where Chuckles lies in wait. Can the inventor of golf etch yet another achievement in the annals of history?

It's halfling versus monster in the ultimate test of survival! Join Tiberius, Centaur, and Rythbryt as they pit some of Tolkien's most iconic heroes against the deadliest creatures that Middle-Earth has to offer in an escalating test of heroic mettle.

Now available on YouTube


Wednesday, November 11, 2020

TMAT Talks - Episode 8: Top-10 Snipers (Good & Evil)


Tiberius, Centaur, and Rythbryt take a break from throwing nasty monsters at under-powered heroes to finish their long-delayed discussion of the top-10 "sniper" profiles in the Middle-Earth Strategy Battle Game. Surprise, surprise: they hardly agree, and that's fair. Also, Centaur hates magic.

Now available on Anchor, Apple Podcasts, Google Podcasts, Spotify, and wherever you listen to podcasts!

Music: Happy Haunts by Aaron Kenny

____________________________________________

Intro (0:00)

Good: Honorable mentions (7:45)

Good: They're really trying (16:58)

Good: Centaur hates magic (39:25)

Good: Shoot thrice, can I (?) (49:50)

Evil: Honorable mentions (1:04:42)

Evil: Aren't these guys too low? (1:30:23)

Evil: Do you like your dark lord scrambled or sunny-side? (1:39:46)

Evil: To fly, or not to fly? (1:52:38)

Evil: Divide and devastate (2:06:06)

Monday, November 9, 2020

Heroic Heroes: Top 10 Heroes for Heroic Accuracy

Good morning gamers,

Today begins a new series that will take us through the end of the year and we'll be looking at each of the specialized Heroic Actions available to heroes in the Middle-Earth Strategy Battle Game. For each heroic action, we're going to review a) what the heroic action does, b) when you would actually use it, c) how you can waste the heroic action, and then d) the Top 5 heroes for Good and Top 5 heroes for Evil who can get the most out of the heroic action being viewed.

Our first heroic action is the heroic action I like the least - Heroic Accuracy. I've discussed Heroic Accuracy in the not-so-distant past when discussing my Top 5 ways to waste a Might point and before that I was pretty harsh on it in my review of the specialized heroic actions back in February 2019. Lest you think I will be coming to this discussion from a jaded perspective, know that I do think Heroic Accuracy has its uses (which we'll cover a bit later). I do think this is the most niche specialized heroic action (and the most likely to waste Might, which we'll cover later), but figured we just get it out of the way from the get-go.


What Does the Heroic Action Do?

Heroic Accuracy is a niche heroic action that allows the hero who calls it (or all friendly models within 6" of him if he shouts "Take Aim!") to reroll all failed In The Way rolls. As I mentioned in my post on wasting Might points, this helps you with a very small (albeit sometimes important) part of shooting in MESBG:

  • You roll to hit the target;
  • You roll to see if you hit anything that's in-the-way;
  • You roll to wound.
It's that second bullet that you can reroll - you need to hit before hand AND you still need to wound afterwards. To understand the usefulness of this heroic action, let's looking at what situations would drive you to use it.

Saturday, November 7, 2020

Guest Post: (In)convenient Allies in MESBG: Preconditions for a Competitive Alliance with Sharbie

Good morning gamers,

This weekend we host yet another article from Sharbie - if you haven't read his previous article on the Watcher in the Water, you should. Today, Sharbie explores the idea of including allies in your lists - what do you look for in an allied contingent? What can they provide that merits losing your army bonus (unless you're Historical allies, which most factions aren't)? Can you go too far with an allied contingent and lose the core of your original force? All of these questions will be covered below - take it away, Sharbie!


Thursday, November 5, 2020

Overly Pedantic Stats: Are Hobbit Armies better than LotR Armies?

 Hey Reader!

I'm beginning a new series on this blog centered around "overly pedantic stats," wherein we assign statistical values to different characteristics of a model to determine how strong the innate stat block is compared to other factions. We do not factor in skill level of the player, army composition, formations, or scenario, but instead just look at the raw stats of the warriors and heroes to see how good they are vis-à-vis each other. 

We looked at five different characteristics for every hero and warrior: offensive capabilities, defensive capabilities, utility abilities, movement values, and cost. Each model was ranked on a scale of 1-5 in each category, and then was assigned a final overall value for the model. This overall value will not be used in today's post, as we are instead looking at the overall score by category for each civ, to see how they line up. We can then use these stats to determine the relative strength of the models in each faction in the game.

One use case for using these stats is answering the question of "power creep": are factions that were released later in the game (found in the Armies of The Hobbit book) stronger or better than the earlier factions that were released (found in the Armies of The Lord of the Rings book)? Let's find out.

Wednesday, November 4, 2020

TMAT Challenge - Episode 4: Balrog v. Barrow-Wights

It's man versus monster in the ultimate test of survival! 

Tiberius, Centaur, and Rythbryt take a break from matching up iconic heroes against monsters to answer the ultimate question you never thought to ask: can 350 points of Barrow-Wights beat 350 points of Balrog?


Monday, November 2, 2020

Mastering Magic: Fury

Good morning gamers,

We come to it at last - the final spell in all of MESBG. We've talked about damage spells (Sorcerous Blast, Area-of-Effect damage spells, and precision spells). We've talked about augments (auric bonuses, stat/resource restoration, magical protection, and damage enhancers). We've talked about debuffs (stat/resource reduction, neutralizing with Immobilize et al, and breaking gear). We've talked about spells that scatter enemy models.

Today, we wrap it all up with one of the first spells I ever used and the spell that (in my opinion) has changed the most from the Legions era to the current MESBG gaming system: Fury.

Ah, Fury. As I've stated in many posts, I got started playing the game with the Mines of Moria starter set and one of the first things I learned was that I needed a Moria Goblin Shaman - Goblins just can't charge Gandalf or gang-up on Boromir reliably without one (that, and they seem to run away a lot)!

Back then, Fury didn't require you to have a Will point to keep it alive - you just had to not lose a fight (which, if you were spear-supporting from the second rank OR standing in the third/fourth rank, was pretty easy to pull off). Even if your opponent had a Ringwraith who could cast Sap Will on you and you lost all your Will, the Fury train kept on chugging. While it was active, all models of the same race as the caster passed all Courage tests and got a 6+ save against all wounds.

When the Hobbit SBG system redid the way magic worked, Fury became dependent on having a Will point in your store. Like the previous version of the rules, friendly models of the same race passed all Courage tests and got a 6+ save against all wounds, but you could channel the spell to improve that spell to a 5+ save. Moria didn't have to do this, as they could take Groblog (whose crown made Fury give a 5+ save so long as he was on the board).

In the newest edition, things have changed yet again - let's look at what Fury does, and to help me with this discussion, I've asked the other members of the TMAT team to help me out a few things based on their experiences (and if you haven't heard our podcast on Evil Spellcasters, I highly recommend you check that out for our extended discussion on Fury).


What Does Fury Do?

Fury is an exhaustion spell that is cast on the caster himself and affects all friendly models within 6" of the caster that have certain keywords (specified by the spell). For the most part, these keywords match the race and affiliation of the caster (Mordor Orc Shamans have "Fury (Mordor Orc)" and so won't help your Black Numenoreans - who aren't Orcs - or your Cave Trolls - who are not Mordor models). Affected models automatically pass any Courage tests they need to take. If channelled, affected models may roll a die for each wound they are dealt and ignore a wound they would have suffered for each roll of a 6 they get.

Monday, October 26, 2020

Mastering Magic: Augmenting Damage Spells

Good morning gamers,

We've only got two more posts left in this series - and today we have some really fun spells: BladewrathEnchanted Blades, and Enrage Beast. These three spells are held by only five models - three with Enchanted Blades and two special models who alone have Bladewrath and Enrage Beast. While we've looked at spells that do damage (either as a blast, in an area, or to a single model), restore stats/resources, remove stats/resources, protect friendly models from magic, breaking items, neutralizing enemy combatants, scattering models, and provide auric benefits (either by enhancing nearby models/the caster OR by scattering models), today's spells are the only ones that make you more lethal in combat (though I guess a channelled Shroud of Shadows counts as well).

Fair warning, I only have two of the models in this list, so pictures will be scarce . . .


What Do These Spells Do?

The most common of these spells is Enchanted Blades. When cast normally, the caster picks a friendly model within range (6" for all of them) and if cast successfully, the model is allowed to reroll all failed To Wound rolls it makes. When channelled, the target model also receives a bonus of +1 To Wound (which is cumulative with similar rules, such as the bonus provided by using a two-handed weapon or having the Backstabbers/Hatred special rules).

Bladewrath allows a caster to pick a friendly model within range (6" as well) and that model makes Strikes in the Fight phase at Strength 6. If channelled, this is improved to Strength 10. It's important to note that the model itself doesn't become S6/S10, but rather resolves Strikes at S6/S10 (otherwise, this would be a great counter to the Rend/Hurl Brutal Power Attacks or special rules like Monstrous Charge).

Finally, Enrage Beast picks a friendly Bat, unridden Warg, or Spider model within range (12" this time) and increases the target model's Fight, Attacks, Strength, and Courage values by 2 until the End phase. Because this boosts the model's characteristics, this IS a good counter to the Rend/Hurl BPAs and rules like Monstrous Charge. When channelled, the target's characteristics are increased by 3 (instead of 2). While this is a powerful augment, the friendly model then suffers a S10 hit at the end of the round because of how exhausting being awesome can be (most models will be wounded on 3s - which still means a 33% chance of avoiding any damage at all).

All three of these spells are useful - especially if you are using units that "have problems wounding." Adding someone who has these spells can increase your overall damage, but picking the right model to augment is often the difficulty with these spells (and making sure they stay within range). To help with this, let's understand who has these spells and how best to use them.

Wednesday, October 21, 2020

Introducing: TMAT Challenge

One of the perks of Tolkien fandom is that Middle-Earth offers our imaginations plenty of room to roam. Case-in-point: you're shooting the breeze with your mates one day, and somebody says out of the blue, "Hey, you know that Haldir guy? I'll bet he couldn't beat Shagrat in a fight straight-up." To which your mate says, "Dude, you're full of it." And then you debate (and smack-talk) for an hour about who'd beat who, and how, and have a great time (while your significant other looks on, worriedly). 

We have those conversations all the time. And then it dawned on us: we have a gaming system that let's us test these theories! What are we doing!

And so, TMAT Challenge was born.

List-building and tournament tactics are fine and all, but sometimes you just need to kick back and rediscover the fun of the Middle-Earth Strategy Battle Game. How many monsters can Theodred kill before he dies? Who'd kill more Goblins: Thranduil and Dain, or the Witch-King and the Wild Warg Chieftain? And can 350 points of barrow-wights really kill 350 points of Balrog?

Find the answers to these burning questions you've never thought about (and more) on TMAT Challenge! 

Available exclusively on YouTube

(because if there's no internet video, it didn't happen)


Monday, October 19, 2020

Mastering Magic: Call Winds and Instill Fear

Good morning gamers,

Well, we've been plowing through magical spells for a while now, but we come today to the last spell in the arsenal of MANY evil spell-casters (causing us to wrap up a LOT of models today). While Ringwraiths (and other evil casters) have neutralizing spells in the form of Transfix/Compel, a precision damage spell in Black Dart, and the ability to reduce enemy resources/stats via Sap Will and Drain Courage (the Witch-King also has access to Your Staff is Broken), Ringwaiths have a very iconic spell in the game that can scatter enemy models: Instill Fear.

While Instill Fear is a good scattering spell, we'll be talking about a more precise scatter spell as well: Call Winds (which is only available to Galadhrim and High Elf Stormcallers).

Nazgul: "I'm casting Instill Fear - SCREEEEEEEEECH (or is that Transfix now? oh well, whatever!)!"

What Do These Spells Do?

Instill Fear is an area-of-effect scatter spell that affects all models within 3" of the caster (not because the spell says it's 3", it's just always 3" for all the models that have it). All enemy models within 3" of the caster have to pass a Courage test or make a full move directly away from the caster (or until they run into something/someone) and are afterwards unable to move (basically, they run in fear). If channelled, the models that test for Courage have to roll three dice and use the lowest two dice (which, if you haven't seen the math for it, is pretty brutal for anything that is below Courage 5 - and even C5 models are only 60% likely of passing). Add to this that most models with Instill Fear have some kind of Harbinger of Evil/Ancient Evil special rule attached to them, models really have to be Courage 6 to have a better-than-not chance of passing this channelled spell . . . ouch.

The models test in the order the caster wants, so it's pretty common to test with the models furthest from the caster first, then working your way inward. You can cast this spell a few milimeters from a model (aka within an enemy model's control zone), but after the scattering, you will need to complete the charge against whatever model you entered the control zone of first.

Call Winds is a precise scatter spell, targeting a single model and pushing that model back D6" (2D6" if channelled). The model stops if it hits an obstacle (but not models) and is Knocked Prone. Unlike previous versions of the game, models aren't forced to stay on the ground for the rest of the turn (which is sad). Like Sorcerous Blast, the Strength of your target doesn't dictate whether the model can be knocked Prone - anyone is fair game. This spell is different from Sorcerous Blast in two ways, though: first, this spell doesn't knock any other models Prone if they're in the path of the scattered model. Second, no damage is done to the target (or anyone else the model would pass through - even when channelled). While not a damage spell, it certainly changes the way an enemy model can behave for the round (and usually the next round as well).

Monday, October 12, 2020

Mastering Magic: Debuff Spells

Good morning gamers,

Today we're covering four spells that will knock down your opponent's stats or heroic resources. Like our post on Restoration spells, the value of these spells is based on denying your opponent the ability to use heroic resources effectively (or reduce important stats - like Strength or Courage). Most of the characters we'll be viewing today are spooky and wraith-like, but you get some weird other characters showing up too. Today's post features such nasty spells as Curse (blows away Fate), Sap Will (blows away Will), Wither (reduces Strength), and one of my favorite spells in the game (and an often underrated spell), Drain Courage (reduces Courage).


What Do These Spells Do?

Two of the spells we're covering today (Sap Will and Drain Courage) are present on every single Ringwraith, as well as Sauron, the Necromancer of Dol Guldur and (for Drain Courage, at least) the Mouth of Sauron. Since these are spell-casters available to most of the armies of evil, chances are you'll have one of these spells available to you (if not both).

Drain Courage is a straight-forward spell: if not resisted, the target's Courage value is reduced by 1 (to a minimum of 0). Since most of the models with this spell also have Harbinger of Evil/Ancient Evil, you probably don't need to ACTUALLY reduce your target's Courage to 0, but still. . . . When channelled, this reduction is changed to D3 Courage (which, as I've said in a previous post on magic, means you're not guaranteed to actually get anything from the channel).

Sap Will is similar, but targets your opponent's Will store. When cast normally, the target's Will is reduced by D3 and when channelled, the target's Will is reduced by D6. While this sounds great, most models in the game (unless they're spell-casters or a select few other models) have 1-3 Will points and they'll probably use at least 1 Will point to resist this spell. This means this spell is likely to be cast against models with lots of Will only (which will make you have to decide whether channelling is worth it against your target).

The other two spells are MUCH more niche, belonging to only one model in the range each. Curse is a nasty piece of work, removing 1 Fate when cast normally or ALL Fate when channelled. Most heroes have 1-2 Fate points, so channelling this spell is really only necessary against the select few models that have 3 Fate (especially if they're rerollable). Since this spell is only found on the Necromancer of Dol Guldur (who has Drain Soul to insta-kill any model that is out of Fate AND who can be accompanied by Mirkwood Spiders who can Paralyze people if they don't spend a Fate point to protect themselves), it's quite likely that this spell will prompt a resistance attempt from your opponent.

Wither is only available to the Angmar Orc Shaman and reduces the target's Strength by 1 if cast normally (and reduces the target's Strength by D3 if channelled). A Strength penalty of 1 doesn't seem like much, but when cast against a S4 hero, suddenly D6 troops are MUCH harder for the hero to crack through. In an Angmar list where most of your units are D5, that may not seem like much - but your Cave Trolls, Ringwraiths, and Gulavhar suddenly become much harder to deal with, since your opponent can't rely on a big hero to take them out. When channelled, this could do nothing extra than a normal cast, but it will (again) probably prompt a resist roll (because you do NOT want to lose 2-3 pips of Strength).

Thursday, October 8, 2020

Armies of Middle-Earth SBG: Angmar in the Middle-Earth Strategy Battle Game

Photo Credit: Game Art on Pinterest

Yes, we're back from hibernation with another Armies of Middle-Earth write-up! The Fall semester is usually pretty full for me (because life), so I wouldn't get your hopes up for more of these in the near-future. But I thought I'd make an exception for everyone's favorite faction to play against (just kidding): Angmar.

Those of you who have been following this series probably noticed that we skipped over Angmar when we did our cadre of evil army reviews last year. That was intentional, because my own experience in Angmar was... basically non-existent. And while there's a lot of stuff in Angmar that looks good on-paper, I had a suspicion that to truly appreciate what it can do, you had to experience it. So that's what I did, over the course of this summer, as I got ready for TMAT's THRO tournament (where I took an Angmar army). Now that the tourney is over--and armed with all the things I learned--I finally feel like I can do Angmar justice.

Spoiler alert: this army is crazy good, and I'm hardly the first person to say that. You'll find our standard list of recommended resources in the back, but I'll flag a few that I particularly liked--and used a lot when preparing my own Angmar force for THRO--here at the outset. Taylor over at The Nazgul Times has a great break-down of all the profile choices in the army. My take is slightly different than his on some things (mostly the Dwimmerlaik and Warg Riders), but his insights are fantastic. For a panoply of list-building ideas, check out Mik's Fog of War post on Angmar with Dave Nolan (Dave's instincts are more in-line with mine--WK and barrow-wight spam--while Mik loves the trolls, wargs, and especially Gulavhar that can make Angmar particularly scary). Tiberius posted his own thoughts on balanced Angmar lists last Spring in his Bare Necessities SeriesLastly, if you have painting projects and are looking for something to play in the background, I would highly recommend the Green Dragon Podcast's recap of Ardacon 2019's Masters Tournament (featuring Kylie's Angmar army), supplemented if you like by video coverage of three of her rounds courtesy of STF Wargaming Studio (though I don't know that you'll get much painting done if you have that on in the background). Tiberius, Centaur, and I also talked about Angmar quite a bit in our lengthy recap of the THRO tournament (complete with some battle reports), in the highly unlikely event you want to hear anything more from me. Edit: And, as a special treat, you can now listen to the Green Dragon's full faction break-down of Angmar. Plus a whole bunch of other links to other community resources at the end!

Alright, here we go... 

(although for full thematic effect, you'll have to run this music track in the background)

Wednesday, October 7, 2020

TMAT Talks: Episode 7 - The Hunters Red October (THRO) 2020


It'd been a while since TMAT's last tournament, so Red Jacket was like, "gotta shake off some cobweb legs, dudes." *

If your tournament scene is quiet (or you're looking for batreps involving Barad-Dur, Hunter Orcs, Angmar, all-mounted Rohan, or Easterlings (with Shagrat)), Tiberius, Centaur, and Rythbryt are back to give you some before-action predictions and post-action breakdowns from our recent 700 point tournament. It's a time-travel miracle! **

Now available wherever you find your podcasts (mostly):
--------------

* Okay, fine... generously, that's a very rough paraphrase.

** Patent pending.

Monday, October 5, 2020

Mastering Magic: Shatter and Your Staff is Broken

Good morning gamers,

So we come to it at last - the last post that will involved Gandalf the White (eight posts required to cover all his spells - clearly, he is a beast)! Gandalf does a lot - he can cast Sorcerous Blast if he wants to do damage to one or more models, he can cast Immobilize/Command if he needs to neutralize one particular model, he can cast Terrifying Aura and Blinding Light as augments to himself and those nearby him, he can give Will points to friendly models (including himself) with Strengthen Will, he can protect models with Fortify Spirit, and he can do precision damage against Spirit models with Banishment.

So today, we cover the most niche thing he (and others) can do in MESBG: break a weapon that is wielded by an enemy wizard (which, if paired with Fortify Spirit, gives him a distinct advantage over enemy wizards). The other characters besides Gandalf who have item-breaking power (Moria Blackshield Shamans, the Witch-King of Angmar, and the Necromancer of Dol Guldur) are also very good at fighting wizards or combat heroes (in the case of the Shaman). Let's take a look at these game-altering, hero-negating, niche-ability casters!

For the third week in a row, no pictures - just got back from vacation, don't own all the models, you've seen plenty from Gandalf, yada-yada . . .

No fair - I was totally going to ruin your day with that!

What Do These Spells Do?

These spells are, as has already been mentioned, incredibly niche. Your Staff is Broken is only possessed by three models in the range and at first glance the spell can only be used against three models in the range (five profiles): Gandalf the Grey/White, Radagast the Brown, and Saruman (or Saruman the White). While these five profiles might not seem like much, they show up in nine different army lists (eight Forces of Good, one Forces of Evil) and these casters can be VERY dominant on the table.

All three of these wizards are expensive (Radagast is the cheapest when run without extra gear at 150 points, though he can be up to 200 points with the Sleigh and Sebastian) and their free Will point each turn from their Staffs of Power is very much why they are "good" to include in any army (I've talked about Gandalf the Grey, Gandalf the White, and Saruman at length in a previous series on magic, showing how they provide good benefits to their team that simply cannot be provided by other unit choices). Taking away this free Will point not only limits the wizard's casting potential (as they move from an Unlimited Spellcasters to an Auxiliary Spellcaster), but also makes them far less cost-effective than other unit options (Gandalf the White without his Staff of Power is a vastly inferior choice compared to Boromir or Aragorn).

When channeled, this spell also does a S7 hit to the caster, which is a cheap shot to be sure (wounds most of these profiles on 3s - Gandalf the White would be wounded on 4s). 

It's important to note before we move on to Shatter that Radagast can choose to NOT take his Staff of Power by taking a Great Eagle mount. I don't generally think this is a good idea - while he becomes a great combat mage while mounted, you might want to support your Eagles with the ability to heal wounds (with Renew), Immobilize enemy heroes who want to Strike against your Great Eagle warriors, and knock models down that are trying to swarm your troops (Nature's Wrath) - and with only 6 Will points, you're just not going to get enough out of him to make him worth it, I think. Still, 6 Will can do some of this work and you're getting a Great Eagle for 50 points, so . . .

As I alluded to above, there are sneaky targets you can hit with Your Staff is Broken besides the wizards listed above, since the spell can break a "staff," which means it can disarm models like the Undying or Sharkey as well. The benefits of this will be a lot less dramatic, but will still be present.

Our other spell we're covering today is Shatter, which can destroy any item that is NOT a Staff of Power, the One Ring, or a piece of organic gear (like mounts, creatures, claws, teeth, wings, or tails). Similar to Your Staff is Broken, when channelled, this spell does a S6 hit - not as strong as Your Staff is Broken, but still quite strong.

Monday, September 28, 2020

Mastering Magic: Precision Damage

Good morning gamers,

Today is our seventh post in our series on magic and we turn our attention to spells that do precision damage (that is, damage to a single target). While we've already covered Sorcerous Blast and area-of-effect spells, these spells require a lot of thought to use well - just plucking off a Wound here and there or sniping a random warrior could leave you drained by the end of the game without doing enough for the cost you pay. The spells we'll be covering today are the feared Chill Soul, the deceptively alluring Black Dart, the cool (mostly for Kardush) Flameburst, the very-much-hated Paralyze, and . . .

BANISHMENT!!!! Credit: Quora.com

As I was preparing this post, I didn't see a lot of places that needed pictures, so I've passed on them again. Call me lazy, I guess.

What Do These Spells Do?

Two of these spells do Wounds: Chill Soul does 1 Wound against whoever the target is (need to specify if the mount or rider is the target if the model is a cavalry model), while Banishment does 1 Wound against a target Spirit model. If Chill Soul is channelled, you add 6" of range to the spell, which means you'd only want to do this if you need that range (more on this later). Banishment moves from doing 1 Wound to doing D3 Wounds against your target. This could mean one-turn-killing many Spirit models in the game (even if they pass all their Fate). As has been discussed in previous posts, sometimes that D3 roll will still result in a single Wound - whatever.

Two of these spells do Strength-something hits: Flameburst does a Strength 6 hit (which is a pretty decent hit - any model in the game will be wounded on a single die, most warriors will be wounded on a 3+ or a 4+, heavily-armored troops and most combat-oriented heroes will be wounded on a 5+), while Black Dart deals a Strength 9 hit (which will wound most things on a 3+, really tough things on a 4+, and Sauron on a 5+). While you have to specify the mount or rider for Black DartFlameburst damages both mount and rider.

When channelled, the Black Dart deals D3 hits instead of one hit, which (again) means that sometimes your channel will do absolutely nothing because you will roll a 1 or 2 and end up doing 1 S9 hit. Flameburst, when channelled, adds Set Ablaze to the target (mount and rider), which deals an extra S9 hit and a S5 hit at the end of each turn until the model a) lies down and crawls (aka, chooses to be prone for a turn), b) walks through water (aka, risks drowning or is entering difficult terrain), or c) dies. This can be REALLY useful at forcing an enemy hero to step away from the fighting for a turn or two, but more importantly, this will make whoever you're facing think twice about whether their hero can just press through and kill stuff. 

Finally, Paralyze on its own doesn't do any damage, but functionally, models that are Paralyzed will take damage from whoever charges them. As we discussed in our podcast on evil spell-casters, when you choose to cast Paralyze, you need to make it count - charge that model with strong stuff, beat the model into a bloody pulp, and move on. Paralyze, at the moment, cannot be channeled - it's channelled version is cool, but not game-altering (each turn the model is Paralyzed, they take a S5 hit - this would be really good in some cases, but since most of the targets for Paralyze tend to be big models that you don't want to deal with, you probably aren't wounding on better than a 5+ each time).

Monday, September 21, 2020

Mastering Magic: Magical Protection

Good morning gamers,

Today we start our sixth post in our "masterclass" series on Magic in MESBG. We've looked at Sorcerous Blast, Immobilize (et al), auric spells, restoration spells, and area-of-effect spells. Today we turn our attention to some of the most useful spells a caster can have when facing an army with a spell-caster of its own (or multiple spell-casters - THE HORROR): Fortify SpiritProtection of the Valar, and Shroud of Shadows. While we'll only be looking at five models today (three Forces of Good, two Forces of Evil), several of these heroes (Galadriel, Lady of Light from the White Council, Gandalf the Grey from several lists including the White Council, and Ashrak from Moria) can ally with all but four factions in the game either Conveniently or Historically (woe to Arnor, Numenor, Barad-Dur, and Sharkey's Rogues). This means that understanding what these heroes do - and why they might be slapped into a list - is good for any player to know.

Pre-warning: no pictures in this post, mostly because I only own the two Gandalf models and have photographed them a lot already in this series. Call me lazy.

What Do These Spells Do?


Two of these spells are quite straight-forward: Fortify Spirit gives a friendly model (which could be the caster himself) not one but TWO free dice when you make a Resist test against a magical power - and yes, this stacks with other free dice that might come from Heroic Resolve, Resistant to Magic, or a Staff of Power, and they don't require you to spend a Will point of your own to use them. They're just free. When channelled, the highest Resist die also gets +1 to its result (meaning you can automatically resist any spell that is cast against you on the roll of a 5 or 6 - wow-zahs). This spell is an Exhaustion spell, so once cast, you want to make sure the caster (not the person who is the target of the spell) retains 1 Will in their Will store to keep it up.

Protection of the Valar is also straight-forward in that the friendly model that is targeted by the spell is immune to both magical powers and weird special rules for the round (I'm looking at you Golden King of Abrakhan and Dead Marsh Spectres!). When channelled, this spell affects the target and all friendly models within 3" of the target, which can make A GROUP of heroes immune to any magical barrage. Unlike Fortify Spirit, however, this spell isn't an Exhaustion spell, so you need to cast it every round in order to make it work (the opportunity cost is certainly higher, but not being affected by magic for the round is guaranteed).

Shroud of Shadows is the most nuanced of the spells and also the most powerful. Based on the most recent Designer Commentaries, the friendly model that is targeted by the spell is not only immune to magical powers (except from Ringwraiths, maybe Sauron), but is also invisible (granting all kinds of movement benefits) and is immune to shooting attacks and requires a Courage test to charge the model with a reduction of Courage based on the distance the model is from the target. As clarified in the most recent FAQ, models that fail this Courage test get to move normally and aren't rooted in place. When channelled, any enemy models in base contact with the target halve their Fight Value (rounding up). While definitely useful at keeping models from being targeted by spells, this spell ALSO makes it hard to shoot or charge them - perfect for keeping a very important model safe.

Thursday, September 17, 2020

Quest for the Ringbearer: What I REALLY Want From The Legendary Legions

 Good morning gamers,

Earlier this week, we were given a few hints from the Warhammer Community Team via Jay Clare about what was officially coming in Quest for the Ringbearer. If you haven't read the article yet, you should. As a long-time lover of the Felllowship of the Ring movie (and as a proud owner of the old Fellowship of the Ring Journeybook), Quest for the Ringbearer has been the sourcebook I've been most excited about to date. While I've been guessing for a while about the Legendary Legions that were coming (I had seven in mind, five-and-a-half of which showed up in the book), I figured I'd get my guesses on paper before they're spoiled so I can either say "I called it!" or "But I had this really great idea . . ." Without futher ado, let's get into those Legendary Legions!

Wednesday, September 16, 2020

TMAT Talks, Episode 6: Big Honkin' Things (Evil)


After a long (editing-induced) hiatus, Tiberius, Centaur, and Rythbryt dive into their top-10 "Big Honkin' Things" for the forces of evil, which of course means some time in the sun for everyone's favorite evil war beasts and siege engines (plus a couple surprise entries). After giving their rankings, they top things off with three more ally-able army lists (450 points or less) in the pocket-full-of-power segment! 

Music: Happy Haunts by Aaron Kenny 

Intro (0:00)

Honorable mentions and low-accuracy projectiles (5:06)

Catapults and Towers (47:28)

Mumaks and Death Wagons (1:24:57) 

An unsurprising top-3… mostly (1:52:27) 

Pockets-Full-of-Power (2:28:45) 

----------

You can now listen to TMAT Talks everywhere you listen to podcasts!* If you like what you hear, leave a 5-star rating to help us spread the word!

Apple Podcasts:


Google Podcasts:


Spotify:


Anchor:


RadioPublic:


Breaker:


Overcast:


Pocket Casts:


* (Except YouTube... still working on this episode's YouTube version. Sorry. :-P)