Good morning gamers,
This is our fourth article in this series on how to fight "bad" or "mean" models and today we're tackling Beorn and Grimbeorn, two of the toughest monsters in the game right now. With a new Legendary Legion released in the Defence of the North supplement giving new life to Beorn (and a profile to Grimbeorn - at long last), the bears are a real danger you could see on the tabletop. But how bad are these guys - and what can you do to fight against them? Let's dig in and see what all the hullabaloo is about . . . did you catch the "Baloo" reference there?
What Makes "The Bears" So Hated?
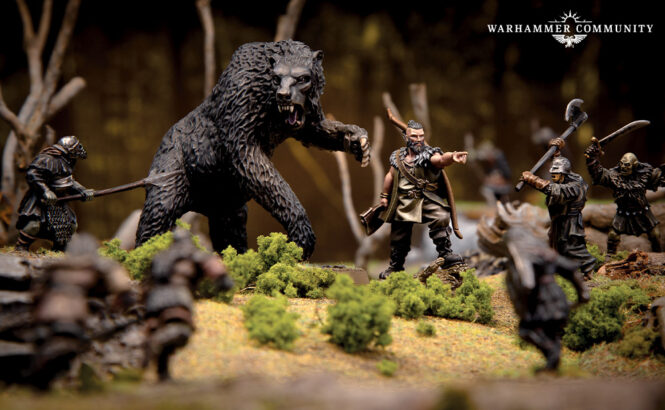 |
| Photo Credit: Warhammer Community |
Since the rules update in 2018, Beorn has had one of the strongest profiles for the Forces of Good (and to be honest, he has one of the toughest profiles in the game period). Despite having incredibly good stats while in bear form (F8/S8/D8 with 3 Attacks/Wounds/Might/Will/Fate and C6 with Fearless), Beorn wasn't nearly as prolific on the tabletop as other Good monsters like Gwaihir or Treebeard. Armies of all-Eagles and all-Ents have been seen throughout the world at tournaments (for the Ents, this was particularly true after the release of War in Rohan), but Beorn only made an appearance here or there.
If I had to guess, this is probably due to two reasons: first and foremost, he's a 200-point hero who couldn't lead troops cheaper than 100 points (Great Eagles) - and most players aren't going to dump 200 points into a hero who can't lead troops unless they've already got a heap of models (and why do that when you could run Gwaihir or Treebeard or just more guys?). Second, Beorn isn't as fast as Gwaihir (8" move isn't bad, but it isn't a 12" Fly), doesn't give you three models towards your army size like Treebeard (for the same cost as Beorn), and doesn't have the alliance options you get with either of these other two monsters. Third, there were the occasional games where Beorn would just not want to change from a man into a bear (getting a 4+ can sometimes be elusive). To be fair, Beorn in man form is no slouch - he's really good - but he's not nearly as resilient as he is in bear form - and he doesn't have Brutal Power Attacks (most particularly Crushing Strength). Yep, there are ample reasons to take someone other than Beorn in your army.
All of this changed, of course, with the release of Defence of the North and the Beornings Legendary Legion. Not only did this allow you to run Beorn with 20-point warriors (who may be too powerful for their lore or points), but it also introduced a SECOND bear you could bring to the fight - and solved some of the other problems you had with Beorn. There were times when Beorn (who begins in man form) would be unable to change into his bear form for several turns - in the Legion, they don't roll for changing (they just do it). There were also times when you could just batter Beorn down with strikes - now he gets a natural 6+ save before he has to use Fate points (this was changed in a recent FAQ). Beorn couldn't double his wounding dice before because he didn't have Monstrous Charge - in the Legion, he has it now. Yeah, that Legion made Beorn viable in ways he had never been before.
But one of the best things about the Beorn-Bear profile is his Strength 8 - yes, his Fight Value of 8 and Defense of 8 are good too, but the sleeper stat is the Strength 8. For starters, besides Beorn and Grimbeorn in their Legion, no other model with Monstrous Charge has an innate Strength stat higher than S8 - Smaug's Unstoppable Momentum rule is the only thing that will knock them over unless the models with Monstrous Charge and S6-7 call a Heroic Strength (which might get them to S9-10, but isn't guaranteed - and requires a 5+ if you're starting from S6). Because most of these models are likely to call a Heroic Strike (or Heroic Defense in the case of Gulavhar) so they can beat the F8 of Beorn, even if Beorn loses a fight, he's not that worried about taking large amounts of damage from monsters that are used to knocking things around.
Strength 8 is also really useful on the flip-side: because Beorn and Grimbeorn both have Monstrous Charge in their Legion, they can knock over just about anything in the game (Ents, Mumaks, Smaug, Gulavhar, Sauron, and The Balrog are the only exceptions - and anyone who calls Heroic Strength and gets to at least S8). Against most of THESE models (not Sauron or the Balrog), Beorn is already beating their Fight Value or tying it, so he COULD call a Heroic Strength if he's okay with a roll-off (though you can't knock over Smaug or a Mumak, so don't bother), but he is probably better off calling a Strike/relying on the higher Fight Value and using Crushing Strength (or resolving strikes normally if Heroic Defense has been called). Doubling dice against basically everything? Yeah, he'll take that.
So this all seems very oppressive, right? Well, sort of - because as powerful as the Bears are, there are a few strategies you can use to beat them up (even in their Legion). Let's look at a few . . .
How Do You Fight Back Against "The Bears"?
Our first stop is, ironically enough, their Might stores. Both Beorn and Grimbeorn "only" have 3 Might points. While this is usually the max you expect from a top-tier hero (some can do better), having 3 Might points on an expensive hero - and probably 6 Might points max across the entire army - isn't that much Might. Both Beorn and Grimbeorn have access to Heroic Strike (which is often a trap for Beorn), Heroic Defense (for when you don't feel good about Heroic Strikes), Heroic Combats (getting you more mileage out of your Monstrous Charge - and evening the model count disparity), and Heroic Moves - and after you try to call any/all of these things, it's not hard to out-Might these guys in their Legion. If you have tricks to help you get Priority (or lots of Might to call Heroic Moves), it's not hard to get the bears to run out of juice - and then you get to choose who or what they'll be fighting.
This brings us to our second strategy: Beorn (and to a lesser extent Grimbeorn) can be baited or drawn out to fight a single model or a few models, which limits their ability to do real damage. Any time you pay 200 points for a model (or 400 points for two models in their Legion), those models HAVE to be killing lots of things. So what happens when you take the "Barrabas approach" and have a single model move just within 8" of Beorn so that when he begins his move, he HAS to charge that model (or have his Beorning allies cut off his path)? Well, Beorn is going to charge that one model. And if that model is alone with no one near him (except for maybe another model about 6" away from them so as to prevent a Heroic Combat from allowing Beorn to go back where he wants to go) . . . well, Beorn isn't going to be killing much for the next turn or two.
Grimbeorn doesn't have the F8 of his dad, but he also doesn't have the Berserk special rule that makes his dad charge into a model if he can. You can still bait Grimbeorn though: moving two models just barely into 8" of him gives him the opportunity to fight or not fight during a round - and so long as your heroes are staying back, you can probably get Grimbeorn to burn a Might point to call a Heroic Combat to get into a few other models. Your heroes can then sail in on the following turn to tear into Grimbeorn (ideally when his dad is nowhere to be seen).
Our third strategy relies on shooting: while shooting Beorn and Grimbeorn is pretty hard for anything that isn't a siege engine, shooting Beornings is laughably easy if they have to come to you. Beorn and Grimbeorn may be all but immune to shooting while in bear form (D8 with a natural 6+ save and 3 Wounds/3 Fate silences a wide array of shooting threats), but their followers have very little to protect themselves. Sure, Beornings have 2 Wounds each, but with D4, basically any shooting is going to wound them well - and getting two wounds on a 5+ or 4+ difficulty isn't hard at all if you've invested in archery.
Finally, like we talked about last time with Gwaihir, both Beorn and Grimbeorn are vulnerable to sustained magical attacks - especially on the first turn. As it turns out, the Skin-Changer rule is an active ability and has to be used at the start of Beorn's or Grimbeorn's move, so if you move first and cast a magical power that prevents them from performing actions or using Active abilities (most commonly via Transfix or Immobilize, but also possible with Paralyze), they can't transform. Even if you throw magical powers at them once they're in bear form, a Transfix or Immobilize that gets a 5-high or 6-high is unlikely to be blocked by the free resist die from the Resistant to Magic special rule - and with only 3 Will points, you could see the Bears not only have to burn through Will points to be able to move or make strikes, but they might also have to spend a few Might points as well. As has already been covered, there's a lot that they need their Might for - they REALLY don't want to have to burn anything on passing Resist tests!
Okay, let's look at some models that are good for countering the bears, given all these thoughts . . .
Tiberius's Top 5 Models To Counter "The Bears"
There's actually a lot of models that could have made this list, but I'm going to be taking some representative models (so if your favorite guy isn't here, fill him in as you want). We begin, as I usually do, with both an honorable mention and a dishonorable mention (because why limit yourself to five profiles?).
Honorable Mention: The Dwimmerlaik on horse (or possibly a Fell Beast)
I've been thinking about this guy a lot recently, but when it comes to the bears, this guy is ANNOYING! I mentioned in our strategies that both their Will points and Might points are limited - and if you want to keep the bears from killing things, you want to hinder their use of Might and Will. Enter the Dwimmerlaik: each Will point he spends when the bears spend a Might or Will point (or Fate point, I guess) could result in the bears having to spend an additional heroic resource in order to do what they want (be that resisting a magical power, calling a Heroic Action, or blocking damage with Fate). With 16 Will points and the opportunity to cast Transfix to boot, this guy is a pretty nasty threat to the bears (though you do need to be within 6" of them, so that can be a risk).
But it gets better: he's also the only Ringwraith that has a two-handed weapon by default (and the only one beside the Witch-King who has access to a two-handed weapon at all), which means that if he's on the charge on a Fell Beast, he can wound the Bears on a 4+, he can start with an equal amount of dice as they do (3A vs 3A), and he can keep them from spending Might to boost their rolls or even prevent wounds from being blocked by Fate. If he's doing this on a turn when he's also Transfixed the bear, losing the fight just costs 1 Will point - he can't be punched back! Sheesh, that's a painful guy to have to fight (though there's a lot of this-has-to-happen-first kinds of things, so he only gets an honorable mention today).
Dishonorable Mention: Floi Stonehand (probably with Balin)
Oh look, it's Floi again! Yep, he's back - but this time, we're going to slot him into the "dishonorable" category because he's the only model without access to Transfix/Immobilize that can actually KEEP a bear from changing into a bear. Remember how we said both Beorn and Grimbeorn have to start off in man form and then change into bear form? Well, if Floi gets to move first (which might happen naturally, but could also require a Heroic Move), he can turn off the Skin-Changer rule for one of these guys for the round.
To break this down a bit further, the Skin-Changer rule (the most potent rule the bears have, since it allows them to become bears in the first place) has to be used "at the start of <Beorn/Grimbeorn>'s Move." Floi can use his Loremaster special rule "at the start of his move." Since both happen when the model's move begins, Floi would be able to keep Beorn or Grimbeorn from using Skin-Changer, locking one for the round in man-form. You could later keep them from changing if you could charge them on the following turn (or if you have Transfix/Immobilize in your list, as we've already mentioned).
But it gets better - because if you're taking Floi in your army, you might also be bringing Balin in your list, which makes you more likely to win priority with the rerolls he gets from the Longbeard special rule. If we've got a better chance than the bears of getting a high roll, if we have more Might than they do to call that Heroic Move near (or with) Floi, and then burn a Will point to make sure one of those bears doesn't transform . . . yeah, that's a D5 hero without a natural 6+ save standing in front of our archers (or hiding behind his D4 warriors - which we're perfectly fine with). And if we can KEEP getting priority/moving first, then one big hero will NEVER be changing forms! Nasty, right? Okay, let's get into the real contenders . . .
Pick #5: Shade + Lots of Orcs (aka "the Barabbas approach")
But the great thing about a Shade list from Angmar is that you probably have LOTS of Orcs or Wargs that you can use to drag Beorn away from where he wants to go. Getting a chain of Wild Wargs 6" away from each other and driving Beorn away from the objectives (while moving the rest of your army in the opposite direction) leaves Beorn with one of two choices: chew through the grunts that are leading him astray or change back into man form (where he's more vulnerable). Not a great trade, overall.
Pick #4: Azog on the White Warg or any version of Aragorn with Anduril
Aragorn with Anduril needs no introduction if you read my post on the Balrog - with the ability to call Heroic Defense every turn to blunt the attacks of the Bears (and the ability to wound them in return if he wins on a 4+ - or a 3+ if he two-hands with the penalty), Aragorn is a hard out for anyone. He can also call a Heroic Strike, but I'd be very hesitant to do that since a) you might not get to their ending Fight Value level if/when they Strike, and b) if you lose, you're very, VERY vulnerable to taking damage. Still, Aragorn is hard for most heroes to deal with, be they man-sized or monstrous (and since he can ally in cheap archers from a variety of lists as allies, you shouldn't have much difficulty dealing with the Beornings either if you have some space to work with).
Azog has a similar damage mechanic, where he wounds all hero models on no worse than a 3+ with the I Am the Master special rule. With the White Warg beneath him, he has 6 Might points at his disposal and with F7 base, he's pretty good at making heroes work to fight him. Azog is usually fielded from the Azog's Legion list (where he picks up Master of Battle - which is great if you're fighting a F7 Grimbeorn, less so if you're fighting a F8 Beorn), but if you've included a cheap Strike hero like Fimbul in your list, you can have Fimbul call a Strike against one bear while Azog is fighting the other. If the bear Fimbul is fighting calls a Strike in reaction, then Azog can use Master of Battle to get a free Heroic Strike out of the deal. Pretty sweet, right (well, for one turn . . . because Fimbul will likely be dead after it . . .)?
But having Master of Battle gets better because if Azog is fighting Grimbeorn - and even more so if Azog is on the charge and is out-dicing Grimbeorn - there might be a temptation for Grimbeorn to call a Heroic Defense to blunt Azog . . . at which point, Azog can copy the Heroic Defense and blunt the bear too. Whichever way it goes, so long as you have high-Fight or Strike-capable models near him, Azog can drain the resources from those bears faster than they can drain him of his resources - and that's nasty.
Azog is sometimes fielded as part of the Pits of Dol Guldur Legendary Legion and if you see him there, he gets free Heroic Combats without access to his heavy armor or his stone flail. In these situations . . . you don't want Azog anywhere near the bears - but he can chow down on Beornings all day long in that list! Other heroes (like Gundabad Orc Captains with shields - or a few Hunter Orcs) can try to tie down the bears while Azog and the Keeper go slamming into the Beornings and while that might not work as well as the Master of Battle variant, it could work.
Pick #3: Grima Wormtongue (with Saruman, naturally) or any 12" range spell-caster
Saruman poses a threat to the bears that's unmatched by most - he can reach out from 18" away to either Immobilize the bears in place, Command them to walk away from the action, or (from 12" away) Sorcerous Blast them to have a chance at doing damage and knocking them Prone to slow them down (and ideally ramming them into a friend or two, depending on the placement of the models). Saruman is a nasty bit of work, but all the more so if he has Grima in tow.
Grima's A Traitor Within special rule allows him to deploy in the warband of one of the bears at the start of the game - and so long as he doesn't make a Strike at anyone, they can't kill him. Oh, sure, a 20-point Beorning can charge Grima, but Grima's not going down - and if both armies deployed on the centerline and get locked in, chances are good that Grima won't be dragged away from where the bears are. While within 6" of the bears, Grima's Wormtongue rule kicks in and makes them have to spend 2 Might for every 1 Might they'd normally spend - which is a more reliable method of limiting Might usage than the Dwimmerlaik! Paired with Saruman, it makes it so that heroic actions will be more costly and resisting magical powers will also be more costly (if you have to boost your roll). So keep Grima near the bears, keep the pressure up with magic, and then chop down the bears with your Uruk-Hai!
While the Might-limiting nature of the Wormtongue special rule is pretty much exclusive to Isengard (and anyone they choose to ally with), any army with a 12" Transfix and a lot of Will to force the use of Might/Will by the bears stands in a good place. If you're using Radagast, the Witch-King, Gandalf, or the Necromancer to lock down one bear with magic, their ability to use Might is pretty limited. Saruman can also ally conveniently with just about every Evil faction from the Armies of the Lord of the Rings and the Necromancer can do something similar for the Armies of the Hobbit Evil factions (and here's a shout-out to Mirkwood Spiders, who can work WITH the Necromancer to Paralyze the bears if they've been the targets of Curse . . . there, I acknowledged their presence . . .). Of course, you could also just go with . . .
Pick #2: The Dark Lord Sauron (and maybe Glorfindel, Lord of the West)
There aren't that many models that want to fight toe-to-paw against the bears - but Sauron is one of them. For starters, Sauron starts at F9, which will require the Bears to call a Heroic Strike if they want to have the higher Fight Value. They'll also need to charge him in order to get an equal number of Attacks, since Sauron starts with 4 Attacks - and if he retains the higher Fight Value with Transfix and a higher number of Attacks, the bears are in for it. If Beorn/Grimbeorn call a Strike, Sauron doesn't NEED to call a Strike in return - he could save his Might to boost a roll or just keep it so he has more Might than the bear later in the game. Since he won't be Knocked Prone by Monstrous Charge and he'll be wounded on 5s normally and 4s with Crushing Strength, which isn't that reliable but certainly could happen.
If the bears choose not to call a Heroic Strike but instead choose to call a Heroic Defense, Sauron always has the option to Barge them in order to get to Beornings that are nearby. So long as Sauron can survive until the bears runs out of Might, Sauron can have the higher Fight Value with more attacks than a single bear and will be wounding on 4s . . . yeah, that's not bad at all.
But as hard-hitting as Sauron is on offense (and as hard to kill as he is), the real advantage he has is that starting from 18" away (like Saruman can), he can start throwing Chill Souls at the bears, which can chip away at their Will stores or their Fate stores (and potentially their Might stores). Sure, the bears might rely on that natural 6s save to shrug off the damage from a spell or two, but it's unreliable - and if they have to burn resources (especially Might) before they get close, they're in trouble. Sauron can change the game from Chill Soul to Transfix at any time (rooting the bears in place - or keeping them from changing on the first turn of the game) and this can not only keep them from calling Heroic Strikes to beat him in combat, but it can also keep them from calling Heroic Defenses . . . yeah, it's unfair but it's partly why Sauron is so good in the magical arena.
If you're playing with the Forces of Good, there isn't a good caster who can go toe-to-toe with the bears in combat - but Glorfindel is a pretty good option if you're looking for a not-caster. He can't stop the bears from bowling him over if they charge him, but with an immunity to the Crushing Strength BPA while wearing the Armor of Gondolin (and other BPAs), having an Elven-made weapon at about their same Fight Value and being able to two-hand to increase his damage (he does so with a penalty, so best get him some friends in the fight as well - and maybe some rerolls from Cirdan), he stands a better chance than most of surviving a spat with the bears and doing damage in return should he win. I would say that Gil-Galad would be a better option, but that single Fate point and vulnerability to either Crushing Strength or Monstrous Charge just doesn't make me feel confident. Glorfindel isn't Sauron (heck, he isn't even Aragorn-with-Anduril), but he's pretty good (and can ally with anyone), especially if he has an old Hobbit friend with him. Speaking of which . . .
Pick #1: The Goblin King with Gollum (or any list that spams models and has access to the Ring and at least one big hero)
Azog and Aragorn can both wound the Bears really well, but they do run the risk of taking damage from the bears too (especially Azog). Glorfindel and Sauron are really good at fighting the bears, but they too could find themselves overwhelmed. So who could do good damage to the bears while not being afraid of their retaliatory damage besides Sauron? How about the Goblin King! If he has a Ringbearer friend in tow, you don't have to worry about getting the higher Fight Value so long as there's room for Gollum in the fight with the Goblin King. At that point, the innate F6 of the Goblin King with the ability to Piercing Strike and Burly-two-hand from S5 allows him to wound on 4s - potentially doubled if you can use Gollum and/or someone else to trap the bear! If they call a Defense, you Barge and walk into some Beornings nearby - easy!
But it gets even better - the Goblin King can chuck Goblins at the bears while they're on the approach (up to 12" away) and if they're hit (5+ if you stood still, 6+ if you moved), the bear will take a S8 hit (wounded on 4s) and will be Knocked Prone (cutting its movement in half on the following turn)! That ought to slow him down and might even chip off a wound or some Fate points!
What's more, a list like Goblin-town (whether taken as an ally or run on its own) is likely to have an overwhelming number of models in it, which will make the job of the Beornings much, MUCH harder to clear out space for the bears and manage their match-ups. If one bear is fighting for his life against the Goblin-King and Gollum, the Beornings might have a good 4+ models in each of their fights and could struggle to win fights (though their banner bonus from the Legion will help). If you're playing a control-based mission, though, good luck beating these guys with your small, elite army and your really expensive heroes . . .
But this idea of having a big-hero or a combo of heroes can be replicated by other lists as well - many Hobbit-era lists can ally with Bilbo (in one of two forms - probably requiring Gandalf or Thorin to come with him), Frodo can be allied with almost everyone from the Lord of the Rings era (you might need to bring Aragorn, Boromir, or Legolas with him), and if you like the Last Alliance, you can rely on Isildur to tank a bear so long as he has the Ring on. Glorfindel was mentioned in the last set and can bring Old Bilbo with him in a Rivendell list, which can make him oh-so-effective at facing down against a bear. After that, you just need a swarm of guys to overrun the Beornings (and possibly shoot them down) - not that hard.
Sample Lists
Our first list is yet-another-Floi-Stonehand list, this time going with an Impossible Alliance of Dwarves with Dwarves. Floi is once again being fielded by a Dwarf King, but we're allying in Balin the Dwarf from Thorin's Company along with Bombur the Dwarf - one for helping us get those priority rerolls, the other for restoring Will points on Floi or Balin so we can shut down special rules throughout the game. At 700 points, we've gone for bare-basic core warriors in the form of Dwarf Warriors and Dwarf Rangers, but honestly, I'm not worried:
- Dwarf King with two-handed axe and throwing axes [ARMY LEADER]
- 7 Dwarf Warriors with shields
- 4 Dwarf Rangers with throwing axes
- 4 Dwarf Rangers with bows
- Floi Stonehand
- 6 Dwarf Warriors with shields
- 3 Dwarf Warriors with Dwarf bows
- 2 Dwarf Rangers with bows
- King's Champion
- 2 Heralds
- 6 Dwarf Warriors with shields
- 3 Dwarf Warriors with Dwarf bows
- IMPOSSIBLE ALLY - Thorin's Company: Balin the Dwarf
- Bombur the Dwarf
700 points, 42 models, 6 Dwarf bows hitting on a 4+ AND 6 bows hitting on a 3+ AND 1 throwing axe hitting on a 4+ AND 4 throwing axes hitting on a 3+, 30 D6+ models, no fast models but 2 Might for Heroic March, 8 Might
Not as big as the last list we saw, but we don't have access to Hobbit Archers in this list, now do we? It's possible that swapping the Dwarf King and Balin the Dwarf for Balin the Dwarf, King of Moria would be better (and getting 60pts of stuff - say 2 Vault Warden Teams and another Dwarf Warrior with bow), but the impact of the Impossible Alliance is unlikely to hurt us much - neither Balin nor Bombur want to be anywhere near the action, but they can stay near Floi to a) make sure Floi gets Will back, and b) make sure Balin gets Will back when he tries to make those priority rerolls. Of course, for Balin to get Will back, you need Floi to not be burning Will, so that's unlikely to happen until the King's Champion and the Dwarf King have finished their bloody work. The list relies entirely on "core" warrior units (Dwarf Warriors and Dwarf Rangers - both available in big plastic blisters), but gives you quite a bit of firepower and a MASSIVE army.
Our second list features Isildur and a "Last Alliance" army - I've opted for Isildur, Cirdan, and a High Elf Captain with everything, since this gives the infantry-heavy list the much-needed March, one good killing hero, and an auric hero to protect us from Beornings (and makes sure we can always charge bears if we want to). If you prefer Elendil to Isildur and wish to take him instead (fantastic against the Beornings, decent against the bears), you'll probably want to drop Cirdan (and possibly swap the High Elf Captain for a different Elf hero) and lean harder into Numenoreans:
- Isildur on horse with shield and the One Ring [ARMY LEADER]
- 6 Warriors of Numenor with shields
- 1 Warrior of Numenor with shield and weapon-swapped flail
- 3 Warriors of Numenor with shields and spears
- 5 Warriors of Numenor with spears and bows
- HISTORICAL ALLY - Rivendell: High Elf Captain on horse with shield, Elf bow, and lance
- 5 High Elf Warriors with shields
- 4 High Elf Warriors with shields and spears
- 1 High Elf Warrior with shield, spear, and banner
- 2 Rivendell Knights with shields
- HISTORICAL ALLY - Rivendell: Cirdan
- 1 High Elf Warrior with shield
- 1 High Elf Warrior with shield and spear
- 2 High Elf Warriors with Elf bows
- 2 High Elf Warriors with Elf bows and spears
700 points, 36 models, 5 bows hitting on a 4+ AND 6 Elf bows hitting on a 3+, 16 D6+ models, 4 cavalry and 2 Might for Heroic March, 6 Might
Our last list is an evil list featuring the big man himself, Sauron. Knowing that a Beorning LL list at 700 points will have 15 Beornings and 2 bears, I've opted for double the numbers by running gobs of Orcs to use as bait for whatever bear we aren't cutting down with magic. In order to help us beat up on the bears more, I've chosen to use my favorite supporting hero for Sauron (a Ringwraith on horse) so we have two magical attacks that can weaken/stall the bears:
- The Dark Lord Sauron [ARMY LEADER]
- 5 Orc Warriors with shields
- 4 Orc Warriors with shields and spears
- 1 Orc Warrior with shield, spear, and banner
- 9 Orc Trackers
- Ringwraith on horse with 2M/9W/1F
- 5 Orc Warriors with shields
- 5 Orc Warriors with shields and spears
- 2 Orc Trackers
700 points, 33 models, 11 Orc bows hitting on a 4+ AND 1 Chill Soul hitting on a 4+, 2 D6+ models, 1 cavalry and 2 Might for Heroic March, 5 Might
Conclusion
The bears are in right now, but they're certainly beatable - and they use similar strategies as many of the other monsters we've looked at so far in this series. Next time, we leave the "monster models" alone and will tackle one of the most dominant lists in the meta right now: the Assault Upon Helm's Deep Legendary Legion. This could be viewed as a way to combat the Isengard Assault Ballista, but we'll also be looking at how to tackle the list when there's a bomb floating around and a big gang of crossbows guarding both the ballistas and bomb. It's a hard nut to crack, but we'll break it down next week. Until then, happy hobbying!
Great article as ever, although I think it's missing the one true counter to the Bears: the Watcher! Paired with a Bat Swarm and a lot of Goblins for the trap and I think its 'yank and shank' move is the most reliable way to kill a bear in the game. And it's pretty devastating to the Beornings after their leaders are gone as well. Other lists can beat the Beornings by just hammering the warriors and ignoring the Bears, but the Watcher build can kill whatever it wants from that list
ReplyDeleteThat's a good shout - I felt like there was a big monster I was missing. Yanking into both the bat swarm and the Watcher bypasses the low Courage problem and so long as you keep the other Bear from pulling the bats out, I think it's a definite option!
DeleteThis is an excellent breakdown—super thorough but still really readable. I especially liked how you didn’t just explain why Beorn and Grimbeorn are strong, but actually focused on practical counterplay with clear examples and list ideas. The emphasis on resource management (Might/Will) and positioning tricks like baiting was particularly insightful. Also, the Top 5 section was a great touch—it really helps translate theory into actionable strategies. Definitely one of the most useful anti-“bear meta” guides I’ve read!
ReplyDelete