Good morning gamers,
Today we're beginning the first in a series of posts on taking your Fall of the Necromancer models into Matched Play. If you didn't catch the drift from our review of the models we need to play all of the scenarios from Fall of the Necromancer, we don't have a lot to work with. All of the Halls of Thranduil models available to us are available in the Rangers of Mirkwood LL, so we'll be looking at that today. These models include:
- Legolas Greenleaf, Prince of Mirkwood
- Tauriel with Elf bow
- 2 Mirkwood Ranger Captains
- 20 Mirkwood Rangers
Did you notice anything that was missing (besides all the armored stuff)? A lot of players like to add in a few Wood Elf Sentinels into their Lothlorien or Halls of Thranduil lists to provide some shenanigan options to their forces - and these are really good inclusions. Did we get any in the scenarios? No.
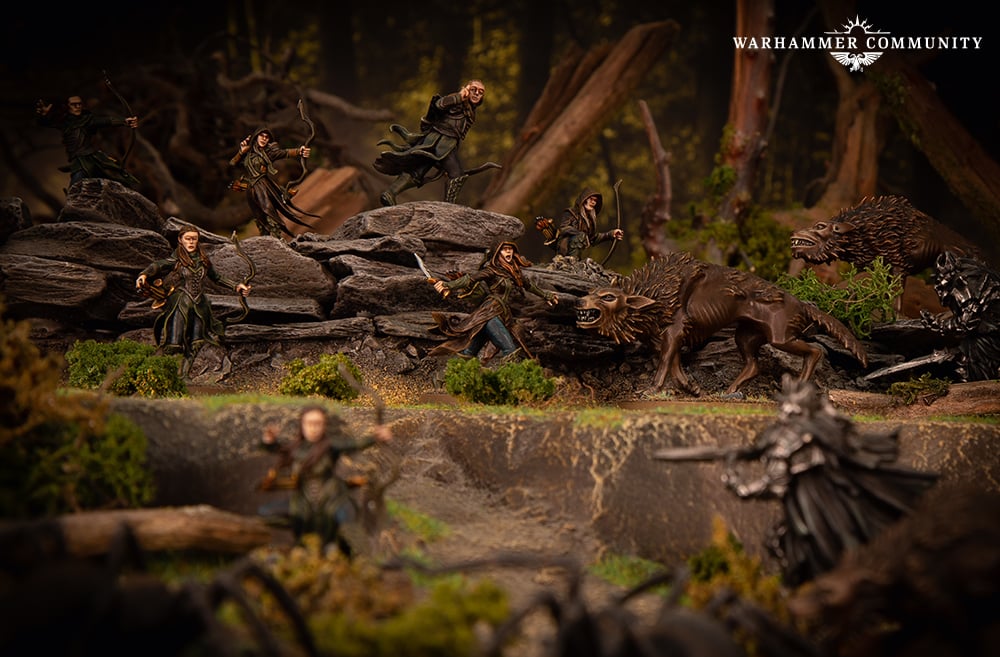 |
| Photo Credit: Warhammer Community |
Sentinels also give an underrated bonus to the army: variability in points usage. At almost any points level, you're likely to have both Legolas and Tauriel in your list - Tauriel is one of the cheapest F6/3A heroes in the game and can reliably have at least 4 Attacks on a turn when she's able to charge two enemy models. With 3-Might-and-Strike on both her and Legolas (who picks up the Knife Fighter rule in the Legion - which I would totally pay extra for to get on every version of him), you can at least challenge most big things in the game AND fight against spam lists.
But once you get these two heroes . . . what do you do next? With only 14-point Mirkwood Rangers and 75-point Captains available to you, not coughing up points that "you just can't use" is quite hard without using weapon swaps. Having something that is 25pts doesn't SEEM like that much of a help, but spending 25pts when you would have spent 28pts can save you a little more, which allows you to turn those odd extra points into an Elven Cloak for Legolas or another guy.
With a max points value of 620pts (650 with 22 weapon swaps), I've decided on showcasing a 500-point list (in line with what we did for the Scouring of the Shire series - small books get small points levels) - here it is!
Given the models we have to work with, the following list seemed to maximize our points efficiency, our Might levels, and our model count the best - though I really wish Legolas had an Elven cloak:
- Legolas Greenleaf, Prince of Mirkwood [AL]
- 5 Mirkwood Rangers
- 2 Mirkwood Rangers with weapon-swapped axes
- Tauriel with Elf bow
- 5 Mirkwood Rangers
- Mirkwood Ranger Captain
- 5 Mirkwood Rangers
500 points, 20 models, 20* Elf bows hitting on a 3+, no D6+ models, no fast units or Heroic March, 8 Might points
All told, 20 models isn't a lot at 500pts, but 20 shots a turn from Elves (22 shots if Legolas shoots three times instead of once) is pretty crazy. Let's see what we can do with this army.
Army Theory
Like the Rangers of Ithilien LL, this Legion has one primary game: it wants to shoot people. Like, all day if it can. At 500pts, if you expect your opponent to field 25-30 models, you can expect 22 Elf bows hitting on 4s (more on that in a minute) and wounding on 5s or 6s to kill ~2-4 models a turn - especially if you choose to boost wounding rolls from your heroes with Might. Even if you only get 1-2 turns of shooting off, there's a good chance that your opponent will be halfway to breaking before you engage - and will be at roughly your model count (if not lower). While a 1:1 fight between your Elves and basically anything isn't ideal, your high Fight Value (and the ability to shield if you want to) gives you the ability to win fights even when you should lose.
If you have some space between you and the enemy, I'd highly recommend using the skirmish triangles formation I wrote about last year: this gives a group of 3 archers 360 degree vision and makes it impossible for your opponent to block your shots (unless he gets some of your other skirmish triangles in the way). Since you don't have spears in this army, forming ranks can make your formation rigid, predictable, and could also limit the number of models that can engage once your opponent begins to close with you. By having flexible 3-man blocks, you can begin to separate once your opponent gets close and force him to spread out his own forces in pursuit - and if you get charged, you have the option of shielding if you were charged by 1 model or using Knife Fighters if you were charged by 2+ models. Hopefully you get some kills with your bows before then though!
I've chatted a lot with Red Jacket about this Legion and have another key insight: since this list is all infantry and doesn't have any Heroic March heroes (I know, Mirkwood Ranger Captains have Accuracy and not March, don't get me started), you need to be focused on moving towards objectives in scenarios where that matters. If you don't have to move very far, advancing 3" a turn for several turns and then letting out a burst of speed (or using Heroic Combats to slingshot you towards objectives) is going to be key for winning a lot of games. We'll look at this more in the gameplay strategy section for where it applies.
But even if the scenario doesn't require you to get anywhere, moving and shooting can help you a lot - standing and shooting will increase your likelihood of hitting an enemy (and if you can afford to stand and shoot, that's good). But 22 shots hitting on a 3+ gives you an estimated 14.67 hits/turn vs. an estimated 11 hits/turn if you move and shoot - and if by moving and shooting you buy yourself 1 extra turn of shooting, it will make up for FOUR turns of standing and shooting. For those of you who were curious, those 14.67 hits will translate into 4.89 expected wounds/turn against D4-5 models, while the 11 hits/turn is supposed to generate 3.67 wounds/turn: with only ~1 kill/turn more against D4-5 models, getting in an extra round of shooting while moving will make up for THREE rounds of standing and shooting. Against a slow foe, standing and shooting might be fine - but against a foe that's Marching (or a thundering cavalry charge), it might be better to move and shoot.
One other thing we need to talk about is what to do if you run into another shooting list. Yes, this list packs in the archery - but as you can see above, you're only supposed to kill 2-4 models/turn if you're moving around (assuming you're shooting at D4-7 troops, which is most models in the game) and if your opponent is starting with a 5-10 model advantage over you, he can probably absorb your archery while dealing catastrophic damage in return (what with your warriors being D3 and all). Because everyone in the list has an Elven Cloak (except Legolas - who happens to be your ARMY LEADER), the Stalk Unseen rule might make your models (except Legolas!) invalid targets for enemy archers - at least until they get close. If you come up against an enemy shooting list, you need to take advantage of terrain (especially horizontal terrain). This is partly why moving and shooting can be helpful - slightly adjusting what side of the tree or pillar you're behind can give you that oh-so-important blocking terrain to trigger Stalk Unseen, while only slightly affecting your overall damage output.
While this advice is good for any faction that pairs shooting with Stalk Unseen (most notably Wood-Elf-heavy Lothlorien lists and Wildmen of Druadan lists), woodland terrain is particularly useful for this Legion, as being within 1" of a tree or being within a piece of woodland terrain gives you a 6+ save against wounds. Yes, this won't trigger very often, but with your models costing as much as they do (and being as fragile as they are), you should take what you can get! Put into context, if your opponent needs a 5+ To Wound (S2 archery), needs to pass a 4+ in-the-way for a tree, and you have that 6+ save, he needs 14 shots/turn to get 1 Wound/turn with a 4+ shoot value (most models standing still) and 21 shots/turn to get ~1 Wound/turn with a 5+ shoot value (most models moving). At 700+ points, getting 14 shots a turn is pretty hard - and at 500pts, getting 14 shots/turn is nigh impossible (unless you get 50%+ bow limit like the Serpent Horde or Azog's Hunters - which puts you into the shooting-heavy category we talked about above).
One final thought: while you have a pair of really good heroes in this list who are decently good at challenging big things, don't engage big things with your named heroes. Tauriel's Blade Mistress rule rewards her for fighting lots of stuff (which includes letting her get trapped), while the Knife Fighters rule (on everyone else) provides a similar, though more moderated, incentive. Since you're all infantry, shooting horses out from under big heroes (with Legolas's Deadly Shot one-arrow ability) and shooting up flying monsters is your best way of making your opponent's heroes fight on your level: as infantry with restricted movement. Shooting is your game - so shoot tactically with your heroes (where your Might can be used to boost almost-Wounds into actual Wounds) and have your warriors focus on breaking the enemy. Once the enemy gets close enough to engage, forget about Heroic Strike (except as a defensive measure) and focus on Heroic Combats for extra movement if it's needed or chomping through troops to break the enemy/get better match-ups for your Elves. And get traps!
Okay, with all that out of the way, let's look at how to approach the different scenarios!
Gameplay Strategy
Maelstrom & Object Missions (Pools 1 & 3)
Maelstrom missions are only a problem for lists that want to be together and have to spend Might to do that. This Legion gives us the ability to modify our rolls by +1 or -1, which means we can either choose to not show up (on a 1-2) or pick our deployment point (on a 3+ - with full control over our board edge 4+). As such, it doesn't really matter who we pick to arrive first, but I'd end with Legolas just so we know if the other warbands haven't arrived. All three of the Maelstrom missions can favor shooting lists, so long as they keep moving (which you should be doing in all three of these missions).
In Hold Ground, we don't really care where we deploy - just so long as we have good firing lanes to places the enemy deployed OR are likely to deploy. We can count on our opponent trying to use terrain to his advantage if he deploys second, so deploying near terrain (ideally woodland terrain) is good for us, since it could give us cover in the coming turns AND will likely deprive that same cover from our opponent. If he deploys first, deploy 2-3 of your warbands near a single enemy warband to shoot it early in the game, severely limiting the models that will make it to the middle from that warband (or wiping it off the board entirely). Your goal is to get as many of your Elves into the center as possible though - with lots of shooting at your command, you can hopefully limit how many enemy models get into the center.
Since traveling 18" or more to the center will take a minimum of 6 turns of moving/shooting, you'll probably want to spend at least one turn doing a full move towards the center - this is best timed when your opponent is closing in on one of your warbands and you don't think you've softened up his warband enough to engage. If possible, you don't want all three warbands to move full each turn - always have some kind of shooting you can throw at the enemy.
Command the Battlefield is much, MUCH easier. Ideally, all three warbands will deploy in different quadrants and you play a great game of keep-away with your opponent. If Legolas is gunning for anyone left in the fourth quadrant (passing in-the-ways as needed) and the rest of your models are concentrating fire on 1-2 warbands (ideally everything targeting the same warband), you should be able to weaken the enemy's numbers in the quadrants you control and win the game by breaking the enemy and having double the models in three quadrants. You have lots of room in the quadrants to maneuver - so maneuver, don't get caught until you have numerical advantages, and use that Might to boost rolls!
Heirlooms of Ages Past is the tricky one - but it always is. If possible, you again want your warbands to arrive in three different places, giving yourself firing lanes to wherever the Heirloom might arrive - moving 3" onto the board should make your opponent steer clear of your initial drop points OR he'll focus on arriving near one of your warbands, which should shoot on the first turn and then run/shield after that while the rest of your army navigates to the Heirloom tokens and shoots the enemy that is trying to trap/kill your warband. If you can get the Heirloom, find a piece of terrain that can shield you from view so you don't get shot and you're good to go - throw your Warriors away while as many heroes as possible surround the model that has the Heirloom for protection.
When we move into the object missions, our strategy changes somewhat: in Seize the Prize, I usually recommend having a gunline that looks at the Prize - and we kind of what to do that here. We want to be very careful, though, of how exposed our shooting models are - and we know we'll only be advancing 3" each turn towards the middle (so we can reasonably assume we'll arrive second). Our goal, then, is to get as many firing angles at the center as we can get, which will cause our troops to fan out and be prepared for whoever is racing the Prize away (should the enemy get a model to pick it up). While we might not be able to keep the enemy from getting it first, we CAN keep him from getting it onto our side of the board - and if we can do that, breaking him without being broken and wounding/killing the enemy army leader will cause us to win the game. As our heroes get close, they can use Heroic Combats to not only help us break the enemy, but rush our troops deeper into the enemy ranks - and hopefully we can pick up the Prize on our opponent's side of the board.
Destroy the Supplies is going to be much simpler: we have three skirmish triangles (9 models total) defending our supply markers, while the rest of our army (11 models) moves to skirmish with the enemy. While actually GETTING to the enemy supply markers is likely going to require Tauriel to work some magic, we can also rely on our opponent getting broken with our archery if we keep our firing lanes clear. Since we don't have a good reason to race ahead, we can move our shooting models to engage in the mid-field, focus on breaking the enemy while slowly moving up the board, and racing around only when we have a good chance of getting clear of the enemy. If Legolas can snipe a model or two defending a supply token, Tauriel can reliably Heroic Combat off of one enemy model to get to it and remove it. If we break the enemy and clear at least one token without losing any of our own, we stand a good chance of winning narrowly.
Retrieval is basically the same deal - except we aren't going to race for the enemy flag. We know the enemy will rush for our flag and we really can't stop him - unless we kill a lot of guys. If we can break him while returning our flag to its starting position, we can actually back away from our flag and spread out, preventing it from being moved very far and shooting the enemy to bits. If we can drift some models towards the enemy flag and then race for 1-2 turns at full speed towards it, we might even be able to dislodge the enemy flag - which means breaking the enemy without being broken will win us the game). This scenario (like Destroy the Supplies) is going to be hard with our low model count, but hopefully our shooting and skirmishing will help with that.
Control Missions (Pools 2 & 5)
You know this is coming: we hate these missions. Low model count, center-line deployment for the enemy, and the potential to cede 3-4 objectives to the enemy from the get-go is not a recipe for success. So what do we do? Well, three warbands is pretty high for 500pts - so we deploy Legolas to a position of safety in the rear (to protect Army Leader 1-2 VPs and to keep the bulk of our troops out of charge range initially), we deploy the Captain's warband near him (for concentrated fire and keeping our models from getting trapped), and then we deploy Tauriel's warband where we can support her near the center line to get her and her Rangers locked into combat quickly and contest an objective.
Without Tauriel's warband, we have 16 shots/turn (3 from Legolas, 1 from the Captain, 12 from the warriros), which should translate into ~8 hits/turn if we're moving towards the 3-4 other objectives and 1-3 wounds/turn for the 1-2 turns we're likely to keep this up. A few kills here and there . . . won't change anything. A few kills near Tauriel's warband, however, could make a HUGE difference. As we approach the enemy, we fan out to force them to spread out, though Legolas should approach cautiously - we want him using his Deadly Shot to either rapid-fire shoot at objectives with more than one model on them OR clear an objective that has a single model holding it. A few quick kills could force our opponent to leave objectives unclaimed, which is good for us.
Or should I say, that's good for us in Breakthrough and Domination. Capture and Control doesn't vary greatly from the other two EXCEPT in this one respect: the ability for our opponent to tag an objective and leave it means our models HAVE to move around the board to tag objectives our opponent has already claimed. And that's bad. With this in mind, Tauriel needs to be using Heroic Combats (and maybe our other heroes as well) to get the movement needed to contest objectives and clear models out that Legolas can't kill (or claim objectives Legolas has already cleared for us). It'll be hard, but we knew that already.
In the get-somewhere missions our job gets easier, but still not easy. In Reconnoitre and Storm the Camp, we don't HAVE to get across the board - and since we have no fast units (and no way to be fast), why bother. With 22 shots/turn, we can reliably keep our opponent from getting anyone off if we keep our firing lanes clear and shoot anyone trying to break away (especially if we can get Tauriel locked into combat near anyone making a break for it and she get a Heroic Combat off). Breaking the enemy without being broken and keeping Legolas alive (and ideally unwounded) will win us the game if we can keep anyone from getting off the board edge or claiming our camp (and we can still win if 1 enemy model gets off the board/our camp is claimed so long as we break the enemy without being broken and can kill the enemy army leader - we're less likely to see army leaders we can't kill at 500pts than we are at higher points levels, but let's not count on this, shall we?).
In both of these scenarios, we're counting on getting 5-6 VPs and keeping our opponent to 0-1 VPs - not great for our tournament score, but a win will still feel good. In Divide and Conquer, we actually have a better chance at scoring a lot of VPs, though with a much greater risk of losing the scenario in a big way. We can slowly advance towards the center objectives and shoot the enemy as he advances, eventually relying on Heroic Combats to get our models closer to the center of the board and take control of objectives from whatever models remain. It's tricky, though, since this is a scenario where the game might suddenly end once our opponent breaks - so we want our opponent to break when we have double the number of models around both secondary objectives OR the enemy doesn't have double our models in the middle (tricky, right?). With 9 of the 12 possible VPs being wrapped up in three objectives (1-2 for each secondary objective and 3-5 for the primary objective), we can't rely on just breaking the enemy without being broken to win (breaking the enemy is only worth 1 VP and no additional VPs are up for grabs for being unbroken ourselves).
Killing Missions (Pools 4 & 6)
These are your bread and butter missions - if you can keep your army alive. In Lords of Battle and To The Death, we want to stand behind cover and shoot the enemy to pieces - it doesn't get any easier than that. Contest of Champions is a bit harder, though having F5-6 models in your army means most army leaders will need to call Heroic Strikes to beat your units instead of Heroic Combats (unless they're working with another hero). Legolas is a pretty competent leader with Knife Fighters, but frankly if you can break the enemy before the enemy army leader can get a lot of kills, you should be okay. It might be worth using Tauriel or a shielding-Captain to speed-bump whoever you're fighting, but I'm more inclined to think that a shielding Mirkwood Ranger might do a better job.
The one thing I'll recommend for this scenario, however, is a deployment strategy: since the enemy army leader wants to rack up kills, spread your models out - make it so he can't kill more than 1 model/combat and has to burn Might to call Heroic Combats to get more than one kill each turn. Any self-respecting shieldwall army is going to pack their models in close, which is exactly what the likes of Tauriel and Legolas want. Managing Legolas's combats will be key, but if Tauriel starts in front of him (with a path for him to charge out since you spread out your units), I think he'll be okay.
In the hero-killing scenarios, things are still good: in Fog of War, you can protect your Captain and keep him on the periphery of the board, shooting merrily (maybe even calling a Heroic Move or two to get his warband up the field towards a terrain objective - woodland terrain, if possible). Pick a hero to kill that Legolas can snipe (if possible) and don't engage - run away, don't stay, don't play the way your opponent wants to play (I can be poetic when I want to be - see?). :-) Similarly, in Assassination, our goal is to just stay away and break the enemy with Legolas sniping our target hero (and Tauriel doing the last wound at range or in melee if possible - Legolas would be a great assassin, but alas, he has to be our army leader in this Legion).
I'm not sure that I need to go into that much detail for Clash by Moonlight - we shoot things, our opponent will have a hard time matching our damage output from a distance, and we want to break our opponent without being broken (and ideally kill 1-2 heroes while only losing 0-1 of our own - but with Legolas being our only non-Stalk-Unseen model, we could be in for some trouble). I will reiterate what I said earlier about tackling shooting armies: we need in-the-ways to protect our guys from being shot and we need to be near trees/in woods if possible to get any kind of save we can. In this scenario, any army with a reasonable amount of shooting suddenly becomes a shooting list and we have to approach any gun fight with cover in mind.
Conclusion
This list seems like it really suffers for not having Sentinels. I guess it could work, but seems like you are playing on “Hard Mode” without the pseudo-magic support.
ReplyDeleteStill, this legion looks like a ton of fun, and I can’t wait to play it (once I finish half-a-million other projects).
The Pool 2 scenarios get a bit easier if you're able to drag guys off objectives and shoot models off others. Pool 5 can be easier too. The lack of Sentinels did get fixed in the scenarios for Defence of the North, but not this one sadly.
DeleteI have learned the hard way recently that this is a good army, honestly. I have played against them 'to the death' scenario (700p) with the usual D6 block and some cavalry, and even a cave troll... I wanted numbes, so I had no banner (a mistake, definitely). But I took Shadow Lord for archery protection - alas Legolas shot him with his 2+ 'wonder-shot'. This made me thinking: wouldn't it be great to have a paragraph or two in such an article that also expresses how to fight with that army, what to use? It would benefit both sides: the player and the opponent
ReplyDeleteWhile we could talk about how to counter the list we're showcasing, the counter-play, counter-counter-play, etc. gets a little tedious. I can say that later this year we'll be doing a series where we talk about those annoying models/lists that you hate to fight and some of the best models to counter them. Stay tuned!
Deletethank you for the reply, I will certainly stay tuned. I know it would be boring to counter everything, but what I meant actually was just 1-3 tips for what to be afraid of playing with and what to use to get advantage playing against such army :) Of course I will visit the blog once in a while. Cheers!
Delete