This is our second post in our mini-series that brings those Fall of the Necromancer models you need for scenario play into Matched Play. Evil has a real problem building lists for Matched Play, since you get a mix of Orcs that are used in the Armies of the Lord of the Rings with the Necromancer in the scenario book - and without a Hero of Valour/Legend to bring along (and almost always as Impossible Allies), you're really limited in how you can build lists for Matched Play games.
As such, the one faction that's pretty well fleshed out in this book is Azog's Hunters - though our access to heroes and bows in the scenarios is quite limited. As such, we can grow our available model count a bit and trade our archery-heavy rules for other rules by not running Azog's Hunters and instead running the Pits of Dol Guldur Legendary Legion. Here is the list of models we have to play with from the scenarios:
- Azog (we probably have the model that's mounted on the White Warg, but not in the scenarios)
- The Keeper of the Dungeons
- Thrain the Broken
- 12 Hunter Orcs with no additional gear (we probably have 12 other Hunter Orcs)
- 6 Hunter Orcs on Fell Wargs
- 6 Fell Wargs
While the Pits of Dol Guldur Legion loses a lot compared to a historical alliance between Azog's Hunters, Azog's Legion, and the Dark Powers of Dol Guldur, the scenarios pare down the selection of models even MORE than normal. We don't have Gundabad Orcs to give us spears, C3, or D6 for starters - and that's a HUGE loss. Thematic, yes, but still a huge loss. We also don't have any generic Captains, so we'll need to take Azog (duh) and the Keeper of the Dungeons to lead our troops (and he's not bad in this Legion - especially if your opponent is worried about Azog). Still, no Captains means a max cap of 33 models in our force and no Heroic March unless Azog is willing to burn Might to move the army (which, admittedly, he can get away with in this Legion since he has the option for free Heroic Combats).
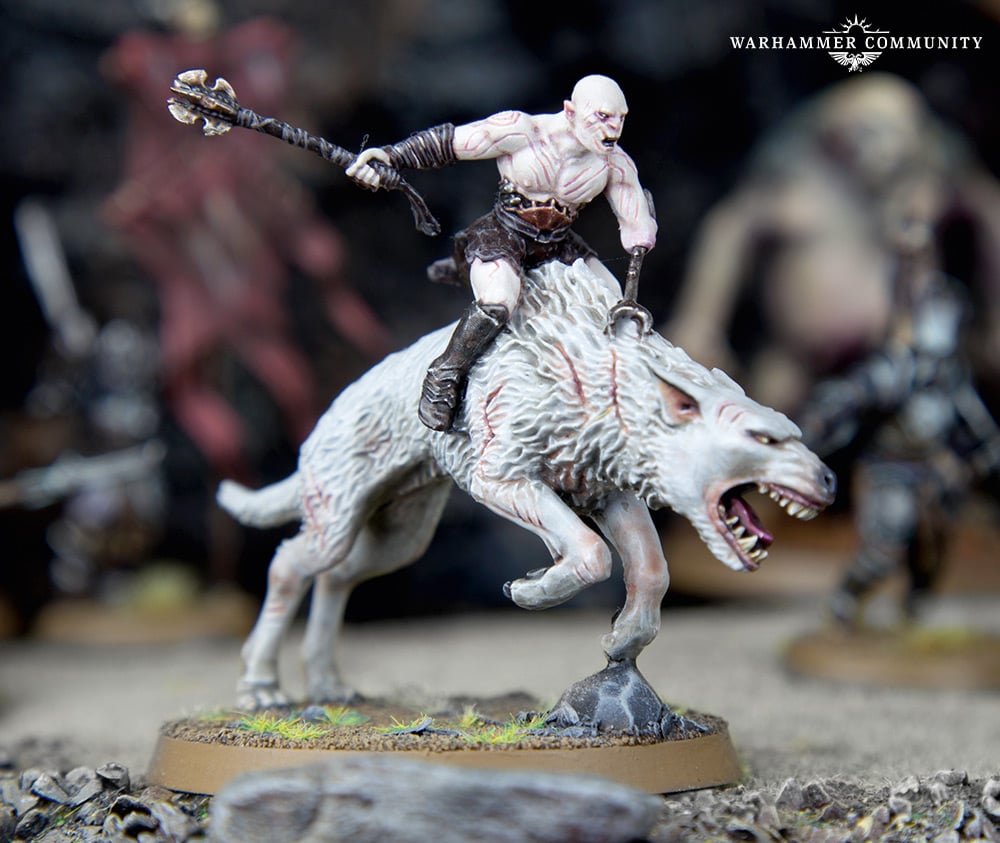 |
| Photo Credit: Warhammer Community |
The units we have access to are incredibly limited in number - as you can see above, we have 12 Hunter Orcs, 6 mounted Hunter Orcs (so we have 18 Hunter Orcs if we don't take mounted guys), and 6 Fell Wargs (who might be needed as loose mounts for the mounted Hunter Orcs). As I mentioned in the what-models-do-you-need post, we'll ACTUALLY have 24 Hunter Orcs (up to 6 of which can have extra gear), as well as the White Warg, but this really constrains what kind of list we can build. As such, we're going to be looking at two lists today - one that is pretty true to what we've been given, and one that departs a bit from the script (but still doesn't require us to buy any more models). Let's check it out!
Our first list plays strictly to what we've been given in the scenarios, with some license taken with the Hunter Orcs we have spare. Everything here could be built as-is from the Hunter Orc box and requires no conversions at all - and I think it's a cool list (albeit with one glaring downside):
- Azog [ARMY LEADER]
- INDEPENDENT: Thrain the Broken
- 14 Hunter Orcs
- 1 Hunter Orc with Orc bow
- 2 Hunter Orcs on Fell Wargs
- The Keeper of the Dungeons
- 6 Hunter Orcs
- 1 Hunter Orc with Orc bow
- 5 Fell Wargs
500 points, 32 models, 2 Orc bows hitting on a 5+, 1 D6+ models, 2 cavalry + 5 fast infantry, 6 Might points
While I have 24 Hunter Orcs accounted for here (20 vanilla, 2 with Orc bows, and 2 dismounts), I have 7 Fell Wargs in the list. Unless I took a banner (which would require some conversion work), I couldn't get the numbers to fit with 24 Hunter Orcs and 6 Fell Wargs - so make a marker or something for a Hunter Orc that's mounted (or magnetize the rider?) so you can show which Warg had a rider that was killed.
IF we wanted to be technically in line with the scenarios, this would be our army - but unless you happen to have a rare Azog sculpt that came without a mount, chances are good you have a model of Azog on the White Warg in your collection - and you should definitely get the Warg in this list. I've made allowances in other sourcebook reviews to use models that don't appear in the scenarios but we have the model anyway, so I'm going to propose a second list today that is probably a bit better - and plays a slightly different game than the first:
- Azog on the White Warg [ARMY LEADER]
- 9 Hunter Orcs
- 1 Hunter Orc with banner
- 2 Fell Wargs
- The Keeper of the Dungeons
- 8 Hunter Orcs
- 1 Hunter Orc with two-handed pick
- 2 Fell Wargs
The second list has traded Thrain the Broken, 3 vanilla Hunter Orcs, 1 Fell Warg, and 2 Hunter Orcs on Fell Wargs for a banner and the White Warg - it's a net loss of 7 models (25 instead of 32) and some cavalry counter-charge boosts in order to get some extra oomph out of Azog (in the form of the White Warg AND a banner - which can help other models too). Having played with this Legion a few times (always at low points levels - as the points level gets higher, Azog's Legion with or without the Signal Tower looks really appealing), I can say that the extra Might/Will/Fate from the White Warg, the added mobility this gives Azog, and the knock-down to help trigger those Heroic Combats are HUGE boosts. I think most players who have used the Legion would prefer the second list - so naturally, I'm going to review the first list today. :-)
In my mind, here's what the first list has going for it: while Azog isn't quite as punchy in the first list, he's still going to be a pain to deal with - especially if a Hunter Orc on Fell Warg charges into the same fight. Free Heroic Combats with 5 dice to win/10 dice to wound is actually better than 4 dice to win/8 dice to wound if Azog has to solo a target - and pulling the Hunter Orc out of the fight would diminish Azog's killing power some, but he'd only go down to the same level as he would be if he had charged a cavalry model/was counter-charged by a cavalry model. The added resilience (especially the Will/Fate points) is good, but you could probably make the first list work if you wanted to (and at a point, 32 models at 500pts - most of which are Hunter Orcs or smashy heroes - can be really hard to deal with). 25 predominantly F3/D4/C2 models can be waded through in a few different ways, so I feel better with +7 models.
Okay, let's look and see what the list does!
Army Theory
Normally, a "Pits list" is going to focus on Azog - and Azog is still a beefy hitter for us. Yes, he's dismounted, but as Ali King once wrote, we can do things with our dismounted heroes that we simply can't do with a 40mm base (or in Azog's case, a 50mm base). In this list, we've got no spear supports, but Azog can still call free Heroic Combats and with F7/S5/3A and 3 Might, he can win fights against grunts pretty well on foot as well as mounted. Wounding them is going to be harder, so we want Azog operating on the flank of our battle line so he can get a Hunter Orc on Fell Warg in the same fight - then Combat off a single model (Feinting if it's not risky from F7 to reroll 1s) to slingshot the Hunter Orc into an unsuspecting model and Azog into a hero/monster or two grunts.
But more important than Azog in this list is how hard we've leaned into Hunter Orcs. At low points levels, Hunter Orcs can be devastating (though charging Terror walls will never be their forte). While your average force at 500pts will have 25-30 models, we have 24 Hunter Orcs in our list (two mounted, the rest on foot), which means we can have a distinct dice advantage against our foes if we can double-up against them. If we can peel off their spear supports, dicing up the front line isn't that hard to do - and with the dice we'll be rolling, our opponent may be incentivized to shield if he loses his supporting model (which in most cases means our Hunter Orcs are going to be on the board on the next turn).
Speaking of peeling off spear supports, we have lots of fast models - 2 Hunter Orc cavalry and 5 Fell Wargs, all of which can charge models they can't see when they start their movement. This means we can tuck them away behind terrain but within reach of the enemy lines and STILL be able to do devastating charges to reduce their numbers. This army is a hyper-aggressive list and if it can bring its models to bear, you can absolutely devastate an enemy in 1-2 turns.
To help our Hunter Orcs out, we have Thrain the Broken in our list: Thrain gives us a F4 model who can be a superstar hero in combat on certain rounds OR the kind of hero you safely tuck away in the back so he doesn't get killed and cough up VPs. Either function is fine - we don't care - and for only 10pts, I think he's a great add. If you don't like Thrain, you can downgrade 1 Hunter Orc on Fell Warg into a Hunter Orc and a Fell Warg (giving you 1 cavalry and 6 fast infantry), but this won't grow your model count at all . . . so I've gone with Thrain.
While Azog is going to do great work for you in the killing department, the sleeper agent in this list is actually the Keeper of the Dungeons. With 2 Attacks and F5, he doesn't look as good as Azog - and he's not - but with Burly and a two-handed pick (+1 To Wound with no penalties at S5 or S6), a Heroic Combat from him against 1 model will see him rerolling 1s in his second find. If he kills two models in the ensuing fight, he suddenly causes Terror (making it less likely that he'll be counter-charged). If he calls a second Combat on the next round against two models, he'll be rerolling all failed To Wounds - which means there's very little in the way of warriors that he can't crush two at a time.
And all of this culminates in the Ambush special rule we get from the Legion, which gives us the ability to declare before priority is rolled that we're going to claim priority for the round and no Heroic Moves can be called to challenge it. If we get to pick the charges we get with our army (and specifically Azog/his Hunter Orc buddy and the Keeper) and we get the two Heroic Combats that we discussed above to work, we can claim Priority on the following turn to deny our opponent any chance to react to our devastating punch. If we get two turns of Azog and the Keeper raging through the enemy ranks, breaking (or even quartering) the enemy is certainly possible.
Okay, let's look and see how we want to approach each scenario.
Gameplay Strategy
Maelstrom & Object Missions (Pools 1 & 3)
Okay, here's the thing: we're going to be lame ducks on the first round of any maelstrom mission - so we don't like maelstrom very much. We also don't have the near-infinite Might on Azog that we're used to having, so we can't just "deploy the Keeper, then make sure Azog arrives next to him". BUT we can guarantee we have priority on round 2, so we aren't too concerned with initial deployment so long as we don't get shot to death on the first go.
In Hold Ground, we could March our troops up to the center of the map with Azog, but I think we'll want his Might for other things. As such, we're fine arriving separately and sending our fast models to the center to contest it early or drive off enemy models. If our enemy gets close to us, we unleash our Hunter Orcs on him (and even if they die, we can win the game if we've kept our opponent out of the center and rushed in with our Fell Wargs). Azog and the Keeper should take any opportunity they have to get into combat, as Heroic Combats from Azog can get us some extra movement and the Keeper can become a big threat to our opponent in the late game if we charge him up as he approaches the middle.
In Command the Battlefield, we can send our fast units (and our archers) to the various corners of the board, but frankly I think we'll be in a better position if we arrive on opposite board edges and just sit there. With 32 models in the army (13 models divided up into two quadrants and 19 models divided up among the other two), we might have a model count advantage on our opponent and he'll need to come to us. We don't want to sit back, though - if he has any amount of shooting, we could really be in for it. Direct your Hunter Orcs towards the enemy (benefitting from cover as much as possible) and engage quickly, but once again, it's okay if we break so long as we have a numerical superiority while we die.
Our Fell Wargs are gold in Heirlooms of Ages Past - 10" move on infantry models allows them to dig up an Heirloom at great speed, so deploy your Heirloom tokens closer to the center of the board to make your opponent move faster to get to them. If you can dig up the Heirloom (you have 5 Fell Wargs and 2 cavalry, so you should be able to tag them all pretty quickly), you can run it to some corner of the board while your main forces just rush wherever the enemy has shown up. So long as your Fell Warg carrying it doesn't run away scared, I think you'll be okay (have his buddies join him as soon as they can so you can at least outnumber your opponent near it should he run off).
Usually, I'd recommend having a gunline for Seize the Prize - and many of the lists I've covered in these posts do this. You can't do that here - you're gonna just have to rush it. Good news though: you can auto-claim priority on the first turn, March with Azog to get 15" movement on your cavalry (cutting off access to the Prize from your opponent) and 13" movement on your Fell Wargs (to pounce on the Prize and hopefully dig it up). With a horde of Hunter Orcs ready to swarm the Prize on Turn 2, it doesn't really matter what your opponent does - you're ready for combat if he wants any shot at getting the Prize. With Azog and the Keeper getting locked in as fast as possible with the enemy, you can use your Hunter Orcs as a screen to get the Prize around the enemy flanks and off the board (run all your Fell Wargs with whoever has the Prize so you can pick it up quickly).
In Destroy the Supplies, we have the numbers to hedge around our own, but our army is such that we probably just want 10 guys rushing at each of our opponent's stashes. If there's a flier or something, we can have a few Hunter Orcs (our bowmen included) hedge them off - we can stand ON the supply markers too in order to keep models from being able to swoop in behind us and tag it. Heroic Combats featuring our heroes and cavalry models can not only help us carve a hole through the enemy lines, but also race fast units through a gap to get to supply markers.
Retrieval is played very similarly: don't guard your flag with anything more than a skeleton crew and bull-rush your opponent with your Hunter Orcs. Getting multiple models into the enemy where possible (and wrapping around to pull spear supports) will be a big part of winning the initial shock - as will Heroic Combats from your heroes. Without a banner, your F3 could be a bit of a liability if you're in 2 dice vs. 2 dice fights, so avoid that as much as you can (check out our article on the Cirith Ungol LL for how to double-up mid-battleline if you haven't read that article yet).
Control Missions (Pools 2 & 5)
When it comes to control missions, your numbers can help you a lot - though with low Defense, that can all swing very quickly. Azog and the Keeper want to start on the center line, relying on your Fell Wargs to tag/hold objectives while the Hunter Orcs just mob wherever the enemy troops are. Whether it's Domination (place your objectives in a 12" equilateral triangle of the center if possible), Capture and Control (use your Fell Wargs to tag-and-fade with the objectives), or Breakthrough (start on either side objective and pinch for the enemy rear objective with Azog and the Keeper), you're playing this hyper-aggressively, deploying as far forward as possible.
For the traveling missions, you have March on Azog, but you don't have 6 Might, so WHEN you March is critical. Your favorite of these missions is probably Reconnoitre - quartering your army will probably not be that hard to do (you can always Stab your way to victory if you need to) and you can probably keep Azog alive while a few Fell Wargs or Warg Riders race around the edges of the map and get off the board (especially if he can sling-shot a few of them towards the board edge with a Heroic Combat). Since you have 32 models, the game will end when 8 of your models are left on the board or have exited the board - so if you get 3-4 models off, you want Azog to hang on with only 2-3 other guys. Once you're there, the game's over and you can (hopefully) win handily.
Storm the Camp is trickier: you probably want to March at least once during the game and you MIGHT be able to race to the enemy camp, but guarding your own is going to be pretty difficult. If we were using Azog's Hunters and had 50% bows with Narzug in tow, I'd feel a lot better - but we don't. Nope, we'll be racing across the field hoping we don't break before we reach the enemy - and that's not very likely if our opponent brought any semblance of archery. If it looks like he's going to hide, you can find terrain to hide behind and just say, "I'm good with a draw", but let's be honest: no one wants to play that kind of game.
Finally, your warbands are going to be split up in Divide and Conquer - which isn't the worst thing in the world, but we know the Keeper's warband will be showing up late. Our cavalry and Fell Wargs can get into the middle quickly, but we need our infantry to support them in the fighting (so we don't want to engage until the Hunter Orcs are in place). If we can get into the center with our heroes, we have a good shot at winning.
Killing Missions (Pools 4 & 6)
These are going to either go really well . . . or really poorly. You'd think with a bunch of 2A warriors and 2-3A heroes that we'd feel confident - but F3 without spears and D4 aren't great in these missions. In To The Death, our opponent will be able to sit back and shoot at us with whatever he has - hopefully that isn't the case, but if he has archery, we're in deep trouble. In Lords of Battle, he can do the exact same thing - and if in either of those missions our melee damage hops on the low-dice-rolling train, it's over for us - and probably very quickly.
Contest of Champions is our best bet: we can start with everyone on the center line and we just need to keep the enemy army leader from getting a lot of kills - which won't be hard if his warriors are killing our guys. :-) Azog should be able to rack up some kills with Heroic Combats while the Keeper kills some guys near the enemy army leader, threatening him. Both he and Azog should converge on the enemy army leader if they can - if they can trap the leader, they can outright kill basically anyone. In this scenario, being able to call Ambush will be really helpful on the first turn, since we can deploy with the knowledge that "we're going first" and can gang up on the enemy army leader's warband (or the entire army) from the start.
The hero-slaying missions will also be a challenge: you probably want to protect Thrain in Fog of War - and park him FAR away from the enemy (like, on the board edge, lying down). You'll want to pick any hero you think you can kill - Azog and the Keeper are both pretty capable, though the rest of your army is also very scary. Pick a piece of terrain that will be reachable by your fast units but also supportable by Azog or the Keeper with a Heroic Combat. Your opponent will probably go for the Keeper as his target (or Thrain . . . maybe), so make sure his fights are managed and that he doesn't get shot to death early.
In Assassination, our assassin is definitely going to be the Keeper (predictably so), though we're fine with Azog killing the target and getting us 5VPs if we need to. Thrain will be noticeably absent from the action (he might be the enemy's target, after all) while our Hunter Orcs just try to break the enemy (along with the help of the Heroic Combats from the heroes). Azog taking damage in this scenario could cough up VPs too, so make sure both he and the Keeper have well-managed fights.
If you happen to play Clash by Moonlight . . . well, you're going to want to March when you think you can move within charge range - and then endure one nasty hail of archery. After that, use Ambush to get locked in and hope you can break the enemy with whatever's left of your army. Keep Thrain FAR from the action and make sure there's at least two lines of troops between your other heroes and the enemy archers. This one's gonna be rough - but we knew that already!
Conclusion
This Legion is really fun - though it doesn't look as powerful as a lot of the other ways you can run Azog. If you haven't read our previous article on this Legion, I highly encourage you check it out - and then take the Legion out for a spin! In our next post, we're staying in the evil side of the house to talk about one of the nastiest heroes to face in the game: the Spider Queen. Fall of the Necromancer has a bunch of Spiders, Bats, and Wargs in it, so it made sense to view one of the weirdest collections of warriors you'll ever face. But unlike the last two articles, we're upping the points level and looking for allies. Check out one of the nastiest options available to evil in this sourcebook next time - and until then, happy hobbying!
I know this is post is more about using the models required for the scenarios, but if that wasn't a limit, what would be your recommended warrior breakdown for this legion? I'm guessing you'd take 33% hunter orcs with bows, but would you fill out the other 67% with just Gundabad Orcs (plus 4-6 Fell Wargs)? Could you instead go Hunter Orc heavy, with a small contingent of spearman to support where needed?
ReplyDeleteI've also been thinking this might make a cool all cavalry (and Fell Warg) list with the free combats on Azog + the surprise attack to autowin priority. Mounted Hunter Orcs seem overcosted, but perhaps the legion bonuses can make up for it.
The Legion review covers this a little (https://tellmeatalegreatorsmall.blogspot.com/2022/09/the-stuff-of-legends-pits-of-dol-guldur.html), but I tend to take 33% Hunter Orcs with Orc bows, a few vanilla Hunter Orcs, 1 Gundabad Orc with shield and spear for every Hunter Orc and infantry hero (one with a banner too), and a handful of Fell Wargs. The ability to shield is kinda like being a 2A Hunter Orc, but having some higher Defense troops can give greater tactical flexibility.
Delete