We've come to the last post in this series (mostly because I didn't want to tackle the Vanquishers of the Necromancer) and we're ending with one of my favorite Legions ever: the Rise of the Necromancer LL. Often hailed as a horrible all-hero army because it's slow and has far too few numbers, this Legion his a PAIN for many armies to deal with because everything in it can just refuse to die. Yes, you might be able to outmaneuver them, but don't underestimate them. Thanks to getting several missions in the Fall of the Necromancer sourcebook with Castellans in them, we actually have a very healthy list of models to use:
Today's discussion will not only be on the list itself, but also a short treatise on the points levels that it plays well at - let's dig in!
- The Necromancer of Dol Guldur
- The Keeper of the Dungeons
- 9 Nazgul of Dol Guldur
- 6 Castellans of Dol Guldur with Morgul Blades
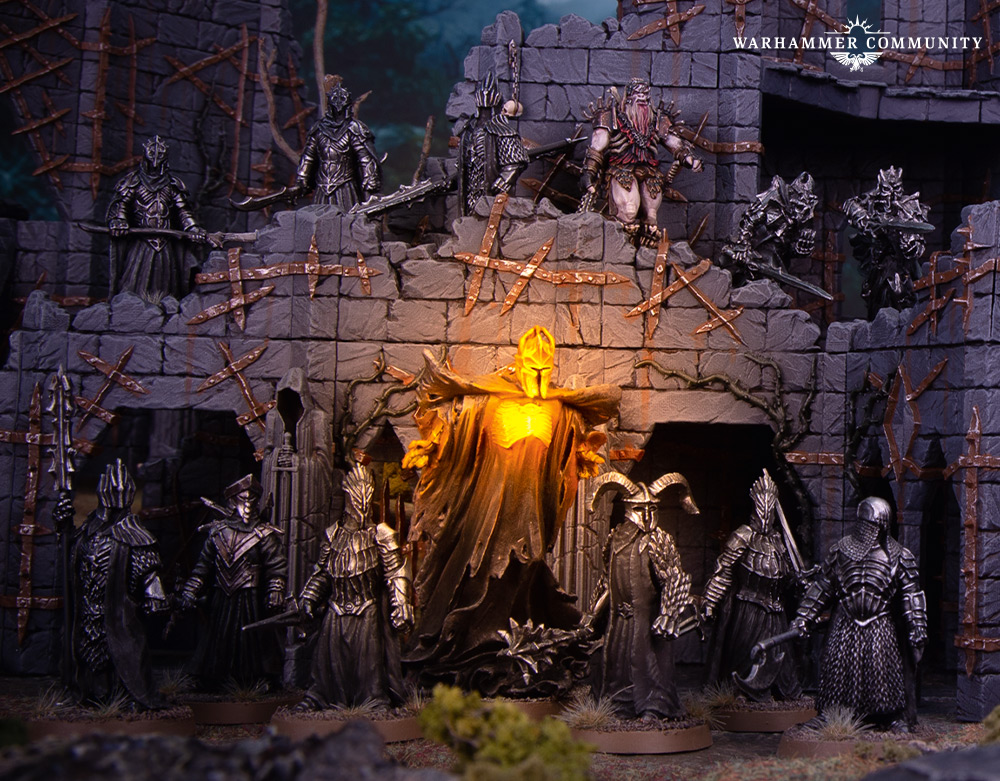 |
| Photo Credit: Warhammer Community |
Today's discussion will not only be on the list itself, but also a short treatise on the points levels that it plays well at - let's dig in!
I know that this is going to surprise no one, but we're going to begin our list by taking . . . the Necromancer of Dol Guldur! I mean, clearly, we were bringing him - we have to. But the big question with this Legion is what to bring AFTER you bring him. As I've talked about in my article on the Rise of the Necromancer Legion in our Stuff of Legends series, the Nazgul give you access to Might points and maneuverability (mostly if they die and are resurrected, occasionally from special abilities), while the Castellans give you staying power and killing power (often rivaling the damage output of the Nazgul). My ideal list for this army would include the 2 Abyssal Knights (for handling a surprising number of objective/traveling/maelstrom scenarios), 2 Slayers of Men (for +1 To Wound without penalty), and Khamul (+1 To Wound with 3 Attacks). Of course, paired with at least 5 Castellans, you'd need an 825+ point limit, which is . . . a bit high considering how low our model count is.
As such, I've opted to use this list at lower points levels where the Necromancer will be hard to shut down, the Castellans will be harder to kill, and the enemy numbers will be far closer to our own. At 600pts, we have the following options for our list:
- 0 Nazgul and 8 Castellans with 6 options for Morgul Blades or weapon swaps (we don't have this many Castellans available to us - and I think we want more Might);
- 1 Nazgul and 6 Castellans with Morgul Blades or weapon swaps (this would be very dangerous);
- 2 Nazgul and 5 Castellans (this would require us to not take any Morgul Blades, but I think that's fine);
- 3 Nazgul and 3 Castellans (while having 3 Nazgul would probably be good, having only 3 Castellans isn't that scary);
- 4 Nazgul + 1 Castellan with a Morgul Blade and weapon-swapped axe (I assume - this is WAY inefficient and the Castellan will be easily avoided).
Taking 0-1 Nazgul either violated what we were trying to do in this series (even though 8 Castellans might end up being awesome) or being incredibly inefficient with our points (unless we REALLY want those Morgul Blades). Taking 3-4 Nazgul means we have incredibly small numbers, so I wasn't particularly drawn to that either. So that leaves us with 2 Nazgul - and I'll admit right up front that if we want to be TECHNICALLY accurate to the wargear in the scenarios, we should run the 1 Nazgul/6 Castellans list. However, I think our chances of winning will be higher in most scenarios with the 2 Nazgul list - here it is a bit more fleshed out:
- The Necromancer of Dol Guldur [ARMY LEADER]
- Nazgul of Dol Guldur (Abyssal Knight)
- Nazgul of Dol Guldur (Abyssal Knight)
- Castellan of Dol Guldur
- Castellan of Dol Guldur
- Castellan of Dol Guldur
- Castellan of Dol Guldur
- Castellan of Dol Guldur
600 points, 8 models, no shooting but Chill Soul cast on a 5+, 8 D6+ models, no cavalry but 2 Abyssal Knights, 7 Might points
When I reviewed the Rise of the Necromancer Legion before, the Abyssal Knights came in middle of the pack (behind Khamul and the Slayers of Men - mostly because this Legion needs to be able to kill things and these three guys happen to be the best at it). I did say that I understood the desire to have these guys before the Slayers of Men, so my thoughts back then COULD be construed to agree with what I put into the list today. As it stands, I'd like to make one change to what I had before:
If you can only take 1 Nazgul, take Khamul. If you can only take 2 Nazgul, take the Abyssal Knights. If you can only take 3 Nazgul, take Khamul AND the Abyssal Knights.
Khamul kills a lot of stuff - so long as he saves his Might to win duels or boost resurrection rolls. The Abyssal Knights are the best at getting places (even above the Lingering Shadow) and they are incredibly resilient if they save their Might to boost resurrection rolls. Get these guys - they're great. Since we have 2 Nazgul slots, we're taking the Abyssal Knights - and honestly, I like this list a lot (it's been loads of fun to use). Let's see what it does!
Army Theory
As I talked about in the Legion review, this list is mostly about the Necromancer - he picks up an extra Attack (useful), he can cast twice per round (but can't cast the same spell twice or target the same model twice), and everyone picks up Resistant to Magic. Okay, he's the center - we get it. While he's definitely essential to the list, he's actually not that essential to THIS list. Oh sure, we'll take a F7/S6/2A hero who can channel Curse to take away all of an enemy's Fate points and channel Shroud of Shadows on ourselves to always have the higher Fight Value, but we don't actually need him for all that much from a killing perspective. Yes, we'll take Chill Soul attrition damage as well as Instill Fear sending our foes flying away in terror, but the actual damage the Necromancer has to do is actually . . . quite low. Why?
Well first off, we have five Castellans. If you've never fought five (or more) Castellans, let me break this down for you: if you happen to be facing a 30-man army (what you can reasonably expect any decent person to bring to a 600-point fight), chances are good the enemy is bringing S3 warriors - MAYBE S4 guys if they're, like, Morannons and possibly Dwarves. S3 warriors that can actually beat F5/2A Castellans in a fight are going to wound these guys on 6s - and if you allocate 6 Will to use for Fate saves and 6 Will to use for fighting on these guys (check out our post on Multi-Purpose Will spell-casters for what I mean by that), these guys can endure quite a few rounds of fighting where the enemy needs 6s before they poof out of existence (which, if we're honest, is how most conventional armies plan to deal with these guys).
But here's the thing: we have FIVE of them - you can't bring overwhelming dice to bear in FIVE places and expect to come out the winner on all fronts - and that's even HARDER when there's a caster standing behind them casting Compel on your banner and Chill Soul on your hero's horses. Add to this that getting good Courage and high numbers at low points is virtually impossible and the Terror-Harbinger combo that we have going on is going to make this incredibly small shieldwall prove to be a pain to assail. Trust me, I've fought these guys a lot - and I've never once thought that facing five or more of them was fun. Castellans get a bad wrap in the community, but not here at TMAT.
We also have two Abyssal Knights - and these guys are AMAZING. F5 with Elven-made weapons should sound familiar to you - these guys are basically Elves who just won't die. Their Elven-made weapons have several uses, to include giving you a roll-off advantage against most heroes in the game (forcing them to spend their Might calling a Strike instead of boosting rolls, wounding you, or calling Heroic Combats), but they can also be used in the same fight as a Castellan to give the Castellan some added resilience (oh, and the Castellan can Feint if he's in the same fight as someone else - really nice). The 2 Might each of these guys have COULD be used for calling Heroic Strikes (they have it, after all), but the most useful heroic actions these guys can call are far more mundane: Heroic Moves and Heroic Combats. Depending on your scenario, you may need to throw models up the board - and a Heroic Combat with a Castellan and an Abyssal Knight can see that Abyssal Knight getting closer to an objective/board edge while the Castellan does a flanking maneuver to clear out the back rank of a battle line - nasty!
I will say that if you know your scenarios ahead of time and you know that you don't have to go anywhere, the Slayers of Men are far better options than these guys. Elven-made weapons are great and all, but +1 To Wound at S4 (for effective S6) is incredibly good - these guys make great Heroic Move/Combat caddies as well, getting your Castellans into better positions to really deal damage to the enemy. I love both sets of these guys - and they're ever so much fun to use!
So the general strategy for this force is simple: direct your Castellans towards the bulk of the enemy and get them fighting, while the Necromancer performs precision strikes against key enemy pieces and the Abyssal Knights focus on scenario objectives. Let's see how this is applied across the different pools.
Gameplay Strategy
Maelstrom & Object Missions (Pools 1 & 3)
We're all showing up together in the maelstrom scenarios because we have to come on as a single warband (thanks to our Legion rules). This can be both good and bad depending on the scenario: on the one hand, we're unlikely to be at much of a disadvantage if we have to deploy first - I mean, we'll all be together with the Abyssal Knights and the Necromancer walking on first and the Castellans forming a wall behind them to guard against enemy pursuit. If the enemy wants to deploy part of his army around us . . . I think we're okay with that!
In Hold Ground, the Abyssal Knights will be walking towards the center with the Castellans and the Necromancer falling in behind them. The Castellans can get side-tracked a little if there's a large portion of the enemy army nearby, but you'll want the Necromancer to accompany them so you can get some Heroic Moves in to intercept. The Necromancer should focus on killing any mounted Warriors he can and dismount heroes so the enemy arrives about the same time you do. If the Castellans get locked into combat in the center, you can probably wear the enemy out before your troops die - just do your best not to get trapped (that's a Castellan's worst nightmare).
Heirlooms of Ages Past could be really easy - you have Compel to drag models towards your Castellans and you have Chill Soul to snipe anyone who picks up the Heirloom (and if you happen to dig up the Heirloom early, whoever gets it is unlikely to die easily with it - though an Abyssal Knight might be dead at a critical time, but he's likely to come back). This scenario could also be a nightmare - if the enemy gets it early and is far away from you, precious time could be lost trying to reach them (and every second counts in this scenario). If this does happen, move as quickly as you can and do your best.
Finally, Command the Battlefield is usually a nightmare for all-hero armies (and low model count armies in general), but at the end of the day, you're likely to have 8 models on the board - and chances are good you will have most of them on the board at the end of the game. As such, walk onto the center of a board edge if you can and immediately contest two objectives. Once your opponent's deployments are known, your 5 Castellans stay on the center with 1 Abyssal Knight while the Necromancer and the other Abyssal Knight drift to clear one quadrant (skirmishing with Chill Soul as needed). Your goal is to pick on a quadrant with just a few guys - killing four models tucked away in a corner with Chill Soul doesn't take long - and once he's down to 1 guy, you'll have double his models and you're getting full points. If the enemy starts to make a move for your Castellans, your Abyssal Knight can leap to support them, pitting almost all of your army in one quadrant.
The Necromancer, if left alone, can walk from one quadrant to the next sniping models as he goes - and if any big heroes try to challenge him, a Chill Soul to take out their horse and a Shroud of Shadows to make charging him difficult (or impossible) is a fine trick. Should you get the jump on him, a Transfix to keep him from Striking will likely give you the higher Fight Value and one lucky Wound if he's out of Fate will likely see him die quickly. Suffice it to say that if you can have 2x the enemy's models in one quadrant, have a lot of models in another quadrant, and deny any points in a third quadrant, your opponent will be hard pressed to win the game - especially if you break him and his models start fleeing from their corners!
The object missions will be much harder to win: in Seize the Prize, your Abyssal Knights are out in front, absorbing archery for your Castellans as much as possible. Why? Because we want them to die and be able to appear within range of the Prize on Turn 2. Some lists can dig up the Prize on Turn 1, so having someone ready to engage on Turn 2 can stall the enemy out long enough for the Castellans to show up and start leveling the playing field. The Necromancer has a wealth of tools to deal with anyone who picks up the Prize, be it Chill Soul if they've only got 1 Wound remaining or Compel to bring them into combat with a bunch of Castellans. Once he nears the action, he can channel Shroud of Shadows on himself and Curse the enemy model (if it has 2+ Fate points) so they're weakened before the fighting begins. If the Necromancer can get the Prize (either by killing the model who has is, digging it up, or having it handed to him by one of your other guys), he can cast Shroud of Shadows on himself to protect himself from archery while one of your Abyssal Knights escorts him up the field (calling Heroic Moves for him if required). The other Abyssal Knight should run like mad for the enemy board edge (dying and resurrecting closer to the enemy board edge as much as possible). When the Abyssal Knight is close, the Necromancer can hand off the Prize in the Move phase to the OTHER Abyssal Knight, cast Shroud of Shadows on him, and then on the following turn you vanish/appear next to the Abyssal Knight near the board edge and escape with the Prize. Job's a good one - if you can get the Prize!
In Destroy the Supplies, we need to press the attack with our Castellans quickly in one place while the Necromancer and the Abyssal Knights do their best to catch models getting around our lines. We can't win by just guarding our own stuff (and we don't have the bodies for it anyway), so we might as well just go for destroying the enemy supplies and hoping we break him. This one's probably our hardest scenario - but that's probably true for any low-model-count army . . .
Finally, in Retrieval, we CAN play defense, but there isn't much point. The Castellans will be pushing up with the Necromancer in support (though he shouldn't stray too far from our flag). One of the Abyssal Knights will want to move with the Castellans, calling a Heroic Move or two (or possibly a Combat) to get the Castellans in position and moving. The other will want to make a break-away for the enemy flag. Unlike a lot of other models, however, killing this guy COULD mean he gets closer to the flag, which is oh so annoying. Should he pick it up and stay alive, he can blink over to his friend who should start walking towards your board edge when you get close to grabbing the flag. This will save you a lot of walking time!
Control Missions (Pools 2 & 5)
Ordinarily, you wouldn't think that having 8 models would make you any good at control-based missions, but here's the thing: two of the control-based missions (Breakthrough and Domination) end when one side is reduced to a quarter of it starting size. This usually means that the Nazgul of Dol Guldur have been (at least temporarily) killed, but also means that you need to kill 4 of the 6 Castellans/Necromancer - ALL of whom are very difficult to kill without a sustained fight. If you're playing at higher points levels (700+), you probably have 1-2 beater heroes that can kill a Castellan, but at 600pts, killing these guys with heroes is quite difficult - especially if the Necromancer is casting Transfix on a 2+ and Compel on a 4+ to keep up to two heroes from doing any damage to you! This means that warriors will need to deal with the Castellans, and Castellans don't mind those odds most of the time.
In Domination, we can start on the center - so we probably should! One Abyssal Knight can walk towards a rear objective we have while the other either drifts towards a second rear objective (should that be an option) OR push for a deep enemy objective (again, not minding if he dies along the way so he can Resurrect closer to the objective we're going for). The Castellans for a hedge on the center objective with the Necromancer about 6" behind them (to keep him from getting caught on the first turn). With the ability to cast Chill Soul on a random grunt and Compel to drag a banner away from the action (and Instill Fear to clear the center objective on the second turn), the Castellans just need to brace for impact on the first turn - and they may start racking up the kills on the first turn too! After the center is held, the Necromancer can park there and threaten other objectives while the Castellans begin a steady march towards another objective. If you can hold three objectives and break/quarter the enemy, you can win the game.
Breakthrough is fought similarly, except that you want to start contesting one of the side objectives with one of your Abyssal Knights drifting to defend your rear objective. Your 5 Castellans clear whatever's at your starting side objective and start a relentless advance towards your opponent's rear objective (with an Abyssal Knight to escort for Heroic Moves). The Necromancer can stay on the side objective, relying on Instill Fear to clear out anyone trying to get there, but more importantly can use Chill Soul and Compel to keep the enemy from rushing your rear objective. If your Abyssal Knight that's guarding it looks like he needs a hand (and your Castellans are contesting your opponent's rear objective), your other Abyssal Knight can vanish and appear in the rear to help the other one. Ideally these guys will be able to come back every turn and at least contest the rear, with the Necromancer focusing on killing a warrior every turn and Compelling someone else away from the action (like a big hero who might kill an Abyssal Knight).
Capture and Control is potentially easier for you - and potentially harder. Abyssal Knights love being on the move and they are great for tagging and leaving objectives. Your Castellans can rush wherever the enemy main contingent is, escorted by the Necromancer, knowing that your Abyssal Knights can work on tagging/clearing objectives for your team. Against fast armies, however, this may not work too well - so you'll need to use the Necromancer to Chill Soul/Compel models away from the objectives in order to keep them from being tagged by the enemy, undoing your efforts. This scenario also ends when one side is broken, so whether you've kept the objectives after your opponent breaks (or you've lost 5 models - which is probably 3 Castellans and your 2 Abyssal Knights, however temporarily) will be the key. If you have a chance to veto one of these three scenarios, veto this one.
When it comes to getting places, this list is amazing because of the Abyssal Knights (and Castellans). Storm the Camp will require your Castellans and the Necromancer to spread out in the center of the board with your Abyssal Knights rushing for the flanks of the board. Eventually, these guys will want to rendezvous on one flank to press the enemy camp, saving their Might exclusively for resurrection rolls and Heroic Moves. The Necromancer and the Castellans are focused on breaking the enemy and keeping anyone from racing for your objective (which can be done with a mixture of Compels towards the Necromancer, Chill Souls against models with 1 Wound, and Transfixes against models that are near a Castellan). The Necromancer's Might will probably be needed for Heroic Moves, so don't plan to channel anything in this scenario!
Divide and Conquer should be relatively easy: you have a single warband that will deploy in a single corner and you just need to rush into/hold the middle. The Abyssal Knights can be used in a few ways here, drifting towards the enemy contingents to distract archery fire away from the Castellans and later vanishing/appearing in pursuit of one of these contingents so that you provide a distraction from the center OR a flank charge into their valuable support units. Whichever side you think is weaker should be your focus. The Castellans hedge up in the center with the Necromancer, who can use Instill Fear/Shroud of Shadows to keep himself from being charged easily and clearing the objectives. If you're not worried about being charged by too many models, Chill Soul/Instill Fear is a good option too.
Reconnoitre is pretty tough for a 6" move army, but it's in this scenario that the magic number of "8 models" really comes into play. We will eventually walk onto the board with our models and our Castellans should immediately spread out to catch anyone trying to get past us. The Necromancer will need to drift around to fight enemy models, using all his tricks to keep them from getting across the board. We then want our Abyssal Knights to split up and move for the two enemy board edge corners, relying on their resurrection abilities to get a little extra speed. If the enemy sends models to catch them, vanish/reappear in one place so some of the enemy models are left in the middle of nowhere - and then start to split up again.
If we can get these two models off the board, the "end game" begins. Our Castellans start throwing themselves at the enemy, Feinting/Stabbing as much as needed to lose Will and die. Once the Castellans are gone, the Necromancer casts all but 1 Will point to get an enemy model within charging range of him and hopefully Chill Souls one additional model racing for our board edge. He then charges into the model, dies at the end of combat, and the game ends (because we've quartered ourselves). With 2 models off the enemy board edge, our opponent will have 2VPs for killing the Necromancer, 1VP for breaking us (or 3VPs if they broke us and we didn't manage to break them with the Necromancer and our Castellans), and could even beat us is they got 2 models off (giving us no VPs) or 3+ models off (since we'll get no VPs). As a result, do what you can to wound the enemy army leader (or kill him) and break the enemy before the end game begins.
Killing Missions (Pools 4 & 6)
So, you don't die, right? These scenarios are theoretically quite easy and many are played the same way: To The Death and Lords of Battle are great scenarios for us, since breaking us before we break the enemy will be quite difficult (and the Will points we spend for Fate don't count towards the victory conditions). Similarly, killing our heroes in Clash by Moonlight (and breaking us) will be incredibly hard, so breaking the enemy and killing 2-3 heroes should give us the win. Contest of Champions doesn't give our opponent's army leader too many models to slay so long as the Abyssal Knights aren't nearby (just give him Castellans to fight) and if the Necromancer can call a Heroic Combat and kill a few models, we should be in for a win as well.
The most dangerous missions for us are Assassination and Fog of War: our opponent is likely to target one of our Nazgul of Dol Guldur in both missions because while they may not STAY dead, they can be killed - and easily. Assuming that the rule about "healing a wound doesn't deny VPs for wounding a model" applies to killing Nazgul of Dol Guldur, we could be coughing up 5-7 VPs in Assassination or 3 VPs in Fog of War by these guys drifting into danger. As such, our Abyssal Knights want to hang back, moving towards opposite corners of our board edge for starters, then vanishing to consolidate their positions if one is being pursued. Our Castellans and the Necromancer advance and start killing things as quickly as possible, using the Necromancer (who can't be our Assassin) to target whatever hero we want to kill (5VPs is fine). Our Assassin will want to be one of the Castellans - get him into contact with our target if possible, but it's fine if we don't get there. In Fog of War, pick a Nazgul of Dol Guldur to keep alive (he just needs to be on the board at the end of the game) and pick a terrain piece that we can sit on near the middle of the board.
Conclusion
This is one of those armies that can reward good game play - and the Necromancer is incredibly good when he's got a wall of Castellans to keep him from being engaged. He's also surprisingly good in combat with that second Attack and I highly encourage you experimenting with this list at some point. This coming Thursday, we'll be diving into the models required to play the scenarios from Defence of the North and digging into using those models in Matched Play next week - hope you check that out and until next time, happy hobbying!
Hi I have a non LL variation of this list I am running with three or four nazgul and 10 castellans. Something I've found an absolute nightmare is keeping track of the separate will for all the castellans when the models look so similar. Any tips?
ReplyDeleteRythbyrt has a bunch of Castellans (15 or so?) and basically has each pose in a different color, then has the pose-color combo on his record keeping sheet. Other options include getting transfers/free-handing designs on their cloaks so you can tell them apart.
DeleteCurious what Nazgul you're favoring?
Good idea I might use different coloured bases too. So far I am thinking Witch King (leader whose main job is staying alive), Lingering Shadow (always the MVP of the game with extra free movement) , Slayer of Men and then either Khamul or another SoM/Forsaken
DeleteI know he gets trashed if you talk about him, but I'd opt for Khamul over Slayers of Men (I like both, but Khamul kills stuff if you save his Might for boosting dueling rolls). I'd also highly recommend the Abyssal Knights (like I did in the article), but if you only have room for one, the Lingering Shadow does some of what they can do.
Delete