Featured Post

The Stuff of Legends: The Wolf Pack of Angmar

Good morning gamers, AAAAAAAAAWWWWWWWWWWHHHHHHHHOOO OOOOOOOOOOOOOOOOO!!!!!!!!! Yep, today we're tackling the Wolf Pack of Angmar Legenda...

Thursday, March 31, 2022

The Road To The TMAT GT 2022: Tiberius's List

Good morning gamers,

Well, we're preparing for the GT this weekend and today we're going to talk about the armies I thought about taking and what army I decided to take. I should mention that while there are five lists here that could have worked well, it was always going to be one of two lists.

The Tournament Format

The tournament this year will feature the veto system, with each round coming from a different pool of the Matched Play Guide. The pools will be the control pool (#2), the slaying pool (#4), and the get-somewhere pool (#5). Each round the players will take turns vetoing a scenario from the pool, leaving only one scenario to play that round.

The tournament is also set for 800pts and 2:15:00 rounds, so there's enough time to finish the scenario if the players play quickly. We've never done an 800pt event before, so this will be a new one for us.

That's it for the preliminaries - let's look at some lists!

List #5: The Vanquishers of the Necromancer LL


Yep, they're the hot new sauce - and while Gandalf might be required now, at 800pts neither the most recent list building rule that Gandalf needs to be in the list nor the demotion of Galadriel to a Hero of Fortitude change anything (except that Galadriel is less likely to be issued a Heroic Challenge). Yes, you can't cast Sorcerous Blast, Nature's Wrath, and Wrath of Bruinen after you've been charged, but you still have plenty of melee combat potential and spells like Immobilize, Panic Steed, Renew, and Banishment can be game-changing and are still fair game when your models have been charged. 

Based on the THREE objective-scenario practice games that I played, I learned that . . . I have a lot to learn about playing objective-based games with these guys. Knowing that at least one scenario would require me to do this, I'm putting them back in the box and will bring them out for a tournament in the future (and learn how to use them better).

  • Saruman the White [ARMY LEADER]
    • Gandalf the Gray
    • Galadriel, Lady of Light
    • Elrond, Master of Rivendell with heavy armor
    • Radagast the Brown

Monday, March 28, 2022

In Defense Of: Ted Sandyman

 Hey Reader!


Today we're continuing the In Defense Of series, and Tiberius asked me to jump in and chat about Ted Sandyman, as we're finishing out "Ruffian Month," and the In Defense Of series wouldn't be complete without referencing one of the models I referred to as one of the ten worst evil slayers in the game. We will start by looking at why people tell you not to take him, then we'll discuss why you should take him, and then close out by discussing how to make him work effectively in your army list.

Why NOT To Take Ted Sandyman

Was planning on painting these guys this month, but
I've been working on stuff for the tournament. April, though!

Most of this comes down to profile: if you're going to get a hero, you should be getting someone that will be useful to you, either by providing a useful special rule to aid your team (like the Goblin Scribe, who sucks at everything except one thing: flooding your enemy with free guys), or calling useful heroic actions (like captains calling Heroic March), or having good stats (like the combat heroes and wizards have).

Ted has none of these: he has no special heroic actions, which means you can use his 1 Might Point to call a Heroic Move (or maybe a Heroic Combat if you happen to be in a fight you like with, say, Sid Briarthorn or Rowan Thistlewood), but other than that, he's not helping on that score. He has no auric or helpful special rules (beyond the one that limits his warband to F1 S2 models), unless you count Resistant to Magic which is more of a personal bonus than anything else unless you happen to fight a wizard with an area of effect spell.

And as a hobbit, it's not surprising when I say that he has bad heroic stats: for +15 points you could get a Moria Goblin Captain who is +1 Fight, +1 Strength, +1 Defense, +1" of movement, +1 Wound, +1 Might, and access to Heroic March - almost a straight +1 across the board over Ted in every category (in exchange for slightly better shooting with a S1 stationary 8" throwing weapon and Resistant to Magic).

That's bad.

Thursday, March 24, 2022

Quest of the Ringbearer: Pop-up Bree, Part 2

Good morning gamers,

Before we get into the meat of this post, I just wanted to note that we recently passed 1 MILLION page views on the blog (if you trust the Google analytics). From all of us at TMAT, thanks for reading the things we post - it really does keep us going!

We have our annual grand tournament here at TMAT coming up next week and for this tournament, I decided I wanted to bring my Bree board to the event. Naturally, having 17 buildings on the board wasn't going to happen (Army Leader brawl during Contest of Champions in the Prancing Pony, anyone?), but I did want the board to be finished and about 8 buildings on the board (2/quadrant). If possible, I wanted to get all of the buildings done so I could say, "It's done" - and I also wanted things IN the buildings to make them more interesting. So today, we're going to see what I did!

Board Construction

Bree - multi-functional for Matched Play or Scenario Play . . .

The board is basic - two 2' x 4' half-inch sheets of polystyrene (cut from an 8' x 4' half-inch sheet of polystyrene) that can be arranged in two ways (one with the Prancing Pony in the center of the board, one with the prancing pony left off and the rest of the town kind of staggered). While not ideal for modular play (would have been better as four 2' x 2' panels with nothing overlapping the edges), the board is designed to be used in the Escape from Bree scenario (which is why the Pony spans the middle) and does have a lot of alleyways for moving troops around. Frankly, I like it.

As I mentioned in the last post, I wanted the buildings to be removable and easily storable - and part of the removability was to have their bases affixed to the board. I glued the bases to the board with PVA and used a collection of works from William Shakespeare, Leo Tolstoy, and Sir Arthur Conan Doyle to keep them flat as they dried. Some warped a bit, but on the whole, they came out just fine. Each was cut with a knife to make floor designs and then sprayed with Kona Brown spray paint.

The ground texture was caused by a mixture of rolling a foil ball across the surface and spraying textured spray paint over the top. I've put rocks and other grit on boards before and sealing them up is really difficult. Both of the techniques I used this time either indent the board OR adhere directly to it. Because I knew I was going to be spray-painting directly onto the board (instant death for polystyrene), I decided I was going to leave the plastic layer that came with the board on it as a layer of protection for the polystyrene. It seemed to work pretty well. Everything then got sprayed in Kona Brown (I went through two cans getting the board and bases set).

Finally, a few of the buildings were going to be heavily used by animals or feed for said animals, so I put some dull grass flocking in some of the areas (glued with watered-down PVA) and then sealed it with a sealant spray. I didn't want this stuff flaking off, so the seal helped make it rigid.

Monday, March 21, 2022

In Defense Of: Sid Briarthorn

Sid Briarthorn up front as Rowan and Sharkey argue about
directions. Bill and Worm clearly side with Rowan.

 Hey Reader!


Today we're continuing the In Defense Of series, and Tiberius asked me to jump in and chat about Sid Briarthorn, as I've started tinkering with Ruffians and finished painting up the model! We will start by looking at why people tell you not to take this model, then we'll discuss why you should take it, and then close out by discussing how to make it work effectively in your army list.

Why NOT To Take Sid Briarthorn

So, like all of the heroes from Sharkey's Rogues (and The Chief's Ruffians legendary legion), Sid is not a "power hero" in combat: at F4 S4 with 2 Attacks he's barely hitting the baseline for, "this guy will feel like he's better than your average warrior," and by that I mean "he's tying an Uruk-Hai Berserker in fighting stats" while costing 25pts more than one of them. Add onto this the fact that he's only D4 with 2 Wounds and 1 Fate, and he's not a survivable hero either.

And while he's cheap, he's surrounded by other cheap heroes, so he's the "best answer" you have to big heroes that the enemy fields (other than throwing tons of bodies at the problem and hoping it works), which also kind of puts him in the precarious situation of attracting the Elendils, Aragorns, and Azogs of the world because why not remove a Stand Fast hero that is also a banner? And with his combat stats, he's very easy to kill.

Furthermore, Sid suffers from the general problem for Sharkey's Rogues heroes: no cavalry. Unlike Arwen and Eowyn who have a horse to make their S3 more reliable at killing things, Sid has to rely on...I guess trapping people with overwhelming numbers from buddies? And maybe Heroic Strength, assuming you can win the fight in the first place? Add onto this the fact that chasing people down with Sid is not easy and you are highly susceptible to archery, and you've got some built-in issues with getting killing power out of one of the most killy heroes in the faction.

Thursday, March 17, 2022

Dueling Calculator: Building A Monte Carlo Simulation, Part II

Good morning gamers,

In our last post, we viewed how to set up a Monte Carlo simulation to give us a better understanding of how models do when fighting each other (rather than just generating statistical probabilities). We only focused on the dueling aspect of the game because . . . it was really involved. Today, we finish the discussion (for now) to get the basics of wounding into the simulation. Let's get started!

Building The Simulation: Setting Up Inputs

In our last post, we had to roll dice for both sides, identify penalties applied to those rolls, determine if boosting rolls is a good idea, and then figuring out the highest roll for each side. More than 60 columns later, we found "the winner." Today, we don't have to do as much - but we DO have to generate a ton of columns. Rolling to wound in MESBG is done by one side during each duel (generally speaking - some models, like Sharku or Sharkey, can deal damage to their aggressors when they lose a fight) and it's often resolved within a few seconds of viewing the roll. But here's what's going on during those handful of seconds:
  • We figure out how many dice each model will be rolling (factoring in whether or not the enemy is trapped and we double our dice);
  • We identify the wounding difficulty we need to reach to successfully wound;
  • We roll the dice and look at our initial results and identify any successful wounds;
  • We identify if we have any rerolls that we can use (which could be rerolling 1s or rerolling any failed To Wound rolls);
  • We identify which dice have succeeded in wounding after rerolling;
  • We identify how much Might we'd need to spend to boost a wounding roll; and
  • We spend Might to boost wounding rolls that we want to work.
In order to walk through these steps is going to take columns - lots of columns for clarity - and we're going to have to make a lot of assumptions that go back to our inputs page. 


Our inputs page has the following information that we can use:
  • Base Attacks
  • Charge Bonus
  • Whether the enemy is trapped
  • Wounding Difficulty
  • Whether the model rerolls 1s To Wound
  • Number of full rerolls the model receives
  • Might allocated to boosting wounding rolls
The important thing to keep in mind is that the "Trapped" section is independent of knock-down - is my opponent trapped based on his innate positioning (regardless of whether you charged the guy or not). Setting this up right is important since we're rolling to see who has priority.

Notice that we've also set up different inputs for rerolling 1s and full rerolls - since we can reroll as many 1s as we want when we Feint (or however else you reroll 1s) and we usually have a limited number of rerolls, we will need to keep track of which dice have been rerolled on 1s before we do full rerolls.

Okay, let's get into it!

Monday, March 14, 2022

In Defense Of: Ruffians

Good morning gamers,

In our last post, we looked at how to make Harry Goatleaf work better in your forces (that is, in Sharkey's Rogues or the Chief's Ruffians LL). Today, we're continuing our discussion of Sharkey's Rogues by looking at the lowly Ruffian - quite possibly the worst warrior profile in the game (maybe second-worse to Hobbit Militia).

Why NOT To Take Ruffians
Photo Credit: Warhammer Community

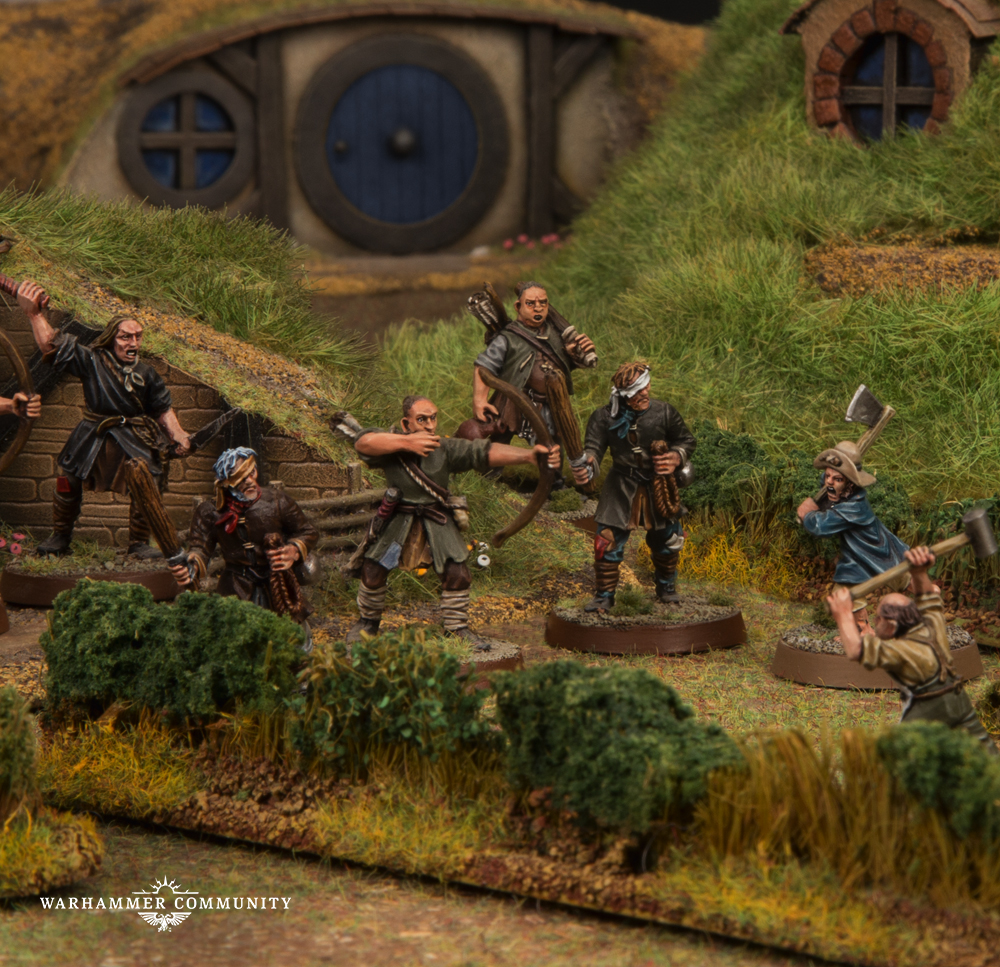
Ruffians have . . . nothing to recommend them in their profile. They are F2/5+ (both stats are below-average), S3/D3 (average Strength, below-average Defense), 1 Attack/1 Wound (average), and C2 (below average). When compared to other Evil warriors, you can see that the price difference between a Ruffian and an Orc, Goblin, Uruk, or Man is pretty stark - and the stat differences are pretty stark too:

Evil "Core" Warriors . . . Ruffians are cheap and that's about it . . .

The only model that costs the same as a Ruffian with a piece of gear (6pts) is an Orc Warrior - and the Orc has +1 FV, +1 (or +2) Defense, and has access to Piercing Strike instead of Stun. Orc Warriors are available in a lot of factions (Barad-Dur, Mordor, Isengard, and similar models are available in Angmar - to say nothing of several Mordor-based Legendary Legions) and have access to spears, shields, and banners (all useful pieces of gear which Ruffians do not have).

There are two models that are cheaper than Ruffians (Moria Goblin Warriors and Goblin Warriors from Goblin-town) and both have similar profiles (lower Movement, potentially higher Defense) but have access to spears/supporting rules (which Ruffians don't have). Goblins (either kind) are at least 1pt cheaper than a Ruffian with a piece of gear - and despite those savings, the Ruffians can only gloat over an extra 1" of movement.

Thursday, March 10, 2022

Dueling Calculator: Building A Monte Carlo Simulation, Part I

Good morning gamers,

Last year, we did a few posts on how to build an Excel-based calculator to determine your probability of winning duels (without boosting and with boosting) and the probability of wounding (either the average expected wounds you'll deal or the likelihood that you deal X wounds to an enemy). These posts, while very useful in providing a statistical view of combats in MESBG, are incomplete. You can tell the calculator that you assume someone has charged, or that someone is within range of a banner, or to some degree that someone has help winning the fight. But no matter how hard you try, there's more information that we might want - and it would be helpful if we could see examples of a combat. For this, we need a simulation - more specifically, a Monte Carlo simulation. And today, we build that.

Monte Carlo Simulations: Repeating A Scenario Many, Many Times

Monte Carlo simulations operate on the following theory: if you repeat a situation thousands of times, you can derive trends from them and get an idea for what to expect in a given (or changing-but-controlled) situation. This is particularly useful when we're rolling dice - you can mathematically figure out your likelihood of getting certain results statistically (as we've already done), but when you have dependent rolls (like dueling and wounding), it's sometimes helpful to see them in examples. And that's what we're doing today.

We're going to create a scenario (two sides fighting) and repeat the scenario 2000 times. Instead of assuming priority, we're going to roll for it - and that means we need to change the scenario inputs a bit. We already have things like Fight Value and number of dice to win the fight and wound on each side, but we need additional information too.

We're also going to allow one side to get up to five model types in the fight (Vertical) and the other side up to two model types in the fight (Horizontal). Because fights break up into one-on-one when multiple models engage from each side, most situations will involve one model on one side and one or more models on the other. The lone model could have a spear-supporting model (or 1-2 pike-supporting models), so I've let the Horizontal team have a second profile option. There may be situations where you'd need more than two profiles for the lower-model-count side (such as an Isengard-Easterling alliance with an Uruk-Hai Berserker supported by an Uruk-Hai Warrior with a pike and an Easterling Warrior with pike and shield), but for simplicity today, we're going to limit the scenario to 5 vs. 2.

We're also going to build out the dueling roll portion only - mostly because the process of accounting for basic dueling and wounding rolls is incredibly complicated and takes a LONG time to explain (I tried doing both dueling and wounding in one post and it was WAY too long). So, keep your shirts on - we'll be back next week to deal with the wounding portion. Keep in mind, though, that we can still learn interesting things from the dueling portion only (which we'll talk about at the end).

Finally, we need to acknowledge when making a simulation like this the first rule of spreadsheet tools:

Columns are free.

Columns in Excel continue to be added as you journey further to the right. We're going to generate a TON of columns in this spreadsheet - and by not constricting ourselves to a certain number of columns, we can keep our granularity as we go and it will keep our cells clean and our work simpler in the long run. So with that, let's dig in and start simulating some fights (well, the dueling portion anyway)!

Monday, March 7, 2022

In Defense Of: Harry Goatleaf

Good morning gamers,

Today we're continuing our discussion on models that don't receive much love from the community. Today's model has been described by Matt Iverson from the Unexpected Podcast team as "the only guy we are less likely to put in an army [than Barliman Butterbur]" - yes, we're looking at Harry Goatleaf, member of the Wanders in the Wild, Sharkey's Rogues, and the Chief's Ruffians Legendary Legion.

"What do you want?"

Why NOT To Take Harry Goatleaf

Harry Goatleaf costs 40pts and is . . . well, not very impressive. Here are a few heroes that are around 40pts - and for thematic reasons, I have picked only Hobbit characters (see our post on Denethor earlier in this series for a larger sampling):

Lackluster profile much?

Harry Goatleaf gets the usual critiques that surround models from the Wanderers in the Wild list (can't lead troops, often make you lose your army bonus) - and to boot, his profile is really weak with only 1 Attack, 1 Might point with no specialized heroic actions, and Defense 3 with 2 Wounds/1 Fate. As we saw in our reviews of Denethor and Smeagol, there are heroes who have decent combat stats for 40pts or less - and Harry isn't on that list.

Harry also has a Lantern that gets some critique - like Blinding Light, it illuminates a 12" radius around Harry Goatleaf. However, unlike Blinding Light, you can't turn it off AND there is no "hit-on-6s" anti-archery bubble from it. Instead, you just illuminate an area - your models, your opponent's models, etc. This will only come into play (for good or for ill) in one scenario out of eighteen - but in that one scenario, it does nothing for you. The fact that you can't turn this off can be a huge liability - especially if you're only D3 with 2 Wounds/1 Fate in a scenario where the enemy will get +1 To Wound and can shoot at you from as far away as they wish. With all this in mind, he's more likely to be run in Sharkey's Rogues or the Chief's Ruffians LL instead of being allied into another force from the Wanderers in the Wild.

Thursday, March 3, 2022

Fyrd Formations: Reforming Shieldwalls

Good morning gamers,

In some of the recent formations articles (fighting on the ground and how to fight against shieldwalls), we've looked at shieldwall formations and how to both use them unexpectedly and how to fight against them. Today, we look at how to evolve your shieldwall formation to gain an advantage against an enemy shieldwall formation (or how to use a smaller shieldwall to take on a larger shieldwall). While we'll be using Minas Tirith and Mordor armies to illustrate, any armies that have warriors with spears and shields can do what we're going to do here.

Note: many of the principles we're going to cover here have already been brought up by Rythbyrt almost two years ago in one of his posts on spears and shield formations - check it out here. We're going to take some of the thoughts Rythbyrt brought up way back when he wrote that article and apply it using the principles that were used historically with the Fyrds in Saxon England.

What Were Fyrds?

A "fyrd" was basically a militia force of farmers that were trained by a local lord in Saxon/Mercian England. The Anglo-Saxons trained their local militias to fight in blocks with shields held tightly together and spears to thrust outwards at anyone who tried to break the shieldwall. The fyrd system worked really well against Scots/Picts, Irish, Welsh, and Danes - but didn't work particularly well against the Normans (something we'll actually be looking at next month).

In England during the first millennium, the usual modus operandi of military forces (be they Anglo-Saxon, Dane, or otherwise) was to form a shieldwall and ram up against the other guy's wall. You then strove with them all day, hoping to break a hole in it. If you managed that, then you could attack the men who were shoving with all their might against your fellows and kill them without them being able to put up a fight. If your wall broke, you were probably dead before you knew the wall had been breached. While there were formations designed to break through shieldwalls (like the Svinfilking), as a general rule, you just shoved our shieldwall against your opponent's.

Most of the time, shieldwalls succeeded or failed based on their length or depth - have either factor out of proportion to your opponent and your line could end up breaking quickly. If you had a short shieldwall and your opponent had a longer shieldwall that had the same depth as yours, your opponent would start to wrap around your men and kill you from the sides (bad day). If the shieldwalls of two armies were the same length but one was deeper than the other, the mass and strength of the deeper rank might break through the thinner wall. Either way, it pays to have numbers.

This principle (longer battle lines or larger numbers) actually does translate into victory in MESBG - but it is possible for a smaller force to defeat a larger one if it positions its troops well. To understand how that works, let's look at three different ways you can form up a shieldwall and why they might be useful depending on the size of the shieldwall your opponent brings to the table.