Well, this is our last post in this series for now. We've already seen how to take your Quest of the Ringbearer collection to field armies like Angmar, Rivendell, and the Serpent Horde, as well as Legendary Legions like the Breaking of the Fellowship, the Black Riders, Ugluk's Scouts, and Cirith Ungol. Today, we're covering an army that has gone from dominance to decline in the international competitive community: the Rangers of Ithilien.
The List
We get quite a few Minas Tirith models in Quest of the Ringbearer (despite the faction only showing up in three missions) - here's the full list:
- You have access to several heroes from the Black Gate (King Aragorn, Gandalf the White, and Peregrin Took, Guard of the Citadel);
- You'll need Faramir, Madril, and Damrod;
- You'll need the ForgeWorld models for Anborn and Mablung;
- You'll need 24 Warriors of Minas Tirith;
- You'll need one Minas Tirith Command blister (for the Warrior of Minas Tirith with banner);
- You'll need one box of Rangers of Gondor; and
- You'll need 6 Osgiliath Veterans (two with shields, two with spears, and two with bows) - though you can convert these models pretty easily from Warriors of Minas Tirith if you want too.
If you play Fantasy Fellowships, you get a few more options: Denethor, Irolas, Beregond, and 6 Citadel Guard (just the spear guys, not the bow guys). As cool as running Elessar with Gandalf at 700pts can be, the clear favorite from this book is the Rangers of Ithilien Legendary Legion (which, conveniently, got updated in this sourcebook with two new profiles - Anborn and Mablung). Given this list of models (note that we only have 24 Rangers of Gondor in it), you can make the following list for the Rangers of Ithilien Legendary Legion:
While this is a perfectly legal Rangers of Ithilien list to run (you could even save 6 points by running Warriors of Minas Tirith instead of the OsVets, probably getting you +1 model depending on how you allocate your gear), you really aren't playing to the strengths of the Legion. I could review this list (with or without the OsVet substitution), but instead, I'm going to recommend that you buy another box of Rangers and run the list as it's intended to be run - with as many Rangers as possible:
- Faramir, Captain of Gondor with bow [ARMY LEADER]
- INDEPENDENT: Frodo Baggins with Sting, Mithril coat, and Elven cloak
- INDEPENDENT: Samwise Gamgee with Elven cloak
- INDEPENDENT: Smeagol
- 2 Rangers of Gondor
- 1 Ranger of Gondor with spear
- 2 Osgiliath Veterans with shields
- 2 Osgiliath Veterans with spears
- 2 Osgiliath Veterans with bows
- 1 Warrior of Minas Tirith with shield
- 1 Warrior of Minas Tirith with shield and spear
- 1 Warrior of MInas Tirith with shield, spear, and banner
- Madril, Captain of Ithilien
- 5 Rangers of Gondor
- 4 Rangers of Gondor with spears
- Anborn, Ranger of Ithilien
- 3 Rangers of Gondor
- 1 Ranger of Gondor with spear
- Mablung, Ranger of Ithilien
- 3 Rangers of Gondor
- 1 Ranger of Gondor with spear
- Damrod, Ranger of Ithilien
- 3 Rangers of Gondor
- 1 Ranger of Gondor with spear
700 points, 41 models, 29 bows hitting on a 3+ AND 2 bows hitting on a 4+ AND 2 S1 thrown stones hitting on a 3+, 6 D6+ models, no fast models but 3 Might for March, 14 Might
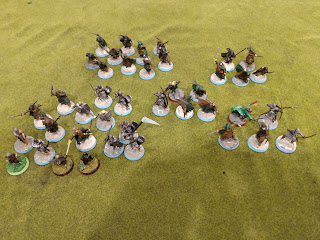 |
| Lots of proxied models - Anborn, Mablung, and a few more Rangers are needed and my Smeagol is sneaking somewhere, but this did give me a chance to show off a few models I like . . . |
While this is a perfectly legal Rangers of Ithilien list to run (you could even save 6 points by running Warriors of Minas Tirith instead of the OsVets, probably getting you +1 model depending on how you allocate your gear), you really aren't playing to the strengths of the Legion. I could review this list (with or without the OsVet substitution), but instead, I'm going to recommend that you buy another box of Rangers and run the list as it's intended to be run - with as many Rangers as possible:
- Faramir, Captain of Gondor with bow [ARMY LEADER]
- INDEPENDENT: Frodo Baggins with Sting, Mithril coat, and Elven cloak
- INDEPENDENT: Samwise Gamgee with Elven cloak
- INDEPENDENT: Smeagol
- 4 Rangers of Gondor
- 4 Rangers of Gondor with spears
- 1 Warrior of Minas Tirith with shield, spear, and banner
- Madril, Captain of Ithilien
- 4 Rangers of Gondor
- 5 Rangers of Gondor with spears
- Anborn, Ranger of Ithilien
- 3 Rangers of Gondor
- 2 Rangers of Gondor with spears
- Mablung, Ranger of Ithilien
- 3 Rangers of Gondor
- 2 Rangers of Gondor with spears
- Damrod, Ranger of Ithilien
- 3 Rangers of Gondor
- 2 Rangers of Gondor with spears
700 points, 41 models, 37 bows hitting on a 3+ AND 2 S1 thrown stones hitting on a 3+, 2 D6+ models, no fast models but 3 Might for March, 14 Might
We could have run +4 Rangers if we dropped the banner, but frankly, I think that the banner will be useful. Our list has become more heavily composed of D4 models, but since our total number of D6 models has dropped only slightly (-4), I don't think we've suffered too much from what we had above. Let's see how this list works.
Army Theory
In this list, shooting is what you do - so your answer to most problems involves shooting. Yes, we have a good number of troops at 700pts (over 40) AND we have a good amount of Might (14 + a free Might point to modify shooting-related rolls on Anborn each round) AND our troops are F4 and almost half of them have spears. All of this is good. However, what we don't have in this list is a big heavy-hitter (Faramir isn't one no matter how he's kitted out - but especially not without his horse and lance) and we don't have magic protection or archery protection (though Stalk Unseen near Mablung does help). So what do you do if you run up against an archery-heavy or magic-heavy list? Well, you're probably going to shoot them - just sayin'.
While this can be strength of this Legion in some games, MESBG doesn't always reward you for playing keep-away from your opponent and shooting them to death. This is a good thing, by the way - when I first got started playing MESBG (back when volley fire was a thing for infantry models), not having as many archers as the other guy - no matter how elite or horrible those archers were - meant you were going to be outnumbered by the time you engaged. Being outnumbered was bad (because you didn't have heroic tiers like we do now - one hero could lead 49-74 warriors if they wanted to), so you tried to get as much shooting as possible to kill the enemy before he got to you. The only saving grace you had was that certain scenarios required you to control different points on the map - and if you held those and your opponent didn't, he could shoot you to death and still lose.
While the rules for structuring your armies (and the volley fire rules) have changed, the fact that certain scenarios reward you for getting to a place and holding it hasn't. In fact, many of the scenarios in the Matched Play guide require you to be somewhere, grab something, or stop your opponent from getting somewhere. Sometimes, this will play to your strengths because you can start on important objective points. Other times, it will require those bowmen you have to either show up second to an important spot if they are shooting the whole way OR they'll have to forego shooting to "be there on time." And honestly, that's a good place for the game to be.
Apparently, though, the scenarios alone weren't a good enough deterrent from this Legion shooting everyone to death. This is because, frankly, if you have 50 bows in your army (as this list almost has - but could have if we Frodo, Sam, and Smeagol), you don't HAVE to go places to win the game. If you have enough bows, you can shoot all of the models your opponent gets to an objective and then win the game by breaking him (and possibly killing his army leader). This kind of oppressive archery was . . . well, not that fun to play against. So as a result, the rules writers errata'd the Legion to require you to take Frodo, Sam, and Smeagol at all points levels - something I actually proposed when I evaluated the Legion in our Stuff of Legends series.
What surprised me was that the same community that decried this Legion as being too powerful at certain points levels then decried the Legion as being too nerfed to be usable at any points level. Wow guys . . . just wow. :) Okay, back to tactics before we get too side-tracked . . .
When shooting with this Legion, it might be tempting to have your Rangers "just shoot stuff" - but as I've learned over years of shooting with various armies at various points levels, as much as possible, you want to focus your fire on one or two areas. In this list, we have 37 bows, which if we move and shoot will hit with ~18 of them and will deal ~6 wounds to D3-4 targets and ~3 wounds to D5-6 targets. If you shoot at 3-4 different squads of the enemy, you'll kill maybe a guy or two in each squad. If there's 10 models in each of these squads, that won't make a big difference to the formation's fighting power, threat, or formation integrity (reforming a formation often makes them lose a little distance, buying you a little more time). Focusing those 3-6 wounds on 1-2 squads can lead to 3+ models killed, which could cause the formation to lose half of its models - which is a HUGE problem. Often times, a devastating blow like this on one formation of the enemy will cause all of the enemy troops to approach more cautiously (and that can buy you a lot of time). Obviously, we don't always have the choice of who we can shoot at, but when given the choice, we should focus on concentrating on one area.
While we know shooting is an important part of this army's playbook, I think it bears noting here what Frodo, Sam, and Smeagol give you. Maybe this will be an unpopular opinion, but I think Frodo, Sam, and Smeagol are valuable in this list - and while they don't give you as many models or bows as a Captain of Minas Tirith on a horse with a lance and shield backed up by 10 Rangers of Gondor would (which are cost equivalent to the three models you're getting), the three travelers do provide interesting ways for you to win missions. Yes, increasing your break point by +4 has its value - as does having +2 Might for Heroic March on a mounted model and +10 bows - but there are loads of tactics that can be pulled off with these three little guys, as we'll see in the various mission we could draw.
At a high level, to begin to probe their usefulness, you have 3 Might on Sam and Smeagol that can be used to call Heroic Moves. Most armies at all points levels will need to have some kind of mid-tier or upper-tier combat hero calling their Heroic Moves - this list isn't like that. While Eomer might want to be on the charge, he'd probably prefer to call a Heroic Strike/Combat instead of a Move. Sure, he'll call it if he has to, but he'd rather someone else do it. Sam isn't a great fighter (though he can get free Heroic Combats to get your Rangers into fights if Frodo is nearby) but Smeagol isn't bad at all - with F4/S4/2A, he's basically got a Captain's offensive profile (sans the horse, the lance, and 2 Might - though if you've Marched, the Might difference might not be there . . . see what I did there? That never gets old . . .). When you add to this that Sam has Stalk Unseen (thanks to his Elven cloak) and Smeagol (most of the models anyway) are crouching down on the ground, these models can not only call Moves for you, but they can also do so while being hard/impossible to charge if they can't be seen at the start of an enemy's move.
Frodo provides a few benefits to your team - not only does the Ring allow him to make your F4 Rangers pretty tough to out-Fight in combat, but with D6 and Heroic Defense (which, after the most recent FAQ, can clearly be used when wearing the Ring - some people knew that already, but the section of the rules wasn't clear to this guy), he can be a tough nut to crack for almost anything in the game. Short of seeing Sauron on the other side of the table (or Isildur or Young Bilbo, I guess) there aren't a lot of models that you're afraid to fight with Frodo - especially since he's not the source of army-wide Fearless and the we-can't-be-broken-if-I'm-
Please note that when I just talked about both Frodo and Sam, I didn't once mention them fighting alongside Faramir (either to give Faramir free Heroic Combats or to allow Faramir to have the highest Fight Value). I did this for two reasons. First and foremost, in Quest of the Ringbearer, we have no horse for Faramir, so we don't have a mounted mid-tier hero to go slamming through the enemy ranks in a Heroic Combat. If he's mounted and on the charge, being in the same fight as Sam or Frodo (or both on the same turn, potentially) could have a lot of value - especially if you're being careful with your match-ups.
Second, and probably the most compelling reason, is that in this list you have D5 army leader - and in my experience, D5 army leaders aren't the guys you want to throw into combat - and Sam and Frodo (being expendable little guys) are the kinds of pieces that should be thown into combat. Backed by Rangers (or in the same fight as Rangers if Frodo is wearing the Ring), these two guys become quite valuable pieces, able to tank damage for your weaker warriors, while still getting that extra bit of hitting power from the Rangers to deal some damage to the enemy. Augmenting your basic troops with these hobbits (and Smeagol, actually) is good for your team - but Faramir needs to be commanding from a place of protection (he should be nowhere near the action).
One last thing we'll cover from the get-go is the value of Might on your Ranger heroes: you can use their Might to boost wounding rolls. Madril's Might is quite useful for Heroic March - he's your only source of it, he has 3 Might in his profile, and since he can't call Heroic Strike/Defense, he doesn't really need it in combat. As a result, saving his Might for Heroic March in scenarios where you need to get somewhere is good, but chances are you may not need them all for March - you could use them to boost shooting rolls if you don't need to get somewhere. Anborn's Might point (singular) doesn't need to be used for boosting wounding rolls necessarily (as he gets a free Might point to boost a shooting-based roll each round), but having that Might point to provide a +2 to your wounding roll OR to boost a wounding roll after you boosted a To Hit roll is quite valuable. Similarly, Damrod and Mablung can use their Might points (one each) to boost a wounding roll when shooting to make sure that you pluck that model that's guarding an objective, that mount your opponent's power hero is riding on, or that model that's got the Prize/Heirloom/racing for your board edge in Reconnoitre or Storm the Camp. Wounding rolls can be the difference between a model being on the board and NOT being on the board - and if you can turn a not-kill to a kill, that's valuable.
Finally, Faramir's Might can be used for Heroic Strike/Defense, but can also be a dangerous threat at a distance if he uses his Might to boost a roll. You don't want to waste that Might, of course, but if you're trying to peg an important model, Faramir's the best option you have in this list (at least as a one-time shot - Anborn probably does more overall if given enough time). I will note that the Might of all of these Ranger heroes would probably have been needed to call Heroic Moves for the army in critical combat rounds if we didn't have Sam, Frodo, and Smeagol along . . . that further encourages us to use our Might for shooting.
Okay, enough about grand strategy - let's dig into each scenario and see what we can do with this list!
Game Play Strategy
Maelstrom & Object Missions (Pools 1 & 3)
For Maelstrom missions, we have the advantage of having Madril in our list. In Hold Ground, we will begin by deploying Madril and spending 1 Might if we need to so we can choose the board edge we want him to arrive in. Since we have Woodland Creature on everyone except the three travelers, we won't mind if we deploy near woodland terrain (as we can use it as a screen against most armies who try to follow us). In most cases, it would be good if your Rangers didn't walk more than 3" onto the board, giving you the ability to shoot at anyone who deploys near you (or who you deploy near if you arrive second). The threat of being fired on immediately is more important than ACTUALLY getting shots in on the first turn. After that, March as many people as can fit within Madril's 6" March radius to the center, but don't worry about getting everyone - the rest of your Rangers can move to find good firing lanes and fall behind the rest of the pack. While getting all of your Rangers into the center of the board would be pretty epic, you don't need to - you just need to establish a presence in the center before the enemy force breaks and then show up with the rest of your guys when they run out of targets to hit. Frodo and Sam can be really helpful late game, as they're difficult to kill without focused effort and can stand within range of the center objective to support our troops (and deny points if things go south).
In Command the Battlefield, showing up in all four quadrants (which can be done by arriving on the center of opposite board edges) can be devastating. Once again, deploy Madril first and spend the Might that you need on all of your warbands to arrive on the board edge of your choice (I'd do north and south - only requires you to get to a 4+). Unlike Hold Ground, it's perfectly fine in this scenario to get a 1 on your malestrom arrival roll for your non-Madril warbands - staying on the edge of the board is valuable. Use your bows and kite away from the enemy, drawing them deeper into a quadrant while you fire at them. Move your Ranger squads nearer to each other so they can support each other once the enemy finishes pursuing them. Ideally, the enemy is broken up by the time he arrives and can be dealt with by your F4 troops easily. Tucking Frodo and Sam deep in a quadrant can help keep our Rangers in line if they separated from the Ranger heroes - C6 heroes are quite reliable for that AND if they have a piece of terrain near them, they can be immune from enemy targeting at a distance.
In Heirlooms of Ages Past, you want to arrive in one corner (beginning with Madril) and then stake out an objective or two to defend but NOT flip over right away. If your opponent happens to find the heirloom, you can abandon the objectives and move out towards him (shooting a hole in the enemy ranks to get to whoever has the heirloom). If your opponent digs up a bunch of objectives and fails to find the heirloom, then you know you have control of it and can dig it up at your leisure. Frodo would be the best person to pick it up, though Sam will do as well - both have Stalk Unseen innate to themselves and both have good Health/Fate to keep them from going down quickly. Hide the heirloom as quick as you can and have your gunline between your opponent and the heirloom.
In Seize the Prize, you want to deploy as far forward as you can and March with Madril 4.5" forward (I'd recommend a Pac-Man or a Millenium Falcon formation for maximum movement and shooting) directly towards the center objective. If your opponent moves anyone towards the objective, you have tons of shots coming their way - make sure your heroes all have clear shots for the center for maximum unit killing). Making sure you have a clear line of sight to the Prize is key to getting the most out of this - unlike all the other factions we've viewed recently, we don't want to go barrelling into the center. We'll get there eventually - but for the first turn (maybe two), we can take it slow. Should our opponent dig up the Prize, we just shoot through their ranks and make it hard to get it across our board edge. We can engage if we need to, but ultimately we don't care if our opponent tries to stay out of melee or not - just keep him on his side and shoot the enemy army to pieces and the worst we can get is a draw (we can even win if we wound/kill the enemy army leader). If your opponent tries to block out your troops from the guy carrying the Prize, remember that you have Frodo and if he puts on the Ring, he can move through the enemy lines to threaten the Prize carrier.
In Destroy the Supplies, we have tons of bows to defend our supplies, but we want to focus on punching a hole through the enemy ranks that will enable Madril to March a bunch of guys deep into their space and threaten their supplies. Frodo is a sneaky asset here, as he can move into contact with a supply marker and can be VERY hard to charge so he can't destroy it. With Sam and Smeagol as escorts, you can put multi-wound models between him and anyone trying to protect his stuff (though again, with the bows you'll have coming to support you, you probably don't need to worry about too many troops being around).
Retrieval is a different story: you want to hedge around your flag with your bows, playing a very defensive game. Frodo can sneak over to the enemy flag, but it's unclear to me if you can pick it up while invisible (check the Ring rules). If Frodo can grab the flag and move it at all, then winning the game isn't that hard if you can keep 40 models safely around your objective. Take your time threatening with Frodo - you can make it VERY hard to snag him if you're careful. If your opponent leaves an opening, you can rush his flag with a division of your Rangers, but I'd focus on making sure your objective isn't taken. This is likely to be one of the missions where you don't get to shoot very much, so stand and shoot for a turn (or two, if you can) and decimate what you can before your enemy closes. 40 F4 models with lots of spears is hard to shift regardless of what comes your way, so I wouldn't say that being charged is that much of a scare.
Control Missions (Pools 2 & 5)
In Domination and Breakthrough, you have pockets of archers who can sit on the objectives . . . I wouldn't start on the center line, but instead use your archers to shoot your opponent off the center objective by getting as many angles on the center as possible. You can also rely on shooting the enemy off of his own starting objectives. Smeagol, Sam, and Frodo can be used to skulk towards far-off objectives (especially in Breakthrough) OR stay near your starting objectives to keep your Rangers in line if you happen to break. With lots of bows, you want to keep firing lanes open to as many of the objectives you don't control at all times (if possible). Even if you control an objective, it's a good idea to have some option to shoot at it, just in case your opponent swings that way and tries to take it from you.
In Command and Control, I would start outside of charge range of the center objective and have clean shots to it so you can kill anyone that tries to turn it - but focus on clearing the side objectives. Frodo will once again be putting the Ring on and moving to the rear objective - all he needs to do is touch it and it will turn to your control. Taking control of the side objectives will give you the positioning you need to threaten the center and rear objectives - don't be afraid to get locked in on the sides if required. Sam and Smeagol are great for sitting on the side objective with Faramir, as their multiple wounds and Sam's ability to Strike can hold up enemy mid-tier heroes who are trying to rampage through your troops.
Reconnoitre is always a tricky scenario for non-mounted factions (we've foregone the horse on Faramir and haven't taken any Captains of Minas Tirith), but we have 3 Might for March wtih Madril to get some of our troops up the board. Honestly, we don't need to get everyone up the board, but if you can form up into a Pac-Man formation, you can get everyone in range if you want to. Marching with Frodo, Sam, and Smeagol (4-5" of movement vs. 6" movement for the rest of your army) is tricky - you need them to keep up, but they'll probably want to be in the rear of your formation so they don't slow anyone else down. Once you get to marching and shooting, however, they can move 7-8" while the rest of the army is moving 4.5" (but normally Madril needs to slow down with them). I would March twice to get as far up the board as you can, but still keeping 1 Might point for boosting wounding rolls with his bow. This scenario can be won by Frodo, Sam, and Smeagol (or some of your regular Rangers) getting off the board edge, but it will also need to be won by having your Rangers sniping models that try to escape you. As such, March at the beginning and then start to spread out into pockets of 3-4 guys. Each then focuses fire on pockets of the enemy trying to get around your pockets of guys - and if you can completely remove a group of enemy models, then you can move your Rangers to support each other in places that are now more threatened. Remember too that you can win the game by quartering the enemy and keeping him from getting anyone off - might be hard to do, but can certainly be done if he doesn't have archery protection up.
Seize the Camp is going to be hard to get max points, but I'm confident you can keep your own camp clear if you move up your forces towards the center of the map and start kiting your way back to your camp. Frodo, of course, is doing the work actually getting to the enemy camp, while I'd leave Sam and Smeagol to bicker in your own camp and fight anyone who straggles past your archers OR the can support your Rangers (providing Strike and S4/2A to whatever your Rangers are doing). Faramir needs to stay safe - so he should lead up the defense of your camp, holding back and staying out of danger and always near Mablung, who will give him Stalk Unseen.
Divide and Conquer will see one of your deployment zones able to March to the center (wherever Madril is) and the other coming on slowly. Personally, I'd March Faramir and Madril's warbands towards the center and have the three mini-squads deployed in the other corner and walk slowly towards the center, harassing with their archery as they go. We talked about concentrating fire - focus your fire on ONE of the enemy forces so that you can decimate that group as it arrives and can then focus on the other force (instead of getting trapped in between the two). If you manage to severely reduce the numbers on one side, slowly advance towards the center, shooting enemy models off of the center objective if you can (unless the two secondary objectives are lightly manned). Ideally, you hold at least one of these scenarios with Faramir and Madril, but if you choose to March at half-speed to do extra archery damage, advance slowly on the objectives.
Killing Missions (Pools 4 & 6)
To The Death is your bread and butter - you have a banner, you have lots of bows, you may even have Stalk Unseen to make you ineligible targets. Everything is great - shoot away, keep Faramir safe, and win all day.
Clash by Moonlight is similar - you can't start shooting until you're within 12" of the enemy, but with +1 To Wound, you're supposed to hit (while moving and shooting) with ~18 shots each round, which will turn into 6-9 wounds depending on the Defense of your opponents. Ouch . . . Breaking the enemy without being broken yourself (Stalk Unseen helps against shooting lists) gets you 5 points and killing more heroes than your opponent does nets you another 3 points, so if you can keep your 8 heroes alive (Smeagol is the only one in any real danger so long as the others have some terrain to obscure them) and not lose any, you just need to quarter your opponent (ideally killing a few heroes) and you should be fine.
Lords of Battle can be good for you, as your archery can rack up a lot of damage. Deploying mid-deployment-zone gives you room to back up and you can advance forward if you need to, but ultimately, you want to rank up a lot of kills before your enemy charges you and then swarm them to get even more kills. Frodo and Sam can be a liability in this mission, as they have lots of Wounds/Fate and Sam in particular isn't hard to wound (Frodo at least is D6 with access to Heroic Defense). Keep them away from sight but able to sail in to help as needed. Skirmish for as long as you can, break the enemy as quickly as you can, and hope the game ends before you lose too many guys.
In Contest of Champions, you can kill models with Faramir for sure. Sniping the enemy army leader is pretty hard, though, with this list, UNLESS you're able to retreat and beat a hasty retreat. Faramir can work with Sam to get some Heroic Combats off, but chances are good your opponent's army leader will be gunning for those low-Defense Rangers. Frodo can help slow the enemy army leader down with Heroic Defense (backed by a Ranger, your opponent will likely need to Strike in order to get the higher Fight Value), but even that is not sustainable for holding the enemy army leader at bay. Should Frodo die against the army leader (which might not happen, by the way), the army leader gets a Might point back.
Assassination is much better for you - you can have Anborn snipe someone, using Heroic Accuracy if you need to hit someone who is hiding behind other models OR just pummel a hole towards that model. You have a bunch of heroes who could be chosen, so make sure they all stay near Mablung and behind terrain so they can't be sniped. If you can break the enemy by clearing out his warriors, you can start getting the game to end early. If you do this and don't lose any heroes, you'll win.
Fog of War is tricky, as your heroes are once again going to be targeted by the enemy (less so Faramir than the others). You probably want to protect Frodo and keep him WELL away from the enemy. The hero you want to target will be anyone who you think you can peg with archery (obviously). Staying away from the enemy, kiting for as long as you can and shooting as many models as you can, will be the key to victory. You can pick a piece of terrain to hold, but I'm not sure it's really worth trying to get. You probably should pick a piece of terrain near the center line of the map, allowing you to back into it as you kite.
Commonly critiqued as an auto-loss as your army leader in Contest of Champions (including recently on the Drawn Combat blog), Galadriel provides a LOT to your army list (even as your army leader). We'll look at the choices you make between not only hero or Celeborn, but also the other heroes in your list and heroes you can ally in to augment what she's doing for your Lorien troops. Should be good fun - until next time, have a happy new near and happy hobbying!
No comments:
Post a Comment