Good morning gamers,
We've covered a lot of Legions so far - we've covered almost everything from Gondor at War, we've covered everything from War in Rohan, we've covered both Legendary Legions from the Scouring of the Shire, and we've covered almost everything from the Quest of the Ringbearer. Today we cover the Legion I am most excited to try out at a tournament (our recent escalation tournament wasn't a good format for this Legion, but we'll pull it out soon): the Depths of Moria.
While my love for the Balrog in the last year-and-a-half is well documented on this blog, I know that most people who have reviewed this Legion have been incredibly critical - NOT because the Legion is bad, but because they already hated the Balrog and this Legion makes fighting the Balrog even harder than it was before. I've also heard people say, "It's fine - this Legion just has the Balrog, so once you tie him down, the Legion is easy to beat." My hope is that this article addresses both of these concerns - the Legion isn't overpowered, the Legion isn't impossible to beat, and it isn't EASY to beat either. It's . . . well . . . just another Legion. Let's dive into it!
Part 1: What Do You Need?
 |
| Legion Tax: 350pts |
What causes the Balrog to stand out above the rest (and the thing that makes most people not like him) is that he's got 4A at F10 - he doesn't have to Strike. Unless you're Sauron (who doesn't have an Elven-made weapon) or Gil-Galad (who does have an Elven-made weapon), you aren't guaranteed to reach F10, though a few heroes (F7-8) have a pretty good chance of making it to F10 when they Strike - and many of those models are monsters with really high Strength levels (or they're Elendil or Glorfindel). Since getting to F10 isn't guaranteed for anyone except the Balrog/Sauron/Gil-Galad, there's often a complaint that "no one should be that high." Even Sauron and Gil-Galad can only make it to F10 three times in a game (potentially more often for Gil-Galad if he can kill smaller heroes without using Might, since Blood and Glory gets him more Might), so while they can guarantee a roll-off against the Balrog if they tie his highest roll, they're not likely to be able to sustain it long enough to actually kill the Balrog.
The trade-off for the Balrog is two-fold: first and foremost, the Balrog doesn't have any Might. While most big heroes can choose to use their Might to call Heroic Strikes, they can also use Might to boost a 5 to a 6 in a duel - and if the Balrog doesn't get a 6 on his side of the fight, even a Hobbit hero with 1 Might point can beat the Balrog. Sure, you gotta Wound after that, but you also didn't die - how's that feel, big guy? For those interested in the trade-off of boosting your dueling rolls instead of Striking, Rythbyrt wrote an article that you can view and I talked about it in an article about wasting Might points (pro tip: if the Balrog has F10, you're running a huge risk of wasting Might by Striking from F5).
The second trade-off is that the Balrog has no Fate, which means that any wounds against the Balrog will (in most missions) get you a victory point - and models that have Might left over can spend Might to boost Wounding rolls with the knowledge that it's doing something. In this Legion (as we'll see in a minute), dealing Wounds to the Balrog is really important, since you have to deal 5+ Wounds to the Balrog in order to break the enemy army - and breaking your opponent often tips the scales as to who wins the game.
 |
| Depths of Moria Bonuses |
Yep, the Balrog pretty much gives you the perfect package, but there are other things you need to include in your army as well. First and foremost, you need a Moria Goblin Captain to call Heroic Marches (or Heroic Moves) for you. With +2 Might for each of these guys, you'll be running with less Might than most armies, but you should have enough to position the Balrog early in the game (and possibly late in the game too, if you're careful). While I like giving them shields, many players (including Sharbie and the Unexpected podcast team) say you can run these guys "vanilla" for 35 points.
You also need a Moria Goblin Drum (or a Blackshield Drum, I guess). These Drums get some nice boosts in the Legion and are a great way for getting a reroll in the Balrog's fight if you have at least 1 Goblin in the fight (more on that later). Drums are a whopping 75 points, but with battlefield-wide coverage, they're well worth their cost.
Finally, you should have a heap of Goblins around the Balrog to make sure he's fighting where he wants to fight. Getting the Captain, Drum, and Balrog is almost 500 points, so you probably won't get a heap of Goblins AND the other prerequisites until you get at/above 600 points, but because you need the model count, I think taking Blackshields would be pretty rare for this Legion (unless you want the mobile drum).
Part 2: Why Take This Legion Over "Normal" Allied Forces?
 |
| Why run the Legion? You do it because you want to run ME! |
Weakness #1: Bye-bye Named Goblin Heroes
Moria has a handful of named Goblin heroes - and most of them are really good. Durburz is a cheap Hero of Valor and gives you a 12" Stand Fast, which is really good. He also has 3 Might for Strike/Defense/Resolve, the latter two have great utility (Striking from F4 is good against models with a reasonable Fight ceiling, but not great against models with a high Fight or Heroic Strikes of their own). Groblog is another great hero, who brings 3 Might and Strike/Defense to the table (again, not at a high base Fight Value), but can also increase the Fight Value of nearby Moria Goblins, which is a great way to get roll-offs against (or even beat the Fight Value of) average troops. If you're lucky with the traps, you can even get F5 on your Moria Goblin Prowlers, if you keep your army bonus - which is just crazy.You also have access to Druzhag and Ashrak, who give you access to fast models and can augment them really well. This is particularly good if you've allied a big spider into your list (Shelob or the Spider Queen), a big Warg into your team if you're running Druzhag (like a Wild Warg Chieftain or the White Warg), or "just Giant Spiders," which get a crazy good offensive profile. All of these heroes were imagined by GW, so they don't appear in the Legion.
I talked about what I hoped we got for this Legion before it came out - and I'm really happy with what we got! The Drum bonus I wanted (affecting the Balrog) didn't happen, but the battlefield-wide buffs (and counting as a banner for scenarios that give VPs for banners) is a much better boost and I'm happy with it. Not getting a 6+ save on Goblins near the Balrog is sad, but getting +1 Fight Value is much better and I'm happy with it.
Well, that's it for the Depths of Moria. If you agree (or disagree) with things written here, let us know in the comments! For me, I can't wait to bring this out at a tournament where we're fighting at 700+ points, so expect to see that sometime! In our next post, Rythbryt takes us through the Legion with the highest tax to date (yes, it beat out the Balrog): the Grand Army of the South. Can you fight Mumaks? How many of them? What about camels? If you're ready to drop some cash on some really great models, check out the Legion that will pack a punch with every charge. Should be a great time - until then, happy hobbying!
Strength #1: Supplement With The Balrog
The Balrog already had augments to his Goblin minions in the form of a 12" Fearless bubble for friendly Moria Goblins - which makes his army a nightmare for armies like Angmar that rely on Terror keeping models from doing anything. This doesn't mean that fighting Angmar is easy - it never is - but you have ways of dealing with Angmar's best rules so long as the Balrog is on the board (even if he's paralyzed).This Legion gives the Balrog a 6" FV buff for nearby Goblin models, which means you don't need to get traps to get the +1 FV that you need in the normal Moria list. Add to this that the army can't be broken until he is wounded 5 times and the drums in your army count as banners in scenarios that give you points for having a banner and you have a crazy good army.
Weakness #2: Bye-bye Monster Options
Moria has quite a few monster profiles - and they're all pretty good! Dragons are F7/S7/4A monsters with Monstrous Charge and can fly, which gives them incredible positioning. Cave Drakes are F6/S6/4A monsters with Monstrous Charge and an 8" move with both Woodland Creature and Mountain Dweller to give them incredible mobility on the board despite not being able to fly. Dwellers in the Dark are also 8" move but have smaller bases, F7/S5/3A, and the ability to recover Wounds if they kill things. Then you've got the Watcher in the Water, who is F6/S6/6A, can appear anywhere on the board if you get a 3+ on an arrival roll, and has access to a really cool BPA that allows him insta-kill an enemy model if they can't pass a Fate save and remove himself from the board to arrive anywhere later in the game. Yep, these are neat monsters.The Legion retains the Balrog and Cave Trolls, but loses access to everything else. Some might see this as a huge disadvantage - and each provides more mobility options than the Balrog has (at least on paper) and sports a pretty good offensive profile (though none are quite at the Balrog's level) for a more affordable price. But this leads us into another strength of the Legion, which is . . .
Strength #2: Keeping the Best Monster Options
While you can make an argument that having other monsters will save you money and deal as much damage as the Balrog, most of these monsters don't have Strike (Dragons do) and will wilt before big heroes (unless you have a gimmick to handle it, like a Bat Swarm). Even if you're using a Bat Swarm, you have to ensure that the Bats end up in the same fight as your monster without being pulled off, which can be complicated if you're dealing with horde armies, Terror/Harbinger heroes, or don't get to move first.The Balrog needs no assistance in being hard to tackle - and with a new special rule that makes it impossible to break your army without dealing 5+ Wounds to the Balrog, you can't just avoid him (like you can try to do against other Moria monsters). The Balrog also isn't as fast on paper, but with free Heroic Combats (which the limited Might on the other monsters - or no Might in the case of Dwellers in the Dark - will make a rare occurrence), you can actually get a deceptive amount of movement - and kills - from the Balrog over other Moria monsters. And again, you don't have to have him fighting with a Bat Swarm in order to make dealing with big heroes easier.
This Legion also has Cave Trolls in it, which are roughly half the cost of other monsters (or a comparable cost to Dwellers) - and while fitting them in is hard, they're good budget monsters with "good" combat stats (F6/S6/3A) and while you won't see them at smaller points levels, I think they provide a good anchor for wherever the Balrog is not present for your army. We'll address this when we get to the lists . . .
Weakness #3: Bye-bye Mobility Options
Moria has quite a few fast troops by default: Warg Marauders are phenomenal models (especially in Reconnoitre), Bat Swarms are great in scenarios like Heirlooms of Ages Past or Seize the Prize (as you are infantry and so are both fast and able to dig up the mobile objective), and you've got really fast monsters as well (Dragons with wings, Dwellers in the Dark, or Cave Drakes, which we already talked about). If you take Ashrak, you have access to Giant Spiders (which are cheaper and more punchy than Warg Marauders in some respects) and if you take Druzhag, you have access to Giant Spiders and Wild Wargs/Fell Wargs (both are very cheap objective grabbers). However you kit your army out, you have plenty of options for speed to supplement your incredibly high numbers. Oh, and you can ally fast models in - like the Spider Queen with a horde of spiders, wargs, and bats!This Legion has none of those options - no bats, no wargs, no spiders, no speedy monsters (except sometimes the Balrog). As a result, you have one option for speed: March, March, March. If you're counting on getting somewhere first, pick a different Legion - this Legion isn't a fast one.
Strength #3: March + Lash = Crazy-town
You're not fast by default, but this list doesn't need speed to be dangerous. The Balrog has the strongest throwing weapon in the game (S7) with a tie for longest range on a throwing weapon in the game (8"). This means that he can move his full distance and still shoot (with a 3+ shoot value base, 4+ if he moves and shoots), allowing him to threaten any model that starts within 14" of him when he starts his move. If he's marching, he has a 9" move with an 8" range, which means models have to stay outside of a 17" radius of him if they move before him and he's marching. This is basically impossible to avoid. If he hits the target (on a 4+, unless a rule says otherwise) and doesn't kill the target (which is guaranteed against multi-wound models, possible against other models if he doesn't get the 3+ or 4+ that he usually needs), then he drags them into base contact with him and you can call a free Heroic Combat to get another move.Strength #4: Points Efficiency
There are lots of points savings going on in this list, but I'll only cover a few. First and foremost, you can get +1 Fight Value and the equivalent of Bodyguard on your Goblins just by having them near the Balrog. Normally, this would cost you +2 points/model, but in this Legion, it's free. Second, you get the benefits of a War Horn AND lots of banners when you buy a Moria Goblin Drum (or a Blackshield Drum), which means the battlefield-wide boost is pretty inexpensive. Normally, you'd need to pay 55pts for a war horn and a 3" banner - add in the cost of two models holding these two pieces of gear and you spend next to nothing to get that increased banner range.
Lastly, Moria Goblin Prowlers have incredibly good value in this Legion. While Prowlers are a good value normally (7pts/model gets you a similar profile to a Warrior of Rohan with throwing spears, except that you cost -1pt to get Backstabbers and have -2" of range on your throwing weapon - there are wargear options that differ as well), in this Legion you tack on the additional bonuses to Fight Value, Bodyguard-equivalent, AND battlefield-wide banners (which is good, since you have to fight two-handed).
Part 3: Legendary Legion Improvements
 |
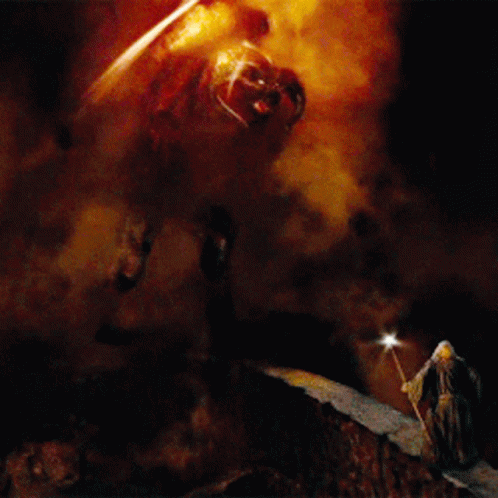
| Hey, Tiberius is writing about the Balrog - did you really expect only ONE GIF?!?!?! |
The one thing I wanted was the "descend from the ceiling" thing we saw in the movies - basically the ability to hold one Moria Goblin Captain in reserve and deploy his warband on the board within certain terrain features or walk on the board in ambush. However it worked, it would have been great - and since mobility is the greatest weakness of this Legion, I think it would have been good to add. But that's all I can critique the Legion for - the rest of it is great!
Okay, we need to start by talking about the Balrog (some more): for starters, the Balrog doesn't charge into the center of an enemy battleline - you want to charge into the flanks of a battle-line. You're a S9 model with Hurl, so if you can lash someone into you, call a Combat, squish the guy, and charge into one of the front-rank guys on the flank (charge a spearman if you can, but you probably break the front-rank guy's control zone first) at a nearly perpendicular angle to the battle line and HURL AWAY! S9 means you should be looking at 6-9" of hurled distance, which should clear the battle line pretty well (and if you angle it slightly towards the second rank, you can knock over a lot of guys in both ranks).
Part 4: Army Strategies
 |
| Don't worry - we'll just avoid that thing . . . right? |
Second, everyone orbits around the Balrog. Your Goblins are better if they're near the Balrog, so keep them near the Balrog. Your monsters get less flack when they're near the Balrog, so keep them near the Balrog. Your army will be harder to kill if they stay near the Balrog (who is hopefully knocking people over who were supporting fights that the Goblins were in), so stay near the Balrog. Want to make sure you get VPs for that Drum? Make sure it's near the Balrog! You got the message, right?
Third, you gotta March - like, all the time. March is more important for this list than basically any other army (except maybe Barad-Dur) - you need to get the Balrog killing stuff quickly, so get him moving! Yes, Heroic Moves are important too, but they're not nearly as important as getting your army moving and engaged quickly. Ideally, you have a center-line deployment scenario and you don't have to March at all - but in most scenarios, you'll need to move up the field.
Fourth, you need to make sure that you get numbers over combat units. You don't have to worry about being broken IF you can keep the Balrog from being trapped, surrounded, and beaten up. For that reason, you need numbers - guys to hold the line, keep your opponent from getting around the Balrog, and calling Heroic Combats to get into the Balrog's fight around the flank. So . . . make sure you get lots of people into the fight!
Fifth, protect your drum. Moria Goblin Warriors with Orc bows are often left at home in Moria armies, but parking them near Moria Goblin Drums allows you to shoot at enemy models as they race towards the Drum and they can pick up the drumsticks of the drummers if they get killed. Personally, I prefer the Moria Goblin Drum over the Blackshield Drum, as Blackshields can't take ranged weapons and Moria Goblins can.
Last, we have one last note on the Balrog: in this Legion, you can set one model aflame in the Shoot phase with the "and Flame" special rule. Picking a model to set aflame is important, and here's the plan: pick the enemy army leader if you can. If not, deal with an enemy hero that you want to beat a hasty retreat. Monster warriors are also good choices, as they don't have Fate and often have limited wounds (and they have to play more carefully if they're constantly being threatened with death).
Part 5: Army Showcase
At 500-points, this Legion won't get all three of the models it wants (the Balrog, a Captain, and a Drum) with any amount of numbers. As a result, our first list is the "no Captain" build, which locks us in to 19 models, but does give us rerolls from the Drum and enough models to support the Balrog wherever he's at. You have a few Moria Goblins with bows to protect the drum, but otherwise you're running full-bore with the melee Goblins, hopefully forming an anvil to tie down some of your opponent's forces while the Balrog does his thing. I would consider taking 12 Goblins with shields instead of a 6/6 split between shields and spears if you were worried about being wrapped. With 18 models, we've got a pretty big group (but expect to start off outnumbered):
- The Balrog [AL]
- Moria Goblin Drum
- 6 Moria Goblin Warriors with shields
- 6 Moria Goblin Warriors with spears
- 3 Moria Goblin Warriors with Orc bows
Our second list is the "no Drum" 500-pt list, which gets a healthy number of models at the cost of the Drum banner benefits. We have 25 models now (only six more than the drum list), but we have 2 Might for March/Moves and our shieldwall has increased in size a bit (as has our archers - because honesty bows). Honestly, I like the drum list better, but whatever - and Sharbie, I left the shield off the Captain:
Army Summary
- The Balrog [AL]
- 5 Moria Goblin Warriors with shields
- 5 Moria Goblin Warriors with spears
- 4 Moria Goblin Warriors with Orc bows
- Moria Goblin Captain
- 4 Moria Goblin Warriors with shields
- 5 Moria Goblin Warriors with spears
- The Balrog [AL]
- Moria Goblin Drum
- 5 Moria Goblin Prowlers
- 5 Moria Goblin Warriors with spears
- 6 Moria Goblin Warriors with Orc bows
- Moria Goblin Captain with shield
- 4 Moria Goblin Warriors with shields
- 5 Moria Goblin Warriors with spears
- 1 Moria Goblin Warrior with Orc bow
- Moria Blackshield Captain
- 4 Moria Goblin Warriors with shields
- 5 Moria Goblin Warriors with spears
- 1 Moria Goblin Warrior with Orc bow
Bonus list time (because why not): while the previous 700-pt list tried to get as many models as possible, I think there's something to be said for keeping your model count lower and getting better models instead. This list is one that I'd love to try - and it intentionally takes fewer models (only 31) in order to get more damage on the board. With a Cave Troll, 10 Moria Goblin Prowlers (with spear supports), and the obligatory Drum/Captain (with some Orc bow guards for the Drum), you've got a powerful army that's ready to take on just about anything (though admittedly, you have three model with higher than Defense 4). I've also made this army throwing-weapon heavy (12 in total because I love throwing weapons), but since you have 1 warrior slot left, you could drop the Troll Chain (or the shield on the Captain) in favor of an additional Goblin:
- The Balrog [AL]
- 1 Moria Goblin Drum
- 6 Moria Goblin Prowlers
- 6 Moria Goblin Warriors with spears
- 4 Moria Goblin Warriors with Orc bows
- Moria Goblin Captain with shield
- 4 Moria Goblin Prowlers
- 5 Moria Goblin Warriors with spears
- 1 Moria Goblin Warrior with Orc bow
- 1 Cave Troll with troll chain and hand-and-a-half hammer
A great article! Made even better by leaving off the shields on the Captains, of course...
ReplyDeleteMore seriously, I've been running this Legion quite a bit recently at 650 points, and struggling a fair amount. The list had looked pretty solid to me (2 Captains, Drum, and 31 Goblins), but I'm having a hard time holding the enemy up for long enough for the Balrog to do his thing. Do you think the Legion just doesn't work beneath 700 (at which I would have an extra 10 models if I went full spam, making life much easier), or is it more likely my lack of experience with the Balrog?
I think there are probably several factors: first, not all points levels are equal. At/below 500pts, you will never have all of the essential models in the list (Balrog, Captain, Drum, horde), but the Balrog becomes much harder to deal with as the points limit shrinks. Once you get to 600, you can get the three essential choices and pair them with up to 28 Goblins (which would fill your warband slots after you include the Drummers). At this point level, however, your opponent has the ability to take another mid-range hero, which can be bad for the horde, but probably doesn't threaten the Balrog. Upping it to 650 would appear to force the Legion into adding a Captain and basically nothing else (+3 Goblins or +1 Goblin and shields on your Captains or +1 Goblin and a Blackshield Captain), while your opponent could take the extra points and upgrade that mid-tier hero into a big hero who can threaten the horde and make life hard for the Balrog. 650 would appear to be awkward . . .
DeleteSecond, it could be scenarios or the army match up. With a lot of D4 in the list (and a lot of D5 otherwise), not a lot of speed, and average numbers at most points levels, there are certain match ups that you're going to struggle to win because the Balrog can't be everywhere (most of the time).
I would be curious to see what happened if you tried the following list at 650 - far less numbers, but you get a second threat to counter a mid-tier hero or chew through troops:
Balrog
Captain
Drum
Cave Troll with hammer
22 Moria Goblin Warriors (4 bows, 9 shields, 9 spears)
Your model count has dropped (27) you have quite a few D4 models, you have less Might, but it has more killing power and you can Hurl with two models down the lines (and they can't be knocked over by each other's Hurls).
I was going to suggest a cave troll as well (for the reasons Tiberius gave), but probably not for 650. :-P with just 27 models (and a fair bit of S5 and under), I’m concerned about scenarios that end when you’re quartered. The Cave Troll helps break the enemy faster, but that doesn’t exactly buy the Balrog more time. But maybe that’s less of an issue if you’re winning more fights and killing more stuff.
ReplyDeleteAt 700, though, 37 models is a good count given that you also have a Balrog and drum and troll (although just 2 Might kind of scares me).
2 Might is bad - though with free Heroic Combats, your effective Might is much higher. It does mean you need to accept being slow (which you probably will be anyway) and you need to accept that you're moving second a good bit of the time. If both of these things are problems . . . Rohan might be a better option. :)
Delete