Good morning gamers,
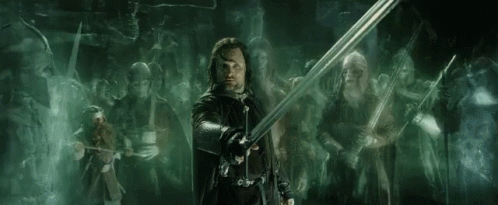
Today we're back in Gondor at War to review one of the first Legendary Legions released (and still a popular Legion): the Return of the King. Any Legion that gives you Anduril on Aragorn for free is going to be popular, but pairing this with high Defense models (many of which you probably have in the Pelennor Fields starter kit) makes this army fun for new players and veterans alike.
While I'm not a big fan of this Legion, Rythbryt is - so he's bringing the list review for us today while I interject here and there from the sidelines. Have at it, man!
Rythbryt: While many of the legendary legions we've looked at previously are pretty niche, this one is quite well-known. If you scour the YouTube interwebs, you'll find no shortage of discussions and bat-reps about the Return of the King legion. I also think it's the legion you've most likely played before, because if you picked up the Pelennor Fields box set, you probably have all the models (or could easily proxy the few you don't have).
With that said, I'll try to bring something new and fresh to this topic... but I'd also encourage you to check out what Centaur and Tiberius have to say, as they've both previously weighed in on the Dead of Dunharrow.
Part 1: What do you need?
 |
| Legion Tax: 260-265pts |
Aragorn's importance can't be overstated. He's the only source of Heroic March in an army that has only 1.5 ranged models max (more on them shortly), assuming that you don't want to burn the King of the Dead's Might point for that purpose (pro-tip: you usually won't). While Terror armies don't necessarily have to move first, doing so can be a major advantage--you still get to pick your fights and reposition your battle-line, and the enemy may not be able to counter-charge the engagements you've selected. Free Heroic Combats are great tools for repositioning your troops and getting more punch out of your combat heroes (on whom this legion can be surprisingly dependent to win combats). The King of the Dead is a pretty resilient hero in his own right, and Aragorn (even in his Strider form) is one of the hardest heroes Good has to kill off. Finally, Spirit models treat Aragorn as a 6" banner, thanks to one of the legion's core special rules.
The one eyesore stat on Aragorn's profile is his inability to take armor, which means he's capped at D5. Fortunately, the legion has a couple tools to mitigate that risk. For one, Aragorn still has access to his elven cloak (for 5 points), which offers protection from ranged attacks and magic if he's shielded by terrain. Aragorn can also lead Warriors of the Dead in this legion, which means you can put multiple D8 in-the-ways between him and any ranged attacks. Assuming the enemy can see Aragorn behind those ranks, the odds of him taking enough bow fire to chew through his 3 Wounds and 3 Fate before you get into combat are pretty low. (But once you hit combat, watch out for evil armies with mass throwing weapons...)
Aragorn can't be mounted in this legion (something about horses not liking the accursed mountain), but he's still plenty dangerous in a brawl because he gets Anduril for free. Sure, the 40 points you save don't go quite as far in an army where your cheapest warrior costs 15 points (again--always take the shield on your Warriors of the Dead), but an extra 2.67 warriors is still an extra 2.67 warriors, and in hyper-elite armies like this one, every extra model helps. Anduril means you never need more than a 4+ to wound anything in the game (unless Heroic Defense is involved), or a 3+ if you decide to two-hand. If you don't need Aragorn's Fight Value (because another F5+ model is involved in his fight), you can always do the busted two-hand-plus-feint trick, too, to wound on a 3+, rerolling 1s. And if you're concerned about the lack of punch without the horse, you can still replicate 75% of Aragorn's damage output either by throwing him into combats against trapped models or having one of your Riders of the Dead charge into his combat if he’s fighting a model on foot (both of which will double your to-wound dice from 3 to 6).
Return of the King Bonuses
The King of the Dead isn't Aragorn's equal in combat (to be fair, very few models in the game are), but he fills a number of important secondary roles in this legion. First and foremost, he gains Harbinger of Evil, which makes your basic warriors harder for most opponents to charge (unless they have a special rule like Bodyguard, or access to spells like Fury). In addition, since all your Spirit models have Blades of the Dead, a -1 to Courage may make your enemies easier to wound even if they have a Courage bypass ability. Unless you're playing D3 Wood Elves (or some hobbits), you'll almost always have an easier time wounding against Courage than you will Defense, and Harbinger makes it that much easier (especially against Courage 4 dwarves, and Courage 2 orcs--models that can be significantly harder to wound if you had to take on their defense).
The King's not terrible in combat (Fight 5 with Strike, two attacks at Strength 4, and of course Drain Soul to insta-kill most things that can't save his wounds with Fate points), but with only one Might he's not super-reliable, either. He really benefits from having a spearman bolted to his back the entire game (getting him to three attacks) and from Aragorn's banner reroll (basically giving him 4 dice to win the fight, if you have aforementioned spearman bolted to his back). Defense 8 with 2 Wounds and 3 Fate also means he can weather a botch or two if it comes to that, especially since most mid-tier enemy heroes (and high-tier 1 Fate enemy heroes) tend to be leery about taking him on. Harbinger plus S4 plus Blades of the Dead means he usually needs no more than a 4+ to wound mid-tier heroes (C5 or below), and no more than a 5+ to wound elite heroes (C7 or below). If those heroes lose a combat, and are trapped, and the King is rolling 4 dice to wound... watch out. Finally, he can be surprisingly hard to lock out of combat, thanks to his small infantry base (at just 25mm, he can slip in and out of combats much easier than the mounted models that are usually pursuing him), and with 6 Will (plus potentially Resistant to Magic from a nearby Herald), he can shrug off spells for quite a while.
While Strider and the King of the Dead are great starting points for heroes, you'll probably want at least one more at most points levels. While Aragorn does a lot for your army, he can only ever be in one place at a time (maybe two, if you have successful heroic combats and room to reposition afterwards). And, of course, Aragorn can't Heroic Combat and Heroic Strike in the same Fight Phase, so if you want / need to do both in more than one clutch moment, either Aragorn or the King will need some help with that.
Fortunately, the Legion comes with three additional hero options, all of whom are good models (although I do think there's a hierarchy for this particular legion). Legolas is the most versatile. He’s rightly prized for his prowess in the Shoot Phase (either three S3 shots at a 3+ to-hit, or a single S3 shot on a 2+ to-hit, that he can fire regardless of Blinding Light, in-the-ways, or even friendly models being in combat). But his combat profile is pretty good as well: F6, 2 Attacks, S4, and access to Heroic Strike with his elven-made daggers means he’s quite good at winning fights, especially if you can get a few extra dice into the combat. He's vulnerable to being shot himself (D4 base, up to D5 if you take the armor), but as with Aragorn, you have the option to protect him with an elven cloak plus multiple in-the-ways from D8 warriors.
Or, you could just go with Gimli (who's Defense 8) and shrug off 95% of enemy shooting without trying. He's not as versatile as Legolas (and certainly doesn't have Legolas's threat range), but he's arguably better in combat (throwing axes on the charge, and he trades elven-made weapons for either 3 attacks or 2 attacks with a +1 to-wound). As with the King of the Dead, both Gimli and Legolas (plus Aragorn, for that matter) really benefit from having their own assigned spearman, both for that extra attack and to benefit from Aragorn's banner bonus (since the three hunters aren't Spirit models, they need a Spirit model in their duel to claim its advantages). At higher points, they're also quite a bit better if you take both Legolas and Gimli: since they have a friendly kill-count rivalry, Gimli picks up a static +1 to-wound if Legolas is outscoring him (which is almost always the case when Gimli hits combat), while Legolas's shoot value improves by +1 if Gimli is ahead on kills (which sometimes happens in the late game).
Finally, for slightly fewer points (75 to Legolas and Gimli's 100-110 points), you can pick up one or a few Heralds of the Dead. They aren't on the level of Legolas or Gimli when it comes to combat, but they aren't bad, either: Fight 4 is kinda "meh," but S4 with Blades of the Dead hits most models pretty hard, they have 2 Attacks and 2 Wounds, and they're Defense 8 with shields (again--always take the shields), so they're pretty resilient. Like Aragorn and the King, their primary contribution to your army is that they buff your Spirit models: all Spirit models within 3" of their Pennants pick up Resistant to Magic, which shores up one of the weaknesses of the list (vulnerability to magic, outside of the King's 6 Will). In addition, each Herald comes with 3 Will points, which you can use in all of the normal ways plus the King of the Dead can spend them to call Heroic Actions (so long as he's within 3" of a Herald). That means just a single Herald makes the King quite a bit more threatening: that's up to 4 Heroic Strikes / Combats / Moves, instead of just 1, which is a 300% effectiveness buff (plus you get another model out of it).
Part 2: Why take this legion over "normal" allied forces?
Let's get the obvious out of the way first: if you want Aragorn, Gimli, Legolas, and the Dead of Dunharrow in the list, this is basically the only way to run that particular list at anything near an optimized level. For starters, the Fellowship is the only way you can run Gimli and have an alliance (because for some reason, the only way to run Gimli in a Khazad-Dum list is actually in a Kingdom of Moria list--even though Gimli didn't go to Moria with Balin and friends?--and the Kingdom of Moria has really punishing alliance restrictions). But pairing the Fellowship with the Dead of Dunharrow is only a convenient alliance, which means:
- You lose the King's Harbinger of Evil bonus;
- Aragorn has to pay 40 points for Anduril;
- Aragorn loses the 6" banner bonus; and
- The three hunters can't lead any Dead of Dunharrow plus you lose the Dead of Dunharrow's army bonus (which means the only way to bring more than 15 warriors / riders of the dead is to bring... a Herald).
The more interesting question is whether this legion is better than taking the Dead of Dunharrow plus Minas Tirith with King Aragorn (which is a historic alliance, and Tiberius's preferred build). The tradeoffs are that we're paying 200 points to turn your historic alliance into a convenient one if you bring both Legolas and Gimli (which nixes the Harbinger / troop "spam" army bonus from the Dead of Dunharrow, without the ability to bring more troops), and we're paying a whopping 65-80 points more for Aragorn. Granted, King Aragorn is quite a bit better: you pick up D7, a static 6" banner for all friendly models, and a horse option, plus you can lead "cheaper" warriors and cavalry from the Minas Tirith list. But that's a very different list than what the legion offers. And again: it's very, very expensive if you also bring Legolas and Gimli, who probably/can't bring troops with them. Of course, you are always free to do you--but if this is an alliance you want to try, you're probably not bringing Legolas and Gimli (and may not bring either of them).
In contrast, this Legion offers you the leanest way to bring this iconic collection of heroes and warriors in a single list: there's no Anduril tax (because it's free), there's no hero-tax on Legolas and Gimli (because they can lead warriors), and there's no frills, bells, or whistles to buy for Aragorn (no mount option, and you still get a 6" banner effect, plus the option for an actual Banner on a Warrior of the Dead if you want it). The result is that you can squeeze more Warriors / Riders of the Dead into this list than you could any other list with multiple F6, 3 Might heroes (although bear in mind, the definition of "more" here means "2-4 extra warriors," not "ten-plus extra warriors"), and you keep Harbinger of Evil.
In my opinion, those are definite wins.
With that in mind, let's tackle some weaknesses and strengths:
Weakness #1: Fight 3 is just "meh." I suppose every profile needs some sort of weak spot (don't tell that to Iron Hills Warriors, though), and for Warriors and Riders of the Dead, theirs is Fight 3. It's fine--and Aragorn's 6" banner bonus helps a lot--but most of the time you'll be losing drawn combats. If you're used to playing with elite troops (elves, for instance), it'll take some getting used to.
Weakness #2: Almost no ranged attacks. You have Legolas's bow (if you have Legolas) and Gimli's throwing axes (if you have Gimli). That's it. Now, granted: Legolas's bow (plus a D8 front line to keep Legolas safe) is enough to bring most armies to you eventually (more on that in the tactics section). But if you're not patient by nature (or if the scenarios demand it), be prepared to run around a lot.
Weakness #3: Limited numbers. The legion tax (Aragorn + King of the Dead), plus the need for at least one more 100 point hero at most points levels (and a strong draw to bring at least two more, even at low points levels--see Tiberius's 500 point list below, for example), plus a base warrior that costs at least 15+ points, means your numbers are going to be tiny (like, low-20s at 700 points if you go full Three-Hunters mode). Your heroes and troops are high-quality, Warriors of the Dead can be incredibly durable, and you have some built-in tools to deal with hordes (Terror + Harbinger), so you can make do: but again, if you're not used to playing with small, hero-centric armies, it may take some getting used to. And your margin for error is pretty small if your heroes do botch combats. Which leads me to...
Weakness #4: You're pretty hero-dependent. Again, this isn't a knock on Warriors of the Dead: when they win fights, they're pretty reliable at killing things, especially if there are 2+ of them in a combat (2 dice have a 75% chance of scoring at least one 4+, which is all you'll need against most warriors if you have Harbinger active). But F3 plus small numbers means they don't win as many fights as you'll think they will, especially if you charge headlong into another enemy shieldwall that outnumbers you 2-to-1 (which most shield walls will), and/or if the enemy has any sort of Terror bypass (Bodyguard, Sworn Protector, Fury, Fearless, a War Horn, Erkenbrand, Shire Merry, a Dwarf Shield Bearer, a Wood Elf Sentinel, Compel, etc.). True, your warriors have a pretty good chance of surviving (especially if the enemy is S3 or below), but to cut through enemy lines, you'll be largely reliant (at least at first) on your heroes. Bigger heroes can also carve their way through normal Warriors of the Dead (a S4 hero with a +1 to-wound on a horse needs only a single 5+ on up to eight to-wound dice to kill a Warrior of the Dead), so you'll need your heroes to deal with them, on top of calling heroic actions, anchoring your lines, buffing your warriors, and dealing with any other threats your opponent has brought (like monsters, casters, siege weapons, chariots, etc.). Again, depending on the armies you usually play, you may be used to this dynamic; but if you primarily play armies where the troops do a bunch of the work, this army usually plays differently (unless you see a lot of F2 in your local "meta"--in that case, go to town).
Weakness #5: Vulnerability to mass magic. The King of Dead can shrug off spells pretty well (especially if there's a Herald around), but Aragorn (3 Will), Legolas (2 Will), and Gimli (2 Will) are susceptible to being stun-locked by an enemy Transfix / Immobilize or Compel / Command. Being on infantry bases helps (max move of 2.5-3" from Compel, unless you've Heroic Marched), and if the enemy has only one spell caster (as most enemy armies do), you can probably survive: Aragorn isn't entirely useless if he's been Transfixed because he's still contributing that 6" banner, and with 2-4 combat models, plus some 10" move cavalry with Terror, you can usually cut your way to the caster if a single hero is transfixed each turn. But against armies with more than one caster, your heroes--and with them, your army--may stall (especially if Legolas is hanging back away from the battle line, shooting all game).
Having said all that, this Legion definitely has some strong points:
Strength #1: You're the most well-rounded Terror army in the game. I'm already on-record as saying that no army matches Angmar when it comes to the sheer volume of Terror you can field in a game, mostly because of the cost of its Terror units (5-7 point orcs, paired with 50 point Barrow Wights). But that volume comes at a price: Terror Orcs are still Orcs, which means they're vulnerable to the same things Orcs are generally vulnerable to: shooting (particularly S3 bows, since they're only D5) and Terror (since Angmar can't bring a Fury shaman). And while Barrow-Wights are very scary, multi-dimensional models (they are high defense, have great courage to hold your battle-line together if you break, and they have 5 Will that they only need to throw one, devastating spell: Paralyze), one dimension they don't cover very well is combat (they're only F3, with 1 Attack and no Might). Which means if a big hero can get into them, they go down pretty quickly (and with them, their 3" Terror bubble). Warriors and Riders of the Dead have Terror built into their profile (so no need to worry about "bubbling-up"), they're almost entirely immune to shooting (D8) and Terror (base Courage 6), and while they still have the Orcs' average Fight 3, Defense 8 makes them much more resilient in combat (while their S3 goes further most of the time, thanks to Blades of the Dead).
Where this legion really separates itself from Angmar is in the amount of work your heroes can do: the King of the Dead is at least a couple steps above a Barrow Wight when it comes to hitting power (and the three hunters are a step above the King). Angmar's other Spirit heroes run more expensive than the King, Gimli, and Legolas (and a couple are more expensive even than Aragorn), and I'm not sure many of them would be favored in a straight-up brawl against the three hunters or the King (the Tainted and Dwimmerlaik run at least 120 points as sub-optimal combat models, and as many as 170 points if you deck them out for fighting; the Witch-King and Gulavar are likely in the 200 point range, but Gully has no Fate (and no more than Courage 4/Defense 5), so... it's dicey, to say the least).
Strength #2: Answers to most enemy armies. This is a catch-all category that is going to cover a bunch of things we've already alluded to, only this way I get to talk about a bunch of them at the same time (and also talk some tactics against specific forces). FWIW, I do think this is an army where their strengths synergize really well, so discussing them together makes sense. Mass spell-casters aside (see Weakness #5, above), you play pretty well against basically any other force you'll face:
- Hordes: Despite low numbers, F3, Terror, Harbinger, Blades of the Dead, and Defense 8 give you an advantage against most spam armies (Goblin-Town, Moria without the Balrog, Corsairs, Sharkey's Rogues, the Shire, etc.). And for any mid-level spams (i.e., any Orc spam list with a Fury Shaman, or mass Gondor with Bodyguard), you have Legolas to snipe out their shaman or leader.
- Terror Armies: Base Courage 6 on your warriors and heroes is about as good as you'll get for an army that isn't made up of (good) monsters.
- High Defense Armies: Blades of the Dead + Harbinger covers a multitude of sins. And even against the "annoying" wood elf armies, or special troops like the Watchers of Karna (C5 vs. D3), you're unlikely to ever need more than a 5+ to wound, even if they've brought a War Horn along.
- Ranged Gun Lines: The Rangers of Ithilien Legendary Legion still isn't a "fun" legion to face, but at least you'll have more fun with this legion than most other opponents would if you draw it.
- The key to taking down the Rangers legion with a combat army is that you need some combination of (a) superior archery protection--preferably a 6+ to-hit effect like Blinding Light, (b) high defense models who can survive the mass shooting you'll face (because even if the Rangers need a 6+ to hit, they'll still likely roll hits if they're shooting 40+ times per round), (c) speed to close (because your biggest strength is that good can't shoot into combat), and (d) the ability to reliably kill rangers quickly once you close (because shoot phases take forever, and most tournament rounds are timed).
- There's no Blinding Light here, but you have everything else: D8 is basically as good as you'll get anywhere--troops or heroes--and even if the Rangers are scoring hits, a 6/5+ to-wound (S2 vs. D8) means you're unlikely to actually cop very many wounds (which is great--since we won't have that many models to begin with). Aragorn and Legolas are vulnerable (with 40+ shots, at least some in the ways probably get through), and I'd probably be tempted to keep the King and Gimli in the back rank, too, at least as you close (because again--when your opponent is rolling 40+ shots, anything can happen, so why tempt the dice gods?). Elven cloaks on Aragorn and Legolas probably aren't bad buys, as is the armor for Legolas (because S2 bows need 6s to wound D5, but only 5s to wound D4).
- Aragorn brings the speed (thanks to March), and since we're probably looking at no more than 30 models at most points levels, it's not particularly hard to fit all the warriors and heroes within his 6" March range. There are ways to get Aragorn marching from the back rank (keep a couple 28-30mm gaps in your ranks, for him to slip through), so you can still keep your force moving at full-tilt even if you're protecting him with some D8 in-the-ways. It's harder if you want to move-and-shoot with Legolas as you advance. Your front rank is tough enough that you can probably weather the extra turns of movement (you're at least moving 4.5" instead of just 3"), although I'd probably just run forward at max speed and trade a couple turns of Legolas's bow-fire for a couple turns of combat. If you take several riders (and don't need them for anything else), you could also attempt a blitzkrieg movement with them (powered by a single March from Aragorn, they can cover 25" in two turns). D8 riders on D6 mounts have about the best odds you'll get of booking it across the field against the Rangers and surviving, especially if they have some cover at the mid-point. And once they get into combat, they can't be shot at.
- Lastly, once you do close, you have the ability to start killing Rangers fast. They are F4, and they'll probably outnumber you, so that gives them some advantages. But at just C2 (in Harbinger range), they'll have trouble charging en-masse (and if the enemy has opted for more rangers instead of more spears, that may cause problems). Ranger gun lines also tend to spread out pretty wide, so if you are able to attack a section of them (with your Terror troops), you may be able to defeat them in detail, minimizing their numbers. None of the Ranger heroes are particularly good at fighting your heroes, either (Faramir is the best, but with no armor--and being the army leader--it's pretty rare that the enemy throws him into combat until things get dire). So as long as you can keep your own heroes from being surrounded, they can clear through rangers pretty fast (none of them need more than a 4+ to wound D4 Rangers). The Warriors also wound Rangers on 4s (S3 vs. C3/2), while the Rangers need 6/4+ to wound them (S3 vs. D8). That's a pretty stark attrition advantage. And if your vanguard of Riders are still alive, and they can start riding down Rangers, things can escalate quickly.
- A Serpent Horde / Corsair gun line is both easier and tougher to deal with. On the one hand, neither will consist of 90-100% bows (the way that the Rangers are usually fielded--Serpent Horde can get to 50%, while Corsairs are capped at 33%--plus heroes, of course). Additionally, Corsairs and most Haradrim only hit on a 4+ (instead of the Rangers' 3+), assuming any Watchers of Karna you face have the twin blades upgrade (instead of the poisoned bow). Both those factors mean the expected number of hits you'll get are way less than what you'll take from the Rangers. But S4 crossbows only need 6s to wound the Dead (a huge bump over wounding on a 6/5+), and any time you get to reroll failed to-wound rolls en masse (if the Betrayer is boosting the Serpent Horde), you just never know what'll happen. That said, you still have D8 warriors and can still March each turn with Aragorn, so you can still close on those armies (even if the Haradrim are mounted, a 9" march will still catch them eventually). And once you close, you still have mass Terror backed by Harbinger, and most Serpent Horde / Corsair models have terrible courage (Watchers of Karna and Reavers with a Bosun excepted, of course--but if you're facing those, that may be a situation where you decide to slow-roll in with Legolas shooting each turn).
- The wrinkle is that once you get into combat, your troops--and more importantly, your heroes--aren't necessarily safe, because evil can shoot into combats (and if Aragorn or Legolas are in combat with a single pleb, the enemy has a huge incentive to do just that). The best way to mitigate that, in my experience, is to tie up as many of the ranged models as you can with your own hearty troops (this works better against Harad, because their ranged warriors are almost always F3; against F4 Corsairs, spotting them some extra dice isn't ideal). Shielding in banner range of Aragorn gives 3 dice to win the fight, which combined with your hearty defense gives you a reasonable shot at surviving. Alternatively, I've found that the enemy is much less likely to shoot into your heroes' combats if your heroes are fighting their heroes (especially important heroes, like Suladan, a Taskmaster, a wraith, a bosun, or a named Corsair hero--all of whom Aragorn, Legolas, Gimli, and the King can take on with decent-to-very-high confidence).
- Elite Troops: We're talking cream of the crop troops here: Half-Trolls, Mahud Raiders, Spiders, Warg Marauders, etc. Guess what? All of them have at least some sort of disadvantage against you. Most of the time it's Terror + Harbinger, which of course is a double-edged sword here. Not only are you more difficult to charge, but at S3 you'll wound Half-Trolls on 3s (instead of the normal 6s) thanks to Blades of the Dead, while they need 6s to wound you (S5 vs. D8). Don't get me wrong: half-trolls still aren't fun to fight, but they're a lot less scary when they can rarely charge you and you are far more likely to wound them than they are to wound you.
- All-Cav Armies: Cavalry are a real threat to your warriors, because any time you get to roll 4 dice to-wound, you can't ignore the risk that your warriors will take wounds. This is especially true of S4 cavalry (who wound the dead on 6s, instead of 6/4+), but even a S3 cavalry model with a +1 to-wound only needs to get a single 5+/3+ to kill your warriors (again, on four dice).
- Fortunately, the only armies in that vein that you'll see en-masse are Haradrim Raiders / Serpent Riders, Warriors of Minas Tirith, and Mahud Raiders (who, between Impact Hits and S4 with a War Spear, wound you on either 6s or 5s), all of whom have abysmal courage (although watch out for the Mahud Raiders' army bonus, and prioritize their leaders). Apart from Serpent Riders, they're also all F3 cavalry, which means as long as you can match their dice count (which you can do or exceed, if you shield within banner range of Aragorn), the odds are that you'll force--and then win--some draws. Even though these cavalry models hit your dead hard, the dead tend to hit them harder (usually needing no more than a 4+ to wound), which means you can still win the attrition war, especially if they have to charge you piecemeal (due to failed Terror tests). The worst draw on paper are Iron Hills Goat Riders backed by Dain (because they're Fearless, F4, and S4 with a War Spear, they'll wound the Dead on freakin' 5s on the charge). But you rarely see those spammed for a variety of reasons (they're expensive for having "only" F4, and they're expensive models to purchase), and you can usually deal with the 2-4 of them that you will see on the table.
- With that general caveat out of the way, let's talk about mass mounted Rohan. Even without lances or war spears, mass Rohan on the charge with its army bonus is still very dangerous: S4 wounds D8 on 6s, and the enemy's odds of getting at least one "6" on four dice is an alarmingly-high 52%. Like Serpent Riders, Royal Guards are always F4 (plus they have Bodyguard), and Riders can get to F4 as well if they're within range of Theoden (or Theodred, or Helm Hammerhand, in their Legendary Legions--although neither gains the +1 Strength on the charge bonus, and as such, neither has to be a strictly all-cav force). How you respond depends on what models the enemy has leaned into. A force primarily composed of Riders of Rohan is unlikely to do much to you at range (S2 wounds D8 on 6/5+, and if the Riders move at all, they hit on 5s, and are moving a maximum of 5"... not exactly a winning recipe against your dead, especially if you can move them 9" each turn with Aragorn). Riders also don't have Bodyguard, which means unless they've brought Erkenbrand, they'll likely need to roll an 8+ to charge your Terror models (because a 12" Harbinger bubble usually reaches models within 10" of your battle line). Royal Guard do have Bodyguard, so you're probably copping at least one charge from them if the enemy has a bunch of them (unless Legolas can get the army leader early--but of course, that's much easier to pull off if the leader is Theodred than if the leader is Eomer).
- Even so, there are some advantages you likely have. For one, Rohan Cavalry actually cost about as much as Warriors of the Dead (especially if the enemy has leaned heavily into throwing spears--which are usually awesome on cavalry models, but aren't particularly effective against the Dead), so the model count is actually likely to be pretty even. Second, even with the lower Fight Value, you may still be able to get the dice advantage if you shield within range of Aragorn (especially if the Royal Guards get overly-aggressive, and charge a single Royal Guard into two of your Warriors--if both shield, and one is in range of Aragorn, that's up to 5 dice to win the duel, against the enemy's two--you're much more likely to get the 6 in that situation). You won't kill any riders on that turn if you shield, but if you're able to blunt their charge, your own casualties are likely to be low. Third, in situations where an all-cav army charges an all-infantry army, and the cav charge stalls with minimal casualties inflicted, the odds tend to swing in the infantry army's favor, especially if the infantry army has Might to call the Heroic Move on the following turn (which, with Aragorn, you can always do). Gamling's Banner isn't what it was (which is to say, it's not an auto-take), which means most Rohan cav forces have a cap on the number of Heroic Moves they can call. So call one each turn (if you lose priority), and force them to spend their limited Might (which is Might they won't have later on to deal with Aragorn, the King, Legolas, or Gimli). If you win the roll-off, charge them and fight normally: even if you lose the fight, a S3 rider rolling a single to-wound die only gets a 6/4+ 8% of the time (S3 vs. D8). That's significantly lower than your 50% chance to wound (S3 vs. C3/2). And if you lose the roll-off, repeat the shielding with banner (assuming the enemy succeeds in charging), stall that charge again, and then rinse-repeat the following turn. It's not a fool-proof strategy, but it's a much better strategy than most heavy-infantry armies have.
- Finally--and this applies to all heavy-cav armies--while this Legion is primarily an infantry force, it doesn't have to be an all-infantry force (and I'm of the view that it shouldn't be). As you'll see in the army lists at the end, I recommend taking at least a few Riders of the Dead at all points levels (even 500). That's because counter-charging a charging cavalry model with your own cavalry model is the single-best way to blunt a cavalry charge in the entire game, because the enemy's cavalry drops down to their base Attacks value (usually one) and they don't knock infantry models over (which means instead of rolling 2 dice to win the fight, they're only rolling 1, and instead of rolling 4 dice to wound, they're only rolling 1). Your cavalry doesn't get any bonus-attacks or knockdown either, but that's fine: because the enemy rider charged into at least one of your infantry models, you're getting an extra dice to win the fight from that infantry model (and potentially more, if you have a spear support, or the enemy has charged more than two of your infantry). That gives you at least 2 dice to win the fight (to the enemy's 1), and that's before we add banner rerolls (and if the enemy has charged an infantry hero, we may have quite a few more than 2 attacks to win the duel). Moreover, depending on how your own horseman charges the enemy cavalry, you may also be able to trap the enemy's rider... in which case, those 2+ dice to win the fight become 4+ dice to wound if you win. Considering that the enemy only gets a single dice to-wound (so long as your own infantry model isn't trapped, of course), that's a very good trade (especially since you wound against Courage--if you double your dice, you can usually get at least one 4+). So always take a few Riders of the Dead, keep them in reserve behind your infantry lines when facing heavy cav, and use them to selectively "turn off" enemy cavalry charges in key spots. Enemy charges into your own infantry heroes are the priority (although if you employ some of the other tactics we'll discuss shortly--like keeping your key heroes in the middle of your battle line, within arms-reach of each other, they can be very hard for the enemy to threaten in practice), but even a single counter-charge on the flanks to spell two beleaguered warriors of the dead can make a huge difference.
- Trample Damage: We're really in a niche now (think Great Beasts, Chariots, and Mumaks), but it's a niche that's out there, and it's a niche that usually messes up other conventional armies (and even hero-heavy armies), because your only answer is usually "Heroic Move-Off and hope" (since models that Trample usually don't charge, which means they don't have to test for Terror). You can still force Heroic Move-Offs (and as with all cav armies, having Aragorn means you can usually do it longer than the trample army you're facing), but you also have some added tricks.
- For one, D8 means Khandish Chariots need 6s to wound you (i.e., your warriors have a 70% chance of surviving a trample, which is pretty good). Great Beasts and Iron Hills Chariots only need 5s to wound (S6 vs. D8), so the survivability rates go down (about a 45% chance to survive a Trample from the Beast, and a 30% chance of surviving the Chariot), but again: that's better than most D6 warriors would have (a 25% chance against the Beast, and a 12% chance against the Chariot). D8 also means Mumaks need 4s to wound you (S9 vs. D8) instead of the usual 3s--again, your warriors are still likely to die (12% survival chance against regular Mumaks, and 7% if they have the Tusk Weapons Upgrade), but that's still 300% and 700% better than the 4% and 1% survival chance you'd have with anything D7 or below. Heroes fare much better, of course, especially those who are D8 and/or have multiple Fate points (which... happens to be all four of the big ones). Yes, a Mumak can Trample into the King of the Dead... but he usually doesn't want to do that...
- Of course, these survivability odds assume we just stand there and cop a trample from the enemy. Alternatively, we could try to avoid taking a trample at all... and we actually have more tricks to do just that than a heavy-infantry combat army normally does. Apart from Khandish Chariots (who, with a 10" move, are a special case), all these other trample models move 8", which means that they're slower than our Riders (who move 10") and slower than our infantry if Aragorn is marching them around (which is 9"). Which means as long as we're thinking a couple turns ahead, there's no reason why an enemy model with Trample should be able to catch us flat-footed (unless we "win" priority on the first turn of a Maelstrom of Battle scenario, of course). If the enemy is moving second, we position our army where they'll be no closer than 9" from us at the end of the turn (so they can't reach us). If the enemy starts the turn within 9" of us, and we have 10" move Riders in range, we can tag the Beast while the rest of the army slides into position behind them (at Courage 6, the odds of both Riders failing to charge is pretty low). And yes: with a Heroic March, Trample machines and beasts can move up to 11". But the number of times they can spam a Heroic March is limited, and of course, a War Beast or Chariot that calls a Heroic March can't also call a Heroic Move in the same Move Phase (which means as long as we've thought two turns ahead, Aragorn can seize the first movement on that turn, and then either charge the enemy or move outside its March range as the situation demands).
- In any event, once we get our army into the trampling model (which, with Aragorn, we'll be able to do eventually), having multiple F6 heroes, plus warriors who wound it on no more than a 4+ (and sometimes a 3+ once Harbinger kicks in), plus Anduril and the King of the Dead with Drain Soul, means they're not all that tough to kill (even in a single turn). Other armies can kill Mumaks and chariots, but no other army has an easier time of it.
- Heavy / All-Hero Armies: Fighting all-hero armies (like the Broken Fellowship) or heavy-hero armies (like Erebor Reclaimed), or hero-heavy all-cav armies (like any number of Rohan's Legendary Legions, or at larger points levels, the Grand Army of the South) can be a real challenge for lots of lists. To successfully counter them, you usually need (a) multiple big heroes of your own, who can either assassinate or grind out the enemy's heroes; (b) either mass shooting (to crack through high defense or Blinding Light) or superior shooting protection (so you can't be pelted to death by their own shooting as you close), and (c) really, really dependable troops (because in a hero-on-hero battle, the army whose troops buys their heroes the most time to do their thing tends to win). You can build this legion to have all those tools:
- Big Heroes: Aragorn (with Anduril for free), Legolas, Gimli, and the King are about as good a foursome of heroes as 460 points will buy. As tough as the Broken Fellowship is (and they are tough), I'd back those four against the big four from the Broken Fellowship (Aragorn without Anduril, Legolas, Gimli, and a 0-Fate Boromir) any day of the week. Three of the four heroes can grind (Legolas is a bit iffy, but if he has some Spirit bodyguards around so he can't be overrun (and gets a banner reroll from his supporting spearman), he's tough to actually kill off), and all four heroes can assassinate (between Legolas's 2+ to hit, Aragorn's 3+ to-wound, Gimli's +2 to-wound, and the King of the Dead's Drain Soul). And when it comes to grinding out wins against enemy heroes, it's hard to beat Mighty Hero. Yes, the loss of Frodo and Sam hurts, but I do think upgrading the four hobbits to 8-9 Warriors / Riders of the Dead is a step-up (more on that shortly).
- Shooting: Mass shooting, we have not. But Legolas's shooting is still as deadly as it always is (even without the re-rolls from the Broken Fellowship's rules), and if you can't get Blinding Light, Defense 8 and elven cloaks are not bad consolation prizes. Even against Crossbows, Defense 8 plus free Heroic Marches from Aragorn is usually enough to get where you need to go (at which point, Blades of the Dead should make short work of the enemy's archer block, if it hasn't given up some turns of shooting by retreating beforehand).
- Dependable Troops: Iron Hills Warriors in an Erebor Reclaimed list are the gold standard here, and what tips the scales is whether hte Dwarves' F4 / S4 out-lasts the Dead's Blades of the Dead / Harbinger. The Dwarves wound the Dead on 6s, while the Dead wound the Dwarves on 4s--which means the Dwarves need to win better than 2/3 of their fights to keep things close. That's a tall order, especially if the Dwarves only have a single 3" banner (because Aragorn's giving a banner reroll to Spirit models that covers an area four times as large). Otherwise, you're looking at models with Courage 6, Defense 8, and shields (giving them essentially 3 dice to win fights). And don't underestimate how annoying Terror and Harbinger makes life for enemy warriors and heroes, and especially for enemy cavalry warriors and heroes (whose courage tends to be... not good).
Part 3: Legendary Legion Improvements
At the risk of stating something you already know, this legion is plenty competitive as-is, and certainly isn't broken. It's also a film-based legion (and the designer's notes clearly say so), so I won't suggest things like "you should be able to bring Halbarad and Rangers in this list, because they were there in the books" (although it is unfortunate that you can't make a list with Aragorn, Rangers, the Dead, the Twins, and Legolas/Gimli without giving up all of their army bonuses--in particular, the Ranger's and Dead's bonuses).
But hey, this is my opportunity to wish list. So here's a few tweaks I would make, in ascending order of craziness / awesomeness--go big or go home!
- I would give the Three Hunters either Terror or Fearless if they're within 3" of a friendly Spirit model, and/or on a turn in which they Charge. Look--if there's an army of unholy ghost men charging you, and they're clearly being led by this raggedy looking man with an enormous sword... don't tell me you wouldn't be afraid of him, too. There's also precedent for both elves and dwarves picking up Terror (Gil-Galad, Elrond, Galadriel, Dain, Durin), so it's not the most improbable thing in the world. Plus orcs and evil men are kind of skittish anyway. Doing this would give the three hunters a little added survivability, and help them synergize with the list a little better. Do they need this? Of course not. Would it be awesome? Absolutely. If you don't go that route, I'd make them Fearless at least: sure, they generally pass their Courage tests anyway, but again, be honest: if you were charging with a bunch of undead warriors at your back, who were bound to fulfill their oath to you, would you fear anything? I thought not.
- You have to bring both Aragorn and the King of the Dead, and Aragorn has to be your leader. Which I'm fine with. But it does mean that for most scenarios, the enemy has no incentive at all to take on the King of the Dead (and several incentives not to do so). You know what would fix that? Give the King of the Dead the equivalent of Hurin the Tall's Line of Command, so if you want leader kill points from Aragorn, you also have to slay the King of the Dead. Do you need this? Absolutely not. Would it be awesome? You bet.
- As we'll talk about shortly, there's really not much reason to take a Herald of the Dead over one of the Three Hunters. Yes, Resistant to Magic is nice, and an extra 3 Heroic Actions on the King is great. But since Legolas and Gimli can lead warriors (which, for the record, is something I would not change), and they're much better combat models for only a modest amount of points, I think you're hard-pressed to fit a Herald into this legion at anything under 1200 points (and maybe higher than that). How could you fix that? Give the Heralds an option for a Spectral Steed, for however many points you think that'd be worth (15-20?). They'd still be competitively costed to Legolas / Gimli, but you could pick up some punch in your army and have a hero to babysit your cavalry models (mostly so you could have a fast warband for your cavalry, that could be led by someone other than a marching Aragorn). Look, there are already Riders of the Dead in the list. Surely, they'd have some sort of leader commanding them. In the absence of generic captains (which Dunharrow doesn't have), the heralds fit the bill, right?
- Lastly, it'd be fun if Legolas and Gimli got some sort of buff in this list, similar to what they receive in some of their other legions (Aragorn is fine--he already gets Anduril for free, let's not get crazy). So here's my entirely cheesy, totally unnecessary suggestions, based on their two aristeia moments at the Battle of Pelennor Fields:
- Legolas: "If Gimli has more kills than Legolas, Legolas gains the following special rule:
Bad-*** Shrug: In addition to the usual uses of Deadly Shot, if Legolas is within 12" of an enemy model, he can make a single ranged attack, using his normal shoot value. If he hits, ignore all in-the-ways, and reduce the target's Defense Value by 6 (to a minimum of 1). If the model is a Monster, it suffers 2D3 wounds.
Designer's Commentary: Look--this is a legion specifically designed to capture the film version of the Battle of Pelennor Fields, when the Dead arrive. And in that version of that battle, Legolas one-shot a Mumak at point-blank range. Can Legolas do that in the game? No. Not even close. Would it be awesome if he could? Absolutely. Doesn't Duinhir do D3 wounds against monsters? Yes, he does. Isn't Legolas at least twice as awesome an archer as Duinhir? I rest my case.
- Gimli: "If Legolas has more kills than Gimli, Gimli gains the following special rule:
That Still Only Counts as One!: In addition to the usual uses of Axes of the Dwarves, at the start of each fight, Gimli can choose to make only two attacks with his normal hand axes. If he does so, and wins the duel, Gimli may make two strikes with his hand axes against every model with whom he is engaged. Additionally, if Gimli slays every model with whom he is engaged, he may immediately move up to his full move allowance, and may charge another enemy if able to do so.
Designer's Commentary: Look... life's hard enough when you're a slow-moving dwarf, and your comrades in arms are Legolas and Aragorn. But you know what happened in the film version of the Battle of Pelennor Fields? Gimli was absolutely flying around at the same rate as Legolas and Aragorn, whirling his two axes and clearing out orc maggots like there was no tomorrow. Can he do that in our game? No. No, he cannot. Would it be awesome if he could? Absolutely. Can't Uruk-Hai Berserkers already make their base attack against every model engaged in their fight? Yes. Isn't Gimli at least twice as good as an Uruk-Hai Berserker? *mic drop*
Tiberius: These changes are all good ideas (I like the synergy ones a lot), but probably the biggest thing I'd give this army is the ability for its Spirit models to move through friendly (and possibly enemy) models just like a model wearing the One Ring can move through models. We see in the movies the Dead walking through walls, walking through Aragorn, and racing through/over Orcs - and this simply isn't handled in the game. I mentioned this recently on the GBHL Facebook page and others seemed to think it was a good idea too - but Rythbryt has some thoughts (as usual). :)
Rythbryt: So this is a very interesting idea, but I feel as a stand-alone mechanic, it's probably broken. Control zones are a key element of board control in this game (maybe the key element), and you usually have to pay a premium for models that can bypass that (models with Fly, for example), which are limited in number to begin with and also have some sort of limitation to prevent it from becoming oppressive (usually big points costs, paired with large 40-60mm bases). Warriors of the Dead (and in particular, Riders) aren't cheap, but they're not exactly Great-Eagle-points.
That said, I do like this idea, and am kind of disappointed I didn't think of it. But I do think it'd need to be limited in some fashion, so here's a few proposed solutions (I guess in my preferred order of :
- Make it a once-per-game ability. Even if you never call it, your enemy lives in perpetual fear until it happens (Is this the turn we get overrun?), and no enemy banner / leader / shaman is safe. Lots of legions have powerful, once-per-game special rules (and a few have not-so-powerful, once-per-game special rules), so this wouldn't be unprecedented.
- Tie it to Heroic Moves from the King of the Dead. He's generally not doing this, because you want his Might to kill things, and in almost every circumstance you're using Aragorn's free Might to call Heroic Moves when you need them. This would not only steer players away from Aragorn-spam, but would also offer a real reason to bring a Herald of the Dead over Legolas or Gimli (and for your opponent to go after the King of the Dead--hard, and right from the jump). Both of those are plusses, I think. Plus, it'd be super-thematic.
- Allow all dead to do it, but they cannot charge when they do so. This basically treats this special rule as the Dead's equivalent of a War Drum: it's a powerful reposition ability, but you can't leverage it immediately to get a combat bonus. This kind of game-breaking rule in general presents balance issues in any combat situation, but it almost breaks scenarios like Breakthrough and Reconnoitre, which are basically built to force most armies to grind against the enemy's battle line the entire game. This change would still give the Legion an advantage in those scenarios, but at the cost of a turn of combat.
- Allow all the dead to do it, but they can only move half-speed when they do. The biggest concern for me is your "mass" infantry block moving 6" through enemy lines. This presents balance issues in general, and really presents balance issues for scenarios like Breakthrough and Reconnoitre, which are built around the idea of grinding against enemy battle lines (most of the time). 3" of movement is still enough to jump past a single line of troops, but not enough to jump bulked-out shield walls 95% of the time (because someone backs away a full-inch the turn before, and/or someone usually has a 1" control zone between themselves and the Dead at the start of the Move Phase. Cavalry could do it (which would be devastating), but only if they move slower than most infantry models (5" to the standard 6" for infantry), so at least there's counter-play options.
Part 4: Army Strategies
To be perfectly frank, the strategies for this legion aren't all that different from those of most of the legions I've written about. The only differences are that you're generally better able to do those things, as long as you can minimize your numerical disadvantages. Here are some things to think about as you tackle that task:
You need to keep your core heroes alive, and buy them time to do their thing. You'll likely be tempted to go "overboard" on your heroes with this list, because they're so awesome and themey. Don't. Yes, the three hunters and the King are incredibly tough to deal with at low points levels (sub-600, for example). But you need at least some warriors to keep them from being surrounded (not to mention some speed from Riders). My general rule of thumb is to try to have 1 cavalry model and 4-5 foot warriors for every hero in the force: if all the foot warriors have shields, and do nothing else but shield within Aragorn's 6" banner effect, it's unlikely we'll be overwhelmed, assuming our heroes don't botch their combats spectacularly. In other words, this is a classic "die slowly" army (to borrow the Green Dragon's phrase).
Terrain is your friend. As a primarily all-infantry army, the greatest threat to your troops dying slowly is some sort of mounted, high-courage, high-damage warrior. S4 warriors with lances (like Mahud Raiders or Iron Hills Goat Riders) are particularly scary, as they'll wound your Warriors on a 5+ (with four dice to wound), but even S3 warriors with lances (like Knights of Minas Tirith or Harad Raiders) only need a 5+/3+ to do the job (and again, they're rolling four dice to wound). Terror usually helps, but even models with terrible Courage pass Terror checks sometimes. So unless the scenario actually requires that you fight your opponent in open ground at this precise moment, don't fight them on open ground. Find some woods, or a deep river, or a bottle-neck between a couple terrain pieces, and fight there instead. Find somewhere--anywhere--where you won't be surrounded and knocked down.
You're an infantry army... but don't be afraid to book it. You are required to field Aragorn, which means you are required to have a Mighty Hero (poor, poor baby). Free Heroic Moves are awesome, but so are free Heroic Marches, especially in the early game when you're jockeying with your opponent for favorable positioning in favorable terrain. As a D8 army, you're largely immune to shooting (and if you have Legolas, you may be able to bring the enemy to you anyway), so don't be afraid to charge ahead to get to a favorable spot first, or to move from side-to-side to throw the enemy off your scent (especially if you can move first-last-first).
90% of the time, Aragorn and the King should anchor the middle(ish) of your battle line. If you play with lots of big heroes, you probably tend to have your heroes on the flanks. Usually that's a very sound strategy (overwhelming a flank is a great way to trap--and then collapse--a standard battle line), but most of the time, we do it because our big heroes are on horses, and horses tend to get bogged down, overwhelmed, and trapped in the middle of a battle line. In this legion, Aragorn and the King can't be mounted--so resist the urge to play them as if they are. The safest place for them--right smack-dab in the middle of a bunch of D8 ghosts--is also where they're most effective: you get maximum use out of both Aragorn's 6" banner effect and the King's 12" Harbinger of Evil if they're in the middle of your line. Let your Riders of the Dead take care of the flank work (and Gimli isn't bad in that spot, either--he's usually tanky enough to pull it off). But Aragorn and the King hold the center line. Speaking of which...
95% of the time, keep Aragorn and the King within arm's reach of each other at all times. Part of this is about concentrating firepower (two models that are very good at killing high-defense troops tend to overwhelm battle lines over time), but it's also about deterring bigger heroes from coming in. Aragorn or the King can go down if they get separated and surrounded. But it's very hard to surround either Aragorn or the King if the other is within 2" of the other at all times, and together they're killing off 3-4 models a turn (which is perfectly reasonable). If you don't need Aragorn's free Might to move first, a free Heroic Combat off troops is a great way to clear some extra chaff, and if you can Heroic Combat into the King of the Dead's fight, you can really clear some things out (and every model you kill is one less model that can aid a hero in killing your own heroes). Aragorn wounds all heroes on 4s or better, with an elven-made sword and a free point of Might every turn; the King wounds against Courage with Drain Soul. Isolated, most heroes aren't exactly lining up to take them on; very few heroes feel safe about taking them both on together.
Defeat in detail is your friend... and probably your best chance to win any given game. Per page 9 of the Green Dragon Podcast's Tactical Dictionary:
Defeat in Detail is an offensive Position and Resource Management tactic that attempts to bring localised overwhelming force to bear against successive elements of a dispersed enemy. To successfully apply this tactic requires the enemy commander to split their force either by choice or necessity. Once this division occurs the player must seize the Initiative by concentrating their Resources against smaller pockets of the enemy’s Resources.
Basically, this is what happens when the enemy has more guys than you, so they split their army up into several parts, and then your entire army descends on each part one after the other and crushes it into oblivion (i.e., about 50% of Domination matches, especially against newer players). Most players eventually learn not to do this most of the time (some scenarios call for it eventually--part of the game-within-the-game is figuring out exactly when to separate), but even so: this legion runs so many less models than most armies at any points level (often 50% less, or more) that even skilled opponents may decide they can afford to split their forces up, and engage your army with roughly equal numbers while the rest of their army goes off to do other things. The success or failure of this force largely depends on how well you can capitalize on those moments, especially in matches where you have to move around (and can't just camp in defensive terrain). If the enemy splits up to seize four of the five objectives in Domination, you'll need to move quickly from one objective to the next, defeating each force before reinforcements can arrive. Between Aragorn's banner bonus and the quality of your troops and heroes, you should be able to do that. But speed is the name of the game.
But what about opponents who don't split their forces up? This concept is useless then, right? Not quite. Because you have Harbinger + Terror, even armies who stay together may end up charging you piecemeal because they're failing courage tests (especially if they don't have Fury or another Courage-bypass). If half the enemy charges into you, and the other half fails their Terror tests, you have a prime opportunity to defeat them in detail. It's tempting to charge models who have failed those tests--and if you have a scenario where it's advantageous to be in that position, by all means do it. But if that's not the case, you're almost always better off ignoring the models that failed--they can't hurt you outside of shooting (and you're D8, so you mostly don't care about that)--and focus instead on swarming and killing whatever models did manage to charge. Anduril, and Drain Soul, and Blades of the Dead will kill a lot of things in a straight-up brawl. But they'll kill a ton of things--and big things--if you're getting double-dice to wound from traps, opportunistic charges with your Riders, and putting extra heroes and spearmen in the fight.
Finally, I've saved what is probably my most controversial tactical suggestion for last:
Repeat after me: Legolas is a combat model... Legolas is a combat model... Legolas is a combat model... We've all done it. That 2+ to-hit (or triple-shot) is just so tempting. And his D5 (or D4) looks so squishy. And we paid points for that elven cloak. So Legolas hangs out at the back, behind some tree, sniping God-knows-what the entire game, and terrifying your opponent. And then at some point in the game, we wish Legolas was somewhere else on the battlefield. So he starts leggin' it (no pun intended). For some of you skilled players, he actually makes it in time. For most of us mere mortals, he's too late.
Don't get me wrong: we want Legolas to be an archer in this army. Unlike most of the armies that can field him (the Fellowship to a lesser extent, but definitely Thranduil's Halls, especially if you like to max out Mirkwood Rangers), Legolas is this legion's only source of ranged firepower 90% of the time (and the remaining 10% is when you have Gimli's throwing axe). But 90% of the time, he's also going to be our only other hero, besides Aragorn and the King. He's going to have more than 40% of our army's Might (3 of 7). And if we're going to survive (let alone win), he's going to need to use that Might for more than just shooting things, and he's going to need to start using that Might much, much earlier than turn 7 or 8.
So how do we do this? Well, the vast majority of the time, we're going to want Legolas to deploy with the rest of our battle line. We can still protect him pretty well (just put him behind 2-3 D8 Warriors as the lines close, and he should be alright--after all, he can still snipe things on a 2+ no matter how many friendly units you put in front of him). And that doesn't mean we automatically throw him into combat when the lines join. But when the lines join, he needs to at least have the option to enter combat, if that's what we need. Most enemy heroes are going to stay as far as they can from Aragorn and the King (if we play it safe, and keep them together, near the center of our line). With 2 Attacks (3 with a supporting spearman), F6, Strike, and elven-made weapons, Legolas is our best hope to counter that hero on a flank (until we get enough points to add Gimli), or (better yet) deter that enemy hero from pressing that flank at all.
Yes, yes, but how do we do this? It's a fair question: after all, Legolas can only move half-speed whilst shooting, right? Here's a few strategies to maximize Legolas's shooting, while still keeping him within striking distance of your battle line:
- Depending on the scenario, you may not need to move at all. There are some scenarios that don't require you to fight in a particular spot, ever (To the Death, Lords of Battle, Contest of Champions, Clash by Moonlight), and a few that don't require you to fight in a particular spot until the end of the game (Fog of War, and to a lesser extent Breakthrough, Defend the Supplies, and Assassination--if we plan to assassinate the target with Legolas). If that's the case, our Defense 8 usually means we care not for arrows (and since we have Legolas, the odds are that we can make the opponent care enough to come to us). So while we'll probably want to make some minor moves to get into a more defensible position (or to get Legolas within 24" of whatever we want to shoot at), once we get in position we can just stand still and Legolas can go to town behind a few Warriors. Very simple.
- If we must move, Legolas is pretty good at moving and shooting. Odds are you already know about his 4+ shoot three times when he moves. But don't forget that Legolas's 2+ special hit can't be modified (literally... by anything... as the FAQ writers have told us multiple times). Which means if Legolas moves and shoots, that 2+ to-hit is still a 2+ to hit. Were you planning to snipe with Legolas? If so, there's absolutely no downside to also moving him that turn before you take the shot (and plenty of advantages). Especially because...
- Spammed Heroic Marches from Aragorn opens up all sorts of options. If you've never played an army with Aragorn in it, you're in for a treat. 9" of movement per turn on your infantry models (and up to 15" for your Riders, provided you can get them within 6" of Aragorn when they're done) is really, really fast, especially on a 4x4 board. And you can absolutely run Legolas forwards 9" with the rest of your line: he can't shoot that same turn, but if running 9" gets him to a safe spot from which he can contribute shooting and attacks for the next 3-10 turns, who cares? Underrated alternative play: use Heroic March to move your entire army (or a portion of your army) 4.5" per turn, and have Legolas snipe each round as you close (taking advantage of either three shots on a 4+ to hit, or that single 2+ snipe shot). You're still moving about as fast as regular infantry do (and against Hobbits and Goblins, you'll be moving about as fast as they are, or slightly faster), and if you do it repeatedly over 3-4 turns, only moving 4.5" each time, your opponent may be lulled into forgetting that your models can actually move 9" when you March--setting up that game-breaking Picard Maneuver (more on that on this episode of the Green Dragon Podcast, at just before the 39 minute mark).
- For most scenarios, we're perfectly happy to deploy on the center line. This usually isn't the case when we have shooting armies--especially Good shooting armies. And it makes sense: we paid points for all those bows, so of course we want to get as many turns of shooting in as possible, especially if we have superior ranged firepower. But this legion isn't a "shooting army": it's an army that has shooting in it. Yes, it's powerful, powerful shooting. But as powerful as Legolas's shooting is, it's probably not as powerful as our combat power, which is huge (Anduril, Drain Soul, Blades of the Dead). Plus, if Legolas can shoot, he can always shoot into combat... so there's no downside (when it comes to our ranged firepower) to being in combat early. Which brings me to my final thought...
- Legolas is very dangerous to opposing heroes when he's far away, but he's arguably more problematic when they enter combat. Legolas can't quite get to evil's level when it comes to "shooting into combats" (for one, he can't kill friendly models; for another, D8 models are quite a bit tougher to kill with shooting anyway; and for a third, you probably don't want to be killing your own elite troops anyway, if you can avoid it). But he can do what may be the single-most annoying thing you can do to a big hero: snipe out their mount after they've charged Aragorn (or, if it's a one-Fate hero, the King of the Dead). As long as he can see the model, a 2+ probably hits, there's no in-the-way to hit the mount (just say you hit the mount), and unless you're dealing with those rare D6 mounts, a 5+ to wound (plus some Might if you need it) will get the job done. Once slain, the hero takes a throw rider check, which means a 1/6 chance that they're prone (or 1-in-36 if they're an Expert Rider... it does happen, though), but a 4/6 chance that they won't be able to make strikes in the ensuing Combat phase. Which means there's an 83% chance (i.e., they roll anything but the "6") that they won't be able to actually wound your hero--and they certainly won't be knocking them down anymore. Plus, depending on how literally you read the rule for 2-5: Rises from the Dust (which says the rider "can do nothing else for that turn," including moving, shooting, striking, or casting), they may not be able to call any Heroic Actions against Aragorn, either, unless they get that "6" on their thrown rider check. Even if that's not the case, this is absolutely devastating to enemy heroes (who now have to survive incoming slashes from Anduril). If the enemy is smart enough not to charge their mounted heroes into Aragorn while Legolas is nearby, you can always go after the enemy's banner, a spear support, the shaman... whatever else is hovering just behind the enemy's battle line. And, of course, you always have the option to charge Legolas's F6 into the fray (with 3 Attacks if you bolt a spearman to his back), and take out a couple troops a turn that way if you have nothing good to shoot at. Now, of course, you could do these things from 18-24" back, too (except the whole "killing troops in combat" thing, of course). But line-of-sight gets trickier at that distance (especially if you're going for something man-sized or smaller behind the enemy's line), and if you're 24" back you may not be able to reach priority targets behind the enemy's line anyway, plus you're a good 2-3 turns away from where you can start using Legolas's Might to help the rest of your army (if not more). You have way more options if he's with your main battle line, and almost no down-side. So why not do it?
Well, that was longer than I thought it would be. :-P But hopefully it's helped to stir your creative juices.
Speaking of that, let's look at some lists now, shall we?
Part 5: Army Showcase
Since you have to take Aragorn and the King of the Dead, and since you only have two warrior options (Warriors and Riders), the only real variation in this list comes from which heroes you take, and at what points levels. The guiding principles for me were as follows:
- The Strength of this army lies in its heroes and troops, so we always want to be maximizing one of those two things.
- At the risk of stating the obvious, everyone who can take a shield gets a shield.
- I prefer armies with lots of heroes (or at least more heroes than my opponents). So for me, while having a good core of troops is important, if I have the choice between adding a hero or adding 5-6 warriors, I'm going to opt for the hero.
- Since the three hunters don't natively benefit from Aragorn's army bonus, we'll want to aim for at least twice as many spears as we have heroes. Since we don't have much else to spend to spend extra points on (because our troops are so expensive), this usually isn't a problem.
- The army is generally slow, and some scenarios require you to move fast. Additionally, as a primarily Infantry army, we're susceptible to cavalry charges, particularly if the enemy has Bodyguard or some other Terror bypass. Riders of the Dead fix both issues for us (because they move fast, turn off enemy charge bonuses if they counter-charge, and are hard to charge themselves), so despite their higher point costs, we'll be adding riders as we progress.
So here's what I'd do to develop the list at the following points levels:
Aragorn with Anduril
- x3 Warriors of the Dead with Shields
- x3 Warriors of the Dead with Shields and Spears
- x1 Rider of the Dead
The King of the Dead
- x2 Warriors of the Dead with Shields
- x4 Warriors of the Dead with Shields and Spears
- x1 Rider of the Dead
16 Models isn't huge for 500 points, but given the quality of heroes and troops, it's by no means small. Aragorn and the King of the Dead are the equal of pretty much any collection of heroes you'll see at this level, we have two riders to help with objective missions, and we have a core battle line of 12 Warriors (7 of whom have spears).
Additionally, I've gone ahead and added two Riders of the Dead. My initial instinct was to save them for later, but if you run the math, two riders basically costs us the same as three warriors, and frankly, I think you get more value out of the two cav models (plus it doesn't affect our break point). We'll want them for objective missions, and at 500 points, two cavalry models may actually be enough to give us cavalry superiority against a fair number of armies. Terror-bypasses are also pretty rare at this level (all-mounted Rohan probably doesn't have Erkenbrand, non-Mordor Orc armies probably don't have a Shaman--and an Uruk-Hai army at this points level almost certainly doesn't have one), which means the odds that we'll get to charge with our Riders is probably higher than usual. Additionally, armies that can field a bypass at this level probably can't also afford a hero to match us (Iron Hills with Dain excepted, of course), and for those that can, being able to selectively cancel their charge bonuses (with a very sturdy D8 warrior, on a very sturdy D6 mount) will be invaluable.
Finally, I've left you five points to spare, should you want to give Aragorn an Elven Cloak to help against shooting--otherwise, that's five more spears (so all of our foot warriors will have them).
List #2: 595/600 Points, 17 Models
Aragorn with Anduril
- x2 Warriors of the Dead with Shields
- x2 Warriors of the Dead with Shields and Spears
The King of the Dead
- x2 Warriors of the Dead with Shields
- x3 Warriors of the Dead with Shields and Spears
Legolas Greenleaf
- x1 Warriors of the Dead with Shields
- x2 Warriors of the Dead with Shields and Spears
- x2 Riders of the Dead
At this points level, I'd add one more hero, and 95% of the time, it will be Legolas because of the flexibility he brings to your force. There's an argument to be made for Gimli here (against ranged armies on horseback with good courage--Rivendell Knights, for example--Gimli has quite a bit more staying power), but as we discussed in the tactics section, the addition of Legolas gives us some much needed ranged punch (even without my cheesy buff) and opens up a ton of tactical options for dealing with enemy heroes (especially mounted) and specialty pieces (like banners, Wood Elf Sentinels, and Dead Marsh Spectres). We also pick up another Fight 6 hero with 3 Might (which is always handy), and Aragorn, the King, and Legolas are a really tough out for most 600-point armies.
Once again, I've saved you 5 points for an upgrade, which is probably best spent on Legolas (either the armor or elven cloak, depending on your play style and the amount of terrain you typically have in your local scene). We still have the two riders for objective captures, which I've moved to Legolas's warband (since he doesn't necessarily have to be deployed with the rest of your force). I went ahead and left some foot warriors in his warband, just in case you draw a Maelstrom scenario, but you could certainly play around with the warband configurations here.
List #3: 695/700 Points, 21 Models
Aragorn with Anduril
- x5 Warriors of the Dead with Shields and Spears
- x1 Rider of the Dead
The King of the Dead
- x2 Warriors of the Dead with Shields
- x2 Warriors of the Dead with Shields and Spears
- x1 Warrior of the Dead with Shield, Spear, and Banner
- x1 Rider of the Dead
Legolas Greenleaf
- x5 Warriors of the Dead with Shields and Spears
- x1 Rider of the Dead
I'll be honest: 700 points is the hardest spot for this Legion, in my opinion. At this points level, you probably want to bring along a banner (for those pesky VP scenarios like To the Death) and a third Rider of the Dead. But the points get super-awkward at that point, and in the end, I was only able to bring an additional four models (which seems really low for another 100 point increment). I went ahead and did it, just to show you what it looks like, but I don't like it. 21 Models is also getting into very small territory for a 700 point army, and I'm not sure you have the heroes at this points level to really make it work.
Having said that, we finally at least have the tools we'd want for most missions. The addition of the Banner means we can fight on a couple of fronts (and at least the King and his Warriors will get Banner rerolls if we have to deploy Aragorn separately due to a Maelstrom scenario), and three Riders increases our flexibility by 50% over just two. Finally, I've once again left 5 points of wiggle-room for the upgrade of your choice.
List #4A: 795/800 Points, 22 Models
Aragorn with Anduril
- x5 Warriors of the Dead with Shields and Spears
The King of the Dead
- x2 Warriors of the Dead with Shields
- x2 Warriors of the Dead with Shields and Spears
- x1 Warrior of the Dead with Shield, Spear, and Banner
Gimli, Son of Gloin
- x5 Warriors of the Dead with Shields and Spears
Legolas Greenleaf
- x3 Riders of the Dead
I know what you're thinking, and I don't disagree: 22 models seems very small for 800 points. This is the hero-variant where we add Gimli to the mix (for what it's worth, this is about the lowest points total where I'd add Gimli), and gets us to full-power with our heroes. 10 Might (plus Mighty Hero on Aragorn) is nothing to sneeze at, we still have three Riders (plus a Banner) for scenarios, Legolas's ranged attacks to keep the enemy honest, and a lot of close-combat damage once Aragorn marches us wherever we need to go.
The important thing to remember about this variant is that we have almost no margin for error if our heroes stall: they must be killing things to try to keep the model count close, especially against armies that sport F4 or above troops (which is a lot of them). If our warriors start to drop, we're in real danger of being overrun. Anchoring in defensive terrain is always important, but I think it's the most important for this version of the list.
Alternatively, here's the list if we drop Gimli for warriors:
List #4B: 795/800 Points, 28 Models
Aragorn with Anduril
- x5 Warriors of the Dead with Shields
- x2 Warriors of the Dead with Shields and Spears
- x1 Rider of the Dead
The King of the Dead
- x5 Warriors of the Dead with Shields
- x2 Warriors of the Dead with Shields and Spears
- x1 Warrior of the Dead with Shield, Spear, and Banner
- x1 Rider of the Dead
Legolas Greenleaf
- x4 Warriors of the Dead with Shields
- x3 Warriors of the Dead with Shields and Spears
- x1 Rider of the Dead
First off: to preserve those 5 points for a hero upgrade, we basically have to trade in most of our spears (dropping us to 8 in total). That's not the worst thing in the world, but it is a thing. Second, our model count has only gone up +6 (yes, that's what 100 points buys you in this legion), and that's 6 Warriors on foot (no bonus cav). In exchange, we've lost another F6 hero with 3 Might and Strike.
Is that a good trade? I'm not so sure... and I'm also not sure we've eased the pressure on our heroes, either. Yes, we have a slightly bigger margin for error (in that every model lost hurts a little less), but we're also relying on 2-3 heroes in fights (depending on where Legolas is), instead of 4--so each botch in combat hurts more, too. And if we keep Legolas in the back, away from our battle line (which, again, I'd strongly recommend against), suddenly we're very dependent on Aragorn and the King to keep our main battle line alive... and at 800 points, the odds that the enemy has their own battle-line heroes who can match or defeat them has grown significantly.
List #5: 995/1000 Points, 34 Models
Aragorn with Anduril
- x3 Warriors of the Dead with Shields
- x5 Warriors of the Dead with Shields and Spears
- x1 Rider of the Dead
The King of the Dead
- x3 Warriors of the Dead with Shields
- x4 Warriors of the Dead with Shields and Spears
- x1 Warrior of the Dead with Shield, Spear, and Banner
Gimli, Son of Gloin
- x3 Warriors of the Dead with Shields
- x4 Warriors of the Dead with Shields and Spears
Legolas Greenleaf
- x1 Warrior of the Dead with Shield
- x1 Warrior of the Dead with Shield and Spear
- x4 Riders of the Dead
I went ahead and skipped 900 points, because I've never seen anyone play at that level (if you have, leave a shout-out in the comments!). 34 Models is still really small... but it's a tough, flexible 34 models. Twenty-four warriors on foot (plus our banner bearer) is a lot to chew through, and should be able to buy Aragorn, Legolas, Gimli, and the King time against most enemy hordes. We still have four top-tier heroes to deal with enemy heroes, plus Legolas to snipe out important pieces, thereby pressuring the enemy.
Finally, I've also chosen to sacrifice our numbers a little bit (and by a little bit, I mean by 2 models) to bring two additional Riders of the Dead (bringing our total to 5). I can't help shaking the feeling that one more might be better, but it's hard to cram them in without giving up a lot of spears (we're at 60% spears in this list, which is pretty good--dropping a spearman and additional spears for one more rider would drop us to just six, including the banner-bearer, which is a big loss). But if you wanted to go that route, I wouldn't blame you.
BONUS LIST: 1200/1200 Points, 43 Models
Aragorn with Anduril
- x4 Warriors of the Dead with Shields
- x4 Warriors of the Dead with Shields and Spears
The King of the Dead
- x4 Warriors of the Dead with Shields
- x3 Warriors of the Dead with Shields and Spears
- x1 Warrior of the Dead with Shield, Spear, and Banner
Gimli, Son of Gloin
- x4 Warriors of the Dead with Shields
- x4 Warriors of the Dead with Shields and Spears
Herald of the Dead with Shield
- x4 Warriors of the Dead with Shield
- x4 Warriors of the Dead with Shields and Spears
Legolas Greenleaf
- x6 Riders of the Dead
For those of you who love the Herald of the Dead (and I don't blame you--they're fantastic sculpts), I didn't forget about you. Once you get to the 1200+ points level, they're good value: the King becomes even deadlier, you have a fifth hero who can tank enemy heroes for a while, and you have get another warband drop out of it (which can be helpful to gain a deployment advantage. We're up to 6 Riders now, too, which is getting close to a good-sized cavalry contingent. Yes, we'll still be severely outnumbered most of the time, and our hero edge is starting to diminish (the odds of very big things being fielded at 1200+ points--Sauron, the Balrog, multiple Dragons, Smaug, multiple Wraiths on Fell Beasts--is quite high). But it's very hard for me to justify taking the Heralds before this points level, because we really want the Might and Fight 6 from Legolas and Gimli, and really need the warriors. So my advice is that if you love their sculpts and want to run them... what you probably want to do is to run a regular Dead of Dunharrow list instead, ally in Aragorn with some Rangers, and leave Gimli and Legolas at home. :)
Tiberius: Honestly, I'm not sure I need to provide a list idea after what's been provided above, but I'm going to anyway (because we all like making lists, am I right?). :)
While my original 500pt list was very similar to Rythbryt's list, after playing with the Breaking of the Fellowship LL in preparation for our recent Grand Tournament, I realized the pain that having lots of big heroes at low points levels can be. As a result, I think there's a pretty good case for the following list being competitive in most scenarios (even objective-based ones).
Aragorn with Anduril and Elven Cloak
- x1 Warrior of the Dead with Shield
The King of the Dead
- x1 Warrior of the Dead with Shield
Gimli, Son of Gloin
Legolas Greenleaf with armor
If you don't feel comfortable with 6 models at 500pts, drop Gimli and Aragorn's Elven cloak to get +7 warriors (12 models total). This army has 10 Might - all of which can be used for Strike - and in order to break you, not one but TWO of these big heroes has to go down. Have fun with that . . .
Army Summary
Thanks Rythbryt for taking us through another Legion in depth (I'm beat - and congrats if you made it this far). :) In our next post, we turn our attention to one of the most anticipated (at least for me) Legions from War in Rohan: the Defenders of Helm's Deep. While I was hoping that the Deeping Wall would be its own thing, the only REAL critique that's been made about this Legion is whether there should be more Elves in the list. But that begs the question: do you need Elves in this list? Do you need Aragorn in this list? Does it depend on points level? Find out the answers to these questions and more next time - until then, happy hobbying!
These are all really good; I like including an actual banner 1) because they help Spirit and non-Spirit models, and 2) because VPs in some scenarios, but I think you're right: you probably don't need it until 600+ points.
ReplyDeleteMay give this legion a look; I've always seen it as too small for larger tournaments, but I'm liking what I'm seeing so far, :)
I agree, the banner for VPs can be important. At lower point levels, though, bringing one usually means dropping that third hero, and I think you probably need more than 4 Might more than you need a banner most of the time (especially since you can replicate 90-95% of the reroll function from the banner through Aragorn's 6" banner effect).
DeleteTerror + Harbinger (plus the quality of heroes, of course) is what keeps it competitive, even at lower points levels. If the draw is right (orcs, uruks, men without body-guard, and dwarves so long as they aren't mounted), the warriors can buy a lot of time for the heroes if they selectively charge and shield.
I have found they play particularly well in objective capture games, because even when they're outnumbered, they're hard to charge and even if Aragorn's banner bonus isn't in range, a D8 warrior with Terror who shields can be tough to clear (plus cavalry armies usually have to engage you in missions with set objectives, instead of just avoiding you all game--since it takes a long time to kill the dead with just ranged attacks). Meanwhile, the heroes clear off any objectives you don't hold. It's also one of the worst draws you can get in Hold Ground (once the points get big enough to field large warbands), because the King's Harbinger bubble conveniently envelops the entire 6" contested zone (and then some), and the dead + Aragorn are very, very hard to move once they set up camp.
I love this army. The biggest perk is that nearly everyone has a pile of ghostly warriors and can make a cheap and competitive army with an old Aragorn and king model from eBay.
ReplyDeleteMust admit though at 600+ I always take a herald and at 1000 always have a proper banner too. Warriors with shields, spears, and a banner reroll can shield like nothing else.
Aragorn with cloak
King of dead
Herald with shield
10 warriors with spesr and shield.
10 with just shields
Works well.
Maybe we need a bit more respect for the Herald . . . but I can't help but think that no Legolas really reduces your options for dealing with certain threats (like Shamans or Bodyguard heroes).
DeleteI’ll need to give this a try. The model count (23) isn’t too bad for a 650 force (it’s higher than my 800 list :-P). I’d probably lean towards a couple of riders myself (so probably end up in the 21-22 model range) just to have that flexibility, but I’ll be sure give it a try!
DeleteI’ll need to give this a try. The model count (23) isn’t too bad for a 650 force (it’s higher than my 800 list :-P). I’d probably lean towards a couple of riders myself (so probably end up in the 21-22 model range) just to have that flexibility, but I’ll be sure give it a try!
DeleteOh. I want to try this LL for 400 point tournament. But it is only 9 models... Or maiby better vanilla army of dead? I can take 19 of them )
ReplyDeleteAt 400pts, your opponents will be hard pressed to deal with Aragorn and the King of the Dead. Since you have 140pts left over, you could get 9 Warriors of the Dead (5 with shields and spears, 4 with just shields), which would get you to 11 models. You'd need to rely on charging 2 models with your Warriors and shielding to buy time for your heroes, but it could certainly work.
DeleteI wouldn't run the Dead pure at 400pts - Centaur ran them at 450, but the lack of Might and probably speed are big hurdles to overcome.
Okay, it was not great, but it was good.
DeleteAragorn really beast on 400 pts.
But in some scenarios strength in numbers or in high mobility.
Number-counting scenarios will be tricky with this Legion below 600pts (but realistically, it's more like 800pts). Aragorn can clear out guys with Heroic Combats, but actually getting to objectives once he's not Marching you is difficult.
DeleteWhat are your thoughts at 650 points? I feel like it’s a weird point level but this is what I’m thinking.
ReplyDeleteAragorn
5 Warriors of the dead with shields
6 Warriors of the dead with spears& shields
1 rider of the dead
King of the Dead
5 Warriors of the dead with shields
5 Warriors or the dead with spears
1 Rider of the dead
Not sure if adding another hero and having lower numbers is better or having more number because of basically unlimited might(Aragorn).
The list looks pretty good, but I would make only one change: the 5 Warriors with spears and no shields should have shields instead. At 650, you have to assume there will be 30+ models on the other side of the table - and that means a 10-model shieldwall is going to be wrapped. By taking extra D8 models that can shield to get extra dice, you can help manage your fights better. Plus, most of the time, you want to be D8. Depending on your meta, D7 might be just fine, but I would recommend being D8 on everyone who isn't Aragorn to deal with S3-4 archery and to give you options for spreading out. I also wouldn't bother with a third hero at this points level - your numbers are already going to be light.
DeleteLooking at bringing this to an 800 point tournament. What are your thoughts? I like the hero heavy option on this one. I’ll either leave it like this or take the elven cloaks from Aragorn and Legolas to upgrade one warrior of a dead to Calvary (didn’t think I needed many cav because infantry move 8”. I think at least one will help race across the board or deny enemy heavy mounted heros the Knock to the ground bonus on my hereos)
ReplyDelete800 points ROTK(10 might,24 models,1 bow)
Aragorn elven cloak
-1 warrior banner
-3 warriors with shields
-4 warriors with spears
King of Dead
-3 warriors shields
-4 warriors with spears
Gimli
-2 warriors shields
-3 warriors with spears
Legolas armour and elven cloak
Overall, this looks like a good ration of warriors to heroes for 800. 24 models is small at this points level, but Aragorn gives you options against really big heroes, Legolas may be the best hero in the game right now, and Gimli and the King of the Dead give you two options to munch through troops (which this army will need to do in order to whittle the model count down).
DeleteFour thoughts on the list construction itself:
1) Do the warriors with spears have shields, too? If not, I would definitely take the Spear + Shield option over just the spear option, as D8 is huge, especially against lances and +1 to-wound troops who are S3 (instead of being wounded on a 5+, it's a 5+/3+... and that second roll does matter). It also helps a ton against S5 heroes (6s instead of 5s), and can really blunt some heroes' ability to wound (or at least to wound without spending Might).
2) This is subject to change, depending on what the new scenarios in the Matched Play guide look like (and what edits are made to older scenarios). But I would think about putting at least one warrior (and maybe two) in Legolas's warband. _Usually_ you can put him where you want him on the board, but for those pesky maelstrom scenarios (especially if the enemy has a ton of archery), having at least a couple D8 pincushions that you can deploy between he and the enemy can be helpful. Against a horde army (which typically has low courage), it can also mean it's much more difficult to surround Legolas and trap him.
3) If it were me, I would try to get at least a couple of riders into the list. Again, I'll caveat that we don't know what the updated matched play guide will bring. But at least in the previous round of scenarios, there were scenarios that could be difficult to win if you didn't have at least a couple of models that could March 12-15" (either on the first turn or in the late game). Additionally, since none of the heroes can take horses, a charge from a cavalry model is the only way to get double-dice to wound your targets, unless the target is trapped (which is tough to do if you have a lower model count than your opponent does). Finally, even a couple of cavalry can make it much more difficult for the enemy to get charge/knock-down bonuses on _your_ heroes (by counter-charging their mounted hero/warrior with your mounted Rider, you can turn off their charge bonus _and_ potentially trap your opponent's mounted model, too). Legolas taking 3 dice to the face is much different than Legolas taking 8 dice to the face.
DeleteThe practical issue is that doing that would mean reducing the model count by at least one, and probably two. The cleanest way would be to drop four warriors with shields (or spears) [60 points], replace them with two Riders (50 points), and then spend the remaining 10 points on shields for spear guys and spears for shield guys (or you could drop two warriors for one Rider, and then drop an elven cloak or Legolas's armor for 10 points of shields/spears... but I'm not sure I'd opt for that). It only ends up being a -2 net (you trade 4 warriors for 2 warriors), but 22 is smaller than 24, so... yeah. It's costly.
4) I've alluded to the matched play guide a couple of times. Not sure when your event is (or if you've gotten the players pack for it yet), but this may be a situation where you may want to wait to finalize your army until you know what the scenarios are that you'll be facing (or if there's some sort of veto mechanic that'll be used). The reality of this particular force is that your model count is always going to be low no matter what you do. And I generally am of the opinion that dropping one of the heroes (usually Gimli) for effectively 4 extra models (as you have to replace Gimli) generally isn't worth it (because 28 models isn't _that_ many more than 24 models). Having said that, you may want to make sure that you can at least have a good go at all the scenarios before you commit to what is likely to be a dramatically smaller army than your opponent's. Because an extra four models _is_ an extra four models...
Hope that's helpful, and good luck at your tournament! We'd love to hear what you actually took and how it went!