In the run-up to TMAT's grand tournament, I ended up doing an inordinate amount of number crunching using Jeremy Hunthor's excellent duel and wound spreadsheets, which I've mentioned before. There's nothing special about what I've done (it just involves plugging lots and lots of numbers into the calculator, and then copying the results and recording them), but since I've already run a lot of calculations I thought I'd share some of the observations that I found particularly interesting, beginning with the strengths, weaknesses, and baseline probabilities behind five common infantry formations you'll see in the Middle Earth Strategy Battle Game.
Understanding how these formations work generally, and the probabilities behind them, can help us better understand why some formations work (or don't) against others, and help us to recognize strengths (and weaknesses) in our opponent's formations, so we can avoid (or exploit) them accordingly. They also give us a baseline for figuring out if a particular faction's take on one of these standard formations (say, a shield-spear shieldwall formation) is above average (Iron Hills dwarves) or below average (orc warriors backing up orc warriors) when it comes to their killing power and resilience.
Understanding how these formations work generally, and the probabilities behind them, can help us better understand why some formations work (or don't) against others, and help us to recognize strengths (and weaknesses) in our opponent's formations, so we can avoid (or exploit) them accordingly. They also give us a baseline for figuring out if a particular faction's take on one of these standard formations (say, a shield-spear shieldwall formation) is above average (Iron Hills dwarves) or below average (orc warriors backing up orc warriors) when it comes to their killing power and resilience.
(As always, maths ahead...)
TMAT features predominantly infantry armies, with a few mounted heroes and the occasional all-cav or monster-heavy force. So as I was thinking about what to bring, I began by looking at standard infantry formations, since these are usually the bread-and-butter of both forces. At a very high level of generality, pure infantry formations usually come in one of five stripes:
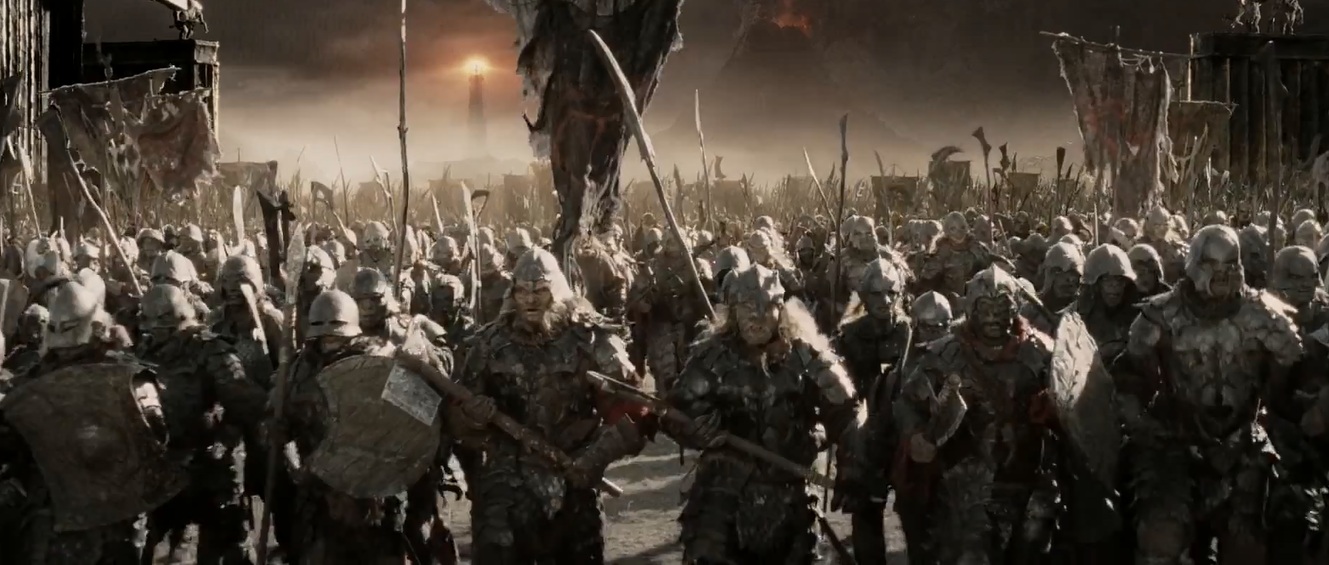
- The "mass infantry" formation. By mass infantry, I mean a collection of infantry models armed with hand weapons, and without spears or shields. Because they lack spears and shields, they can only make strikes if they are in base-contact with their opponent, and are typically low defense (though not always).
- Mass infantry with supporting weapons. These are armies whose basic battle line consists of models who can take spears (or pikes), but no shields. The advantage is that you can bring more offensive firepower to bear in closer quarters, because now you can stack two-dice against one, and four against two. The disadvantage is that your "front-line" troops are usually susceptible to damage, which usually means that to win the attrition war, you need to out-kill your opponent the old fashion way (by using a front-line with multiple attacks, high strength, two-handed weapons, throwing weapons, skull-doggery, charging up the dice, magic incantations, etc.).
- The "Viking shield wall." This standard battle line consists of basic infantry with shields and a hand-weapon (but not spears), standing side-by-side. Their advantages are pretty clear: good-to-very good defense (usually at least D5), you can shield for an extra-attack if outnumbered, nd you take up tons of space on the battlefield. The biggest weakness is that you can't support other friendly models due to the lack of spears, which can make it difficult to deal with enemy forces if you can't bring your superior numbers to bear (say, you're trying to dislodge a smaller force that's entrenched in terrain that prevents you from surrounding them).
- The "standard shield wall." This is what most players envision when talking about "shield walls." You have infantry with shields and hand-weapons in front, and a second line of infantry behind them who support the front rank with their spears. The chief advantage is that you can concentrate both your hitting power and staying power on particular spots on the battle-field, which can make you very difficult to move. The downside is that you're typically very position- dependent (shields in front, spears behind), and since you're condensing your warriors into two lines, one behind the other, the formation is easier to surround and trap (especially if it has to step over itself to change positions on the fly).
- The "pike block." The same as a spear-supported shield wall, only with a third rank armed with pikes. It has the same strengths and weaknesses of the spear-supported shield wall, only to greater extremes: because you have three ranks lined up one behind another, you have tremendous hitting power throughout the formation (three dice at least to win the fight and strike wounds), but the formation is even more likely to be surrounded since it's deeper and harder to pivot or spin.
Mass Infantry Formations

Photo Credit: davetownsend.org
These are battle lines that can’t take shields or spears. On the one hand, this makes them pretty cheap compared to their counterparts, which means there tend to be more of them. Their sheer numbers also enable them to contest large sections of the board simultaneously; they are less effective at contesting one or several concentrated spot on the battlefield (because they have to engage one-on-one, instead of two-on-one with spears, or three-on-one with pikes).
Although most armies can run these if they want to, they’re only the bread-and-butter formation for a couple armies: Hobbits (no shields or spears) and Sharkey’s Rogues (ditto), both of which are swarm armies where you’re probably relying on bows to do damage primarily, and engaging in melee combat only when you have to do so. If you ran a pure Azog's Hunters force that consisted purely of Hunter Orcs on foot and Fell Wargs without riders, they would fall into this category as well (no spears, no shields), but who does that? ;-)
When a mass infantry formation engages another mass infantry formation, the vast majority of the time we end up with 1-on-1 fights (because no supports). All other things being equal, each model has a 50% chance of winning a 1-on-1 fight, so variations in the models’ fight, attack, strength, and defense values, as well as the presence or absence of a banner, greatly impact their odds of winning the fight:
Mass Infantry Formation: 1 v. 1
(both S3/S4, D3, tied Fight/Attacks)
Duel Win %
|
Kill %
|
Death %
| |
Good
|
50.00%
|
25.00%
|
25.00%
|
Evil
|
50.00%
|
25.00%
|
25.00%
|
Mass Infantry Formation: 1 v. 1
(both S3/S4, tied Fight/Attacks, Good has D4 instead of D3)
Duel Win %
|
Kill %
|
Death %
| |
Good
|
50.00%
|
25.00%
|
16.67%
|
Evil
|
50.00%
|
16.67%
|
25.00%
|
Mass Infantry Formation: 1 v. 1
(both S3, D3, tied attacks, Good has higher Fight or Evil Whirls/Feints)
Duel Win %
|
Kill %
|
Death %
| |
Good
|
58.33%
|
29.17%
|
20.83%
|
Evil
|
41.67%
|
20.83%
|
29.17%
|
Mass Infantry Formation: 1 v. 1
(both S3/S4, D3, tied Fight/Attacks, Evil Two-Hands)
Duel Win %
|
Kill %
|
Death %
| |
Good
|
63.89%
|
31.94%
|
24.07%
|
Evil
|
36.11%
|
24.07%
|
31.94%
|
Mass Infantry Formation: 1 v. 1
(both S3, D3 tied Fight, Good has +1 Attack or a Banner)
Duel Win %
|
Kill %
|
Death %
| |
Good
|
66.20%
|
49.65%
|
16.90%
|
Evil
|
33.80%
|
16.90%
|
49.65%
|
Some quick-thoughts:
- These formations are incredibly fragile. If they’re D3 (as hobbits and ruffians are), they have a 25% chance of dying as soon as they enter close combat, before any dice are rolled. Even the small jump from D3 to D4 (against S3) reduces their chances significantly, although a 1-in-6 chance of dying, before any dice are rolled, is still frighteningly high—and that’s just against a single model.
- The best way to improve your survivability is to increase attacks (25% chance of death drops to 16.9% at D3, and all the way down to 11.3% if you’re D4 instead of D3), which means these armies really like high-attack models (Hunter Orcs) or banners (definitely Hunter Orcs). So take banners if you’re Hunter Orcs on foot! No, seriously: they really like banners, because their chance of winning the fight 1-on-1 jumps all the way to 82%, and their chance of death falls to less than 6%, if you can stack a banner reroll on their two attacks and D4. Frodo in a Shire army is a real force-multiplier: even if the Ruffians have higher fight, a hobbit with a banner benefit will best a ruffian without one nearly 60% of the time. If you’re running Ruffians… trust your higher fight if you’re dueling Hobbits, I guess, and hope they don’t have Frodo? Otherwise, load up on bows and whips and try to out-avoidance a Shire army (good luck with that, btw...).
At the flanks (which could be reaaaaaly far apart if you have two swarm armies where everyone can only duel and strike if they’re in base contact with an enemy model), we tend to get multiple combats: 1-on-2, 1-on-3, or more. Once we get to three-on-one situations, we’re also probably dealing with traps—either by the sheer number of enemy models bearing down on you, or nearby engaged friendly models bogged down in the press of combat. The side with multiple models has a significant advantage in these situations; if you’re the one outnumbered, higher fight, more attacks, and banner rerolls are the only way to get back into the fight (remember, these guys have no shields…).
The outnumbered model starts out with a huge hole to dig out from:
Infantry with hand-weapon vs. Infantry with hand-weapons
(both S3/S4, D3, tied Fight/Attacks)
1 v. 2 1 v. 3
Duel Win %
|
Kill %
|
Death %
|
Duel Win %
|
Kill %
|
Death %
| |||
Good
|
33.80%
|
16.90%
|
49.65%
|
Good
|
25.69%
|
12.85%
|
65.02%
| |
Evil
|
66.20%
|
49.65%
|
16.90%
|
Evil
|
74.31%
|
65.02%
|
12.85%
|
The only way the outnumbered side (good) can actually pull-even is if they have a banner and are fighting only two models of equal fight and attacks (50% chance to win the fight). But even with those 50% odds, the good model is still significantly more likely to die before any dice are rolled, because if he wins the fight he only gets to make one strike, while his opponents will get to make two (37.5% chance of death, vs. 25% chance of killing). And if the single model is fighting three, even the banner isn’t going to push the fight into its favor. A banner on the outnumbering side is a virtual death-sentence:
Infantry with hand-weapon vs. Infantry with hand-weapons
(all S3/S4, D3, tied Fight, Good has +1 Attack or a Banner)
1 v. 2 1 v. 3
Duel Win %
|
Kill %
|
Death %
|
Duel Win %
|
Kill %
|
Death %
| |||
Good
|
50.00%
|
25.00%
|
37.50%
|
Good
|
40.46%
|
20.23%
|
52.10%
| |
Evil
|
50.00%
|
37.50%
|
25.00%
|
Evil
|
59.54%
|
52.10%
|
20.23%
|
Infantry with hand-weapon vs. Infantry with hand-weapons
(all S3/S4, D3, tied Fight, Evil has +1 Attack or a Banner)
1 v. 2 1 v. 3
Duel Win %
|
Kill %
|
Death %
|
Duel Win %
|
Kill %
|
Death %
| |||
Good
|
25.69%
|
12.85%
|
55.73%
|
Good
|
20.92%
|
10.46%
|
69.19%
| |
Evil
|
74.31%
|
55.73%
|
12.85%
|
Evil
|
79.08%
|
69.19%
|
10.46%
|
Higher defense helps to a point, but odds of death are still very high. Higher fight helps more, but not as much as a banner would. Higher defense or fight on the outnumbering side again puts the outnumbered model in a really tough spot:
Infantry with hand-weapon vs. Infantry with hand-weapons
(all S3/S4, tied Fight/Attacks, Good has D4 instead of D3)
1 v. 2 1 v. 3
Duel Win %
|
Kill %
|
Death %
|
Duel Win %
|
Kill %
|
Death %
| |||
Good
|
33.80%
|
16.90%
|
36.78%
|
Good
|
25.69%
|
12.85%
|
52.29%
| |
Evil
|
66.20%
|
36.78%
|
16.90%
|
Evil
|
74.31%
|
52.29%
|
12.85%
|
Infantry with hand-weapon vs. Infantry with hand-weapons
(all S3/S4, tied Fight/Attacks, Evil has D4 instead of D3)
1 v. 2 1 v. 3
Duel Win %
|
Kill %
|
Death %
|
Duel Win %
|
Kill %
|
Death %
| |||
Good
|
33.80%
|
11.27%
|
49.65%
|
Good
|
25.69%
|
8.56%
|
65.02%
| |
Evil
|
66.20%
|
49.65%
|
11.27%
|
Evil
|
74.31%
|
65.02%
|
8.56%
|
Infantry with hand-weapon vs. Infantry with hand-weapons
(all S3/S4, D3, tied Attacks, Good has higher Fight)
1 v. 2 1 v. 3
Duel Win %
|
Kill %
|
Death %
|
Duel Win %
|
Kill %
|
Death %
| |||
Good
|
42.13%
|
21.06%
|
43.40%
|
Good
|
34.03%
|
17.01%
|
57.73%
| |
Evil
|
57.87%
|
43.40%
|
21.06%
|
Evil
|
65.97%
|
57.73%
|
17.01%
|
Infantry with hand-weapon vs. Infantry with hand-weapons
(all S3/S4, D3, tied Attacks, Evil has higher Fight)
1 v. 2 1 v. 3
Duel Win %
|
Kill %
|
Death %
|
Duel Win %
|
Kill %
|
Death %
| |||
Good
|
25.46%
|
12.73%
|
55.90%
|
Good
|
17.36%
|
8.68%
|
72.31%
| |
Evil
|
74.54%
|
55.90%
|
12.73%
|
Evil
|
82.64%
|
72.31%
|
8.68%
|
The outnumbered models’ odds can go up more if we stack higher fight and defense on top of an extra attack/banner reroll, to the point that we can actually get better than 50% odds to win in a three-on-one situation. But only if all three advantages are in the outnumbered model’s favor:
Infantry with hand-weapon vs. Infantry with hand-weapons
(all S3/S4, Good has higher fight, D4 instead of D3, and +1 Attack or a Banner)
1 v. 2 1 v. 3
Duel Win %
|
Kill %
|
Death %
|
Duel Win %
|
Kill %
|
Death %
| |||
Good
|
61.03%
|
30.52%
|
21.65%
|
Good
|
52.84%
|
26.42%
|
33.19%
| |
Evil
|
38.97%
|
21.65%
|
30.52%
|
Evil
|
47.16%
|
33.19%
|
26.42%
|
This also cuts the other way: if multiple models are fighting just one model, and those multiple models also have higher fight, defense, and a banner effect, they’re in a very strong (and safe) position):
Infantry with hand-weapon vs. Infantry with hand-weapons
(all S3/S4, Evil has higher fight, D4 instead of D3, and +1 Attack or a Banner)
1 v. 2 1 v. 3
Duel Win %
|
Kill %
|
Death %
|
Duel Win %
|
Kill %
|
Death %
| |||
Good
|
17.36%
|
5.79%
|
61.98%
|
Good
|
12.59%
|
4.20%
|
76.48%
| |
Evil
|
82.64%
|
61.98%
|
5.79%
|
Evil
|
87.41%
|
76.48%
|
4.20%
|
Remember as well that the chance of the good model dying will be even greater if the good model is also trapped… like, virtual-certainty levels of chances:
Infantry with hand-weapon (Trapped) vs. Infantry with hand-weapons
(all S3/S4, Evil has higher fight, D4 instead of D3, and +1 Attack or a Banner)
1 v. 2 1 v. 3
Duel Win %
|
Kill %
|
Death %
|
Duel Win %
|
Kill %
|
Death %
| |||
Good
|
17.36%
|
5.79%
|
77.47%
|
Good
|
12.59%
|
4.20%
|
86.04%
| |
Evil
|
82.64%
|
77.47%
|
5.79%
|
Evil
|
87.41%
|
86.04%
|
4.20%
|
Finally, it’s worth noting that while we’ve been dealing with vanilla warriors that fit this category, there are some exceptions where their stats are significantly higher. One obvious example are the Guardians of the King/Grimhammers in the Army of Thror, who boast an above-average fight value (F4), an exceptional defense value (D7), and can benefit from banner effects (either a traditional banner or a 6" banner effect from Thror). Technically they fight in the same way massed infantry do (they have no shields and no spears, so they have to get into base-contact to fight), but unlike most massed infantry they love close combat (especially if they can toss throwing weapons on their way in). So while their odds of winning the fight aren’t any higher than what another infantry model with higher fight and a banner would have, their higher defense value reduces the chance that they’ll die significantly, even when they're outnumbered significantly:
Infantry with hand-weapon vs. Infantry with hand-weapons
(all S3/S4, Good has higher fight, D4 instead of D3, and +1 Attack or a Banner)
1 v. 2 1 v. 3
Duel Win %
|
Kill %
|
Death %
|
Duel Win %
|
Kill %
|
Death %
| |||
Good
|
61.03%
|
30.52%
|
21.65%
|
Good
|
52.84%
|
26.42%
|
33.19%
| |
Evil
|
38.97%
|
21.65%
|
30.52%
|
Evil
|
47.16%
|
33.19%
|
26.42%
|
Guardian of the King vs. Infantry with hand-weapons
(all S3/S4, Good has higher fight, D7 instead of D3, and +1 Attack or a Banner)
1 v. 2 1 v. 3
Duel Win %
|
Kill %
|
Death %
|
Duel Win %
|
Kill %
|
Death %
| |||
Good
|
61.03%
|
30.52%
|
11.91%
|
Good
|
52.84%
|
26.42%
|
19.87%
| |
Evil
|
38.97%
|
11.91%
|
30.52%
|
Evil
|
47.16%
|
19.87%
|
26.42%
|
Mass Infantry Formations with Supporting Weapons
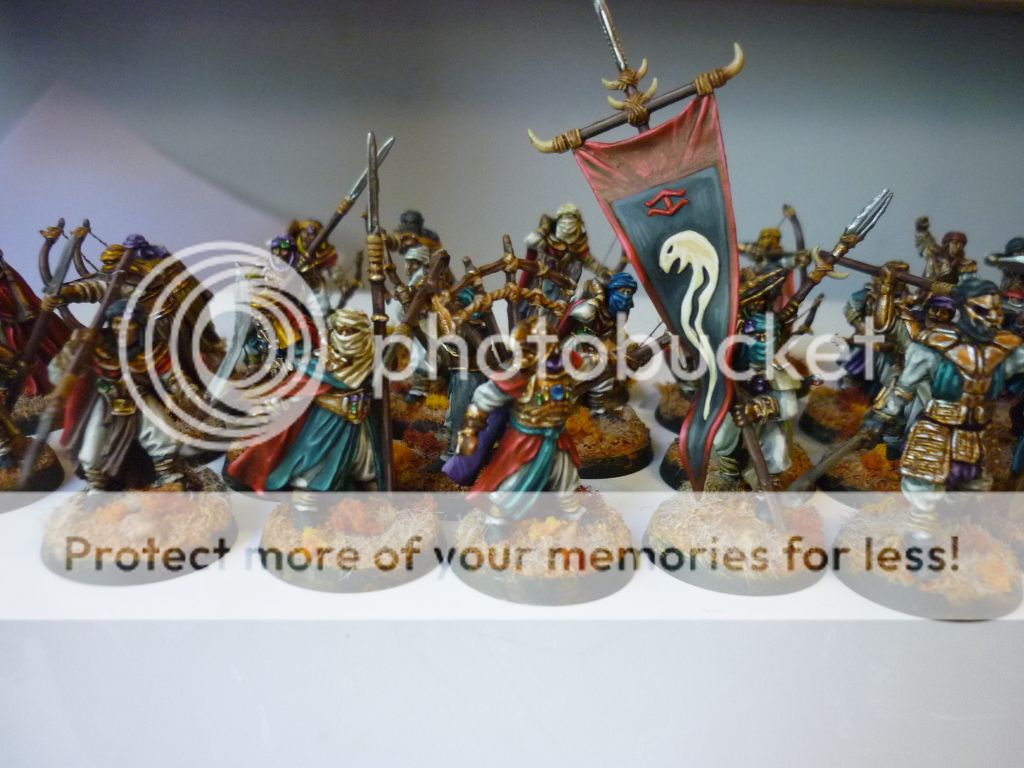
Photo Credit: Elven Warrior
Now we’re adding spears (but not shields) to our mass of infantry. The Wildmen of Druadan and the Rangers (or Hobbits backed up by Rangers) qualify, as does the Serpent Horde on its own (their front rank typically consists of bows or multi-attack/high-strength swordsmen, rather than shields) and most corsair armies if you field them without Black Numenoreans (arbalesters technically have shields, too, I guess...). The two Hobbit goblin factions (Goblintown and the Goblin Mercenaries in Azog's Legion) can also support each other without shields thanks to Chittering Hordes, so they'd fall into this category, too. As with the mass infantry formations, these tend to be pretty cheap infantry (except Rangers), and/or have at least some ranged options (except Goblintown and Goblin Mercenaries) to compensate for the fact that they’re squishy in combat, and/or some damage-dealing buffs (mounts, poison, cheap piercing weapons, etc.) so they can kill as fast or faster than they are killed.
Even with their lower-than-average defense (typically D3 or D4, although occasionally you’ll see models like the Dunedain with D5) and average-to-below-average Fight Value (the Rangers being the notable exception), these formations will do very well against mass infantry formations without spears if we can protect their flanks and prevent them from being surrounded. If we can do that, we recycle most of the stats above from when one model is fighting two; the only difference is that only one of our models is at risk of dying, while the second stands safely in the back rank. If we can’t prevent surrounds, they revert to being more expensive mass infantry in one-on-one and multiple combats.
When one of these formations clashes into its mirror image (two-on-two fights), having the higher fight actually becomes slightly more valuable than the banner reroll. As we saw in our detailed break-down of Heroic Strike, more and more dice are rolled, our odds of rolling at least one “6” go up; since the entire duel comes down to a single die for each side, the more 6s we’re likely to roll, the more valuable having the higher fight value becomes:
Infantry with spear support vs. Infantry with spear support
(all S3/D4, tied Fight and Attacks)
Duel Win %
|
Kill %
|
Death %
| |
Good
|
50.00%
|
27.78%
|
27.78%
|
Evil
|
50.00%
|
27.78%
|
27.78%
|
Infantry with spear support vs. Infantry with spear support
(all S3/D4, tied Fight, Good has +1 Attack or a Banner)
Duel Win %
|
Kill %
|
Death %
| |
Good
|
59.54%
|
33.08%
|
22.48%
|
Evil
|
40.46%
|
22.48%
|
33.08%
|
Infantry with spear support vs. Infantry with spear support
(all S3/D4, tied Attacks, Good has higher Fight)
Duel Win %
|
Kill %
|
Death %
| |
Good
|
61.03%
|
33.91%
|
21.65%
|
Evil
|
38.97%
|
21.65%
|
33.91%
|
Higher defense theoretically makes a difference on survivability, but most of the time these sorts of battle lines will be wounding each other on 5s anyway (S3 vs. D4), so the +1 defense bump from D4 to D5 doesn’t make much of an impact practically. Only extreme differences in defense (like those D7 Grimhammers backed up by Warriors of Erebor with spears) are going to result in significant reductions in Death %.
At the same time, the scale of carnage goes up in these two-on-two scenarios, especially when these spear formations break down—which they do, because our odds of death are between a quarter and a third of the time, before any dice are rolled. Once the lines falter, we can not only get multiple-models into a single model (like we could with massed infantry), but we can now back-up those multiple massed infantry models with multiple spears, for absurdly high death probabilities:
Infantry with spear support vs. Infantry with spear support
(all S3/D4, tied Fight and Attacks)
2 v. 4 2 v. 6
Duel Win %
|
Kill %
|
Death %
|
Duel Win %
|
Kill %
|
Death %
| |||
Good
|
34.25%
|
19.03%
|
52.77%
|
Good
|
26.81%
|
14.89%
|
66.77%
| |
Evil
|
65.75%
|
52.77%
|
19.03%
|
Evil
|
73.19%
|
66.77%
|
14.89%
|
Infantry with spear support vs. Infantry with spear support
(all S3/D4, Good has higher Fight and a Banner)
2 v. 4 2 v. 6
Duel Win %
|
Kill %
|
Death %
|
Duel Win %
|
Kill %
|
Death %
| |||
Good
|
59.72%
|
33.18%
|
32.32%
|
Good
|
53.23%
|
29.57%
|
42.66%
| |
Evil
|
40.28%
|
32.32%
|
33.18%
|
Evil
|
46.77%
|
42.66%
|
29.57%
|
Infantry with spear support vs. Infantry with spear support
(all S3/D4, Evil has higher Fight and a Banner)
2 v. 4 2 v. 6
Duel Win %
|
Kill %
|
Death %
|
Duel Win %
|
Kill %
|
Death %
| |||
Good
|
16.24%
|
9.02%
|
67.22%
|
Good
|
10.15%
|
5.64%
|
81.96%
| |
Evil
|
83.76%
|
67.22%
|
9.02%
|
Evil
|
89.85%
|
81.96%
|
5.64%
|
The "Viking Shield Wall"

Photo Credit: East Grinstead War Gamers
In one v. one fights against mass infantry, these models tend to have a pretty clear advantage. They usually have tied or better Fight than the 2-3 fight you’ll see on mass infantry armies, and at least one additional defense (more often, 2-3 more defense). Both sides have to fight one-on-one, but warriors with shields are usually better equipped to do that (and walk away at the end):
Infantry with hand-weapon and Shield (S3/D5)
vs.
Infantry with hand-weapon (S3/D3)
Tied Fight (F3) Good has higher Fight (F4+)
Duel Win %
|
Kill %
|
Death %
|
Duel Win %
|
Kill %
|
Death %
| |||
Good
|
50.00%
|
25.00%
|
16.67%
|
Good
|
58.33%
|
29.17%
|
13.89%
| |
Evil
|
50.00%
|
16.67%
|
25.00%
|
Evil
|
41.67%
|
13.89%
|
29.17%
|
Infantry with hand-weapon and Shield (S3/D6)
vs.
Infantry with hand-weapon (S3/D3)
Tied Fight (F3) Good has higher Fight (F4+)
Duel Win %
|
Kill %
|
Death %
|
Duel Win %
|
Kill %
|
Death %
| |||
Good
|
50.00%
|
25.00%
|
8.33%
|
Good
|
58.33%
|
29.17%
|
6.94%
| |
Evil
|
50.00%
|
8.33%
|
25.00%
|
Evil
|
41.67%
|
6.94%
|
29.17%
|
These models are also more likely to survive the pell-mell of spear combat, thanks to their higher defense value and their ability to shield, which works wonders to improve their staying power, especially when combined with a friendly banner:
Infantry with hand-weapon and Shield (S3/D5)
vs.
Infantry with hand-weapon and Spear Support (S3/D4)
Tied Fight Good has higher Fight
Duel Win %
|
Kill %
|
Death %
|
Duel Win %
|
Kill %
|
Death %
| |||
Good
|
33.80%
|
11.27%
|
36.78%
|
Good
|
42.13%
|
14.04%
|
32.15%
| |
Evil
|
66.20%
|
36.78%
|
11.27%
|
Evil
|
57.87%
|
32.15%
|
14.04%
|
Tied Fight + Good has a Banner Good has higher Fight + Banner
Duel Win %
|
Kill %
|
Death %
|
Duel Win %
|
Kill %
|
Death %
| |||
Good
|
50.00%
|
16.67%
|
27.78%
|
Good
|
61.03%
|
20.34%
|
21.65%
| |
Evil
|
50.00%
|
27.78%
|
16.67%
|
Evil
|
38.97%
|
21.65%
|
20.34%
|
Shielding with tied Fight Shielding with higher Fight
Duel Win %
|
Kill %
|
Death %
|
Duel Win %
|
Kill %
|
Death %
| |||
Good
|
50.00%
|
0.00%
|
27.78%
|
Good
|
61.03%
|
0.00%
|
21.65%
| |
Evil
|
50.00%
|
27.78%
|
0.00%
|
Evil
|
38.97%
|
21.65%
|
0.00%
|
Shielding with tied Fight + Banner Shielding with higher Fight + Banner
Duel Win %
|
Kill %
|
Death %
|
Duel Win %
|
Kill %
|
Death %
| |||
Good
|
59.54%
|
0.00%
|
22.48%
|
Good
|
71.93%
|
0.00%
|
15.60%
| |
Evil
|
40.46%
|
22.48%
|
0.00%
|
Evil
|
28.07%
|
15.60%
|
0.00%
|
Infantry with hand-weapon and Shield (S3/D6)
vs.
Infantry with hand-weapon and Spear Support (S3/D4)
Tied Fight Good has higher Fight
Duel Win %
|
Kill %
|
Death %
|
Duel Win %
|
Kill %
|
Death %
| |||
Good
|
33.80%
|
11.27%
|
20.23%
|
Good
|
42.13%
|
14.04%
|
17.68%
| |
Evil
|
66.20%
|
20.23%
|
11.27%
|
Evil
|
57.87%
|
17.68%
|
14.04%
|
Tied Fight + Good has a Banner Good has higher Fight + Banner
Duel Win %
|
Kill %
|
Death %
|
Duel Win %
|
Kill %
|
Death %
| |||
Good
|
50.00%
|
16.67%
|
15.28%
|
Good
|
61.03%
|
20.34%
|
11.91%
| |
Evil
|
50.00%
|
15.28%
|
16.67%
|
Evil
|
38.97%
|
11.91%
|
20.34%
|
Shielding with tied Fight Shielding with higher Fight
Duel Win %
|
Kill %
|
Death %
|
Duel Win %
|
Kill %
|
Death %
| |||
Good
|
50.00%
|
0.00%
|
15.28%
|
Good
|
61.03%
|
0.00%
|
11.91%
| |
Evil
|
50.00%
|
15.28%
|
0.00%
|
Evil
|
38.97%
|
11.91%
|
0.00%
|
Shielding with tied Fight + Banner Shielding with higher Fight + Banner
Duel Win %
|
Kill %
|
Death %
|
Duel Win %
|
Kill %
|
Death %
| |||
Good
|
59.54%
|
0.00%
|
12.36%
|
Good
|
71.93%
|
0.00%
|
8.58%
| |
Evil
|
40.46%
|
12.36%
|
0.00%
|
Evil
|
28.07%
|
8.58%
|
0.00%
|
The trade-off with shielding is that it ups your staying power to a point. If you’re outnumbered, it can reduce the chances that you’ll be slain, sometimes significantly. The problem is that if you’re shielding everywhere, you can’t deal any wounds (outside of corner cases like the Oakenshield), which means you’re still going to be outnumbered next turn, and probably even more so (because Shielding, while powerful, isn't a 100% guarantee against dying). So armies in this formation need to really press their advantage whenever they manage to get two or three of their models into melee combat with a single enemy model, and may even have to gamble more in 1 v. 1 combats where they don't have a clear advantage. The fact that they like to fight spread out can help them as well, if they're able to surround spear formations and peel the usually squishy spears out of supporting combats into one-on-one fights.
The "Standard Shield Wall"

Photo Credit: East Grinstead War Gamers
This is essentially an upgrade to our mass-infantry formation with spear supports, only now the front rank has shields (instead of bows, two-handed weapons, etc.); or an upgrade to our Viking Shield Wall by giving it a rank of spearmen behind.
Most armies can form this formation, and have incentives to do so. Not only do we get the staying power of shields to keep our own front rank alive, but the added dice we get from spears makes the combat more deadly for our opponent (and, by extension, less deadly for us). This is probably the go-to formation for Arnor, Gondor, Fiefdoms, the Dead of Dunharrow, the Army of Thror, the Iron Hills and Erebor Reclaimed, all the elven factions, Mordor (and its Angmar, Barad-Dur, and Legendary Legion variants), and Azog's legion. It’s also the usual formation for Moria (unless you're running heavy monsters) and foot-Mahud (unless you're running heavy half-trolls).
This formation does particularly well against the mass infantry and Viking shield wall formations (which have to fight one-on-one), as long as you can keep your flanks and rear spear line protected. Not only do you have multiple-dice to your opponent’s one, but you also have the staying power that allowed our Viking shield wall to survive against spear supported infantry without shields. Above-average fight (or fight buffs) and access to banners tend to be staple features of these army lists, as well, which only increases their advantage.
Consider the chances of our mass-infantry army if they run into a standard shieldwall, and cannot flank it (or the chances of a mass-infantry army if they have to win combats in a particular spot, like around an objective, where the opponent has dug-in with a shield wall):
Infantry with Shield supported by spear (S3/D6)
vs.
Massed Infantry with hand-weapon (S3/D3)
Tied Fight Good has higher Fight
Duel Win %
|
Kill %
|
Death %
|
Duel Win %
|
Kill %
|
Death %
| |||
Good
|
66.20%
|
49.65%
|
5.63%
|
Good
|
74.54%
|
55.90%
|
4.24%
| |
Evil
|
33.80%
|
5.63%
|
49.65%
|
Evil
|
25.46%
|
4.24%
|
55.90%
|
Tied Fight + Good has a Banner Good has higher Fight + Banner
Duel Win %
|
Kill %
|
Death %
|
Duel Win %
|
Kill %
|
Death %
| |||
Good
|
74.31%
|
55.73%
|
4.28%
|
Good
|
82.64%
|
61.98%
|
2.89%
| |
Evil
|
25.69%
|
4.28%
|
55.73%
|
Evil
|
17.36%
|
2.89%
|
61.98%
|
The big difference here isn’t the difference in Duel Win %, as stark as those numbers are: it’s the mammoth gulf between the odds that a good model will die (its Death %) compared with its chance to kill at least one evil model (its Kill %), or what I like to call a kill ratio: how much faster can I kill something than be killed? In an equal fight between equal combatants, the kill ratio is equal (i.e., 25% vs. 25% in a combat between one massed infantry with equal stats against another mass infantry with equal stats, or a 1:1 ratio). Adding defense to a one-on-one fight (the Viking Shieldwall) pushes the ratio in our favor, from 25% v. 25% (1:1) to 25% vs. 8.3% (a roughly 3:1 ratio, meaning we’re three times more likely to kill than be killed). Adding a spear behind that Viking Shieldwall (thereby gaining another attack) pushes that ratio to 50% vs. 6% with tied Fight, or a kill-death ratio of about 8:1 (eight times more likely to kill than be killed). And if we have higher fight and a banner, our ratio jumps to 20:1 (62% vs. 3%). If we’re entering fights knowing we are twenty-times more likely to kill our opponent than our opponent is to kill us, we’re feeling pretty confident about our chances.
The kill ratios are less pronounced if we throw our standard shieldwall against a Viking shieldwall (the mass infantry we just pounded on were D3, after all), but they’re still there (somewhere between 4:1 and 8:1):
Infantry with Shield supported by spear (S3/D6)
vs.
Infantry with hand-weapon and Shield (S3/D6)
Tied Fight Good higher Fight
Duel Win %
|
Kill %
|
Death %
|
Duel Win %
|
Kill %
|
Death %
| |||
Good
|
66.20%
|
20.23%
|
5.63%
|
Good
|
74.54%
|
22.78%
|
4.24%
| |
Evil
|
33.80%
|
5.63%
|
20.23%
|
Evil
|
25.46%
|
4.24%
|
22.78%
|
Good tied Fight + Banner Good higher Fight + Banner
Duel Win %
|
Kill %
|
Death %
|
Duel Win %
|
Kill %
|
Death %
| |||
Good
|
74.31%
|
22.70%
|
4.28%
|
Good
|
82.64%
|
25.25%
|
2.89%
| |
Evil
|
25.69%
|
4.28%
|
22.70%
|
Evil
|
17.36%
|
2.89%
|
25.25%
|
It could also be worse than this, too. We’re assuming S3 models attacking D6 models all around. If the evil model is only D5 (like a Rohan shield wall is), or if the good models are S4 (like siege Uruk-Hai), good’s Kill % will be quite a bit higher.
At this point, the evil model probably decides to Shield, right? That helps to reduce its odds of dying, but probably not as much as it hoped for (especially if good has higher fight and/or a banner), while good’s kill ratio becomes essentially infinite (15-22% vs. 0%):
Infantry with Shield supported by spear (S3/D6)
vs.
Infantry with hand-weapon and Shield (S3/D6)
Good tied Fight; Evil Shields Good higher Fight; Evil Shields
Duel Win %
|
Kill %
|
Death %
|
Duel Win %
|
Kill %
|
Death %
| |||
Good
|
50.00%
|
15.28%
|
0.00%
|
Good
|
61.03%
|
18.65%
|
0.00%
| |
Evil
|
50.00%
|
0.00%
|
15.28%
|
Evil
|
38.97%
|
0.00%
|
18.65%
|
Good tied Fight + Banner; Evil Shields Good higher Fight + Banner; Evil Shields
Duel Win %
|
Kill %
|
Death %
|
Duel Win %
|
Kill %
|
Death %
| |||
Good
|
59.54%
|
18.19%
|
0.00%
|
Good
|
71.93%
|
21.98%
|
0.00%
| |
Evil
|
40.46%
|
0.00%
|
18.19%
|
Evil
|
28.07%
|
0.00%
|
21.98%
|
Now unlike the mass infantry, it’s still possible for the Viking shield wall to recover in this situation if they have higher fight and/or a banner effect. But in three of the four scenarios (all the shielding scenarios), good still has the superior kill ratio (an infinite one, at that), and in the fourth (Evil has higher fight and a banner, while good does not), the kill ratios are just about even, if slightly in good’s favor still (about 6:5 good, even with evil having all the advantages):
Infantry with Shield supported by spear (S3/D6)
vs.
Infantry with hand-weapon and Shield (S3/D6)
Evil with tied Fight Shields + Banner Evil with higher Fight + Banner
Duel Win %
|
Kill %
|
Death %
|
Duel Win %
|
Kill %
|
Death %
| |||
Good
|
40.46%
|
12.36%
|
0.00%
|
Good
|
38.97%
|
11.91%
|
10.17%
| |
Evil
|
59.54%
|
0.00%
|
12.36%
|
Evil
|
61.03%
|
10.17%
|
11.91%
|
Evil Shields with higher Fight Evil Shields with higher Fight, Banner
Duel Win %
|
Kill %
|
Death %
|
Duel Win %
|
Kill %
|
Death %
| |||
Good
|
38.97%
|
11.91%
|
0.00%
|
Good
|
28.07%
|
8.58%
|
0.00%
| |
Evil
|
61.03%
|
0.00%
|
11.91%
|
Evil
|
71.93%
|
0.00%
|
8.58%
|
None of these are winning positions; at some point, the Viking shield wall will need to figure out a way to get its superior numbers into combats with the second rank of spearmen. Doing so will swing the odds back in their favor; failing to do so will result in defeat. It will probably be a long, drawn-out defeat, but it’ll be defeat.
The standard shield wall also enjoys a kill ratio advantage over a mass of infantry with spears (but no shields), thanks to the staying power shields provide. It’s not as pronounced a difference as we saw with the Viking shield wall (the mass infantry spears still have two attacks, so their kill % stays much closer), but we’re still looking at favorable ratios for the standard shield wall on the order of 2:1 to 5:1 (rather than 4:1 to 8:1). In other words, you don’t want a rank of infantry and spears grinding against a standard shield wall if your front rank doesn’t also have shields.
Infantry with Shield supported by spear (S3/D6)
vs.
Infantry with hand-weapon supported by (S3/D4)
Tied Fight Good higher Fight
Duel Win %
|
Kill %
|
Death %
|
Duel Win %
|
Kill %
|
Death %
| |||
Good
|
50.00%
|
27.78%
|
15.28%
|
Good
|
61.03%
|
33.91%
|
11.91%
| |
Evil
|
50.00%
|
15.28%
|
27.78%
|
Evil
|
38.97%
|
11.91%
|
33.91%
|
Good tied Fight + Banner Good higher Fight + Banner
Duel Win %
|
Kill %
|
Death %
|
Duel Win %
|
Kill %
|
Death %
| |||
Good
|
59.54%
|
33.08%
|
12.36%
|
Good
|
71.93%
|
39.96%
|
8.58%
| |
Evil
|
40.46%
|
12.36%
|
33.08%
|
Evil
|
28.07%
|
8.58%
|
39.96%
|
Finally, it’s worth noting that the standard shield wall formation can mitigate its greatest weakness (being flanked, or surrounded) somewhat by the back rank shields as well as spears, and/or by giving your front rank spears as well as shields. This makes both ranks interchangeable, which can be handy if you have to shift position suddenly and don't have time to worry about wrapping your shield guys in front of your spear guys (and vice versa).
If you’re surrounded by a horde, this is also the best way to keep your shield wall up as long as possible, Shield walls tend to crack if a warrior with shield is killed, leaving the spearman behind him to take his place without a shield; having a shield on your bank rank allows them to plug that hole without giving up the integrity of the shield wall. And for certain factions who also have the Shieldwall special rule on their warriors (Iron Hills, Erebor Reclaimed, Gondor), having a second rank of spears with shields will confer additional defensive benefits, too.
The "Pike Block"
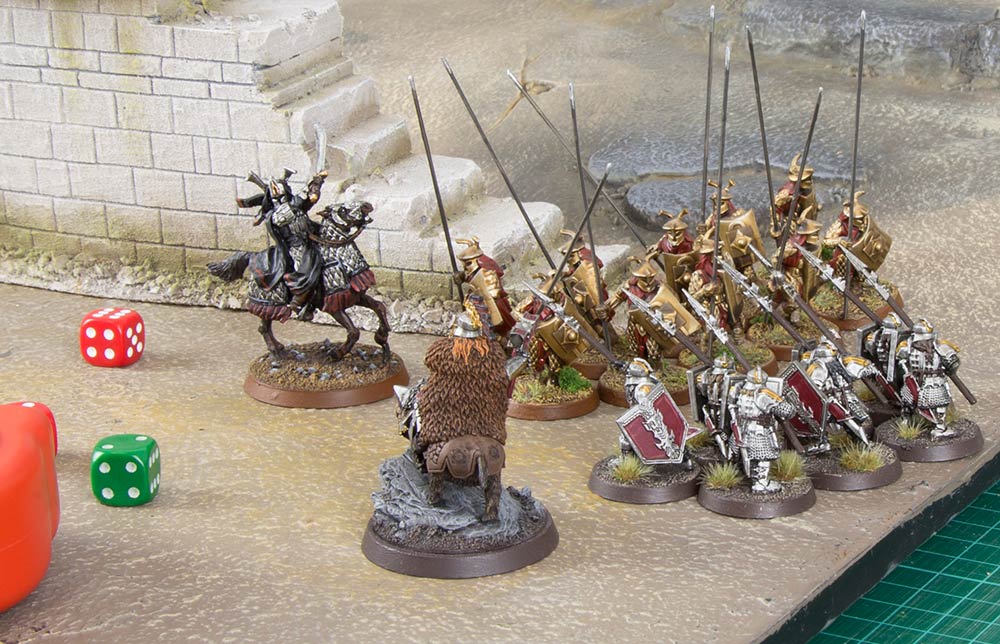
Photo Credit: warhammer-community.com
This is the standard shield wall, only with a third rank that carries pikes. Unlike Viking and Standard shield walls, these are pretty rare. Easterlings and Siege Isengard run them fairly standard, Fiefdoms a little less, and less often than that, Lothlorien (even though they have arguably the best pikemen in the game).
The third rank of pikes will generally not have shields as there's usually a duel roll penalty for carrying both a shield and a pike (the Easterlings are the obvious exception, along with Lothlorien, who can shield with a pike because they're the best pikemen). Even for Easterlings, outfitting every warrior in a pike block is expensive, so you’ll generally have at least one rank without them, which means the order of the ranks is important (and thus the rank as a whole is less maneuverable).
If maneuvered properly, and if the flanks are protected, these formations are the most dangerous standard infantry formation in the game, as they can bring massed attacks to bear on a concentrated area. Even a standard shield wall with above-average defense will struggle to get a favorable kill ratio if it runs headlong into a pike block:
Infantry with Shield supported by spear and pike (S3/D6)
vs.
Infantry with Shield supported by spear (S3/D7)
Tied Fight Good higher Fight
Duel Win %
|
Kill %
|
Death %
|
Duel Win %
|
Kill %
|
Death %
| |||
Good
|
59.54%
|
25.08%
|
20.95%
|
Good
|
71.93%
|
30.30%
|
14.53%
| |
Evil
|
40.46%
|
20.95%
|
25.08%
|
Evil
|
28.07%
|
14.53%
|
30.30%
|
Good tied Fight + Banner Good higher Fight + Banner
Duel Win %
|
Kill %
|
Death %
|
Duel Win %
|
Kill %
|
Death %
| |||
Good
|
65.75%
|
27.70%
|
17.73%
|
Good
|
78.93%
|
33.25%
|
10.91%
| |
Evil
|
34.25%
|
17.73%
|
27.70%
|
Evil
|
21.07%
|
10.91%
|
33.25%
|
The only thing that keeps evil in the running with its kill ratios (ranging from 5:4 to 3:1) is the fact that most pike blocks can’t make way with two models, which means if the pike block loses the fight (which it can do, even though the odds are against it), the standard shield wall gets to roll double-strikes (four dice to wound) because the model at the front of the pike block is trapped. If that saving grace is lost (Easterlings, for example, can make way with up to two models thanks to their Phalanx special rule), the kill ratios are decidedly in favor of the pike block (from 2:1 to 5:1).
Infantry with Shield supported by spear and pike (S3/D6)
vs.
Infantry with Shield supported by spear (S3/D7)
Tied Fight Good higher Fight
Duel Win %
|
Kill %
|
Death %
|
Duel Win %
|
Kill %
|
Death %
| |||
Good
|
59.54%
|
25.08%
|
12.36%
|
Good
|
71.93%
|
30.30%
|
8.58%
| |
Evil
|
40.46%
|
12.36%
|
25.08%
|
Evil
|
28.07%
|
8.58%
|
30.30%
|
Good tied Fight + Banner Good higher Fight + Banner
Duel Win %
|
Kill %
|
Death %
|
Duel Win %
|
Kill %
|
Death %
| |||
Good
|
65.75%
|
27.70%
|
10.46%
|
Good
|
78.93%
|
33.25%
|
6.44%
| |
Evil
|
34.25%
|
10.46%
|
27.70%
|
Evil
|
21.07%
|
6.44%
|
33.25%
|
It is possible for standard shield walls to draw even with pike blocks, but it’s trickier; since a model can only shield if all models in the fight are shielding, the front rank of a shield wall can’t increase its attacks to two without giving up the extra attack from the spear behind it (which kind of defeats the point). This means a shield wall can only roll up to 3 dice results in the duel role (one from each rank, plus a banner reroll), which will only ever tie the rolls from a pike block (and only if the block doesn’t have a banner reroll). There are things the pike block can do to help out, of course (two-handing with the front rank, or putting shields on non-Easterling pikes (again, Phalanx is good) sot he pikes suffer a -1 penalty during the duel roll. But usually that won’t happen.
This leaves higher fight value (ideally with banners) as the only option left. If you can pull it off, it’s a definite boon:
Infantry with Shield supported by spear and pike (S3/D6)
vs.
Infantry with Shield supported by spear (S3/D7)
Evil + Banner
Duel Win %
|
Kill %
|
Death %
| |
Good
|
50.00%
|
21.06%
|
15.28%
|
Evil
|
50.00%
|
15.28%
|
21.06%
|
Evil higher Fight Evil higher Fight + Banner
Duel Win %
|
Kill %
|
Death %
|
Duel Win %
|
Kill %
|
Death %
| |||
Good
|
47.16%
|
19.87%
|
16.15%
|
Good
|
35.23%
|
14.84%
|
19.79%
| |
Evil
|
52.84%
|
16.15%
|
19.87%
|
Evil
|
64.77%
|
19.79%
|
14.84%
|
Even with these advantages, the shield wall only manages to essentially draw the kill ratios, or pull very slightly ahead. In any event, it's largely fool’s gold anyway. While you can usually manage the banner (in some respects it’s easier to banner support a shield wall against a pike block, since the pike formation is pretty compact and you’ll have a very good idea of where it’ll end up a couple turns in advance), it’s very, very difficult to pull off having higher fight than a pike block because of the armies they’re in. Easterlings are the only pikes that are base F3, and most Easterling players try to have at least one Black Dragon (F4) in their pike combats if possible. Uruk-Hai pikemen are also standard F4, which means only elven shield walls are going to have a realistic chance of out-fighting them, unless you have overlapping +fight bubbles in your force. Speaking of overlapping +fight bubbles, Dol Amroth pikemen start standard F4, and upgrade to F5 when within 3” of Imrahil (or 6” of the Banner of Minas Tirith, or F6 when within range of both). That leaves the Guard of the Galahdrim Court in Lothlorien who, speaking of F6… are F6 base. There are some shield walls that can get to F6 (Palace Guard around Thranduil, or Galahdrim Guards who are behind only one rank of Galahdrim instead of two), but most of the time, this will be a bridge too far. Remember, a pike block only needs to have tied fight to have a tremendous advantage against a shield wall. And there are no F7 shield walls (only segments of them).
This means out-flanking a pike formation becomes vitally important. Every other formation should have an advantage in model count (cheap mass infantry, mass infantry with spears, and certain Viking shield walls) and flexibility within their formation (cheap mass infantry and Viking shield walls, which don’t need to fight in formal ranks, and to a lesser extent standard shield walls if every rank has both spear and shield) to get around the flanks of the pike block. Once you do that, you can peel off the pikes into one-on-one combats (probably trapped as well—Viking Shieldwalls love this formation) or two-on-one and two-on-two combats in your favor if you you’re your own spears (spear/shield vs. spear/shield, and spear/shield vs. pike, probably with traps, too).
Looking Ahead
All of this is just meant to give us a baseline for how these five basic infantry formations perform against one another. Within these five categories, there’s a lot of variation. A Goblintown army with mass infantry supported by two-handed weapons will struggle with (and against) different formations than a line of Half-Trolls backed up by Haradrim warriors with poisoned spears and bows. A Rohan Viking shield wall may struggle against a Mordor standard shield wall of Black Numenoreans backed up by Morannon orcs with spears (actually, check that; it will struggle with that standard shield wall), while a mass of Durin's Hearthguard and Iron Guard will cut through it with ease (as I know all too well from personal experience). So there’s a lot of nuance left to be discovered in how these formations function and fare within specific army lists.
A great intro write-up to understanding different kinds of infantry formations - I will add that sometimes, though, you'll see some armies that "should" prefer one type using another for different reasons. Best example is Tavros' Moria Goblins tend to use an infantry-horde formation instead of a shieldwall because a) it's faster to move all those Goblins, and b) because they're Goblins and that's what they do. Eventually they resolve into a shieldwall, but on the approach, this might work pretty well. You also tend to see this when someone has an area-of-effect range attack (be that from a siege engine or a fire-breathing dragon).
ReplyDeleteThis is very true. There are also plenty of infantry units who can fight in multiple ways--high elves with spears and shields come to mind, since they can surround with shields (Viking Shieldwall), spear support each other (standard Shieldwall), or go two-handed with their elven blades in a pinch (mass infantry formation) potentially with spear supports behind them (mass supporting infantry). That kind of flexibility can really help to confuse an opponent, or to take advantage of an opening during the fight phase.
DeleteThere is also a bit of rock-paper-scissors element to this as well, that doesn't come across in the numbers I ran. If you throw each of these formations into a head-on-fight with any of the other formations, the pike block is going to come out on-top almost all the time (they almost always have equal-or-higher fight values, with D6 front rank units and are rolling at least three dice to win the fight). Spear supports have a chance on a frontal assault (two dice aren't better than three, but they're better than one, especially if you have a banner), while single attacks (mass infantry, viking shieldwalls) much less so. Which leads to a pretty obvious lesson, I think: don't throw those formations into a frontal assault on a pike block.
DeleteThe advantage those two formations have is numbers (mass infantry, and even Viking shield walls, tend to cost at least no more than--if not quite a bit less than--the units in a pike block) and mobility (pikes have to keep a static, deep formation, while models armed only with hand-to-hand combat weapons are incentivized to move around). If either of those formations can surround the pike block--even on just two sides--they can start stripping models out of those frontal assaults into one-on-one fights on the flanks (or even the back of the formation, ideally). They'll still have to win duels and crack the defense of the formation, but for Uruks and Galadhrim in particular, there will probably be traps galore which will help with the killing.
A cheap, mobile standard shieldwall (like, orcs with shields backed by orcs with spears, at about the same cost for a pair as a single pikeman) could potentially do this very effectively (since at least some of those peeled off one-on-ones would become two-on-ones). So could the scenario--missions that split forces apart aren't the best for pike blocks (or really any force that depends on consistent formations).
This comment has been removed by a blog administrator.
ReplyDeleteThis comment has been removed by a blog administrator.
ReplyDeleteWe've been spammed! Does that mean we've hit the mainstream?
DeleteIt's your friendly neighborhood rules grump again, haha! :)
ReplyDeleteThey changed the rules for supporting units with pikes. Page 85: "A pike-armed model can Support a friend Engaged in close combat by being in base contact with another pike-armed model that is already doing so (note they must both be pikes; neither can be a spear."
That’s a good catch. Inter-faction I think it only impacts Galadhrim and Isengard (spear orcs and Uruk pikes), but for alliances (I’m thinking Gondor-Fiefdoms in particular), it could be a real nuisance. :-P
Deleten the medieval times, Viking soldiers acquired their viking shield popularity. Today, there are lots of individuals worldwide who've an enduring passion and attention to weaponry and gear which were usually used throughout the dark ages.
ReplyDelete