Featured Post

The New Age Is Begun: the Fords of Isen Army List

Good morning gamers, We're back for another week in Rohan month (Volume III!) with the Fords of Isen army list. A while back, the TMAT t...

Showing posts sorted by relevance for query "beware of dragon". Sort by date Show all posts

Friday, January 16, 2015

Beware of Dragon, Part 5: To Fear or Not To Fear

Good morning gamers,

We've talked about the "vanilla" dragons who have no upgrades, the "utility" dragons who have a single upgrade, the "offensive versatile" dragons who have two upgrades and use their Will to breathe fire, and the "defensive versatile" dragons who have two upgrades but no fire. Given these 11 possible builds, how does one go about fighting these things? To all the dragon hunters out there, this post is for you.

Sunday, December 14, 2014

Beware of Dragon, Part 3: The "Offensive Versatile" Dragon Types

Good morning gamers,


In our previous two posts, we talked about the Vanilla dragon type (no upgrades) an the Utility dragon types (one upgrade). These five builds are more affordable options that what we're going to be talking about today, but they only do one thing for your army. In today's post, we're going to be looking at the three possible Versatile dragon builds that include the "Breathe Fire" upgrade, because let's face it, we think breathing fire is pretty cool. Because you pay Will points to use Breathe Fire, we're going to be referring to these dragon builds as "offensive versatile" types, while the non-Breathe-Fire builds save their Will stores for resisting magic or passing Courage tests ("defensive versatile" types). It's important to note that the fact that "offensive" or "defensive" has been tacked onto the Versatile description doesn't mean that taking an "offensive" dragon build lacks defensive options (or that "defensive" dragon builds lack offensive capabilities). Rather, the focus is only on how it enables the use of its Will store. Before we begin, let's get some of the elephants out of the room.

Tuesday, December 2, 2014

Beware of Dragon, Part 2: The "Utility" Dragon Types

Good morning gamers,


In today's post, we're going to look at the four types of "utility" dragons that you can buy in the LOTR Strategy Battle Game. The following terms will be used throughout the post, so here are their "formal" definitions up front:
  • Utility Dragon - a dragon with a single upgrade is termed a "utility" dragon, since the upgrade provides a niche capability for the dragon to perform a primary function (and very few other functions besides that). This is used to differentiate a dragon with a single upgrade from those with no upgrades (termed a "vanilla" dragon) and those with two upgrades (termed a "versatile" dragon).
  • Lightning Build - a dragon who relies on its fiery breath to devastate enemy ranks and the heroes who lead them. This allows a dragon, for a limited time, to have an archery attack option.
  • Thunder Build - a dragon who relies on the thunderous pounding of its wings to choose its battles, avoid several turns of archery, and often ensures that it will receive its charge bonus.
  • Rain Build - a dragon who relies on magical spells to enfeeble enemy heroes (or warriors, I guess) in order to defeat them asymmetrically. Like fighting in rain, heroes who face a dragon of this kind will not be entering the combat at full strength (if anywhere near the same playing field).
  • Hail Build - a dragon who relies on its tough hide to ignore wounds dealt by the most powerful of blows. This has its advantages against enemy archery, damage-oriented magical spells, and melee attacks.
For the sake of theme, these all have storm elements in their titles - the "hail" build is probably better termed a "rock" build, but since hail is rock-like...you get the picture.

Friday, December 26, 2014

Beware of Dragon, Part 4: The Defensive Versatile Dragon Types

Good evening gamers,

We've talked about Vanilla dragons, Utility dragons, and Offensive Versatile dragons. In this post, we're wrapping up the tactical overview of dragon builds and focusing on the "defensive versatile" dragon options. As mentioned in our last post, these dragons don't use the Breathe Fire upgrade, which brings a few concerns. The chief benefit to this dragon type is that your Will store can be saved for one of two things: casting magic (if you have the Wyrmtongue upgrade) or passing Courage tests (available to all three builds below). This allows you to protect your dragon either by weakening your foes or ensuring you are resolute enough to stay and fight. The concerns for this build are as follows:

Sunday, November 23, 2014

Beware of Dragon, Part 1: The "Vanilla" Dragon Type

Good morning gamers,

In preparation for the release of The Hobbit: The Battle of Five Armies, I'm doing a four-post review of Dragons that you can buy in the LOTR SBG. There are, in my taxonomy, three classes of dragons you can buy and understanding why you would purchase each will assist in deciding what army you build around it. The classes are:
  • Vanilla: no upgrades (cheapest option, melee-oriented)
  • Utility: a single upgrade (medium expense, single-task-oriented)
  • Versatile: two upgrades (most expensive, potential for multi-task orientation)
In this post, we're going to focus on the "vanilla" class - what you get by just purchasing a dragon. As we talk about the "benefits" and "cautions" for playing with dragons, keep in mind that most of what I'm going to relay in this post isn't going to be rocket science or unexpected, but it is important for laying the groundwork for understanding what upgrades (if any) you buy for your beastie.

Thursday, June 16, 2022

So...Let's Talk about That Dragon (Emperor)

Photo from Gamespot - still one of the best movies ever made

Hey Reader!

So Defence of the North is finally here! We've been hearing about this supplement for quite some time, and as someone who has collected Easterlings since 2012 and has wanted to collect Dale for quite some time (I like Erebor as well, just not a high priority right now), I am so excited to finally have my hands on this book! Shipping across the Pond takes a while, but grateful for the team at GW for their work to get it through customs to us.

One of the most previewed models from the supplement was The Dragon Emperor, with constant discussions about what his profile should look like, what his special abilities should be, and how to fit him into an army that already has good mounted heroes (Amdur and Khamul), good secondary damage heroes (Dragon Knights and now Rutabi), and the balance between mounted forces and an infantry pike block (oh, and archers - believe it or not Easterlings have archers, too). And as information slowly trickled out two things became clear:

First, they were trying to sell a new model. Now it should be noted that I don't mind this, as GW is a company, and they need to sell models. Totally down with him having bonkers stats and abilities both in-world as he's the best that the Easterlings will probably ever get, and also out-of-world from a business perspective. So I've got no issues with the mercantile reasons for making a new power hero for the Easterlings: everything checks out.

And second, and perhaps more so, he's a very interesting fit for Easterlings, serving as a "centerpiece" model (not that Easterlings lacked that before - more on that later) that has both offensive firepower and support abilities (not that Easterlings lacked that either, but we're getting ahead of ourselves).

So how does he hold up? Is he worth the monetary and points investment (as both are high: $190 USD and 170 points in-game)? And is he actually undercosted as some have claimed? Let's take a look.

Monday, July 27, 2026

The New Age Is Begun: the Moria Army List

Good morning gamers,

We got a request a few weeks ago (at the time that I'm writing this) to review the Moria army list - and despite how crazy this world is, we listen here at TMAT and I found a slot for the article to fit in. So . . . tell us what you want us to review and we'll see what we can do. :) The Moria army list differs quite a lot from the Depths of Moria list, despite the fact that the core units of both armies are the same. Between rules that are present in each list and each having a different "big monster" (or monsters) in it, you can get a very different experience playing Moria than a "Depths" list. Let's see what causes these differences, shall we?

Moria: Changes for 2025

Profile Selection

This list has all of the GW-named Goblins in it (both Durburz and Druzhag from the Armies of Middle-Earth and Ashrak and Groblog from the Legacies document), all of the generic Goblin heroes (both Moria Goblin Captains/Shamans and Blackshield Captains/Shamans), and all of the big monster heroes from the last edition EXCEPT the Balrog (Dragons, Cave Drakes, and the Watcher in the Water). 

You also have access to most of the old Moria warrior profiles - Moria Goblin Warriors/Prowlers/Drum, Blackshield Warriors/Drum, Warg Marauders, Dwellers in the Dark, and Cave Trolls. These profiles are available to any hero in the list. Druzhag opens up a few other profiles: the big profile that was missing from the list above - Bat Swarms - as well as Fell Wargs and Mirkwood Hunting Spiders (who might actually be useful in this list - more on that below). All in all, unless you really liked Wild Wargs last edition, you have everything you had before - hooray!

Monday, July 6, 2020

The Bare Necessities, Part XXVII: Khand

Good morning gamers,

As we continue the part of the series where we discuss armies I don't intend to collect, we will be looking today at the Variags and Khand and how you can run these lists with a balanced list in mind. Khand has some really cool mechanics that, by all rights, I should love (as many bows as you like so long as they're mounted on horses, fairly inexpensive heroes with lots of bite, and chariots that run things over). The drawback, of course, is the expense to get started collecting (though chariots can be acquired from various historical ranges and Khandish warriors look a bit like Samurai or Ashigaru troops). 

Credit: Scott's Wargaming

Money for me is a huge factor in what I collect - I might be willing to drop $200 on an army over time, but if getting to a starting place costs $200+, I'm probably not biting (and with a single chariot costing more than $40 at the moment and the horsemen coming in metal blisters, this army won't be on my radar . . . ever). Still, Khand is pretty popular and you can learn a bit about these guys online (the Green Dragon Podcast featured a discussion on Khand - check that out, they interview a Kiwi who has had great success with them).

While I have never run Khand and never fought Khand, my good mate MinutemanKirk (as well as someone I met in a Facebook SBG group) was willing to answer some questions on Khand for me. Here's how our discussion went . . .

Interview Questions with MinutemanKirk and JS (some edits for clarity by Tiberius)

T: Is there ever a time you would run Khandish infantry?
MK: Alright, so I expounded a little bit on my guest blog post. I don't think Khand is a very viable army on its own (right now anyway, fingers crossed for more units/heroes!). I think the situations I would run infantry is if I was trying a horde approach, didn't have the models for more mounted units, or wanted to have a scrub unit for holding down objectives. None of those, apart from not having enough models, are compelling enough for me to run Khand infantry en mass.
JS: No. Never. Except for scenarios or when there are a few points left to boost numbers in warbands. Basic thinking does not work on Khand - your Khandish Horsemen are your infantry and your Khandish Chariots are your real cavalry.

T: Since you can run Khandish Horsemen with an unlimited bow limit (assuming you keep your army bonus), are these horsemen good to run? If so, how many do you run (and what is the ratio of horsemen to chariots)?
MK: Khand cavalry are surprisingly efficient: Fight 4, Strength 4 (using Piercing Strike), and a bow for only 13 points. It allows them the flexibility to be pure skirmishers (although Serpent Horde would be a better choice for that) while also enabling perfectly legitimate melee attacks. The problem with focusing on skirmish while also wanting to use chariots is chariots are inherently NOT skirmishers with their unique movement rules: you can't just stop and run away if the enemy makes a run at you. Their movement rules also make it difficult to skirmish wit chariots on terrain-heavy or other movement-restricted boards. If I had unlimited time and money to run a Khand force, I would probably go for a 2:1 or 3:1 rider to chariot balance. Chariots are great, but they need a little screening and when one or two go down, it leaves a massive hole in the line (and a thirty point loss each). Despite the in-the-way requirement, I've found charioteers are extremely squishy.
JS: Typical warbands would look like this: 1 Khandish King on Chariot + 1 Khandish Charioteer + lots of horsemen. Repeat, repeat, repeat.

T: Chariots are awesome, but how do you keep them from running into each other? Are there issues you've ever run into when facing armies that feature Command/Compel?
MK: I've never had an issue with them running into each other, but then I've also never run more than four chariots at a time. You want to avoid getting them in a column formation whenever possible, because, if a chariot doesn't kill something, the whole column stops. Avoid that and it's relatively easy to avoid friendly tramples. I've also not had an issue with Command/Compel as long as it only comes from a single caster. When using Easterlings with Khand, most opponents either can't get to a chariot before it gets into close combat, or is focused on neutralizing Amdur/Dragon Knights. So far as I understand the rules, even a Command/Compel must follow their movement rules. Thus, if you get a chariot into close combat, a Command/Compel isn't worth the effort since you'll be running over your own guys anyway. (T: so far as I know, that's correct as well - more on this discussion in a few weeks, :-) ).
JS: Your chariots are your cavalry. You want them on the flanks to crush enemy static lines (having them bruise over bowmen blocks is very efficient). Well played, they will never touch each other. You should have on each side one Charioteer/King on Chariot. Your anvil line is composed of your cavalry, shooting while moving, then crushing with Piercing Strike the enemy lines while your Chariots are disturbing spear supporters.

T: Is it worth taking bows on your charioteers instead of axes?
MK: Personally, I would never take a chariot with a bow to skirmish with.
JS: No, never. You want them to run over enemies, then in melee use Piercing Strike. Even if the enemy wins the fight against you (which is not that easy with Monstrous Charge and your 6" banner from the King) he still needs to overcome your shield (your Chariot). Classic charioteers should pick up softer targets. Your King has to deal with the heavier heroes.

T: Any additional thoughts?
MK: Kings are always better to take than Chieftains unless you don't have the models or you don't have the points. You absolutely lose nothing (King's have Heroic March too), and the extra Attack and Defense in close combat are literally lifesavers.
JS: Khand can't do a spear-and-shield formation, but it's best not to find a work around for this - work with what you have. Yes, it is a very non-classic play style, but played correctly, it can be even stronger.

Thanks guys - we'll be looking at a list I derived from this discussion, with a few lists from MinutemanKirk (and a follow-up post from me) at the end of the post.

Monday, October 30, 2023

Nemesis: How to Fight the Assault on Lothlorien Legendary Legion

Good morning gamers,

Last time, we looked at the much-feared Assault Upon Helm's Deep Legendary Legion and some strategies you can employ to fight it. Today, we turn to the other "Assault" legion (the Assault on Lothlorien) to see what the hype is about this list . . . and some things you can employ to fight against it. Yes, it shoots things - and yes, it has crazy shenanigans that the Helm's Deep list doesn't quite have - but it also plays very differently and can be beaten with some other methods of attack. Let's dig in and see what all the fuss is about (especially now that they've changed a bit).

What Makes The Assault on Lothlorien Legion So Hated?

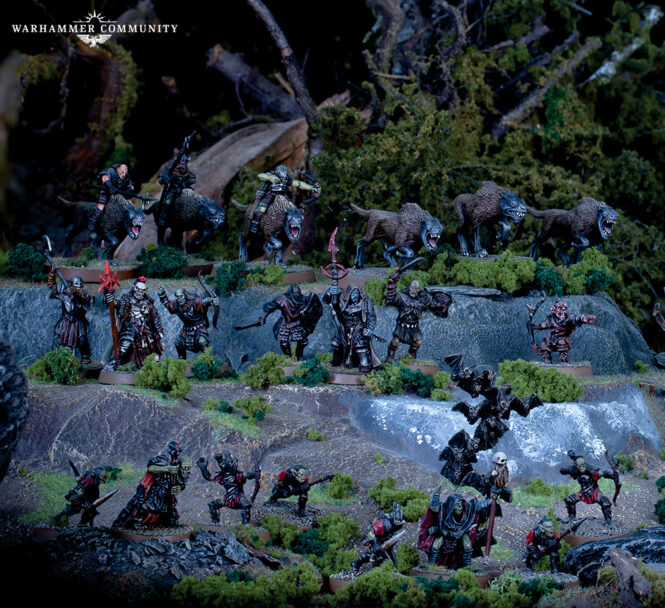
Photo Credit: Warhammer Community 

The first thing that annoys players about fighting this Legion is that it's a horde list - this critique isn't unique to the Legion, but any time you can get a large number of models at basically any points level, someone is going to gripe. Sometimes bringing a horde to the board (I'm a poet, I know) is fine - no one seems to complain that much when there's a Denethor-led Minas Tirith spam list on the board - and there are plenty of lists that run "just a lot of Orcs or Goblins" that no one things is oppressive. It's not like this list is spawning new models from behind your lines like Goblin-town or has +10 or +15 models on you at the start of a game (though it might).

What makes this list annoying is that it's a horde list with other stuff. The list has access to Moria Goblins (5-7 points depending on what gear you give the Moria Goblin Warriors and your opinion of Moria Goblin Prowlers), Orc Warriors and Trackers (5-10 points depending on the gear you give them, potentially more if you invest in a banner), and Wild Wargs (which all heroes can lead and are very cheap fast infantry). If you spend 250-300 points on these things, you can easily field 40 warriors at most points levels, so long as you have the heroes to lead them.

Enter the shamans in this list: on the named front, you've got Druzhag and Ashrak (at least one of them is required), who come in at 50-90 points, but fielding both is certainly possible at 500+ points. You also have Muzgur (who is required along with one of these Goblin guys - and now has to be your army leader), who at 70 points is one of the cheapest Heroes of Valour in the game (normally he's Fortitude, but in this list he's Valour). Pick up all three of these guys (or two of these guys and one other hero) and you can horde out pretty easily.

On the generic hero front, you have both Moria Goblin Shamans and Orc Shamans (45 or 50 points, respectively) who are able to lead 12 warriors in their warbands, thanks to the promotion to Fortitude status in the Legion. Which one you prefer used to depend very much on your view of Orcs - are they just a handful of spearmen behind the Goblins or are they a proper shieldwall (half shield, half spear-and-shield). Now that you have to have fewer Goblins than Orcs, it'll be hard for any player to have exclusively Goblins in their shieldwalls, but I have always liked the picks that can help the Orcs reach S4 (which you can get with Moria Goblin Prowlers who have to fight two-handed, but not Moria Goblin Warriors) and the flexibility of not having to have these guys arrive near the Goblin lines. I used to be in the minority opinion on this - time will tell how the new meta for this list will shake out.

Monday, June 10, 2024

The Board Is Set: How to Play Domination

Good morning gamers,

Today begins our three-part series in the second pool of scenarios from the MESBG Matched Play Guide. We've already viewed the three scenarios from Pool 1 (the Maelstrom of Battle scenarios) and today we're focusing on my favorite set of scenarios: the ones with all the objectives. These games are often quite fun and can give players the opportunity to pull out a win or a draw at the very last minute, even when their dice are quitting on them and their guys are dying. While I've struggled to win these scenarios when I've played them in our tournaments, they're always fun. Let's look first at how the pool of scenarios works and then we'll look at the particulars of the first of these scenarios: Domination (and if you've already read this section, you can skip it here).

Pool 2: Objectives Are Everything

Pool 2 isn't the only pool with objectives that you need to control - we've already viewed Hold Ground (one objective in the center of the board) and the Heirloom becomes a kind of objective if no one is holding it in Heirlooms of Ages Past. The quadrants in Command the Battlefield aren't exactly "objectives," but they function in much the same way - just as really, really BIG objectives.

There are two other scenarios that have objectives as well: Divide and Conquer (three objectives) and Storm the Camp (like Command the Battlefield, there are two pretty big "objectives"). We'll cover both of these scenarios when we get to Pool 5 in a few months, but it should be clear that in these two scenarios (and the three from this pool), we have 1-4 objectives that you get points for controlling.

Thursday, October 31, 2019

Armies of Middle-Earth SBG: Moria in the Middle-Earth Strategy Battle Game

Image result for moria

Deep beneath the misty mountains lie the caverns of Moria. In ages past, the greatest kingdom of the dwarves gave way to foul goblin invaders. After the fall of Azog, the land lay quiet for years, until Balin's ill-fated expedition, and the Fellowship's own venture into this forsaken land, awoke an ancient malice...

Few armies in the Middle-Earth Strategy Battle Game have such a diverse list as Moria. From spammable cheap troops to elite, monstrous heroes, there is no such thing as a "standard" Moria force. So grab your torch, brush up on your elvish passcodes, and venture with us into the long dark of Moria.

Photo Credit: YouTube


Thursday, August 14, 2025

FAQ Time: Unpacking the August 2025 FAQ

Good morning gamers,

I didn't submit anything to this FAQ - I've been busy fussing with Star Wars Legion and Bolt Action lists for the better part of the last few months, so I'll be honest, this FAQ snuck up on me and yet, there wasn't that much that surprised me. There was one VERY big change that I totally did not see coming . . . before we get into that, let's take a look at what got updated . . . and then we'll get into the really spicy stuff that creeped up and went unanswered.

Photo Credit: Reddit

What Didn't Have Changes

It should go without saying that there were no clarifications on the Legacies of Middle-Earth document, which GW has already said exists so people can use the "no-longer-supported" profiles - many of which were beloved in the last edition. I'm personally very appreciative that the Legacies document was released and that we have it - if they don't update any of the profiles, I think I'm fine with that.

Beyond that, everything got updates (though the Matched Play Guide only got one update, so it's basically as-is - I expect that to change as more people play the updated scenarios). Let's dig into what didn't really change (or what worked the way we thought it did) . . .

Rules That Worked Like We Thought

There were a few errata to the Armies of Middle-Earth supplement - most of which were expected: Theodred starts with a shield, Druzhag's Fury magical power targets himself, and like in the last edition, Druzhag can include Beast models in his warband, but that doesn't open them up as options in other warbands. I'm not going to reprint the text of these errata here - but you can find them in the Armies of Middle-Earth Designer Commentaries.

I'm going to start with an FAQ on Treebeard carrying Merry and Pippin from the Armies of the Lord of the Rings supplement: the question was asked if Merry and Pippin are affected at all by the Wrath of Bruinen magical power while sitting on Treebeard's head. The answer, as you'll see below, is no - they cannot be targeted and are unaffected. There was a tandem question asked about what happened to them in Treebeard is knocked Prone - the answer is that they, like any rider, are Knocked Flying:

Q: If Merry and Pippin are riding into battle on Treebeard, and Treebeard is hit by a power such as Wrath of Bruinen, are they also hit by it? What happens when Treebeard is knocked Prone? (p.24) A: The Merry & Pippin rule states that they cannot be targeted individually by Magical Powers, and so they won’t be targeted – they would not suffer a hit from Wrath of Bruinen. If Treebeard is knocked Prone, Merry and Pippin will count as being Knocked Flying, as per the result on the Thrown Rider Chart (see p.70 of The Middle-earth Strategy Battle Game Rules Manual).

Monday, February 3, 2020

The Bare Necessities, Part V: Making Your Heroes Better (and Keeping Them Alive)

Good morning gamers,

Today is our last post in our series on list building – walking through the different things to consider for your army when thinking about victory points (VPs) that can be scored in a game. As a brief refresher, here’s the list:
  • Fast troops who can claim objectives or exit the opposing board edge;
  • At least one banner;
  • Ways of delaying/avoiding being broken (often in the form of large numbers);
  • Means of killing/inhibiting enemy heroes; and
  • Means of keeping your own heroes alive/augmenting their damage.

We’ve already covered fast troops, banners, “the numbers game,” and neutralizing enemy heroes. Today, we wrap up the discussion by talking about different ways you can make your heroes better (and keep them from dying). Most of our discussion today will focus around your Army Leader (and your opponent’s Army Leader), though most of it also applies to other heroes.

Monday, August 17, 2020

Mastering Magic: Sorcerous Blast

Good morning gamers,

So we find ourselves today beginning a new twelve-part series on magic. I know what you're thinking: 

"Tiberius, you just DID a series on magic. What's there left to talk about?!?!?!"

Lots. :-)

To be honest, I've covered magic quite a bit on this blog. My last series on magic was back in July-August 2019, where I looked at the four different kinds of magical models in the game (Combat mages, Auxiliary mages, Multi-Purpose Will mages, and Unlimited mages).

Prior to that (in April-May 2019), I covered four of my favorite magic heroes in five posts and why I liked what they brought to the army over more traditional, combat-oriented heroes (Gandalf the Grey, Gandalf the White, Gandalf the White again, Saruman, and Galadriel).

More recently, I and my fellow admins Centaur and Rythbryt did a review of our "Top 10" Good spell casters and "Top 10" Evil spell casters in our TMAT Talks podcasts (available on YouTube, going up on other places too). Our post on "Top 10" Support heroes (both Good and Evil) also featured spell-casters - though I did restrain myself from ranking Gandalf the White in that post.

Centaur, Rythbryt, and I teamed up with two of our mates (MinutemanKirk and RedJacket) for two TMAT Drafts with support-oriented heroes as well (Forces of Good and Forces of Evil). While spell-casters were only a part of the total set of models in the pool, they played no small part in my calculations for either side of the coin (no surprise there).

I've written a smattering of other articles in the last year (or so), including the best anti-mageswhen channelling wastes Might points (and other things that weren't related to magic), and a review of the best Ringwraiths to take in an army. All of this is under the new MESBG rules - I also talked about magic under the previous rules sets (but I won't drudge all those up here).

After compiling this list, it occurs to me we have written about magic a lot (and me in particular). :)

So what have we not talked about with magic? Why, how to best use each spell, of course! In writing most of these posts (and some other posts on list building), we received comments from some of our readers about how to get better value/from certain casters (Gandalf especially) because they just never seemed to do enough killing to justify their existence in a list over a more combat-oriented hero. This got me thinking about different spells and how to "best use them" (or whether they're even worth using at all). 

So, this series was born, where we'll understand at the beginning of each post what a spell (or set of spells) does, who can use it, how you use the spell effectively, when you use it, and wrap up with a few case studies of people who should (and shouldn't) use it and how. As the series continues, when we've finally covered all of the spells available to a hero model, we'll do a recap of that hero and talk about how to balance what you've read about in the previous posts on the blog so you can integrate the various thoughts into a solid game plan. The end-goal is not only to make spell-casters more accessible to new players, but give experienced players an idea of how they could integrate some of the most powerful spell-casters in the game into existing armies they like to run.

Our first spell that we'll be covering is a spell that got a lot of critique under the new rules: Sorcerous Blast. While only available to a handful of models, Sorcerous Blast has the potential to really change your opponent's combat plans - and let's face it, it's a damage spell (so by definition, it's a cool spell - you think we would start with Enchanted Blades?!?!?!?!). Let's see what it does.

Monday, August 19, 2024

The Board Is Set: How to Play Contest of Champions

Good morning gamers,

Author's Note: with a new edition looming ahead of us, it's unclear how the scenarios are going to change . . . so since we're nearly done with the series, we're going to press on and hope that the changes that we see don't invalidate all of our work. Even if the scenarios get reworked, hopefully the principles found in these articles will give you a starting point for how to play the scenarios. If they all change . . . we'll write more articles next year. :)

This is our third and final scenario in Pool 4 - and alongside Heirlooms of Ages Past, this scenario is a polarizing one for many players: Contest of Champions. This scenario is, on its face, about how many models your army leader can kill in melee. For some armies, this is fine - if I'm running Aragorn, Azog, or Boromir, I'm probably able to kill enemy models pretty well (and for a long time). If your army leader is Treebeard or the Balrog, you can probably kill models AFTER you catch them. However, if your army leader is someone like Galadriel or Saruman . . . well, that's likely going to be harder.

Well, today, we're looking to see what kinds of strategies we can use to play this scenario - and we'll approach the topic first by recapping what Pool 4 is all about and then identify the options that are available to you depending on the kind of army you're running. Let's take a look (though you can skip the recap, once again, by clicking here).

Pool 4: Killing Lots of Models

The previous three pools have mostly involved controlling certain points on the map (Pools 1-2) and having enough speed to get to an object or set of objects (Pool 3). While your killing power has value in these scenarios (either for holding or securing objectives - or for punching a hole through the enemy to get to their objectives), there is no pool where your killing power is more important than in Pool 4.

In two of the scenarios (Lords of Battle and Contest of Champions), players have to do a bit more recordkeeping than normal and have to keep track of the wounds they deal to their opponent and the Fate points that are spent by their opponent's heroes (Lords of Battle) or the number of kills their army leader gets in melee (Contest of Champions). Both of these scenarios also allow the armies to start up close to each other if they want to, so things can very quickly become a blood bath . . . which some armies welcome gladly.

Monday, March 16, 2020

The Bare Necessities, Part XI: Angmar

Good morning gamers,

So far in our series on balanced lists, we’ve talked about how to maximize your potential for scoring victory points in the context of Minas Tirith, Isengard, Rivendell, Mordor, and Lothlorien. Today, we continue our discussion by viewing the ancient kingdom of Angmar. An Angmar list won the most recent Masters tournament in the UK (Kylie from the Green Dragon podcast at its head) and is a great example of how to make a flexible list (you should look up her list in the final game against Jay Clare on STF Wargaming for more info). Other Angmar lists that are well-balanced appear on Mik’s Veni Vidi Vici blog as well (one of those lists looks very similar to the one I wrote up here - so maybe that's a commendation?).

Angmar: How Much Might Do You Want?
Angmar has a very unique problem: depending on how you want to build your army, your Might point tally might be really low (see what I did there – “might” be low? That joke never gets old – blame my Dad card). While you can take Gulavhar, Buhrdur, or a maxed-Might Witch-King (which I think is the only way to run the Witch-King) who can all take 3 Might OR run Golfimbul, Angmar Orc Captains, the Tainted, or Wild Warg Chieftains who each have 2 Might (though the Wild Warg Chieftain’s Might has limited application for heroic actions), many of the “good” hero options (Shades and Barrow-Wights) and some of the “sorta-good” hero options (don’t underestimate the power of the Dwimmerlaik or an Angmar Orc Shaman) have 0-1 Might.

While you might say “Okay, I’ll just run the heroes with lots of Might and I’ll have 8-9 Might points, just like most other armies at my point level,” think again:  taking a reasonably kitted-out Witch-King will cost you at least 150 points, which will added to the 200-point Gulavhar and 110-point Buhrdur brings you over 450-points on just your three big heroes. That’s too much in a 700-point game, I think (even if your Orcs are cheap as chips). While taking all three of these heroes would be fun, it’s tempting to drop one of them to pick up 2-4 Barrow-Wights OR turn one of them into a Shade (and maybe pick up a Barrow-Wight or two on the side). Doing this, however, reduces your Might from 9 to 6.

In my opinion (and this thought is shared by most of the other lists provided around the community), you want a mixture of two units to flesh out your Might points: Angmar Orc Captains (who aren’t great heroes, but give you 2 Might to spend on Heroic Moves/Marches) and Wild Warg Chieftains (who are similar to Cave Trolls in many respects, but trade a Burly two-hander for Might/Will/Fate and speed). I don’t like the Angmar Orc Captain very much, so we’re going to be turning to the Wild Warg Chieftain instead in our list:

Saturday, February 8, 2020

Introducing... TMAT Talks, Episode 1: Top-10 Monsters

Image result for sauron vs. balrog
Photo Credit: Charliebitsme

Ever wondered how a TMAT write-up would sound if read in the author's own voice? No? Well great news--you get to find out anyway!

In true Benjamin-Button fashion, we wrote before we learned to talk, but now we're talking and we're very excited about it. It's TMAT Talks: all TMAT, all the time (as long as you're playing it).

In our inaugural episode, Centaur, Tiberius, and Rythbryt take a look at the top-10(ish) Monster models for good and evil, breaking down what makes some of them great, why others suck, and where they rank against each other, filled with plenty of our own user-biases along the way. Are eagles better than ents? Is Shelob even viable? And who ya got: Beorn or Gwaihir? Sauron or Smaug? (Spoiler Alert: One of us would take neither... twice...)

So grab some paint brushes, dust off that monstrous mumak model that's been sitting in your to-do pile for years, and join us for TMAT Talks.


Now available on Soundcloud!

And also available on YouTube!


Monday, October 23, 2023

Nemesis: How to Fight the Assault Upon Helm's Deep Legendary Legion

Good morning gamers,

The Assault Upon Helm's Deep Legendary Legion has been rocking the meta (or should I say piercing the meta? Bombing the meta?) since its release in War in Rohan. It's a Legion that isn't constructed around a top-tier hero (it's got no named heroes at all), but instead gives greater reliability to its siege engines and allows you to run more Uruk-Hai than you usually would be able to with Heroes of Fortitude/Minor Heroes.

Many competitive players have identified this as a list that's unfun to play against - stand back and shoot at the horde of Uruk-Hai and you get torn up by crossbows and ballista. Try to close with the ranged units? You get blow up with a bomb team (and have to face a pike block with whatever's left). When you as a player feel caught between a rock and a hard place, it's hard to have fun (unless you like a good challenge and don't mind losing . . . like I do . . . most of the time).

I've fielded this list a few times (though I don't run more than 2 ballistas/1 demo team on principle) and one of our resident Isengard enthusiasts here (Red Jacket) has run it at several of our events with different configurations. Having had to play Red Jacket's Assault Upon Helm's Deep list at 623 points at the TMAT 2023 Grand Tournament earlier this year, I have to say the two ballistas backed by nine crossbows was nasty and awful (and naturally, I had to play against it in Lords of Battle where my Orcs and Barrow-Wights needed to close in fast . . . and he killed more with his ballistae once I got within 12" of him than from farther away).

But there's got to be a way to crack the code - how does one beat up a list like this? I mean, the list has been out for ages - surely, there's a proven method for beating them? Well, there are several strategies you can use - but before we get into them, let's break down what about this Legion makes it feared.

What Makes The Assault Upon Helm's Deep Legion So Hated?

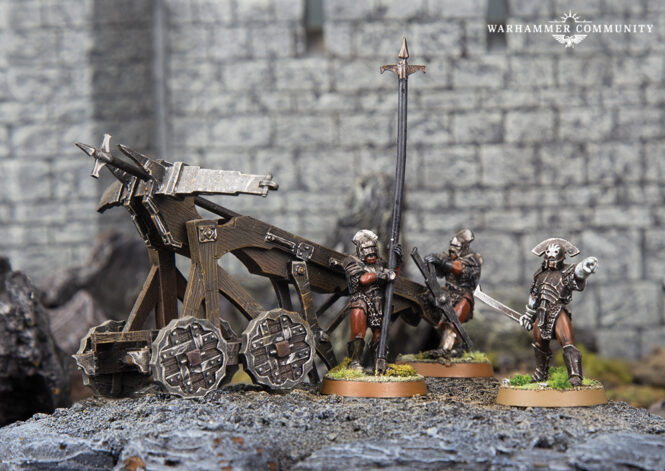
Photo Credit: Warhammer Community

The first thing you'll hear people gripe about are the long-range threats in this list. The list begins with Isengard Assault Ballistas, which are probably too cheap for what they do. When compared to other siege engines, you get a comparable crew size, a comparable Strength/Defense, the Large Siege Engine requirement (which makes you a siege target - very handy when fighting other siege engines, but does place a requirement of 2+ unengaged crew to fire it), and good rules (Accurate/Piercing Shot, 6" minimum range) - for a discount bargain price of 65 points. You can see the full comparison below:


If the ballistae weren't enough to make you gag, each ballista comes with 1 siege veteran (Minor Hero) and 2 crew who don't have shooting weapons, so you can take +1 Uruk-Hai Warrior with crossbow for every ballista you take - that's 76 points for a S9 ballista and a S4 crossbow. Sheesh, that's rough. Add into this that you can field 13 Uruk-Hai Warriors - 8 with pikes/shields, 5 with crossbows - for 135 points, and it's not hard to see why the pairing of crossbows with ballistae would drive people nuts. Sure, you have to field 1 Uruk-Hai Captain (who can lead 18 Uruk-Hai) for every ballista you want to take, but that's not a high tax.

Monday, November 29, 2021

Quest of the Ringbearer Inspired Lists: Ugluk's Scouts Legendary Legion

Good morning gamers,

In our last article, we looked at some Rivendell models you can add to your Quest of the Ringbearer collection to run a fun Rivendell list. Today we're looking at some of my favorite models in the range (aesthetically and thematically): Uruk-Hai Scouts! Yep, we're going to Isengard and seeing what kind of Scout-based lists we can make!

The List

Isengard plays an important part in the Lord of the Rings films, particularly in the Two Towers. In the Fellowship of the Ring, though, there are few forces that are quite as terrifying as seeing the scouts of Isengard racing down the Anduin pursuing the Fellowship (and ultimately engaging them at Amon Hen). Your Isengard collection, though, leaves you with very, VERY few choices:
  • Lurtz is the "big hero" during the Amon Hen sequence;
  • The Uruk-Hai Scout command pack will be useful too, though you only NEED the Captain with two-handed weapon (the other guys are useful too - just not needed for the campaign);
  • You'll need 24 Uruk-Hai Scouts, conveniently provided in a single plastic kit; and
  • You have access to 3 Orc Captains and 37 Mordor Orcs from the Osgiliath scenario (which Isengard has access to if you read closely enough).
If you're playing Fantasy Fellowships, though, you get a few more models to work with thanks to the Ambush at Night scenario:
  • You need Ugluk (who comes in the Lurtz pack);
  • You need Mauhur; and
  • You need Grishnakh and Snaga.
If you limit yourself to these models, the clear army to run is the Ugluk's Scouts Legendary Legion, where you can field 5 warbands of Orcs or Uruk-Hai Scouts (for a total of 52 models):

  • Ugluk [ARMY LEADER]
    • 3 Uruk-Hai Marauders with shields
    • 2 Uruk-Hai Marauders
    • 1 Uruk-Hai Marauder with banner
    • 3 Uruk-Hai Marauders with Uruk-Hai bows
  • Mauhur
    • 3 Uruk-Hai Marauders with shields
    • 3 Uruk-Hai Marauders
    • 3 Uruk-Hai Marauders with Uruk-Hai bows
  • Uruk-Hai Scout Captain with two-handed axe
    • 2 Uruk-Hai Marauders with shields
    • 3 Uruk-Hai Marauders
    • 2 Uruk-Hai Marauders with Uruk-Hai bows
  • Snaga, Orc Captain
    • 4 Orc Warriors with shields
    • 1 Orc Warrior with spear
    • 5 Orc Warriors with shields and spears
  • Grishnakh, Orc Captain with shield
    • 5 Orc Warriors with shields
    • 6 Orc Warriors with shields and spears
    • 1 Orc Warrior with shield, spear, and banner
700 points, 52 models, 8 Uruk-Hai bows hitting on a 4+, 1 D6+ model, 28 fast infantry, 13 Might

This is a big list - 52 models is nothing to sniff at. In the international community, it would appear that a lot of people think that this list is a great choice. I, however, get frustrated with this list because the 8" move on the Uruk-Hai is wasted a good bit of the time. Since you have access to spears on the Orcs, if you want to run a shield-supported Uruk-Hai line, your Uruks will need to either a) move 6" to let the Orcs keep up, or b) need to move 4" to shoot and move on the same turn (slowing down your Orcs and not allowing the archers to keep up with any melee Uruks that want to move 8"). Sure, you can run an Uruk-Hai Drummer to make those bow-armed Uruks move 5.5" while shooting (which is basically the same movement as you get on your Orcs), but at that rate, you're moving "as fast as normal troops" - which means the 8-11" movement you should get on those Uruks is still wasted (at least to a degree).