Featured Post

First Impressions: The Kingdoms of Men, Part II

Good morning gamers, NOTE: there has been an update based on a comment made below - the change is in red . I have not yet seen the War of th...

Monday, September 30, 2019

Workbench Update: Moria

Hello gamers,

When I got started in the Middle-Earth Strategy Battle Game in September 2010 (LOTR SBG back then), I bought the core game: The Mines of Moria. My first tradiditonal army (read, wasn’t composed entirely of heroes) was, therefore, Moria. Within a month of getting the core game, I picked up Durburz on eBay and converted one of my archers into a Moria Goblin Shaman. With 22 Goblin Warriors (lost one and never found it again), 2 Goblin heroes, and 1 Cave Troll, I had a very impressive 25 models in a 300 point force … or so I thought. At 300 points, it’s hard to get anything in your army, but the hardest thing for most armies to get are numbers. As my collection grew (Lothlorien, Khazad-Dum, and Isengard by the end of that year – and many more armies since), Moria has in many ways fallen on the wayside. This is true for a number of reasons:
  • They don’t have good magic casters and I love magic casters;
  • They don't have good archery and I love archery;
  • They don't have any decently priced powerful heroes and I love decently priced powerful heroes;
  • Cave trolls and other monsters don't resist magic well and I love magic casters;
  • Their basic troops get crushed by high-strength archery and I love archery;
  • They get lots of troops UNLESS they get powerful monsters, which means they don’t spam as well as some other civs that can field powerful heroes (and I love powerful heroes).
That’s a lot of reasons (really three reasons used twice each). So, today we try to rectify it by giving these Greenskins some love and helping them look a little better on the table (with the ultimate goal of making me want to run them more). This post will primarily focus on what you can do with Goblin bowmen models and in particular highlight how you can convert them into heroes.

Saturday, September 28, 2019

"Fly you Fools!": Rethinking Shield-Spear Combat


Image result for minas tirith shield wall combat

It's been a couple months since our last dedicated post on maneuvering, but after doing so many theory-crafting posts on army lists recently, and with Tiberius about to launch a new series on Shooting, I thought it was high time to dust off some models, move them around the table-top in a photogenic-esque fashion, and see if we could get them to do interesting or unexpected things.

We're kicking off the first post of our new series on tactical maneuvering with what tends to be (for most armies, at least) the default battle-line in the Middle-Earth Strategy Battle Game: a front rank of warriors with shields (and sometimes the occasional front-rank hero) backed up by a rank of warriors with spears. This Shield-Spear formation (not to be confused with a Viking Shield Wall formation, which lacks spears, or a Shieldwall formation, which also gets a +1 defense bonus based on its position when strikes are made) generally tends to be pretty static. But that needn't be the case. As with Shieldwall, your Shield-Spear formation can be a dynamic and flexible formation, setting you up for the next turn, frustrating your opponent's plans, and even transforming "unwinnable" combats into salvageable ones.

If that sounds intriguing to you, read on for five simple tactics you can employ to accomplish just that! (No, that doesn't sound click-baity at all...)

Warning: lots of text, photos, and maths ahead. But it's the weekend, so it's not like you have anything better to do, right? ;-)

Photo Credit: VaderFan2187

Wednesday, September 25, 2019

Armies of Middle-Earth SBG: The Serpent Horde in the Middle-Earth Strategy Battle Game


With the Easterlings and Khand behind us, we're moving down south to the land of the Haradrim. We'll begin with traditional Harad (rebranded the Serpent Horde in the new edition of the Middle-Earth Strategy Battle Game), before moving on to Far Harad and all their camels (so, so many camels) next time. Like any serpent, these guys move fast and strike fast, with venom dripping from their fangs. There may also be mumakil involved...

Photo Credit: upabovetodownunder.blogspot.com

Monday, September 23, 2019

The Fellowship: The Strength of the Company, Revisited

Good morning gamers,

In our previous two posts, we revisited the Fellowship's tactical units (Gandalf the Grey and Bill the Pony) and the Hobbit characters in the Fellowship (Frodo, Sam, Merry, Pippin, and Smeagol). Today, we wrap up our revisit of the Fellowship to the four characters who really do it all - not only the predominant kill generators, but also provide the well-roundedness the team requires to be truly frightening. At long last, we tackle Legolas, Gimli, Boromir, and Aragorn - Strider. This post revisits a post we did back in 2012 and will be quite different in some areas, but much of what was written there still holds true (so you should read that before you continue if you haven't already).

Sunday, September 22, 2019

"Fly you Fools!" - Formations and Maneuvering in the Middle-Earth Strategy Battle Game

Army lists, rules updates, and theory-crafting are all well and good, but as any experienced player knows (and any new player learns quickly), having troops with the greatest stat-line in the world won't save your force if it gets caught out of position, or can't bring its superior firepower to bear on the enemy. In a war game that exists in three-dimensional space, the ability to maneuver your troops into position, and adapt their position to meet the objectives around you and the enemy before you, is a critical key to success.


Saturday, September 21, 2019

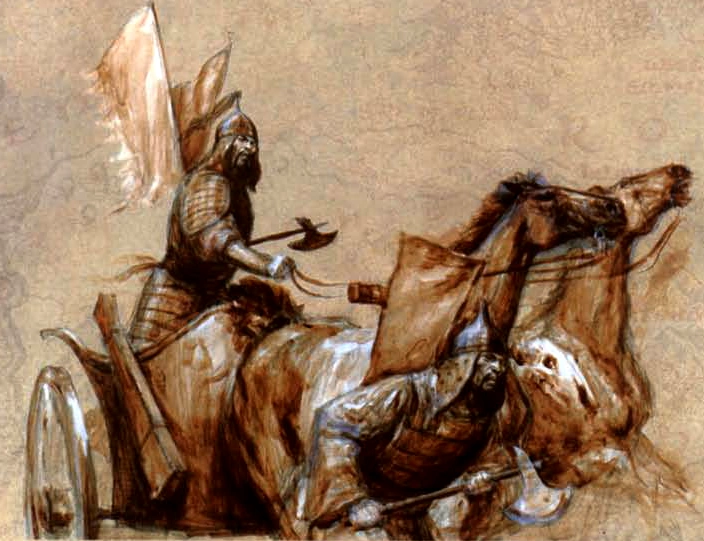
Armies of Middle-Earth SBG: The Variags of Khand in the Middle-Earth Strategy Battle Game

Image result for khandish chariots

Our Pelennor Fields army write-ups are really starting to take shape now, after Centaur's review of the Dead of Dunharrow. Today, we resume our look at the evil armies of Pelennor with an army that got an even shorter-shrift in the films than the Easterlings (who at least got a cameo, albeit in the dark): the mysterious Variags of Khand.

Almost nothing is known of this mysterious troop in the lore (apart from the fact that they were, in fact, there at Pelennor), but in the Middle-Earth Strategy Battle Game, Khand has taken the form of axe-wielding horse archers and charioteers, which gives them a unique place in the Middle Earth we inhabit. Khand received a number of buffs in the new edition (most notably to their chariots, which are surprisingly-inexpensive death carts if they get moving). They also seem tailor-made to take out enemy cavalry models, between their chariots (which do two Strength 4 impact hits to both horse and rider, plus have Monstrous Charge) and their generic horsemen (which are Fight 4 with bows and hand-and-a-half axes, for a laughably cheap points cost).

Full disclosure: this is not an army I've tried (though MinutemanKirk has run them with Easterlings, so I'll defer to him where he disagrees ;-) ), although I have watched them run down Uruk-Hai. It was rather brutal to watch. Given that Uruk-Hai always mess up my armies, I had mixed-feelings about that...

Photo Credit: LOTR Fandom


Thursday, September 19, 2019

Army of the Dead Army Review


Hey Reader!

In today's post we will be examining the Army of the Dead, a force that has existed for a while in the game, and has had a new addition with the Gondor at War book. So now that we have miniatures coming from Forgeworld, it's fitting that we should look at the Army of the Dead and what they offer your army.

The list is not as extensive as Rohan, Gondor, or the Fiefdoms (which we've shown recently on the blog - check out the links to those, as they are great reads!): there are only four profiles total for the army (2 heroes as of the release of Gondor at War, 2 warriors). So we will begin with a quick discussion on the profiles available to you, and then move on to the 6 strengths and weaknesses of the list (didn't plan for there to be six of each - just kinda worked out that way, but I'm not going to argue with it).

Monday, September 16, 2019

The Fellowship: Concerning Hobbits, Revisited

Good morning gamers,

The Fellowship is full of powerful heroes – heroes who are in many ways the top of their class for what they do. Who can kill as many models (no matter how high their Defense or Fight Value stats are) as Aragorn? How many archers can out-shoot Legolas? What heroes are as tough to crack as Gimli (okay, there are a few tougher than him, but none are at his cost level)? Who can out-Might Boromir (besides Aragorn and Azog on the White Warg – both of who cost a good bit more than Fellowship Boromir, by the way)?

Yes, the Fellowship has lots of powerful heroes. But these powerful heroes can only do so much – Aragorn will often use his free Might point each turn to call that needed Heroic Move or Heroic March or Heroic Strike, but he can’t call all of them for free in the same turn (and what if he needs to boost a die to win a fight?). Legolas can be lethal from a distance, but there are times when he’s going to let you down (either because the targets are tough or because terrain obscures the perfect shot). Gimli can deal a lot of damage and take a lot of damage, but eventually the crowds will press and crush him. Boromir is a great hero, but with Defense 6, 3 Wounds, and 0 Fate points, he can be incredibly fragile. To solve this problem, the Fellowship must rely on four (or five?) of its members: the Hobbits. While their profiles aren’t as impressive as the rest of the Fellowship, they fulfill an important part of the army’s need: something cheap to hold off part of the horde to allow your power heroes time to “do their thing.”

In many ways, the hobbits are my favorite part of a Fellowship army – not because of what they can do, but because they never cease to surprise me. Let’s take a look, shall we?

Saturday, September 14, 2019

Armies of Middle-Earth SBG: The Easterlings in the Middle-Earth Strategy Battle Game

Photo Credit: Warhammer Community

Updated September 2023: Having wrapped the forces of good at Pelennor Fields (MinasTirith, Rohan, the Fiefdoms, the Rangers of the North, and the Dead of Dunharrow [coming!]), it’s time to get evil again. While Mordor took center stage, they had a host of allies at their beckon call. Today we look at their heavily-armored allies from the north-east, the Easterlings of Rhun (even if they only made a single, brief cameo).

I’ve always liked the look of Easterlings aesthetically (like I’ve said before, I’m a sucker for heavily-armored infantry of any kind), red-gold color palate is remarkably rich. They’ve been a staple in the TMAT group for a long time (check out our pre-MESBG resources at the end), one of my sons has played them extensively in Battle Companies (chosen solely because of the Rhunish Drake), and in 2022 the faction got several major additions in the Defense of the North supplement... so yeah, they're in a really good spot now. Marshall the gleaming  horde!

Army Quick(ish) Hits
  • Strength: Combat Heroes with Renewable Might. There aren’t that many that can field multiple three-attack heroes, and the ones that can almost always have to field a bevy of expensive named legends. They’re the armies you expect: The Fellowship (Aragorn, Boromir, Legolas, Gimli), Thorin’s Company (Thorin, Dwalin, Gloin, Dori), Erebor Reclaimed (Thorin, Dain, Dwalin, Gloin, Nori, Dori), the Army of Thror (Thror, Thrain, young Thorin, Dwalin), Thranduil’s Halls (Thranduil (usually), Tauriel), the White Council (Elrond, Glorfindel, Celeborn, Galadriel), Azog’s Hunters/Legion (Azog, Bolg, and potentially Ogres/Trolls), the Three Trolls (all the trolls), Minas Tirith (Aragorn, Boromir), Rohan (Eomer, Theodred), Rivendell (Gil-Galad, Elrond, Glorfindel, the twins (sometimes)), Ents, Khazad-Dum (Durin + King’s Champions), Moria (Balrog, Dragon, Drake, Watcher, Cave Trolls), Isengard (Lurtz, Mahur), Barad-Dur (Sauron, Witch-King, Troll Chieftain, Mordor Trolls), The Serpent Horde (Suladan and Raza), Angmar (Witch-King, Burhdur, Cave Trolls, usually Ghulavar), and of course Mordor (Witch-King, Khamul on Fell Beast,** Shagrat, Zagdush, Mordor Troll Chieftains, Mordor Trolls, and Gorbag sometimes). The Easterlings are on that list, too, with Amdur, Lord of Blades, Dragon Knights (plus Khamul, if you take him on Fell Beast and take the +1 Attack buff each turn), and now Rutabi and the Dragon Emperor. Plus, the fact that Dragon Knights aren’t named heroes means you can take as many of those 3 Attack heroes as your points level will allow (most other lists can’t do that, though there are some exceptions). Amdur has a fantastic stat line for dueling enemy heroes: Fight 6, Strength 4, Defense 6/7 if mounted, 3 Attacks, 3 Wounds, and 3/3/1 Heroic Stats with Heroic Strike, plus an elven-made hand-and-a-half sword for winning those crucial drawn combats. The Dragon Knights have a pretty good stat line as well (Fight 5, Strength 4, Defense 6, with 3 Attacks, 2 Wounds, 2 Might, and Heroic Strike), and are very inexpensive points-wise even when mounted on armored horses (cash-wise is a different story). Unyielding Combat Stance is great on Amdur and the Dragon Knights in case they get charged by a cavalry model or have their horse shot out from under them (4+ save whenever knocked prone, even if Knocked Flying), but the star of the show is Blood and Glory, allowing them to regain a Might point any time they slay an enemy hero. Given their stat-line, a Dragon Knight should be able to deal with most generic captains with ease, and Amdur (who gets to counter-call Heroic Strikes for free, thanks to The Lord of Blades) is a striking machine. Last but not least, those 3 Attack Striking Dragon Knights can shield, even though they have no shield (Shield of Blades), which can make them very difficult to chew through.

Monday, September 9, 2019

The Fellowship's Tactical Units, Revisited

Good morning gamers,

This post kicks off a new series where we revisit a series we did back in 2012 on the Fellowship of the Ring – and we’ll be covering the Auric heroes of the fellowship first (old post here). Gandalf the Grey has already been covered on this blog (since the new rules were released, I covered him in the context of Thorin’s Company and Rythbryt covered him in his post on the Fellowship of the Ring), so we’ll only be covering his tactical uses briefly. While we covered Gandalf the White last time, he’s no longer part of the list. Whether this was the right call or not, we won’t be covering him (though those who like Gandalf the White should read our posts on him). We’ll be spending a good bit of time covering Bill the Pony and the tactics for using the “tenth” member of the Fellowship of the Ring.

Friday, September 6, 2019

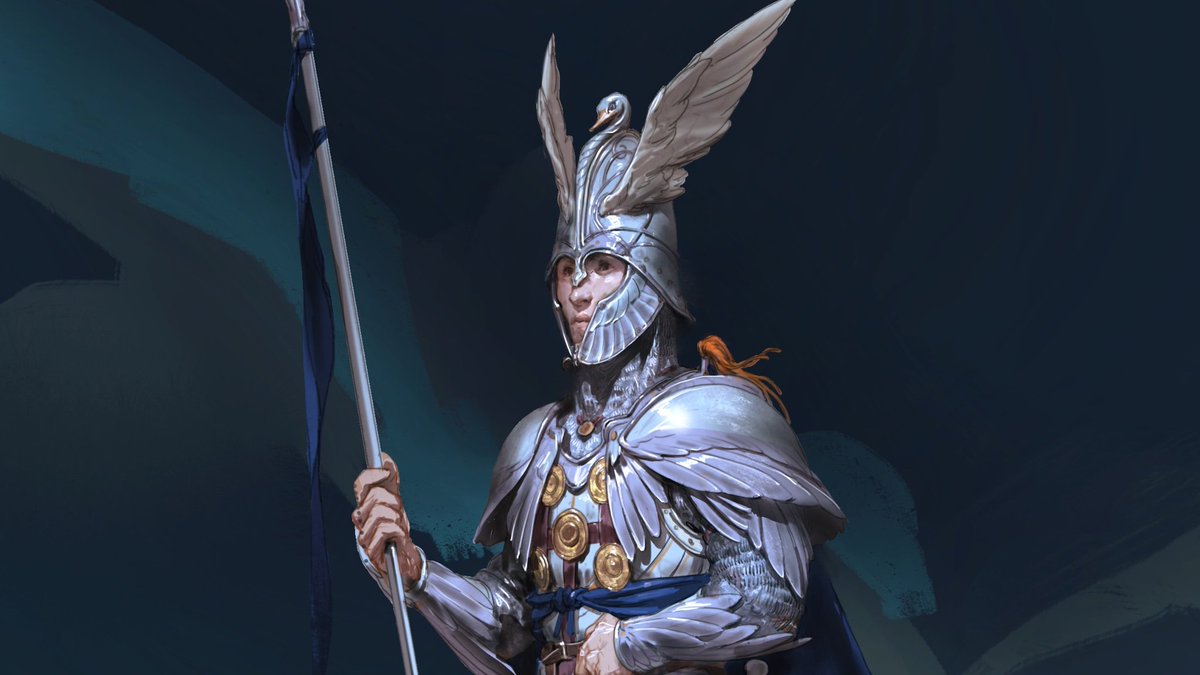
Armies of Middle-Earth SBG: The Fiefdoms in the Middle-Earth Strategy Battle Game


After the sprawling thematic tableaus that are Minas Tirith and Rohan, the Fiefdoms army list may seem a little... confined? But don't let that put you off your guard. This list is a power-house, packed with powerful named heroes, fantastic warrior profiles, great synergies, and so, so, so many Heroes of Valor. So gather your wing-crested helmet and mount your noble steed. To Gondor! (By way of Dol Amroth, of course.)

Photo Credit: Evan Amundsen

Monday, September 2, 2019

Workbench Update: Mordor

Good morning gamers,

I’ve been spending time recently updating my Rivendell and Numenor armies (giving them the tender loving care they deserve). Last time, we gave some tender loving care to my Angmar forces. Today, our attention turns to an army that I’ve enjoyed playing, and will enjoy using a lot more now: Mordor. Mordor is seeing a new model, as well as some conversions and weapon swaps, so let’s get into it!