
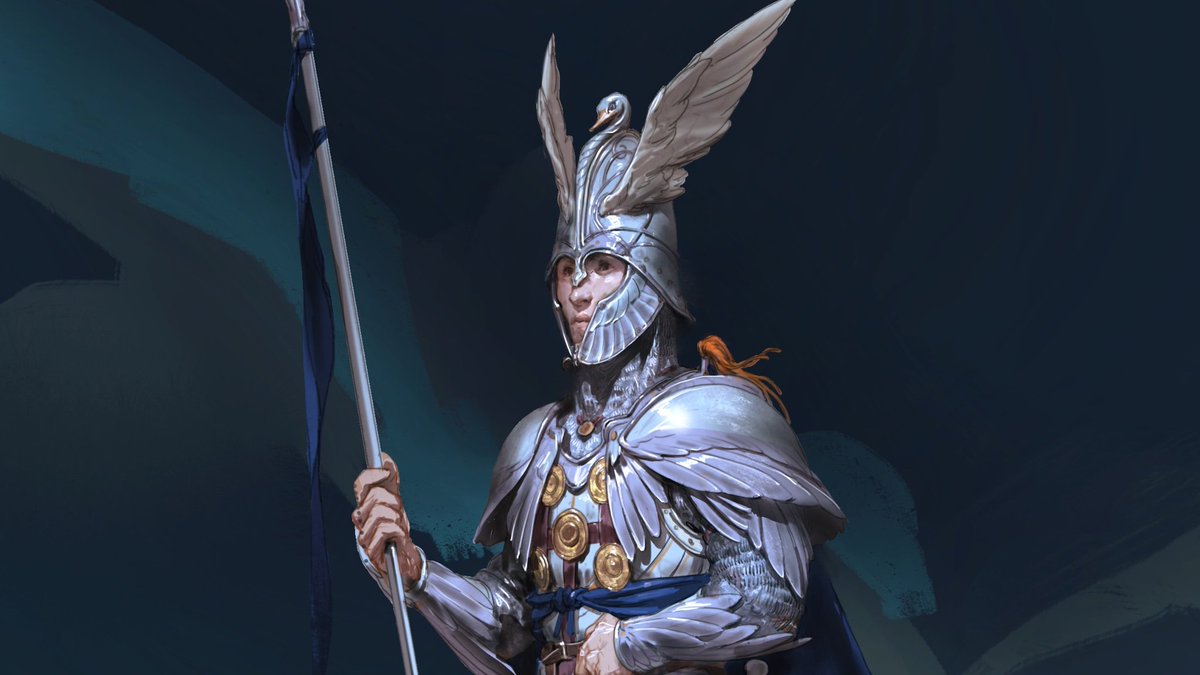
After the sprawling thematic tableaus that are Minas Tirith and Rohan, the Fiefdoms army list may seem a little... confined? But don't let that put you off your guard. This list is a power-house, packed with powerful named heroes, fantastic warrior profiles, great synergies, and so, so, so many Heroes of Valor. So gather your wing-crested helmet and mount your noble steed. To Gondor! (By way of Dol Amroth, of course.)
Photo Credit: Evan Amundsen
Army Quick(ish) Hits
·
Strength: Named Heroes with Clear Roles.
The Fiefdoms don’t have the raw number of named heroes that Minas Tirith and
Rohan do, but that isn't necessarily a bad thing. Like Minas Tirith, the Fiefdoms have a
top-tier beatstick hero in Prince Imrahil: Fight 6, Defense 7, 3s in all the
right places (Attacks, Wounds, and Heroic Stats), and the option for an armored
horse and a lance (so against infantry troops—or heroes—he’s effective Strength
6 on the charge, rolling 8 dice to-wound). His heroic action suite is fantastic—Resolve,
Strike, Strength, and Defense—and makes him a good match-up for enemy monsters
(he has the Strike to get the higher Fight Value, a horse/lance for extra
attack dice and damage potential on the charge, and if all else fails, he has
Heroic Defense to shrug off damage), and his special rules are fantastic buffs
for your troops. He costs a fair bit of points, but when you compare him to,
say, Boromir in a Minas Tirith list, he’s very good value. Beneath Imrahil are
two supporting captains. Forlong the Fat is a combat beast: Fight 5, Strength 5
(which, for a man, is unheard of), Defnese 6, with 2 Attacks, 3 Wounds, and
3/1/1 heroic stats with the option for a horse. He comes with a sword, war
spear, and a war horn folded into his cost (the same as Hurin the Tall’s),
which means if you work the 25 points you usually pay for a Warhorn into his
cost, he’s absurdly inexpensive for a Fight 5, Strength 5, 2 Attack model who
can lead 15 models. Angbor the Fearless is another Hero of Valor with very good
combat stats: Fight 5, Strength 4, 2 Attacks, and a 2-handed broadsword that
ignores the -1 duel penalty if it rolls a “6” (similar to the Knight of the White
Tower in Minas Tirith, though without Mighty
Blow). Angbor is a hefty Courage 5, though with Fearless you almost never need it (it’s good against Blades of the Dead, though, especially
if you have Forlong’s War Horn in tow). He’s extremely cheap for what he does,
plus friendly Clansmen of Lamedon treat him as a 6” banner (more on them
shortly), which makes him absurdly cheap for what he does. And with Heroic
Strike from Fight 5 (plus Fearless,
plus a 2-handed weapon), he’s a real danger to Might-less monsters and mid-tier
captains who can’t Strike up. Duinhir rounds out the crowd. He is also
a Hero of Valor (so the Fiefdoms have one named Hero of Legend, and three named
Heroes of Valor, which is crazy on its own). His specialty is monster hunting (Go for the Eyes!) and buffing your
Blackroot Vale Archers (who get to reroll both ranged hits and ranged wounds
within 6” of Duinhir). With Fight 4, Strength 4, and 2 Attacks, he’s a decent
fighter in melee, and with Defense 5, 2 Wounds, and Heroic Defense, he can be
surprisingly tricky to take down.
·
Strength: Elite Cavalry. In a
historic alliance that includes both Minas Tirith and Rohan, it would take a
lot for the Fiefdom’s cavalry units to stand out. Minas Tirith boasts the
cheapest heavy-cavalry unit in the game (Defense 6 riders with lances), while
Riders of Rohan are elite skirmish cavalry with their 24” bows and mounted
Royal Guards are devastatingly effective shock cavalry with Fight 4/5 on the
charge, Strength 3/4 on the charge, and Defense 6 riders. So how do the
Fiefdoms compete? By giving Fight 4 to a Defense 6 rider with a lance, and then
giving that rider an armored horse. That combination makes them devastatingly
effective at counter-charging enemy cavalry: not only will they deprive those
cavalry models of their crucial charge and knock-down bonuses, but the Defense
6 mounts means Strength 3 cavalry without lances will need a brutal 6 to wound
the rider (and a 5+ to wound the horse), and even Strength 4 cavalry with
lances will still need a 4+ to wound your mount (and a 5+ if they don’t get the
charge or don’t have a lance). Fight 5 isn’t out of the question, either, if
your mounted Knights are within 3” of Imrahil (or 6” of Boromir’s banner). They’re
not the consensus number 1 cavalry model in the game (Morgul Knights have
almost an identical stat-line, plus Terror,
for fewer points), but they’re on the short-list.
·
Strength: Flexible Combat Troops. The
Fiefdoms have access to five different troop profiles, but each can fill
multiple roles in your army. Knights of Dol Amroth make very good front-line
infantry fighters (Fight 4 / 5 within 3” of Imrahil, Defense 6) or very strong
cavalry (mounted on armored horses with lances), plus the option for a banner (situationally
useful if you’re concerned about VPs) and a War Horn (not worth it if you’re
running Forlong; worth running Forlong to get for “free”). Your Men-at-Arms are
the closest the Fiefdoms have to specialty troops, as they’re primarily Fight 4
pikemen who can get to Fight 5 within 3” of Imrahil (or 6” of Boromir’s banner—or
up to Fight 6 if they’re within buff range of both at the same time). The
Axemen of Lossarnach’s signature Axe of
Lossarnach can be used as either a spear or a two-handed axe, giving these Fight
4 warriors real versatility (Fight 4 spears in a back rank, or effective
Strength 5 (or even Strength 6 if you Piercing Strike with them) on a flank.
The Clansmen of Lamedon are primarily Fight 4 cleavers (effective Strength 5
with their 2-handed Broadswords, but no duel penalty if they roll the 6), but
their high Courage and their synergy with Angbor make them phenomenal at
capturing and holding objectives once your main force has tied up enemy archers
(at Defense 4, Clansmen are vulnerable to shooting). Even Blackroot Vale
Archers, which excel at wounding mid-defense opponents from range, have the
option to take spears, banners, and even a war horn if necessary. They’re only
Fight 3, but in an army where your front rank models almost always have Fight 4
(or higher) it doesn’t hurt as much, and their 3+ shoot value (plus potential
to-hit and to-wound rerolls on ranged attacks) can pack a real punch. Their
Courage (2 / 3 with a War Horn) can be an issue in the late game, unless they’re
near Angbor in a pure/historic Fiefdoms force; then they’re golden.
·
Strength / Weakness: Army Bonus / Synergy.
Speaking of Angbor (and Forlong, and Imrahil, and Duinhir, and Boromir, etc.),
let’s talk about the central feature of Fiefdoms: synergy. All four of the
Fiefdom’s named heroes have a special rule that provides a significant buff to
a portion of your Fiefdoms force. Blackroot Vale Archers within 6” of Duinhir who
don’t move get to reroll 1s to hit during the Shoot Phase, which is pretty
sweet (they hit on a 3+ anyway, so you have a very good chance of getting
almost-all-if-not-all “hits”). Clansmen within 6” of Angbor gain Fearless. Axemen within 6” of Forlong
get to reroll 1s to wound during the Fight Phase. And Captains, Men-at-Arms,
and Knights of Dol Amroth within 12” of Imrahil count as being in range of a
banner. That’s pretty crazy synergy, right? But wait, it gets better! Because some
of these troop profiles also have a crazy special rule that
synergizes with one of the named heroes. Knights and Men-at-Arms (plus Dol
Amroth Captains) get +1 to their Fight Value if they’re within 3” of Imrahil. Clansmen
within 6” of Angbor count as being in range of a banner (so yes—that’s one 12”
banner effect, and one 6” banner effect, built into two heroes). And while
Blackroot Vale Archers don’t have a Duinhir-specific rule, they do get to
reroll failed to-wound rolls if a friendly hero calls Loose! But wait… it gets even better! As if all this wasn’t enough
synergy, a pure/historic Fiefdoms force gains the For the White City! army bonus: special rules marked with an
asterisk affect all models in the Fiefdoms army list, not just the ones listed
in the rule. What are those rules? Imrahil’s 12” banner effect (applies to Clansmen,
Axemen, and Blackroot Vale archers); Forlong’s reroll 1s to-wound (applies to
Knights, Clansmen, Men-at-Arms, and Archers); Angbor’s Fearless bubble (applies to Knights, Axemen, and Archers), and
Duinhir’s reroll 1s to hit (theoretically applies to Knights, Axemen, and
Clansmen, though they don’t have any shooting weapons, so oh well). This means
it’s possible for a single Knight of Dol Armoth, within 3” of Imrahil and 6” of
the other heroes, to gain (1) +1 Fight Value, (2) a 12” banner reroll bonus,
(3) reroll 1s to wound in the Fight Phase, and (4) Fearless (plus he can reroll 1s to hit during the Shoot phase if he
didn’t move). Like I said: synergy. As with other synergy-based forces, this
can be a weakness. Synergy bubbles usually mean your models are more
concentrated, which can make them more vulnerable to ranged attacks (siege
weapons with splash damage are particularly dangerous), being surrounded (or
avoided), etc. Fortunately the Fiefdom synergies are almost all very large (6” –
12” range), so you can afford to have your force spread out more than most, while
still keeping your buffs up. The pairing of synergies between troops and heroes
also means you can split your troops up into smaller groups with different
synergies (i.e., clansmen with Angbor, Axemen with Forlong, etc) to cover more
ground if you like; alternatively, if you have the army bonus up, you can send
any of your troops (or a mix of different troops) with any of the named heroes,
and know that the whole group is going to receive at least one buff. The other
major issue with synergy lists is that if you lose a key synergy piece, the
effectiveness of the list as a whole can suffer. Protecting your named heroes
is always important, but for a list like the Fiefdoms that’s so synergy-dependent,
it’s more important than most.
·
Strength: Mobility. Between Knights
and mounted Heroes (Imrahil, Forlong) you have a very mobile core to your army.
Getting some mounted models for seize the prize or reconnoitre is so easy, you’re
probably likely to do it without much encouragement. Unlike Rohan and Minas
Tirith, if you want access to Heroic March you’ll need to bring along an
ordinary Captain. They’re not bad choices, though: they’re pretty fairly costed
for a Fight 5, Strength 4, Defense 7 captain, plus within 3” of Imrahil they
jump up to Fight 6 (which is crazy-good for a generic man hero, and better than even Rohan’s
named heroes can muster), and can be mounted on an armored horse with a lance
for significant damage output. Don’t forget that they benefit from any of those
asterisk special rules if you have the Army Bonus active (12” banner, rerolling
1s to wound, and Fearless). Last but
not least are the Blackroot Vale Archers (and Duinhir). With Mountain Dwellers, they can move
through rocky terrain with no penalties and if you need to pass a critical
jump, leap, or climb test and they fail, they get a chance to reroll that test.
If you can find a spot in rocky terrain to set them up for shooting attacks,
they’re in prime position: they get cover from the rocks against enemy archers,
enemy cavalry will give up all their bonuses if they charge them in the rocks,
and if enemy infantry try to flush them out, the enemy will stall when they
enter the rocks (moving only 3” per turn), while your Archers can move 3” per
turn (or 4.5” if benefiting from a Heroic March) while keeping up their barrage
of deadly shafts.
·
Strength: Elf-Level Duel Potential. We’ve
already talked about the elements of this, but it’s worth noting again: Fiefdoms
is the only army of Men where your bread-and-butter warriors (Knights, on foot
or mounted, and men-at-arms with pikes) can get to Fight 6 (Fight 4 base, +1
within 3” of Imrahil, +1 more if within 6” of Boromir’s Banner, since all
Fiefdom troops have the Gondor Warrior
keywords). Fight 6 is harder to get up, but in most cases its gratuitous; you
only really need it against elves (who will find it a very nasty surprise) and
occasionally half-trolls. Against any other troops, Fight 5 is usually plenty
to have the fight value advantage. As seasoned players know, elf armies are at
their best when supported by a banner with 2+ dice in the fight (as their odds
of getting a 6 goes up significantly if they can get 2-3 attacks in a fight,
instead of just one). Fiefdoms has those same elements, only they’re better:
spears for most Elves (Guards of the Galadhrim Court excepted, of course) are
replaced with pikes, and instead of having to bring along several 3” banners, a
Fiefdoms force with Imrahil and Angbor can have nearly 600 square inches of
banner effect up at any one time (to put that in perspective, a regular 3”
banner covers less than 30 square inches of table space). Having that much
banner coverage means that your army can fight on several different fronts, in
several different formations (a central block of Clansmen, backed up by two
ranks of men-at-arms; on their flanks, a front rank of clansmen backed up by
Archers or Axemen; and at the extreme flanks, mounted knights ready to charge),
and yet each strike force has access to those critical dice rerolls.
·
Strength: Excellent Killing Power. Unlike
Minas Tirith (which, apart from Knights on the charge, siege weapons, and its
hero suite, can struggle to kill high-defense troops), the Fiefdoms have a ton
of tricks for killing their foes. In addition to the armored Knights on Lances
(who are now Fight 4 / 5, so they can tie or win fights against dwarves), both
the axemen and the clansmen have two-handed weapons. The axemen can also
Piercing Strike (taking them to Strength 4, and effective Strength 6 with the
2H to-wound bonus). The Clansmen can feint (with no penalty if they’r backed up
by axemen or men at arms), plus they get to keep any 6s they roll with their
broadswords. Back up either clansmen or axemen with two pikes (one of whom is
almost certainly in banner range), and you have both a very good chance to win
the fight (3 dice + 1 reroll at Fight 4 / 5), but a very good chance to kill
the enemy (3 dice to wound, one two-handed, potentially rerolling 1s to wound
if you feinted or if Forlong is within 6”). And if your Blackroot Vale Archers
benefit from a Heroic Shoot, they get to reroll all failed to-wound rolls in
the Shoot Phase.
·
Strength: Courage. With the
exception of those Blackroot Vale Archers (Courage 2), Fiefdoms boasts average
to very good courage models, especially if your force includes Forlong and his
free War Horn. Men-at-Arms and Axemen are base Courage 3 (Courage 4 with
Forlong), which is a solid core. The Knights of Dol Amroth themselves are base
Courage 4 (5 with Forlong), making them dependable objective-grabbers in the late
game. But the capstone are the Clansmen: Courage 5 base, and Courage 6 with
Forlong’s War Horn means that even with Harbinger of Evil active, they’ll pass Courage
tests on a 5+, and even Strength 4 heroes will need a 5+ to wound them. If you
do break, Imrahil (at Courage 6 / 7 with Forlong) gets an auto-pass on his first
Courage test (because he’s a hero of legend) with a 12” Stand Fast!, which is
pretty reliable. Finally, don’t forget that any Clansmen within 6” of Angbor get
the Fearless special rule, and that
if you have a pure/historic alliance of Fiefdom models, Angbor’s Fearless buff applies to all
Fiefdom models within 6” of him, including heroes (which means if Imrahil is
within 6” of Angbor, Imrahil will automatically pass his courage test, triggering
his 12” stand-fast… in addition to Angbor’s guaranteed 6” stand fast… which
means if they start within 6” of each other and then spread out to cover troops,
they can cover almost 600 square inches in Stand Fasts! between them.
·
Weakness: Magic Defense. This is one
of the few things the Fiefdoms struggles to do on its own. You do have access
to Heroic Resolve through Imrahil if you need it, although you’re probably
going to try to use his Might for other things. Forlong and Duinhir only have 1
Will each, and while Angbor comes with 3 Will of his own, he can’t call a
Resolve to help the rest of your army. Fortunately you can ally in an excellent
wizard through Minas Tirith if you need to (Gandalf the White), which is a
great way to get 15 Gondor troops into your army as well (maybe as cheap
front-rank fighters to protect your Defense 5 Axemen).
· Strength: Alliance Options. The Fiefdoms don't have quite the alliance selection that Minas Tirith and Rohan do, but any time you can get access to Minas Tirith and Rohan as historic allies, you're doing pretty good. Not much more to say here that hasn't been said already, other than to say you could go in a ton of different thematic directions (Théoden/Denethor/Imrahil, Boromir/Imrahil, Aragorn/Eomer/Imrahil, etc), and almost all of them are competitive--just don't go with Eorl the Young, unless you want to give up all of your fantastic army bonuses. ;-)
·
Weakness: Start-up Cost. You can get
the Blackroot Vale Archers in large plastic kits, but everything else comes in
small packages. The mounted Knights are pretty good value, and the new foot knight
set from Forgeworld is absolutely stunning. The Axemen and Clansmen were
recently re-released as well, in a set of 6. You can still pick up Imrahil,
Forlong, Angbor, and Duinhir (all in metal) from GW, although buying all of them together will add up (though not as much as Rohan or Minas Tirith heroes tend to add up). If you want a mounted version of Forlong, you'll have to look elsewhere for that, too, as there's no official GW model.
Hero Profiles

Photo Credit: The One Wiki
·
Prince Imrahil of Dol Amroth: He's not quite Aragorn (Mighty Hero, Horselord, Anduril) or Boromir (6 Might), but he's perfectly serviceable as your centerpiece hero, and over-qualified (as Eomer is) as your second beatstick. 3 Wounds, 3 Fate, Defense 7, and Heroic Defense give him a ton of staying power, and Fight 6, Strength 4, 3 Attacks, an Armored Horse, and a Lance (plus Heroic Strike and Strength) make him a powerhouse on the charge. As with Aragorn and Boromir, with only 3 Will he will succumb eventually to sustained magic attacks if you can't support him (unless you're really good at rolling 6s to resist spells), but you can always take Gandalf along to help out (and you invest way less points in Imrahil and Gandalf mounted than you would in, say, Gandalf and Aragorn/Boromir, while still getting 33 warrior slots for your trouble). Worst-case scenario, Imrahil is still incredibly useful, even if he's transfixed: that 12" stand fast and 12" banner effect are absurdly good buffs to troops who are already high courage and high fight. And if you get compelled into combat with a big scary thing, you can still shield (although you can't call Heroic Defense, which is a bit of a bummer). The Fiefdoms has a great assortment of named heroes, but if you're playing a pure force (or even bringing just an allied contingent of Fiefdoms), Imrahil is always the first profile you think about.
·
Forlong the Fat: Let's start with Strength 5 with a +1 to wound (lance) and no duel penalties. Here's the list of profiles in the game that have Strength 5 with a +1 to wound and no duel penalties:
That’s it—that’s
the list. Has a bit of that "one of these things is not like the other" flavor to it, doesn't it?
Add to that 3 Might points, Fight 5, Defense 6, 3 Wounds, and a mount option, and you have a Hero of Valor who can be your reliable second or third damage-dealer for a bargain price. Note as well that Axemen of Lossarnach (or any Fiefdoms model, warrior or hero, in a pure/historic alliance force) gets to reroll 1s to-wound in the Fight Phase if they're within 6" of Forlong. If you add that to his War Horn (which, unlike the Horn of Gondor, is a real War Horn that grants +1 Courage to your army), and your damage-dealing hero is also a very good support hero, providing valuable buffs to your core troops. Just be careful against high-fight monsters: while Strength 5 and 3 Wounds gives you a better chance of surviving a Rend than most, he only has one Fate and no option to Heroic Strike (plus his charge bonus on a horse won't knock Monsters down, regardless of his strength and theirs).
Elendil (Narsil)
Dain Ironfoot (Burly 2H
hammer)
Dwalin (Burly, 2H hammer/axe)
Azog with the Stone Flail (Burly)
Bolg (Burly, 2H Pick)
The Keeper of the Dungeons (Burly, 2H Pick)
The Goblin King (Burly, 2H Pick)
Cave Trolls with 2-Handed Weapons (Burly)
Gundabad Trolls with Scythe Gauntlets
Forlong the Fat (War Spear)
Add to that 3 Might points, Fight 5, Defense 6, 3 Wounds, and a mount option, and you have a Hero of Valor who can be your reliable second or third damage-dealer for a bargain price. Note as well that Axemen of Lossarnach (or any Fiefdoms model, warrior or hero, in a pure/historic alliance force) gets to reroll 1s to-wound in the Fight Phase if they're within 6" of Forlong. If you add that to his War Horn (which, unlike the Horn of Gondor, is a real War Horn that grants +1 Courage to your army), and your damage-dealing hero is also a very good support hero, providing valuable buffs to your core troops. Just be careful against high-fight monsters: while Strength 5 and 3 Wounds gives you a better chance of surviving a Rend than most, he only has one Fate and no option to Heroic Strike (plus his charge bonus on a horse won't knock Monsters down, regardless of his strength and theirs).
·
Angbor the Fearless: Few Heroes of Valor come as cheaply as Angbor, and most that are don't pack the combat profile he does. Fight 5 with Heroic Strike and 2 Might is a great starting point for any model. Add 3 Will, 2 Fate, 2 Wounds, Courage 5 / 6, and Fearless, and you have a very resilient profile that's largely immune to courage shenanigans (spectres, sentinels, Blades of the Dead), can shrug off a few spells before succumbing, and is tough enough to survive an unfavorable round of melee combat. In combat, he functions much as the Knight of the White Tower does in Minas Tirith (but without the Mighty Blow bonus): a two-handed sword at Strength 4 (wounds Defense 6 on a 4+), and any 6s he rolls on his duel roll stay 6s. As an infantry model himself, he slots in well as an anti-monster/mid-tier captain leader of an infantry block, plus he grants a 6" banner effect for friendly Clansmen which is phenomenal value (even monsters with Might will be loath to wade, voluntarily, into the midst of Angbor and 15 clansmen). As with the clansmen in general, he's vulnerable to shooting (Defense 5), so make sure you protect him as he advances, then let him loose.
·
Duinhir: Duinhir is one of the few Heroes of Valor who comes cheaper than Angbor, which is great, because if you take Duinhir, you want to pack as many Blackroot Vale Archers into your force as possible. Any within 6" of him who didn't move get to reroll 1s to hit, which on a model that already has a 3+ shoot value is phenomenal (especially when paired with their own ability to reroll all failed to-wound rolls if they benefit from a Heroic Shoot). In combat he's not too shabby (he has two attacks for an archer at Strength 4, which is very rare unless you're someone like Legolas or Haldir), but he's at his best at range against monsters. Not only does he get to reroll failed hit, in-the-way, and wound rolls against Monsters, but any wounds he does cause count as d3 wounds, which means if you can score a wound (and maybe fudge it with some of your 2 Might points if you have to), you can drop a Cave Troll, Mordor Troll, Isengard Troll, or Gundabad Ogre in a single go (and be almost there on a Gundabad Troll), and potentially 6 wounds on Smaug if you manage to hit his Missing Scale (on a to-hit of 6, Duinhir's Strength 2 Bow does 2 wounds, each of which does d3 wounds). Given that most monsters cost as much as if not significantly more than Duinhir, you're getting a very strong counter to those monsters plus 15 warrior slots. Hard to argue against that kind of value.
·
Captain of Dol Amroth: In addition to a beefy stat profile (Fight 5, Strength 4, Defense 7, with 2 Might / Wounds and 1 Fate), these guys have three potential advantages over the other named heroes (other than Imrahil, whom you should always take if you take them). First, they're the Fiefdom's only source of Heroic March, unless you're planning to ally in one of the March heroes from Minas Tirith or Rohan (which you can totally do). Second, they can be mounted with lances (unlike Duinhir and Angbor) on armored horses (unlike Forlong). Third, if they're within 3" of Imrahil, they go to Fight 6. Mid-tier cost heroes who are Fight 6, mounted, with lances are an absolute bear for most armies to deal with, especially if they're heavy on troops and light on heroes themselves. I wouldn't take loads of them over multiple named heroes (because the named heroes each have strong 6" bubble effects that will buff your troops significantly), but if you already have Imrahil, 1-2 of the other named heroes, and are looking for one more combat beatstick (plus March), they're a very strong choice.
Warrior Profiles
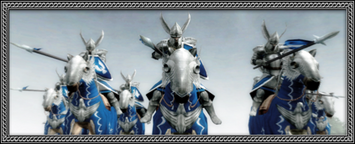
Photo Credit: One Ring to Rule Them All
·
Knight of Dol Amroth: On foot they're okay, but probably overpriced. Fight 4 is good, not great, Strength 3 is good, not great, and while Defense 6 / Courage 4 is very good, the total package is not otherworldly. On armored horses with lances they're significantly more expensive, but they will cut through most enemy troops with ease, especially if you have other mounted heroes along to support them: within 3" of Imrahil / 6" of Boromir with Banner, they jump to Fight 5 (or Fight 6 if they happen to be in range of both buff effects), they can reroll 1s to wound within 6" of Forlong, they become Fearless within 6" of Angbor, and they get a free banner reroll within 12" of Imrahil and/or 6" of Angbor. If you get 2 dice plus a reroll on the charge, at Fight 5/6, with 4 dice to-wound, wounding Defense 6/7 on a 5+, reroll 1s to-wound, and don't have to Courage-check to charge Terror-causing models, there's not much you can't handle. You don't have to take them all-mounted (Fiefdoms has plenty of very good infantry troops), but if you do, they're great partners for Rohan since their Fight bonuses don't depend on charging (which means you can still get high Fight Values even if the opponent won a contested Heroic Move-off). Side note: the new Forge World sculpts for the dismounted knights, while on the pricier side, are absolutely stunning and amazingly customizable.
·
Man-at-Arms of Dol Amroth: A much cheaper version of the Dol Amroth Knights on foot, without the bloated extra points. The drop from D6 to D5 hurts if they get engaged, but they have pikes so that shouldn't happen. Even so, Fight 4, Strength 3, Defense 5 is still plenty good, and since they're Gondor Warriors they gain Fight buffs from Boromir (plus a +1 Fight buff from Imrahil potentially). Fight 4/5 on a stick is always handy to have. Supporting a front-rank of dismounted Knights, they're probably overkill. But supporting a front rank of Fight 3 Warriors of Minas Tirith or Rohan Warriors, they're fantastic. Just one note: the rules for pikes don't allow you to pike-support a spear-supporting model (you only get to pike-support another pike-supporting model), so if you want the full three-ranks deep with them, you need to bring two ranks of men at arms (not a rank of them, plus a rank of Archers with spears / Axemen of Lossarnach / Warriors of Minas Tirith with spears).
·
Axemen of Lossarnach: Another excellent (and more flexible) choice to support Fight 3 allies. They're still Fight 4, and will benefit from Boromir's banner buff (but not Imrahil's). Their Strength 3 axes can be used both as spears or as two-handed weapons, which means they pack more punch than your average spearman if the enemy tries to wrap your shield-spear ranks and engage them (they also have daggers, so you don't have to incur any duel roll penalties if you don't want to). In a pinch they're pretty good front-rank fighters, too (since you can support a 2-handed weapon with a pike or spear now), although as with anything Defense 5 and below, they succumb to elf bows (and other Strength 3 infantry) fairly quickly.
·
Clansmen of Lamedon: Defense 4 makes them vulnerable, but they're dirt-cheap for Fight 4 infantry with Courage 5 and two-handed weapons. Be sure to keep a banner bonus near them for the best chance at that natural 6 on the duel roll (if you have Imrahil and/or Angbor, it shouldn't be that difficult). If you can get them to Fight 5 with Boromir's banner, and spear-support them (or better yet, throw some ranks of men at arms behind them for Fight 5 or even Fight 6), they can prove deceptively difficult to kill despite their low defense. If they're rolling 2+ dice to win the fight, at Fight 5/6, with a banner reroll, they don't lose that many fights (and if they aren't losing fights, your opponent isn't rolling to wound them (usually)). Sure, you can achieve the same effect with heartier front-rank troops if you like: a WOMT with shield, backed up by 2 ranks of men-at-arms, will have a slightly better chance of winning the fight (because no duel penalties on a roll of 1-5). But it won't have the added killing power you get from the two-handed weapon.
·
Blackroot Vale Archer: If you have a front rank of Fight 4 or above, these guys are very good choices for second-rank guys. They're most at home as archers (where they're particularly deadly during Heroic Shoots, where they reroll all failed to-wound rolls), but can take spears (like their Minas Tirith counterparts) to get those extra bonus dice into combats (and, in a historic alliance, they benefit from Imrahil's 12" banner, so you can also get an absurd amount of banner rerolls into combats that they're supporting). Their courage is an issue if you get broken, and they're not all that good at melee combat on their own (Fight 3, Strength 3, Defense 4), but as supporting infantry to your main battle line, they're more than serviceable. And paired with Boromir's banner, they get to Fight 4.
About those Legendary Legions…
·
Men of the West (Gondor at War): Once again, this is not exactly the best army list for showing off what the Fiefdoms can do. You lose your access to horses (even on Imrahil). You lose all your named heroes (except Imrahil). And you lose access to most of your core troops (dismounted Knights and men-at-arms are in, but Axemen, Clansmen, and Blackroot Vale Archers are all out). If you want to give it a try, Tiberius has some recommendations on how to run this legion here, but unless you really want the +1 Fight bonus for a single turn (which, to be fair, can make an army of Imrahil, Captains, Knights, and Men-at-Arms all Fight 6 or above depending on their positioning, which is nothing to sneeze at), I still think you're better off just building a historic alliance around Minas Tirith, Rohan, and the Fiefdoms, where you can incorporate the strengths of the full lists. They really do compliment each other very well.
Concluding Thoughts
And that's it! If you count Centaur's write-up about the Rangers of the North (plus his upcoming review of the Dead of Dunharrow), we've coincidentally finished all the good armies represented on the Pelennor (and perhaps not-so-coincidentally, all the factions represented in my current Battle Company, which I'm having a blast with... more on that later, perhaps). As always, please let us know what you think in the comments section. Have you played the Fiefdoms before? Been run down by them? Always thought their swan hats a bit strange? And are you intrigued to try out some of the synergies in this list, and their allies in Gondor and Rohan?
Recommended Resources
- New Rules, Part VII: The Kingdoms of Men, Part II (December 2018)
- Cavalry (April 2013, *pre-MESBG)
- Dol Amroth for Gondor! (February 2013, *pre-MESBG)
- Fiefdoms Model Range [Games Workshop]
- Fiefdoms Model Range [Forge World]
Recommended Resources:
- MEDIA: Review of The Middle-Earth SBG Armies of the Lord of the Rings - Part 6, The Fiefdoms (STF Wargaming Studio)
- MEDIA: Tactics Talk: The Fiefdoms (The LOTR SBG Team)
- READING: Fog of War, Part 7: Gondor (Veni, Vidi, Double)
- MEDIA: How to Play and Buy: Fiefdoms (DC Hobbit League, *pre-MESBG)
- MEDIA: LOTR SBG - Fiefdoms Army List (GBHL, *pre-MESBG)
- BATTLE REPORT: INSANE Battle Report Moria vs Fiefdoms ~ Arda Unleashed Championship Round (ZorpaZorp)
- BATTLE REPORT: Tales of Middle Earth Ep.83 - Middle Earth SBG Battle Report - Fiefdoms Vs. Mordor (Blackfyre Productions)
- HOBBYING: How to Paint a Knight of Dol Amroth (Battle Games in Middle Earth)
One final plug for Captains of Dol Amroth: if you're running Blackroot Vale archers, you need to be able to call Heroic Shoots and while having March might be good in some scenarios, Heroic Shoot is better for these guys. While any hero could call a Heroic Shoot, there's so much more you can do with Imrahil's or Angbor's Might.
ReplyDeleteThat's very true. While the March will be better for certain scenarios (Seize the Prize, for instance), if you don't have a "get-to-a-certain-specified-place scenario), being able to threaten the opponent with rerollable ranged attacks is a great way to force them to come to you, especially if you can form up in defensible terrain with a choke point for your pike block.
DeleteIf you're going for more of an allied contingent, Madril is an intriguing choice, since he's a cheap 3 Might Hero of Fortitude who can Heroic March if you need it, but otherwise is more than happy to sit back with the archers calling Heroic Shoots 2-3 times. You could even have Madril bring a full warband of WoMTs (with some bows equipped, too) if you want some beef in front of those Blackroot Vale Archers.
Loving the ongoing army review series. And for the record I do think the swan hats are a bit strange, though the plastics have less pronounced cone-heads than the original metals. I remember when these figures first came out they were SUPER controversial - they were some of the first models not based on the films, and everyone was afraid LOTR was going to turn into Warhammer!
ReplyDeleteTotally agree. I definitely prefer the aesthetics of the new plastic kit, though to be honest, most of my Dol Amroth knights have swappable uncovered heads for battle companies purposes. ;=)
DeleteGreat write up! It seems like Fiefdoms get overshadowed by the availability and wide Hero/Warrior selections of the other Good Men factions, so it's great to see them get more attention.
ReplyDeleteSpeaking of being overlooked, I think one of the more underappreciated design aspects of the Fiefdoms is that almost all of your Warrior choices are 9 points. Men-at-Arms, Axemen, Clansmen, and Archers w/ Spears are all 9 points. Want to give your Knight an Armoured Horse + Lance? That's also 9 points. That kind of 1-to-1 interchangeability means that you can really fine tune your list based on what works best for your needs or personal playstyle.
I also wanted to emphasize how flexible the army can be. A block of Axemen + Pikes at F4/5/6 can be pretty challenging to deal with. While the lack of shields at D5 is definitely a weakness, the ability to pivot your battle line on a dime can be a phenomenal advantage. No shields means that your warrior block doesn't have the same type of facing requirements that a traditional spear/pike wall does so you can move your supporting models every-which-where they're needed.
The points cost is a great point. It also makes them easy to swap in/out with a WoMT Shieldwall list.
DeleteI hadn’t thought about the added flexibility. I typically go the other way, trying to get as many spear-shield models as possible so that they can deploy flexibly as you mentioned, but that gets expensive. :-P I hadn’t thought about going the other way, apart from lists like Harad where you don’t really have the option. It’d be rough against lots of elf bows, but if the opponent has minimal shooting (or just S2 shooting), the D5 is a lot less of a liability, especially if backed up by 2 pikes and a 12” Banner!
I'd like to know who exactly made the "consensus number 1" cavalry Morgul Knights. :p
ReplyDeleteIf we are talking *potential* of cav, you really can't compete with Dol Amroth for the reasons mentioned in this article: fight, rerolls to win, reroll 1s to wound, courage, lances, armor, etc.
Frankly in my mind, the only other cav in the game (not including monstrous mounts) that could truly compete for #1 is Rivendell knights, Dwarf Boar riders, and Mahud camels. And even then, the later two only because of their respective armor (dwarves) and special rules on the charge. While Rohan, of course, has great cav on the charge, most of their strengths require them to charge. Not so with Dol Amroth. As long as their respective heroes are within range (that same requirement can be said of Rohan heroes too) it is useful in *every* fight. While Morgul knights with a lance and armor on an evil rider is attractive, the lack of synergy with heroes and poor courage, for me, make them a great thematic choice but a weak gaming choice against in most army builds.
Oh, I don’t think Morgul Knights are the consensus #1 profile :) my point was that I don’t think Dol Amroth are, either, since a MK offers the same raw stat line (F4, S3, Lance, D6/5, C4) plus Terror for cheaper. ;) I agree the synergies with KoDA have a more reliable ceiling, especially if you can get them to F5 (which isn’t charge dependent). MKs are hard to counter charge if the enemy doesn’t have high courage or bodyguard, but there are lots of armies that can build around that.
DeleteIn addition to the cav you mentioned (personally I’d probably lean towards the Goat Riders, just because high damage/Defense, plus the knock-down rule, plus they’re the rare cav that can gain Fearless), I do think Galadhrim Knights deserve a plug. Constant F5, D6 riders, elven-made hand-and-a-half swords, and Fleetfoot for very cheap is nothing to sneeze at.
How’s the relocation going?