Featured Post

The New Age Is Begun: The Buhrdur's Horde Army List

Hey Reader! Today we're discussing a list that I got excited about when I heard Rise of Angmar was going to include it, and that I reall...

Sunday, November 6, 2011

Ill Met By Moonlight: Uruk-Hai vs. Wood Elves

So Gaius' two armies are competing in the tournament. As he can't control both of them, he gives one to me...and of course, in an "ill met by moonlight" scenario, he gives me the team with a single archer who already wounds his targets on a 4+ and now a 3+. I'm really not enjoying how this game is looking, as there is lots of terrain and so many enemy archers (who now wound my shield-bearing Uruks on a 5+ and my pikemen on a 4+). This, I'm sure, will be a good, uphill game. Here are the forces:

The Fist of Isengard: 401 points

Uruk-Hai Captain with shield and heavy armor - 60 points
17 Uruk-Hai Warriors with shield - 170 points
16 Uruk-Hai Warriors with pike- 160 points
1 Uruk-Hai Warrior with crossbow- 11 points

35 units, 1 crossbow, 1 hero

Host of Lothlorien: 402 points


Galadriel, Lady of Lothlorien - 130 points
8 Wood Elf Warriors with Elven blades and thrown daggers - 80 points
4 Wood Elf Warriors with Elf bows- 36 points
12 Wood Elf Warriors with Wood Elf spears - 96 points
6 Galadhrim Warriors with Elf bows - 60 points


31 units, 10 Elf bows + 8 thrown weapons, 1 hero

The scenario we will be playing is an "Ill Met By Moonlight" game on a board that is 48" x 48". In this final game of our tournament, no units will be allowed to shoot at an enemy unit from a distance of more than 12". All ranged attacks, though, receive a +1 bonus to wound because the darkness prevents units from dodging missiles as easily as if it were daylight. Both armies will divide their forces into two groups: one will be deployed between 18-24" of the army's starting board edge, while the other starts within 3" of the board edge. These units are placed at the choice of the general, as opposed to the "To the Death" games we've played in the past. The game is played until one side is destroyed (death or rout). In this game, we may play until one side cries "uncle," depending on how bad the game is going.

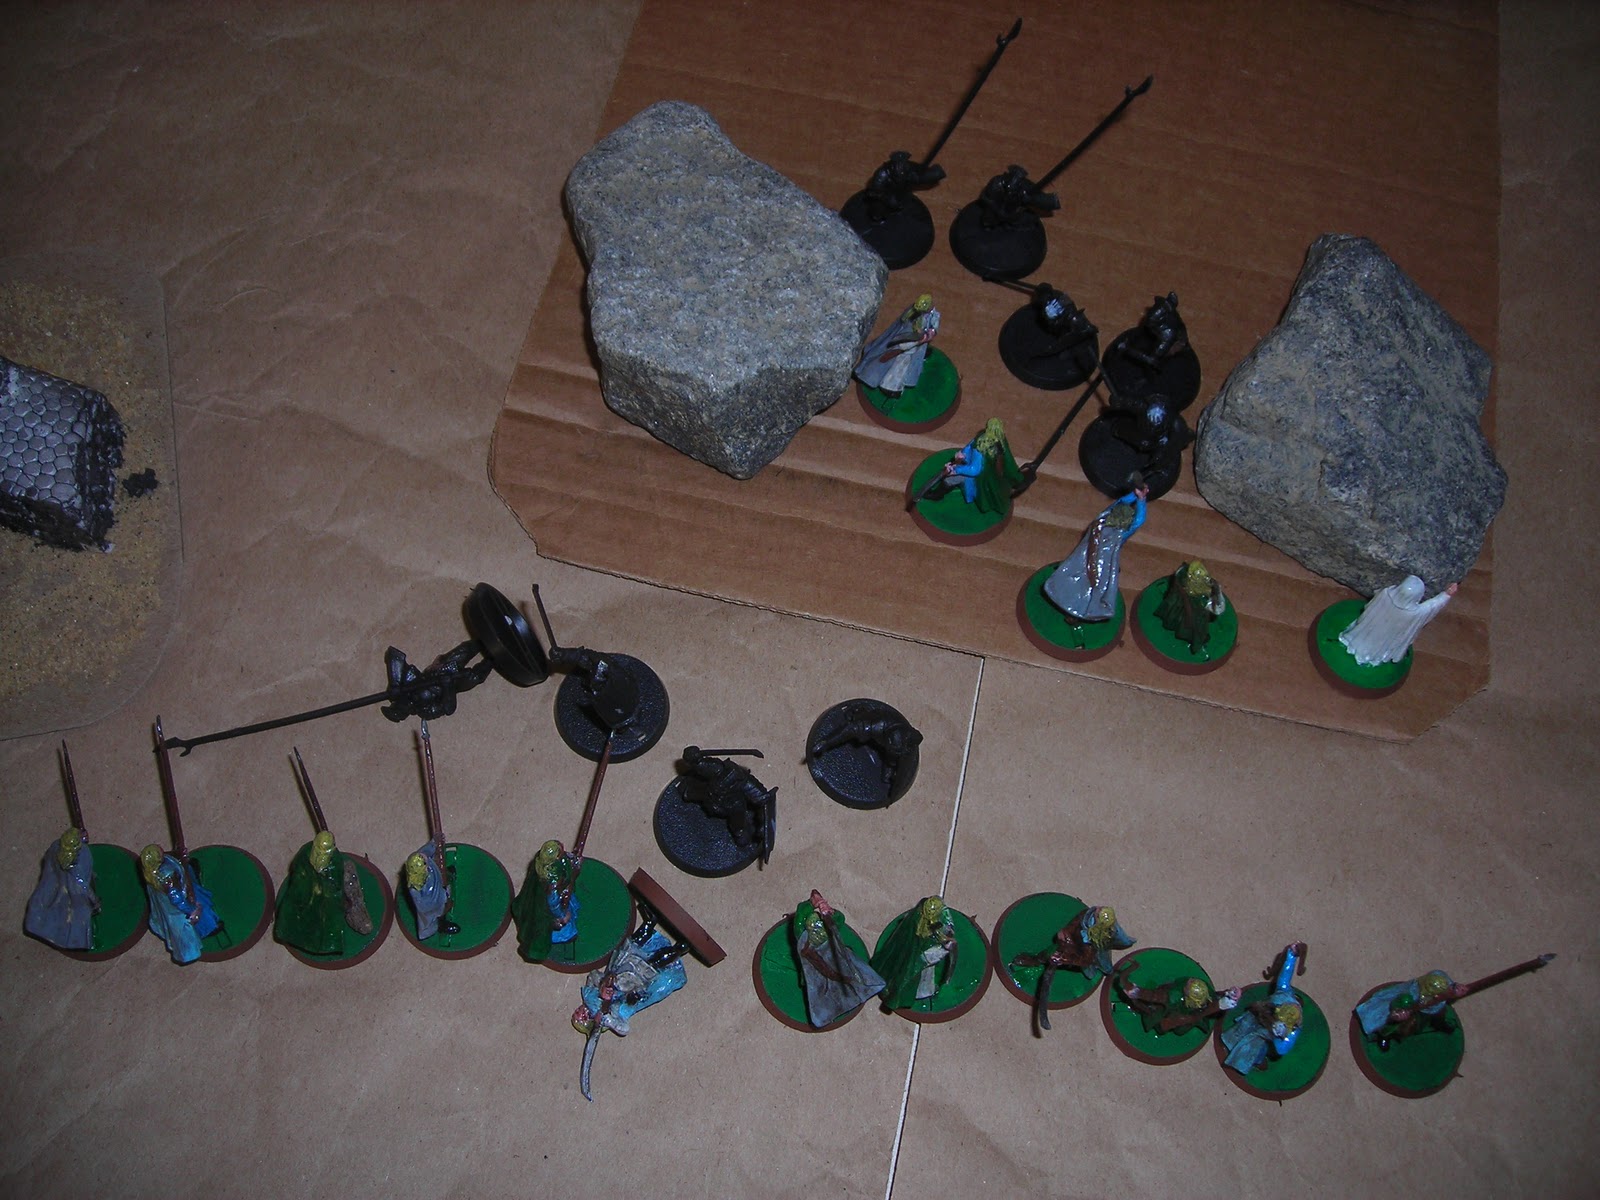
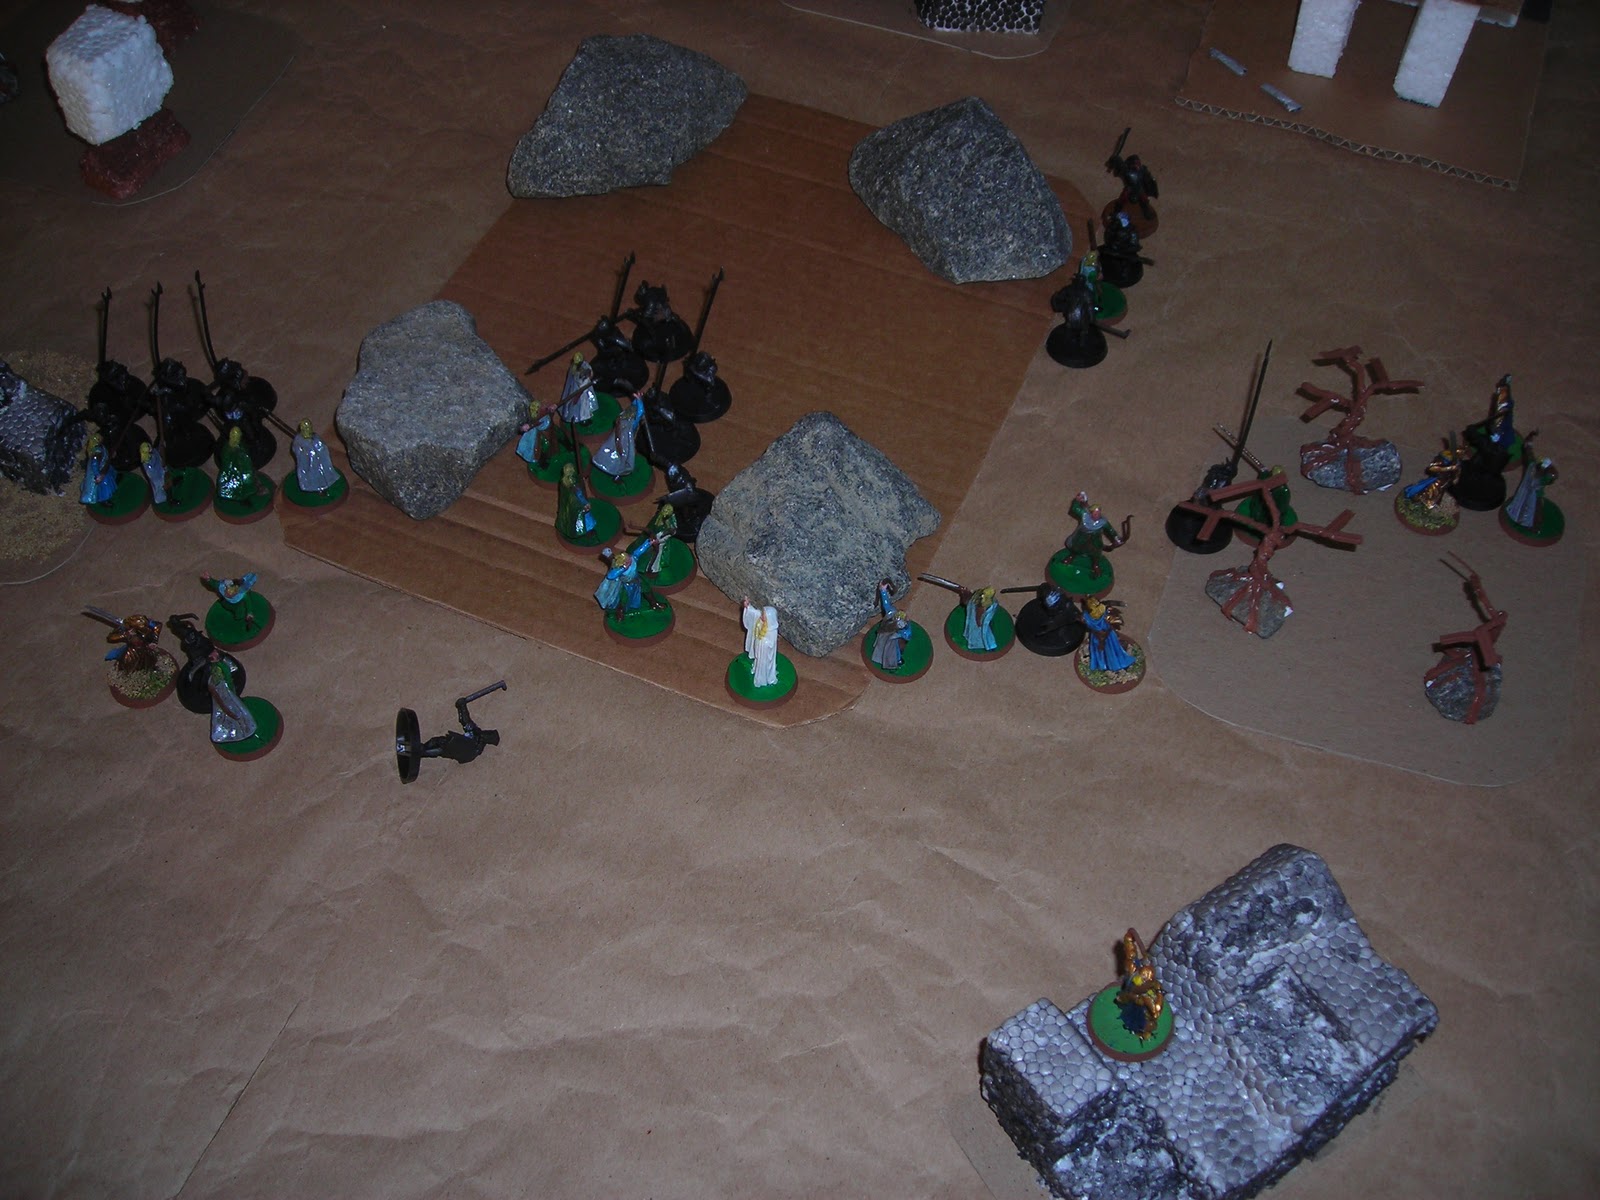
The map is set up as follows: all terrain pieces are within 3" of each other, with the first piece of terrain being placed was a circle of rocks (normal ground, rocks are climbable) in the center of the map. There are two forests, two cairns, two hills, and a ruin, and the Amon Hen structure (which will be improved in the future, I promise). The Uruks won the roll off and have chosen to select their board edge (south), ceding priority to the Elves for the first turn.
The advantage (though meager) that the Uruks have is that for once, I outnumber the Wood Elves - which, considering my units cost more than Gaius', is a huge blessing. Added to this advantage is that his units will not be able to shoot at mine until we are close (we've ruled this to include volley fire, as "seeing" units is limited in this game to 12"). Gaius did ask if he could substitute Galadriel for Celeborn and I promptly informed him that the armies couldn't be changed mid-tournament...mostly because "Cast Blinding Light" doesn't do much in this scenario.

The reason for that is as follows: the scenario happens at night. With the nighttime conditions comes two advantages: archers can't shoot beyond 12" and ranged weapons gain a +1 to wound. When "Cast Blinding Light" is in effect, anyone within 12" of the caster can be seen as if it were daylight (this means that units within 12" of the caster can be shot normally). The "+1 to wound" bonus is hard to figure, but the special rule attributes it to not being able to see the arrow and dodging out of the way. It appears then that this would prevent anyone shooting into the light from gaining the +1 to wound as well as preventing those inside the light to gain +1 to wound (as the target, who is still being shot at from 12" away if not in the light, can see the shaft coming). All told, the power defeats the purpose of the scenario and doesn't play much of a role in a game with 1 enemy archer in the first place. Instead, it keeps the crossbow moving most of the time until battle is waged. As such, I'm sure Gaius will not be casting it during this game.

My forces have been divided evenly as far as pikes and shields are concerned, with my captain at the back (I don't want him immobilized during the beginning of the game by Galadriel and then see my army fall to pieces should we be broken). I've placed my crossbow Uruk-Hai in the first group and placed around him a guard of units. Knowing that Gaius will want to stack the trees with soldiers, I'm a small band practically in one wood while keeping my crossbowman watching the other.

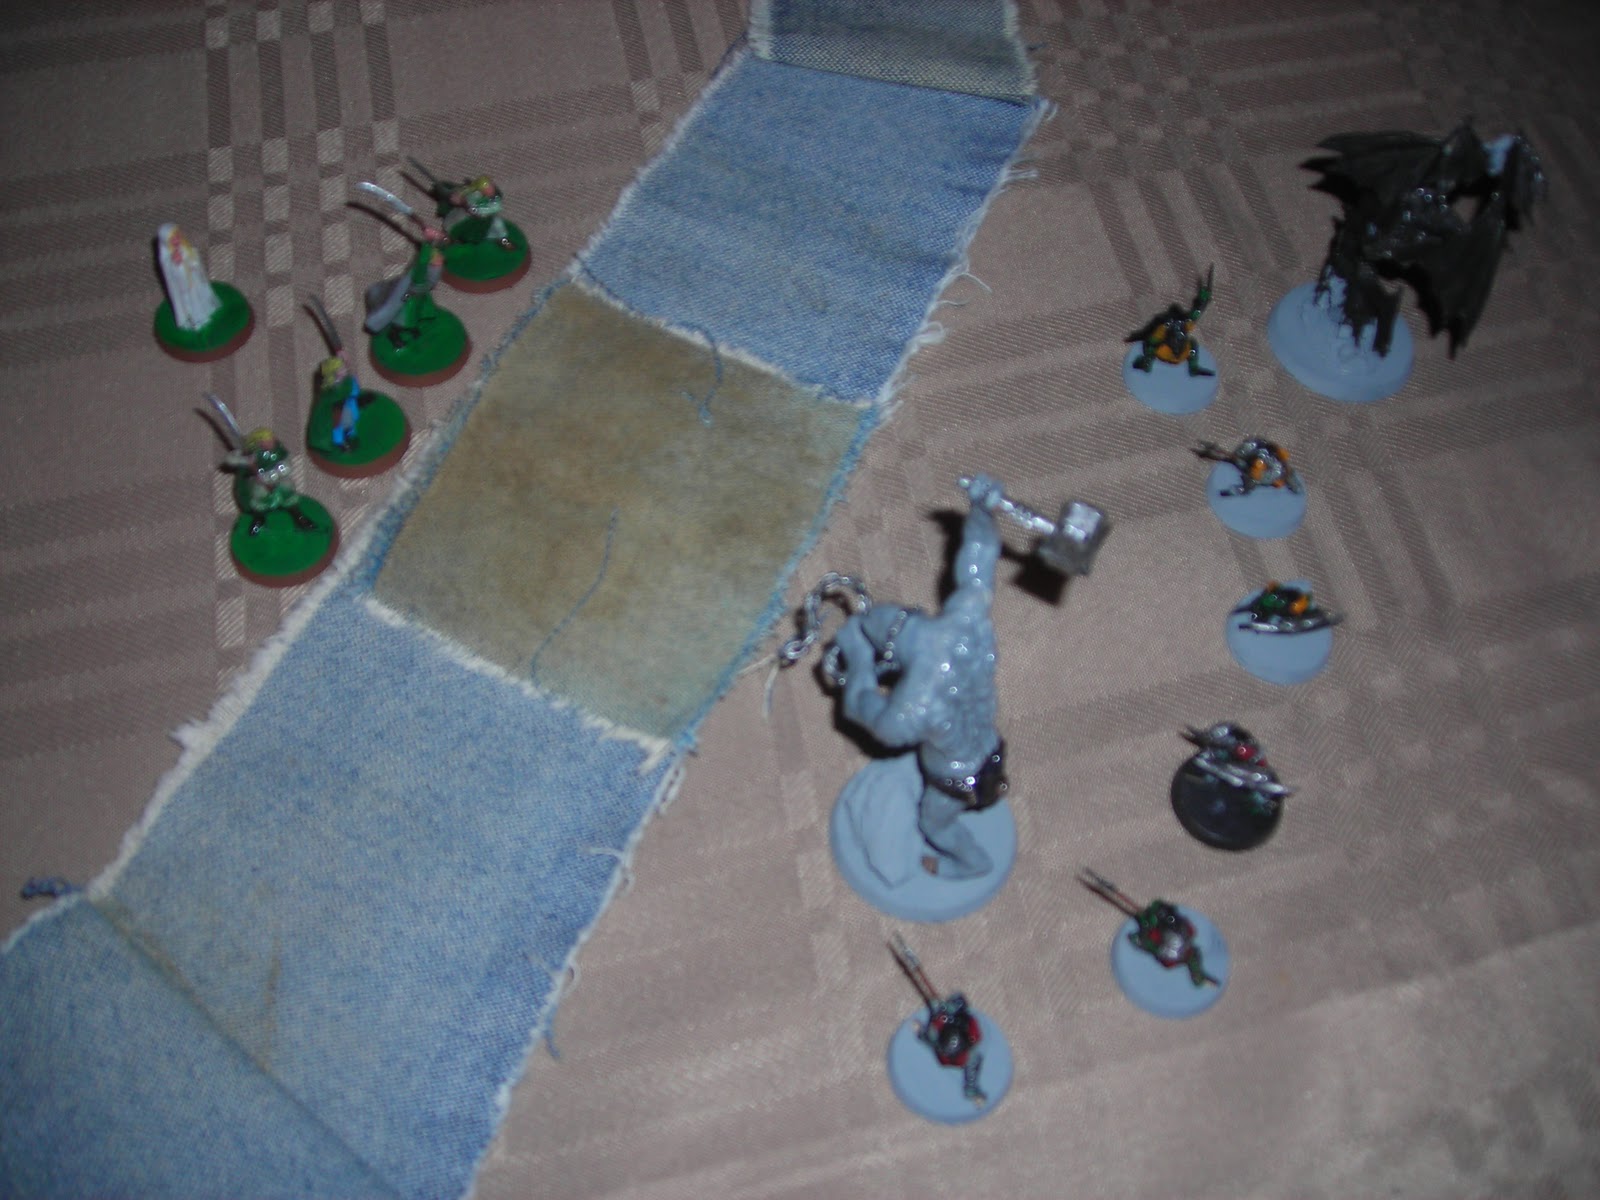
Gaius split his forces evenly, which means I will begin with archers at in the best case scenario end with archers as well. It'll be a good uphill fight, but I need to strike first if I'm going to take his Elves apart. As you can see from the picture above, Gaius has formed a nice "bulwark" formation with four Wood Elves with spears, probably counting on repelling my pike-supported Uruk-Hai with his high Fight 5. As the cheapest Elves with both the shielding rule and the spear rule, they're pretty awesome like this...need to break them now and remember that tactic later.


Turn 1: Foes In The Dark (Priority - Elves)

The armies move and fights ensue. The Elf bulwark is engaged, with one Elf not being attacked (he'll be supporting his friend in the fight, methinks). By the woods, I have a few Uruks coming up around one side, while other Uruks are guarding the crossbow to make sure he can fire safely this round. The Elves are shifting around with their archers and will be fighting in one fight by those woods this round.
If fighting Elves in the day was hard, fighting them at night is even harder. Though Gaius will need to measure all of his archer shots this game, his throwing weapons simply benefit from the +1 to wound rule. Still, the 4 throwing daggers only took down 1 Uruk-Hai with pike this round, while a Galadhrim archer and a Wood Elf archer took down two of my Uruks. Grrr...I knew this was going to happen.
The Uruks on the left have killed two of the Elves with spears (good-bye, bulwark strategy), while the Elves with spears push back the Uruk pikeman but fail to get the 5+ required to wound. You will also see one of the Uruks near the crossbow has a shiny token on him: he was immobilized by Galadriel to keep him from charging the forest. The shiny token will pop up in this game when someone is immobilized.
Kill count: Uruk-Hai 2/31, Elves 3/35.


Turn 2: The Midnight Foray And Ambush (P - Elves)

My supporting team of Uruks are trying to catch up to the fighting going on at the far side, but much of the battle is now flowing against me. With the Elves gaining priority, the two remaining members of the "bulwark" formation have retreated to the safety and numbers of the Elven reinforcements. The sheer number of spearmen in the formation means that I need to engage units carefully, as their units can support while alongside. The Elves use their thrown daggers against my center formation, killing 1 Uruk with shield. They have also engaged my Uruks at the forest, keeping their archers clear of any entanglements. You will also see that the crossbowman has been immobilized by Galadriel. Come on...
The Uruk with shield at the top of the picture was killed with a throwing dagger in the Shoot phase (handy skill for these Elves to have), but on this side of the battle, only an Uruk pikeman was killed. Off to the left of this picture is a Galadhrim Warrior with Elf bow and a Wood Elf with Elf bow, who both took aim and send feathered arrows into this poor chap.
On the other side of the field, the crossbowman withstood the firepower of the Elven archers, though a pike-carrying companion was not so lucky.
In the fights that ensued, the Uruks won 1 fight and killed an Elven swordsman. The Elves failed to wound most of their foes, with the exception of a pikeman (seeing a theme here?). The two Wood Elves with Elf bows you see in this battle line are actually spearmen, so don't be deceived.
In the woods, one Elf lost his fight, while the other lost his and died. Go Uruks!
Kill count: Uruk-Hai 4/31, Elves 7/35. Uruk force is broken after 11 more kills, while the Elven force requires 12 more...oh no, I hate it when this happens.


Turn 3: Reinforcements Arrive (P - Uruk-Hai!)

So the Elves in this game not only get superb mastery in an "ill met by moonlight" scenario due to their heavy use of archery, but they also have a spellcaster in this game (and the only spellcaster in the whole tournament). After my Uruks charged into the Elves in the woods (engaging a Galadhrim Warrior with bow), Galadriel leaned over, successfully cast Command, and moved the Uruk away from the archer he had charged, running shamefully into the middle of the field where he can be a prime target for the 2 Elves perched on the ruins or the 3 Elves in the woods. The other units moved as you'd expect, engaging some units and all three remaining Uruks in the Elven backfield are trapped. Oh, goody...
Sink me already...the Elves kill 3 more Uruks with their bows this round. You will remember I mentioned there were 5 archers who could shoot this round...well, 3 of them got lucky. What did my crossbow do this round? Or the first round? Why nothing but miss his targets...why do you ask?
LOOK AT THE BOTTOM RIGHT! Three trapped Uruks, three choices to "shield," three 6s rolled, and no 6s rolled by the Elves! I'm so happy. Elsewhere on the field, the angry combatants decided to flail at each other, so as to not kill anyone, but two of my Uruks successfully stuck to their training and killed an Elf with Elven blade. I'm so happy I've forgotten may dismay about the Shoot phase.
Kill count: Uruk-Hai 5/31, Elves 10/35. As great as it was to not lose any Uruks during the Shoot phase, I need to kill more Elves if I want a chance at winning this game.


Turn 4: Consolidation And Confusion (P - Elves)

Galadriel did an annoying Command spell again - this time against my Uruk Captain. She successfully cast it using 1/6 Will points + her free Will point. Isengard doesn't have good heroes per se, and most of them happen to be glorified Uruk-Hai who possess no more than 1 Will point each. Such is the case here, so I used my 1 Will point to roll 1 dice, hoping to roll a 6 (though in a way, it was pointless). I know from past experience that if you don't resist the casting of a spellcaster, they'll keep the targeted enemy hero out of combat for the entire game. With 2 Might points, I had a 50% chance of stopping the spell. I rolled a 2...so the Captain advanced in the opposite direction while his troops rushed towards the center. My Uruks are in trouble elsewhere, as you can see, so I'm not pleased with this position. You'll also see that an Uruk with shields was killed by a throwing dagger in the center deadlock.
Crossbow kill! A Galadhrim warrior bites the dust as a quarrel gets the better of him. Unfortunately for me, the other Elven archers in the area decide to mow down my Uruks, claiming 4 more kills. Three of these kills were Uruks with shields, who usually have the advantage of only being killed on a 6, but when the nighttime conditions makes that a 5+, they fall ever so quickly. Not liking this at all...but I kinda guessed it would happen.
The fights went surprisingly well. Only one of my trapped Uruks died (keep it up other guys), while an Elf with Elven blade died to his angry Uruk foe. The Elves won all but 1 fight (the shielding Uruk-Hai on the right won his fight), but failed to wound anyone besides the trapped Uruk at the bottom right.
Kill count: Uruk-Hai 7/31, Elves 16/35. The Elves are 9 units from breaking, while the Uruks are 2 away. This is probably a good indicator that I am losing.


Turn 5: Reforming The Lines (P - Elves)

Of my two remaining Uruks in the backfield, one was killed by a thrown dagger, while the other has been trapped and immobilized (courtesy of the Lady of Lothlorien). He has also been trapped by two archers and a swordsman with throwing daggers (who thankfully didn't take him down). You will see, however, that just above this fight the Elves have re-established their bulwark formation. Just as before, they are trying to keep out my 6 invading Uruks with their spear-work, so we'll see how that fares. My Captain is attempting to avoid Galadriel while keeping near the core of my units. As my force is now 1 unit from breaking, I need to keep my army together.
As there was no shoot phase, we move straight to the Fight phase. Here you can see that the Elves won every fight down low, killing 3 Uruk-Hai in the process. The bulwark worked...congratulations Gaius. The Uruks are now broken, so we'll see who stays.
On the other side of the field, my Uruks are slightly more successful, as one of them shielded his way to victory, while the other units lost their fights (the shield unit surrounded by archers managed to live after the blows fell, the pikeman died, and the crossbow-shield combo fight were rebuffed by the Elven spearman (who failed to wound the crossbow Uruk).
Kill count: Uruk-Hai 7/31, Elves 21/35. The Uruks are broken...great.


Turn 6: Rally, Rout, and Rage (P - Uruks - broken, remember)

Since my units are doing so poorly (and I control the camera), I took a bit of a privilege  taking shots of things that could be cool. Here, you can see my brave (more like incredibly angry Captain shouting to his men to stay in the fight). Those seen here are the ones who could hear him over the din of combat and chose to stay, after seeing his valiant stand.
Four of the five Uruks who were repelled by the bulwark, however, did not hear the Captain, and seeing that the enemy was gaining the upper-hand, promptly fled the field. Their lone companion shouldered his pike and headed to the left of the frame to support someone else in the fight. You can see the Elves here wondering if they should pursue the Uruks or ensure that the battle was won. In the end, discipline in the ranks won the day.
After all the courage testing was done, the Elves moved and we have the fights as so. Three of the units in the Elven bulwark have moved on to close off one of the rocky passes, while the other rushed to aid the Elves with swords at the other entrance. You will see one Uruk (closes to the bottom right) engaging two Elves with swords. He is backed up by two pikemen, so that fight is a 4-3 if you include all the spear support. Gaius thought about immobilizing that Uruk, but I said that would be incredibly unfair and cruel. He settled instead for immobilizing the Uruk nearest Galadriel, who was being attacked by an archer, a swordsman, and a supporting spearman.
This Galadhrim Elf shot at the captain from his perch and landed a blow so hard on the Captain that any other Uruk warrior would have fallen. The Captain, however, fell to one knee, rose instantly, and urged his followers on as if nothing had happened (Fate point successful, basically).
Despite the whole game going down in flames, my Uruks managed not only to win their fights, but slay their opponents! Three more Elves bite the dust, as the five angry Uruks are surrounded by seven vengeful Elven warriors.
If things hadn't gone so ill on this side, I might have thought the game was save-able. As it turned out, two Uruks with shields fell to their opponents and the others managed to live through an Elven onslaught (the crossbowman actually winning his fight, but not killing his foe).
Kill count: Uruk-Hai 10/31, Elves 23/31. With only 8 Uruks left to fight off 9 archers, 9 spearmen, 2 throwing daggers, and an un-engaged spellcaster, I cried "uncle" and ceded the game (and consequently the third and final game of the tournament) to Gaius. Wood Elves seize a major victory.


Conclusion:

Assessment by Gaius:

If it weren't the last game in the tournament, this game would not have had any glory to it. From the beginning, we all knew that the Elves were going to dominate with the archery rules and the Uruks were going to have to endure a lot of shooting and probably use a phalanx formation to break the Elven lines. Absent bad rolls on the part of the Elves, the game was going to be won by me. It was for precisely this reason that I didn't give Tiberius the Elves. :-P Still, fun game.

Assessment by Tiberius:

The game, as I believed from the get-go, was an up-hill game. Gaius and I both agreed that we liked the immediate battle that this provided, but the use of Wood Elves in this scenario is a bit...unfair. All the same, it was fun while it lasted and seeing the Uruks charge head-long into the Elven ranks was fun. Breaking the bulwark at the beginning, slaying the Elven fighters in the center at the end, and nailing a Galadhrim archer with a quarrel were all great moments, but unfortunately, no victory can be built on these alone.

Stellar unit for Uruk-Hai: Uruk Warriors with shields

The game, on the whole, went to the dogs. The shield troops, however, distinguished themselves under the pressure by not only surviving barrages of Elven arrows, but slaying Elven warriors and shielding themselves to fight another round. For two rounds, 4 ferocious Uruk-Hai kept at bay 12 Elven warriors, which is more than double their point totals in enemy units (with more dice and higher Fight values). In the end, however, the Uruks were never able to capitalize on this or pick up momentum. My metaphysical hat off to these guys and I wonder if any other unit will ever take this title away from these hardy troops.

Stellar unit for Wood Elves: Galadhrim Warriors with Elf bows

Though I never remember to keep track of which bows kill what, 13 kills were clocked by the archers of the Elves, about half of which could be assumed to be the direct result of the Galadhrim warriors. Beyond these kills, the Galadhrim Warrior from his perch plucked the Fate point off of the Uruk-Hai Captain, and these kills ultimately led to the securing of an entire side of the battlefield (the wooded area) and bogged down the Uruk army from charging into the center successfully. It should be no surprise that the archers won this game, as "Ill Met by Moonlight" is an archer's paradise.

Saturday, November 5, 2011

Understanding the Strategy: Wood Elves


So the Wood Elves are by far my favorite army that I own. They require a lot of skill to use and always require a lot of terrain to stay alive (particularly woods). The hope that I have for this post is to open the floodgates of opportunity for the Wood Elves. We'll begin with the basic advantages of the Wood Elves and a brief overview of their disadvantages. After that, we'll look at the different formations and tactics that I find work rather well. Here's the army we'll be talking about:

Galadriel, Lady of Lothlorien - 130 points (Army List: Lothlorien)
8 Wood Elf Warriors with Elven blades and thrown daggers - 80 points
12 Wood Elf Warriors with Wood Elf spears - 96 points
4 Wood Elf Warriors with Elven bows and Elven blades - 40 points
6 Galadhrim Warriors with Elven bows - 60 points
Ally: Legolas, Prince of Mirkwood with armor - 95 points (Army List: The Fellowship)

501 points, 32 units, 11 bows + 8 thrown weapons, 2 heroes

Potential allies: The Fellowship, Khazad Dum, Eregion, Fangorn, The Grey Company, Rivendell, the Grey Havens, Thranduil's Halls, The Host of the Hammerhand, Theoden's Host, Minas Tirith, The Army of the High King, Durin's Folk, The Wanderers in the Wild, The Wizards, the Eagles

The Strengths of the Lorien Elves

PROFILE

 The Wood Elves of this army are, like all Elves, gifted with several critical advantages. The first of which is they have a Fight Value of 5 and a Courage Value of 5. As a result, they will win ties in close combat against all basic troops and will tie/beat most heroes who are not champion brawlers by trade (Aragorn, Gimli, etc.). They will beat such heroes as Durburz (the Goblin King of Moria), Captains from any force (except Elves and Dwarves), and the Golden King of Abrakhan. For roughly 20% or less of the cost of any of these heroes, that's well worth the investment. They will tie down heroes like Ringwraiths, Dain, Eomer, and any named Uruk-Hai captain, which means that such heroes will need to win a roll-off, which they cannot alter with their Might points. Again, that's also not a bad investment. Their high Courage value means that they don't need to benefit from a hero's Stand Fast! most of the time (though I'd still advise it) and they can charge terrifying units more consistently than other basic troops. In cases that rarely apply, this Courage value is even better than some units (the Army of the Undead wounds Elves on 5s instead of the usual 4s and Spectres will rarely be able to use "A Fell Light Is In Them" against your units).
The Wood Elves also benefit from having a high Shoot Value (3+). The high Shoot value is made even stronger when you have a Wood Elf units, as they are the only Elves that can purchase throwing weapons for their non-archer infantry. With a 33% bow limit instituted on all armies, this allows all Wood Elf units (for 9-10 points each) to utilize their Shoot value of 3+. It is also useful that they can have thrown weapons in that these weapons can be used as you charge an enemy in the Move phase, allowing you to kill units in all 3 phases of the game where units are doing something (Priority and End phases excluded here). In this army, throwing daggers have not been given to the spearmen to save money (since it would cost 24 points to give all of my spearmen throwing daggers - forcing me to use Haldir without Elf bow instead of Legolas with armor).
But the high Shoot value is made even more effective because the Wood Elves have the Woodland Creature ability. This allows Elven units to move through difficult wooded terrain without penalty. Since all infantry and monsters without this ability cut their movement in half (and all cavalry cut their movement to 1/4), the enemy can't travel more than 2.5"-3" through woods. Since your Elves can move half their movement and still fire their weapons, the Elven archers can move back 3" through the woods and maintain the same distance against their foes and still fire their bows. Enemy archers will need to travel 1.25"-1.5" if they want to shoot, which means you can really put a distance between them and you with a good-sized wood. Whenever I play as a Wood Elf, I make sure at least 2 patches of trees are used - I'll be able to place one and my opponent will probably choose to place the other. This will ensure that I've always got good woodlands to help my army when I need it. A "wood" in the Lord of the Rings game is about 6"x6", while a "forest" is about 12"x12", which means you'll have some room to maneuver if you can get some of those on your board.
WEAPONRY

We've talked some about the Elves basic profile, but let me touch now on their weaponry. The Elves benefit from Strength 3 ranged weapons, which is great for taking on moderately-armored targets (Defense 4-5). A Defense 5 unit would be wounded by a Strength 2 bow (and most bows are Strength 2) on the roll of a 6, but a Strength 3 bow increases that roll to a 5, which means you are twice as likely to wound your target as you would be with a weaker weapon. Elven bows also shoot at the same range as normal bows (24"), so for the extra point you pay for your unit, you are making it easier to hit the enemy shield-and-armor units, which is great. Thrown daggers are also Strength 3 with a 6" range, which means they're perfect for softening up an enemy during a Shoot phase before a charge. It will, of course, be better if you are able to charge the following round, since you'll be able to use your thrown weapons to cause devastating damage in the Move phase as well.

Elven blades and Wood Elf spears are also great weapons for 1 point each. An Elven blade gives an Elf warrior the ability to choose from round to round whether or not he will use his blade as a hand weapon or as a two-handed weapon. This gives him the flexibility to win a fight more easily or to wound their opponent more easily. Whenever possible, gang up multiple Elves in close combat against an enemy so that your Elven blades can be used as two-handed weapons, as the ability to wound Defense 5 units on a 4+ or Defense 6 units on a 5+ can cause some real fear in your enemy. Elf archers may also take these weapons and may choose to use them as two-handed weapons if they wish (otherwise restricted in other armies), but this army avoids that cost. Wood Elf spears not only get the normal rules for spears, but also allow Wood Elves to gain the "shielding" rule. Though you don't get the defense increase that a shield would give you, your troops will have the ability to ward off large amounts of enemies (who they will likely beat if they roll a 6) or keep a critical junction held for a while.
The Weaknesses of the Wood Elves

 The Wood Elves have many great advantages, as have already been addressed, but with these advantages comes a few critical weaknesses - ones you will need to take into account when you fight your battles. Each, of course, can be countered, which we'll delve into a little here but will spend most of our time talking about in the "Formations and Tactics" discussions.

The Wood Elves have no armor (Defense 3). Most bows will wound your units on a 5+, which means that you are vulnerable - very vulnerable - to missile fire. In close combat (and against Strength 3 or 4 bows), you'll be wounded on a 4+, which means that should a close-combat fight go ill, chances are your soldiers are going to die. Should you face a foe with 5+ Strength (Uruk Captains, Trolls, etc.), you'll be wounded on a 3+, which is really, really bad for your troops. All this to say, try to keep your men in fights that they can win and shielded from sight/protected by scenery while you are at a distance from your foes. Your Galadhrim Elves with Defense 4 will do well against units with Strength 3 attacks, but not much better, so don't count on them slugging it out in a tough fight - focus on battles you can win.
NOTE: sometimes not having armor is a good thing - like if you're trying to swim in a water feature. A unit without armor cannot drown while trying to cross a water feature, so the Wood Elves will never have to fear this (and have a better chance of moving their full distance through the water, instead of treating it like difficult terrain).
This army also lacks cavalry. This isn't a problem per se, unless your opponent has cavalry. When a cavalry unit charges into an infantry unit (or units), they gain +1 attack and knock over the units they fight. One of the most common ways to counter this advantage that cavalry have is to counter-charge them with cavalry so that they lose that bonus. Unfortunately, if you don't have cavalry yourself, you can't perform the counter-charge strategy. As such, you will need to rely on shooting them down - and I'm sure they'll try to rely on friendly units to screen for them or terrain to protect their movements.

Formations and Tactics: Line of Battle

Your infantry work well if they are in a line, with the Elven blades in front (10 Elves) and the Wood Elf spears in back. Your bladesmen will be able to throw their throwing daggers when they charge, while your spears can either move into base contact with the enemies on the flanks, doubling up with their Elven blade companions or supporting if this first option isn't possible. The thrown weapons could kill some of the enemies before the charging is done, opening up vulnerable spear units or allowing you to double up on other units in the front ranks. The charges can be deadly, improving the kill count before you add archery or melee combat. Keep in mind, however, that the objective of having thrown weapons is largely to skirmish the enemy (harassing them) until their lines are broken enough that your Elves will have an advantage wherever they charge. If the enemy doesn't reach you with his charge, focus on charging only half of the battle line so that you don't need to face the whole army at once OR continue retreating with your throwing weapons picking units off the front lines.
Formations and Tactics: Archers

This team can function as a volley team during the beginning of the game, but should move to a vantage point where they can shoot at their enemies while keeping their safety. It will not be surprising that I recommend woods for this job. You'll need to maneuver your battle line of infantry to expose enemy archers or spearmen to your own archers, since units who are engaged in combat are (with limited exceptions) not legitimate targets by archers. Should you have 2 woods in your set-up, I'd recommend splitting your archers (again, if you don't want to have a volley team) so that they can fire from both woods, keeping a fresh set of targets at all times. This will probably also require you to manipulate your forward line to keep the targets open.
Formations and Tactics: Legolas

Legolas is the best archer in the game. Period. He has a Fight value of 6 and a Courage of 6, which means he's a dependable fighter in close combat and should keep your army together should the tide run ill for your force. He is also easily the best archer in the game with his "Deadly Shot" special ability. This allows him to do one of two things in the Shoot phase: shoot 3 times with his 3+ shoot value OR shoot once and automatically hit his intended target (roll to wound as normal). This gives him flexibility between shooting several opponents or taking down one critical opponent - like a Nazgul or a banner-bearer that is obstructed by another unit.
With this second option, he also has the ability to shoot into a friendly combat - something that other Good force archers are not able to do. This is perfect for getting your other units out of a tough situation or letting some of your melee troops shoot with their thrown daggers. Keep him near your archers to not only make sure they stay in the Fight, but to kill off Defense 6 targets and expose less defended units behind them.

Formations and Tactics: Galadriel

Galadriel is, for 130 points, arguably the best spellcaster available to the forces of Good. With 6 Will points and a free Will point that cannot be taken away, she will be able to cast plenty of spells and counter enemy spellcasters (unless something goes terribly wrong). Galadriel's aid to the Elves comes not only in her profile (Fight 6 though unarmed, Courage 7, causes terror), but also in the spells she can use to aid those around her. We'll highlight two of those spells here: Cast Blinding Light and Command.
Cast Blinding Light is the signature use of Galadriel in this army: all ranged attacks against Galadriel, any units within 6", and any units obscured by Galadriel are only hit on the roll of a 6. This spell is a static effect spell and lasts as long as Galadriel has at least 1 Will point left, so cast it on the first turn (roll a 2+ on your free Will point) and use it to protect your forces quickly. Since your units are vulnerable to missile fire (especially from Dwarf bows and crossbows), Galadriel can take away the effectiveness of an archery force fairly well by reducing their shoot values to 6.
Though Orcs and Goblins won't see much of a reduction, you'll notice that Haradrim archers and Dwarf archers certainly will feel the effects. After 17% of the archers hit their targets (or thereabouts), only 33% of the remaining units will actually kill his target - that's only 6% of the total number of archers in the enemy force (if it follows the math)! With a force of 12-15 archers, the enemy will only be killing about 1 unit each turn that's within 6" of Galadriel - perfect for keeping most of your units alive when it matters. If this goes against Galadriel (which is risky), you could block the wound as well, keeping your units alive.

A word to the wise though: units who are using "volley fire" will not be affected by this spell, since they already hit on a 6 only, so get out of volley range quickly (usually this means within 24" of the enemy) so they need to target specific units! As crossbows and throwing weapons are unable to volley, you need not worry about this rule against armies that rely on these weapons.

Command is a bit harder to cast and I usually use 2 Will points (1 from my store) to cast this one if it's essential to cast. Command requires that you roll a 4+ and the targeted unit has its Fight value reduced to 1, its Attacks reduced to 1, and the unit cannot move, cast spell, shoot, or wound for the rest of the phase. This is an excellent way to stop a combat hero from doing anything or stopping a Troll from doing anything. If you want these units to stay where they are, cast Immobilize instead, since it is cast on a 3+.
Command also allows you to move the unit half of its movement (even if it's moved already this turn). If the enemy is close and you'd like to bring them closer to your battle line, use Command to lure a unit out and throw your daggers at it - one dead unit that you don't need to shoot the following round. You can also use this to move a banner bearer out of impact range (or keep a low-Will hero out of the fight for a while). In the picture above, Galadriel could choose to move the Cave Troll away from her bodyguards or bring the Bat Swarm into range of her guards' throwing daggers.
Formations and Tactics: What's Next?

I have the Fellowship of the Ring, who can ally with this army, based on what I need. If I know the enemy will be anti-archer (Shadow Lord), I can change Legolas out for Gimli as a powerful melee hero OR bring Frodo as a spell-caster hunter. Frodo costs 100 points with his Mithril mail and Sting, allowing him to be a Strength 3, Defense 6 spell-caster hunting machine. Putting on the Ring will mean that only Nazgul can target him or charge him and if your enemy is not a Nazgul, you can run with impunity towards the enemy ranks, pass through his units, and take off the Ring just in time to charge the caster. This can also be used to target aura heroes or tactical heroes who rely on having screens of men keep them alive through the early stages of the game (Durburz, the Golden King of Abhrakan, etc.). It's risky, but I can always leave Sting behind and instead take an 85 point Frodo with Defense 6 and 3 Fate points to keep any hero tied up for a while.

I've thought about Galadhrim cavalry, Wood Elf Sentinels, and a full box of Galadhrim Warriors, but right now, these are all pipedreams, so we'll see what happens. Only an overwhelming need to make the army reach 1000 points would justify purchasing any of these boxes.

Sunday, October 30, 2011

Take and Hold: Wood Elves vs. Goblins

So Gaius and I are playing Round 2 of our tournament and each of us has been given a Good force and an Evil force. Hence, today's game will be between my Wood Elves and my Goblins (with me controlling the green skins). The scenario, as was detailed in the last post, will be a "Take and Hold" mission. The armies are as follows:

The Denizens of Moria: 400 points

Durburz, Goblin King of Moria - 60 points
16 Goblin Warriors with shields - 80 points
16 Goblin Warriors with spears - 80 points
13 Goblin Warriors with Orc bows - 65 points
1 Cave Troll - 80 points
1 Bat Swarm - 35 points

48 units, 13 bows, 1 hero

Host of Lothlorien: 402 points

Galadriel, Lady of Lothlorien - 130 points
8 Wood Elf Warriors with Elven blades and thrown daggers - 80 points
4 Wood Elf Warriors with Elf bows- 36 points
12 Wood Elf Warriors with Wood Elf spears - 96 points
6 Galadhrim Warriors with Elf bows - 60 points

31 units, 10 bows + 8 thrown weapons, 1 hero

The scenario we will be playing is a Take and Hold game on a board that is 24" long by 24" wide. No models are deployed at the beginning of the game, but will move onto the board as follows: on a 1-2, the unit doesn't arrive. On a 3-4, the model moves in from any edge of the player's side chosen by his opponent. On a 5-6, the player may choose where on his table edge the unit arrives. Models may move normally, but may not charge. When one side is broken, roll a dice during each End phase - on the roll of a 1-2, the game ends and the team with the most units with their complete bases within 3" of an artifact in the center of the map wins.

The map is set up as follows: in the center is a box of treasure, which will serve as our "artifact." Around the artifact (with no piece being within 12" of the center are four woods, a ruin, a marsh, a rocky outcrop, and a hill. The Goblins won the roll off and have chosen to select their board edge (the northern edge), ceding priority to the Elves for the first turn. To tell you the truth, I'm a bit concerned, seeing as the last time I played a "Take and Hold" game, I won with my Wood Elves...and that's the only time I've ever played this scenario. Also, I had high-defense Dwarves for that game...not Goblins. This should be very, very interesting.
From the last few games between the Goblins and the Wood Elves, I learned how important it is to shield my Bat Swarm from Elven archer fire. Thankfully, this fight requires that all of us be in the very center of the map, so I need to get my bats quickly into the foray and support them with lots of Goblins, who will then tie in Fight Value the Wood Elf Warriors. The greatest fear I have, then, is from Galadriel, who could move them 6" with "Command", which is likely to be enough to get the Bats away from any cover/protection they have.


Turn 1: Forming Ranks (Priority - Goblins)

The armies move towards each other. Galadriel successfully casts "Cast Blinding Light," which doesn't protect her units now, but will later. Both armies form volley teams, but only the Elves team can shoot (because my Goblins would be out of range and need to get closer in order to be helpful in this fight).
Gaius unleashes a barrage of arrows, landing two hits. I assign one to the Goblin with shield (who promptly died) and he assigned one to the Bat Swarm, who unfortunately didn't benefit from cover and one great bat fell dead (one wound of four taken). I don't like facing Elves very much, as they wound my Goblins on 5+ and my Bat Swarm on 4+ at range.
Kill count: Goblins 0/31, Elves 1/48.


Turn 2: The Charge Begins (P - Goblins)

The armies continue to advance. Both sides volleyed, both scored one hit, and both failed to wound. Nothing else interesting to mention about this turn.
Kill count: Goblins 0/31, Elves 1/48.


Turn 3: The Charge Continues (P - Elves)

The armies continue to move and fail to score any wounds with their volley teams (though each again scored one hit).
Kill count: Goblins 0/31, Elves 1/48.


Turn 4: Flashing, Flying Steel (P - Goblins)

The armies have neared each other, though the Troll got closer than  the Goblins to the Elven line. He was promptly targeted by a "Command" spell by Galadriel, who sent him running backwards 3". I hate having to charge an Elven spellcaster, but there's nowhere to hide from her on this map. So, my hope is to rely on my Troll's Defense 6 to keep him alive while the squad of Goblins on the far left move around the flank and attack Galadriel before she casts magic. We'll see if that works or not.
The Elves really come into a world all their own in the Shoot phase - particularly Wood Elves. With 10 Elf bows and 8 throwing weapons, a Shoot phase right before combat can be incredibly deadly. In this case, Durburz' bodyguard contingent was reduced to one unit after 7 warriors were killed by throwing daggers and arrows (3 kills and 4 kills respectively). After losing the last game, I really wish I had been using the Elves in this one.
Kill count: Goblins 0/31, Elves 8/48.


Turn 5: The Battle Rages (P - Goblins)

We have combats! Unfortunately, Galadriel cast "Immobilize" on my Troll this round (she used two Will points - 1/6 - to make sure that it worked). This places him against 5 Elves (one using his Elven blade as a two-handed weapon) and will probably mean that he loses the fight and takes a wound or two (hopefully not three, but we've seen that done recently). Thankfully for me, the throwing daggers of the Elves didn't kill anyone this round.
Also thankfully for me, my small raiding band of three Goblin archers shot into the blinding light and scored one hit, which promptly turned into a wound! As with the last game, this model will be substituted with one of the Wood Elf archers who is waiting to be converted into a Wood Elf spearman.
In return, the volley team of Elven archers turned to fire at my archers, preventing them from volleying ever again. Two Goblins fell to their arrows, which is a bummer for me.
In the Fight phase, I won most of the combats against the Elves on the left flank, but only managed to wound one of them (come on, guys!). The Elves beat the troll, but he suffered no wounds (huzzah) and during all the fighting, I only lost two Goblins. With two sneaky teams of Goblins on the way, my units just have to hold...
Kill count: Goblins 2/31, Elves 12/48. The Elves will break the Goblins when they kill 12 more units, while the Goblins need to kill 14 Elves before they break...oh dear.


Turn 6: Around The Objective (P - Goblins Again!)

The Elves consolidate their position as Galadriel casts Immobilize yet again on my Troll (1 Might used with her free Will point). My first division of flankers have engaged one Elf and continue to press on towards Galadriel. I just need my lines to hold for one more turn or so...
My flankers are shot at and lose two units to Elven bow fire. Grrr...
Another Goblin archer is shot down. I'm starting to figure out at this point that shooting at the Elves in either position isn't worth it for my archers, so I'm going to charge them towards the objective soon. Hopefully I won't attract those bows though. I'm kind of in a classic "Sun Tzu wouldn't be too happy with my gereralship skills right now" position until my flanking troops arrive.
I don't ususally call heroic combats with Durburz, but I need to rack up Elven kills right now. I take a chance, call the heroic combat, win, and slay the trapped Elf (yaye!). Durburz and his spearman friend engage the two Elven bowmen (spearmen proxies in this game) just below them, with me choosing to split off the red Goblin spearman and the Green Elf spearman to the right into their own fight).
Pardon the blurry picture, but nothing happened to the right of the Troll (no one died, Duburz lost his second fight, etc.). The Troll lost again, but escaped uninjured yet again. Three Goblins fell (which is really not good) and one Elf was killed in return (whose token will be shuffled around to the other side of the board where proxy Elves are still present).
Kill count: Goblins 4/31, Elves 18/48. 6 Goblins away from breaking...12 Elves away...oh no...


Turn 7: Pushing For Victory (P - G.O.B.L.I.N.S.)

So here we are on Turn 7. My Goblins have charged again, with the Bat Swarm pushing deep into the ranks of the Elves. Galadriel casts Immobilize on the Troll again and side-steps to attack the Bat Swarm (trapping it with the help of another Wood Elf). I'm a bit concerned right now, as my trapped Bat Swarm is what I'm depending on while my Troll is out of commission. My Goblins, as you see, are cutting across the plains towards the objective to try to get more bodies there, but despite my bad position, I've kept most of the Elves out of scoring range.
Three Goblins die, but not the foremost one in the charging division. I don't know how he escaped the three arrows that were shot at him, but none even hit...incredible.
In the Fight phase, Durburz calls another heroic combat, this time fighting all by himself. He won the fight (surprisingly) and moves on to fight elsewhere (the swordsman on the left).
There was a lot of death in the Fight phase (which I'm usually a fan of in these games, as it makes them shorter). Four Goblins were killed, as were two Elves. My bats were not very lucky and lost their fight, promptly getting hacked to ribbons by the Lady of Lothlorien and her Elven guard. You can also see that the Troll was wounded (1/3 Wounds), which isn't good as my force was broken this turn.
Kill count: Goblins 7/31, Elves 26/48. The Goblins are broken. The dice was rolled and on the roll of a 5, the game continues.


Turn 8: Gaining Difficult Ground (P - Elves)

The Elves reform their lines, trying to keep the Goblins from advancing further. My final flankers went too far out of the way, as they are just now nearing the Elven ranks. If I wasn't broken by now, I'd probably be arriving at the right time. Galadriel put my Troll under a spell yet again and I'm a bit frustrated with how the battle lines are looking. After the Fight phase for this round was resolved, Gaius and I realized I didn't test for my Goblins' courage. As he had almost as many Elves as I had Goblins, he was fine with that (and I think he felt bad about my position in the tournament).
The Shoot phase was relatively uneventful. One of my Goblins shot at Galadriel and scored a hit (rolled a 6), then scored a wound (also a 6)! She turned to look at the oncoming arrow and deftly dodged the shot (rolled a 6 for her Fate save, 2 Fate points remaining). With a cry of anguish, the archer attempted to notch an arrow on his bow as one of his companions fell to an Elven arrow.
The Fight phase was brutal. The Troll was beaten yet again and suffered another wound.  Two Elves fell, while four Goblins were killed. Durburz lost his fight and suffered a wound as well (no Fate used). At this rate, my goblins aren't going to be very strong when their reinforcements arrive.
Kill count: Goblins 9/31, Elves 31/48. The Goblins are broken. The dice was rolled and on the roll of a 2, the game ends. With a score of 5-3, the Elves win a minor victory.


Assessment by Gaius:

2-0 in the tournament so far...who would have thought. :-P I really like Tiberius' Wood Elves, but the Goblins are the easiest team to fight out of his civilizations (only 2 Defense 6 units, while the Uruk-Hai and Dwarves have Defense 6 standard in their armies). I owe a lot to the archers in this game, as they consistently cut down Goblins - especially in Turn 4.

Assessment by Tiberius:

Games like these bite. Hard. I was thinking near the end of it that it might have been wise to charge the Troll and Durburz at the archers instead of the main line so that Galadriel wouldn't have had any good targets to use magic on and the archers would need to shoot at difficult targets coming their way (or be consequently mauled in the upcoming fight). At the end of the day, though, you can't do anything about the casualties the Elves inflicted with their bows and even if my power troops had been on the perimeter and away from Galadriel, the Elves would have still killed a lot of units in the center and there would be no units to challenge them there. Classic victory, Gaius, well done...

Stellar unit for Wood Elves: Galadhrim Warrior with Elf bow

Keeping track of who killed which unit during archer is really hard, but the archers in this game scored 17 kills. Of those kills, the Galadhrim and Wood Elf archers killed roughly the same amount of units (about 2 per archer), which means that the Galadhrim killed at least 10 Goblins. That nearly pays for them (and probably does if they killed 12). In addition to their effective archer this game, they cleared out scoring units more adeptly than the infantry in the center - which is really good, as they are unable to shoot at units in combat.

Stellar unit for Goblins: ????

There weren't really any stellar units for the Goblins (I mean, 9 kills isn't much). Of those kills, the Goblins with shields killed 4 units (1 of those with the help of the Bat Swarm), the Goblins with bows killed 2 units (one at range, one in close-combat), and the Goblins with spears killed 2 units (one in single combat and one in a heroic combat with Durburz). Durburz scored 1 kill (and another one with a spearman), so our choices are quite limited really. Hence, I give the game title to...the cave troll. he killed no units (but not of his own choosing) and successfully tied up the spellcaster and between 2-5 Wood Elf warriors. All told, the cost for tying down this monstrous beast was twice his cost. It is not his fault that the rest of the team didn't capitalize on this power play (and I feel really bad for him).