Featured Post

The New Age Is Begun: The Army of Thror Army List

Good morning gamers, We occasionally get requests for army lists to review - and at the start of last month, we got a request for the Army o...

Showing posts with label Goblins. Show all posts

Monday, August 11, 2025

The New Age Is Begun: The Depths of Moria Army List

Good morning gamers,

Editor's NOTE: this post was edited on August 18th, 2025 to add in comments on the profiles added by both the Armies of Middle-Earth supplement and the Legacies document. AoME updates are shown in blue while the Legacies updates are in red.

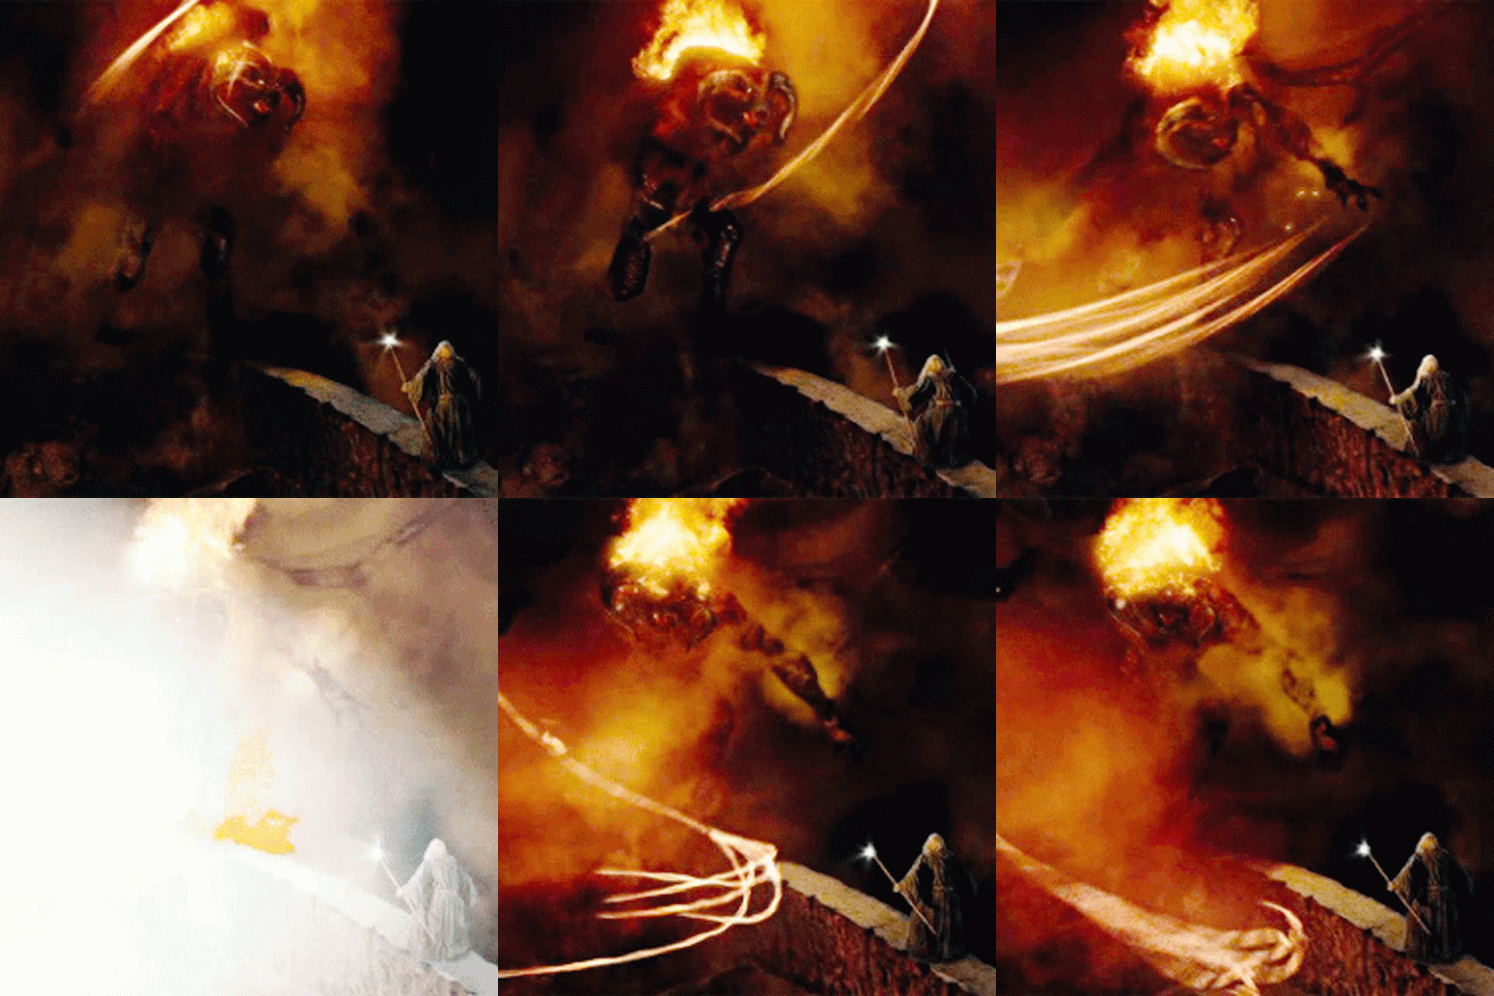
It's no secret - I love the Balrog. I love everything about him - at least, since the MESBG revamp back in 2018 (before that, he was definitively worse than a Dragon). In the 2018-2024 era of MESBG, there was actually a lot of counter-play to the Balrog since a lot of heroes had a chance of getting to F10 and even those who couldn't get to F10 just needed the Balrog to NOT get a 6 on his dueling roll and either get a 6 on their own (possibly with rerolls, but also "just being lucky") or by boosting into a 6 with Might points. In the current stat of the game . . . a lot of heroes can't reach F10, but the counter-play of "getting a 6 when the Balrog doesn't" still exists. Still, he's a big boy and can be a dominant power on any board that he's playing on thanks to some of the changes he received. Let's see how the Depths of Moria army list has changed from the previous Legendary Legion (and Moria in general)!

The Depths of Moria: Changes for 2025

Profile Selection

I'm not going to dwell on this segment - I covered the units that are available to Moria (and this army list is just those same profiles) in my First Impressions post. The short of it is that from the Armies of the Lord of the Rings book, we have the Balrog, the Watcher in the Water, and Moria Goblin Captains for our heroes and Cave Trolls and Moria Goblin Warriors for our warriors. This got updated in the Armies of Middle-Earth supplement to add Moria Goblin Shamans and Moria Goblin Prowlers and by the Legacies document to include Blackshield Captains/Shamans/Warriors/Drums. Unlike a lot of other army lists, however, you don't have any required units in this list, so you can technically run it as a Balin's Tomb list (Captains, Warriors, and a Cave Troll or two), as a Balrog-centric list (with or without the Watcher), or a Watcher-spam list (which would probably be more popular if there were Bat Swarms available to us). As we'll look at next with the army list bonuses, however, we TECHNICALLY have a sixth unit . . . that we get for free.

Army List Bonuses

Many of the army list bonuses are the same as we had in the previous edition - the Balrog starts the game with "Shadow . . ." active, making him harder to hit directly (only on a 5+ or 6+), though this does nothing if you're shooting at a Goblin behind him and he's in-the-way. He can also lose "Shadow . . ." to use the ". . . and Flame" rule, which allows you to set a model (friend or enemy, actually) within 3" of him Ablaze on a 2+, so long as he hasn't been Transfixed or is otherwise unable to use Active Abilities (and no, this isn't a shooting attack, so he can use it even if he's engaged in melee). Finally, the Dominion of the Balrog still gives friendly Moria Goblin models within 6" of the Balrog +1 Fight Value, which is great for your F3 Captains and so-so/usually-not-that-useful for your F2 Goblins (what with many warriors getting promoted to F4). The far more valuable part of this rule is that until your opponent has dealt 5 wounds to the Balrog, you never count as being Broken - which is great for denying VPs, but also means you may need a method for quartering yourself to get the game to end when you want it to (and you'll want to avoid games that end randomly when one side is broken unless you think you can break the opposing force).

The big change to the rules is that the Drums in the Deep special rule used to extend the range of your drums from 12-18" to battlefield wide and give you VPs for keeping them on the board when banners scored VPs. Now, you don't have access to drums, but you do get the effects of a battlefield-wide drum all the time . . . for free. Yes, this is the secret sixth profile - you get a 0-cost Moria Goblin Drum that can never be attacked, can never be turned off, and that affects all Goblins everywhere . . . for free. This is a HUGE change, especially at low points levels - and did I mention that it's FREE?!?!?!?! I'm very interested to see what happens to this guy when the Armies of Middle-Earth book drops and whether the alternative Moria option is better than what's here . . .

Monday, August 30, 2021

The Bare Necessities, Part XXXVII: Goblin-town

Good morning gamers,

Well, this is an army I've fought quite a bit and I can't say I've enjoyed any of those games. At all. So when it came to doing this series last year, I passed on reviewing Goblin-town because, frankly, I didn't know how everything worked and what was a good way to tick all the boxes. To be even more frank, I'm not sure you NEED to check all the boxes. 30+ models will basically be a given, but do you need fast troops with this list? What about an actual banner? Ways to buff your models? We'll get into all of that today as we review an army that has its own special place in the hearts of MESBG players.

Two great and annoying models . . .

Goblin-town: The Art of Fast Play
Goblin-town plays a game that several armies do: spam out cheap, horrible models and rely on your outlandishly high numbers to take the day. Unlike armies like the Shire and Sharkey's Rogues, you can support other models - and while your Defense is low (like the Shire and Sharkey's Rogues), the fact that everyone has the equivalent of a spear for basically the same price means you can get LOTS of die into your fights. And I mean LOTS of dice. So why doesn't everyone play this list?

I think the biggest reason is that this army takes FOREVER to take a turn. Moving 30-40 models CAN take a while if you're being super careful, but moving 60+ models takes a long time even if you're trying to move quickly. Movement trays can help, but even with trays it takes a long time. So how can you fix this so you can play within a time constraint?

There are two ways, I think, that this can be done. The first is to embrace the Goblin-town mindset and don't care about where you place things. Veteran gamers may cringe when I say this - but I'm serious: place models so they're backed up by a friendly model, but just move them. No planning, no worries, no strategy - just take up space! If you're moving in the right direction, you might be a bit out of position for one turn, but there will be another turn and you'll be in a spot that's just fine.

The second way (and I think the more competitive way) is to ally with someone else - other armies will be more expensive and will give you other ways of dealing with problems (like big heroes and devastating spell-casters). By bringing in a big hero or two (backed by average-cost to expensive warriors), you drop your model count and can take your turns faster.

So what's the right balance between a high model count and allying in what we need to make a balanced list? Well, we're turning to the Armies of the Hobbit army book and allying with an army that, frankly, would want to keep their army bonus in most cases. But it turns out, you can supplement a lot of Goblin-town weaknesses by just bringing one warband of models from another list.

Monday, June 7, 2021

The Stuff of Legends: the Depths of Moria

Good morning gamers,

We've covered a lot of Legions so far - we've covered almost everything from Gondor at War, we've covered everything from War in Rohan, we've covered both Legendary Legions from the Scouring of the Shire, and we've covered almost everything from the Quest of the Ringbearer. Today we cover the Legion I am most excited to try out at a tournament (our recent escalation tournament wasn't a good format for this Legion, but we'll pull it out soon): the Depths of Moria. 

While my love for the Balrog in the last year-and-a-half is well documented on this blog, I know that most people who have reviewed this Legion have been incredibly critical - NOT because the Legion is bad, but because they already hated the Balrog and this Legion makes fighting the Balrog even harder than it was before. I've also heard people say, "It's fine - this Legion just has the Balrog, so once you tie him down, the Legion is easy to beat." My hope is that this article addresses both of these concerns - the Legion isn't overpowered, the Legion isn't impossible to beat, and it isn't EASY to beat either. It's  . . . well . . . just another Legion. Let's dive into it!

Part 1: What Do You Need?

Legion Tax: 350pts
The only model that you NEED to include is the Balrog. At 350 points, he's a pretty pricey model (only less taxing as a Legion than the Grand Army of the South LL), but he gives you an AMAZING combat profile. On offense, this model is ridiculous - F10/S9 and 4 Attacks is a beastly profile, though it's important to realize that many heroes can get to 4A so long as they have access to a mount, have 3 Attacks base, and are charging enemy infantry (which includes most flying models and monsters, such as the Balrog). Some models (like the Dark Lord Sauron) have 4A as well with a pretty similar combat profile. Other heroes have 4A AND Monstrous Charge (like Cave Drakes, Dragons, the Witch-King with the Crown of Morgul on a Fell Beast, and kind of Smaug--he gets the knock-down, but not the extra attack) or more than 4A (with or without Monstrous Charge, such as the Watcher in the Water while he hasn't suffered 4+ Wounds, the Gundabad Catapult Troll if he gets a 2+ on his D6 roll for his crew, the Champions of Erebor on Chariot, and of course an unwounded Gulavhar). Having 4A base is a pretty exclusive club, but the Balrog isn't the top dog in it.

What causes the Balrog to stand out above the rest (and the thing that makes most people not like him) is that he's got 4A at F10 - he doesn't have to Strike. Unless you're Sauron (who doesn't have an Elven-made weapon) or Gil-Galad (who does have an Elven-made weapon), you aren't guaranteed to reach F10, though a few heroes (F7-8) have a pretty good chance of making it to F10 when they Strike - and many of those models are monsters with really high Strength levels (or they're Elendil or Glorfindel). Since getting to F10 isn't guaranteed for anyone except the Balrog/Sauron/Gil-Galad, there's often a complaint that "no one should be that high." Even Sauron and Gil-Galad can only make it to F10 three times in a game (potentially more often for Gil-Galad if he can kill smaller heroes without using Might, since Blood and Glory gets him more Might), so while they can guarantee a roll-off against the Balrog if they tie his highest roll, they're not likely to be able to sustain it long enough to actually kill the Balrog.

Wednesday, April 14, 2021

TMAT GT: Tiberius's Army Thoughts

Good morning gamers,

This coming weekend is TMAT's Grand Tournament and we're doing an escalation tournament with the following point levels and scenarios:

  • 450 - Hold Ground
  • 600 - To The Death
  • 750 - Fog of War

I've been wanting to throw an escalation tournament for ages - I developed armies in an escalation tournament style to teach people the game since I got started playing (100 points of warriors only, 250 points by adding a hero or two and some additional warriors, and slowly adding more points with additional warriors and heroes until you get to 500-700 points). This approach allows people who are new to the game (or haven't played in ages) to understand the core mechanics slowly and ease them into a game that has (if we're honest) a LOT more rules than the game requires.

Developing armies that can do well at three different point levels and are good at missions that do different things is hard to do - and so I had many armies swirling through my brain before I finally quieted the petitions from the boxes and picked one. Extra bonus points are awarded at this tournament if you have a "nesting dolls" style build, where the 450 is a subset of the 600, which is a subset (naturally) of the 750 - as opposed to having the 450 army be a subset of the 750 army and the 600 be a subset of the 750 army (but not having all of the models in the 450pt list in the 600pt list). Here are the armies I considered taking - and why I didn't chose the ones I did.

Monday, October 26, 2020

Mastering Magic: Augmenting Damage Spells

Good morning gamers,

We've only got two more posts left in this series - and today we have some really fun spells: BladewrathEnchanted Blades, and Enrage Beast. These three spells are held by only five models - three with Enchanted Blades and two special models who alone have Bladewrath and Enrage Beast. While we've looked at spells that do damage (either as a blast, in an area, or to a single model), restore stats/resources, remove stats/resources, protect friendly models from magic, breaking items, neutralizing enemy combatants, scattering models, and provide auric benefits (either by enhancing nearby models/the caster OR by scattering models), today's spells are the only ones that make you more lethal in combat (though I guess a channelled Shroud of Shadows counts as well).

Fair warning, I only have two of the models in this list, so pictures will be scarce . . .


What Do These Spells Do?

The most common of these spells is Enchanted Blades. When cast normally, the caster picks a friendly model within range (6" for all of them) and if cast successfully, the model is allowed to reroll all failed To Wound rolls it makes. When channelled, the target model also receives a bonus of +1 To Wound (which is cumulative with similar rules, such as the bonus provided by using a two-handed weapon or having the Backstabbers/Hatred special rules).

Bladewrath allows a caster to pick a friendly model within range (6" as well) and that model makes Strikes in the Fight phase at Strength 6. If channelled, this is improved to Strength 10. It's important to note that the model itself doesn't become S6/S10, but rather resolves Strikes at S6/S10 (otherwise, this would be a great counter to the Rend/Hurl Brutal Power Attacks or special rules like Monstrous Charge).

Finally, Enrage Beast picks a friendly Bat, unridden Warg, or Spider model within range (12" this time) and increases the target model's Fight, Attacks, Strength, and Courage values by 2 until the End phase. Because this boosts the model's characteristics, this IS a good counter to the Rend/Hurl BPAs and rules like Monstrous Charge. When channelled, the target's characteristics are increased by 3 (instead of 2). While this is a powerful augment, the friendly model then suffers a S10 hit at the end of the round because of how exhausting being awesome can be (most models will be wounded on 3s - which still means a 33% chance of avoiding any damage at all).

All three of these spells are useful - especially if you are using units that "have problems wounding." Adding someone who has these spells can increase your overall damage, but picking the right model to augment is often the difficulty with these spells (and making sure they stay within range). To help with this, let's understand who has these spells and how best to use them.

Monday, September 21, 2020

Mastering Magic: Magical Protection

Good morning gamers,

Today we start our sixth post in our "masterclass" series on Magic in MESBG. We've looked at Sorcerous Blast, Immobilize (et al), auric spells, restoration spells, and area-of-effect spells. Today we turn our attention to some of the most useful spells a caster can have when facing an army with a spell-caster of its own (or multiple spell-casters - THE HORROR): Fortify SpiritProtection of the Valar, and Shroud of Shadows. While we'll only be looking at five models today (three Forces of Good, two Forces of Evil), several of these heroes (Galadriel, Lady of Light from the White Council, Gandalf the Grey from several lists including the White Council, and Ashrak from Moria) can ally with all but four factions in the game either Conveniently or Historically (woe to Arnor, Numenor, Barad-Dur, and Sharkey's Rogues). This means that understanding what these heroes do - and why they might be slapped into a list - is good for any player to know.

Pre-warning: no pictures in this post, mostly because I only own the two Gandalf models and have photographed them a lot already in this series. Call me lazy.

What Do These Spells Do?


Two of these spells are quite straight-forward: Fortify Spirit gives a friendly model (which could be the caster himself) not one but TWO free dice when you make a Resist test against a magical power - and yes, this stacks with other free dice that might come from Heroic Resolve, Resistant to Magic, or a Staff of Power, and they don't require you to spend a Will point of your own to use them. They're just free. When channelled, the highest Resist die also gets +1 to its result (meaning you can automatically resist any spell that is cast against you on the roll of a 5 or 6 - wow-zahs). This spell is an Exhaustion spell, so once cast, you want to make sure the caster (not the person who is the target of the spell) retains 1 Will in their Will store to keep it up.

Protection of the Valar is also straight-forward in that the friendly model that is targeted by the spell is immune to both magical powers and weird special rules for the round (I'm looking at you Golden King of Abrakhan and Dead Marsh Spectres!). When channelled, this spell affects the target and all friendly models within 3" of the target, which can make A GROUP of heroes immune to any magical barrage. Unlike Fortify Spirit, however, this spell isn't an Exhaustion spell, so you need to cast it every round in order to make it work (the opportunity cost is certainly higher, but not being affected by magic for the round is guaranteed).

Shroud of Shadows is the most nuanced of the spells and also the most powerful. Based on the most recent Designer Commentaries, the friendly model that is targeted by the spell is not only immune to magical powers (except from Ringwraiths, maybe Sauron), but is also invisible (granting all kinds of movement benefits) and is immune to shooting attacks and requires a Courage test to charge the model with a reduction of Courage based on the distance the model is from the target. As clarified in the most recent FAQ, models that fail this Courage test get to move normally and aren't rooted in place. When channelled, any enemy models in base contact with the target halve their Fight Value (rounding up). While definitely useful at keeping models from being targeted by spells, this spell ALSO makes it hard to shoot or charge them - perfect for keeping a very important model safe.

Monday, September 14, 2020

Mastering Magic: Area of Effect Spells

Good morning gamers,

Today we start our fifth post in our "masterclass" series on Magic in MESBG. We've looked at Sorcerous Blast, Immobilize (et al), auric spells, and restoration spells. Today we look at some of the most fun spells in the game: area-of-effect offensive spells! As fun as rooting a model in place can be, as great as regaining heroic resources is, and as awesome as augmenting models around you is, we REALLY want to do massive damage. While you can do that with Sorcerous Blast under certain conditions, it's easier with some other spells - or is it? The spells we'll be covering today are: Collapse Rocks, Wrath of Bruinen, Nature's Wrath, Panic Steed, and Tremor.

What Do These Spells Do?


These spells can be grouped together in different ways, but here's the basics of each spell:
  • Panic Steed removes the mount of the target (becomes an area-of-effect when channelled);
  • Nature's Wrath knocks enemy models Prone near the caster (and deals S2 hits when channelled);
  • Wrath of Bruinen also knocks enemy models Prone near the caster, but also inflicts a S2 hit (channel for higher Strength on the hits);
  • Collapse Rocks deals a S5 hit to a target model that is near a rocky piece of terrain (becomes an area-of-effect when channelled); and
  • Tremor deals a S6 hit and knocks models Prone who are on a D6" line away from the target model.
All of these spells have the ability to affect an area of the board - but some require you to channel them in order to get the area of effect to occur. Wrath of BruinenNature's Wrath, and Tremor all affect a given area of the board (3" around the caster for Wrath of Bruinen and Nature's Wrath, D6" line away from the target for Tremor). Collapse Rocks and Panic Steed become area of effect spells when channelled (2" around the target for Collapse Rocks, 3" around the target for Panic Steed).

Most of these spells also knock their targets Prone: any hostile figure within the affected area of Wrath of BruinenNature's Wrath, or Tremor are Knocked Prone (with cavalry suffering from Knocked Flying instead of rolling on the Thrown Rider chart). Collapse Rocks and Panic Steed don't innately Knock Prone, but Panic Steed does require a roll on the Thrown Rider chart.

Most of these spells do damageWrath of Bruinen does Strength 2 hits (Strength 3 if channelled, Strength 8/9 if the target is in a water feature) to all affected models, Collapse Rocks does a Strength 5 hit to all affected models (so long as the targets are near a rocky piece of terrain), and Tremor does a Strength 6 hit to all affected models. Panic Steed removes the mounts of the affected models, but otherwise doesn't do any damage. Nature's Wrath does no damage innately, but does a Strength 2 hit to all affected models if channelled (basically becomes Wrath of Bruinen without the water feature rule).

Finally, most of these spells affect only enemy modelsWrath of BruinenNature's Wrath, and Panic Steed only harm enemy models (which makes them great spells to cast when your opponent charges one of your battle lines). Collapse Rocks and Tremor have to be used more carefully, since their damage (Strength 5 and Strength 6 hits!) are suffered by both friendly and enemy models.

For those of you who like charts, here's the visual summary of what is described above:
  Collapse RocksNature's Wrath Panic Steed  TremorWrath of Bruinen 
 Area of Effect?X*
 Knock Targets Prone? **
 Damage Spell?** 
 Affect Only Enemy Models?  
* Channelled version meets the requirement
** Models that get a 1 on the Thrown Rider chart will be Prone and take a S3 hit

Monday, March 30, 2020

The Bare Necessities, Part XIII: Moria

Good morning gamers,

We’ve talked about Minas Tirith, Isengard, Rivendell, Mordor, Lothlorien, Angmar, and Numenor already in this series on list building and today we turn to my first army of Evil – the one that took me a LONG TIME (and ultimately a Balrog) to enjoy using: Moria. Moria has a surprising number of warrior and hero profiles and their variance is huge (literally “huge” in size of model, points cost, and $$$ to acquire). That said, Moria’s wide selection of heroes (read monsters) and warriors (read monsters) can be really expensive and leave you wondering what you’re actually getting for the purchase of that model. After nearly 10 years of collecting Moria (and occasionally enjoying in game-play), I’ll share some of my thoughts that made me agonize over this list for so long (and even now, I’m not convinced it’s quite right – I think it’s mostly right, but you’ll see what I mean when we get into it).

Moria: Who’s Your Centerpiece?
While Minas Tirith armies need to decide which of the “big 3” to run (King Aragorn, mega-Boromir, or Gandalf the White), Moria armies have a “Big 5” to deal with: do you run...
  1. A Balrog (who will eat up half of our points today)?
  2. A Cave Drake (or two)?
  3. A Watcher in the Water (maybe with a Cave Drake)?
  4. A Dragon (with wings and one other upgrade)?
  5. Or Durburz (who is not anywhere near as big as the other options, but if you don’t take the Balrog, he makes for a pretty good army leader and can be run with basically any of the other options without much difficulty). 
The beauty about Moria is that while you have lots of options to choose from, you aren’t stove-piped into taking just one of them (a Moria army could easily field Durburz alongside any of the monsters - including the Balrog, Cave Drakes are fairly inexpensive as well). Today, we’ll be looking at my favorite of the Moria monsters (which our dedicated readers already knew was going to happen, right?) and a way you can build your Moria list around this monstrocity. Here’s the list . . .

Monday, January 6, 2020

The Bare Necessities, Part I: On Cavalry (or Fast-Moving Infantry)

Good morning gamers,

Today’s post kicks off a new series on the “bare necessities” for any well-balanced army to employ based on the scenarios you may have to play. While not all unit types (cavalry, archers, and monsters in particular) are available to all factions, most armies can find a way to get cavalry-like movement, archer-like shooting, or monster-like heroes into their armies. In this series, we’ll be looking at some of the most basic things to include in your army in order to give you the opportunity to score maximum points in a game (assuming that the scenarios you play are random and not pre-defined). All games are based on both how you play AND how your opponent plays AND both of your dice rolls, so while your army list doesn’t guarantee you a victory, it does decide how many points you are able to get. As a review, the following categories give you points in different scenarios:
  • Getting units off your opponent’s board edge (Reconnoitre);
  • Getting units within a given radius of one or more objectives/points on the map (Domination, Hold Ground, Capture and Control, Heirlooms of Ages Past, Fog of War, Storm the Camp);
  • Having 1+ banners alive at the end of the game (To The Death, Heirlooms of Ages Past)
  • Wounding/killing the enemy army leader or enemy heroes (every scenario, but most importantly Clash By Moonlight, Contest of Champions, Fog of War); and
  • Wounding lots of models, either because you’re counting models or because you’re trying to Break/Quarter the enemy army (every scenario, but most importantly To The Death, Lords of Battle, Contest of Champions)
When you break down these five points, it leaves you with five elements of your army that you would need to include if you wanted a chance at maximum points in a scenario:
  • Fast troops who can claim objectives or exit the opposing board edge;
  • At least one actual banner;
  • Ways of delaying/avoiding being broken (often in the form of large numbers);
  • Means of killing enemy heroes; and
  • Means of keeping your own heroes alive.
These five points will be the crux of what we’re going to be looking at over the next five posts. I figured I’d begin with the one that I’ve only recently come to appreciate: the inclusion of fast troops in your list for strategic purposes. In this post, we’ll be looking primarily at cavalry, though we’ll also be looking for ways you can get access to cavalry-like speed without cavalry (for the factions that don’t have access to them). For additional reading on cavalry, I highly recommend some thoughts Centaur wrote in 2012, a very detailed analysis of what mounts get you from Rythbryt in May 2019, and some of my own thoughts on throwing weapons (if you’re looking into skirmish cavalry).

Friday, December 20, 2019

Last Month on TMAT (November 2019)


November was full of other-life stuff (with personal travel for all of us), but we still got some content up! With our series on shooting continuing and a few workbench updates, there's a mixture of hobbying and tactics if you need to catch up!

Thursday, October 31, 2019

Armies of Middle-Earth SBG: Moria in the Middle-Earth Strategy Battle Game

Image result for moria

Deep beneath the misty mountains lie the caverns of Moria. In ages past, the greatest kingdom of the dwarves gave way to foul goblin invaders. After the fall of Azog, the land lay quiet for years, until Balin's ill-fated expedition, and the Fellowship's own venture into this forsaken land, awoke an ancient malice...

Few armies in the Middle-Earth Strategy Battle Game have such a diverse list as Moria. From spammable cheap troops to elite, monstrous heroes, there is no such thing as a "standard" Moria force. So grab your torch, brush up on your elvish passcodes, and venture with us into the long dark of Moria.

Photo Credit: YouTube


Monday, October 21, 2019

Throwing Weapon Theory: How to Make Them Work, Revisited

Good morning gamers!

In our last post, we looked at how shooting has changed in the new rules of the Middle-Earth Strategy Battle Game and what kinds of considerations you should think about when it comes to including archery in your army. In general, I think all armies benefit from having some kind of archery presence, but some definitely benefit more than others. While most armies have a limit of 33% of their models being able to carry bows, you can allow more of your army to contribute to shooting damage by including throwing weapons in your army (especially on your non-bow-armed models). That’s what we’ll be looking at today. This post revisits a topic we covered back in July 2015, for those who want to see what was written there . . .

How have throwing weapons changed?

There are three big changes that have come to throwing weapons since I got started playing the game back in September 2010. The first and foremost change is that the number of “throwing weapon types” has grown. While whips existed as a special rule and not a fully-fledged piece of gear, all other kinds of thrown weapons (be they daggers, axes, or spears) were the same – 6” range, Strength 3 hit. With the Hobbit Strategy Battle Game, a distinction between throwing spears (8” range) and all other kinds of throwing weapons (6” range) was added. This has been retained in the new rules, with some other throwing weapons (like whips) being canonized as gear items as well.

The second change is that unless you’re shooting your throwing weapon on the charge, you suffer the “scoot-and-shoot” penalty (see our last post for what this is). While only a small change to your To Hit roll, it makes running away from an assaulting force a bit less effective (which, in a game where 1 pip of difference a die can have huge consequences, is no small thing). Still, throwing weapons are still quite valuable despite this reduction – and the fact that you don’t suffer it when you charge means you should be charging into combat with these guys (because you might just get a lucky wound in!).

The third change (and perhaps the most nuanced of them) is the addition of Heroic March. When I did my last post, the Hobbit rules were introduced and Heroic March became a thing (but we didn’t adopt it in our gaming group until the new release). Heroic March allows infantry models to overcome the greatest problem with throwing weapons: getting extra movement to start the next round as close as possible to the enemy throwing weapon models. While Heroic March doesn’t allow you to charge anyone, the extra 3-5” of movement (which stacks with movement gained from a Drum, if your team can get one) is invaluable. Where Dwarf and Goblin teams were at a distinct disadvantage with 5” move against 6” throwing weapons, now they can clear 8” of ground in a single turn (which should be enough to stand just outside someone’s control zone OR make up ground if your opponent ran like mad away from you to buy himself more space). While this doesn’t make your soldiers more resilient against throwing weapons, it might take a turn or two less to close with them (which can be huge).

With these changes in mind, we’ll dive into what makes throwing weapons so great (and probably my favorite aspect of the MESBG game).

Monday, September 30, 2019

Workbench Update: Moria

Hello gamers,

When I got started in the Middle-Earth Strategy Battle Game in September 2010 (LOTR SBG back then), I bought the core game: The Mines of Moria. My first tradiditonal army (read, wasn’t composed entirely of heroes) was, therefore, Moria. Within a month of getting the core game, I picked up Durburz on eBay and converted one of my archers into a Moria Goblin Shaman. With 22 Goblin Warriors (lost one and never found it again), 2 Goblin heroes, and 1 Cave Troll, I had a very impressive 25 models in a 300 point force … or so I thought. At 300 points, it’s hard to get anything in your army, but the hardest thing for most armies to get are numbers. As my collection grew (Lothlorien, Khazad-Dum, and Isengard by the end of that year – and many more armies since), Moria has in many ways fallen on the wayside. This is true for a number of reasons:
  • They don’t have good magic casters and I love magic casters;
  • They don't have good archery and I love archery;
  • They don't have any decently priced powerful heroes and I love decently priced powerful heroes;
  • Cave trolls and other monsters don't resist magic well and I love magic casters;
  • Their basic troops get crushed by high-strength archery and I love archery;
  • They get lots of troops UNLESS they get powerful monsters, which means they don’t spam as well as some other civs that can field powerful heroes (and I love powerful heroes).
That’s a lot of reasons (really three reasons used twice each). So, today we try to rectify it by giving these Greenskins some love and helping them look a little better on the table (with the ultimate goal of making me want to run them more). This post will primarily focus on what you can do with Goblin bowmen models and in particular highlight how you can convert them into heroes.

Monday, August 26, 2019

Using/Fighting Spellcasters: Unlimited Casters, Revisited

Good morning gamers,

We come to the last post in this series – we’ve revisited a four-part discussion we did years ago on Combat Mages, Auxiliary Mages, Multi-Purpose Will Mages, and now we finally address Unlimited Mages. The original post is here. Of all the mages in the game, these types of casters have the potential for the most Will in the game (in aggregate) and are virtually the only casters who can be active at casting magic each turn for the entirety of the game. For our purposes, we’re following this taxonomy for casters:
  • Multi-Purpose Will Mages: Anyone with the Will of Evil rule (or a similar rule) and has spells (who uses Will to cast magic AND stay alive…and possibly other things);
  • Unlimited Mages: Anyone who gets “free Will,” has spells that can be cast, and does not fall in the previous category;
  • Combat Mages: Anyone with 2+ Attacks, has spells that can be cast, and does not fall in either of the previous two categories;
  • Auxiliary Mages: Catch-all for everyone else, usually limited casting with some kind of immediate/lasting benefit to the army.

Thursday, August 15, 2019

Armies of Middle Earth SBG: Goblin-Town in the Middle Earth Strategy Battle Game

Related image

Updated May 30, 2023: Thus far, we've been looking at armies with huge heroes and elite troops. Don't get me wrong--it's fun to play armies with beefy stat lines and heavy armor. But sometimes it's good to shake things up with a good ol' fashioned horde and drown your opponent in buckets and buckets of dice. 

Today, we're taking a look at the hordiest of horde armies: Goblin-Town, from the Armies of the Hobbit. Unlike the other armies we've looked at, Goblin-Town has very few profiles, and most of them (Grinnah, Goblin Captains, Gollum, and Goblin Warriors) have nearly identical statlines with just a few different characteristics between them. But don't let that fool you: playing this army demands a lot from you, and dishes a lot at your opponents.

Plus it has its own theme music!  One version is an awesome classic. The other... not so much.

Monday, August 5, 2019

Using/Fighting Spellcasters: Auxiliary Mages, Revisited

Good morning gamers,

In our last post, we revisited the subject of combat mages in MESBG – how the heroes we covered in a post a long time ago have changed and what other heroes we failed to cover before. In the older post, we lumped in a discussion on Auxiliary mages who do a few niche things to help your army because at the time, the only one I wanted to talk about was the Moria Goblin Shaman. Today, we’ll be taking an in-depth dive on Auxiliary mages across the lists and explore how to get the most out of them. As a reminder, we’re following this taxonomy for casters:
  • Multi-Purpose Will Mages: Anyone with the Will of Evil rule (or a similar rule) and has spells (who uses Will to cast magic AND fight AND stay alive…and possibly other things);
  • Unlimited Mages: Anyone who gets "free Will," has spells that can be cast, and does not fall in the previous category;
  • Combat Mages: Anyone with 2+ Attacks, has spells that can be cast, and does not fall in either of the previous two categories;
  • Auxiliary Mages: Catch-all for everyone else, usually limited casting with some kind of immediate/lasting benefit to the army.

Wednesday, June 26, 2019

A Pocket Full Of Power, Revisited


Good morning gamers,

A long time ago (almost seven years ago now), I put up a post on different allied contingents you could get from the White Council to add to a traditional force in order to compensate for weaknesses or just include some White Council characters into an existing army (in that case, I looked at Minas Tirith, though in the comments I noted that you’d get a more thematic feel from Rivendell or Mirkwood). Today, we’re coming back to this idea of allies from a slightly different tact:

Given the historical/convenient army restrictions of the Middle-Earth Strategy Battle Game, what are some heroes/warbands you can ally into your army that would compensate for some key weaknesses without being an overly-large burden on points?

We’ll be going beyond the White Council today, but I’d very much like to hear the allies you like to use. The requirements I’m providing for this post are that they can’t be more than half of your army’s point value (we’re playing 700-pts right now on TMAT, so for me that’s 350). I will note that the Forces of Evil will not show up prominently here, since most evil armies are Impossible Allies with each other (and so you suffer a LOT by spending points on models that won’t be able to call heroic actions/Stand Fasts that affect models from another contingent). That said, you will see some evil models here, though they may not trait as high as you want. Without further ado, here we go:

Tuesday, April 30, 2019

I Saw Three Trolls (and I'm tired of fighting them)

Good morning gamers!

This post kicks off a three-post series on some random musings I've had on armies of evil - I normally play armies of good (I'm that kind of guy), but despite my pure heart and lawful-good personality, I am the proud father of three stormtroopers. So...I play against a lot of evil armies (and collect a lot of evil armies so my stormtroopers have something fittingly evil to use).

So today's post involves some thoughts I've been mulling around for quite some time. The primary driver for these thoughts is that recently (much to my delight), my son Gorgoroth has started playing the game. After I showed him the new rulebooks, he wanted to read the books - so I said, "Let's start with The Hobbit." So we did - and we're reading it now. Some of the first characters Bilbo meets on his adventures are the three Trolls - Bert, Tom, and William (not Bill - he's called William in the book, so that's what we call him). Shortly after running into these three characters, Bilbo is plunged into the depths of Goblin-town and meets "the Great Goblin" and all his little minions. As we met these characters, my son asked, "What do these guys look like in the game?" So I showed him.

Monday, March 4, 2019

The Armies of the Hobbit, Part II: The Other Evil Armies

Good morning gamers,

This post will wrap up the evil armies from the Hobbit - and the lists we have today don't really synergize at all as far as theme goes. So, we'll be covering spiders and goblins today - things should be interesting

1) The New Lists: Dark Denizens of Mirkwood and Goblin-town (but what about the Trolls and the Dragon man?)

There are four evil lists we haven't covered yet: the Dark Denizens of Mirkwood (predominantly spiders) and Goblin-town (completely filled with goblins). Both of these lists have one thing in common: they're very traditionally hero-and-warrior teams (as opposed to the all-hero lists that are The Trolls and the Desolator of the North). I decided that we're not going to cover army lists for using The Trolls or the Desolator of the North for two reasons: first, because building lists at the 600pt (or higher) level are just not all that interesting, and second, because I've already covered lists that bring The Trolls already both in the last post and in a previous Armies of the Lord of the Rings post. For Smaug, I've chosen not to cover him because not only does he not fit in a 600 point game, but also because you have to be playing a really large game (1000+ points) in order for his exorbitant point cost to not eat all the points you have (very uninteresting).


Instead, we'll be leaving the discussions for the Trolls to the lists that bring them and we'll wrap up today's post by talking about ways to fight against Smaug (should you face him). We'll be assuming a 700-point game and provide two sample lists that showcase the ability to fight Smaug. By brainstorming ways to fight Smaug, we'll get an appreciation for what he can do (which is kind of like evaluating him). With that, let's take a closer look at the two lists we'll actually be reviewing today.


Friday, November 9, 2018

New Rules - Part III: Angmar and Moria

Good morning gamers,

In our first post, we discussed some of the rules changes that I thought were good/not-so-good with the new rules set. We then looked at Mordor to see a few different lists you can run with their army bonuses (and whether keeping the army bonuses are worth it). Today we're going to look at the armies that used to be included in the Moria and Angmar warbands book (which are conveniently still Moria and Angmar), but both of these army lists have been reviewed already on Mik's Veni Vidi Vici blog, so take a look at that for other takes by great players of the hobby.

Unlike Mordor, Moria and Angmar rely heavily on the old army structures that we found in the Legions of Middle-Earth book. As such, there are some big changes for Moria (less so for Angmar) from the Warbands book (one of which I don't like), but ultimately I think it drifted towards where it always should have been.

1) The New Lists: Moria and Angmar

Back in the Legions days, there were two Moria lists - the "Moria" army list and the "Dwellers Below" army list (which was basically generic Goblin heroes, Wild Warg Chieftains, Moria Goblin Warriors, Wild Wargs, Bat Swarms, and Giant Spiders). Between the two lists, you could ally with basically anyone, but if you wanted Durburz in your army (he was the only named hero back then), you needed to run Moria proper (not the other one). In the new version, they've basically eliminated the second list altogether, distributing the wild beasts of Middle-Earth in the Angmar list (for Wargs) and the Dark Denizens of Mirkwood list (for spiders), though thanks to Druzhag the Beastcaller you can include bats, spiders, and wargs in your army (Ashrak also allows you to get spiders), so if you WANT those creatures, you can still get them.

Not much to say about Angmar - they've remained mostly unchanged from release to release. The one major change that I found is this: back in the Legions era, Spectres were D5. In Warbands, they were D6. Now they're D5 again. Coupled with the fact that spears don't augment the front-line guy like they used to in Legions, Spectres have become a lot less powerful than they used to be. Still, they are Terror-causing warriors who can move low-Courage models with ease wherever they want, so having a few in your army isn't bad (though having a lot is probably a waste).