Good morning gamers,
Today brings us to Part IV in our series on building Minas Tirith/Osgiliath terrain and today, we're turning to the walls and plinths and doing the monotonous job of detail work . . . ugh. Easily the least fun part of any terrain task is adding rote detail to things - not adding cracks, impressions, colored washes to simulate filth and such, but the drawing of brickwork lines, the indentation of certain bricks to add character, that sort of thing. Yes, it's important to the end result of the build, but it sure . . . is . . . boring.
So today, we're going to do all that dull stuff, but to keep our sanity, we're also going to do other things - namely adding our water features to two of our panels, spraying the board so it isn't pink/black, and prepare the board for use in Osgiliath missions! Let's get into it!
 |
| Photo Credit: Sott.net |
Detailing The Outer Wall
If you've seen Lachie's videos on YouTube for the Minas Tirith project, you know what this entails: running an aluminum foil ball around the faces of the wall to add texture, followed up by depressing certain stones with something solid (I've chosen the box for my utility knife blades, like Lachie does), adding some cracks to some of the stonework, and noting where I'm going to add green bits for moss growth. I then slathered these guys in a mix of Mod Podge and black paint so they'd be protected from the spraying that's coming:

I need to paint a few bricks here and there green, black, or grey (specifically choosing sections that were thinly mod-podged) and then spray a gentle white primer coat over it, but I plan to do that after I have the crenellations done. Once they're sprayed and have been washed in black, I think they're going to be great, but I don't want to start washing until I have the gatehouse done too.
Now lest you think I have the worst of this wall work behind me, I have a 48" strip of the Second Level wall to do after the gatehouse and crenellations . . . but I'm tired of doing this menial work and so we'll tackle that some other time. :)
Spraying the Board
I don't think there's a more mindless job than applying spray paint to a board - I mean, you just spray it, right? Well, I'd never sprayed over Mod Podge before and so I was a little scared about the result. Despite a few of the boards being less-dark in their final Mod Podge application, I sprayed away and got six of the panels done (including two of the river tiles):

As you can see below, there was some damage to the boards where the mod podge didn't build up right, but I'm not worried - we've got clump foliage and grit that we can apply here to make things more interesting:

I got six of the boards done at first because I ran out of spray paint, but after ANOTHER trip to the hardware store, I got another can and got five of the remaining seven tiles of the board sprayed (still need to do the second level panels - and all the walls, of course).
Three of the panels (two 1'x1' panels and one 1'x2' panel) are grassy plains leading to the walls of the city, so those will need some earthy brown/green colors followed by some flocking mix and a sealant spray - simple enough, but more on that in a later post.
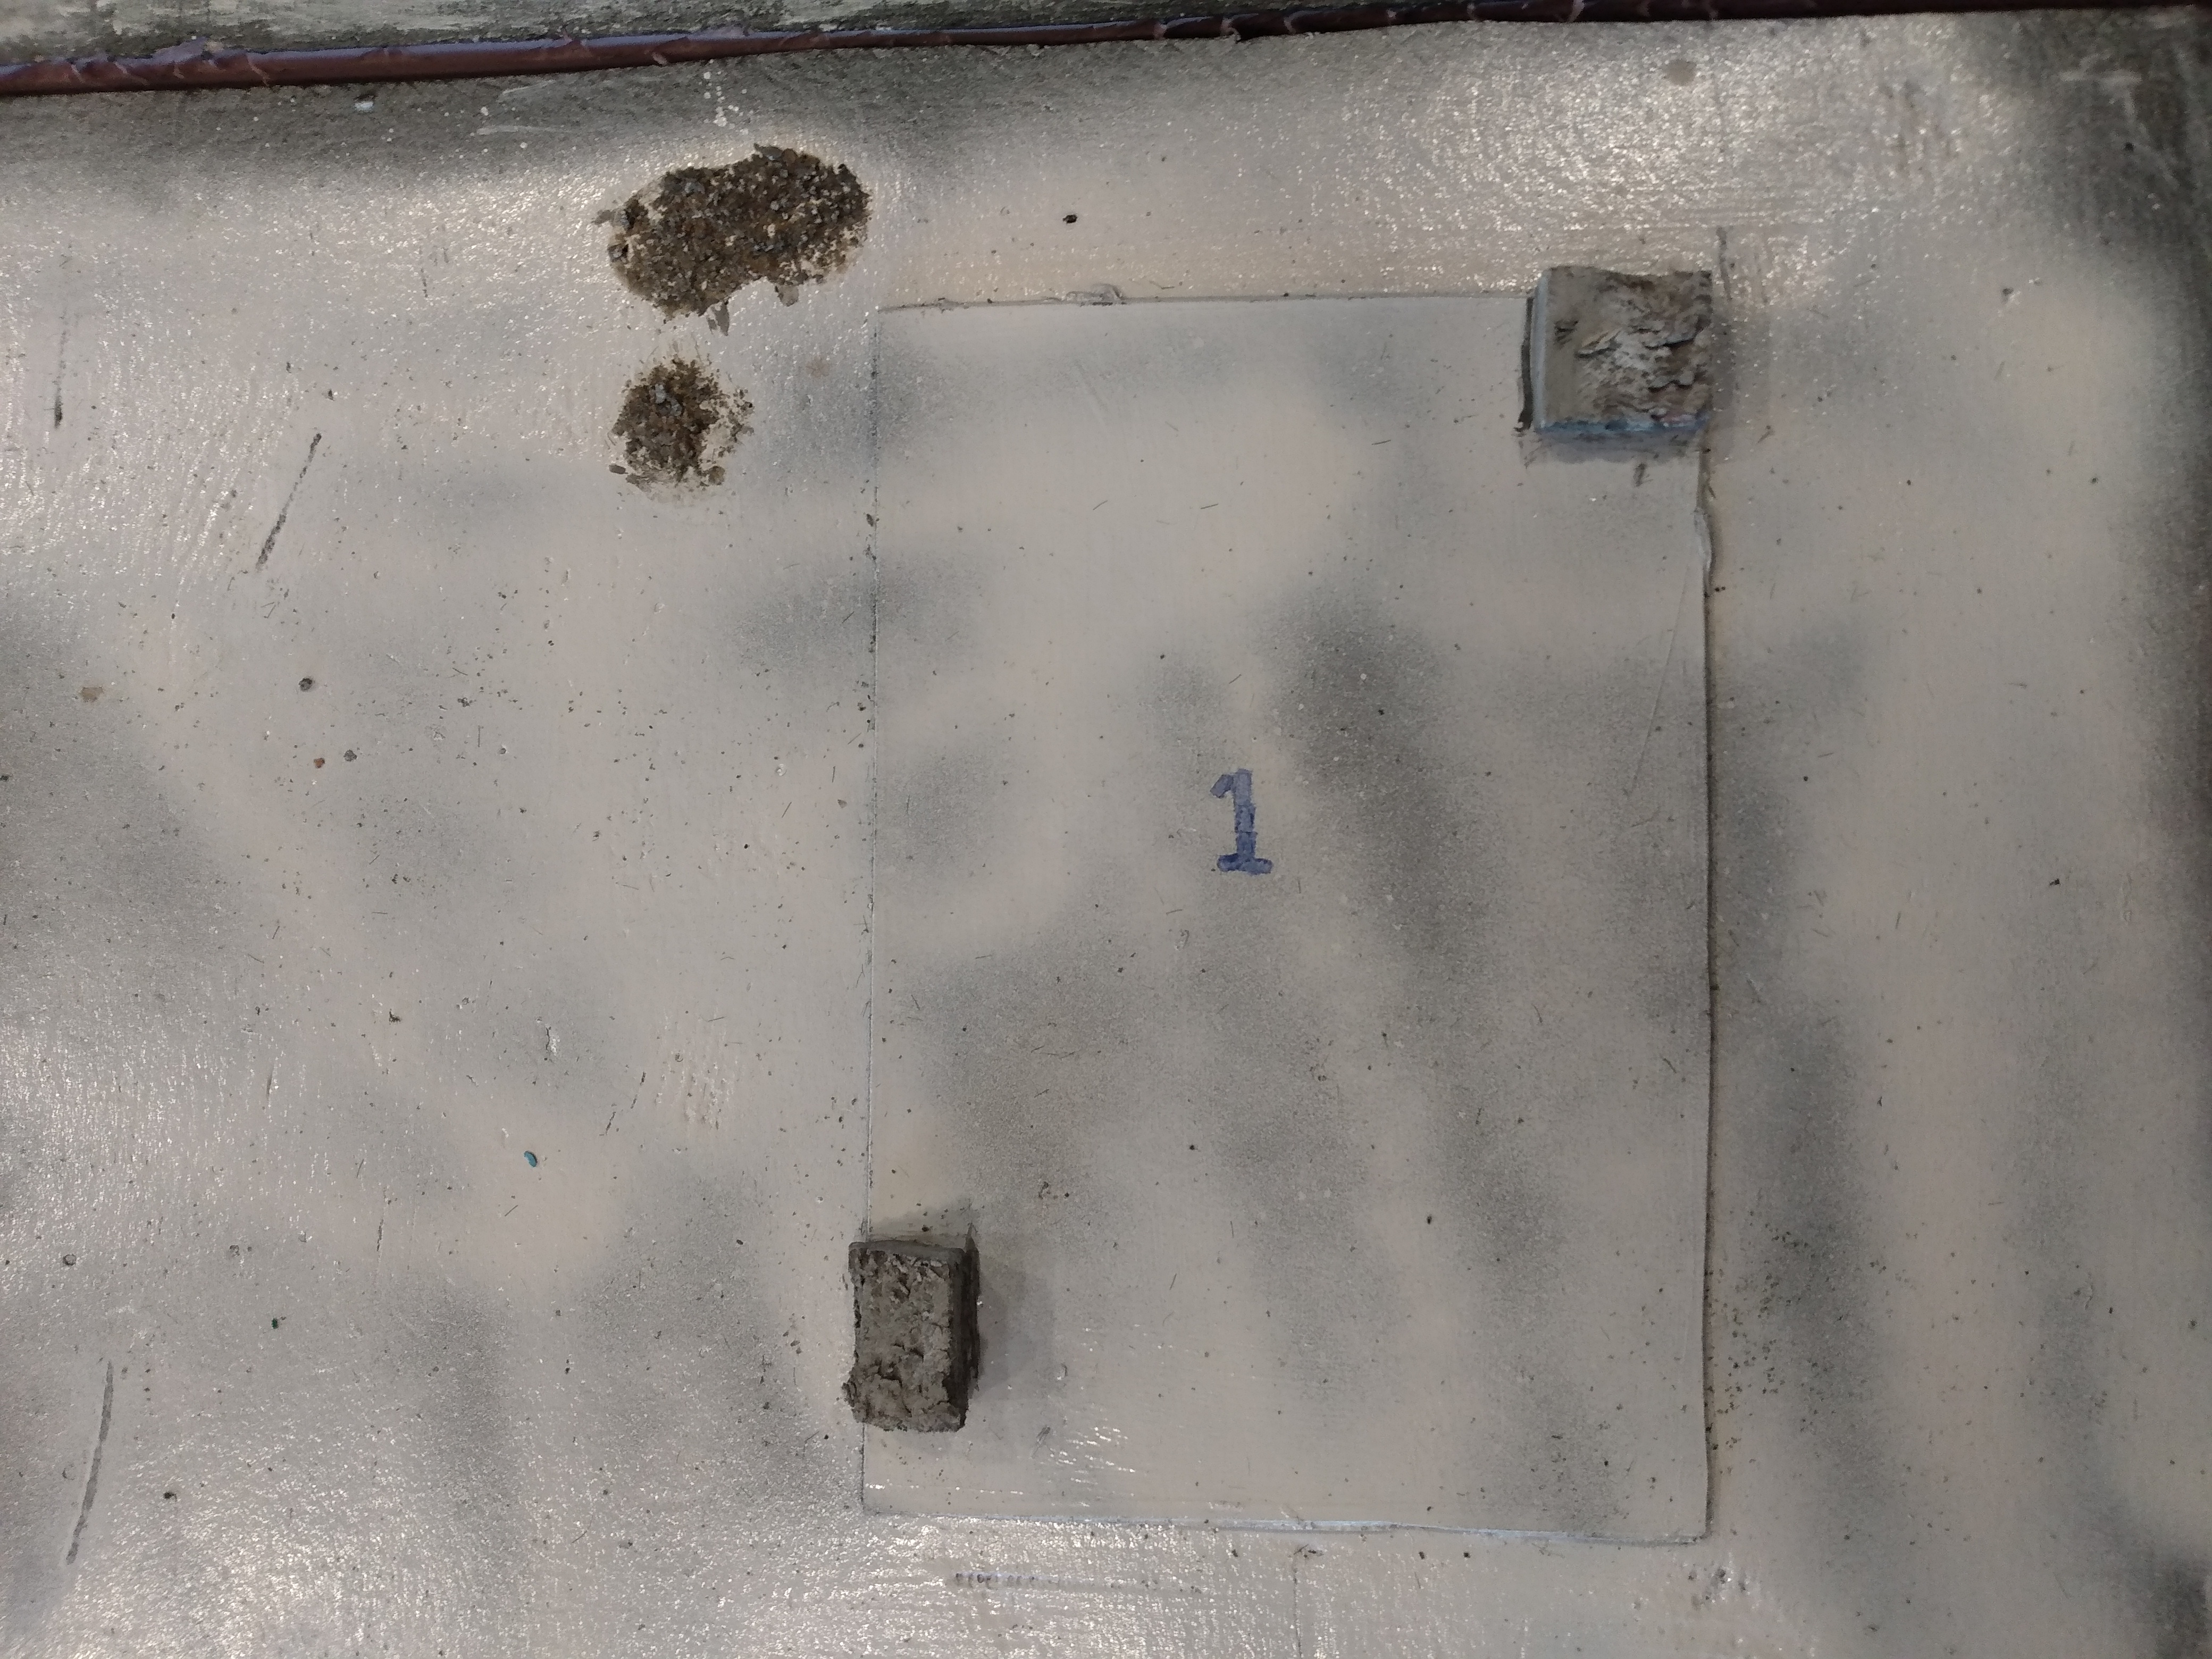
Detailing The Building Plinths
This part was easy but tedious (I mean, it's not wall-stonework-tedious, but it's still tedious). I placed in the center of each building floor a brickwork number - something to help keep track of which building is which in scenarios like Fog of War (something I tried in my Bree board that seems to have worked pretty well). I plan to do more brickwork around each plinth and add a brick circle around each number, but that will come later:

I then placed the four buildings I constructed in a previous post on some of the plinths and, without gluing them in place, made note of where the buildings would be and applied glue/some stone blocks to where they were:
I didn't do this for all of them - I want each building to nestle into a particular spot neatly, so until I get to work on the next batch of buildings (more on that later), I won't have them all textured. These were the only ones I wanted to do for now, so once the glue dried, I dry brushed the stone in black, grey, and white layers and sealed everything in place with a spray-on sealant:
 |
| Sealant ate my rocks a little - but with some dry brushing, it'll be fine . . . |
My plan is to also add some really small magnets in both the bottoms of the buildings and the plinths so that the buildings (which aren't heavy at all and shift a lot) will stay in place. Okay, just one last thing to do: water stuff!
The Water Sections
I've seen a lot of people do water feature stuff on their boards - pouring resin over top, taping gently to avoid air bubbles down deep in their resin, and praying that a mess doesn't occur when they do this on the SIDE of a board. Well, I have a water-on-the-side-of-the-board project and so I immediately said "no" to resin water effects. Instead, I'm going to use a method I've tried before: toilet paper.
Yes, toilet paper - and no, this isn't an original idea from me. I got some toilet paper from the bathroom, got some glue mixed with water, and spread the watered-down-glue mixture on part of my water section. I then laid a few squares of toilet paper down and used an old paint brush to smush the toilet paper down. I applied some more glue over top to soften the toilet paper more (mixing in some dark blue paint to help make some of the water look deeper) and get rid of any designs on the roll and kept going:
 |
| The top panel is still wet, the bottom panel is what it looks like when it dries . . . |
 |
| Amateur - I got the darker water section flipped and it's next to the shore, but it still looks cool. :-P |
And with that, most of the board pieces are set and ready to go (just need to do the second level). I'm really excited to see things coming together - but we're not done quite yet . . .
 |
| Bonus preview: these waterfront tiles have no buildings on them, so I'm making some scatter terrain to go on them (and six objective markers) - there will be 13 pillars altogether when I finish . . . more on that in the next update! |
The Board Is (Almost) Set
With these sections done, we can now play a lot of the scenarios from Gondor at War and Quest of the Ringbearer. The latter is the easiest (only one mission) - and with a new Osgiliath box coming out, I'm excited to try it. Here's what the Osgiliath scenario from Quest of the Ringbearer will look like:
 |
| The three objective buildings will be the ones with only half the building on the board - easier that way . . . |
We're also ready for the Defence of Osgiliath, the Retaking of Osgiliath, and the Fall of Osgiliath missions from Gondor at War:

And the Raiding of Pelargir/Battle for Pelargir scenarios:

We're also ready for Atop the Walls (needed for Fantasy Fellowships):

And the Gate is Breached scenario:

The Streets of Minas Tirith scenario requires us to get the second level board done, so we're not quite there yet (but this is a really cool look at what the before and after looks like, isn't it!):

We're also ready for the Madness of Denethor (another Fantasy Fellowship mission):
 |
| Those walls were sized intentionally . . . |
Finally, we've got the Docks of Harlond scenario, which could be done the same way as Osgiliath and Pelargir, but could also be done this way (showing that it leads to the Pelennor, instead of being "just a city"):

Conclusion
The board is nearly ready for game time (though we've played some fun games on it to test it out in its part-way state). Of course, the obvious thing we're lacking is buildings - at least one more of each kind of building would be a great start (since we can then use half buildings to get us to a "fully populated" board). In our next post, we'll be wrapping up work on the modular pillars for the water sections (since they need terrain on them) and the aforementioned buildings (and while I'd love to say that "that'll be a cinch", I know it'll take all my love for hobbying to do - it's pretty tedious stuff).
Lest you think the next post will be a three-line entry that says, "I did it - here are some pics," think again - I don't want any of my buildings to be carbon copies of each other, so instead of "just doing the templates again," we're going to do something a little bit different and customize some buildings based on the templates I got from Zorpazorp. See you next time - and until then, happy hobbying!
No comments:
Post a Comment