Today begins a new series that we'll be running through November on how to take your Gondor at War collection (NOTE: I updated the post on what you need to get with the money totals at the end due to the outcry that I didn't do that this time - comes out to about $3500, as I expected) and use it in Matched Play. Gondor at War has several factions that could be run pure (Minas Tirith, Rohan, the Serpent Horde, and of course Mordor) or as any of the Legendary Legions from that book (most notably the Riders of Theoden, the Return of the King, the Army of Gothmog, and the Black Gate Opens), but most of those kinds of builds either a) don't have all the models you'd want in your army/Legendary Legion (no Rohan Royal Guards, up to 6 Warriors of the Dead with spears, etc.) or b) have already been covered in our Bare Necessities series. So instead of re-hashing lists that we've already looked at, for some of these factions, we're going to look at competitive alliances you can make to make your game more interesting!
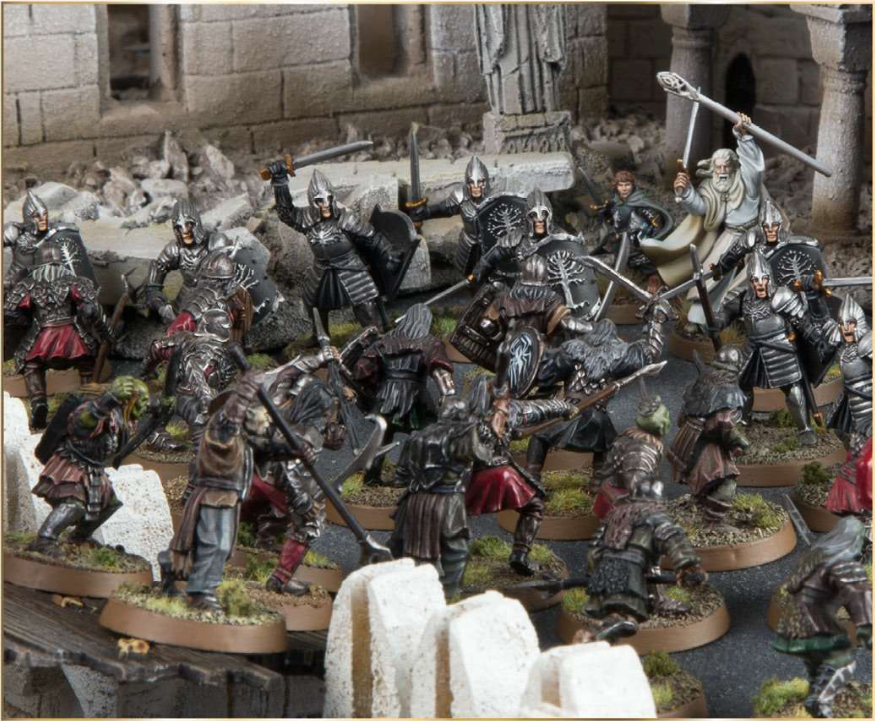 |
| Photo Credit: Gondor at War |
Today we begin with one of the focal-point factions: Minas Tirith. Naturally, this means we're going to have a lot of models to work with - in the scenarios we have:
- Faramir, Madril, and Damrod (but no Anborn or Mablung)
- Mega-Boromir
- Gandalf the White and Peregrin Took (Minas Tirith version)
- Denethor and Irolas
- Beregond
- Hurin and Ingold
- 37 Warriors of Minas Tirith (12 shields, 12 shields and spears, 12 bows, 1 banner)
- 24 Rangers of Gondor (16 bows, 8 bows and spears)
- 12 Knights of Minas Tirith with shields
- 4 Citadel Guard
This is one of the most versatile factions in the game and usually doesn't have a problem getting a horde of F4 infantry (usually with Boromir nearby to make a good chunk of them F5). In Gondor at War, though, we have up to 24 Rangers of Gondor at our disposal (but they'll be eating into our bow limit) and 4 Citadel Guard . . . and that's it. No OsVets (and more importantly no Fountain Court Guard) included, so we're looking at a pretty rough go of it if we wanted to have our usual F4 battle line with just our Minas Tirith troops. So instead, we'll be looking at a list today that allies some cheap F4 models into Minas Tirith - and still sticks to the theme of defending Minas Tirith from invasion. Let's dig into the list!
Here's our list - and we've stuck to a scene in the Return of the King too:
- Gandalf the White on Shadowfax
- 10 Warriors of Minas Tirith with shields
- 3 Rangers of Gondor
- 2 Rangers of Gondor with spears
- HISTORICAL ALLY: Prince Imrahil of Dol Amroth on armored horse with lance [ARMY LEADER]
- 2 Knights of Dol Amroth on armored horses with lances
- 10 Axemen of Lossarnach
- 6 Blackroot Vale Archers
700pts, 35 models, 11 bows hitting on a 3+, 14 D6+ models, 4 cavalry, 6 Might points
This list comes to us from a passage I recently re-read (well, re-listened to) in The Return of the King, Book 5, Chapter 4:
So it was that Gandalf took command of the last defence of the City of Gondor. Wherever he came men's hearts would lift again, and the winged shadows pass from memory. Tirelessly he strode from Citadel to Gate, from north to south about the wall; and with him went the Prince of Dol Amroth in his shining mail. For he and his knights still held themselves like lords in whom the race of Númenor ran true.
Sometimes, Tolkien could really write - and this list does homage to how united the various factions were that defended Minas Tirith at the beginning of the siege of Minas Tirith. Let's dig into why we structured our army this way and how to use it!
Army Theory
Okay, veterans of the game are probably screaming, "Why didn't you take Boromir in place of Gandalf? Don't you know you can have F6 guys with those overlapping banners?" My own preference for Gandalf over Boromir aside, because Gondor at War doesn't give us Men-at-arms of Dol Amroth, we'd need to spend 11pts/model to have F6 - and yes, Boromir is a bit cheaper, but we would see our numbers fall slightly AND Boromir would need to stay in one place pretty statically with Imrahil not that far off.
So no, I wanted Gandalf in my army. We have two kinds of Rangers in this list and their shooting prowess is only offset by their low Defense . . . something that Gandalf's Blinding Light helps with dramatically. With almost 4 skirmish triangles that can be formed, any of these guys that need to advance through open ground aren't that worried.
We also needed F4 models in our anvil, and so our options were a) get Axemen of Lossarnach to support Warriors of Minas Tirith (17pts/file), b) support Knights of Dol Amroth/Clansmen of Lamedon with Warriors of Minas Tirith with spears and shields (17pts/file), or c) rely on the Fiefdoms to have their own anvil and the Minas Tirith contingent to have theirs. Option A looks good to me . . .
We don't have a real banner, but we do have Imrahil's 12" banner for the Fiefdoms models. With Axemen supporting Warriors of Minas Tirith, so long as the Axemen are within 12" of Imrahil, our opponent will struggle to out-dice us. If we have the higher FV, we have a really good chance of winning our fights - and if we lose, we have D6 Warriors of Minas Tirith taking the beating!
Finally, I don't have March in the list, but with Gandalf on Shadowfax, Imrahil on his armored horse, and two Knights tucked under his armpits, I think we can contest the enemy wherever he forms up. At the least, we can make our opponent advance more cautiously - and that can be just fine for us.
Game Play Strategy
Let's see how we want to approach the missions we could be playing with this list.
Maelstrom and Object Missions (Pools 1 & 3)
Maelstrom missions are usually bad for armies that want to meld together - and since we have F4 Axemen of Lossarnach who are intended to support our F3 Warriors of Minas Tirith, it would be nice if we could deploy together. Since Gandalf doesn't have a lot of Might (after you factor in channelling) and Imrahil is our power piece (and army leader), it's probably best if we "just take what comes" and not bother coming on together unless the dice gods love us. That makes Maelstrom missions our least favorite of the batch. Without March, it's going to be hard for our predominantly infantry army to be able to get to each other if we begin on opposite sides of the board.
But the good news is that it's okay if that happens: Hold Ground requires us to get to the middle - and with plenty of shooting in both warbands (and fast units in both warbands too), we can rely on our Warriors of Minas Tirith shielding their way to the center if they need to and our Axemen of Lossarnach supporting each other until Imrahil can bail them out. With Sorcerous Blasts from Gandalf keeping at least some enemy units on the ground (if not killing them), we can force the enemy to struggle into the center instead of arriving in force.
In both Heirlooms of Ages Past and Command the Battlefield, we don't really care if we start split up since it will help us secure objectives more easily if we aren't close to each other. Gandalf's Blinding Light should help keep his warband from taking damage as objectives are approached - rely on the archers to test any objectives that are close to the board edge and have your Warriors of Minas Tirith advance full-speed towards any in the center. Imrahil and his Knights should move towards any enemy warbands that look vulnerable with the Axemen and ultimately Gandalf in support (though a few can be used to test objectives near them if you arrive separate from the Minas Tirith contingent).
For the object missions, you have plenty of speed with Gandalf, Imrahil, and the Knights to make a contest of the prize on the first turn in Seize the Prize, but since these models would need to dismount to pick it up, it's better if they ride wide around the flank a bit, leaving your archers a clear path to shoot anyone in the center. Gandalf can use Sorcerous Blast or Command (Blast to keep models away, Command if someone picks it up and you want to shoot them) to manage the center while the infantry arrive. After an infantry model picks it up (or after an enemy model drops it), get it to Gandalf and run like mad!
Gandalf, Imrahil, and the Knights form your hit-squad in Destroy the Supplies, with Gandalf's defensive buffs keeping your mounted division from being shot to death or crippled by magic, while Imrahil keeps the Heroic Combats going and slaying models everywhere. Form up defensive walls of Warriors backed by Axemen in front of two objectives with your archers guarding the middle (and able to see/support the side objectives). Get into the enemy caches as quickly as possible - you won't have much time in this scenario to wait!
Finally, you can employ a similar strategy in Retrieval - using your mounted units to punch a hole in the enemy lines and racing over to their artifact. Unfortunately, someone needs to dismount to get the artifact, but that's fine - use a Knight to do it if you can. Otherwise (and I can't believe I'm saying this), Gandalf can dismount off Shadowfax and rely on his stats and buffs to keep himself alive and out of trouble while you move it around. Imrahil needs to stay mounted for as long as possible to get the most out of his lance, but make sure he's granting his banner boost to your warriors - they need it!
Control Missions (Pools 2 & 5)
In Pool 2 (Domination, Capture and Control, and Breakthrough) start on the center line with your archers ready to hold your rear objective and harass side objectives. Imrahil should be pounding towards the rear objective with his Knights while providing banner support to the Axemen of Lossarnach. Keep your lines strong in the center, with Gandalf using his magic to soften up the enemy and pull people off objectives.
In Domination specifically, you don't need to make sure there are equally spaced objectives - just that the side objectives have good firing lanes to the other (known/likely) objectives. Then, whatever scenario you get, escort your archers to the objectives and have them lay down fire as needed.
In Storm the Camp and Reconnoitre, you can rely on Gandalf to keep the heat off Imrahil and his Knights, so the rest of your army should be controlling the center of the board as much as possible (with your archers falling back to guard your board edge or camp.
Divide and Conquer is the tricky one with this list, as we have to split up at the start. The Axemen can support each other (losing the D6 frontage they usually have) and the Warriors of Minas Tirith can shield if they feel threatened, so it's not horrible, just trickier. Still, our goal is to get Imrahil into the center and smash stuff once the infantry can provide him cover.
Killing Missions (Pools 4 & 6)
When it comes to killing things, you want to take advantage of your archery and your D6-7 front line/Blinding Light and pummel the enemy with arrows. When they arrive, it's time for Imrahil to look alive and kill stuff. If you're playing To The Death or Lords of Battle, hold back and shoot (and get those buffs up on Gandalf and Imrahil).
You don't have this option in Contest of Champions, so deploy in a Long Fangs formation to give Imrahil an avenue of attack and get him killing quickly. Gandalf will need to tie down the enemy army leader - something he's quite good at. Your warriors should (hopefully) be enough to buy you time to break the enemy, but the most important thing is to make sure that Imrahil is alive and gets 6-9 kills while keeping the enemy army leader to 2-3 kills - if you do that, you've won (even if you break).
If you get Clash by Moonlight, wait to pop up Blinding Light until the enemy is within shooting range (though you might be able to run Gandalf in front to illuminate targets early). You need to break the enemy and your army is well designed to do that - but you also need to kill more heroes than he does. Gandalf and Imrahil are pretty hard to kill, so have Gandalf focus on blasting as many heroes as possible to pieces.
If you get Assassination or Fog of War, you and your opponent will be picking Gandalf to kill/keep alive. Gandalf as an assassin can rely on Sorcerous Blast (or potentially Banishment) to nuke whoever you want to kill from a distance. I'm not that worried. :-)
Conclusion
This is a fun army - and I hope to try it out and run it soon (need to get those Fiefdoms guys - more on that in a future post). If you like this army (or if you think there's a better way to use Minas Tirith with the Gondor at War constraints), let us know in the comments below! Next time we cross the river into Mordor and see what kind of armies you can build with Mordor and its various allies. Until then, happy hobbying!
Reading through the list of available models (and since I don't own Gondor at War), quick question: is it true that there are no trebuchets in the book? Like, no scenarios at all involving trebs? If so, that is so sad...
ReplyDeleteNot a single treb to be found - a missed opportunity, I know (blame the scatter roll). :-P To be fair, there's also not a war catapult to be found - but I do think there could be room for a custom scenario where you have catapults trying to wreck the walls/buildings while the trebs are trying to kill the Catapults before they can torch a certain number. We should try this sometime. ;-)
DeleteCommenting to say a massive thank you to the author- not for this article, but for all! I've just discovered this blog and it is incredible. Thanks for the time taken to write these wonderful posts!
ReplyDeleteGlad you like it - and welcome to TMAT! We're amateurs here who love the game and are just happy others want to read it. :)
Delete