Featured Post

First Impressions: The Kingdoms of Men, Part II

Good morning gamers, NOTE: there has been an update based on a comment made below - the change is in red . I have not yet seen the War of th...

Saturday, June 29, 2019

Armies of Middle Earth SBG: Iron Hills Goat Riders (Profile and Basic Tactics)


Photo Credit: Sepulcher of Heroes

There are many stunning models in Forge World’s Iron Hills range, and yet the Iron Hills Goat Riders still manage to stand out. They’re not cheap (either in points or real money), but your investment is rewarded in-game. With a beefy stat-line, an 8” move, heavy armor on rider and steed, and a Strength 4 lance (okay, War Spear), they are a versatile and invaluable part of any dwarf army (and can be fielded in two: the Iron Hills and Erebor Reclaimed).

Below the jump, we’ll jump into their profile (including their signature special ability, Devastating Charge) and look at why they prove so dangerous (and resilient) on the table-top, as well as some basic tactics for when to commit your Goat Riders to the fray (and when you might want to rein them in). Plus, our signature series maths!

Wednesday, June 26, 2019

A Pocket Full Of Power, Revisited


Good morning gamers,

A long time ago (almost seven years ago now), I put up a post on different allied contingents you could get from the White Council to add to a traditional force in order to compensate for weaknesses or just include some White Council characters into an existing army (in that case, I looked at Minas Tirith, though in the comments I noted that you’d get a more thematic feel from Rivendell or Mirkwood). Today, we’re coming back to this idea of allies from a slightly different tact:

Given the historical/convenient army restrictions of the Middle-Earth Strategy Battle Game, what are some heroes/warbands you can ally into your army that would compensate for some key weaknesses without being an overly-large burden on points?

We’ll be going beyond the White Council today, but I’d very much like to hear the allies you like to use. The requirements I’m providing for this post are that they can’t be more than half of your army’s point value (we’re playing 700-pts right now on TMAT, so for me that’s 350). I will note that the Forces of Evil will not show up prominently here, since most evil armies are Impossible Allies with each other (and so you suffer a LOT by spending points on models that won’t be able to call heroic actions/Stand Fasts that affect models from another contingent). That said, you will see some evil models here, though they may not trait as high as you want. Without further ado, here we go:

Sunday, June 23, 2019

Workbench Update: Minas Tirith

Recently, I put up a post (two, really) on Minas Tirith armies that I liked that centered around Gandalf the White. Today, it's show and tell for Minas Tirith, with painting, basing, and conversions to show for all our work.

Painting

Not much to say here - pictures will show more below. I will note that in all my previous armies, I've adapted my painting scheme so that no two models were alike. If you have 48 Moria Goblin Warriors, for example, you could paint up all 48 to be exactly the same. From what I hear, this is a slog and a real psychological hurdle. For me, I do the following:

  • 2 colors of Goblin skin: Green, Gray
  • 3 colors of Goblin tunics: Red, Orange, Brown
  • 2 styles of armor: Black (with metallic highlighting), Metallic
  • 2 styles of weapons: Black (with metallic highlighting), Metallic
  • 2 colors of sandals: Brown, Black

With this method, I can make a grid that has 48 total combinations, making all the Goblins look different (but keeping a united color pallet). Minas Tirith, however, works differently: all the Warriors of Minas Tirith will need to have the same brilliant metal shine and their weaponry will want to look uniform too. To accommodate this, I took a leaf out of my Uruk-Hai book, where I focused on highlighting details (hand prints - took a long time to do) on my models and adding blood/gore to some of their weapons. This still kept all the models looking unique while keeping a very uniform appearance. For Minas Tirith, I made small differences - gold hilts vs. black hilts, brown boots vs. black boots, and various different hair colors (brown, black, yellow, gray, white - a trick I did with my Dwarves too). Where I got stuck were the swords, because I decided to do brown spears/bows vs. black spears/bows - so I used a little plastic cutting and gluing to change the poses of the swords (which was easy, considering the wholesale changes I made to my Numenoreans a little while ago).

Tuesday, June 18, 2019

Armies of Middle Earth SBG: Iron Hills Dwarves (Profile, Wargear, and Basic Tactics)


Photo Credit: Wargameterrain

Iron Hills Dwarves are a personal favorite of mine. Beyond their aesthetics (which are stunning in Forge World resin), they boast very good statlines and a host of customization options and special rules for function and theme (or both). They can also be fielded in two separate army lists—The Iron Hills and Erebor Reclaimed—which offer loads more thematic material in addition to many capable heroes, including some of the fiercest and most resilient combat heroes in all of Middle Earth. Wherever they are found, Iron Hills dwarves are second to none when it comes to stubbornness and staying power.

We discussed the big-picture strengths and weaknesses of Iron Hills dwarves in our summary of the Armies of the Iron Hills and Erebor Reclaimed, but if you finished that unsatisfied and craving more, this is for you. In this detailed expose, we’ll spend far too much time breaking down the profile of Iron Hills Dwarves, running through their basic combat probabilities, and exploring how we can customize their wargear options to mitigate some of the weaknesses common to dwarves, or to further augment their prowess in combat.

(Combat Stats, Tactics, and Maths ahead...)


Friday, June 14, 2019

Armies of Middle Earth: Iron Hills and Erebor Reclaimed in the Middle Earth Strategy Battle Game

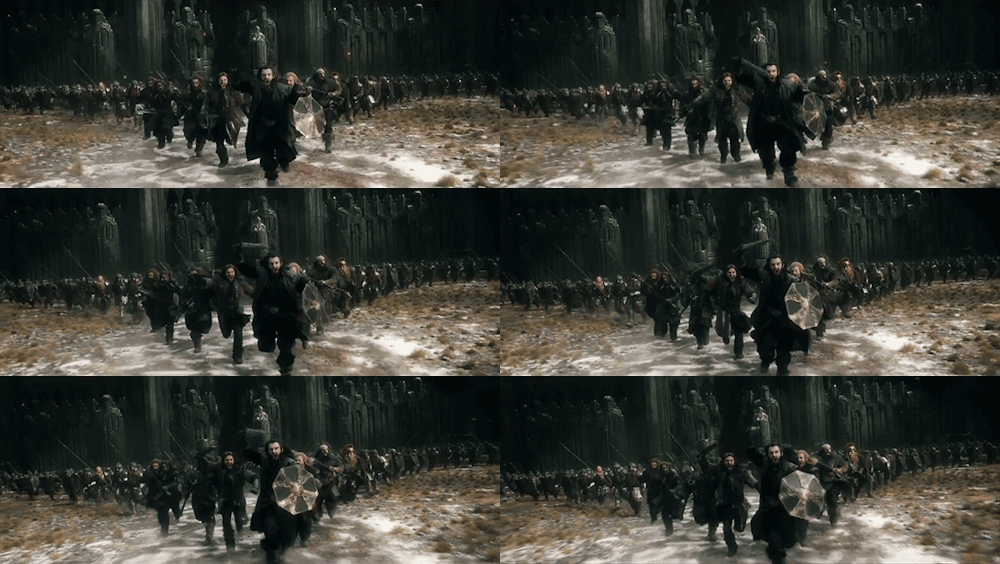
In the lore of Middle Earth, there are dwarves, and then there are the dwarves of the Iron Hills. Founded by Gror, the brother of Thror, the arrival of the Iron Hills have tipped the balance of many fateful battles: at Azanulbizar, routing the orcs when a young Dain Ironfoot slew Azog before the gates of Moria; at Erebor, when they stood against the forces of Bolg in the Battle of the Five Armies; and in the North, when they resisted Sauron in the War of the Ring.

In the Middle Earth Strategy Battle Game, the Iron Hills dwarves represent the pinnacle of dwarven military power and ingenuity. The warriors themselves are both resilient and deadly fighters in close-combat. Their cavalry and war machines pose a threat to enemies who doubt the reach of their “stubby little legs.” And their rank-and-file warriors, who can be fielded in two separate army lists, are led by some of the fiercest combat heroes in all Middle Earth. In stubbornness and staying power, they are second to none.

Below the jump, you'll find some quick-hits on the strengths and weaknesses of both armies, their heroes and warriors, and some recommended resources for further reading (or listening, or watching). And if you're an Iron Hills/Erebor Reclaimed player, or are interested in trying them out, let us know what you think in the comments!

Thursday, June 13, 2019

Armies of Middle Earth SBG: Chart and Table Reference Guide (Updated 13 June 2019)

As one of TMAT's resident chart/table-guys, I figured it might be helpful to have a brief description of how to read the various charts and tables that I use. Below is a reference guide with some sample charts (and tables) that I've used in our series on the Armies of Middle Earth, what they're meant to convey, and how to read them.

I'll try to keep this updated as we progress, so all this information is accessible in one place. If you have any questions about any of these, or if there are charts or tables you'd like to see, please let us know in the comments!

Tuesday, June 11, 2019

It Has Come To Me - The One Ring: Thoughts on the Ring (and how it's changed)

Hey there readers,

I know I said that my next post would be on Minas Tirith - and I've almost got that one ready - but during the intervening time, I decided to do a little research on something I've been thinking about for a while...

A LONG time ago, I did a series of games where I played all six scenarios from the warbands sourcebooks with the Fellowship. Those were good times. During that time, I got to spend a lot of time playing around with the first Forces of Good team I ever owned (not hard, since they were in the starter set at the time): the Fellowship of the Ring. Within that force, I very quickly came to enjoy playing with Aragorn (AWESOME), Legolas (AWESOME), Gimli (AWESOME), and Boromir (AWESOME). Occasionally, I'd have the points for Gandalf, but we played at the 500-pt level back then and let's just say that with these four guys in your team, you're hard-pressed to get Gandalf in there too (even at 600-pts it's a bit of a stretch).

But during those games, the one model I enjoyed using (though I didn't think he was worth his points all the time) was Frodo. Yes, he had the Ring, but other than that, he was very expensive and wasn't good in melee.

But he had the Ring. And this made him awesome (for reasons we'll see a little later).

Fast-forward a few years and now we've got new rules. If you read through the rulebook as quickly as I did, there were a few things you skipped because there was no way they would change. And if you were like me, you probably assumed that the full-page rules for the One Ring didn't have any major changes either. Well, I was wrong. And THAT's what we're going to be talking about today - what the Ring used to be and what it is now. While some things haven't changed much, how you use the Ringbearer has changed dramatically.

Thursday, June 6, 2019

Armies of Middle Earth SBG: Standard Infantry Formations


For those who couldn't tell, I find the probability side of the Middle Earth Strategy Battle Game fascinating. I also enjoy (probably to the point of obsession) list-building, and figuring out how changes and variations in lists impact how my army is likely to fare on the field of battle. Fight value, strength, defense, attack value, and wargear choices can make our troops more dangerous and resilient (or their opposites). 

In the run-up to TMAT's grand tournament, I ended up doing an inordinate amount of number crunching using Jeremy Hunthor's excellent duel and wound spreadsheets, which I've mentioned before. There's nothing special about what I've done (it just involves plugging lots and lots of numbers into the calculator, and then copying the results and recording them), but since I've already run a lot of calculations I thought I'd share some of the observations that I found particularly interesting, beginning with the strengths, weaknesses, and baseline probabilities behind five common infantry formations you'll see in the Middle Earth Strategy Battle Game. 

Understanding how these formations work generally, and the probabilities behind them, can help us better understand why some formations work (or don't) against others, and help us to recognize strengths (and weaknesses) in our opponent's formations, so we can avoid (or exploit) them accordingly. They also give us a baseline for figuring out if a particular faction's take on one of these standard formations (say, a shield-spear shieldwall formation) is above average (Iron Hills dwarves) or below average (orc warriors backing up orc warriors) when it comes to their killing power and resilience.

(As always, maths ahead...)

Monday, June 3, 2019

Is Heroic Strike Good? (Part IV: The Probabilities (Plural) of Heroic Strike)


Related image

We come to it at last...

After a lengthy build-up breaking down all the components of a successful duel role, we're finally read to talk about Heroic Strike itself. When does it make sense? And when is it *gasp* a waste?

There's actually a lot to unpack here (far more than I thought there'd be when I originally started writing on it). We'll start by looking at the overall mechanics of Heroic Strike, mostly to understand exactly what benefits (and risks) it carries with it. It's that balancing of benefit and risk that makes it game-winning or worthless (and a lot in-between).

Because Blogger doesn't like long write-ups, this one is split into two parts. This section (part IV) goes over the three basic probability mechanics in Heroic Strike (the D6 roll to increase Fight Value, the "10" cap on Fight Value, and expected distributions of probable outcomes as dice scale upwards). Part V (which you can read here) applies those principles to a case study between two combatants (Faramir vs. Eomer), and also discusses an alternative use of Might ("boosting") and how that might--or might not--make Heroic Strike more attractive (sorry--those "might" puns were purely unintentional).

(Potential math overload ahead)

Is Heroic Strike Good? (Part V: A Case Study in Miniature)


Related image


Photo Credit: Dork Lords

This is the second-part of our mathematical write-up on Heroic Strike itself (cut for length because Blogger didn't like the full feature in a single post--boo!). If you missed the first part, you can find it here. To summarize, we looked at the basic components of Heroic Strike. Here are the high points:
  • Heroic Strike, like fight value boosts in general, only improve our odds to win drawn combats, and only drawn combats;
  • The Strike itself has a lot of variance, since it hinges on a single, unmodifiable D6;
  • That variance can be reduced somewhat by the overall Fight Value cap of "10," and can also be reduced by having higher Fight Value to start with; and
  • Even though Heroic Strike only impacts the six drawn combat outcomes (of thirty-six total combat outcomes), those scenarios are among the most probable outcomes once we start rolling two or more duel dice, and only become more probable the more dice we add to the duel rolls.
Now, to synthesize all of this, let's take a look at a practical case study between two opponents who share almost identical stat profiles, except for their Attacks. How might calling Heroic Strike (or not calling it) impact their odds to win the fight? And are there other considerations, beyond the mere probabilities of winning and losing, that caution for (or against) spending Might to Strike?

(Maths ahead, as the rubber hits the road.)