Featured Post

The New Age Is Begun: the Minas Morgul Army List

Good morning gamers, We're continuing our "Ringwraith Month" by covering one of the more popular Mordor lists (in light of a p...

Sunday, January 20, 2013

Avast matey! Corsair Reaver conversions

Ahoy! It here be time for another update from the halls of Karningul, savvy?

With the obligatory pirate-speak out of the way.... I have toyed with the idea of adding a Corsair contingent to my Haradrim army for quite some time. Dalamyr has pulled his weight many a time, and the idea of throwing in some xbows to increase my ranged damage and reduce ranged deaths was super tempting, but the notion of the squishy D3 units that I would need to pick up to offset them did not (yes, I know technically this changed under the new warbrokens scheme).

The hasharin fleetmaster and his motley crew. Note the dashing chapeau on the bloke second from the right.  Made up from some cardstock and a spot of modeling clay

Unlike Tiberius, I have no great love for throwing weapons. They are a handy asset, but I have been unimpressed with their effectiveness as a primary means of damage dealing - especially when you trade off defense for them (see wood elves). However, since obtaining the new Harad/Umbar sourcebooks last summer, I now have another option - in what I'm pretty sure is the only official profile that has no model (and no plans to create one?): the Corsair Reaver.

I have seen a number of conversions for Corsair Reavers, typically consisting of taking the shield troops  and either sticking a weapon under the shield, or cutting off the shield arm and attaching a weapon hand. This leads to two problems: 1) you have maybe three poses in your force (since one of the shield corsairs has his shield tucked into his body and is not conducive to swapping out), and 2) you can only use 1/3 of your box of corsairs, requiring multiple boxes to make even a halfway decent group (a very expensive prospect at the current rates for a single sprue).

Forcing roll-offs with elves, multiple attacks, and now on equal footing with Haradrim in terms of armor (yay profile boosts!), these guys are significantly more viable than their knife throwing counterparts.
Craftsmen of Karningul, it's time to take the converting skills up a notch (or three)!

Thankfully, I recently acquired the spare parts from the new plastic Easterling Kataphrakt sprue - along with a number of warg rider weapons from my bits pile. So I had an assortment of swords to work with. It took a bit of creativity, but in the end I managed to come up with a decent conversion for 10/12 poses! If I really wanted to, I could come up with something for the last two, but I'm really not a fan of the constipated archer or the lunging spearman models, so I was okay with letting those go.

L-R: Archer, spearman, another archer. I sorta missed it in the photo, but I used the speartip to make a hatchet for  the reaver on the right. The center reaver got a boarding axe made from some cardboard and a bit of brass rod.

I know technically corsair reavers don't have spears, but a boarding pike seemed
like a suitable weapon  for these crazed blokes

using some of my experience sculpting warg fur for my hill trolls, I decided to give this guy a bit of a queue. Because nothing says "freakishly scary pirate" like a carefully unkempt hairstyle!

"But what about the archer quivers?" I hear you ask. Just hollowed them out, and used them for sheathes! 

The whole crew so far. A few poses are still WIP at this point. 


I'm really happy with the way the conversions came out, and in the few test games I've gotten in so far, they  performed very well. There is nothing quite like halting a charging mounted KoDA in its tracks (repeatedly) or beating back an Uruk pike block. I'm really looking forward to forcing elves and heroes to roll off. ;)

next on the agenda for these guys, finding a paint scheme that I like. So far my Corsairs have been a bit eclectic. I figure, these guys have been roaming the seas, pillaging and thieving. They wear whatever they can get their hands on - which sometimes means the clothing of wealthy Gondorians or it's fiefdoms.

Although before we get there, my sculptors tell me things about some new ideas they are floating for Serpent Guard conversions, maybe it's time to head inland...

Thursday, January 17, 2013

Battle Report: Chill of Angmar v. The Rallying of the Riddermark


Dear Reader,

After doing some further work on my Angmar and Misty Mountains forces, I took Zorro up on an outstanding offer to test out my troops on the battlefield (instead of just in the workshop).  Zorro is trying his hand at my Rohan force just for kicks, and I'm anxious to see what it is like facing off against my favorite hero in the game: Eomer, Knight of the Pelennor Fields!

Zorro's Force: The Rallying of the Riddermark (LOME: Theoden's Host)
Eomer, Knight of the Pelennor Fields w/ Armored Horse: 130pts
1 Captain of Rohan w/ shield: 50pts
1 King's Huntsman: 50pts
10 Rohan Outriders w/ bows: 70pts
16 Warriors of Rohan w/ shields: 112pts
10 Warriors of Rohan w/ shields/throwing spears: 90pts
3 Riders of Rohan: 39pts
6 Rohan Royal Guards: 60pts

TOTAL: 601 points, 48 units, 7 Might


Glenstorm's Force: The Chill of Angmar (LOME: Angmar)

The Dwimmerlaik: 120 pts

3 Barrow Wights: 150 pts
8 Orc Warriors w/ shield: 48 pts
8 Orc Warriors w/ shield/spear: 56 pts
3 Orc Warriors w/ 2H weapons: 18 pts
1 Orc Warrior w/ Banner: 30 pts
4 Orc Warriors w/ bows: 24 pts

Allied force: The Predators of the Misty Mountains (LOME New Addition: Misty Mountains)

Narzug: 50 pts
4 Hunter Orcs: 32 pts
6 Hunter Orcs w/ bows: 54 pts
2 Hunter Orcs w/ 2H weapons: 18 pts

TOTAL: 600 pts, 41 units, 3 Might, 32 Will, 4 Casters


Scoring

Today we will be playing a Domination game, with the following rules:
  • Game ends at the end of a turn when one side reaches 25% of its starting number of models or below
  • 3 Victory Points for each objective marker that has at least one of your models, and no enemy models, within 3"
  • 1 Victory Point for each objective marker that has both friendly and enemy models, but more friendly than enemy models, within 3"
  • 2 Victory Points for killing the enemy Army Leader
  • 1 Victory Point if the enemy force is broken at the end of the game.  If the enemy force is broken and your force is unbroken, you instead score 3 Victory Points

This will be a good way for me to test my troops, as it will test the list's killing power, ability to fight concentrated bodies of enemies, avoid archery, and cover a good portion of the map.  With both forces at around an equal size (48 - 41), there is also no inherent advantage to one side or the other in covering the ground (though speed across the board may be another question).

Deployment


Strategy for Glenstorm: Simple game: cover my hunter orcs with the orc warriors from archery, and aim for the middle objective and Zorro's starting objective.  Like most players, he'll only leave a handful of people at that objective, and send his formations toward the wings.  I'll punch a hole through his center formation through magic and brute firepower, drawing his formations back toward the center, and then keep him out of scoring radius while I rush the top objective.  I'll likely feign an attack to the side objectives just to keep him from reinforcing the center early.

Strategy for Zorro: This game was mostly to expand my horizons and strategic thinking. I've only played Rohan once before, although I've ground them underfoot many a time. I figured it was about time that I see what it is like from under those horse-hair helmets. My general plan was to cover the center objective with the outriders to maximize damage as the orcs charge for the middle, hook the main force to claim the Eastern objective while still pressuring the center, move a stunting force towards the west to prevent orcs from taking my Northern objective from that direction, while Eomer and his riders would feint towards the middle, and then swing around East to claim the Southern objective from whatever stragglers Glenstorm left behind. Basically, I was conceding 1.5 objectives to claim the moral victory of stealing my opponent's home base. A lot of this would depend on the Huntsman's ability to pick off the barrow wights - otherwise things will probably go downhill fast!


We used the setup rules that will be used in the March Tournament for LOME teams, which requires deployment within 12" of opposite corners (Z: I like the old deployment better, as it involved more strategy in determining where to commit your forces rather than each side starting with 2 objectives from the get-go at which point the game devolves into a scrum for the center) and at least 3 distinct groups (no hero required in each group), and the deployments of the armies looked like this:


With everything in place... ("To war!!!") ("Death and Glory!")

Round 1 (P: Evil)


The armies moved toward each other, with each volley line moving only 3" forward.  In the Shoot Phase, Narzug - volleying with his crew of orcs - landed a hit on Eomer, which was Fate Saved (1/3F) (note to self, putting the hit from the guy who has a free might to wound with archery on your main hero is baaaad...).  The Rohan Outriders fired directly into the approaching orcs:


...And down went an orc spearman, and one of the 2Her Hunter Orcs. To add insult to injury, the Huntsman drew his bowstring and downed a Barrow Wight ("Man, I wanted those..." *shrug*).  With that resolved and no melee combats, we move to...

Round 2 (P: G)


Both armies start moving forward, with the Rohan Outriders doing a 3" march toward the center as the Rohan forces fan out toward the far West and East Objectives (by the way, we're calling the top of the picture "North" for these photos, just for convenience).  The main body of my Angmar force closed in on the center objectives, as my archers scoot toward the East Objective, and a small band of orcs accompanied by a Barrow Wight make their way to the West Objective.


In the Shoot Phase, the King's Huntsman looked across the field, saw what was within 24", and said, "Hey Barrow Wight #3, I can see you!"  He landed the hit, it was on target (passing in-the-ways on a 2+ is sweet), and he wounded the Wight, restoring the Might points he spent (killing Barrow Wights on 4s without "spending" might points is sweeeeter).  That's 2 Barrow Wights down for me.  I'd love to tell you that the archery kills this round ended there...


...But it didn't, :-/  One of my orc spearmen and my other 2Her hunter orc also fell this round, which was a pity - because I won't have a chance to use a 2Her hunter orc this game in close combat melee.  I guess that's what happens when you face an archer core. *shrugs* ("My poor next opponent," :) ) (Now you know what it is like to stand in front of your Grey Company =P).  On the bright side:


One of the Rohan Warriors died to our volley fire, bringing the Eastern Objective Rohan force to almost the same size as my archer troop.  With no fights, we prepared to move to Round 3.

Round 3 (P: G)


In an interesting turn of fate, the Rohan warriors nearing the West Objective decided, on the whole, to hold their ground, preferring to present a strong, long battle line against my orcs (Rohan players take note: this is what you should be doing with Rohan infantry!  FOLLOW THIS EXAMPLE!). (It was all... part... of the plaaan /heathledgervoice)  The archers were careful to move to about 6.5" away (to avoid being charged), and prepared for another round of archery.  The horsemen split up, also careful to be more than 12" away from the Dwimmerlaik (to avoid any spells from coming out this turn) ("Much the pity," :) ) (actually, I was more concerned with trying to keep them out of range of the last Barrow Wight - who could unhorse them if you managed priority next), so instead the Dwimmerlaik turns and casts Transfix on the Huntsman to save the last Barrow Wight (2/16 W).  I took the opportunity here to slide my force toward the center, preparing for the punch through his lines to the far objective.  I also remembered that I need someone at the South Objective to claim it, and ran one of my orcs back to tag the base.  The other archers broke into a run toward the far objective, knowing that we will not get a lot more time from the horses or the infantry formation.  At the end of my Move Phase, the Barrow Wight successfully cast Paralyze on the Rohan Royal Guard (2/5W):


And then we turned to fire on each other!  The Rohan Outriders did their dirty work to my archer troop this time, successfully landing a wound:


Narzug...succeeded at being useless this round - as evidenced by the 1 he rolled, :-/  For being almost purely an archery captain, this was depressing, especially since I needed to whittle down the infantry force a bit to prepare for those horsemen.  With no fights, we move to Round 4.

Round 4 (P: E)


...And the battle is met!  With priority on my side, I moved my forces in to engage the enemy archers, pin-pointing the attack around the paralyzed Royal Guard.  The Dwimmerlaik successfully cast Transfix on Eomer (4/16W), who opted not to resist the spell ("Saving your Will points for Paralysis, ayuh?" :) ) (you think?).  I then slid over the second formation of orcs to protect the rear of my main body, and Zorro was kind enough to engage them with the formation from the West Objective (more like, formerly-written-off objective is suddenly free for the taking, and I get to move my shield wall up to keep the orcs penned in to boot? yes please!).  You can also see a few of his soldiers that have broken off from that troop to advance South.  My archers moved up 6" to prepare to engage the far Rohan formation, and his men stepped up to throwing spear range.


In the Shoot Phase, Rohan did a lot of shooting...but there was very little productivity from it (and at this point, the Huntsman begins to fall from favor, despite his early critial hits).  Narzug also shot at the enemy and... yeah...forget him, :)  And then...THERE WAS MUCH BLOOD AND CARNAGE!!!


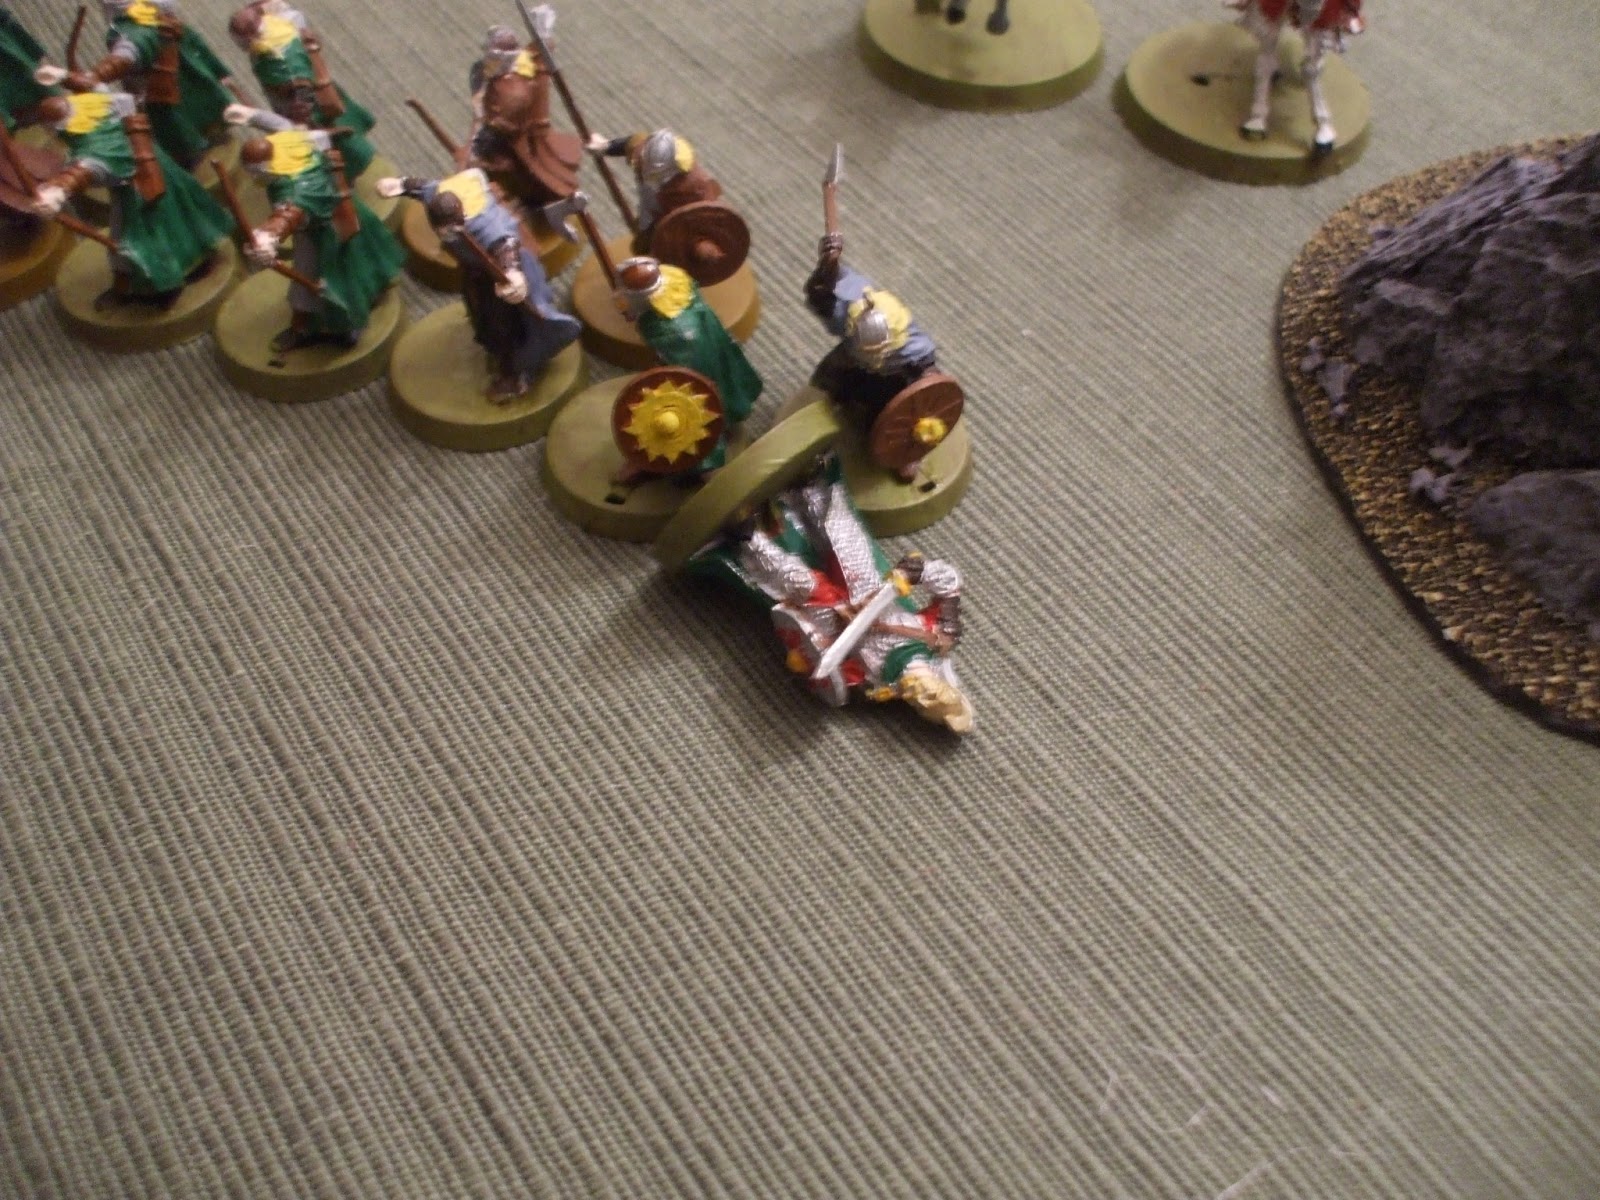
Working my way from left to right, the Rohan Royal Guard killed his orc warrior, and one of the Warriors of Rohan killed his twin.  All of the archers managed to survive the fight, though they did not strike any wounds.  One of the Warriors of Rohan was killed by a particularly savage orc that we refer to on the squad as "The Harbinger" (green orc with sword/shield), and the hunter orc, with 4 S4 dice, killed the paralyzed Royal Guard.  The Rider of Rohan also slew one of the hunter orcs in the adjacent fight.

Current casualty count: Angmar has lost 10/41 (11 to break point), Rohan has lost 4/48 (20 to break point).

Round 5 (P: G)


Zorro wrapped his men around my left flank, and brought his infantry in quickly to engage my archers.  Two of my archers were unengaged, and they joined Narzug in tagging some of the far-end warriors, in hopes of freeing some of their buddies through a Heroic Combat.  The Barrow Wight turned to the Rohan Captain that was leading the flanking formation, and successfully cast Paralyze on him (3/5W)--thanks to the Dwimmerlaik negating his resistance dice (nooooo)--before charging a Warrior of Rohan - which was the best thing my Wight could do, as both Eomer and the Huntsman (the real threats) were out of range.  As the Dwimmerlaik was tagged by an infantryman, no more magic came out this turn.  Eomer took the opportunity to make a break toward the archer fight, and the Huntsman squared up to do some damage to my spear support and bannerguard.  You can also see, near the bottom of the screen, two sneaky Warriors of Rohan preparing to rush the Southern Objective (which, with the way he's pinned my units, I don't know if I'll be able to free.  I may need to change my choice of objectives, depending on how these fights resolve themselves).  Amazingly enough, nothing of note happened in the Shoot Phase (Gandalf Voice: "For which I am very grateful..." :) ) (fail, Huntsman. just... fail).


As mentioned earlier, I called a Heroic Combat with Narzug, and with 6 attacks at S4 and a F4 from Narzug, the not trapped Rider of Rohan was killed (both him and his horse), freeing up 6 attacks to go into other fights:


I chose to engage the Rider of Rohan (as he had not charged, and would have 1 attack against my 4 attacks with a lower FV to win the fight), and ganged the Warrior of Rohan that slipped around our forces (Strategy: If there is a time to cause some serious damage to this formation, now is the time.  If we cannot crumple this force and the horsemen supporting it in 1-2 turns, we'll never reach the objective, and we'll lose the match) (just keep Eomer away from the Dwimmerlaik, just just keep Eomer away from the Dwimmerlaik..).

The fights turned out like this:


As you can see, a three of the orc warriors on the flank were killed, and the orc spearman successfully wounded the paralyzed Rohan Captain, who saved it with fate (1/1F).  Moving up the line, the Rohan Outriders proved to be amazingly resilient, refusing to die to the onslaught of orcs on the whole.  Only one Outrider died in combat, and that to a spear-supported orc warrior and a hunter orc.  The Dwimmerlaik successfully won his fight against the Warrior of Rohan, and (4+ required) killed him.  The Barrow Wight and Orc 2H also won their fight against the Warrior of Rohan, and as wights wound against the unit's courage value, and the Dwimmerlaik reduces the courage of all units within 12" by 1, the S2 attack from the Wight (4+ now against a C2) killed the warrior.

Small aside: everyone expects you to do your magic within range of the Dwimmerlaik because he makes spending Will points risky, but did anyone else see attacking with Barrow Wights within the radius?  Did I keep that under the radar well, or what? ;)  Okay: aside over (considering I didn't know wights had the ability to wound against courage, no of course I didn't see that coming =P).

On the far side, Narzug and his hunter orc took down the Rider of Rohan, and two of the other hunter orcs took down a Warrior of Rohan and a Rohan Royal Guard.  In response, one of the Royal Guards killed one of the orc warrior bowmen.  To close the phase, the Rohan Captain failed his roll to dispel paralyze (requires a 6), and we prepared for Round 6.


Death tally for you: 16/41 for Angmar, 11/48 for Rohan.

Round 6 (P: E)

Eomer calls a heroic move (2/3 might - thanks to the Dwimmerlaik) and engages Narzug's warband to the East. In an effort to save the game before being broken, I started to rush my forces through the thin line of archers, attempting to cut a hole through to the North Objective (and it was only about now that it occured to me the problem I was about to face from having archers as my center line against S4 units *facepalm*).  The Barrow Wight finally caught up with the Huntsman and successfully cast Paralyze on a 6 (4/5W), and would you believe it?  He rolled a 6 to dispel it!  (booyah! look at me and my bad, er, good self!) Otherwise, a lot of the same match-ups from the last fight took place, as the soldiers of Rohan attempted to save their paralyzed captain, engage as many of the orcs as possible, and continue wrapping around our lines.  Nothing remarkable happened in the Shoot Phase.


Sorry for the blur, but as you can (kind of) see, the captain was left unwounded, and his men pushed back the spearmen that attempted to engage him.  Two of the orc warrior 2Hs were killed, and the Warriors of Rohan successfully wrapped around my left flank.  Up top, two of the Outriders were killed (one by the Barrow Wight, one by an orc warrior), and two warriors were finished off by the Dwimmerlaik and the Harbinger Orc.  On the far side, Eomer and his allies killed Narzug in one round (stupid Dwimmerlaik preventing me from risking a heroic combat with my last might point *grumble*) as the hunter orcs killed another of the warriors near the East Objective - there was more fighting to the far side that was off-camera.


Casualty total: 24 for Angmar (broken), and 21 for Rohan (3 from breaking).  The Rohan Captain rolled again to see if he rose from his paralysis, and he failed again.

Round 7 (P: G)

Zorro wisely engaged all of my remaining heroes and most of my warriors, and a few of my orcs then began to Courage Test.  Two of them ran away (pictured below near the center of the board), counting as casualties.  This brings my army to 26 of the 31 required to end the game. Those who passed, make a break for the Northern objective. One of the Rohan Warriors took a moment to stand by the Rohan Captain to attempt to assist in raising him from his paralysis, and the sneaky warriors finally reached and trapped my archer at the South Objective.  Amazingly enough, the East Objective (top right corner) is oddly vacant...


Needless to say, the Southern Objective fell to Rohan. :)  Quite decisively, :)  Near the East Objective, Eomer won his fight against the two hunter orcs, knocked them to the ground, and then attempted to wound them...and would you believe it...


("Yeah...every now and then he does that....Sorry...") (I hate this game) So, with two boys on the ground, I am thankfully not up to 28 casualties, :)  In the adjoining fights, the hunter orcs won out every time, but only wounded the spearman on the right side, missing their opportunity to capitalize (and, since his force is not broken yet, I need to break his force in order to keep him from getting 3 points).  Across the rest of the board:


One of the Warriors of Rohan lost to the Harbinger, and the Dwimmerlaik failed to wound either of the men in his fight.  With 8W remaining, the Dwimmerlaik has been doing his fair share of the fighting, and is also my only unit in scoring distance of the center objective (3"), which creates a problem....

Round 8 (P: G)

Zorro engaged my forces that rushed to the North Objective, though one orc successfully reached them, contesting the objective.  Most of my orcs that were not engaged failed their courage test, resulting in 4 more casualties for me.  As you will recall, things brings me to 30 casualties - one more, and the game is over.  With nothing important happening in the Shoot Phase, we move to the Fight Phase:


In the center, the Barrow Wight lost the fight against the Huntsman, the Royal Guard, and the two Warriors of Rohan, but none of them wounded him, causing them to back away.  The 2Her orc warrior, on the other hand, was not so lucky, resulting in casualty 31.  The Dwimmerlaik won his fight, but failed to wound anyone.


On the far side, Eomer led his men very well, and they did what I have come to expect of them: overcome.  Eomer successfully won his fight, knocked his enemies over, and trounced them soundly, with his Royal Guard and infantry finishing off a trapped hunter orc as well.  The other orcs won their fights, but failed to wound.  Amazingly, though, the East Objective (as you can see), is still vacant (yeah, got a little over zealous with killing orcs there), scoring no points for either side.

Final Score: 11 for Zorro (6 for two controlled objectives, 2 for two contested objectives, and 3 for breaking the enemy force without being broken), and 0 for Glenstorm, ending in an 11-0 Major Victory for Zorro.

Conclusion

Assessment by Zorro: Well, strategy-wise, I managed to do nearly everything I wanted to do. I made a few dumb mistakes (leaving an objective unclaimed, leaving my D4 troops as the main barrier to S4 troops, not remembering to assist my captain in getting up until the end of the game), but I also lucked out with a "free" objective and a few key kills from the Huntsman early on. The Dwimmerlaik really messed with my hero game plan. I'm getting the sense that he will quickly become my least-favorite nazgul to face. Thankfully the rank and file troops were able to tip the scales even without the support of heroes. Luckily for Glenstorm, most armies won't be fielding snipers like the Huntsman or Legolas and will have to wade through a few lines of orcs to get to the wights, so I look forward to seeing the kind of terror this army can wreak (on someone else of course!). Well fought Glenstorm.  

Assessment by Glenstorm: Major props to Zorro for effectively cancelling the strengths of my list.  I walked into the game against an opponent who had almost no Will points, and my aim was to couple brute firepower from the Hunter Orcs with the magic of four casters.  Zorro picked his targets very well, taking out two of my casters and a number of my hunter orcs early in the game, and with only one wight and a Nazgul remaining, my magic game was easy to handle.  From a strategy perspective, it doesn't get prettier than that!


Stellar Unit for Zorro: I think I am going to have to go with the Outriders on this one. The Huntsman got a few key kills with the wights, but quickly petered off into dead weight who couldn't even use his might points to assist - thanks to the Dwimmerlaik. The F4 of Royal guards helped win some key combats, but oddly enough it was the Outriders that carried the day. Not even counting the archery kills, they managed to hold a steady line against superior-and particularly lethal-foes when their inept leader forgot to back them up with shield support. As much as it pains a primarily evil player to say this, well done sons of Rohan!

Stellar Unit for Glenstorm: Hunter Orcs.  Okay, some may label this as "New Unit Syndrome," but let's face it: who can say that they have had orcs without spear support unhorse and kill cavalryman, hold a flank when outnumbered, and keep a major hero (like Eomer on a horse on the charge) tied down with orcs that only cost 9 points/model?  To date...no orc commander ever.  In fact, I'll even wager that Morannon orcs have never done it.  I was highly impressed by what I saw in this army, and, after discussing the game with Zorro, am seriously thinking about fielding more of them in the next game - perhaps removing a Barrow Wight to do so.  I think they complement my force well, allowing me some additional muscle to back up the wildcard that is magic.


As we head into the rest of January, I'm looking forward to experimenting against different civs using different tactics, so stay tuned to this site for more painting projects and games with the forces of Angmar!

Watching the stars,

Glenstorm

"I set myself against what is lurking in this forest, Bane - yes, with humans alongside me if I must." ~ Firenze, Harry Potter and the Sorcerer's Stone

Monday, January 14, 2013

Primed and Prepped: The Dwarf Hold and its Denizens

So, here we are again, looking at the board, which is white with primer. You'll see some WIP shots as we go through, to give you a feel for how the project has advanced.
A month ago, I sprayed a small block of polystyrene as a test to see how much damage the propellant does to this stuff. The block shrank to half its normal size. This made me think, "Hey, I can use this tactic to form my chasm on two of my game boards and what you see was the result...anti-climactic, right? Some bubbling, but no deterioration. So...I'm just going to paint over it and  call it good. We'll see what happens when the paint is sprayed on in a few weeks.
Thorin's Company has gone through a few edits after watching the new movie. Ori no longer "shoots his throwing axe" but now shoots a slingshot. I haven't decided if he counts as using a Dwarf longbow or throwing axes, but right now, I'm leaning towards the axes just because I like throwing axes more (though the longbow gives a few more options to the army as far as range goes).
Here is Groblog in all his splendor. He sports Bestigor-like horns and an impressive hammer-shaped royal staff to command his minions with. I'm planning on giving him an advanced bodyguard of Prowlers with shields. These guys not only are the only Moria units that can wield throwing weapons (yes, I'm obsessed with these things), but they also sport Fight 3/4+, Defense 5 (thanks to the shields), and gain a +1 to wound bonus if their foe is trapped. Perfect for adding a little extra oomph to a select number of battles and making fights more fair against armies from Rohan and Gondor (thanks to the Fight value).
...aaaaand, that's not all. My wife, Ellyriana, got me a bunch of supplies for hobbying from a dollar store for my Christmas stocking, and among those were coffee stirrers that will be used to make my first piece of Goblin terrain. This will not only be my attempt at providing a cheaper alternative to the Escape From Goblin-Town scenery set, but also pursues my hope of being able to make my battle board cross-cultural between Dwarves and Goblins, so when that's ready, I'll get some pictures up.

We're going to be leaving Hobbit month (though work on the board will continue in a few weeks when my wife and son are out of town), so starting now, we will be venturing back into the realm of spell-casters with Flight to the Ford month, as we welcome into the collection a host of new Ringwraiths for my first all-hero Evil army (which I hope is capable of going toe-to-toe with the White Council and the Fellowship) and an Arwen model for the White Council (after she did such an awesome job in a recent battle report). Keep watching this space and we here at TMAT look forward to providing you with more projects, tactica, and battle reports in 2013!

Tuesday, January 1, 2013

Grey Company - Strategy and Tactics

Dear Reader,

Greetings again from the Forge!  Following the last article on the Dunedain, I wanted to tie together a number of the things we discussed about each unit, and outline a few of the combinations that can be effectively used by a Grey Company or Arnor player.  I will preface with the typical warning of any gamer:

This is only my opinion.  Others will disagree with some of my assessments, but I believe that these are good tips to keep in mind, blah-blah-blah...

Okay, now that that's out of the way, let's talk strategy, :)  In this post, I want to focus on not only the units that I use (and have found effective over the past year), but also on some helpful tips that a Grey Company player should keep in mind to increase the longevity and effectiveness of his units, as that is the primary sticking point for any GC army.  I will also be including some thoughts about Arnor-specific armies, especially for those who run LOME lists, and want to stick with a "Grey Company v. Arnor" paradigm.

Strategy Overview

There are three things that are useful to discuss before launching into specific strategies: the strengths of this list, the weaknesses of this list, and how to spot a crisis scenario for your units.  As mentioned one of my previous posts, a lot of the strategy for a Grey Company player comes "in the moment," just as the battle is getting hardest, so knowing when things are just not working and a need comes to reform and reinvent your list in the midst of battle is paramount to success with this army.

1.  Strengths of the Grey Company: Damage Per Round

Warning: Targets in line of sight may
be closer than they appear.  Results
of archery may vary.
If there are only two civs in the LOTR SBG that are designed almost exclusively for damage over defense (which, I would argue, there are more, but not many that are as apparent as these two civs), it is the Wood Elves and the Grey Company side of Arnor.  As mentioned in the last post, the vast majority of your units are D4, so survivability will always be on your mind, especially against S3 and S4 units.  What you shouldn't have to worry about, though, is damage per round.

Optimize your kills every round.  In a 500-600 point game, you should be doing at least 2-4 kills every round, especially before reaching close-combat.  As mentioned before, you can do this through lots of S2 archery (even with multiple volley lines to target different divisions of the enemy army), quick sally charges with S4 hero units, and some of the tactics mentioned later in this post.  In close combat, you should easily meet this quota - get creative with your archery to maximize kills at range.

2.  Weaknesses of the Grey Company: Sustainability

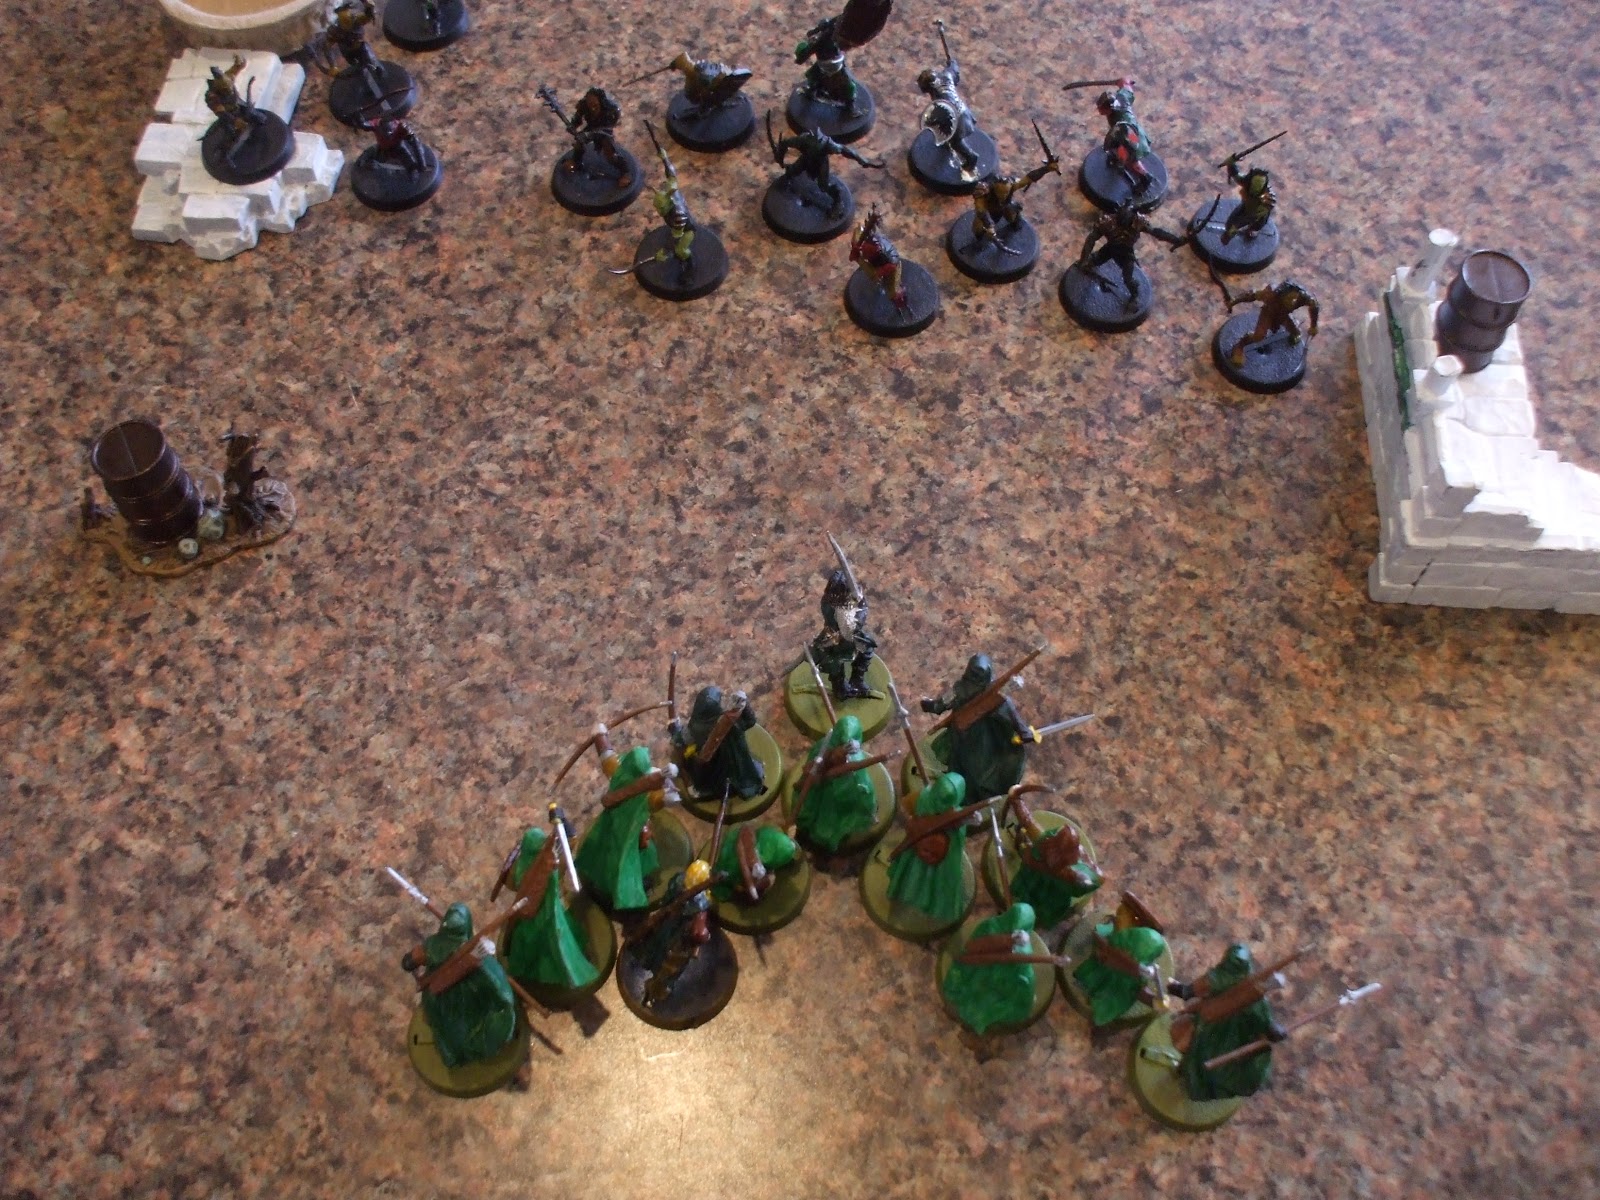
Daerdan and two Rangers of Arnor,
all D4, are beset by Hunter Orcs
There are three things that GC armies should take to heart in providing sustainability for their warriors.  First, as much as possible, avoid bare places, not open spaces.  As you scratch your head over my last statement, consider the strengths of the Grey Company: lots of archery, a good Fight value, and the chance to move through difficult terrain with ease if you field Aragorn, Isildur's Heir.  What you want to avoid is being a sitting duck with D4 (the worst possible place to be), but you don't want to embrace a Goblin Town/Osgiliath-style map either, which will restrict your archery and logistical options through tunnel or urban fighting (the next worse possible place to be).  Thus, avoid bare places (where there is no strategic advantage to deploying units), but don't aim for close spaces - aim for open spaces that give you options for tactical deployment, but do not leave you completely exposed.

Second, take stock of your opponent's army upon deployment, and carefully determine which portions of the army must go down first, and which you would prefer to take down first.  I may be dreading facing that troll that Zorro is fielding, or I may be terrified (literally) of the hero that Tiberius is fielding.  That's not what's important: what's important for my force is to determine what must go down in order to preserve my warriors.  While that S5 hero may cause problems at close combat, those Uruk crossbows that the General Will is fielding are going to cause a problem well before the others do, and will likely punch serious holes in my lines before we draw swords (as he did at the last tournament).  Make your priorities based on survivability, not on what you would prefer not to fight.

Finally, the Roman maxim of "march divided, fight concentrated" is helpful to remember here.  Teaming and ganging on elements of the enemy army (especially in a warband game), even if only in your archery, will do wonders in leaving elements of the enemy army impotent against your force.  Again, aim for kills, but also reduce your opponent's force to unhelpful components (as opposed to destroyed components), as it will save your units and (likely) the victory as well.

3.  Crisis Scenario: The Long Haul

What all Arnor forces dread - Grey Company and Arnor proper - is the long game.  Anything beyond 8-9 rounds (especially with the new warband deployment rules) will likely spell single digit survivors, if any, for Arnor.  With low Courage values for your heavy infantry and low Defense values for your strong courage units, Grey Company units thrive on breaking enemy armies in 5-6 rounds, as their high Fight value and wide spread of Might points helps you in 1-1 situations in Rounds 7 and onward.  If your force is in Round 7 or 8 and the enemy is not broken, be very careful in watching your victory conditions, and rake them in as quickly as possible, or you will lose (as Game I at the Red October Tournament showed - lots of damage, but no victory).

Strategy and Tactics

With all that discussed, I want mention four specific strategies that may be helpful for you in combat.  Some will no doubt say, after reading this post, "Glenstorm, you forgot to mention the 'stay-back-and-shoot-them-all-until-Orome-returns-again' strategy, which is obviously what GC is designed to do!"  A few notes on that:

1) That's not how I play: because I do not believe in the "ever falling back" approach to combat, I don't recommend it on this blog. :)  I view archery as a means of softening my enemy's ranks as I advance, not the primary attack I resort to before hitting my opponent's line in a last ditch effort to break him.  Maybe I'm the only player that does this - I'm okay with it, :)  I will warn you in advance, though, that the strategies below come from my approach to playing, not the "ever-shooting" mindset, so make adjustments to what I say as you read to complement your style of gameplay.

2) People don't like it when you play like that, so I'm not going to recommend it on a blog: If there is one thing that irritates a player in Warhammer, it's an enemy he cannot catch, and an opponent that knows that you cannot catch him, and does it anyway. :)  I believe in tactfully using your surroundings, but also realizing the importance of drawing closer to the enemy each turn so that I can ensure a solid melee combat match-up, rather than the run-shoot-hide strategy that a lot of people recommend with Arnor-based civs.  But most importantly...

3) Maybe that strategy is just so obvious that I don't need to blog about it? ;)  Yeah - I'll leave it there, :)  In the next section, I'll be discussing four tactical strategies you can use that are not intuitive to this list, and thus may be of help to you when thinking through deployment and approach at the start of a game, up until you start slogging through melee combat.

1.  The Wheel
A body of rangers wheels from their
cover behind the ruins
All of our Warhammer Fantasy players are familiar with the term "wheeling," as are any readers that have at all studied medieval battle tactics.  Maneuvering a block of warriors allows you to cover weak units, provide strength as needed, and meet enemy advances from places of strength on the battlefield.  

This strategy is most helpful when you are meeting a two-deep block of infantry, especially blocks that are less that seven models wide.  Grey Company forces offer spears that are also archers, giving you a chance to both support your front rank and attempt to take out your opponent's spear support after the fight has been declared.  Optimally, you will also have banner support (either from Halbarad Dunadan with the Banner of Arwen Evenstar or Aragorn, Isildur's Heir) to assist you in winning the fights.  Once the first round of combat is finished, take stock of the deployment, check for possible assistance from your opponent to this block of men, and engage as many of your warriors around the flanks of the formation as possible.  Once the corps is consumed, reform, and wheel yourself in position to strike again.

2.  The Bullpen

I'm actually not making a baseball reference here - I'm making a rodeo reference.  I had a chance to see a rodeo in-person about 18 months ago, and while I really enjoyed the barrel riding, steer chasing, and bronco riding, I was also captivated with the bullpen for very different reasons.  I had conceptual thoughts for a Grey Company force at the time (hadn't paid up for the army yet), and I noticed the similarities between fielding a GC army and the place where they keep the bulls at a rodeo (nerd, I know...).

At a rodeo, there are two things that the staff are looking for: 1) mad bulls that will have a lot of energy when they come out, and 2) no goring of man or beast before, during, or after the event.  For bulls, this means a tight place where they cannot run around (as that will tire them out), but with enough space that they will not kill each other or any unfortunate cowboy/hand who goes to fetch them.  This is the same predicament for a Grey Company player, and I recommend you find the balance that the cowboy has: with a bullpen.

Here is a recommendation on how not to do it:

The standard "Killbox" Formation

Why do I recommend against this?  It is way too obvious to your opponent, and he will attempt to buck against it (by flinging toward a side) and bring in extra help from outside units against the exposed flanks of your outermost elements (and Too Many Bulls + Not a Lot of Space = Dead Cowboys, remember?).  I recommend this deployment:

A variation of the "Bullpen" Formation in its most basic form

Much less threatening, right?  You almost feel as if it will be too easy breaking this GC element - until you think about charging it.  How many units are in their front rank?  How many are in yours?  There is a guarantee that they will reach your flank, peel off toward your weaker units (in this case, a bannerman), and if there are Heroic Combats (with 2 Rangers of the North in the front rank ready to call them, this is a highly likely scenario), carve holes through your lines to enfeeble your unit.

Setup a bullpen with units in a close block, then fan them out just before charging begins, and watch as your opponent begins to count the cost of charging if he has underestimated your force.  I have used a modified version of this tactic based on the terrain around me in every game I've played with the Grey Company, and it never fails to throw a body of infantry into confusion, as there are too many targets to engage without stretching yourself too thin.  This is because there are very few infantry in the game that like to fight in solo combat - most would prefer to have (and reach their full potential when given) spear support behind them.  Rangers of Arnor benefit from spear support, but their high Fight value moves the extra dice from "necessary" to "helpful," which gives you options.  One of these options, I'd contend, is the Bullpen.

Now, everyone is likely taking a step back and saying, "Can't we just call it a 'Killbox'?  What's wrong with a killbox-style of engagement (like we saw in the first picture), since the list clearly works with that style of fighting, too?"  A few things.  First, who in their right minds walks into a killbox other than Dwarf heroes, a Mumakil, a dragon, or maybe a gang of trolls (all of which you don't want in your killbox, by the way)?  Your opponent will not take the bait, and even if he did, turning to engage the flankers in LOTR SBG is much easier than in Fantasy, weakening the effectiveness of such a tactic.

Second, and more importantly, a Killbox formation opens up the flanks of your killbox to attacks from other elements of the opponent's force.  Unless you are playing a massive game, you won't have this many warriors available to you to trap your opponent with, unless what he sends into the killbox is his entire force (in which case, you're preempting my next tactic).  If he does send in reinforcements, you will soon find your men outnumbered and out of reach of help.

Finally, when I run a Bullpen, I'm not aiming for a dead bull - I want a controlled bull that can still charge, buck, and bray.  I am perfectly fine with a good portion of my opponent's force - maybe even most of his force - arriving alive to close combat.  What I want him to do is feel secure in that force's ability to take on this element of my army, so that I don't attract additional reinforcements.  The trick to a Bullpen is feigning weakness, and then striking your opponent in ways he does not expect.  It takes a lot of practice to run a successful Bullpen, but when it works, you'll discover that your force can clean up an enemy detachment with close to no casualties, and in only 2-3 rounds.  I highly recommend the Bullpen.

3.  The Flying Columns Formation

Three Grey Company elements (Aragorn's force, Halbarad's
force, and the Twin force) envelope an Uruk force
I've mentioned the Flying Columns Formation when discussing my Rohan force in a previous post, though I'll caveat its utility here: it works better for civs with throwing weapons (Rohan, Wood Elves, and Dwarves especially) more than it does an archer-based civ.  Whereas units with throwing weapons can move their full distance and then fire, archer units make a choice between great speed around a flank and damage to said flank in a given round.  The one exception to this rule are cav archers, but ditto the comment from my last post about all of the Arnor lists lacking cavalry, and the hindrances that this gives to your unit options, :)

For Arnor, the Flying Columns gives you a chance to wrap around an enemy force through a bait-and-switch method of luring in an opponent, and then crushing down on him from all sides.  Unlike the Bullpen and the Wheel, however, you are attempting to engulf and engage the entirety (or close to the entirety) of the enemy force, and your aim is not to eliminate an enemy element: your aim is to punch holes in as many of your opponent's elements as possible to make them all impotent for his purposes.  The one advantage that the Grey Company has over Rohan in running this tactic, though, is the option of spear support, which makes crunching through enemy elements more palatable in regards to risk factor to your warriors, if not easier in breaking through enemy lines.

4.  The Spearhead/Wedge Formation


Basic Wedge: Firepower up the sides (weighted toward the
front), with spear support and banner support in the center
The Wedge Formation is an ancient tactic, primarily employed by Northern and Western European nations (with the Saxon Shield Wall as the notable exception), and was especially efficient at breaking blocks of infantry.  The Romans encountered this a lot during their invasions of Germania and Britannia, with the Picts and the Germans employing it most effectively.  The formation is very simple: your power units form the front of the "spear," with a few competent heroes/elite units near the end of the "spearhead" to protect the flank.  Place your spear support in the center to protect your heroes (and options for additional close-combat firepower, if things get rough near the front), and, if possible, include banner support as well (in the picture above, Aragorn, Isildur's Heir fills this role as well as the power hero at the front of the "spearhead").

One of the strengths of using this formation with the Grey Company (and its noticeable absence from my Rohan tactics post mentioned earlier) is that you have a power hero with a banner that does not receive the banner penalty: Aragorn, Isildur's Heir.  This means that you do not have the difficult situation of a weaker attacker near the front of your spearhead, as most other civs would have (the Easterlings have a good option in Amdur as well, in case you're thinking of building an Easterling force), or a swordsman in the center of your spearhead, doing nothing beyond providing banner support.

The Wedge is most effective at taking down large, clunky bodies of infantry that require the formation to hold in order to maintain its strength.  Large bodies of heavy Uruk-Hai warriors with three-deep pike support, Easterling cohort formations, etc. (possibly even some Gondor formations, now I think about it; hm, I'll have to try that...) are the prime targets for a Wedge, as a wrap-around strategy to take on your "spearhead" actually plays to your strengths by reducing their pike/halberd support to 2-1 (and on-par with you), spreading out an enemy that would otherwise be able to fight in a concentrated block unit.

Other than that, though, I honestly do not recommend the Wedge - it is highly unwieldy, lacks the firepower and quick engagement options granted by a Wheel or a Bullpen, and centers a lot of points in a very small, contained portion of the map, which could have terrible consequences for your forces across the rest of the board.  Wedges also have the high probability of trapping the unit at the tip of the "spear," so if you do run a Wedge, make sure that your front man wins his fights (insert the pitch for banner support here).

Wedge formations also don't work well where archery is in play: placing all of your best units in prime archery target practice range is...not advised, :)

Conclusion

Now, within each of these strategies, there are multiple maneuvers that you can perform, including the Feign (fake a hero/elite unit one way to get a nemesis-style unit, like a caster, to move that way, and then pull back and replace him with another hero/elite unit), the Wag (crushing toward one side of the enemy force, breaking it, then swinging back toward the other side, and lather-rinse-repeat until an enemy force is defeated), and other maneuvers that you have seen on this site.  What these four tactical plans are designed to do is to get your momentum rolling as a player, and then, when the battle gets thick, step back and command your forces as they enter combat.

You will also notice that a number of these maneuvers can be easily and effortlessly combined - why not run each of your columns in a Flying Columns Formation like a Bullpen, enticing your opponent to peel off and engage your columns, freeing up your main body?  You could run Flying Columns off of a Wedge Formation against an Uruk-Hai Warrior force, or you could hide one of your columns around terrain to prepare for a Wheel when your opponent is exposed or seeks you out.  The ability to mix and match these formations is one of the reasons that I provided them here, and also speaks to the strength of the list.  As mentioned at the beginning of this set of posts, the Grey Company cannot do everything, but what they do, they can do very well.  Test them out sometime - you'll discover that it is highly versatile, amazingly durable, and quite capable when put to the fire.

This January, I'm dedicating the month to my Angmar forces, reinvigorating them and innovating my strategies by employing a new hero (Dwimmerlaik!!!) and a new set of forces to team them with (which you have already seen here and there in the post so far).  May I be the first to introduce you to my current work in progress, the newest civ added to the LOTR SBG and the TMAT blog - the Misty Mountains List!


Watching the stars,

Glenstorm

"I watch the stars, for it is mine to watch, as it is your's, Badger, to remember." ~ Glenstorm

Saturday, December 29, 2012

Let It Snow: Battle Board Revisited

So, we're starting "Hobbit month," where I'm going to be focusing on my Dwarf and Goblin armies (and the battle board) in preparation for the new movies. I'm not going to have "Goblin Town" in the titles of the subsequent posts, as I'm going for a Dwarf hold, not a Goblin slum. The work on the board is coming along nicely, as you will be able to see in the pictures below.
The board has been mostly covered in white wall spackle (this 4'x4' panel took up about half of the spackle paste that I had), which will not only protect the styrofoam underneath from the primer to be added later in the month, but also gives the floor an uneven texture. Most of it is smoothed out, but there are some rough patches here and there. You'll also notice that the coating of spackle has left some parts of the styrofoam exposed...this is to get some small depressions from the primer that will later be filled with water effects (we'll see how that turns out).
Not all of the board, though, has been covered in styrofoam. I saw the effect of spray-on primer on a small styrofoam block a few weeks ago, and am hoping that the two trench portions of the map will depress but not wholly disappear. The next update will show the results, once they've gotten everything else covered adequately.
I glued down the town centers, making those portions of the board "civilized" by the terrain. Alternatively, if I place my battle mat on the board, there will be permanent hills/elevated ground. Generally, though, I don't plan on having this covered.
Next week, I hope to have the board primed and I'll show you some of the work done on the units and modular terrain. As a spoiler, I've also been working on some carts and shops for the civilized sections. These can be used as barriers on the town centers, adding some mobile terrain and a good break-up to the monotony. In the unit-department, Thorin's Company (as this is Hobbit month) has finally gotten the rocks on their bases painted. Some of the units who got their names on their bases last time have had them redone (want these to look nice), and a few got some painting fixes done after the bases were painted. A few small modifications have been made to Bifur and Oin, after seeing these characters in the movie (despite their small roles). You'll also see a modification of Ori, who will now be firing a slingshot, instead of looking like he's shooting his throwing axe (yeah, I may or may not have gotten a lot of comments on that conversion). All this and more (like the current look of Groblog) will be yours next week. Until then, happy hobbying and a joyous new year!