Featured Post

So It Begins, Part 8: Ride Out

  Good morning gamers, For the astute observer, we jumped from Scenario 6 to Scenario 8 - this isn't a typo. Centaur's 3D printer wa...

Saturday, August 10, 2024

THE SUN IS RISING! THE SKY IS FALLING!!!!!!!!!!

Author's note: To the extent you can decipher them, all thoughts contained herein are completely my own, and may not reflect the views of the TMAT team as a whole, its individual contributors, or its esteemed readers.

Welp. It finally. Happened.

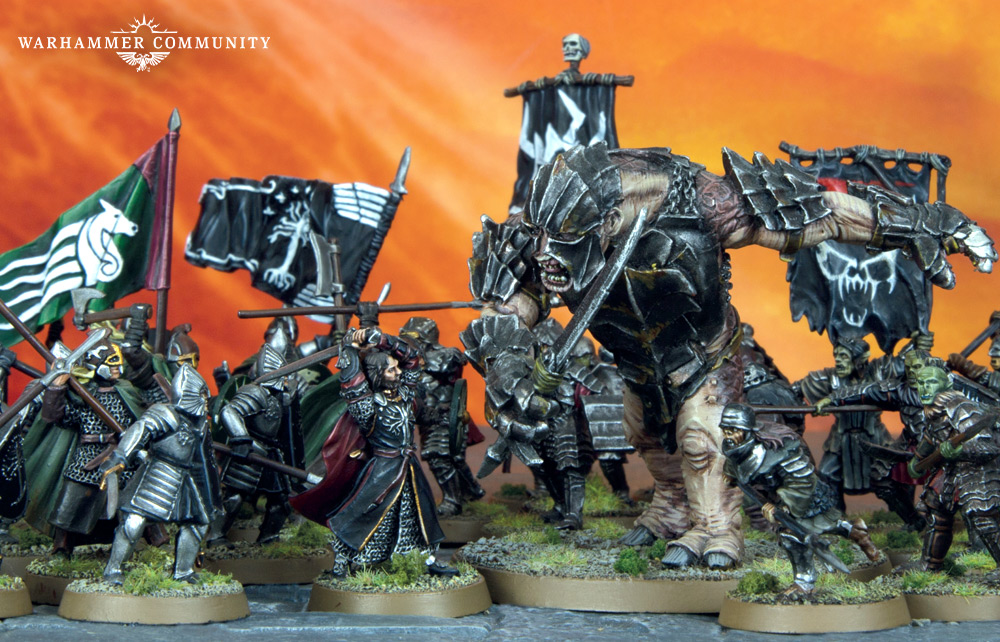
Photo credit: Warhammer Community

After a year of patiently silently watching trolling our blogs, YouTube channels, Facebook groups, and tournament hallways while we endlessly wishlisted complained about what we wanted next what we hadn't gotten, we finally got what we deserved:

A brand new sourcebook, ten new models spoiled, and a ton more content on the horizon. A brand new sourcebook and collection of models that are about to be rendered obsolete by a completely new edition. This is totally what we've been begging for the last thing we wanted or needed!

Allow me to elaborate on behalf of the collective (which of course agrees with me--after all, I have a platform!).

Photo credit: Warhammer Community

Well, we wanted Rhudaur and it looks like we're gonna get it! we got Hyboria instead. Look at those muscle tones--these guys look ripped! don't the developers know it's cold up north? The horns, the cloak, it's all so wild and feral 40K crossed with Thor Odin-son. And the fluff description describes him as the "leader of the Warriors of Carn Dum," so either there's a repurposed Dunlending profile in the works, or there's something more they're holding back this is lazy writing, or we're about to have yet another profile without models, like Reavers and Gundabad Catapult Trolls and Azog's Signal Tower.

Thursday, August 8, 2024

The Scouring of the Shire, Part 9: Arrest of Falco Boffin

Good morning gamers,

It's scenario NINE and we have one of the oddest scenarios to date - Folco Boffin (one of the WORST heroes in the game) and eight Hobbit Militia (one of the WORST warrior profiles in the game) are going up against a bunch of Shirriffs . . . is it even possible for them to win?

The Arrest of Folco Boffin


The board has three Hobbit smials on it - the 12 Hobbit Shirriffs and two heroes deployed within 3" of the southern board edge and Folco and his friends deployed within 3" of the northern board edge. The Shirriffs can Paralyze and carry Falco and the Militia, but they can't kill them - if Centaur's Militia can win fights, they could gain the upper hand quickly. There will be no Thrown Stones this game ("we don't want hurt you guys") - it's basically a bar fight on a roadside, so let's see how it goes!

Monday, August 5, 2024

The Board Is Set: How to Play To the Death

Good morning gamers,

We're starting our fourth round of scenario analysis posts and we're tackling Pool 4 for the next three weeks. When I got started playing MESBG (LOTR SBG back then), the scenarios that eventually made up Pool 4 (the precursors for To the Death, Lords of Battle, and Contest of Champions) were the most straight-forward and our gaming group played them a lot. We also learned a lot about how powerful archers could be (especially back when volley fire was a thing), how great being D6 was, and how important the amount of terrain on the board was. These are all good things for new players to learn . . .

. . . but it can also be unfun if you don't know how important all of these things are and your opponent does know. So today, we're going to begin by looking at what the distinctives of Pool 4 are (you can skip this summary section by clicking here if you want) and then get into what I consider to be the least fun of the three scenarios: To the Death.

Pool 4: Killing Lots of Models

The previous three pools have mostly involved controlling certain points on the map (Pools 1-2) and having enough speed to get to an object or set of objects (Pool 3). While your killing power has value in these scenarios (either for holding or securing objectives - or for punching a hole through the enemy to get to their objectives), there is no pool where your killing power is more important than in Pool 4.

In two of the scenarios (Lords of Battle and Contest of Champions), players have to do a bit more recordkeeping than normal and have to keep track of the wounds they deal to their opponent and the Fate points that are spent by their opponent's heroes (Lords of Battle) or the number of kills their army leader gets in melee (Contest of Champions). Both of these scenarios also allow the armies to start up close to each other if they want to, so things can very quickly become a blood bath . . . which some armies welcome gladly.

Thursday, August 1, 2024

The Scouring of the Shire, Part 8: Uprooting Bagshot Row

Good morning gamers,

We're back with another Scouring of the Shire scenario, and this time we have The Gaffer and some angry Hobbit Militia trying to keep Bill Ferny and a squad of Ruffians from tearing trees on Bagshot Row. The scenario rules might look a bit like deja vu, but I think this scenario was better than its predecessor. Let's dig into it!

Uprooting of Bagshot Row

The rules for this scenario are simple: the Ruffians need to quarter the Hobbits (there are 13 of them, so three remaining) and the Hobbits need to kill Bill Ferny (if both happen on the same turn, it's a draw). This is . . . exactly the same scoring conditions as we had in the first scenario (Skirmish in Bree - though if Bill Ferny doesn't kill 2 models in that scenario, it's also a draw), but there are some really key differences in the supporting rules.

First, all the Hobbits and Bill Ferny must charge if they can - this makes it so Bill Ferny has to either stay completely out of the fighting (which could slow down the speed at which the Hobbits are quartered) or he needs to get stuck in (possibly without support). This you-gotta-charge rule is absent from the Skirmish in Bree scenario and makes the game more exciting if you want to use Bill's Might point to help you kill stuff faster - though Bill Ferny does have to do some fighting in the Bree scenario or the game is a draw - but in this scenario, he at least has the option to stand back if he wants to.

Second, the Gaffer gets +1 FV when fighting Bill Ferny (which means they'll both be F3 and neither has Heroic Strike). The Gaffer also rerolls failed To Wound rolls in combat against Bill (or rerolling 1s/rerolling all faileds with his stones if Bill Ferny is within 4" of a flower or has removed one or more of his flowers respectively). This gives the Good side a hero who's not particularly good, but is also not bad - and last time, they didn't have a hero to fight the Ruffians at all.

Third, last time, the Ruffians walked on from one board edge while the Good models started in the middle of the board. This time, the Ruffians start on one side and the Hobbits start on the other - that allows the Hobbits a bit more choice on how they want to play, though the bows on the Ruffian side do make it so they can't just sit and wait for the Ruffians to charge.


Okay, so with all that in mind, we set up as you see above - Centaur got his Hobbits as far up as he could and I deployed my Ruffians as close to 3" away from the smial as I could. Bill Ferny is touching the chimney and feels very exposed at the moment. Centaur then placed his flowers and decided to use them to make a "no man's land" across the center, undoubtedly to either make a kill zone for his stones or to force me to go around, which will limit my application of numbers. Let's start round one!

Monday, July 29, 2024

Nemesis: How to Fight Against Mordor Troll Chieftains

Good morning gamers,

Earlier this year, we were asked if we could write Nemesis articles for the Witch-King of Angmar and Mordor Troll Chieftains. A few weeks ago, we covered the Witch-King (as an extended discussion of Ringwraiths, who have already shown up generally in this series). Today, we're tackling Mordor Troll Chieftains who . . . get a bit of a bad wrap in competitive circles.

Back when I started playing MESBG (back when it was LOTR SBG and Heroic Strike wasn't a thing), Mordor Troll Chieftains were scary - they were generic heroes who had base F7, giving them an edge over basically any hero in the game. After the rise of Heroic Strike (and its proliferation on a ton of units), having a base F7 stat doesn't usually matter until those "Strike heroes" are out of Might. F7 just isn't what it used to be . . .

. . . but Troll Chieftains are still F7/S7 monsters and if you find yourself across the table from one, you could be in for it. As a result, we're going to discuss today how to beat these guys - and while we're at it, we're going to look at an interesting corollary set of units you can beat with similar strategies: most Dwarf Infantry heroes.

What Makes Mordor Troll Chieftains So Hated?

Photo Credit: Warhammer Community (and a really great article, despite its age)

While Mordor Troll Chieftains receive some censure from competitive players, a LOT of Dwarf heroes are touted as being excellent profile-for-cost units and while you may not see these guys crushing all of the top tables, a solid Dwarf list is a good gatekeeper list that will separate the "bad" lists from the "good" lists. A lot of that is tied to how points efficient their heroes (and most of their warriors) are - and if we understand what makes Dwarf heroes so good (and what they lack), we'll learn a lot about what makes Mordor Troll Chieftains good as well.

Regardless of the Dwarf list you're fielding (except Thorin's Company), it's not hard to find at least one named hero profile and at least one generic hero profile that's F5-6, effectively S6 with/without a dueling penalty (and if that's from the Khazad-Dum/Moria army list, you probably have access to Piercing Strike as well), D8-9, 2-3 Attacks, 2-3 Wounds, and either 2-Might-and-Strike or 3-Might-and-Strike (generic heroes from the Hobbit have 2-Might-and-March, but the Master of Battle (5+) on Iron Hills Captains means they CAN call Heroic Strike for free if an enemy hero nearby calls a Heroic Strike). If you went looking for this in other factions (we'll look at "the big four" of Minas Tirith, Rohan, Mordor, and Isengard), you'd be hard-pressed to find any models that meet this description at the 65-120 price point of most Dwarf heroes - even if you drop the D8 requirement that basically no one outside of Dwarves/monsters can reach (Knights of the White Tower check most of those boxes at 60pts each and add Mighty Blow to the mix - but they are quite a bit squishier than Dwarf heroes).