Good morning gamers,
Today Centaur and I will be playing a scenario that I have been looking forward to playing - the Lockholes! This scenario has an optional rule that I mentioned back when I reviewed the lists you can make with the Scouring of the Shire scenario participants and it's required a little extra record keeping as we've been playing.
The Lockholes has four Hobbit Militia and Lobelia and Fatty "locked up", but if other heroes were carried off in a previous mission (Will Whitfoot and Folco Boffin) or were killed in a previous mission (Farmer Maggot and Gaffer Gamgee), you can replace the Militia with the heroes and rescue them instead. Centaur happened to win most of these scenarios, so only Folco Boffin has been added to the captives list. If he escapes, I'll get +3 Ruffians in the Battle of Bywater scenario.
The Lockholes
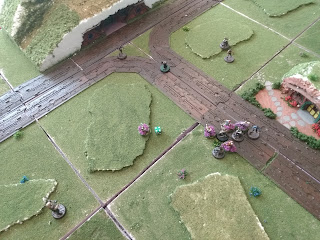
Centaur deployed with most of his guys on the road, with archers on one flank and a few Militia on the other. My Ruffians are pretty spread out to cast a big net for them.
Turn 1: Priority Good
Turn 2: Priority Good
Centaur and I continue advancing - very boring stuff. Notice that I have a new guy who walked onto the board from the bottom (flanking the Militia). The Hobbit Archers stood their ground and shot at the guy moving towards them . . . they mostly missed.
Turn 3: Priority Evil
Fights have begun! Centaur had his bowmen stand still in response to my grand charge. The flanking force with the Militia engaged two of mine and I had an archer come on from the right.
In the shoot phase, Centaur's archers shot the guy in front of them while my new archer got a 6 To Hit, a 6 for the in-the-way, and a 6 To Wound!
Two Heroic Combats were called (a free one by Rowan and one by Paladin (1/1M). Baldo and Paladin's worked (though Baldo had to boost to wound, 1/1M), but Rowan only wounded one of his foes.
Turn 4: Priority Evil
Two more Ruffian bows arrived and the Hobbit archers decided to stand and shoot this round (I think this was a mistake). The Militia swarmed my last guy on the flank, but I caught Paladin and kept him from escaping. The Hobbit Archers sent a salvo into the guy hiding at the bottom-left . . . he survived.
In the Fight Phase, Rowan had to double boost his dueling roll (1/1M) but botched his wounding roll. Paladin lost and was Paralyzed . . . then got UNPARALYZED at the end of the round . . . sheesh. The fight by the Militia is starting to swing in my favor . . . so that's good.
Turn 5: Priority Evil
The archers have given up shooting and screened for Paladin. I got a whip guy (arrived on the bottom of the photo), which is nice but out of position. The Hobbit archers shot . . . and didn't kill anyone.
. . . or Rowan could botch again and cop a wound. #RuffianLife The flanker militia have been slain, so I should be getting some reinforcements for the middle shortly.
Turn 6: Priority Good
Well, Centaur did his best to tie everyone down in the middle while Paladin raced for the Lockholes - as you can see, I've got Ruffians closing in from all sides. One Hobbit Archers moved half-speed so he could shoot at someone (marked by the green die) . . . he missed.
Rowan called a free Heroic Combat and rolled terribly again to wound (you can see that here). Thankfully, his buddies are still getting work done.
Turn 7: Priority Good
Centaur did what he could, but Paladin was swarmed by Ruffians and Rowan set himself up for yet another free Combat - I'm feeling okay about things . . .
In the Fight Phase, Rowan botched AGAIN but I killed most of the other guys. Paladin lost but blocked both wounds with his Fate (2/2F), while Baldo lost and nearly died after failing a Fate roll (1/2H, 2/2F).
Victory for the Ruffians! In the next scenario, Paladin doesn't get any Might - that's nice for me!
Conclusion
The scenario was alright - though I think the distance to travel is too great. If the Shire doesn't play a stand-back-and-shoot strategy, it's really hard for their F1-2 troops to win anything. They also kind of need to stay together, which Centaur didn't do, but whatever.
Tiberius Scenario Rating: 3/5 stars. Lately, I've been saying that the Ruffians need more guys to outweigh the penalties for having to walk across the board through trap-infested forests or to make up for the Sentry rules (which are fun - don't get me wrong), but today I have to swing the other way: the Hobbits needed more guys. With a slower army that needs to have guys free to tag the Lockholes when they arrive, these guys really do need a solid set of models - and more total models than the Ruffians.
As great as the theme of the scenario was, I think this scenario is best described as a "kill all the guys" scenario - with the numbers as they are, the best chance the Hobbits have of winning is by killing all the Ruffians (and the Ruffians already have to do the same, basically). Centaur tried to do this, but with several bad shooting rounds, the Hobbit force was just gonna struggle.
Next time, we'll be playing one of the two big scenarios of the campaign, the Attack on Tuckburough! There have been several modifications to the scenario thanks to the linked campaign bonuses - and the bonuses make the scenario really interesting! Until next time, happy hobbying!


No comments:
Post a Comment