Good morning gamers,
We're doing the Brockenborings scenario today, which is very similar to three other scenarios we've played to date - like The Mayor's Arrest, The Death of Lotho, and The Arrest of Folco Boffin, the Ruffians will be trying to capture two Hobbit heroes - and they'll just have Hobbit Militia to protect them. Like the Death of Lotho, I'll be spread out trying to guess where the Hobbits are going, but unlike that scenario, my hero (Bill Ferny) starts on the board. Like all three scenarios, the heroes given to the Shire player aren't great combatants, but unlike those three scenarios, I don't have a great hero (Bill Ferny is just sad). Let's look at the board - and cover a few caveats about the scenario before we get into it!
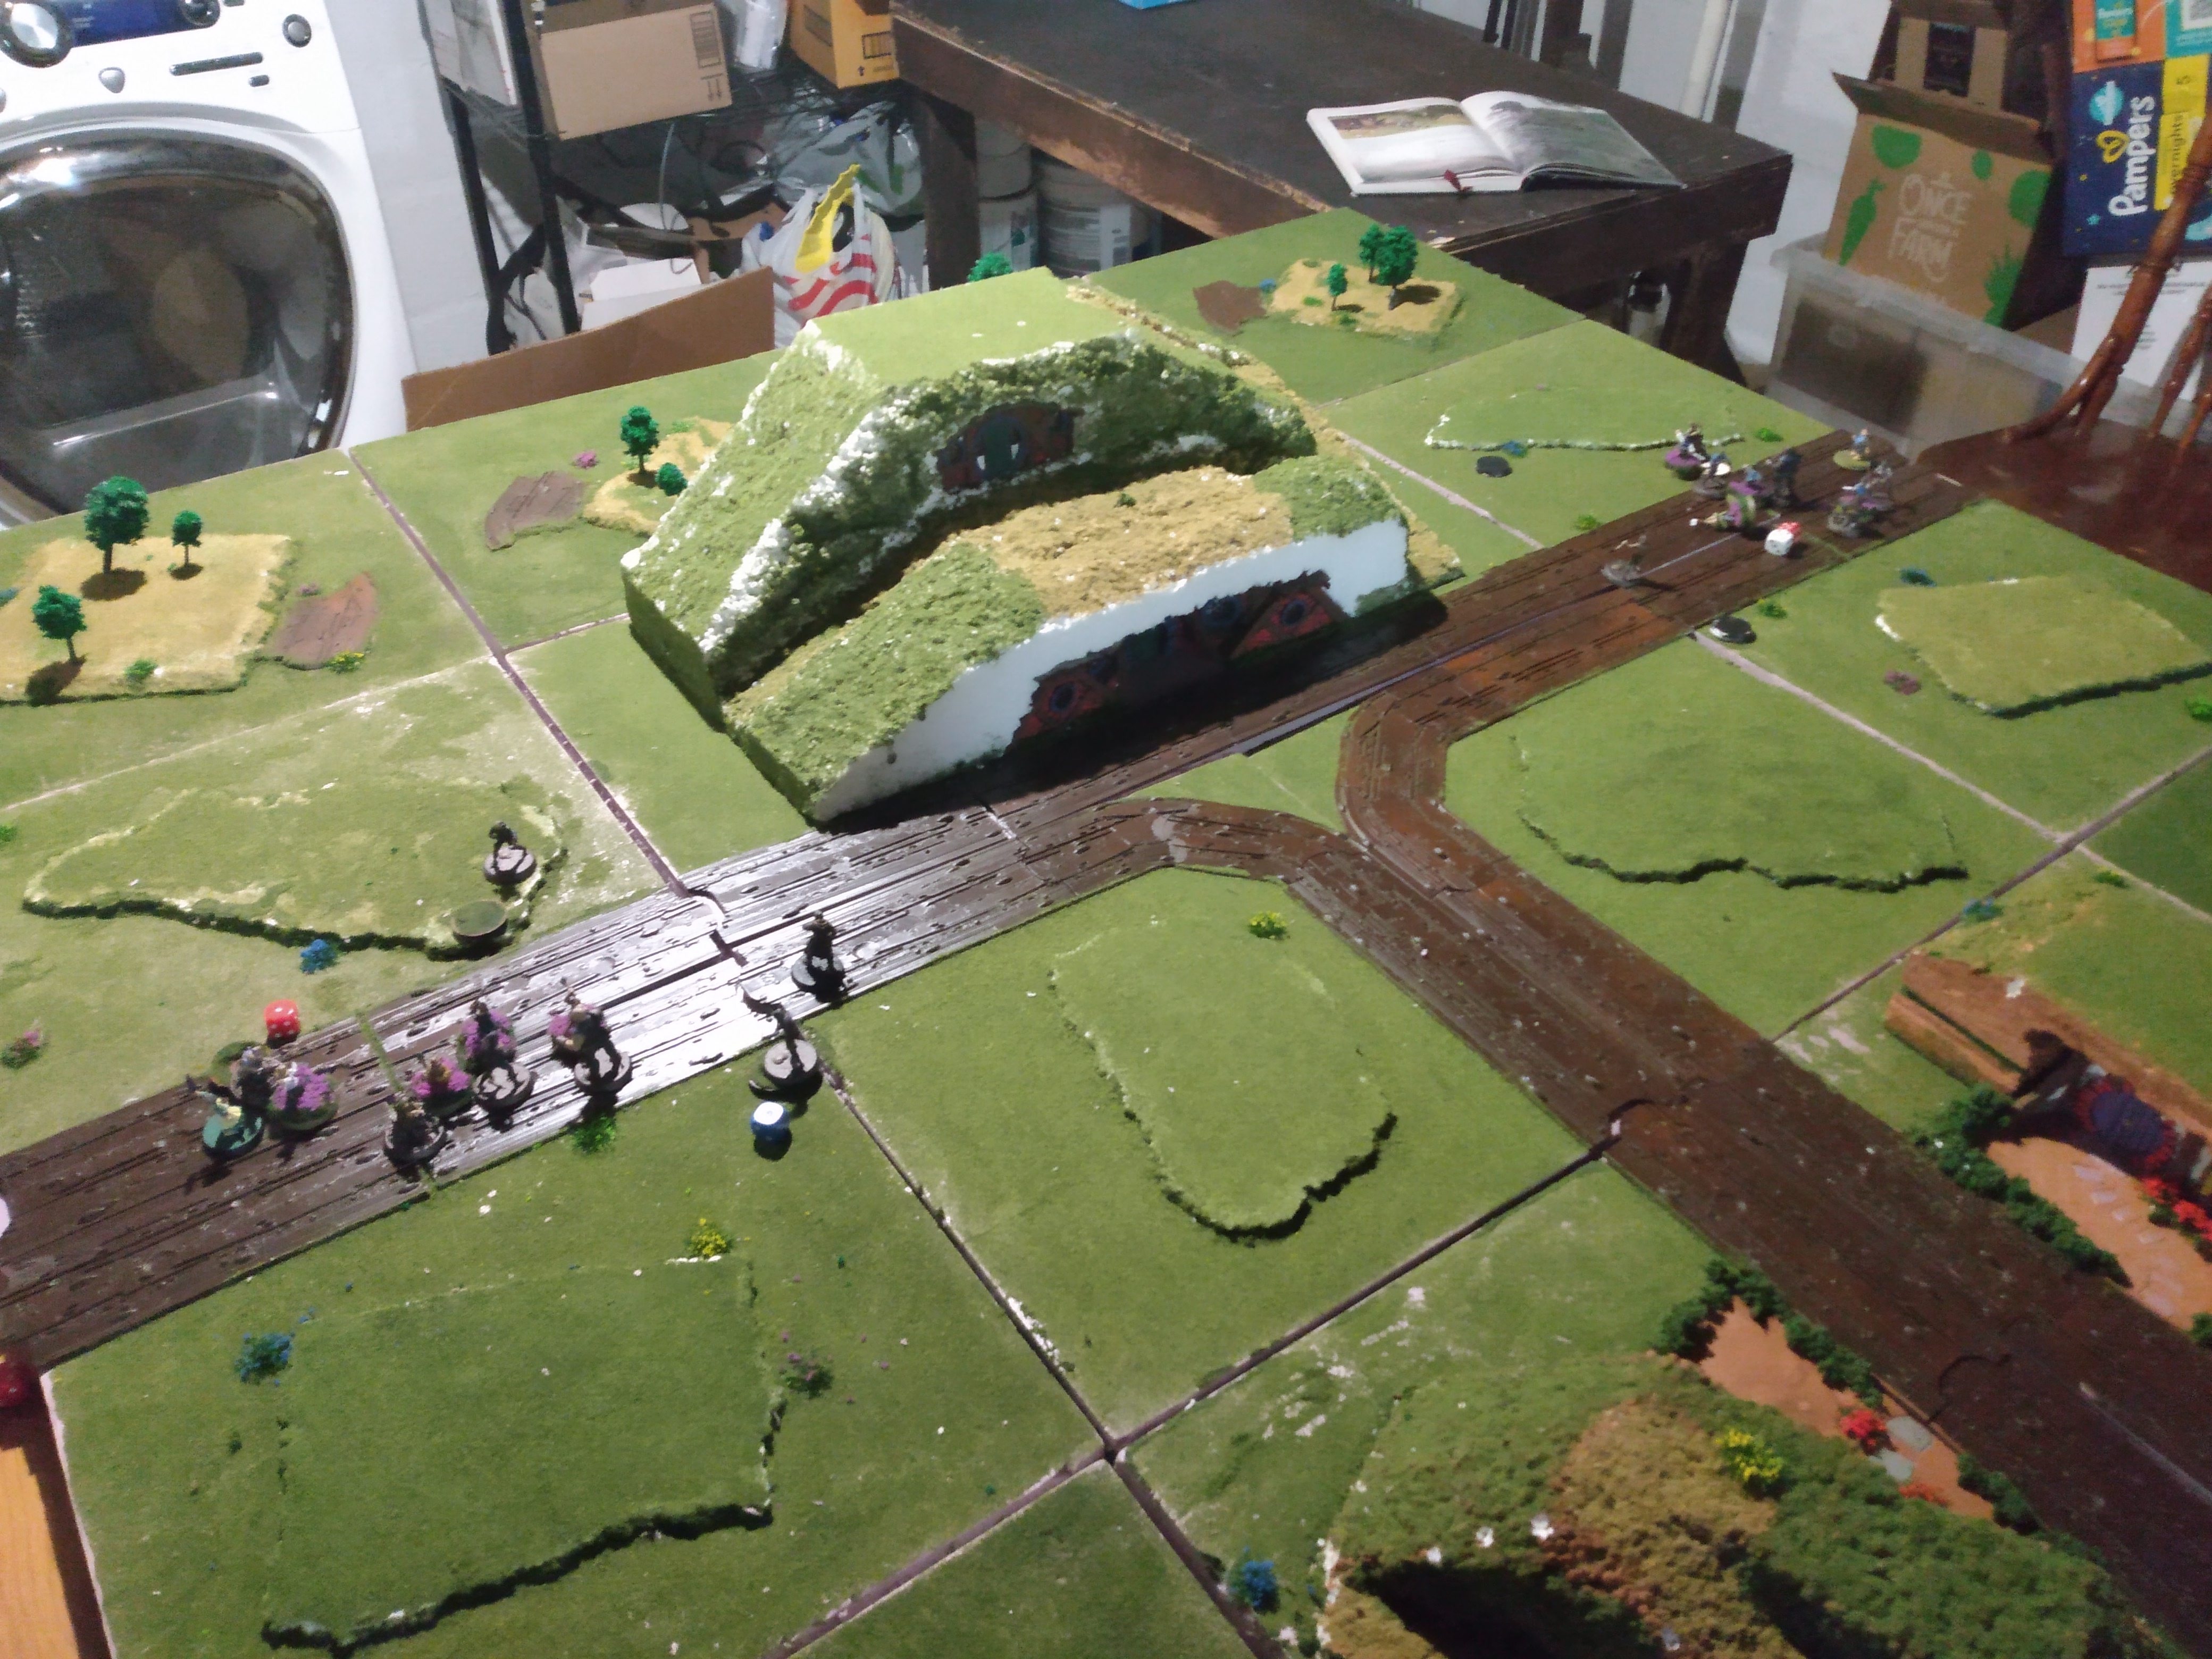
Brockenborings

As you can see, we have a smial in the center of the board in which Fatty, Lobelia, and eight Hobbit Militia begin in base contact. Fatty and Lobelia are trying to get off any board edge and I'm trying to capture them (using the At 'Em Lads or Put 'Em In Chains rules to Paralyze them) and get them off any board edge. If either of them are killed (or if one escapes and the other is captured), the game is a draw. Like the Folco scenario, this means that both of us want them to get close to the edge of the board - we just want to be the one moving them off. My units had to deploy at least 15" away from any Good model, so I've made a ring to hem them in as best I can, with Bill playing flex in the middle of the southern board edge.
Warning: before reading any further, you should know that your play experience in this scenario might be VERY different if you play it on your own from what you're about to read. For starters, because of the way my Shire panels are built, any smial tile we used would have allowed Centaur to travel ~12" to the north of the board to get off the board and since all of my models had to start 15" away from any Hobbit model, Centaur was like, "so I could deploy touching the northern side of the Hobbit smial, you'd have to start 15" away from me, and I could get both of my models off by moving 11" north before you could do anything . . . let's make a game of it and not do that." I appreciated that very much.
Second, thanks to Lotho not dying in the Death of Lotho scenario, Centaur adds 1 Might point to Lobelia's profile, which means Centaur goes from having 0 Might across his army to having 1 Might in his army - that's gonna be handy wherever Lobelia is. If you're playing the game normally, having 1 Might point on Bill isn't a big swing, but it does mean that the Evil player will be guaranteed to go first. Additionally, if Evil wins the Death of Lotho scenario, then Lobelia can't use her Fate point in this scenario (or any other scenario she's in for the rest of the campaign), which . . . would be huge in this scenario. The Death of Lotho scenario has big rewards for both sides if you're playing the linked campaign.
Third, because Centaur won the Bounders Strike Back scenario, he got to put 8 traps (two of each type) on the board . . . I love traps, but golly it comes with a healthy respect as well. My biggest fear is, oddly enough, that I'm going to get slowed down by them and not that I'll take damage from them. Yes, damage would be bad, but getting tied down by those Hobbit Militia will be bad (and it'll be even worse if the Hobbit Militia can write someone off as stuck in a pit instead of having to actually charge my guys).
So with all that prologue, let's see if I can bind up some Hobbits!
Turn 1: Priority Good

Centaur began a mad (four-inch) dash in opposite directions and I closed the gaps as best I could. I triggered a tripwire, but it didn't work (got a 1). In the Shoot Phase, I didn't kill any Militia with my bows - and while Bill is shown here sitting in the middle of the southern road (I forgot to move him), Centaur agreed that we could ret-con that and move him . . . Bill moved near Lobelia, where I think I'll need his Might point. I think I killed a Hobbit Militia near Fatty Bolger with an arrow - I didn't get a picture of it, but that side looks pretty lean in the next shot and eventually there's a guys missing, so we'll go with it.
Kill Count: Ruffians 1/10, Shire 0/13. Traps remaining: 2 snares, 1 tripwire, 2 pits, 2 dummies.
Turn 2: Priority Good

Centaur advanced again, trying to use his traps as shields on both sides. I had one guy caught in a snare (not killed but got stuck), another guy hit by a tripwire (but didn't die), and a third guy get stuck in a pit! In the Fight Phase, both Lobelia and Fatty were involved in fights - Lobelia won her fight and batted at the Ruffian with her umbrella, while Fatty lost his fight, but wasn't bound in chains (GUYS!!!!). In consolation, the guy stuck in a snare disentangled himself (which is statistically likely, but given that these are Ruffians who are CONSTANTLY defying the odds and doing stupid stuff, it made me very, very happy).
Kill Count: Ruffians 1/10, Shire 0/13. Traps remaining: 1 snare, 1 pit, 2 dummies.
Turn 3: Priority Good
With Bill Ferny woefully out of position, Centaur surged ahead with Lobelia and tied guys down with his Militia where he could. Fatty did his best to avoid being tagged. The Ruffian who started in a pit decided to stay in there (MUSHROOMS!!!) and I triggered two more traps - one snare which didn't work and a dummy trap (I said those would be annoying).

In the Fight Phase, I started off with Lobelia's fight, which I won, but I failed to put her in chains (see the "1" die next to her). I then proceeded to win almost every fight on that side and I successfully killed two of the Militia near her . . . if the die results would have been switched for Lobelia's, I'd have bound her (GUYS!). On the opposite side, I killed two Militia, which has increased my odds of getting Fatty dramatically - there's a consolation there.
Kill Count: Ruffians 5/10, Shire 0/13. Traps remaining: 1 pit, 1 dummy.
Turn 4: Priority Evil

With me FINALLY getting priority, I had a chance to get Lobelia - except that she called a Heroic Move and Bill Ferny would only be able to counter-call and affect himself and one other guy who wasn't in the pit - a guy who wouldn't be able to reach Lobelia, so there was no point. Lobelia didn't call With Me and just got off the board edge, as you see here. The guy in the pit . . . is still stuck - BOOOO!

On the other side of the board, moving first was great - got traps on both guys, hopefully securing myself at least a draw.

In the Fight Phase, I finished off the remaining Hobbit Militia on Bill's side of the board (they succeeded in getting Mrs. Sackville-Baggins off, but didn't fare well otherwise), while I bound Fatty and LOST to the Hobbit Militia. Blessedly for me, no Ruffians were wounded on that side. At the end of the round, Fatty didn't recover.
Kill Count: Ruffians 7/10, Shire 0/13. Traps remaining: 1 pit, 1 dummy.
Turn 5: Priority Evil

If Centaur had won priority here, Fatty would have still been on the ground and his buddy would still have been unable to reach him, so getting priority here was really just a coup-de-grace. The Ruffians hauled Fatty away and the rest of them swarmed the upstart Hobbit Militia . . .

. . . aaaaaaand they got him. It's a draw!
Kill Count: Ruffians 8/10, Shire 0/13. Traps remaining: 1 pit, 1 dummy.
Conclusion
I gotta say, it was nice not losing any models to traps - well, besides the guy stuck in the pit and the guy delayed by a dummy trap. Depending on your setup, this game could heavily favor Lobelia and Fatty (how close can they start to any board edge) or it can really favor the Ruffians - but despite that, I think this scenario needs a few more guys for the Ruffians. As we discussed in the Death of Lotho scenario, because you can pick any board edge, you can see where Bill is going to be and . . . just not got that way unless he's the ONLY model in that direction. With Lobelia and Fatty likely to escape after 4-5 turns of moving, if you have 13 Ruffian models to defend four possible directions, Centaur's five-model warbands have enough guys to tie people up if they just move in one (or even two) directions. I had a slight advantage here knowing that (in the name of good form), Centaur wasn't going to try to walk off the northern board edge, but even so, I barely had enough models to tie up the Militia, let alone get to the heroes I was trying to capture.
Tiberius Scenario Rating: 3/5 stars. I like that there are so many capturing scenarios in Scouring - it's very thematic - but unless there's a single board edge that needs to be exited, the capturing army really needs close to double the number of models on the other side. With so much ground to cover, it's REALLY hard to win unless you take certain board edges off the table. This is especially true if the Evil player doesn't have access to March - there's a whole set of their units that will just be dead weight unless a smaller portion of the army can hold the good guys up.
Next time, we're doing the Lockholes - and since I successfully captured a hero (technically two), we're triggering the Lockholes special rule from the linked campaign rules! Let's see if Centaur can get some unfortunate Hobbits to safety - and until then, happy hobbying!
Seems like there's a real running theme here of the Ruffians just not having enough guys. A lot of these scenarios feel to me like they'd be a bit more fair with only a couple more bad guys to level the field.
ReplyDeleteYeah, there's a common thread in scenarios that you get as participants what's in a blister or two - it's why Easterlings are starved for pikes in Defense of the North and why you tend to see Rohan, Minas Tirith, Mordor, and Moria participants in sets of 8.
DeleteThere are exceptions (like the Mordor Uruk-Hai in the Cirith Ungol scenario), but in a lot of cases, scenarios could be improved by just upping the number of sets you'd need to buy and then giving players the participants they actually need.