
Tiberius: The Warriors of the Westfold: 500 points
Rohan Captain with horse, shield, bow - 65 points
Aragorn/Strider with bow - 180 points
9 Warriors of Rohan with shields - 63 points
9 Warriors of Rohan with shields and thrown spears - 81 points
6 Warriors of Rohan with bows - 42 points
3 Riders of Rohan (all can shoot) - 39 points
2 Riders of Rohan with thrown spears - 30 points
31 units, 11 bows + 11 throwing weapons, 2 heroes
Tavros: The Garrison of Osgiliath: 481 points - NOTE: I just now realized that this army was short-handed
Boromir of Gondor - 105 points
Captain of Gondor with shield, lance, and horse - 70 points
18 Warriors of Minas Tirith with shields - 144 points
8 Warriors of Minas Tirith with bows - 64 points
7 Knights of Minas Tirith with shields - 98 points
35 units, 8 bows, 2 heroes
Zorro: The Warriors of the Serpent Horde: 501 points
Golden King of Abrakhan - 115 points
Dalamyr, Admiral of the Corsairs - 100 points
20 Serpent Guard - 160 points
13 Haradrim Warriors with bows - 78 points
6 Abrakhan Guards - 48 points
41 units, 13 bows + Dalamyr, 2 heroes
Golden King of Abrakhan - 115 points
Dalamyr, Admiral of the Corsairs - 100 points
20 Serpent Guard - 160 points
13 Haradrim Warriors with bows - 78 points
6 Abrakhan Guards - 48 points
41 units, 13 bows + Dalamyr, 2 heroes
Captain Glot: The Denizens of Moria: 500 points
Durburz, Goblin King of Moria - 60 points
Goblin Shaman - 45 points
18 Goblin Warriors with shields - 90 points
17 Goblin Warriors with spears - 85 points
10 Goblin Warriors with Orc bows - 50 points
2 Cave Trolls with Troll chains - 170 points
49 units, 10 bows + 2 troll chains, 2 heroes
The scenario we will be playing is a Brawl game, which means we're all just trying to kill each other. We've placed terrain on the map to create the following set-up:
 |
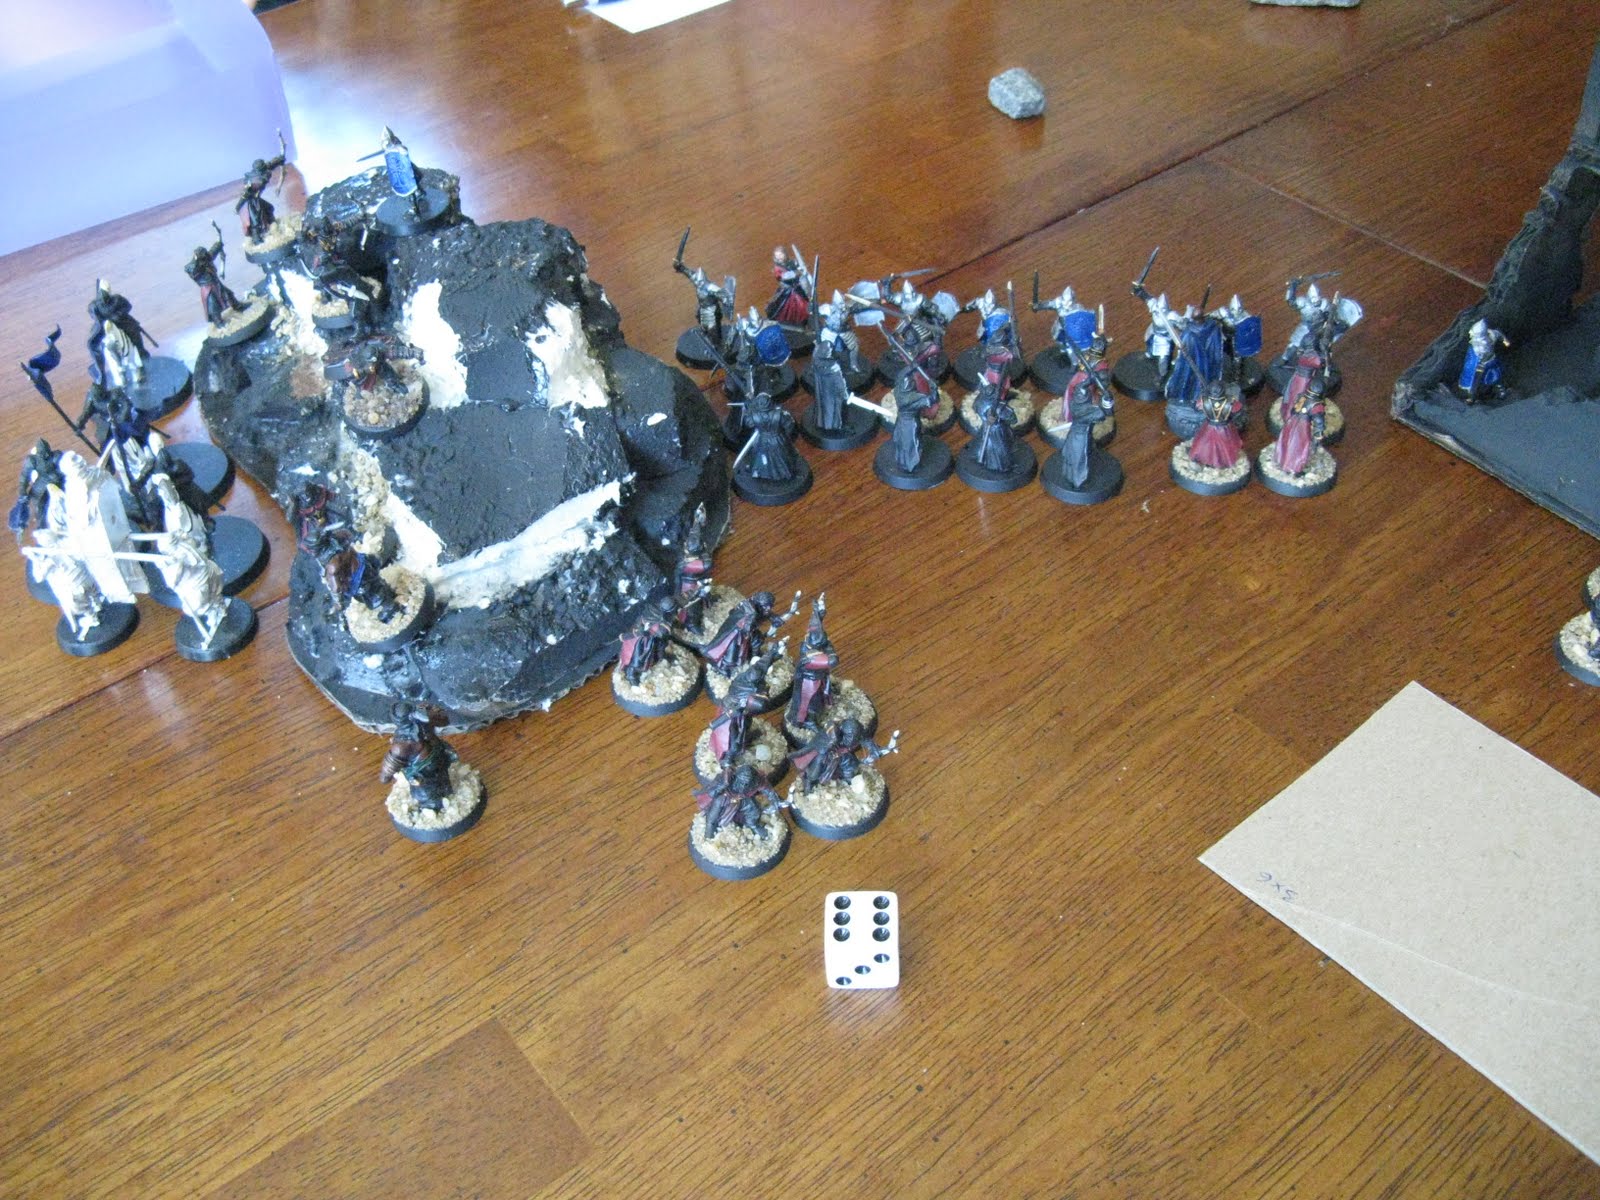
| Rohan has formed up on the bottom right, while Gondor is on the bottom left. Our archers have joined together so we can volley (which I haven't been able to do yet), and we've got cavalry on both flanks. The Goblins have squared off against the forces of Rohan, while the Serpent Horde is squaring against Gondor. Below I've got two close-ups of some of the armies of Good. |
 |
| Today I'm playing with 6 Rohan cavalry. I'm doing this firstly because I think they're cool, but secondly, I'm looking at investing in some (potentially), and I want to see how they work. Today, they'll be playing against Goblins, which won't simulate fighting against units with a higher Fight value (as most of my civs do), but it will demonstrate how they cope with large numbers. The unit in the center of the first rank is a captain. |
 |
| The might of Gondor. Boromir is leading a company of Gondor infantry and a strong squad of knights. The knight on the far right is also a captain. |
Turn 1: The Armies Mobilize, Arrows Fly (Priority - Evil)
 |
| Both armies move towards each other. In the Shoot phase, a Goblin archer kills the horse of the Rohan Captain (real bummer), but the Captain rises from the dust uninjured and ready to join his infantry companions. Two Gondorian archers during the volley killed two Haradrim Serpent Guards. |
Turn 2: Taking Ground (P - Good)
 |
| Both armies have now reformed their ranks after a round of archery and continue to move towards each other. Nothing interesting happened in the Shoot phase, so we'll move on now. |
Turn 3: Strategic Placement (P - Good again)
 |
| The attack continues, with half of the Moria battle line moving towards the Rohan ranks, while the other lingers for a bit. During the Shoot phase, one of the Goblin volley troops nailed a Rohan archer in the head. The cavalry have begun to do something interesting on the Rohan front. |
 |
| The Rohan cavalry are 5.5" away from the Goblin line, which means the Goblins can't charge them in one turn and the Goblins are in range of the Rohan throwing spears. Unfortunately, the Rohan riders didn't hit anyone during this Shoot phase...bummer. |
Kill count: Good 2/90, Evil 1/66.
Turn 4: The Tension Rises (P - Evil)
 |
| It is on this round that we have our first melee fight! It's a bit one-sided, you might say, with a Rohan cavalryman charging into some Goblins on the flank (unfortunately, he didn't kill anyone with his throwing spear). During the Shoot phase, Dalamyr killed a Gondorian swordsman with a thrown dagger (poisoned blade), while one of his fellow archers killed another Gondorian infantryman. The Goblins volleyed at the warriors of Gondor and managed to wound Boromir once...wow. Rohan responded by killing a serpent guard, a Goblin swordsman, and managed to wound Durburz (but that one was saved by Fate). |
 |
| After solidly winning the fight, the Rohan cavalryman killed his Goblin opponent, but only wounded him once with the four dice. This was a common event during this game - proving that the riders of Rohan are noble slayers...at least most of the time. |
Turn 5: The Melee Begins (P - Good)
 |
| We are now solidly engaged in combat, largely because the warriors of Gondor needed to charge into combat to be effective (my Rohan could have avoided the Goblins for a few more turns simply because we use throwing weapons/cavalry and move faster than the Goblin warriors). So, we are in combat and one of the Rohan cavalry with spears killed a Goblin swordsman in the move phase. |
 |
| During the Shoot phase, a Gondorian archer killed the Abrakhan guard (the one sticking out of the hill there), while the Haradrim archers killed a Gondorian swordsman and plucked another wound off Boromir. Ouch... |
 |
| As you can see, several of the Rohan have engaged in fights (one cavalryman is in bad shape against that troll), but for the most part, the cavalry shouldn't have a problem in these fights. The infantryman beside the cavalry is the forcibly-dismounted captain, who encourages his men to continue fighting. Resolution of these fights to come later. |
 |
| The rest of the Rohan line continues to fight the Goblins, though the other Troll, like Aragorn, is noticeably absent from the combat this round. |
 |
| Here we see what the warriors of Gondor are doing. Some have entered the ruins for both protection and gaining valuable ground. Below we have the resolutions for those fights. |
 |
| In the fights between Rohan and the Goblins, the rider against the troll died (pitifully), but one of other riders won his fight and killed the goblin he was fighting. The other rider lost his fight, but wasn't wounded. Rohan warriors killed 1 other Goblin, while the Goblins killed 1 Rohan swordsman in return. |
 |
| As you can see, the fight against Gondor was a bit...one-sided. The serpent guard killed 1 Gondorian swordsman, while Dalamyr killed 2 (he's a wicked hero, I tell you what). 3 Abrakhan guards killed a swordsman as well (included in the center of the previous shot). |
 |
| The Golden King used his 4 attacks and not only beat the riders, but due to his Chop! rule (+1 to wound with no penalty to win the fight), he slew not only both the riders, but also both the horses. Ouch...just...ouch... |
Turn 6: Forcing The Lines (P - Evil)
 |
| In this round of fighting, the riders no longer have the down beat, but they are joined by Aragorn who successfully charges the troll on the right flank. The other troll has also made it to the fight, so that should be interesting. In the Shoot phase, two Haradrim archers kill two archers (one Gondor archer, one Rohan archer). |
 |
| Aragorn won his fight against the troll easily and with the help of the Rohan rider who was fighting with him, they killed the troll (Aragorn spent his free Might point and 2 of his stored Might points to kill him). In the other fights, a Rohan rider killed the Goblin he was fighting (seen at the top of the frame), while the Rohan captain killed the Goblin he was fighting. The Goblins, in return, killed one cavalryman, two Rohan infantry, and Durburz killed a Rohan swordsman. The other cave troll killed yet another Rohan infantry, so in truth, they're giving the Rohan a pound-for-pound punishment over here - not bad for having a lower fight value. |
 |
| The warriors of Gondor managed to kill a serpent guard and an Abrakhan guard, while the knights and their captain killed 2 Goblins. Boromir in this picture managed to burn through all three Fate points of Dalamyr and land 1 wound on him - leaving the Corsair captain with a single wound left! The Serpent Horde responded by killing 2 Gondorian swordsman and the Golden King finished up the other two knights behind the hill (again, without help). |
Turn 7: Hope Begins To Fade (P - Evil again)
 |
| The lines have now become mobs and there is a gap in the Rohan line (thanks to the Troll and some of the poor work of the Rohan). To prevent their horses from becoming bogged down, the Rohan captain and the Gondor captain call heroic moves. In the Shoot phase, a Rohan spearman killed a Goblin swordsman with a throwing spear, while the Haradrim archers continue to batter their opponents and kill one Gondorian swordsman and a Rohan archer. |
 |
| In the Fight phase, Aragorn spends his free Might point to call a heroic combat, but loses the fight badly to the Goblins he was fighting (and is wounded by one of them). The Rohan cavalry, as you can see, killed 3 Goblins (the one with the dice next to him is merely knocked down, not killed). The cavalry with spear that you see is the only cavalryman to score more than 1 hit per model during the entire game...I think he's tired of sparing them pain. |
 |
| In the other fights, the Rohan Captain and his assisting infantryman killed the Goblin they were fighting. One of the Gondorian knights killed his Goblin, but the rest of the work belongs tot he Goblins: Durburz killed the infantryman he was fighting, while two other Goblins killed Rohan spearman. An Abrakhan guard on this side of the board killed the Rohan warrior he was fighting, to further add to the slaughter. |
 |
| Boromir also called a heroic combat and not only plowed through the Abrakhan Guard and Serpent Guard he was fighting, but also killed another Serpent Guard and Haradrim archer in the following round of combat. YEAH! One Gondorian warrior killed an Abrakhan guard on this side, but the rest of the kills belong to the Serpent Horde: they killed a Gondorian archer and two Gondorian swordsman. Three other Good units died somewhere...probably near here... |
Kill count: Good 27/90, Evil 34/66. Both good forces were broken this round...ouch.
Turn 8: The Lines Are Broken (P - Good)
 |
| So things have gotten pretty messy over here, but here's what's happened. Aragorn has charged into the heart of the Goblin archers, with the hope of killing a few of them. None of the Gondor units flee, while two Rohan units do (they are sent to the cone of shame). |
 |
| During the Fight phase, Aragorn rolls 3 1s to win the fight and promptly loses. He takes a second wound and saves a potential third wound with 1 Fate point. The two cavalry at the bottom kill their foes, but the other riders fail to wound theirs, simply knocking them to the ground, as indicated by the dice. The Rohan Captain and his loyal bodyguard kill their foe, as do two other Rohan warriors. |
 |
| The Gondor unit with the spear is the Gondorian captain: during this turn, he was forcibly dismounted by the troll and Durburz, but he rose from the dust unharmed. Two Serpent Guards and a Goblin swordsman killed a Gondorian warrior with shield. |
 |
| Six Serpent Guard and an Abrakhan Guard killed four Gondorian archers and a swordsman. Dalamyr also killed a swordsman, making the force of Gondorian knights dwindle very quickly. Boromir won his fight, but only killed 1 Haradrim archer (using up his last Might point). Right now, it's looking pretty bleak for the forces of Good. |
Turn 9: All Is Lost (P - Evil)
 |
| The armies have now smashed together for one last round of combat (at which point the forces of good are fine with surrendering). Our objective: break the forces of Moria. Aragorn calls a heroic move and gets his cavalry friends to charge into their foes for one last epic charge. |
 |
| The Golden King, having slain four knights during the game, now moves to the tactical role of making heroes fail their courage tests. He spends a few Will points to "bribe" Boromir to flee the battle, after Boromir takes a low courage test. |
 |
| Here you can see Boromir hanging from a gallows in shame...oh well. |
 |
| As you can see, the riders devastated the Goblin lines on this turn, with only one unit being knocked over and not killed (see the unit with the dice). Between Aragorn, the riders, and the Rohan infantry, they sent 8 more Goblins to their maker...which breaks the Goblin force. The Gondorian soldier you see on the far right was smashed by a Cave Troll...ouch. |
 |
| The Goblins and Serpent Guard clean up against the archers of Rohan and Gondor, but one warrior of Gondor still stands... |
 |
| The last Gondor soldier on the far side of the battle won his fight against overwhelming odds and managed to kill a Serpent Guard in the process! Well done, noble son of Gondor! (A little too late, though, but I won't tell him that). |
Conclusion:
Assessment by Tiberius:
On the whole, I assumed that we'd probably lose this game - particularly after the Gondorian cavalry were neutralized by either a troll or the Golden King. I was impressed with how well the Rohan cavalry work if you can distract most of the enemy force with your cheap, cheap infantry. A Goblin shield-and-spear team costs more points than a Rohan Warrior with throwing spear who can shield to get the same amount of dice and have a higher Fight value. This impressed me quite a bit, since the cavalry can not only capitalize on a decent selection of ranged weapons, but can also couple that with incredibly good movement, which is great in the skirmish game, where you can deprive units of their spear support and trap whole portions of the battle line.
Stellar unit for Good: Riders of Rohan
These guys are excellent skirmish cavalry. Particularly against units with Movement 5", they are exceptional at skirmishing and coupled with cheap infantry with thrown weapons, you can really harass an enemy that moves slower than you and doesn't field cavalry. I particularly like how my guys could all use their ranged weapons, which made them versatile units - and they can be devastating on the charge if you pick your battles right. In the end, I've been greatly impressed with the Rohan horseman and am a little intrigued to begin a Rohan army myself...if I can get over their low Fight value.
Stellar unit for Evil: Serpent Guard
The Serpent Guard are 8 points each and have a Fight value of 4 and re-roll rolls to wound of 1. This makes them excellent troops in combat, but they need to remain protected from enemy archers as their defense is low. I'm impressed with these guys and have come to the conclusion that in facing them, my Dwarves are going to need to change their tactics a little. Normally, my Dwarves trust to having heroes crush through the enemy, but when you're facing units Serpent Guard, it'll be interesting to see if my heroes can still hold up against them. We'll see what we do at a later date.


