Featured Post

Top 10 Most Improved Evil Profiles in the Armies of Middle Earth Book

Hey Reader! (Okay before we begin, you should know, because he won't tell you, so I will: Tiberius has a birthday this week! So leave hi...

Monday, October 30, 2023

Nemesis: How to Fight the Assault on Lothlorien Legendary Legion

Good morning gamers,

Last time, we looked at the much-feared Assault Upon Helm's Deep Legendary Legion and some strategies you can employ to fight it. Today, we turn to the other "Assault" legion (the Assault on Lothlorien) to see what the hype is about this list . . . and some things you can employ to fight against it. Yes, it shoots things - and yes, it has crazy shenanigans that the Helm's Deep list doesn't quite have - but it also plays very differently and can be beaten with some other methods of attack. Let's dig in and see what all the fuss is about (especially now that they've changed a bit).

What Makes The Assault on Lothlorien Legion So Hated?

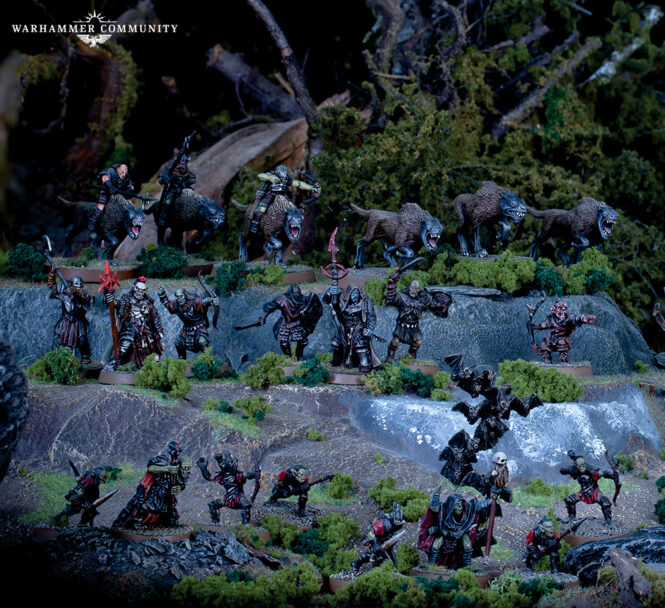
Photo Credit: Warhammer Community 

The first thing that annoys players about fighting this Legion is that it's a horde list - this critique isn't unique to the Legion, but any time you can get a large number of models at basically any points level, someone is going to gripe. Sometimes bringing a horde to the board (I'm a poet, I know) is fine - no one seems to complain that much when there's a Denethor-led Minas Tirith spam list on the board - and there are plenty of lists that run "just a lot of Orcs or Goblins" that no one things is oppressive. It's not like this list is spawning new models from behind your lines like Goblin-town or has +10 or +15 models on you at the start of a game (though it might).

What makes this list annoying is that it's a horde list with other stuff. The list has access to Moria Goblins (5-7 points depending on what gear you give the Moria Goblin Warriors and your opinion of Moria Goblin Prowlers), Orc Warriors and Trackers (5-10 points depending on the gear you give them, potentially more if you invest in a banner), and Wild Wargs (which all heroes can lead and are very cheap fast infantry). If you spend 250-300 points on these things, you can easily field 40 warriors at most points levels, so long as you have the heroes to lead them.

Enter the shamans in this list: on the named front, you've got Druzhag and Ashrak (at least one of them is required), who come in at 50-90 points, but fielding both is certainly possible at 500+ points. You also have Muzgur (who is required along with one of these Goblin guys - and now has to be your army leader), who at 70 points is one of the cheapest Heroes of Valour in the game (normally he's Fortitude, but in this list he's Valour). Pick up all three of these guys (or two of these guys and one other hero) and you can horde out pretty easily.

On the generic hero front, you have both Moria Goblin Shamans and Orc Shamans (45 or 50 points, respectively) who are able to lead 12 warriors in their warbands, thanks to the promotion to Fortitude status in the Legion. Which one you prefer used to depend very much on your view of Orcs - are they just a handful of spearmen behind the Goblins or are they a proper shieldwall (half shield, half spear-and-shield). Now that you have to have fewer Goblins than Orcs, it'll be hard for any player to have exclusively Goblins in their shieldwalls, but I have always liked the picks that can help the Orcs reach S4 (which you can get with Moria Goblin Prowlers who have to fight two-handed, but not Moria Goblin Warriors) and the flexibility of not having to have these guys arrive near the Goblin lines. I used to be in the minority opinion on this - time will tell how the new meta for this list will shake out.

Saturday, October 28, 2023

Fantasy Fellowships: The Erebor Reunion, Part 6b

Good morning gamers,

We're closing in on the end of our Fantasy Fellowship campaign and today we have Bofur's second-to-last mission (the Charge of the Rohirrim). Fell deeds awake - let's get going!

Charge of the Rohirrim

So I'll be honest, this mission felt a lot like deja vu for me after the Eomer's Return scenario - I have a bunch of skirmish cavalry, there's no shooting on the other side, job's done. However, there IS a way that Evil can force a draw if we break them before killing Gothmog (Gothmog can walk off the back edge of the map), so we're going to do some whittling down, but then we're going to charge in and "do what the Riders of Theoden Legion does." Let's see how this all worked out . . .

Centaur deployed just shy of 12" forward and I deployed as far up as I could:


Turn 1: Priority Good


I moved my guys up 5" and prepared to shoot, while Centaur prepared to receive my shooting. In a stunning turn of events, I aimed, I shot, I killed nothing. Turn two . . .

Turn 2: Priority Good


In case you're wondering, the "priority" thing is a bit moot, since there's a scenario rule that Good always counts as winning priority . . . so I stood where I was and fired again, with Centaur standing to receive the shots.


In the Shoot Phase, we actually got some hits this time and killed two Orcs!

Thursday, October 26, 2023

Fantasy Fellowship Deep-Dive: Optimizing Your Characters, Part 2

Good morning gamers,

We're back for another review of which characters are statistically optimized (according to my own analytic model) for certain positions in Fantasy Fellowships. Last time, we looked at the Ringbearer and Companion slots, and this time we're looking at the Friends of the Ringbearer who will be traveling to Rohan and Minas Tirith (aka, the Merry and Pippin slots). The only requirements in Fantasy Fellowships is that the characters cost no more than 50pts, which as of the writing of this article, gives us fifty models to evaluate (most of whom we covered last time in the Companion slot . . . because, you know, Hobbit heroes are generally less than 50pts). We do have some new arrivals, however - and while the two positions we're going to look at today are often in the same scenarios together, there are a few scenarios near the end where they differ (the Ride of the Rohirrim scenario and the Atop the Walls/Denethor's Madness scenarios). Let's dig in and see who's the best!

Scoring Criteria

As I mentioned in a previous article, your Merry and Pippin characters participate in 11-12 of the 23 scenarios in Fantasy Fellowships - or put simply, in half of them. In the early scenarios, they'll be fighting Ringwraiths and Barrow-Wights (Terror-causing units), then they'll be braving the road to and through Moria (with F3 Wild Wargs and F2 Goblins), then pop out the other side to fight F4 Uruk-Hai near and in Rohan (Amon Hen and Ambush at Night) and F3 Mordor and Morannon Orcs (Atop the Walls or Ride of the Rohirrim and the End of All Things). Because most of these are the same scenarios the Ringbearer and Companion are in, a lot of our metrics are going to be the same - but the biggest change from a combat perspective is that you can get away with these guys being F4 instead of pushing them to be F5 (more on this throughout this article).

But there are some key differences for these characters that makes picking the "best" character different from your Companion. First and foremost, the hero you select for your Rohan friend doesn't need to be a particularly good fighter, since he'll be riding safely behind Eowyn (buffing the Dernhelm profile) during the only scenario where Pippin and possibly other Fellowship members are absent. Besides the Boromir character, this is probably your best choice for a "dump" character.

Second, the hero you select for your Gondor friend would benefit greatly from being able to help your wizard character be better. Since the two scenarios where your Gondor Friend will be separated from everyone else involve your wizard character (in one you lose if he dies; in the other the wizard only begins with 1M/1W/1F and no staff of power), it wouldn't hurt to be able to make your wizard character better (or be able to pull models out of his fights). There will even be F4 Citadel Guard who can't be wounded in one of his fights - so a little extra oomph wouldn't hurt.

Third, these guys are often add-ons to your Fellowship (either your Ringbearer and Companion or the full/wizardless Fellowship). As a result, we wanted to reward certain characters for "doing helpful things" with these slots - things like providing shooting, stat regeneration, and banner rerolls. While you CAN get these sorts of things on bigger heroes, getting contributions from smaller heroes is a nice bonus in Fantasy Fellowships. Not all boosts are created equal (some require you to have other Fellowship members with certain keywords or could change the way you/your opponent plays the game), so we're going to have a qualitative measure for how "good" these things are. This is the first time that we'll have a layer of subjectivity in our model, but I thought it was important to let some of the more nuanced benefits of these characters shine.

With this in mind, we have four categories to evaluate again - three will look familiar, but one is unique. Let's take a look . . .
Monday, October 23, 2023

Nemesis: How to Fight the Assault Upon Helm's Deep Legendary Legion

Good morning gamers,

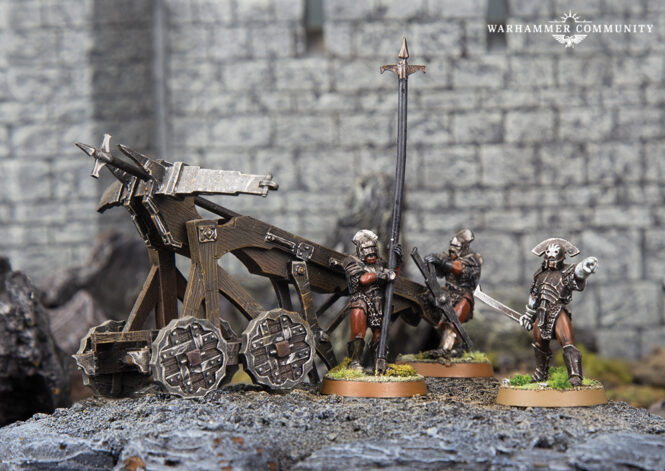
The Assault Upon Helm's Deep Legendary Legion has been rocking the meta (or should I say piercing the meta? Bombing the meta?) since its release in War in Rohan. It's a Legion that isn't constructed around a top-tier hero (it's got no named heroes at all), but instead gives greater reliability to its siege engines and allows you to run more Uruk-Hai than you usually would be able to with Heroes of Fortitude/Minor Heroes.

Many competitive players have identified this as a list that's unfun to play against - stand back and shoot at the horde of Uruk-Hai and you get torn up by crossbows and ballista. Try to close with the ranged units? You get blow up with a bomb team (and have to face a pike block with whatever's left). When you as a player feel caught between a rock and a hard place, it's hard to have fun (unless you like a good challenge and don't mind losing . . . like I do . . . most of the time).

I've fielded this list a few times (though I don't run more than 2 ballistas/1 demo team on principle) and one of our resident Isengard enthusiasts here (Red Jacket) has run it at several of our events with different configurations. Having had to play Red Jacket's Assault Upon Helm's Deep list at 623 points at the TMAT 2023 Grand Tournament earlier this year, I have to say the two ballistas backed by nine crossbows was nasty and awful (and naturally, I had to play against it in Lords of Battle where my Orcs and Barrow-Wights needed to close in fast . . . and he killed more with his ballistae once I got within 12" of him than from farther away).

But there's got to be a way to crack the code - how does one beat up a list like this? I mean, the list has been out for ages - surely, there's a proven method for beating them? Well, there are several strategies you can use - but before we get into them, let's break down what about this Legion makes it feared.

What Makes The Assault Upon Helm's Deep Legion So Hated?

Photo Credit: Warhammer Community

The first thing you'll hear people gripe about are the long-range threats in this list. The list begins with Isengard Assault Ballistas, which are probably too cheap for what they do. When compared to other siege engines, you get a comparable crew size, a comparable Strength/Defense, the Large Siege Engine requirement (which makes you a siege target - very handy when fighting other siege engines, but does place a requirement of 2+ unengaged crew to fire it), and good rules (Accurate/Piercing Shot, 6" minimum range) - for a discount bargain price of 65 points. You can see the full comparison below:


If the ballistae weren't enough to make you gag, each ballista comes with 1 siege veteran (Minor Hero) and 2 crew who don't have shooting weapons, so you can take +1 Uruk-Hai Warrior with crossbow for every ballista you take - that's 76 points for a S9 ballista and a S4 crossbow. Sheesh, that's rough. Add into this that you can field 13 Uruk-Hai Warriors - 8 with pikes/shields, 5 with crossbows - for 135 points, and it's not hard to see why the pairing of crossbows with ballistae would drive people nuts. Sure, you have to field 1 Uruk-Hai Captain (who can lead 18 Uruk-Hai) for every ballista you want to take, but that's not a high tax.

Thursday, October 19, 2023

Fantasy Fellowship Deep-Dive: Optimizing Your Characters, Part 1

Good morning gamers,

If you've been following the blog for the past year, you know we've been walking through Fantasy Fellowships (and we're almost done!). Playing through scenarios has been fun - sub-optimal equipment choices, sub-optimal unit choices, and very different victory conditions have led to some very interesting games (you can read about mine on the Quest of the Ringbearer page).

But one of the things that I've been struck with as we've been playing is how much value the stats and rules of your units actually contribute to how well your games go. I mean, do you NEED good units in your Merry/Pippin slots? How good does your wizard need to be? Well, today begins a new five-part series where I take the principles of the Fantasy Fellowship deep-dive posts I've been doing and applying a statistical score to different categories for each unit that can be taken in a particular Fantasy Fellowship slot, and finding out who are "the best" units for each position. 

If the Google Analytics are to be believed, our least popular posts on the blog are generally related to a) Fantasy Fellowships/Quest of the Ringbearer, b) math posts, and c) Shire or Sharkey's Rogues reviews. Naturally, then, we will kick off this new series by doing a post that covers all three topics. :-) We begin our journey with what might be the two most important characters in your Fellowship: your Ringbearer and your Companion. Let's dig in!