Featured Post

The New Age Is Begun: the Fords of Isen Army List

Good morning gamers, We're back for another week in Rohan month (Volume III!) with the Fords of Isen army list. A while back, the TMAT t...

Thursday, July 28, 2022

Quest of the Ringbearer: Model Collection Update, Part VI

Good morning gamers,

Last time we finished up the normal scenarios from Quest of the Ringbearer, but if you've looked at the Fantasy Fellowship campaign, you know that they steal scenarios from other books too (Gondor at War and War in Rohan) so you can use the "not Frodo and Sam models" more in your games (and let's be honest, it's more exciting this way). Since Fantasy Fellowships are a fun way to play the game, I figured we'd go over how I'm doing on that front (since some of my purchases have been directed that way).

Part VI: Fantasy Fellowship Missions from War in Rohan

There are five Rohan-based scenarios in Fantasy Fellowships:

  • Ambush at Night
  • Warg Attack
  • The Deeping Wall
  • Ride Out
  • Eomer's Return
These scenarios feature 1 scenario for your Merry/Pippin characters to participate in, 3 scenarios for your Aragorn/Legolas characters, 2 scenarios for your Gimli character (because he's too busy tooting someone else's horn to be in the Ride Out scenario), and 1 scenario for your Gandalf character - so 6 heroes in 5 scenarios. Aragorn/Legolas/Gimli substitutes will get armor if they don't already have it in the Deeping Wall scenario and all subsequent ones, while your Gandalf character gets their buffed version (Gandalf the White, Galadriel Lady of Light, or +1 Attack and -1 to the casting difficulties of their spells to a minimum of a 2+). 

Fun times await - let's see how we're doing!

Purchase #45: Captain of Rohan on foot and mounted


I have an actual Captain of Rohan (more on him at the end of this post), but my Captain of Rohan is Ordwald, astride his faithful steed, Fluttershy. I showed my infantry Eomer model last time - here you can also see his mounted version.

Monday, July 25, 2022

In Defense Of: Osgiliath Veterans

Good morning gamers,

Today is the last of the "In Defense Of" posts that I'm writing for now - we'll pop back into this series at some point to cover some other profiles that I, Centaur, and Rythbyrt have bumping around, but we've got some Legendary Legions and factions that need reviewing, so we've got to move on. :-) Today we have probably the hardest sell I've tackled yet (well, some of those Ruffian posts were pretty hard sells too): Osgiliath Veterans. This is one of those profiles that's "cool" but not viewed as particularly competitive - mostly because Minas Tirith is one of the most fleshed out lists in the game (and certainly one of the most fleshed out factions for Good) and with so many "heavy infantry" competing for a spot in your list, these guys just appear to be "bleh" relative to the rest. So today, we'll look at the counts that stand against these guys . . . and then walk through how to rethink your Minas Tirith priorities with these guys in mind.

Why NOT To Take Osgiliath Veterans

Osgiliath Veterans - such a loved-and-yet-unloved lot . . .

In this series, we've compared the profiles that need viewing against their comparable alternatives - and sometimes that list is rather long. Minas Tirith has several Infantry models available to it - each of which is supposed to do something slightly different (note that in this post I'll be assuming we're looking at vanilla Minas Tirith and that their army bonus of +1 Courage is active):
  • Warriors of Minas Tirith (hereafter "Warriors") - cheapest D7 troops with access to both banners and spears;
  • Rangers of Gondor (hereafter "Rangers") - cheap 3+ shoot value S2 bows;
  • Citadel Guard (hereafter "CitGuard") - 4+ shoot value Longbows, potentially mounted on horses;
  • Guards of the Fountain (hereafter "CourtGuard") - F4/D7 with Bodyguard; and
  • Osgiliath Veterans (hereafter "OsVets") - C5
For most competitive players, having C5 just isn't enough to warrant the existence of OsVets - especially when you have Bodyguard on not one but TWO infantry options (CitGuard and CourtGuard). A CourtGuard model might be more expensive than an OsVet, but while the army leader is still alive, their auto-passing Courage tests is a huge boost - and even if the army leader dies, C4 is almost as good as C5.

Thursday, July 21, 2022

Minas Tirith Me Up: Osgiliath/Minas Tirith Terrain, Part II

Good morning gamers,

We're back for Part II in this series, in which we'll be talking about the walls and buildings we're making for the Minas Tirith board. Last time, I showed the modular layout for the board and this time we're going vertical with some of the buildings and structures that will be on it. Keep in mind that Fantasy Fellowship from Quest of the Ringbearer are on my mind while reading - I'll be coming back to that a lot in this article!

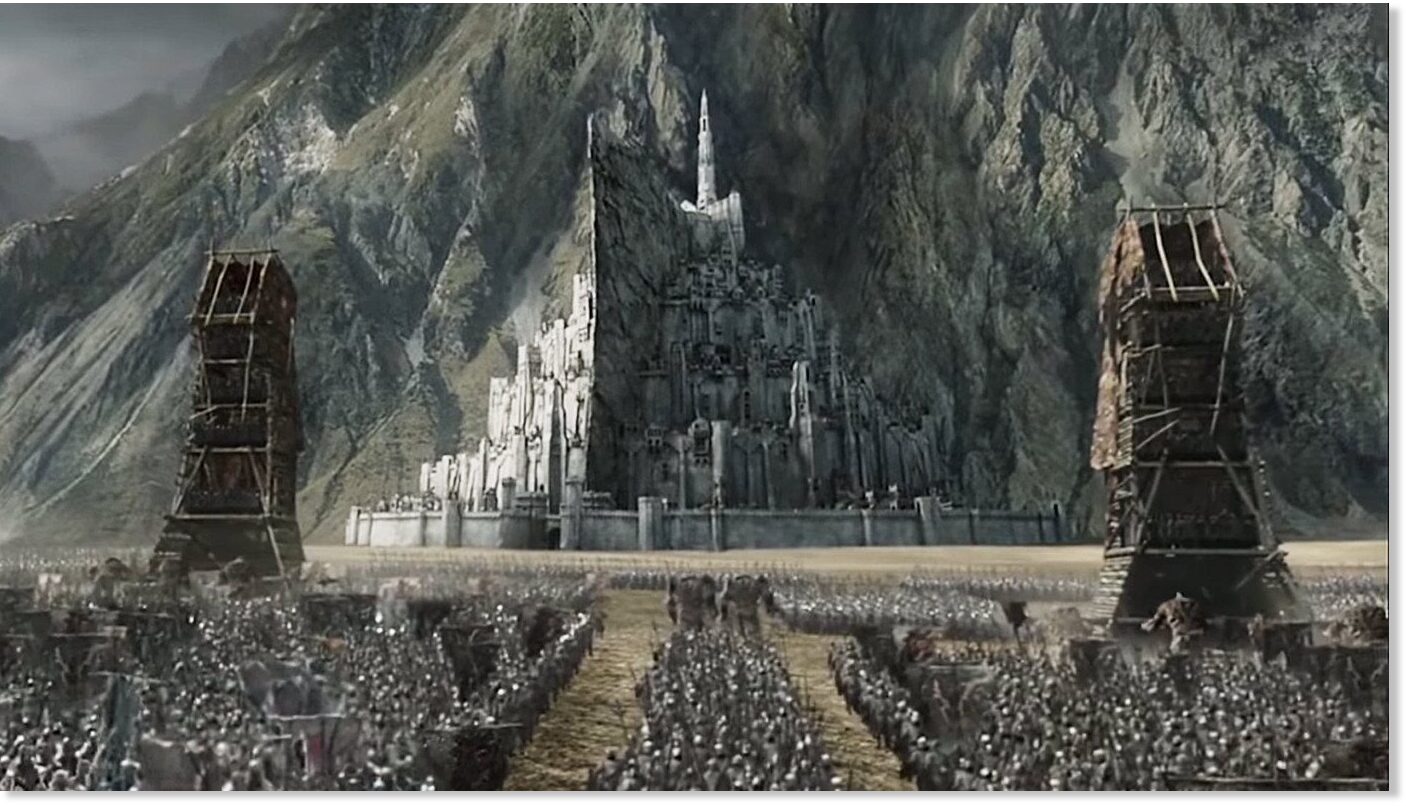
Photo Credit: Sott.net

The Outer Wall

If you've seen the tutorials from Zorpazorp, you know how this begins - big blocks of polystyrene bonded together into a big mass. Well, we're doing a 9" high wall instead of a 12" wall because it will work better with the buildings we have and the storage constraints we're looking at (and because of Fantasy Fellowships - more on that in a moment). It all begins with polystyrene sheets:

Lots of cutting going on . . . the wife has been very patient with the polystyrene bits . . .

Once they were cut into 9"x12" panels, it was time to line them up and start skewering them:

Skewers and glue, man, skewers and glue . . .

Glue added to both sides, smash the other two panels around the skewered one, and boom - 3" thick wall in action. In Fantasy Fellowships, you have the Pyre of Denethor Scenario, which is played on a 24" x 24" board and has two 9" x 12" blocked-off sections that makes a 6" corridor for Gandalf and Pippin to come down into the tomb . . . conveniently, our walls will be able to lay down on their sides to accommodate this. Of course, a wall that high is going to need stairs . . . so I made a staircase:

It will need a bannister around the sides to protect those on the stairs from being shot, but that'll come later . . .

The stairs are 7" switch-backs that would allow some models to try to climb a few steps up (or leap a few steps down) to save some movement. Each stair is 1" long and will be treated as adjacent to each neighboring stair (for the purpose of supporting and engaging). As you can tell from the image, these stairs are going to need some filler to clean up the joins, but it's well on its way.

Added to the two 12" long strips of wall (and a few buildings - more on that in a bit), here's what we have:

A mostly empty board, but it's coming together . . .

These two wall sections can be placed together for the Atop the Walls scenario from Gondor at War/Fantasy Fellowships, so we're ready for that when we get to it! The next big project will be the gatehouse. . . which I have a rough design for and have started the process of carving up the pieces. The board and walls will eventually be coated in something (probably mod podge) before being sprayed a more natural color, but I need to settle on where the buildings will be first.

The Inner Wall

As we move into the rear of the board, I glued down the panels we cut last time for the second level and also made a ramp way to get to the second level:

The second level is being bonded with the aid of Doyle, Shakespeare, and Hugo - I owe them so much . . .

I plan to use the Trebuchet tower template for the gateway of the second level (and one other Trebuchet tower to make the other panel of the wall more interesting). The ramp is shown above running along the second level, but the gate will require the ramp to run straight out instead. The same structure will be used for the gatehouse of the main gate - just wider at the doorway and taller. Not much of an update here I'm afraid - but we can now move on to the buildings!

The Buildings

So I started building these by getting blinds for my house . . . and then saving the boxes. :-) Blinds, as it turns out, are delivered in massive boxes that are super sturdy - perfect for what we need (if we can hide the corrugations). It started off like this:


I then traced the templates for the five buildings I got from Zorpazorp on the box (went through the entire front of the box and part of the side) and started glueing the buildings together. After some coats of spray paint for an initial pass, here's what we have:


An important thing I wanted to do was make as many of the buildings as possible splittable into two pieces - this is not just so I can have partial buildings for Osgiliath/a mid-siege Minas Tirith, but also because nestled buildings store better than blocky, bulky ones. The buildings will be enhanced with details later, but what we have now is a good start.

Conclusion

While the boards are intended to be usable for all the Osgiliath and Minas Tirith scenarios in Gondor at War as well, Quest of the Ringbearer is hard on our minds right now (more on that next month) - and as you can see, we have enough to get started with the Osgiliath scenario late in the campaign:

Just need some scatter terrain ruin/rocky bits and we'll be good to go . . . that and painting, of course . . .

So . . . to finish the buildings, all I need to do is just repeat all the tracing and cutting and glueing and spraying two more times (at least, I think I need to see how full the board is with the projected amount of terrain on it - it may end up being more than that). :-) Hopefully you enjoyed this update - and if you haven't gotten your templates from Zorpazorp yet, you should do that right away! Next time, we'll see if we can get a gatehouse built and prep segments of the board for painting - but until then, happy hobbying!

Monday, July 18, 2022

In Defense Of: Grim Hammer Captains

Good morning gamers,

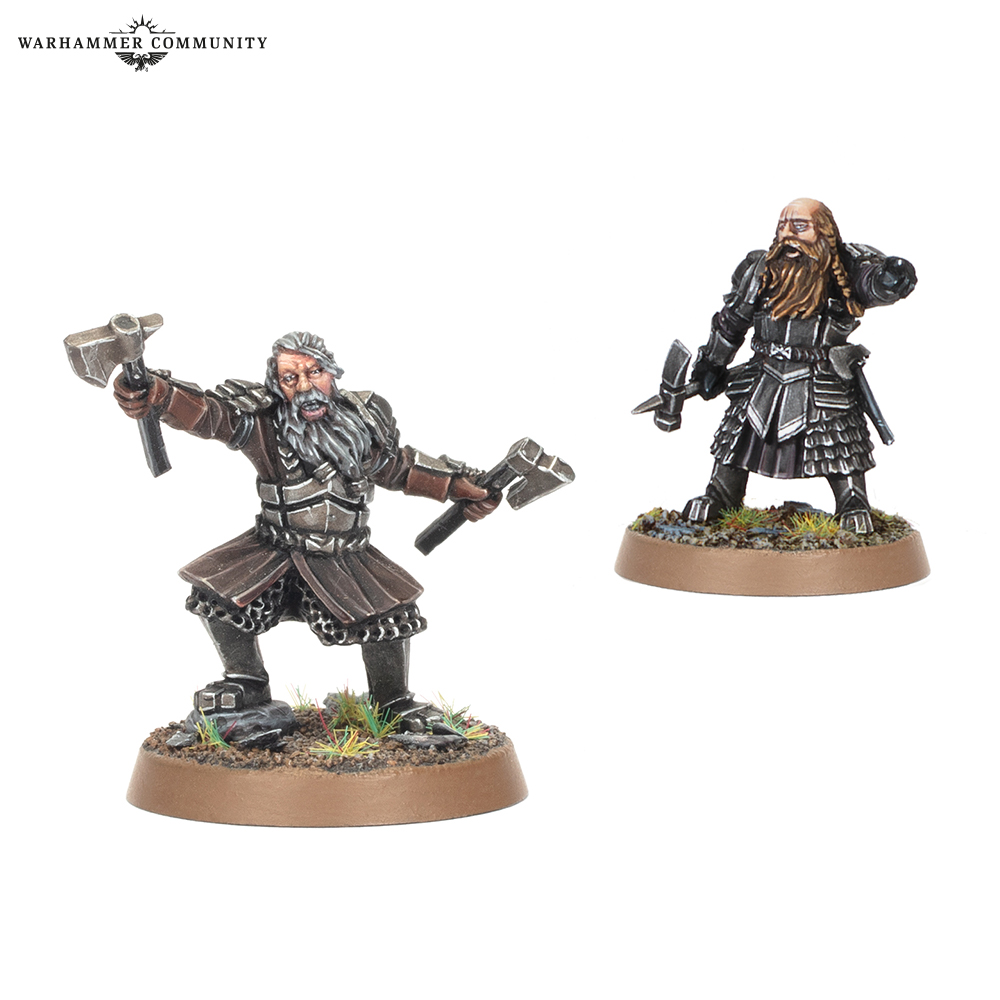
Today we travel to the mountain of Erebor to view one of the most underrated generic heroes in the game: Grim Hammer Captains. Once a profile with an out-of-production model (they came out recently as made-to-order), Grim Hammer Captains exist in an army list with a very limited set of profiles. Unfortunately, most players ignore these guys, choosing instead to go with one of the five named heroes from the Army of Thror or the other generic hero option, Captains of Erebor (who also got a model back in production). So today, we'll be looking at what's missing from this model that gives it the bad wrap that it gets - and why they're perfectly good heroes to take.

Why NOT To Take Grim Hammer Captains

Photo Credit: Warhammer Community

Grim Hammer Captains have a great profile - most Dwarf heroes do - but when compared to the other generic hero option in the list (Captains of Erebor), they just don't look as good:


Grim Hammer Captains cost +5pts and have, as you can see, an identical stat line to Captains of Erebor with shields, though they have throwing axes and the ability to fight two-handed instead of being able to shield. For most players, shielding (getting 4 dice to win the Duel and foregoing the wounding roll) looks a lot better on a F5 hero that can't Strike than going two-handed (where you'd get a -1 penalty to your 2 Attack dice to win the Duel and getting +1 To Wound if you win the Duel roll). Shields save lives - and the cheaper guy has one.

Thursday, July 14, 2022

An Apologetic for the Stun Special Strike

Hey Reader!

So in his recent ranking of the five special weapon strikes, Tiberius came down pretty hard on my main man Stun, so I thought I'd take a minute to beat a dead horse that probably no one cares about by talking about why this special strike is better than you imagine (and should at least be above Bash on Tiberius's list, if not higher). 

I know, no one asked for this post, but I was sick on a Wednesday morning and was off from work, and this is what my mind decided to fixate on, so I don't know what that says about me, but here we are, :P

I want to first walk through why the Stun special strike is so advantageous compared to the other special strikes, and then walk through how the armies that field this special strike compliment it well, as I think the faction context (short of paying for a weapon swap) is the part that a lot of people miss when evaluating this special strike.


I.  Stun: The Irresistible Special Strike

The first and most important part about this special strike is that it's not an opposed roll: your opponent can do nothing about your attempt to stun them. There's no roll-off like you have with Bash, there's no reduction to your Defense if you lose like with Piercing Strike, no penalty to your fight value like you have with Whirl and Feint, and no fear of damaging yourself like you have with Stab.

So in that respect it's the best special strike: nothing hurts you if you fail to win the fight, and your chances of winning the fight aren't diminished either.

Furthermore, you stun human-sized models on a 5+, and you stun monsters on a 6+. It doesn't matter what the target's Defense value, Strength value, Wounds value, or anything else is: it's a 5 or a 6 based on the type of creature you're targeting. And do you know what's great about that? Melee wounding rolls are overwhelmingly done on...a 5 or a 6, or worse than that, especially with the S2 and S3 models that overwhelmingly have clubs and staves (there are also wizards who are S4, but those are rare, and them using the Stun special strike is even rarer, in part because the two "battle wizards" among them either can get lots of attacks thanks to sleighs or they have a S5 sword and often choose to use that instead). So it's not harder to stun someone than it is to wound someone in the vast majority of cases.