Featured Post

The New Age Is Begun: the Fords of Isen Army List

Good morning gamers, We're back for another week in Rohan month (Volume III!) with the Fords of Isen army list. A while back, the TMAT t...

Tuesday, January 29, 2013

Angmar and Misty Mountains Update

Dear Reader,

As January comes to a close, I wanted to give a quick update on my Angmar force and Misty Mountains Force.  Over the past few weeks, I've been painting, converting, and battling with these armies, and I'm looking forward to what next month will bring.  My Angmar forces - orcs, Barrow Wights, and the Dwimmerlaik - have been showcased here before; more recently, though, I bought another blister of Hunter Orcs for the Misty Mountains side of the list (I just cannot get enough of these guys, :) ), and I want to give you all a quick update on that part of the army.

For a 600-point game, I'm currently leaning (following suggestions from some of my opponents and some new ideas from the sourcebook) toward the following army list:

Monday, January 28, 2013

Picking a Captain - Uruk style!

So, I know we're in Flight to the Ford month and all, but I was coming home from work one day and said to myself, "Self, there are many different named Uruk-Hai heroes you can choose and other un-named ones that you can build to meet your purposes...but why pick one hero over another (or are they more or less the same)?"

I kept my vow of not answering myself (that's when you know you're crazy), but I did decide that I'd write up a few thoughts for the insight of our faithful readership - and I'm particularly interested in the thoughts, as I'm going to take my army of the White Hand with me to the TMAT-GT this spring. As it occurred to me, there are three generic purposes for having an Uruk hero in the first place: offense, defense, and army-wide resilience. Though most Uruk heroes are built offensively, these heroes can have other functions as well, which we will discuss in the following classes of heroes: the rock, the main-stay, the hatchet, and the arrow (side note: most of the pictures in this post can be found elsewhere in the blog - this is a shameless plug of mine to get more views on the Google ticker so my blog comes up first during image searches).

Friday, January 25, 2013

kah-CHUNKa!

Just a little showcasing here.

This is a little something that I built a while back and I thought I'd write up a quick overview about it. (no WIP pictures... its me... too lazy :P)

THE... Avenger bolt-thrower. Handmade from scratch.

Although I am a evil player at heart, I really do love Gondor. Always have. The bolt-thrower is unique to this civ and it is quite the devil if you can get it set up in an effective place where you won't have to worry about shooting your own guys. (oh I really wish this thing could go with the goblins. They don't care about that sort of thing)


Definitely a fun thing to play with

I used popsicle sticks for all the wooden parts of the frame. I cut, shaped, and glued them together in four sections.

Section 1- The Base: The base is essentially a tri-sided pyramidal shape with a flat top.  The basic procedure was to cut out the individual planks of wood into their respective shapes, and then assemble as best and straight as possible. I put a circular washer on the top of the pyramid to at least try to make it look like this turret can pivot. After the base was built, I cut out two tiny slits of paper and glued them to the two front legs where the crossbeam attaches to them. This step, with a tiny slice of an unused lance shaft to be the bolt itself, completes construction of the base

Section 2 - The Main Doohickey... part: I seriously don't know what to call this next part. If it was a firearm I'd call it the 'barrel'... The main part of this thing! You know what I'm talking about. It was constructed out of two popsicle sticks glued together lengthwise to give it some thickness. Once dry, I filed it into a more of a rectangle shape with the two ends being mostly square. Here I carved indentations into the side of the piece to make some room for the springs (or screws), and then glued it to the base.

Section 3 - The Magazine: Pretty straightforward. Just glued two popsicle stick pieces together, filed it down to size-and-shape, and glued it on.  

Section 4 - The Bow: Without a doubt the most difficult part of construction. Not to mention that I was not sure how I was going to create the curvature on the actual 'bow' part of this model... aHA. My quick eye spotted an old spray bottle on a shelf! (ok... so I was sitting there, staring at the shelf for like ten minutes before I had the idea. What of it!?!) I took off the lid and promptly sawed away at the part of the lid that screws on to the bottle. After I cut off a nice ring, I chopped it, almost, in half. (little bit more than half... minor detail) I now had a nice, plastic, 'bow'. I just didn't like those serrated edges that the thing had to make it easier to screw and unscrew (for those people that use these things for what they're meant to be used for). So I cut out two slits of thin cardboard, and glued them to either side of the the plastic 'half-ring'. Then glued it on to the front of the main piece... thing.

And viola! Construction complete. Now for detailing.

Using thin strips of paper for metal braces, small slices of a plastic lance for bolts, small spikes from a paperclip as the ammo on the magazine, a toothpick for the main cord that actually does the launching of the projectile, and a combination of materials for the cranks on the back of the model, I spent plenty of time adding details to this thing. (with the periodic break to go look at the GW photo)

Everything glued? Time to paint.
Basically all the wood, I painted brown. All the metal, I painted silver. Really hard.
Once the basic colors were on, I ran a GW Devlan Mud wash over the wood and a Badab Black wash over the metel parts. Then I added some highlights to the metal.


So yeah, it was a fun project and I'm happy with the results.

    ~Tavros~


Wednesday, January 23, 2013

To the Death: Uruk-Hai vs. Harad

Recently, the guys in the club got together for a fun, recreational pair of games to test our armies that we plan to take to the spring TMAT tournament. I was only able to stay for one game, but managed to remember my camera to chronicle the event. The game I got to play was against Zorro's famous Haradrim, but he was excited to try out his Reavers (WIP, see recent post here).

The Fist of Isengard: 600 points

Saruman the Colorful - 170 points [Army Leader]
18 Uruk-Hai Warriors with shields - 180 points
7 Uruk-Hai Warriors with pikes - 70 points
3 Uruk-Hai Warriors with crossbows - 33 points

Ally: Mauhur - 60 points
Ally6 Uruk Marauders with shields - 60 points
Ally3 Uruk Scouts with Orc bows - 27 points

39 units, 3 Orc bows + 3 crossbows, 2 heroes

The Golden Horde: 603 points

The Golden King of Abrakhan - 115 points [Army Leader]
11 Haradrim Warriors with bows and spears - 88 points
10 Serpent Guard - 80 points
8 Abrakhan Merchant Guards - 64 points
4 Watchers of Karna - 36 points


Ally: Dalamyr, Fleetmaster of Umbar - 100 points
Ally: 8 Corsair Reavers - 80 points
Ally: 4 Corsair Arbalesters - 40 points

47 units, 11 bows + 4 crossbows, 2 heroes

To fully appreciate this game, you need to know that we were trying out various kinds of scenarios for the upcoming Grand Tournament in the spring. Here's a quick look (and description) of the tables we were trying out:
Domination game, with parts of rivers on either side but a wide open space with some littered terrain for the center objective. This differs from the set-up at the recent Hunter's Red October tournament, which had a bridge in the middle as the objective. Tavros' Dol Amroth force fought against Glenstorm's "Chill of Angmar" army - brief recap in comments, one/both of you?
A variation of "reconnoiter," which involves attempting to escort diplomats from your board edge to the other instead of trying to get your own units across. Zorro and Glenstorm developed this scenario in preparation for the TMAT GT and the forces of Harad and Angmar faced off after I left.
Ah, the lush grounds of battle that hosted an epic To the Death between my Isengard army and the famed Southrons of Zorro. The twist to this scenario is that sitting on the hill is the "Arkenstone" (portrayed here by my Mirror of Galadriel). At the start of the Fight phase, the number of units from each army are counted up who are within 3" of the stone: the side with the most gains the benefit of a 6" banner from the stone. The opposing side (or both sides in the event of a tie) gains a 3" banner from the stone. This will be this battle report that we'll cover here.
Scoring for this game is as follows:
  • Game-play is until one side is reduced to 25% of its starting force or 90 minutes elapses.
  • 3 point if the enemy army is broken OR 5 points if the enemy army is broken and your force is unbroken;
  • 2 points if the enemy army leader is slain.
  • 1 point if you have a banner remaining at the end of the game. If you have a banner and your opponent has none, score 2 points.
  • [Added scoring points] 3 points if the enemy army is reduced to 25% before the game ends.
We also experimented in this game with "oaths of battle": each army leader declared a separate objective it would attempt to achieve. If completed, this would provide additional points to its final tournament score. If both players achieved their oath, 1 battle point was scored. if only 1 achieved their oath, they scored 2 battle points. The oaths we had to choose from were:
  • Blood-sworn Enemy: Choose an enemy hero - he is your arch enemy and they must die before the end of the game
  • Future King: Your army leader must be alive at the end of the game, neither slain nor "heroically departed".
  • Chivalry in battle: Your army leader must fight the enemy leader in close combat (not shielding) for at least one round and survive.
  • Line in the Sand: Nominate a piece of terrain in your opponent’s deployment zone (or place a marker if there is no suitable terrain). Your leader must end its move within 3" of it at least once during the game.
Zorro chose the oath of killing Mauhur, while I declared I would keep Saruman alive. We alternated placing warbands (within 6" of the board edge on a 1-3 and within 12"on a 4-6) and the Uruks won the roll to go first.


Turn 1: Charge! (Priority - Uruk-Hai)

No pictures of this round, but a few things of note happened: first, Saruman successfully cast Terrifying Aura, so hopefully he won't be ganged on this game. In the Shoot phase, the famed archers of the Haradrim killed two Uruk-Hai Warriors with shields, while the crossbows who could shoot killed no one.

Kill count: Uruks 0/47, Haradrim 2/39.


Turn 2: The Fearless March (P - Harad)

The armies continue to move up against each other. One of the Serpent Guards on the hill decided to lie down while within range of the Arkenstone, so all of the Haradrim within 6" of the Archenstone benefit from a banner this turn (yeah, really useful) (hey, I thought there was a chance your marauders would close the gap!).
The Corsair Arbalesters, not to be outdone by their Haradrim allies, level their crossbows towards the Uruk-Hai ranks. In an impressive move, three of their quarrels find their targets and each takes down his target - two Uruks with shields and one with crossbow. The Haradrim attempt to pierce the armor of the Uruks but fail to cause a wound. The remaining Uruk archers respond by killing...nobody (great...just great...and ouch...).
Kill count: Uruks 0/47, Haradrim 5/39.


Turn 3: The White Wizard (P - tied, Uruks!)

Now within range of the enemy lines, Saruman unleashes a Sorcerous Blast on the enemy (free + 1/6W, 1/3M) and successfully killed both the targeted Watcher of Karna and a Haradrim archer, while knocking down an Abrakhan Guard and a Serpent Guard (it's a start...yaye first kills!(hmm... that bloke is going to be problematic).
The rest of the Move Phase was spent forcing the armies towards each other and engaging everywhere. A Watcher of Karna mustered his resolve, vaulted over a set of rocks and engaged Saruman (I had hoped that he would get stuck on one side of the rocks, but the control zones of my Uruks were taken away...bummer) (+2 to courage for charging terrorizing models for the win!).
In the Shoot phase, a Corsair Arbalester killed one of my Uruk Scouts with Orc bow and once again, no one else did anything in the Shoot phase (come on guys, do something!).
In our first round of combat, things look pretty grim for the Uruks. Mauhur killed a Corsair Reaver (1/2M) on my left flank, but the Uruks lost all the other fights thanks largely to the Reavers. As a result, three Uruk Marauders were killed, as was one Uruk Warrior with shield. My lines are really messy, and there are still four Fight 5 units (3 Reavers and Dalamyr) and a banner alive on that flank...methinks this won't end well.
In the center, I manage to kill an Abrakhan Guard and a Watcher of Karna (yaye!), but am not able to wound in two other combats that I won. Luckily for me, my archer who was fighting two-on-one managed to not die, but unluckily for me, one of the Reavers killed an Uruk with shield. More unluckily for me, Saruman lost his bout with a Watcher of Karna, took two Wounds, and failed ALL. THREE. FATE. POINTS (3/3F, 2/3H). (NOOOOOOOOOOOOOOOOO!!!!!(Do we have a new head of the order here? I dub thee, Bane of the White Hand!). So, with 3 Fate gone and 2 of 3 Wounds dealt, my ability to fulfill my oath is looking pretty slim.
On the far side, a Reaver-Abrakhan team killed one of my Uruks with shields (not really a surprise, right?).
Kill count: Uruks 5/47, Haradrim 12/39. Three rounds in, and the Uruks are 8 units away from breaking, while the Haradrim are at a blissful 19 units away...yeah, I need a stroke of really good luck.


Turn 4: Smoke and Fire (P - Saruman uses his Palantir, Uruks)

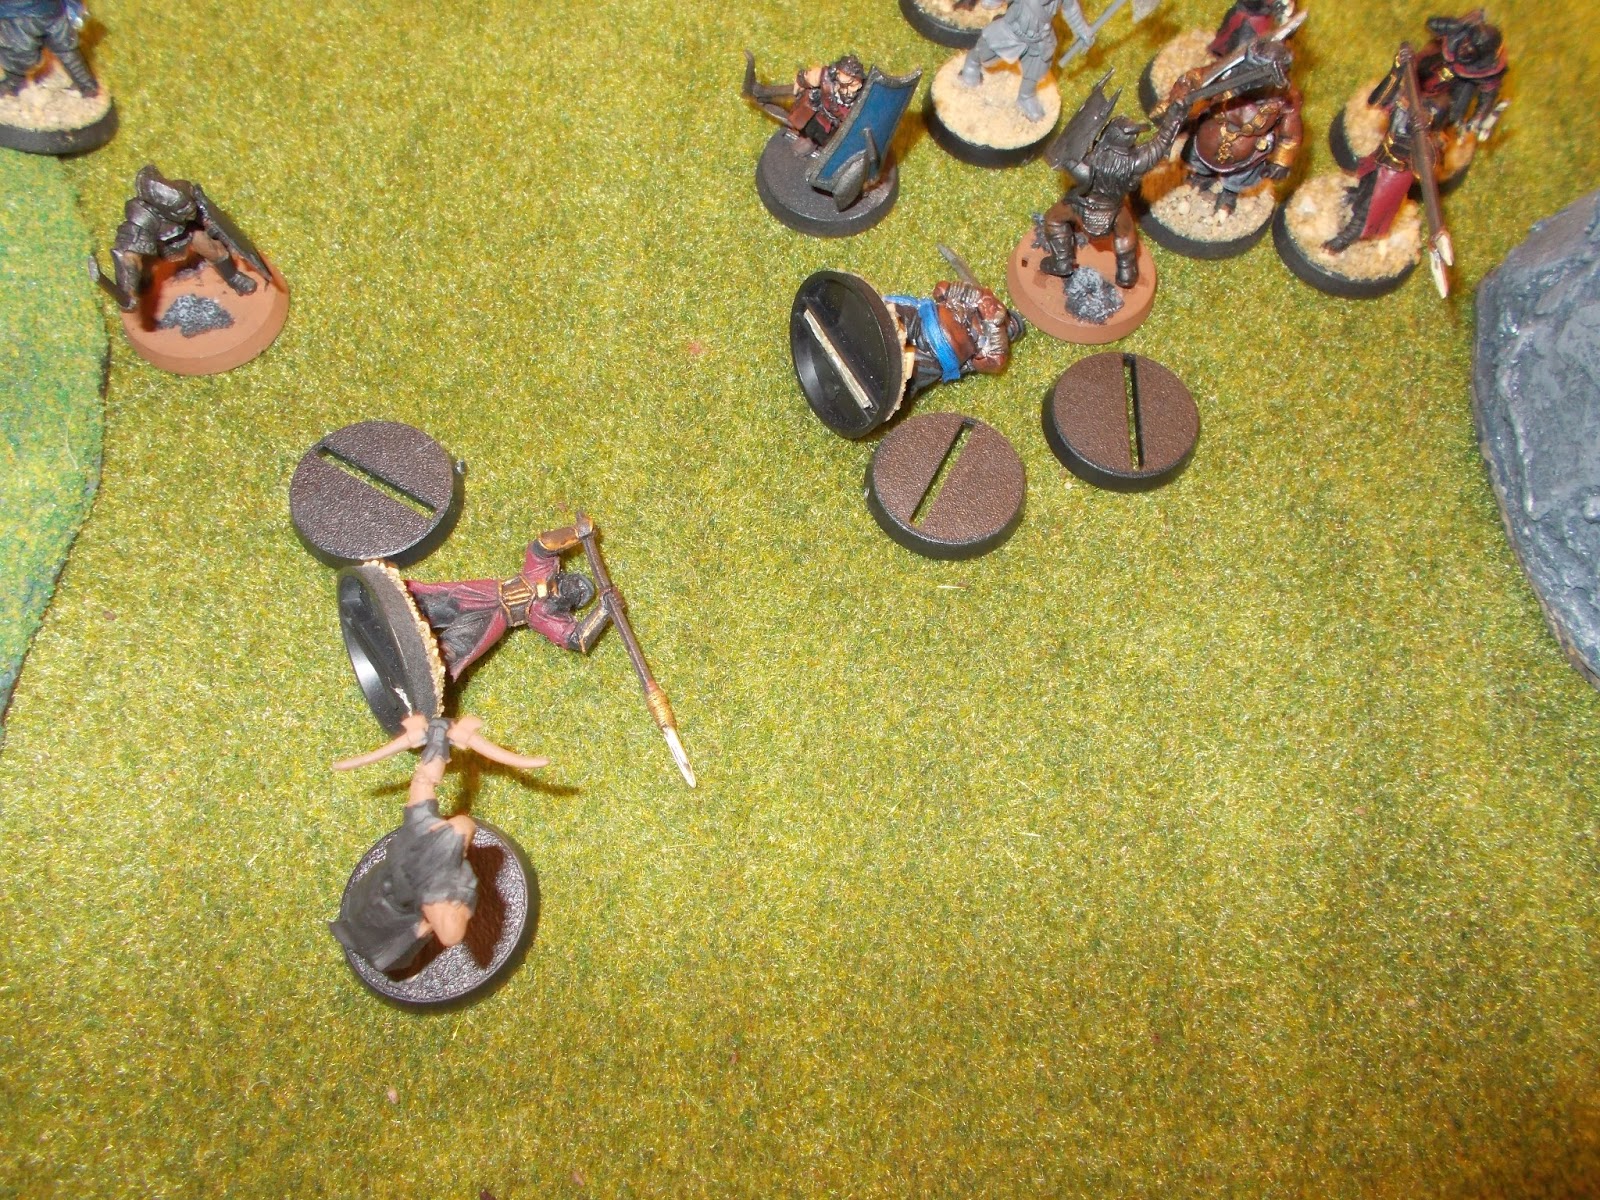
Saruman's Palantir spawned a battle of Heroic Moves (Saruman and the Golden King): Saruman won the roll-off and unleashed yet another Sorcerous Blast, killing two guys (Corsair Reaver target and Serpent Guard) and knocking down a Reaver, who was promptly charged (free + 2/6W, 3/3M). With 4 kills totaling 35 points, I've still got a long way to go before I pay for Saruman's points. I'd like to get over to where his heroes are, but I kinda need to deal with the Watcher of Karna in front of me...
Charges got resolved as you see here: we noticed after we finished moving that we mixed up the movement (we moved my Heroic Move, then all the Haradrim - including the ones on the right flank who were outside the Golden King's range, then the rest of the Uruks), but we didn't want to go back and re-do it. Maybe a few of my guys on the right would be in slightly better positions, but not much would have changed considering how badly they are outnumbered.
In the Shoot phase, my Uruks continue to do nothing (what?), which makes me finally decide to take the "archers are swordsman" mantra to heart and prepare to just charge with them. The Haradrim  for their part, are not silent and kill two Uruk pikemen with a well-placed Haradrim arrow and a Corsair quarrel (man, I needed those). By the way, the Uruk with the green token is "transfixed" thanks to one of Dalamyr's smoke bombs in the Move phase (yeah, that's going to end well...).
To add insult to injury, Dalamyr calls a heroic combat (1/1M) and easily defeats the transfixed Uruk with shield he's fighting. He then charges into the rear of Mauhur, trapping the great Uruk captain (that's really, really, REALLY not good...("knife" to meet you Mauhur-ting).
The fights worked out as follows: Mauhur won his fight (2/2M) and succeeded in killing an astounding...nobody! (come on...) An Uruk Marauder was killed, as was a Corsair Reaver (yaye!), but elsewise, nothing else interesting happened here.
On the hill, Saruman and his helping Uruk archer won their fight, but neither were able to get the 4s required to kill the Watcher of Karna (you really thought you were going to kill Bane so easily?). Elsewhere on the hill, one Uruk was killed, as was the Corsair Reaver on the ground and an Abrakhan Guard (Go team!).
On the far side, things are not going well at all. I have one Uruk with shield out of the original 6 (lost two this round) and a handful of other guys trying to keep this element of the army at bay. I think it's safe to say that this flank has been rolled up (and the other flank isn't doing well either).
Kill count: Uruks 10/47, Haradrim 20/39. I'm broken and things are not looking good at all...this game's done, but we're pressing on because there's still time.


Turn 5: A Powerful Shot (P - Uruks again!)

Saruman passes his courage test (3/6W, score of 16),  thumbs his nose at the GK, and lets loose yet another Sorcerous Blast (free + 4/6W) and this time kills the targeted Serpent Guard and kills another Serpent Guard and a Haradrim archer. A third Serpent Guard and an Abrakhan Guard were knocked down and almost wounded, but not quite. 7 kills with SB and 59 points claimed...certainly helping to make up for my complete lack of archery kills. His Stand Fast covers everyone except Mauhur (who I forgot to test for, but Zorro was content to have remain) (I hadn't killed him yet!) and my army stays to fight to the bitter end.
The rest of the fights are as follows: the guys on the ground were charged, but there's little I can do elsewhere. I'm trying to push the Haradrim away from the stone (which has been benefiting them all game, I might add), in hopes that I can get 6" coverage for the units in the fights surrounding the hill. Kinda hazy on where guys died this round (started removing some of them before the pictures were taken), so I adjusted the final score to reflect the number dead at the end of the round...in case you actually go back and check my math. :-P
In the Shoot phase, a Corsair Arbalester levels a deadly aim, passes his in-the-way test on the rocks, and despite my claims that the quarrel needed to test for its courage, the great wizard of Isengard fell (Grrr...game over and no oath point...sad).
Why do my pictures keep rotating? Anyway, the Haradrim succeeded in killing a pikeman and a Marauder, but I managed to kill an Abrakhan Guard and a Serpent Guard. Still, the day was woeful, as the great Mauhur lost in a roll-off and fell to a great many blades (I think the GK alone wounded him 5x).
On the hill, not much changed - the Uruk Scout with Orc bow died, but so did 2 Serpent Guards (Yaye team, here we can kill more than we lose...).
But, life is just bad over here. I lose two more units and fail to kill the Serpent Guard on the ground - I beat him, but couldn't get the needed 4s on 2 dice to kill him (that's just wrong).
Kill count: Uruks 18/47, Haradrim 26/39. Yeah, life is really not good, but we keep playing, because there is time on the clock and I'm not at 30 units yet, :-P.


Turn 6: The Sun Sets (P - Haradrim)

Basically, all but one of my guys was charged before I got to move, he passed his Courage Test (not drained by the Golden King - don't know if I was that unimportant, if the King had pity, or if I blitzed through my Move phase too quickly to be noticed in time), and took a Serpent Guard off of a friendly. Not Shoot phase because everyone's fighting. Here, you can see the tide has really turned on the hill and I lose a swathe of guys (killing one in return, ironically with the guy who wasn't bribed(technically, only heroes are worthy of bribe, per the rule) (oh...that's...comforting).
Left flank: things are really getting rolled up now, but only one of my guys is killed. In return, I killed a Watcher with the Warrior on the far right.
Yeah, lost the last of my crossbows in what was hardly a fair fight. Thankfully, I lost enough guys that the game came to an end a few minutes before the timer ran out.
Kill count: Uruks 20/47, Haradrim 33/39. I was 4 units away from breaking the enemy, so I feel good. But...final score:
  • Uruks score 0 points for failing to break the enemy army, while the Haradrim score 5 points for breaking the enemy and not being broken;
  • The Haradrim score 2 points because Saruman was killed.
  • No banners this game, so no points scored for either side.
  • The Haradrim finally score 3 points for reducing the Uruk-Hai to 25% before the game ended.
With a score of 10-0, this game is a major victory for the Haradrim  The Haradrim also scored an additional 2 tournament points for fulfilling their oath (killing Mauhur) while the Uruks failed theirs (Saruman did not survive), so in a tournament, this game would have scored the Haradrim 12 points (major win + oath) and the Uruk-Hai 2 points (for a major loss). (If it's any comfort, there will be a couple other small "kudos" bonuses in the tournament that you likely would have received - thus boosting your score another point or so).


Conclusion:

Assessment by Tiberius:

Yeah, tough game today. The Haradrim are a fearsome army to fight, but all told, I did well against them. They were nearly broken (and with Courage 4 heroes standing beside each other, others could have run off) and if I hadn't botched all my Fate rolls, Saruman probably could have survived. Breaking the enemy and keeping Saruman alive would have adjusted the points to make the score a lot closer (4-1). I'm thankful that I got this game in before the tournament, since I'm not likely to face the same mixture of volumes of archery combined with really high Fight values.

Assessment by Zorro:

Well, considering that Harad has never faced Uruks, I was a little apprehensive about how they would handle a force that wounds them on 4s. The victory was a bit hollow considering how many bad rolling streaks Tiberius had, but it was well fought on his part. Given a rematch, Harad probably would have broken, which is a contingency I really need to plan for better. Historically this army has broken so rarely (only 3-4 times in 20-30 games) that, as Tiberius mentioned, I left a large portion of my army hero-less. Rather a bad situation to be in with C3 troops. All told, a fun match. I'm really looking forward to seeing what Tiberius's army is capable of given a gambit of opponents and scenarios. 

Stellar unit for the Uruk-Hai: Uruk-Hai Warriors with pikes

As great as Defense 6 is for keeping units alive, supporting attacks are the best way to ensure that the good opposing units die. In this particular game, I had a single pikeman kill three units - mostly on his own - which highlights another reason to give the award to these guys. I also need to note that Saruman ended up getting 33% of the army's kills - not bad for a spell-caster (and not good for the rest of the army).

Stellar unit for the Haradrim: Corsair Reavers

No question here. When you have a unit that can walk up to a Uruk pike block single-handedly and smack them in the face, you can't not give them the award. Otherwise it would be a bit of a toss-up. There was plenty of good work being done all around. The Arbalesters held their weight and more (for once), the Abrakhans did their share of cleaving, and of course the wizard-hunting Watchers of Karna certainly made a name for themselves with what was probably the most pivotal moment in the match (or in any game I've played in a while): cutting the enemy leader down to size in the first round of melee combat. But without the edge that the Reavers brought, we would have seen a lot more roll-offs, which would have lead to a lot more dead Haradrim, and in a force that has no capacity to shield, any thing that can preserve units is worth it's weight in Mithril. 

Sunday, January 20, 2013

Avast matey! Corsair Reaver conversions

Ahoy! It here be time for another update from the halls of Karningul, savvy?

With the obligatory pirate-speak out of the way.... I have toyed with the idea of adding a Corsair contingent to my Haradrim army for quite some time. Dalamyr has pulled his weight many a time, and the idea of throwing in some xbows to increase my ranged damage and reduce ranged deaths was super tempting, but the notion of the squishy D3 units that I would need to pick up to offset them did not (yes, I know technically this changed under the new warbrokens scheme).

The hasharin fleetmaster and his motley crew. Note the dashing chapeau on the bloke second from the right.  Made up from some cardstock and a spot of modeling clay

Unlike Tiberius, I have no great love for throwing weapons. They are a handy asset, but I have been unimpressed with their effectiveness as a primary means of damage dealing - especially when you trade off defense for them (see wood elves). However, since obtaining the new Harad/Umbar sourcebooks last summer, I now have another option - in what I'm pretty sure is the only official profile that has no model (and no plans to create one?): the Corsair Reaver.

I have seen a number of conversions for Corsair Reavers, typically consisting of taking the shield troops  and either sticking a weapon under the shield, or cutting off the shield arm and attaching a weapon hand. This leads to two problems: 1) you have maybe three poses in your force (since one of the shield corsairs has his shield tucked into his body and is not conducive to swapping out), and 2) you can only use 1/3 of your box of corsairs, requiring multiple boxes to make even a halfway decent group (a very expensive prospect at the current rates for a single sprue).

Forcing roll-offs with elves, multiple attacks, and now on equal footing with Haradrim in terms of armor (yay profile boosts!), these guys are significantly more viable than their knife throwing counterparts.
Craftsmen of Karningul, it's time to take the converting skills up a notch (or three)!

Thankfully, I recently acquired the spare parts from the new plastic Easterling Kataphrakt sprue - along with a number of warg rider weapons from my bits pile. So I had an assortment of swords to work with. It took a bit of creativity, but in the end I managed to come up with a decent conversion for 10/12 poses! If I really wanted to, I could come up with something for the last two, but I'm really not a fan of the constipated archer or the lunging spearman models, so I was okay with letting those go.

L-R: Archer, spearman, another archer. I sorta missed it in the photo, but I used the speartip to make a hatchet for  the reaver on the right. The center reaver got a boarding axe made from some cardboard and a bit of brass rod.

I know technically corsair reavers don't have spears, but a boarding pike seemed
like a suitable weapon  for these crazed blokes

using some of my experience sculpting warg fur for my hill trolls, I decided to give this guy a bit of a queue. Because nothing says "freakishly scary pirate" like a carefully unkempt hairstyle!

"But what about the archer quivers?" I hear you ask. Just hollowed them out, and used them for sheathes! 

The whole crew so far. A few poses are still WIP at this point. 


I'm really happy with the way the conversions came out, and in the few test games I've gotten in so far, they  performed very well. There is nothing quite like halting a charging mounted KoDA in its tracks (repeatedly) or beating back an Uruk pike block. I'm really looking forward to forcing elves and heroes to roll off. ;)

next on the agenda for these guys, finding a paint scheme that I like. So far my Corsairs have been a bit eclectic. I figure, these guys have been roaming the seas, pillaging and thieving. They wear whatever they can get their hands on - which sometimes means the clothing of wealthy Gondorians or it's fiefdoms.

Although before we get there, my sculptors tell me things about some new ideas they are floating for Serpent Guard conversions, maybe it's time to head inland...