Featured Post

The New Age Is Begun: the Survivors of Lake-town Army List

Good morning gamers, We're kicking off the last month of the year for digging through the army lists in the game and we'll be buildi...

Sunday, June 3, 2012

Storm The Camp: Wood Elves vs. Uruk-Hai


So for Battle Report #2 for Wood Elf month, we're having a friendly Storm the Camp game between the Wood Elves and Uruk-Hai. Today's mission, though, places an added challenge on the Elves, as evidenced in the army lists below:

The Fist of Isengard: 502 points


Saruman the Colorful - 170 points
18 Uruk-Hai Warriors with shields - 180 points
11 Uruk-Hai Warriors with pikes - 110 points
1 Uruk-Hai Warrior - 9 points (unit with two-handed axe)
3 Uruk-Hai Warriors with crossbows - 33 points

34 units, 3 crossbows, 1 hero

The Defenders of Lothlorien: 400 points


Celeborn with Elven blade, heavy armor, and shield - 150 points
8 Wood Elf Warriors with Elven blades and throwing daggers - 80 points
10 Wood Elf Warriors with Wood Elf spears - 80 points
3 Wood Elf Warriors with Elf bows and Elven blades - 30 points
6 Galadhrim Warriors with Elf bows - 60 points


28 units, 9 Elf bows + 8 throwing daggers, 1 hero

As you can see, the points in this game are not even - the Uruks have the advantage. This game is to identify the melee capabilities of Celeborn while also chronicling for the first time on this blog the capabilities of Saruman, the great wizard of Isengard. Unlike the two games I've played already with Saruman (sadly not recorded here on this blog), Saruman benefited from Strength 2 bows in the enemy army. In this game, Saruman runs the danger of being targeted by the Elven arrow fire (though no volley fire is in this game). It will be a battle to see whether or not Saruman can focus on transfixing Celeborn or whether he needs to spend his time casting Sorcerous Blast against the vulnerable Wood Elves (the Wood Elf Warriors are wounded on at least 4s by the blast).
To win this scenario, each army has a table corner which serves as their "camp". If, at the end of any turn, there are more opposing units within a camp than defending units, the game ends with the victory going t to the invading side. If both camps are "taken" in the same round, the game ends in a draw. Major victory/loss is awarded if a hero (in this game, the hero) is alive. The board has a smattering of woods, rocky areas, and a marsh. The center of the field is left open, to allow for open combat on the way to the objectives. The Uruks won the roll off and have chosen to select their corner (the northwest corner), ceding priority to the Elves for the first turn.
I'm putting finishing touches on two posts which provide details on the two heroes listed here. I'm going to try to get those posts finished after this one (where I have time to test what I write about and lend my analysis some credibility). In the meantime, allow me to simply say that Saruman the Colorful is your stereo-typical wizard who benefits from casting Transfix on a 2+ and Compel on a 3+ (better than other wizards) and has a Palantir, which allows him to seize priority during one round (great for catching Wood Elves and other skirmish units). Celeborn, on the other hand, has a few Will points which he could use to cast Immobilize or Aura of Command (everyone within 6" passes any Courage tests), but seeing as this army is facing Saruman and happens to pass most Courage tests anyway, it doesn't look like he'll be casting much. Thankfully, Celeborn is also decked for combat and shares most of the stat line of Elrond (except he doesn't have an Elven ring to pass Fate rolls easier).


Turn 1: (Priority - Wood Elves)

Both armies advance towards each other and as typical, Saruman fails to cast Terrifying Aura on himself. I chuckled and we began the next turn. The Elves are almost in archery range and will definitely be in range next turn. I could have not paid for the heavy armor for Celeborn and instead gain another archer to complete the volley team, but part of me wanted to make sure Celeborn was wounded on 6s by the Uruks instead of 5s and the other part of me wanted to see what happens when there is no volleying. No pic this round, nothing interesting.


Turn 2: (P - Uruk-Hai)
The armies continue to move towards each other, but the Elven archers are now in range. The Uruks are marching in the Warhammer Fantasy "Lance" formation, providing a solid two-lines of protection for their pikes. Gaius thought it would be cool, but I have my doubts.
This round, the Elven archers killed a single man, slain by a Wood Elf arrow. First kill is an Uruk (no surprise). 
Kill count: Wood Elves 1/34, Uruks 0/28.


Turn 3: (P - tied, Wood Elves)
So I actually didn't want priority this turn, but I'll take it I guess. Since I'm fighting against a Movement 6 army instead of a Movement 5 army, my chances that I get more than one round of throwing weapons in is not very likely. I move up so that he cannot charge me (about 8" away) and wait to see what he does. The Uruks form up, allowing their crossbows to fire on the archers guarding my base and Saruman rolls up his sleeves to do some magic.
Magic he does: he spends 2 Will points (free + 1/6 W) to cast Sorcerous Blast against one of my throwing dagger guys and blasts him into two of the men behind him. The target and one of the spears go down hard and do not rise (1/3 Might paid to wound).
In the Shoot phase, the Elves kill one Uruk guarding the crossbowmen, but fail to kill anyone else. The Uruks respond with two of their three crossbow bolts hitting, killing two Galadhrim Elves. Youch...
Kill count: Wood Elves 2/34, Uruks 4/28. The Uruks are coming out hard from the get-go.


Turn 4: (P - Wood Elves)
Sigh, here we go again...out of charge range and I've got the skirmish troops. So, I maneuver my guys to again force him to advance slowly or get hit by sharp things. Celeborn moves so that he has a clear view of Saruman and casts Immobilize him. With a 5 rolled on a single dice, Saruman decides to just roll his free dice and gets a 5 as well. A great cheer arose from his Uruk minions as Celeborn fell into the Elven battle line. The Uruks moved up into charge range, knowing that they needed to get the jump on the next turn before the Elves were united as one force. 
Since the Uruks were within 3" of Celeborn, Saruman cast Compel on the great Elven lord with a single dice (2/6 W). Celeborn paid another Will point (2/3 W) and a Might point (1/3 M) to resist the spell. With a single Will point left, I'm a little afraid of what this spell-caster will do once the fighting starts (as wizards are the one kind of spell-caster that you can't just "wait out").
In the Shoot phase, a Galadhrim Warrior killed an Uruk crossbowman and the crossbows returned fire and killed another Galadhrim. The Uruks are on a roll...
Kill count: Wood Elves 3/34, Uruks 5/28. The fun will begin depending on who gets priority...


Turn 5: (P - Saruman seizes priority...uh-oh)
THIS is where Saruman comes into a field all his own. Using the Palantir of Orthanc, Saruman seizes priority and I am left helpless to do anything (besides potentially wasting one of my two Might points to try to move first). The Uruks press hard on the lines and Saruman uses his free Will point to cast Transfix on Celeborn. With his last Will point and one of his remaining Might points (2/3 M), Celeborn resists the spell and knows he has one turn to cut through the Uruk lines and reach the enemy caster. Not. Good. Nothing of interest happened in the Shoot phase.
Celeborn uses his final Might point to call a heroic combat: he narrowly wins the fight and crashes three fatal blows on the Uruk in front of him. He then advances on one of the nearby pikemen, whose control zone protected both Saruman and the retreating pikeman.
The Elves obviously felt their reputation was on the line, because they won all but two fights. More than that, the Elves lost one of their number (trapped and alone, poor bloke) and dealt six kills in return (one by Celeborn). After rolling 6 after 6 after 6, the Elves remain alive and deal a terrible blow to the Uruk army.
Kill count: Wood Elves 10/34, Uruks 6/28. The Uruks are 7 units away from breaking, while the Elves are only 8 units away...this should be pretty close.


Turn 6: (P - Wood Elves!)
The Elves charge and fail with all their throwing daggers (yet again). Celeborn is the last to charge and he places himself so that he cannot be trapped. The Five remaining Uruks with shields are far from him, so all he'll be facing are pikes. Saruman, no surprise, successfully casts Transfix on Celeborn. The other fights are fairly one-sided. No one shot in the Shoot phase, as the Elven archers have charged and the Uruk crossbows reformed to protect their base.
In the Fight phase, five Uruks beat Celeborn (who despite being Transfixed still rolls a 6 to win the fight) and score two wounds, both of which were saved by his Fate points (3/3 F used). With one other dice rolling a 5 in the rolls to wound, I'm really happy I took the heavy armor this game. In the other fights, the Elves clearly had the advantage, but only killed 3 Uruks this round. The Uruks, in turn, won two fights and killed no one. The Elves must be blessed.
Kill count: Wood Elves 13/34, Uruks 6/28.


Turn 7: (P - Wood Elves again!)

The Wood Elves charge again and this time, their throwing daggers worked! Two Uruks fell, which not only pays for the weapons, but chopped a good hole in the Uruk battle line. Celeborn is, once again, transfixed by Saruman - BUT, Saruman rolled a 1, so he paid a Might point to make it work (2/3 M). Three Elves and two Uruk crossbows fired warning shots at each other (not even hitting each other...next phase). We realized after taking this shot, btw, that one of the pikemen was free to move and so he backed up the Uruk fighting Celeborn.
In the Fight phase, Celeborn won his fight (despite being transfixed) and the Elves around him slew four Uruk-Hai. One Elf died during the round (despite being backed up by a friend).
Kill count: Wood Elves 19/34, Uruks 7/28. The Uruks are broken and are speedily retreating to their base. The game is all but over...


Turn 8: (P - tied, Uruk-Hai)
Saruman barely passed his Courage test, transfixed Celeborn yet again, and called a Stand Fast! for his army. Three Uruks needed to test for Courage and two passed the test (the one who failed hoisted his pike and you can see him scurrying away from the field). The Uruks worked on consolidation, since they only have six Uruks in the foreground. The Elves, in the meantime, send three of their warriors back to their base to make sure no one can get around their flanks. The other Elves form up in a battle line and prepare to throw their daggers again.
In the Shoot phase, the Uruks took aim and fired at the Elven archers (by far the greatest threat to their army), but they failed to hit them again. The Elves responded by killing a crossbowman with a Galadhrim arrow and one shield-carrying Uruk with a throwing knife. In the Fight phase, the single fight was won by the Elves on tied 6s and they succeeded in killing their foe.
Kill count: Wood Elves 23/34, Uruks 7/28.


Turn 9: (P - tied, Elves)
The Elves charge into the Uruks and engaged three of them, failing to kill any with their throwing daggers. Saruman decided to not provide his Stand Fast! range to the men in his base in order to get a beautiful shot with Sorcerous Blast (free + 2 other dice, 3/6 W). He succeeded in getting the shot off, but stopped short of knocking over Celeborn. After paying his final Might point, though, he succeeded in killing all three of his targets. The Uruk who was charged, now free to do as he wished, now decided with his companions to charge other units. Only one of the four units within the base failed his Courage test and the others ran up to be closer to Saruman - the Uruks aren't going to play defensively quite yet. Nothing happened in the Shoot phase.
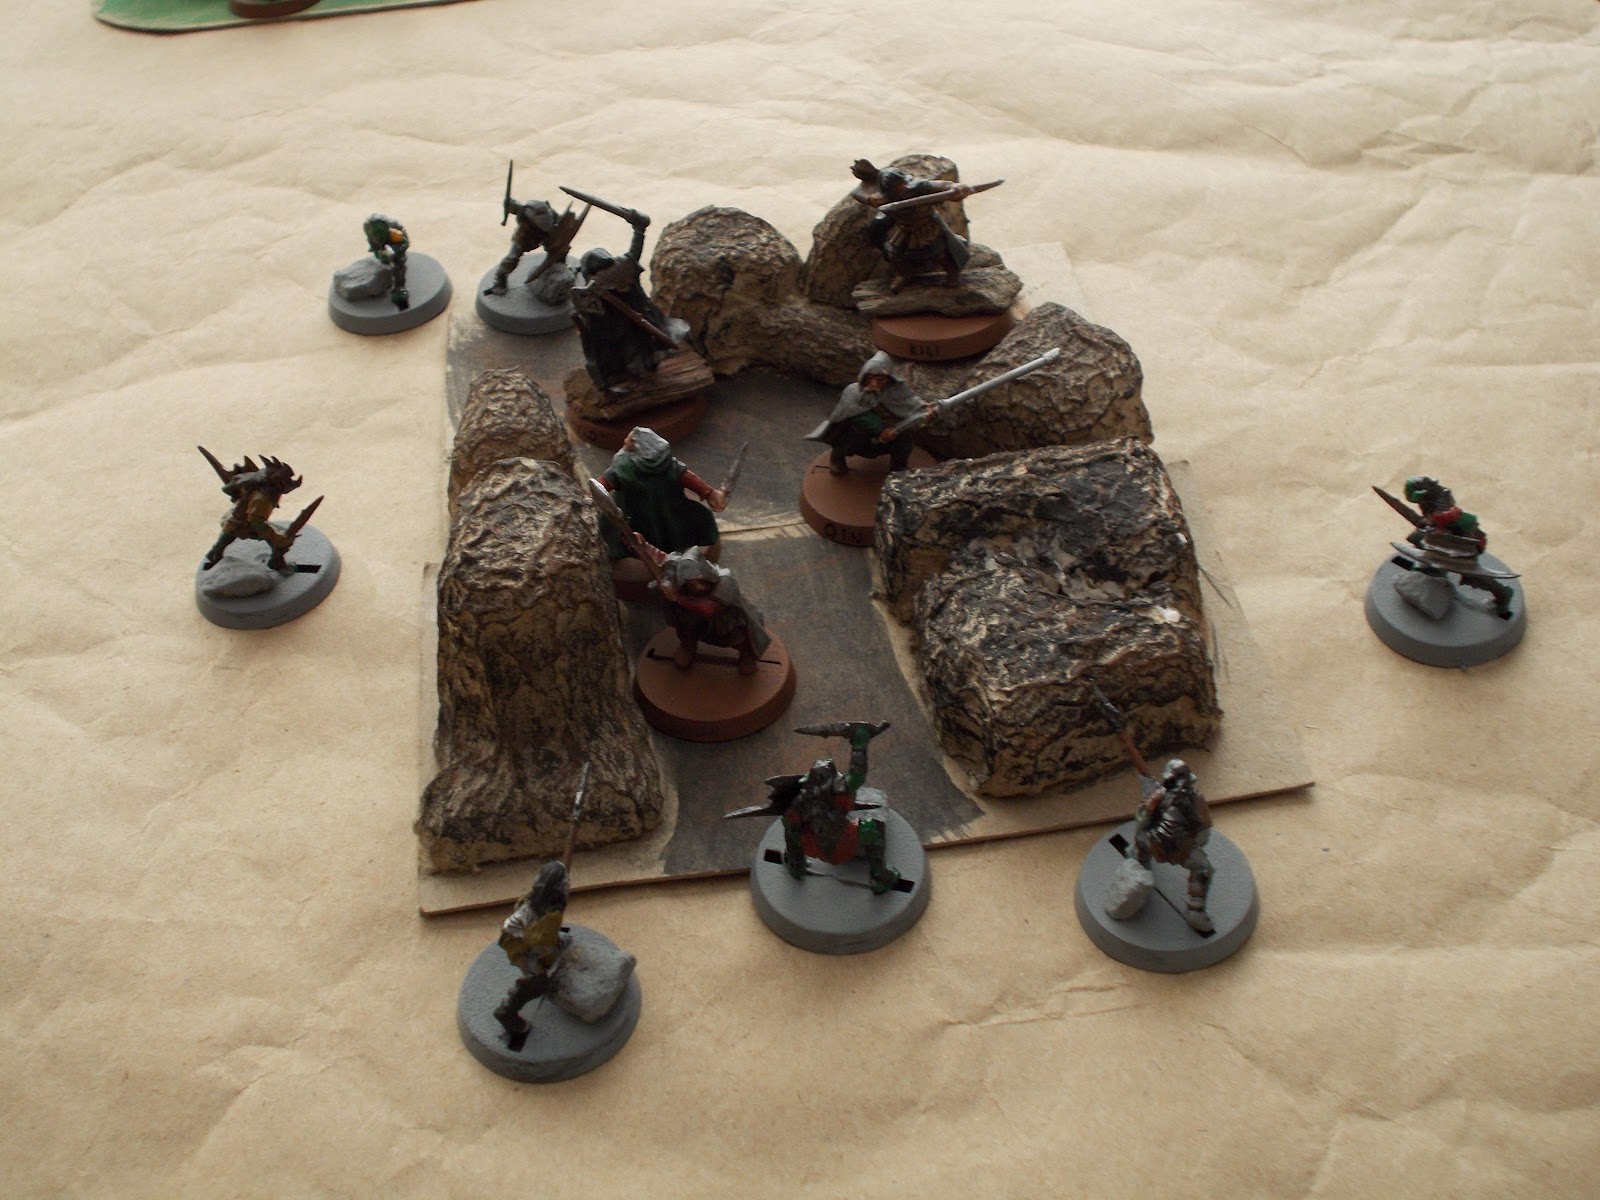
In the Fight phase, nothing of interest happened, but here's what the field looks like (with 3 more Elves waiting back at their base and five Elven archers of to the left of the shot).
Kill count: Wood Elves 24/34, Uruks 10/28. With 10 Isengard units remaining and 15 Elves on the assault, we decided to call it a game. Since both Saruman and Celeborn were alive, we called it a minor victory for the Elves.


Conclusion:

Assessment by Tiberius:

I love my Elves - I really do. The strategy they use is really complicated and very risky, but it can pay off big when run well. Today, I got lucky during one round of combat that succeeded in keeping the flak off of Celeborn while he was transfixed. If it weren't for killing 6 guys in one round, I probably would have been toast. As soon as Celeborn fell, it would have been Sorcerous Blast after Sorcerous Blast, and that is never fun.

Assessment by Gaius:

The opening formation worked rather well: the pikes were protected, keeping the death count from rising until an unnaturally bad round of combat. With the Elves rolling 6s almost every fight (first to win, then to kill), there's really nothing you can do but hope it stops. Next time, though...next time.

Stellar unit for the Uruk-Hai: Saruman the Colorful

The Uruks really didn't do anything this game: no more than 3 kills per unit type and only 10 kills total. Saruman, however, killed 5 units and succeeded in keeping Celeborn down to 2 kills (both in his first round of combat). He finished the game with 3 Will points plus his spare one, plenty enough to kill a few more Wood Elves with Sorcerous Blast or keep Celeborn from doing anything interesting. This all serves as icing on the cake when you consider that he also gave his Uruks priority on a round after no hits were launched by throwing daggers and Celeborn was cautious enough to not challenge the Uruks. Getting your troops into combat with the Palantir is a huge benefit when you're using Uruk-Hai.

Stellar unit for the Wood Elves: Wood Elf Warriors with Elven blades and throwing daggers

Though I didn't use the Elven blades much this game, these guys are loads of fun. Their throwing daggers finally kicked in near the end of the game, resulting in 3 kills and of course, they fought in the forefront and killed numerous Uruks with shields. This they owe to their spear supporters, naturally, but the added pep that the throwing daggers brought after the initial shock was made was nothing short of perfect.

Hero Review: Celeborn with Elven blade, shield, and heavy armor

First off, the Elven blade is a must. You shouldn't be penalized with the "unarmed" rule when you can pay 5 points for the blade. Against most armies, the heavy armor should suffice, but the D7 that you can give Celeborn (and that I gave him today) really paid off. I like using melee heroes (despite my love for spell-casters) and I also like his ability to cast Immobilize on his foes. I can see him doing really well against Trolls, as they can't resist his spells and he can have 4 Attacks if backed up by a spear. If he doesn't have a shield, he can wound a Cave Troll on 5s with 4 Attacks - one good round and you're golden. Like all melee heroes, however, he lacks the Will points to stand up to a wizard like Saruman, so be sure to have other units that can do the killing each round for him.

Saturday, June 2, 2012

Understanding the Strategy: Skirmish Units

So besides spell-casters, I really like skirmish units. When given the considerations they need, skirmishers can be very powerful and can provide a real headache to an enemy general. This post will focus on why one should include skirmishers in a force and some recommendations for what skirmishers to take and how to use them for the armies of Good. I'll briefly go over some skirmish options for armies of Evil, but there aren't nearly as many to pick from.
Why take skirmishers?

Skirmishers tend to be expensive (7-25 points) and lightly armored (if armored at all). Though cheap skirmishers can be fielded effectively in large numbers, more sophisticated skirmishers can buy themselves back in points with high statistics, deadly weapons, or special capabilities. When protected, skirmishers can kill enemy units without fighting them up close, scoring kills without risking your own units. Often times, these units will make up for the additional cost you paid to take them instead of conventional "men-at-arms" warriors, who rely on shields, swords, and spears. To show how this works, allow me to highlight a few principles...

Skirmish Principle #1: Keeping Distance

Skirmish units are generally not heavily armored, which means that should they lose a fight in close-combat, the chances that they live are not very great. Skirmishers have a ranged weapon of sorts (throwing weapon or a bow) and to gain the full use of these weapons, they must keep some space between an advancing horde of foes and their fragile formations. A commander of skirmishers should keep in mind not only the distance between the foes and your skirmishers, but must also measure the distance between your skirmishers and the edge of the board or an impassible piece of terrain. Since most skirmishers will back up from their advancing foes to gain the greatest benefit of their archery, you need to be mindful of where the wall is that you will back into.

Skirmish Principle #2: One Step Ahead

Skirmishers with throwing weapons require an extra consideration before use: the commander of a contingent of throwing weapons must be mindful of who is more likely to gain priority on the following turn. If your opponent moves before you, you can bring your warriors into 6" range from his warriors, but you risk (against your average army) being charged the following turn (if he has priority). If on the following turn, you are required to move first, it will generally be best to move 6" backwards to create a gap of 12" between you and your foe. Even if he stops outside of your throwing weapon range, he will be unable to charge you on the following turn, giving you time to choose how to hit him then.
If you have infantry and your opponent has cavalry, this tactic becomes a bit more difficult to maneuver. Since your foe can move 10-12" towards you, it is possible to get past a 6" throwing weapon radius. In this case, it is best to move into throwing weapon range (when your opponent moves before you) and count on charging the foe on the following turn, taking away the benefits of the cavalry models. This may mean getting closer than 6" to your foe, but making sure that you can charge the following turn is imperative, as cavalry are great at countering throwing weapons if they can maintain distance.

Skirmish Principle #3: Knowing When To Strike

Generally speaking, charging a group of skirmishers against men-at-arms or elite warriors is a bad idea. With low defense and the benefit of ranged weapons, charging is not a good idea unless you have the advantage. Once the enemy has been cut down to size (a smaller size, that is), charging your opponent should only happen when his warriors are disadvantaged in multiple fights. Winning these fights (and hopefully killing the guy afterwards) will allow your skirmishers to defeat the detachment that has been sent to deal with you and allow you to move on to harassing the main body of troops of your foe.
Application of Principles #1: Wood Elf Warriors with throwing daggers or Elf bows

For 9 points each, Wood Elf Warriors are very powerful skirmishers. All Wood Elves can benefit from their 3+ Shoot value if they are given throwing weapons and when coupled with Elf bows, your Wood Elves can bring their innate Strength 3 to bear against enemies from a distance. If protected from enemy archery and charging units, Wood Elves can (and often do) decimate their foes and pay for their equipment quickly. 8 Wood Elf Warriors with throwing daggers and 4 Wood Elf Warriors with Elf bows can pay for their equipment by killing 5 Goblins, 4 Orcs, or 3 Uruks of any kind and statistically, this should happen in 2-3 turns if there are no shooting modifiers (in-the-way, volley fire, spells, etc.). Pretty good, huh?
Fighting against foes with 5" movement is the perfect scenario for the Wood Elf throwing daggers, as they can move after their foe does to 5.5" away from their foe, throw their weapons, and force the enemy on the next turn to move only 4.5" because of the control zone contention. After this advance, your units skip away to the 5.5" distance and let your opponent get ready for that again. If you are forced to move before he does, you have the choice of charging him with your throwing weapons OR moving 5" away, forcing him to choose whether to leave more than 6" between the two of you (can't charge the following turn) or come back into range (still can't charge you). Regardless of the choice, your skirmishers won't be charged during this turn and if the foe attempts to remain outside of your throwing dagger range, he won't be charging you next turn either.
Wood Elves also benefit from the Woodland Creature special ability, which allows them to move through wooded terrain without penalty. Wood Elves who can enter a wood while retreating from their foes will put a good-sized gap between them and their oppressors and perhaps buy an extra turn or two of harassment. Anyone who is foolish enough to pursue these Elves will see them skip right through the other side of the wood and watch as these troops become encumbered in it. If the foe tries to go around, the harassment continues and the Elves may be able to cut back the way they came and leave their foes staring at an empty back of the woods, buying more time.
6) Application of Principles #2: Dwarf Rangers with Throwing Axes or Dwarf Longbows

Dwarf Rangers provide a different kind of skirmisher: the armored kind. Very few skirmishers can get to D5, but the Dwarf Rangers do. For 10 points each, a Dwarf Ranger armed with throwing axes or a Dwarf Longbow is dangerous and capable of dealing damage to his foes. If your enemy uses Strength 2 bows, these skirmishers are some of the best to use, since their D5 means they are wounded on a 6s, instead of 5s.
Like the Elves mentioned above, the throwing axes of these Dwarves can be lethal against enemies. Unlike the Elves, however, your units only move at 5" each turn, which means that if you're playing against a foe with 6" movement you may not be able to skirmish as much. Against Goblins with 5" movement, however, you can readily engage in the steady retreat with throwing axes to reduce their numbers. Dwarf longbows can shoot just as far as Elf bows, but are only Strength 2 instead of Strength 3. This makes them good bows to include in a Dwarf army, though, since the extra 6" at a 3+ Shoot Value is great against D4 and D6 foes.

While the Elves can move through wooded terrain without penalty, Dwarf Rangers can move through rocky terrain without penalty. Just like the woods, these rocky places can give your Rangers the opportunity to place distance between them and their foes and also provide solid cover for your troops. Rocky ground can also be used to form choke points depending on their placement and this allows you to have your enemy choose to face a solid line of Dwarf Warriors or try to catch the Dwarf Rangers harassing their flank by slogging through rocky terrain. This choice will usually favor the Rangers if the foe thinks they can catch them and if they don't make that choice, your rangers should be there to hammer his flank hard and take out his spearmen.

7) Application of Principles #3: Riders of Rohan/Warriors of Rohan/Rohan Royal Guards with throwing spears

The Host of Rohan is almost exclusively a skirmish force: D4-D5 units carrying throwing weapons or bows (either on foot or on horseback) provides an army that lives and dies based on how many foes fall before combat begins. Warriors of Rohan have a standard profile with a Shoot value of 4+ and Defense 5 (when carrying a shield), allowing them to field a large band of skirmishers for 9 points each. This army, however, also provides incredible skirmishing cavalry in addition to elite skirmish infantry.
Riders of Rohan cost 13-15 points and begin with both a bow and shield. These D5 cavalry can resist enemy archer fire (though they benefit greatly from cover as well) and can be equipped with throwing weapons, allowing you to skirmish with your foe easily and outmaneuver him while keeping the fire up. If you move half of your distance, you can shoot with a bow from 24" away, allowing you to engage the enemy's light troops before they are anywhere near your forces (or take shots at his cavalry units with throwing weapons). If the enemy comes closer, you can use throwing weapons (if equipped) and hammer Defense 5 foes who close in on your troops. Though these are costly skirmish units, their effectiveness in combat is undeniable.

Rohan Royal Guards cost 10-12 points and provide an elite warrior with the ability to skirmish. With heavy armor and shields, these guys are D6 and can stand against most barrages that hit them. Throwing spears allow them to skirmish a little but if they are caught by the enemy, they bring Fight 4 to bear against their foes. Royal Guards can also be mounted for 6 points each, allowing them to bring an incredible Fight value to the advantages of cavalry outlined above.

Conclusion: Skirmishers in the Ranks of Evil
I hope this gives you a few ideas on how to employ skirmish units in your armies. I mentioned before that Armies of Evil can also field skirmish units, though their selection of units is much lower. Warg Riders, Haradhrim Raiders, Corsairs of all kinds, and Goblin Prowlers can be used to skirmish with a foe, and can use the same strategies identified above (corsairs operate a lot like Wood Elves with throwing weapons while Haradhrim cavalry have slightly lower defense but are similar to Rohan cavalry). All told, most Evil units fall into the traditional "men-at-arms" categories. In a future post, I'll show you an allied contingent at 600 points that fields an army of strictly skirmish units and see how it fairs against a foe that fields a conventional army without skirmish units to illustrate the usage of these principles. What armies will these be? Well, expect to go underground sometime very, very soon...

Saturday, May 26, 2012

Meeting Engagement: Wood Elves vs. Goblins


So with Uruk-Hai month drawn to a close (I promise I'll get some good shots of Uruks in some of the upcoming informational posts), we're traveling northward to the woodland realms of Lothlorien and Mirkwood. I'm reading through the Lord of the Rings again in my spare time (only my third time, to tell the truth), and I really want to return to my first real Good army for this game. While doing the last few conversions for the spears, I'm looking to test each of the heroes and evaluate their performance. So, of course, I get my good friend Gaius and ask him to put together the most dangerous army he can from my meager collection. Naturally, he skipped the Uruks and even the Dwarves and turned to the Goblins for his answer. Here are the forces:

The Might of Lothlorien: 300 points

Haldir with Elf bow and armor - 80 points
6 Wood Elf Warriors with Elven blades and throwing daggers - 60 points
10 Wood Elf Warriors with Wood Elf spears - 80 points
2 Wood Elf Warriors with Elf bows and Elven blades - 20 points
6 Galadhrim Warriors with Elf bows - 60 points

25 units, 9* Elf bows + 6 thrown weapons, 1 hero

The Denizens of Moria: 300 points

Durburz - 60 points
1 Bat Swarm - 35 points
16 Goblin Warriors with shields - 80 points
15 Goblin Warriors with spears - 75 points
10 Goblin Warriors with Orc bows - 50 points

43 units, 10 Orc bows, 1 hero

The scenario we will be playing is a Meeting Engagement game on a board that is 48" x 48". The game will be fought until one side is reduced to 25% of its starting size (6 Elves or 10 Goblins). If the side that is not at 25% has not been broken, a major victory is won. If both sides are reduced to 25% during the same turn, the game is a draw. We like this game because it's incredibly straight-forward and 25% of a fighting force isn't a lot of units (it's practically over at that point, right?).

The purpose of this game, of course, is to test the usefulness of Haldir, perhaps the best purchase for a unit at 75-80 points because of his Fight 6/3+, two shots each Shoot phase, Strength 3 bow, and Defense 5 (in this case, because we've equipped him with armor). The 3 Might points and Courage 6 also make him an excellent captain, capable of killing foes and keeping soldiers in the fight. Without archery protection, this game should be interesting.
The map has several woods (woodland terrain) and piles of rocks (normal terrain). A marsh sits on the northern board edge (difficult terrain). The Goblins won the roll off and have chosen to select the western board edge as their starting point (depriving the Elves of the two most valuable woods), ceding priority to the Wood Elves for the first turn.


Turn 1: First Blood (Priority - Wood Elves)
The armies move towards each other and the Goblin archers prepare to volley. 
During the Shoot phase, the Goblins landed three hits on the Elven battle line and succeeded in killing one Elf with spear.
Kill count: Wood Elves: 0/43, Goblins 1/25.


Turn 2: The Woodland Responds (P - Goblins)
The Elves are now within shooting distance, but the rocks in the middle of the map provide some cover for the Goblins. The Bat Swarm lingers in the trees but has moved up slightly, hoping to keep some cover between itself and the arrows and throwing daggers of the Elves.
In the Shoot phase, the Goblins volley again and score two hits, succeeding this time in killing an Elf with blade and throwing daggers.
The Elves respond with a fairly poor round of archery, but succeed in killing two Goblins with shields. 
Kill count: Wood Elves: 2/43, Goblins 2/25.


Turn 3: Heroic Orders (P - Gobbies)
The armies are now very close and the lines are drawing up for a hard battle. The Elves have split their company into three parts, focusing on each of the different divisions of the enemy (and each getting 3-4 shots into the enemy ranks).
Haldir calls a Heroic Shoot (I think my first ever) and has his three Galadhrim companions with bows leveled fire into the Goblin volley team. Their arrows stick on three targets and kill one of them. As a result, the Goblins become disorganized (unable to volley). The rest of the Elves, however, fail to take down their targets.
Kill count: Wood Elves: 3/43, Goblins 2/25. The score currently favors the Goblins, so I'm hoping that changes really soon.


Turn 4: A Swift Retreat, A Heated Pursuit (P - Goblins)
During this round, the only choice the Goblins have of avoiding throwing daggers from the Elves is retreat. So, in typical Goblin fashion, they charge headlong forward, hoping to run their enemy against the terrain. The Elves form up just outside of the next turn's charge radius and prepare to fire.
The shooting this round was, again, fairly poor. A Galadhrim archer and a Wood Elf with bow took down a Goblin with shield each and a Wood Elf throwing dagger killed another Goblin with shield. Haldir, in case you've been counting, hasn't killed anyone yet...come on, man.
Kill count: Wood Elves: 6/43, Goblins 2/25. The Goblins are 17 kills away from winning, while the Elves are 27 kills away...hopefully the archery gets better.


Turn 5: Precise Shots (P - Elves!)
The Elves dance away from the Goblins, moving 5" away to keep from being charged. In a future post (a very near future post), I'll discuss a few of the strategies of a skirmish army, but this one focuses on maximizing distance from the enemy and making sure that I'm not charged when I don't want to be. The Goblins, of course, stay out of throwing dagger range, since they couldn't charge me next turn anyway.
The Elves level another "deadly" volley: Haldir pays a Might point (sigh) to kill a Goblin with shield, while a Wood Elf warrior with bow shoots a Goblin spearman in the head. Come on...come on...
Kill count: Wood Elves: 8/43, Goblins 2/25.


Turn 6: Whittling The Enemy Down (P - Goblins!)
Ok, so I'm really happy the Goblins got priority this turn. The Goblins surge forward, knowing that I'm running up against the edge of the board. However, with the space I still have, the Elves dance backwards, staying in shooting range and engaging a few lone Goblins who have come out of the rock-work.
In the Shoot phase, the Elves kill two Goblins, including one who could have charged the Elven archers next turn (yaye). The other Goblin was killed by a throwing dagger, which successfully paid for the investment in throwing daggers.
In the Fight phase, the Bat Swarm defeated the two Elves it was fighting and killed one of them (yuck). The Elven archers won their fights, killing one of their foes.
Kill count: Wood Elves: 11/43, Goblins 3/25. The Elves are 10 units from breaking and the Goblins are 11 units from breaking...this would be really good if Durburz weren't here.


Turn 7: A Clash of Arms (P - Goblins AGAIN)
The Goblins move in close, but swoop in with the Bat Swarm to engage one of my throwing dagger Elves. This is a bummer, because I can give up on a comrade or risk open warfare (which should be pretty even at the moment). With a noble yell, the Elves throw their throwing daggers and charge (killing none).
In the Shoot phase, the Goblin archers killed a Galadhrim bowman...and the Goblin he was facing. Hehe... The Elves loosed their arrows and killed two, one shield-wielding kill for Haldir and one supporting spearman for a Galadhrim.
In the Fight phase, the Elves and Goblin on the right failed to kill each other (fine by me, just so long as I didn't lose anyone).
In the other fights, the Elves came out strong and killed three Goblins but lost two in return (to Durburz, who used 1/3 Might to kill his foe, and one to the Bat Swarm, who has nearly paid for himself after two rounds of combat down-handed).
Kill count: Wood Elves: 17/43, Goblins 6/25.


Turn 8: The Ground Is Stained (P - Goblins...really?)
The Goblins charge at the Elves and hope for a better round. Some of the Goblin archers prepare to shoot at more Elves who are, of course, in combat.
In the Shoot phase, the Goblins fire at an Elf who is fighting a Goblin with shield and land four hits...on the Goblins...who subsequently suffers lethal blows from three of those four hits...bummer. I had to look up the rules, because my next question was, "Ok...so can my Elf shoot now?" The answer was no: models who are engaged in combat during the Shoot phase are banned from shooting that turn (p. 24 of the Mines of Moria rulebook). With no Elven archery, the Fight phase commenced.
Several of units died in the Fight phase: four Elves died and the Goblins lost one spearman and the Bat Swarm. With the fall of the swarm, the Elves have secured dominance in Fight value over ALL of the enemy units at ALL times, but consequently are very short on units. 
Kill count: Wood Elves: 20/43, Goblins 10/25. The Goblins are 2 away from breaking while the Elves are 3 units from breaking...this is going to be really close.


Turn 9: The Prowess of the Woodland (P - tied, Wood Elves)
The Wood Elves charge at the Goblins and kill one with a throwing dagger. All of the Goblins there have been engaged and three Elves are supporting in critical fights. The Goblins are busily trying to consolidate their force and gang up on the Elven archers. Nothing happened in the Shoot phase.
In the Fight phase, Haldir killed his man by using his last Might point (3/3) and his fellow Elves succeeded in killing three other Goblins (no Elves were killed this round). 
Kill count: Wood Elves: 25/43, Goblins 10/25. The Goblins are broken and the Elves are 3 units away...life is currently very good.


Turn 10: The Toll Rises (P - ELVES!!!)
So Durburz (F4) is stuck in a sea of F5 Elves and he's the only hero they have. The Elves tactically withdrew from most of the foes and focused on Durburz and his three closest companions (and two other guys because of their control zones). The rest of the force could decide if they stayed or not. 
You can see here that five Goblins fled the field, putting the Goblins 3 units away from losing the game. My Elves are 3 units away from breaking and 9 units away from losing the game. Anything can happen, but not this round (as I could only lose 8 units).
In the Shoot phase, Haldir killed two Goblins (yaye - finally), shooting one through the head and the other through a loose link in his mail. The nearby Galadhrim grazed another Goblin, but failed to score a wound.
In the Fight phase, Durburz fought on strong, slaying both of the Elves assailing him without the use of Might. One of the Goblins nearby killed an Elf as well and one of the nearby Goblins fell to the Elven spears. With this death, the game was over.
BUT, the Elves weren't finished yet: in the other fights, they slew two more Goblins, further racking up the kills for the game. With a shout of triumph, the Goblins melt away, fleeing before the woodland's defenders.
Kill count: Wood Elves: 30+5/43, Goblins 13/25. Minor Victory for the Elves because their force was broken (barely).


Conclusion:

Assessment by Tiberius:

So that was pretty close: the Goblins failed to take more than few archery hits each turn but ultimately failed to get into combat and capitalize on it until the end. At the close of the game, Durburz had two companions near him and were fighting off six Elves, which isn't a good match-up, but it's not a poor one if you have more units elsewhere on the board. The Elven archers did some heavy damage as the enemy closed on them and then backed up their archery with blade work. Haldir, though, was a bit of a disappointment, as he struggled to get 5 kills this game. Still, happy day for the Elves.

Assessment by Gaius:

Well, that was closer than I've seen Uruks (or Dwarves, recently) come, but that was interesting. To have nothing in the army except Goblins and a Bat Swarm is both challenging and very exciting. All told, I wasn't sure if the strategy would work, but it was nice to have lots of units to take the fire at the beginning. The Bat Swarm began as a real help, too, as he was able to kill two Elves before being mercilessly surrounded and bludgeoned. Oh well, next time. It was also nice to keep the Elves out of the woods, which traditionally keep the games from being close at all.

Stellar unit for the Wood Elves: Galadhrim Warrior with Elf bow

If you peg a victory star on consistency, the Galadhrim Warriors with Elf bows get it. From a distance and up close, they did a great job today, scoring 4 kills with their bows and 4 kills in melee. Though this only pays for four of them, one of these guys was "left behind" in the foreground and not only won every fight he was in, but also killed a Goblin while being surrounded by superior numbers. All told, I'm really happy I chose to buy these guys from Zorro and they truly are welcome additions to the army. I look forward to finishing them this month and exploring some of the possibilities of their supporting hero choices.

Stellar unit for the Goblins: Goblin Warrior with spear

I used to say I don't give these guys the credit they deserve, but lately, they've been getting most of the credit. I must admit, they can surprise me when they win (and then kill) their adversaries all by themselves. The Goblin spearman is one of the iconic Goblin units in the movies and certainly helps them be a viable army, as their low Fight value needs to be compensated with supporting attacks. An honorable mention is given to the Goblins with Orc bows, who succeeded in killing three Elves and two Goblins.