Featured Post

First Impressions: The Kingdoms of Men, Part II

Good morning gamers, NOTE: there has been an update based on a comment made below - the change is in red . I have not yet seen the War of th...

Monday, November 28, 2011

To the Death: The Fellowship vs. The Uruk-Hai

With the grand tournament done, I'm going to experiment with the Fellowship a little against various evil forces. I went back through the battle reports I've put up, and figured out how many points each army has gained while playing their 11+ games. These numbers are visible in the brackets to the right of the army's record. 5 points are gained for a major victory, 4 for a minor victory, 3 for a draw, and 1-2 for a major/minor loss respectively. In these upcoming Fellowship games, I'll be sure to highlight what a major/minor victory entails. Two of these games are going to be against my army of Uruk-Hai (who are desperate for a better game than the "Clash of Piquets" last time), and two are going to be against the Goblins in two Moria scenarios.

Fellowship of the Ring: 500 points

Aragorn/Strider with bow - 180 points
Boromir of Gondor with Elven cloak - 115 points
Legolas, Prince of Mirkwood with armor - 95 points
Gimli, Son of Gloin - 90 points
Meriadoc Brandybuck - 10 points
Peregrin Took - 10 points

6 units, 2 bows + 1 thrown weapon, 6 heroes

The Fist of Isengard: 501 points

Uruk-Hai Captain with heavy armor and shield - 60 points
18 Uruk-Hai Warriors with shields - 180 points
14 Uruk-Hai Warriors with pikes - 140 points
2 Uruk-Hai Warriors with crossbows - 22 points
1 Uruk-Hai Warrior with banner - 39 points

Ally: Vrasku - 60 points

37 units, 2 crossbows + Vrasku, 2 heroes

The scenario we will be playing is a "To the Death" game on a board that is 48" x 48". Unlike the last game, the ability to consolidate a starting force is difficult in this game, as both groups could be spread pretty thin. In this case, only three units will be in each group, so hopefully (for me), the Fellowship heroes will start in the same region, so I can form a solid defense. I know already I need to keep Merry and Pippen out of the fighting if I can, but primarily just to make sure that Boromir and Aragorn don't get clobbered by the Uruk-Hai when the charging comes.

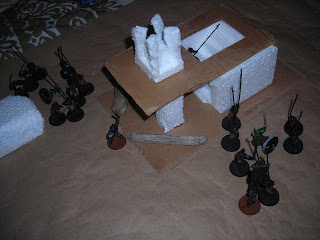
The map is set up as follows: there is the Amon Hen structure, three woods, a river, a rock cluster, and three hills. The Uruks won the roll off and have chosen to select their board edge (the eastern edge), ceding priority to the Fellowship for the first turn. In this game, it will be interesting to see if the superior heroic capabilities of the Fellowship can defeat the strength of numbers of the Uruk-Hai (who Gaius has gotten some practice with in the recent tournament games). As detailed above, each side is split into two groups. We rolled to see where each will be placed, and you can see what each of the components is below:
Isengard, Group 1: (0-3" OR 18-24")
Vrasku - 60 points
9 Uruk-Hai Warriors with shields - 180 points
6 Uruk-Hai Warriors with pikes - 160 points
2 Uruk-Hai Warriors with crossbows - 22 points
NOTE: the crossbow units are going to be substituted during this game with two Uruks with pikes leveled for a charge.
Isengard, Group 2: (0-3" OR 18-24")
Uruk-Hai Captain with heavy armor and shield - 60 points
9 Uruk-Hai Warriors with shields - 180 points
8 Uruk-Hai Warriors with pikes - 160 points

Here's the Fellowship groups:


Fellowship, Group 1: (0-3" OR 18-24")

Boromir of Gondor with Elven cloak - 115 points
Meriadoc Brandybuck - 10 points
Peregrin Took - 10 points

Fellowship, Group 2: (0-3" OR 18-24")


Aragorn/Strider with bow - 180 points
Legolas, Prince of Mirkwood with armor - 95 points
Gimli, Son of Gloin - 90 points


The scenario lends itself to my choice of how to group my soldiers - this Fellowship is the same one that fights at Amon Hen! Boromir and the hobbits need saving, so Aragorn, Legolas, and Gimli will be meeting up with them. It's also nice that the measure for splitting up soldiers is based on number of units instead of points (as one side dwarfs the other by far). Unfortunately, also like in Amon Hen, the three Hunters will need to reach Merry, Pippen, and Boromir before they are overwhelmed.


Turn 1: The Fast Pursuit (Priority - Fellowship)

The Fellowship was able to advance first and safely moved out of range of the Uruk-Hai. Legolas loosed three arrows at Vrasku and landed one of them in his target's leg. Vrasku looked at the shaft, snapped it in half, and bellowed a roar (fate save successful).
Kill count: Fellowship 0/37, Uruks 0/6.


Turn 2: Answering The Horn (P - tied, Uruk-Hai)

Boromir called a heroic move and shifted himself between the advancing Uruk phalanx and the hobbits nearby.  The Uruks then charged all around and Aragorn emerged from the Amon Hen structure.
Legolas takes aim against the crossbowmen on the hill and lands two wounds: one on Vrasku and one on one of his bodyguards (1 Might used).
Aragorn used his free Might point and called a heroic combat. He won the fight easily but then rolled two 2s and a 3 to wound. The only fortunate parts to this sad event is that the Might Point was free and the Uruk-Hai rolled four 6s to win the fight (good thing one 6 by a Fight 6 unit beats those numbers).
In the Fights that ensued, Merry and Pippen met ill ends, with Merry taking one wound and failing his Fate save and Pippen taking two wounds and passing his Fate save but still dying. Boromir blew his horn, but the Uruks were courageous and contested him in the fight. They promptly lost the fight and Boromir lashed out and killed two of the Uruks he was facing (2/6 Might used).
Kill count: Fellowship 3/37, Uruks 2/6.


Turn 3: The Sound of Steel (P - Fellowship)

Crossbows ready to shoot on the hill and Uruk-Hai racing around the melee heroes spells bad news for the heroes here. I'm more than a bit concerned about how this fight is going to go.
Vrasku called a heroic Shoot but neither he nor his companion were able to score wounds on Legolas (Vrasku hit with one shot and rolled a 2, which he couldn't promote to a wound). Legolas then took aim and nailed Vrasku dead in the head.
Aragorn paid his free Might point and another Might point (1/3) to win his fight and killed one Uruk assailant. Boromir won his fight - which he was forced to fight because the Uruks were again courageous enough to contest him - at the cost of three Might points (5/6) and killed one Uruk as well. Gimli paid 1 Might point (1/3) to win his fight and promptly killed two of his foes. At this point, I'm paying Might points to win fights because my heroes can't roll 6s on their dice (and they've got about a 50% chance of getting a 6 on one of those dice).
Kill count: Fellowship 8/37, Uruks 2/6.


Turn 4: Noble Warriors (P - Fellowship)

By this time, I don't have many movement choices for Aragorn or Boromir (though I probably should have rushed Aragorn towards Gimli at this point. I was able to move Legolas off the hill which blocked him from view from the Uruks who were assaulting him, buying him one more archery turn. Gimli charged the other Uruk-Hai who were nearby and delayed a few others from rushing the archer too heavily.
Legolas was worth his salt this round and slew two Uruks with shields while paying NO Might points. I'm so happy...
And suddenly, I'm much less happy. Boromir's foes again were courageous enough to fight and this time Boromir rolled a 2 high. The 7 attack dice turned into 14 wounding dice and successfully landed 3 wounds to kill him (though only three wounds). Aragorn killed two of his assailants (free Might used), but this was not enough to make me happy about what happened a half-stone throw away. Gimli was a power house again and slew two of his opponents (no Might used). 
Kill count: Fellowship 14/37, Uruks 3/6. The Fellowship is broken, but with Courage 6 across the board and priority last turn, I'm not worried. The Uruks are 5 units away, so I'm not doing too bad here.


Turn 5: No Escape (P - Uruks)

With two Might left for each of my heroes (plus the free one for Aragorn), I'm not risking any heroic moves that could be countered by the Uruk Captain. As such, my units are all trapped right now and I'm not too happy about that. I need to role 6s (which no one has done in the last two turns).  There was no Shoot phase this turn.
As you can tell, things are not going well. Gimli lost his fight pitifully and was wounded four times, blocking only one in-coming wound with a Fate point. Being trapped by Uruks is a real pain. Aragorn killed two units but Legolas killed no one.
Kill count: Fellowship 16/37, Uruks 4/6.


Turn 6: Hard Pressed And Hardly Beaten (P - Fellowship)
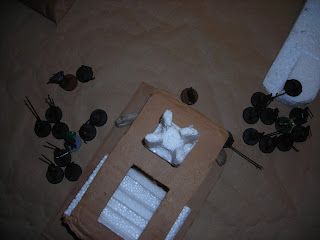
So at this point, I'm really pressed for what to do. I've got two trapped heroes fighting eight Uruks each. I really, really, really need to roll a 6 in each fight this round.
I was happy that my heroes survived this round, but that doesn't mean the round was good. Aragorn burned his free Might point and his two remaining Might points to win his fight and came away killing two of his assailants. Legolas won his fight (2/3 Might points) again but failed to wound anyone yet again.
Kill count: Fellowship 18/37, Uruks 4/6. The Uruks are one unit away from breaking. I am soooo close to seeing this army vanish in a tough fight.


Turn 7: All Turns Black (P - Uruk-Hai)

The Uruks are in end-game phase, with most of them within 6" and visibility of the Uruk Captain. If he can pass his Courage test (1 Will and 1 Might remaining with Courage 4), the army will stay together. I also need to win just one more fight and kill one more unit.
Alas, not to be...Aragorn lost his fight by rolling a 3 high and was promptly dealt 5 wounds. Theoretically, if all three Fate points were successful, he would have received two of his three wounds. Unfortunately, only 1 of these rolls was successful (the other two were 2s, which even with the Free Might point wouldn't have been good). Following Aragorn's noble death was Legolas, who also lost his fight, failed all three of his Fate saves, and was dealt 9 wounds. Not a pleasant end for the game at all, except for Gaius who celebrated a major victory. 
Kill count: Fellowship 18/37, Uruks 6/6.


Conclusion:

Assessment by Gaius:

Winning feels good. It does - especially when you have an army of Uruk-Hai and you best the Fellowship of the Ring. :) In all seriousness, the game moved quite smoothly. I don't handle crossbows very well, so it was tough playing against a skilled archer with a good bow shooting at my vulnerable hero and guardsmen. I like Vrasku's ability to shoot twice, but his Defense 5 is a real draw-back when fighting Strength 3 ranged weapons (as Tiberius' Free People armies all sport). Next time, Uruks with shields will be standing in front of them to provide some protection, but on the whole, they served as a good diversion, tying up a 95 point archer with 80 points of units and leading to his getting trapped before he could move towards his friends. It all worked in the end.

Assessment by Tiberius:

There's something about playing with the Fellowship that is both invigorating and disheartening. It's great to have all (or mostly) elite troops who win fights when they roll a 6 and smash through the enemy without a problem. What can be tough, though, is losing a hero before you're done using him. It's also a bit unnerving when Merry and Pippen die and you're one unit from breaking. It shouldn't be a problem against armies that don't sport the Golden King of Abrakhan, but it's a bit disheartening all the same. On the whole, it was a fairer game facing the full-force of the Uruk army this time, unlike the Clash of Piquets game we played a while back.

Stellar unit for the Fellowship: Aragorn with bow

Though the bow was no help in this game, Aragorn really did a good job (except at the end). I usually say that Aragorn can kill his weight in units (namely, score 180 points in a game). In this game, he only scored 70 points, but that's still really good for a short game. Legolas scored 90 points this game, but this consisted of the crossbow Captain Vrasku and 3 other units. For having more turns of archer, I expected more from him. On the whole, the heroes had a rough day, with no 6s in their Fights after Turn 2 (Gimli had a 6 in Turn 3, but nothing that high since that turn).

Stellar unit for the Uruk-Hai: Uruk-Hai Warrior with pikes

I very rarely give these guys the titles they deserve (same with Goblin spearmen). If it weren't for the overwhelming number of dice (and the all-but-guaranteed roll of a 6 with 8 attacking warriors), the Uruk-Hai would lose most (if not all of) their fights. The pikes are vulnerable to Strength 3 units (Legolas' bow and Gimli's throwing axe in this case), but against Strength 2 weapons (hobbits and Aragorn's bow) or Strength 4 heroes (everyone except the hobbits), these guys are solid troops (or at least, as solid as their shield-toting cousins). The ability to spell death for a hero in one turn of losing a fight like this game featured is invaluable. I am looking at converting two of my pikemen into crossbowmen to mimic this army with warg riders potentially coming in the future. In the mean time, keep an eye out for more hobby projects and games this coming week!

Saturday, November 26, 2011

Super Glue to the Rescue!

So this past week, we thanked our Lord for His bountiful blessings and also took out our Christmas decorations. This led to a discussion of how much "junk" has accumulated in my little closet which made me put down the following maxim: any items that were not being used for a piece of terrain by this coming Sunday were going to be tossed. This should (in theory) do one of two things (maybe both): first, I may get some long-awaited terrain projects completed, or second, I may get rid of a bunch of raw (free) materials that I haven't done anything with in months.

Thankfully, most of the materials have been made into terrain pieces or have been thrown out. Here is a sampling of most of the terrain work that I've done in the past few days (paint jobs still to come, but crafting is half the battle).

Anyone who reads this blog knows that most of my terrain is made for one of two settings: forests or tunnels. The tunnel fighting terrain tends to take over my spare time because of my love for Goblins and Dwarves (see the posts on Goblins and Dwarves for a better idea of what terrain I'm talking about). Here we have some of the newest terrain with an emphasis on walls and passages. On the left, you see a pile of rocks with a tunnel running through it and various forms of stairways/climbable rocks to the summit at the top. This will likely serve as an objective/center ground terrain piece in future tunnel-fighting battles. On the right, two wall pieces with hexagonal doorways stand to make the three existing wall pieces longer or provide an entirely enclosed room (with five entrances, of course).
Here's an up close look at one side of the new rock pile. As you can see, there are steps leading up to the top on this side, each step being big enough for a unit to stand on, which allows for stairway combat. The tunnel passes right through but the entire platform is raised a little, giving some cover for those who are behind any part of the structure. This is vastly beneficial to Goblins, who will probably claim such a structure for their own in future games.
From the other side, the structure is mostly barren. A few small rocks are scattered around the base for terrain effects, but in one instance (see the far right) provide a sort of stair to an otherwise climb-only surface. What we can do with terrain really does make me get excited about future games...
Not all terrain can be walls or tunnel pieces, since there needs to be some form of ruins or other in-the-way pieces on the board. To meet this need, I present the following two pieces. The item on the left uses some of my long-standing terrain pieces (two styrofoam tree heads and two cardboard-with-masking-tape barricades) on an elevated base. There is room on this piece for a Troll to pass through most of it, though a few passages are for infantry only. Makes the game a bit more fun when you can outrun some of your more pressing villains (try it against the Bat Swarm at your peril). The second piece uses a ruin used in previous scenarios added to ruins of completely new pieces.
A more focused picture gives you a better idea of this second terrain piece. Two ruined structures and some fallen pillars provides elementary cover from most sides, though as is the case with most ruins, there is not 360 degree protection for the units inside. Both this piece and the other ruin are multi-function, being able to be used in tunnel fighting missions and terrestrial battles. This is great, because both Elves and Uruk-Hai benefit from having something in the way of enemy arrows.
Speaking of overland battles, the final terrain pieces include three pieces that have all existed prior to this crazed hobbying spree. The field boundaries on the left were the first to be cut out when I started making terrain, but finally got glued down when I figured out they moved too much when left to their own devices. Some of these pieces, however, refuse to stay in place, so it is possible to remove at least one of the sides during game play (I don't want to try pulling on the other ones to find out if they all managed to break free from their chains. For the other two pieces, allow the following two in-depth looks.
The work on the smithy (scenery project during Uruk-Hai month a while ago) didn't really go anywhere. As you'll see a little in this picture and more so in the previous picture, the chimney has changed but the roof and chimney have yet to be nailed down (no pun intended). The interior needs to be painted, so that will be one of the forthcoming projects.
Last but not least, the Amon Hen structure lost all of its duct tape and is now super-glued in place. This provides more stability and less protruding grey mass, which makes for a much better looking piece of terrain. Though perhaps the oldest pre-designed pieces of terrain in my collection, it still has to be painted. This will probably not get done before the To The Death game between the Fellowship and Uruk-Hai that will be coming soon (either tomorrow or next week, depending on scheduling). It will, however, continue to be functional and provides benefits to those who are able to use its breadth to break an enemy line (see the Clash of Piquets Fellowship vs. Uruk-Hai battle report here).
Aaaaand, that's it for now. As I just mentioned, hopefully I'll have a battle report up tomorrow or next weekend. Lots of new events in the family and a boat load of holiday planning meant burn-out this week. I've also been getting into Lord of the Rings Online, which I admit has distracted me a little from this hobby. So we'll see what we can do. Until then, happy hobbying!

Sunday, November 20, 2011

Domination: Dwarves vs. Goblins

Because the Wood Elves and Uruk-Hai fought against each other in the final round of the tournament, the Goblins and Dwarves are due for another game. This game will be the final game before a month of games surrounding the Fellowship of the Ring, as they bring up their total number of games from one to five. In this tunnel fighting game, we have the following combatants.

The Host of Erebor: 500 points

Gimli, Son of Gloin - 90 points
Balin, Son of Fundin with Durin's Axe - 95 points
8 Dwarf Warriors with shield - 72 points
10 Dwarf Warriors with Dwarf bow - 90 points
6 Khazad Guard - 66 points
7 Dwarf Rangers with throwing axes - 70 points
1 Dwarf Ranger with Dwarf longbow - 10 points
1 Dwarf Ranger with two-handed axe - 7 points

35 units, 11 bows + 9 thrown weapons, 2 heroes

The Denizens of Moria: 500 points

Durburz, Goblin King of Moria - 60 points
Ally: The Witch King of Angmar with Morgul blade and +2M/+2W/+1F - 105 points
1 Cave Troll - 80 points
1 Bat Swarm - 35 points
16 Goblin Warriors with shield - 80 points
16 Goblin Warriors with spear - 80 points
12 Goblin Warriors with Orc bow - 60 points

48 units, 12 bows, 2 heroes

The scenario we will be playing is a Domination game on a board that is 48" x 48". Our four objectives are as follows: everything within the field boundaries in the southwest, everything within the three walls in the southeast, everything on the rocky terrain piece in the northeast, and everything on the rocky cairns in the northwest. The teams will select a corner to start the game from and will fight until one side is broken. Once one side is broken, a dice is rolled at the end of each round: on the roll of a 1-2, the game ends and the objectives are counted. If one army holds all four of these by the time one force is broken, they win a major victory. If three are held, it is a minor victory. If two are held by each (or one by each), the game is a draw. If there is an objective that is unclaimed, it is not factored into the scoring (so holding 2/3 means a minor victory).

The map is set up as specified above. No terrain pieces were allowed to be placed within 6" of any objective, though there was not much in the way of terrain added to this game. The Dwarves won the roll off and have chosen to select their corner (the southeast corner), ceding priority to the Goblins for the first turn.
This game should be interesting for two reasons: first, I'm play-testing Dwarf Rangers, who I'm anticipating purchasing around Christmastime. The idea will be to convert the Dwarf Warriors with two-handed axes into Khazad Guards and 2 Dwarf Warriors with Dwarf bows. This will not only finish up the volley team, but add 5 more Defense 7 troops. The Rangers will not only allow me to build an "Unexpected Party" from The Hobbit in anticipation of the new movie, but will also provide a wild card element to an otherwise boring army. In today's game, Elves with Elven blades represent Dwarf Rangers with throwing axes, the Elf with spear represents a Dwarf with two-handed axe, and the Elf with bow represents a Dwarf with longbow. With this large core of Dwarves, the game is not solidly decided...why you ask?

The answer is found in the second reason the game will be interesting: this is the inaugural game of the Witch King, ally of the Denizens of Moria. Though there is no indication in the books that the Witch King favored these warriors at all, the hand of Sauron has now stretched to the Misty Mountains and to tap the great host of Goblin Warriors, the Dark Lord has sent his most powerful emissary. This figure, appearing in the twilight form that a ring-bearer would see if he were wearing the Ring, comes with the standard grey-and-black color that much of the army has. You can also see a touch of red in his face, if you look very closely (which I thought made him look a bit more intimidating). The Witch King has a healthy 12 Will points with which to cast all sorts of magic against his foes and the dreaded "Morgul Blade," which will kill any opponent unless the wound is stopped with Fate point. I'm anxious to see how this unit fares against the hardy army of Erebor.


Turn 1: The Enemy Arrives (Priority - Goblins)
Both teams move towards each other and the volley teams prepare to fire. The Goblins hit Balin but failed to wound him through his tough armor (as predicted).
The Dwarves volley and score three hits, failing to wound Durburz or the Witch King (as also expected), but succeeding in killing a Goblin spearman.
Kill count: Dwarves 1/48, Goblins 0/35.


Turn 2: An Objective Claimed (P - Dwarves)
Both armies continue to move, with the Goblins claiming both North objectives (thanks to the Bat Swarm and the Cave Troll). It appears that the Goblins may get some strong positions in that northern objective before my Dwarves can get there. Nothing interesting happened in the Shoot phase. In case you had not noticed before, Gimli and Balin have split forces this game, Gimli leading his troops to the south and Balin leading his troops to the north. I'm hoping splitting up my heroes doesn't cost me later in the game.
Kill count: Dwarves 1/48, Goblins 0/35.


Turn 3: The Tension Rises (P - Dwarves)
The armies continue to move towards each other and it looks like we should have some combats next round. The Witch King fails to cast "Compel" on a Dwarf Warrior, using the first of his 12 Will points.
In the Shoot phase, both volley teams failed to wound anyone. The Dwarf Ranger with longbow (24" Strength 2 weapon) hit and killed a Goblin spearman, nailing him in the chest with a sleek bodkin.
Kill count: Dwarves 2/48, Goblins 0/35.


Turn 4: A Deadly Clash (P - Dwarves!)
Our first fights will be underway, but the fronts are threatened on all sides. The Witch King transfixed a Dwarf Ranger with throwing axe (2/12 Will) and the Cave Troll and Bat Swarm charge into Gimli and a Dwarf Warrior respectively (would have gotten them in the same fight, but I couldn't). The Bat Swarm is safest when it is engaged in a combat against a single foe (as is the case here), since he cannot be shot at by my Dwarves.
In the Shoot phase, the Dwarf volley team used one of the Dwarves at the northeast objective to direct their fire at the Goblin volley team. The archers scored a hit, a successful in-the-way roll, and a wound against a Goblin archer. Nothing else interesting happened in the Shoot phase.
In the Fight phase, Balin paid a Might point (1/3) to win his fight against the Cave Troll and scored two successful hits (he rolled two 6s, but wounds the troll on a 4+, so hopefully this luck will continue). The Bat Swarm lost its fight, but sustained no wound.
Kill count: Dwarves 3/48, Goblins 0/35.


Turn 5: Battle Is Joined (P - Dwarves again!)
With my Dwarves getting priority yet again, I got to choose the battles. The Witch King paid 1 Will (3/12) and 1 Might to cast "Transfix" on Gimli, who paid 1 Will (1/2) and 1 Might (1/3) to resist it.
In the Shoot phase, the Dwarf volley team fires as one for the last time this game (at least for the next few turns) and nails one Goblin archer. The Dwarf Ranger with longbow snipes another archer off the top of the cairn, scoring his second kill of the day. I like the range on this bow, and against even-Defense targets, it works just as well as a Dwarf bow!
In the Fight phase, the southwest objective was a bit anti-climactic. Gimli failed to kill his opponent and the Goblins more or less survived every round. The exception was against a Dwarf Ranger with throwing axes at the bottom.
On the other side of the field, Balin paid 1 Might point (2/3) to tie the Troll, lost the roll-off, but was not wounded by the Troll. Thank the Lord...in the other fights, two Dwarves died - one to four Goblins and one to two Goblin archers who trapped him (thanks throwing axe buddies).
Kill count: Dwarves 6/48, Goblins 2/35.


Turn 6: Pressed By The Enemy (P - Dwarves - this is getting a bit unfair, you know?)
In the Move phase, the Witch King cast "Transfix" on Gimli with 2 Will (5/12) and after rolling a 6 on one of those dice, Gimli decided not to resist. Nothing much happened in the rest of the Move phase.
In the Shoot phase, the Dwarves shot up the approaching Goblins and killed three of them. Gaius seemed to expect this, but the archers were guarding the uncontested objective, so the chance had to be made. If he can get priority next turn, he should be clear of the archers.
In the Fight phase, the Troll won his fight and wounded Balin (though he failed to wound the Ranger who was assisting the great Dwarf lord). Balin paid his last Might point to make the Fate point work and save the wound. In the other fights nearby, the Dwarves killed one Goblin and the Goblins killed a Dwarf Ranger with throwing axes.
Down in the South, Gimli escaped from combat unscathed, while his warriors killed a Goblin. The Goblins in return killed a Dwarf Ranger with throwing axe. Durburz lost his fight but was not injured by the Khazad Guard opposing him.
Kill count: Dwarves 11/48, Goblins 4/35.


Turn 7: The Witch King Emerges (P - GOBLINS!)

In the Move phase, the Witch King transfixed Gimli again (7/12) and Gimli failed to resist with his last Will point. The Goblins near the southeast objective rushed past the archers and the Khazad Guard and press for the north entrance to the objective. We will see what happens there...
In the Shoot phase, only the Dwarf Ranger killed someone, this time shooting one of the Goblin archers that had descended from the cairn.
In the Fight phase, the Witch King won his fight against Gimli, but failed to wound him with the Morgul blade (he rolled a 2 and a 1...4 Will remaining). He will probably need to take more of a passive role now. In the other fights, Durburz killed the Khazad Guard he was fighting by paying 2 Might points (2/3) and one other Dwarf was killed nearby. A Goblin was also killed, ganged up on by two Dwarf Rangers with throwing axes.
Near the southeast objective, no one died. Four Goblins still press to break past the Dwarf defenses and take the objective, which currently only has one defender.
At the northeast objective, the Dwarf expeditionary force is having a rough time. Balin lost yet another fight to the Cave Troll, but was thankfully not wounded. One Dwarf was, however, and no Goblins were killed this round up there.
After taking the previous photo, we noticed one fight wasn't resolved (or we couldn't remember doing it). The Goblin won and killed the Khazad Guard he was fighting. Bummer...
Kill count: Dwarves 13/48, Goblins 8/35. The Goblins are 11 units from breaking, while the Dwarves are 8 units from breaking. It's fairly close, actually.


Turn 8: The Dwarves Respond (P - tied, Dwarves)

As the Dwarves charge, I am noticing how few little bearded fellows I have left in certain parts of the board. The Goblins still outnumber me, but we'll see how the war in the north plays out. One of my Rangers with throwing axes killed a Goblin during the Move phase in the north, which really helped make the battle lines easier to draw.
In the Shoot phase, my archers were hot again, slaying three Goblin archers as they prepared to fire. The two other Goblins (to the right of the frame) failed to hit anyone...pity that.
In the Fight phase, Gimli used his two-handed axe and won against the Witch King (no penalty is really great sometimes). He then successfully wounded the Witch King (saved by Fate) and paid his last 2 Might points to wound him again, dispatching him from the combat. WOOOHOOO! In the fights nearby, one Goblin and one Dwarf Ranger were killed.
At the southeast objective, the Dwarves won most of the fights and even managed to kill a spearman. Nothing much of interested happened here since the Shoot phase.
At the northeast objective, Balin lost again and suffered a wound to the Troll (1/2). The Dwarves lost most of the other fights (if not all), but none were killed. YAYE TEAM!
Kill count: Dwarves 20/48, Goblins 9/35. Thanks to some amazing rounds of archery, the Goblins are within 4 units of breaking and the Dwarves are 9 units from breaking. I'm feeling pretty good about this, except that I only control 1 objective (right now, game could end as a draw).


Turn 9: Spirits Fall (P - Goblins)

The armies continued to lock against each other in the Move phase. The Dwarf archers have moved more towards the center of the map, focusing on securing the southeast objective and moving towards the northeast objective. Nothing of interest happened in the Shoot phase, as only the Dwarf Ranger with longbow participated and failed to wound his target.
In the Fight phase, Gimli attempted to rally his troops into a more organized defense. They killed one Goblin (credit went to the Dwarf with shield, not Gimli), but lost a Khazad Guard and a Dwarf Ranger.
At the southeast objective, one Goblin was killed and all the Dwarves are still alive. Things are looking good down there, but I don't control this objective anymore - despite having so many troops outside of it!
At the northeast objective, things were terrible. One Goblin was killed, but Balin was finally slain by the Cave Troll. This blow leaves only five Dwarves left to fight in the north and the odds are not good.
Kill count: Dwarves 23/48, Goblins 12/35. With the Goblins one unit from breaking and no heroes in the northeast, I'm hoping that the majority of the forces will flee and I can then shoot the Cave Troll down. We'll see if that actually works.


Turn 10: The Day Closes (P - Dwarves!)

The throwing weapons finally paid off. One Goblin was killed during this round, which means the Goblin force will be broken on their turn. As such, I only attacked strategic targets, trying to keep the best possible position I could. Durburz passed his courage test after paying both of his Will points, calling a Stand Fast! which covered most of his remaining troops in the western objectives. In the Shoot phase, the Dwarf Ranger who has killed so many Goblins already killed the Goblin archer he shot at last time.
In the Fight phase, Gimli and two of his Dwarf Warrior kinsmen killed the two Goblins they were facing. This has them outnumbering the Goblins at this objective. At the southeast objective, no one died, making it a tied 1-1 at that one.
In the northeast objective, the Dwarves killed two Goblins and lost one Dwarf to the Troll. With this score, the objective is tied 4-4.
Kill count: Dwarves 29/48, Goblins 13/35. At the end of this turn, we rolled a dice on a 2, the game ended. With both sides being in control of one objective (Goblins in the NW and Dwarves in the SW) and two objectives equally contested, the game was a draw. If we counted how many points of units were killed in this game, the win barely goes to the Dwarves with 245-215, which shows that this game was a really close tie, despite the Goblins having superior numbers.


Conclusion:

Assessment by Gaius:

So the Witch King didn't work out so well this game. Charging Gimli is probably not one of the best ideas and I probably should have called a heroic combat then. At the same time, I was a bit surprised that he could wound me twice. All the same, lesson learned with the spell caster. I also thought it was interesting that I was able to cross the field past a slew of archers and bring the Dwarf starting objective into jeopardy, leading to a draw instead of a minor loss. With a few tweaks, this army will be a lot of fun to use. Next time, though, I won't leave half of my army without a hero with some Courage, like I did this game.

Assessment by Tiberius:

For starters, I was a bit disappointed that Gimli had such a bad game. In his defense, he was keeping the Witch King at bay while the rest of his soldiers tried to defeat the Witch King's bodyguards. At the end of the day, that objective was won, so I can't complain. Where I can complain is how the Cave Troll won every fight after Round 4 and didn't give me a chance to make it close. I probably shouldn't have charged any units in the north at the beginning of Turn 10, as the Goblins, Troll, and Bat Swarm would need to pass courage tests (and with a Courage 3 as the highest level, many would have fled). Still, we learn, don't we?

Stellar unit for Goblins: Goblin Warrior with spear

The spears killed a large amount of the Dwarves who fell (them and the archers did). I'm not counting any role they played in supporting Goblins with shields - if you look back through the pictures, you'll see them taking on and killing Khazad Guards and shield troops just as easily as the other units did. I don't think I've ever given these guys this award, but they deserve it after playing as many games as they have.

Stellar unit for Dwarves: Dwarf Ranger with Longbow

The Dwarves with shields killed five units and the Rangers with thrown weapons killed four units this game. Both of those numbers are incredibly high. The Dwarf Warriors with Dwarf bows killed 10 units this game, but all of these units scored one kill or less during the game. Hence, our tribute goes to the lone Dwarf Ranger with longbow, who single-handedly shot down four Goblins and scored the number of kills that the Dwarf heroes should have been scoring (if they hadn't been busy elsewhere). The rangers, as you can see from the scores above, are well-worth their investment and should be fun to play with. Though not as durable as their Warrior cousins, their proficiency with throwing axes and longbows (or their much cheaper cost if you only purchase a two-handed weapon) makes them well-worth the investment.