Dear Reader,
Greetings from the Forge! Tiberius and I finally had a chance to get together to test drive my uruk force after his papers and exams from class disappeared and I stopped traveling for work, :) In this match, we will be playing a Domination Game between my Rager's Raiders list (which I have come to love very much, by the way, for all the junk I get from other uruk players about it being too squishy) and Tiberius's Might of Lorien list, which is a slight variation from what you've seen on this blog before. I was excited about this match, in part because playing against Elves always gives me an adrenaline rush (plus my boys love elf flesh), and because this is a new list involving proxy units: I'm looking forward to seeing what Tiberius does with the list following his assessment of this game. The team lists are below:
Rager's Raiders (Isengard Raiders, LOME)
-Ugluk (60) (Army Leader)
-Vrasku (60)
-Uruk-Hai Scout Captain w/ 2Her (55)
-Uruk-Hai Scout Captain (50)
-6 Feral Uruk-Hai (72)
-1 Uruk-Hai Scout w/ banner (33)
-20 Uruk-Hai Scouts w/ shields (180)
-10 Uruk-Hai Scouts w/ bows (90)
TOTAL: 600 pts, 41 units, 10 Might
Might of Lorien (Lothlorien & Mirkwood, Warbands)
-Galadriel (130) (Army Leader)
-8 Wood Elf Warriors with throwing daggers (72)
-2 Wood Elf Warriors with Wood Elf spears (16)
-Thranduil (90)
-9 Wood Elf Warriors with Wood Elf spears (72)
-2 Galadhrim Warriors with shields (18) - proxied by Galadhrim Warriors with Elven blades
-Legolas w/ armor (95)
-5 Mirkwood Guard with Elf bows (55)
-3 Galadhrim Warriors with Elf bows (30)
-1 Wood Elf Sentinel (25) - proxied by Haldir
TOTAL: 603 points, 33 units, 9 Might
This will be an interesting match, as I'll get another round of S3 archery at me (with little cover to protect me to boot) with a new twist: Tiberius is testing out Mirkwood Guard for the first time, who will be landing hits on a 2+, giving him 6 shots (including Thranduil) that are almost guaranteed scored to-hit rolls, wounding on 5s. This will be the hardest archer-based civ I've faced yet, so we'll really see how much of a pounding my list can take.
On top of the archery Tiberius is fielding, he is also running a lighter civ than I'm used to facing (wound on 4s instead of 5s in close combat) that hits me at a higher Fight Value (so almost no roll-offs). As you can tell from the listings on the right sidebar of the blog, though, Tiberius is 11-8-1 with his Elves, with a good number of the wins being against his uruk force which sports D6, so this will be an interesting match for my new uruk list. His force is light, but quite capable, and thus a worthy opponent for the Raiders.
Strategy for Glenstorm: In this light, here's my plan for this battle. I'm going to quickly take the closer two objectives, and then march toward the middle as a concentrated force. I'll then peel off two battle groups toward Tiberius's back objectives before breaking, use a captain in each force to keep my men from running, and then quickly fall to 25% when Tiberius reaches the center objective. So, to call the ball: take the two back objectives (so that if my guys run from my starting objectives, we're okay), and funnel him into the middle with an irresistible target: Ugluk standing front and center, winning the game 6-3, or having majority control over the other two objectives and contesting the center one, winning the game 2-1.
Strategy for Tiberius: This will be the first time I face Glenstorm's Uruk-Hai without Orcs filling their ranks with cheap spearmen and arrow-absorbing swordsmen. I'm hoping that my archery nails a good few before battle is waged, so I can benefit from spears (and having a few very useful heroes). I talked with Glenstorm before the game began about testing out the magic rules from the new Hobbit rulebook - we decided it would probably be good to prove that the Uruks could defeat the Wood Elves without having to take a Courage test each time they want to charge before we experiment with the new rules. :)
Today we will be playing a Domination game, with the following rules:
After agreeing to the terrain, we setup the board (which includes a few of my new pieces! :D ) and rolled for placement. I won the roll off, and with that... (for death and glory!!!) (for the Lady and apple-pie-flavored Lembas!!!)
Turn 1 (P: Uruks)
The armies advance toward each other, but nothing else interesting happens. Tiberius is doing his 3" scoot, as normal, presenting a spear-heavy front line (for shielding, probably) (that, and they're the cheapest units I have, so I don't mind parting with them as much as the other guys), backed by Mirkwood Guard, a Wood Elf Sentinel, and Galadhrim bowmen. Galadriel gets up Blinding Light with her free Will point (on a 4), but otherwise nothing interesting happened. So we move to Turn 2.
Turn 2 (P: Elves)

The Elves keep up the 3" boogie (*sing-songy* bah-dee-ah, tell me you remember...), and my uruks make a mad dash toward the middle of the map. Not having any protection for my main force was really beginning to dawn on me as my archers moved up 3" to form a volley line.

In the Shoot Phase, Tiberius successfully landed two hits, one with a Mirkwood Guard, and one with Legolas, on two of my swordsmen. I returned fire with a volley line, and landed a bunch of nothing - what you get when you face Galadriel, I guess, :) I treated this as my token volley round to attempt to get a shot through the shield; my plan from hereon out is to just charge his ranks and force him into close combat.
Turn 3 (P: Uruks)

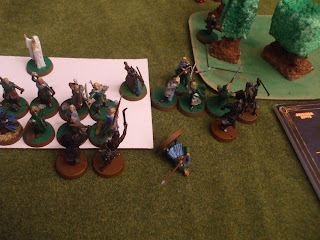
Here you can see my army advance across the open plains, and we are now in control of three objectives! Tiberius sends a spearman off from the main body to claim the objective, and moves his force 3" further toward the other objective. Vrasku moves up toward the log on the far side, and is now in range to cover my approach of the top-left objective.

In the Shoot Phase, Tiberius found himself within 24" of me, and he got a wide spread of archery against my lines. The Wood Elf Sentinel, a Mirkwood Guard, Legolas, and one of the Galadhrim archers each killed a swordsman, and Thranduil killed one of the Ferals (off-screen). As we end Turn 3, I've now lost 7 units to archery - exactly 1/3 of the way to my break point. At this point, my forces are about 17" away from him, and am hoping to be in close combat with him in two turns.
Turn 4 (P: Uruks)

My forces claim the center objective, and my two fire teams head toward the top objectives. My archers come up behind my right flanker squadron, and prepare to support my force as I approach the elven battle line. Tiberius begins to divide his forces, moving three of his elves beyond the range of Galadriel's Blinding Light (Vrasku: "Target spotted!") (Thranduil: "You there, defend the bridge - everyone else, protect the woods!").

In the Shoot Phase, Vrasku managed to pick off one of the Elf Swordsmen (1/3M). I was hoping to kill the guy below him as well, as it would guarantee that I'd have a straight shot for the bridge, and would force him to send part of his battle line to assist in holding the objective.

Tiberius paid back my intended mischief with interest, picking off one of the swordsmen from the fire team he's been drilling into with a Mirkwood Guard, and then...

...He wracks up two more swordsmen with one of his Mirkwood Guard and Thranduil, and then followed up with a shot to my banner from Legolas. This was poor planning on my part: in my desire to shield Ugluk and my Ferals from archery fire, I placed my banner in such a way that no one next to him could pick it up once he fell, thus losing the banner. This...would come back to bite me later in the game, :)
You'll notice that Tiberius did not continue to drill into my flanker squadron like he has been for the last few rounds - after reducing my right attack team to just a captain, a feral, and 4 shields, he commented to me (as he started rolling 2s and 5s to kill my guys on the mound) that he was taking a note from my Dunedain playbook, using his archery to weaken my elements, not outright destroy them. When he said this, I was elated: someone else was using my strategy, and it was working! Then the reality sunk in: my strategy was working... :-/ As we headed into Turn 5, I was confronted with the reality that I'd need to divert part of my archer corps to helping me secure the top objective, meaning that I'd really only have a handful of archers and the remnant of Ugluk's force to hold the line against Tiberius's main force. While my plan was to quickly fall to 25%, I may hit 25% well before I break him and secure the top two objectives. I need to make quick work of these Elves in close combat.
Casualty Count: 11 Uruks (10 from break point), 1 Elf (16 from break point)
Turn 5 (P: Elves)
Sorry, no picture here (we got carried away, :) ). Tiberius continues to amaze me at how well he braces for close combat with a D3 civ, and most of this is due to his heroes. He continues to move up 3", while diverting forces to protect his objectives from the coming horde. Thranduil automatically casts Aura of Dismay on all Elves within 6" of him, which I'd argue is his most effective spell: not only is it an Augment spell (which means that, unlike Warhammer Fantasy, there is no way to dispel it), but it makes all of his men cause terror, which means my C3 force - everyone that is not a Feral or a Captain - will likely fail the charge (well, two out of every five will...). This means that I'll have a harder time breaking into his front line.
Galadriel then cast Command on my Uruk Captain (1/6W + free, 1/3M), who resisted it (1/1W, 1/2M) (With no more Will points, I think I can safely keep him from doing anything while I punish him for being only Defense 5). His Wood Elf Sentinel then attempted to move one of my Uruk swordsmen with his Madrigal, forcing me to take a Courage Test. I passed the test (13), and thus will be able to move on my turn. In a force like this, Sentinels are very useful: the three song options you have to choose from give you a lot of versatility to either defend yourself (causing terror, for example) or support the rest of the team (passing courage tests or keeping enemy units away from the main fight). When combined with support-role heroes like Thranduil and Galadriel, he has a wide range of options to unleash on an unsuspecting team.
I focus my attention on charging the flank of his main formation, and pushing up against the treeline objective, bringing Vrasku over to help me with his S5 and 2 remaining Might Points. One of my ferals successfully charges (Test: 13), one of my shields charges with my Captain (Test: 13 and 12 respectively), and one of my other shield warriors passes (Test: 12). My fire team on the far left makes its way toward the bridge objective, and Ugluk and his force stand their ground to force Tiberius to charge us next turn.

In the Shoot Phase, we get mauled: 2 of the Wood Elf Swordsmen use their throwing weapons to pick off two of my archers, while two of the Mirkwood Guard kill another two archers, and Legolas finishes off yet another archer. Yes, you read that correctly: half of my archers are now dead. On the slightly brighter side, Thranduil spent a Might point (1/3M) to promote his to-hit roll (he finally rolls a 1!), and failed the wound roll. The happy moment disappeared quickly when I realized that I was 5 models from breaking as we head into melee combat.
In the Fight Phase, I called a heroic combat with my Uruk Captain (2/2M), who wins the fight and slays his shielding opponent. The Captain and shield then engage the only sworsman who was out of range of Thranduil's Aura of Dismay.

In the rest of the Fight Phase, the uruk swordsman wins by shielding, and the Wood Elf spearman successfully shields against the Feral. The Captain and the swordsman roll off against the Wood Elf Swordsman, win the roll off, and wound him.
Casualty Count: 16 Uruks (5 from break point), 3 Elves (13 from break point)
Turn 6 (P: Elves)

Of all of the turns for the Elves to get priority, this was the wrong turn: Tiberius uses throwing daggers with his swordsmen, and this makes an already capable melee warrior much more devastating on the charge. On the far side, he charged a shield, killed it, and then engaged my Captain, followed up by another swordsman charging a Feral, killing it, and then engaging my swordsman, bringing me to 3 units from my break point (and with a score of 21 points, the throwing daggers have now been paid for). The Sentinel then targeted one of my shields with his Madrigal, and after my shield failed his courage test (Test: 9), he moved him 6" back from the fight.

Then things went from bad to worse: Thranduil moved up and automatically cast Nature's Wrath on the center of my army. Ugluk opted to resist (1/1W), and rolled a 2 - which, since he used his only Will point to attempt to resist the spell, meant that even his 3 Might Points could not promote the dice to the needed 6. That...bites... :) Needless to say, Tiberius was really happy about how his magic was working this game (kind of important to this list, no? :) ).
Galadriel then cast Immobilize on the Uruk Captain on a 6 (2/6W + free), bringing his Attacks and Fight values to 1, and prohibiting him from striking to wound in the highly unlikely scenario that he wins the fight (which is really bad, because I as counting on him to kill someone this round, as I'm 3 away from breaking). When I finally got a chance to move (couldn't come quickly enough... :P ), I stood up Ugluk and a few others and desperately attempted to push back the bulk of Tiberius's force from the center objective. I also moved my left fire team toward the bridge, and overwhelmed the elves he sent to deter me.
Glenstorm strategy: I measured the distance between my Uruk 2Her Captain and the elf he's using to hold the bridge while Tiberius stooped to pick up his 11-month old son who was crawling around on the floor, and found that I could attack one of the Elves in the forward unit and then swing over to the other elf after the Heroic Combat. I'm setting up my Feral and my 2Her Cap to attack him, so that I can leave the Feral to hold the ground, and can use the 2H to keep my men from running when we break test next round.

In the Shoot Phase, most everyone is already involved in combat, though two Mirkwood Guard (top-center of the picture) still managed to take shots at one of my shields (the one entranced by the Madrigal) and brought him to the ground. Bummer...

In the Fight Phase, 5 Heroic Combats were called, and after we rolled off, they went in this order: Vrasku, Thranduil, Ugluk, Legolas, and 2Her Captain (they are marked by the dice, as shown). We both agreed to be gentlemen and not rush a hero into another Heroic Combat, so the combats went down like this:

Vrasku and the archer with him win their fight against an elf, kill him (Yay for wounding on 3s with this hero!), and jump into the Uruk Captain's fight to give him a chance at survival.

Thranduil wins his fight with an Elf Blade, kills the archer he was fighting (3/3M), and takes on an archer while the Galadhrim who was spear supported in the fight breaks one of my Ferals off of a fight involving a trapped shield.

Ugluk wins his fight, kills the elf spearman, and engages the spearman who was supporting the original elf in the fight, while the Feral in his fight joins in the combats near the bridge objective.
Legolas wins his fight, handily kills the shield, and moves toward the bridge fight as the elves in his combat move in on the Uruk Captain (not good...).

And finally, the 2Her Captain, shield, and Feral win their fight against the elf spearman, kill him (wounding on 2s!!! Gotta love that! :) ), and the shield helps the main body while the 2Her and Feral engage the elf holding the objective.

And after all of that blood and carnage, we're ready to jump into the rest of the Fight Phase, :) The Wood Elf Sentinel and the elf swordsman win their fight against the immobilized captain and wound him once, which I Fate saved (1/1F). Vrasku won his fight (3/3M) and killed his man, and the archer next to him lost the combat but was not wounded, leaving me three models with any hope of taking the top objective. In the center, Thranduil wins his fight and slays the archer he was up against, and Ugluk matched the blow against the elf spear he engaged. In the other combats in this area, a lot of uruks won fights that allowed them to stand up, and the archer somehow avoided death (*Gandalf voice* "For which I am very grateful...").

Near the bridge, one of the uruk shields killed one of the elf swordsmen, and one of the elf spearmen fell to a gang fight against a Feral and a shield. Two of the uruks went down, and (perhaps most disappointing of all), the elf spearman holding the bridge successfully shielded against the Uruk 2Her captain and the Feral. This brings the casualty count to...
Casualty Count: 24 Uruks (broken, 7 from game), 10 Elves (7 from break)
Turn 7 (P: Uruks)

In an effort to make my army disperse on its own, Galadriel called a Heroic Move (2/3M), which I didn't want to challenge (as only Ugluk has Might points left), and then immobilized my Captain again (3/6M + free on a 6). The Sentinel then cast his Madrigal on an uruk archer who failed to pass the Courage Test, and was promptly moved 6" away from the combats.
I tested for my 2Her Captain (Test: 11), and moved him to the base of the bridge so that he could call a "Stand Fast!" to keep my men on the far side of the field. We then swarmed all of the elves near the bridge, and the Feral moved in for a desperate attempt to clear the bridge. After courage testing for my soldiers, I lost none of my frontline fighters, but both of the uruks that manned the back objectives ran ("GUYS!!!").
Strategy for Glenstorm: Okay, this complicates things: since I will likely only have 1-2 turns left in the game, I can't actually take the tree objective, nor can I swing men back to reclaim the far objectives. The center objective will definitely be dominantly controlled if not completely controlled by Tiberius on this turn or the next, if there is a next, and if the elf spear wins, he'll tie me on the bridge objective. I can still win, oddly enough: if I keep one guy alive at the center and tree objectives, completely control the bridge, and break his army, I'll win the game 4-3. We'll shoot for that.
In the Shoot Phase, Legolas attempts to shoot at my uruks, and spends his last Might point (3/3M) attempting to place a hit on a soldier, but all of the shots fail to wound.

At the start of the Fight Phase, Ugluk spends his last Might point calling a Heroic Combat, and he loses the combat to an elf, who wounds the uruk shield in the Heroic Combat (there goes my three-man rush off of the Heroic Combat - any chance I had of breaking his force is pretty much gone).

In the rest of the Fight Phase, the Feral manages to finish off the elf spearman, giving me full control of the bridge.

In the center, there were a ton of defensive victories, and the elves managed to kill another shield. At this point. I'm still holding onto partial control of the dais, but once Thranduil and Legolas get in here, that will quickly change.

Near the trees, Vrasku loses his combat but is not wounded, and the archer falls. This leaves me with two guys on the far side, which means I cannot take the tree objective. My only hope is to reduce the points he receives off of it from 3 to 1. As we head into Turn 8, the casualty count remains grim at...
Casualty Count: 30 Uruks (1 from game), 11 Elves (6 from break)
Turn 8 (P: Uruks)

I start by testing for all of my heroes, and thankfully they all passed. Ugluk (Test: 10) holds the line in the center, and my men madly begin tagging elves in the hope of getting 6 kills. Vrasku passes (Test: 10, 1/1W), and moves into scoring range at the tree objective, and is joined by the Captain (Test: 10). The 2Her Captain (Test: 13) moves toward my remaining uruks and calls "Stand Fast!" as he engages the elves near the bridge, and my Feral moves to the other side of the bridge to stay close to the 2Her Captain. In retrospect, this was a very bad move, as it allowed Tiberius on his turn to rush his Elf Swordsman with throwing daggers toward him, and...

POW!!! (or whatever sound an elf throwing dagger should make) (Whirr-whirr-whirr-thud!) This was not only a pity because it was a Feral that does not get to attack this round (and would have a good chance of getting one of those kills), but also simultaneously costs me my only objective, and guarantees that the battle ends after this round is completed. With no hope of totally controlling or even dominating any of the objectives, this game is over.

Galadriel cast immobilize on the uruk shield that had tagged Legolas, and Thranduil and the Galadhrim joined the melee at the dais, with the Galadhrim breaking Ugluk off of his combat with the elf swordsman (which is a shame, since it means I now wound on 4s instead of 3s for my Heroic Combat this turn). There were no shots in the Shoot Phase, so we moved into the Fight Phase.

In the Fight Phase, Ugluk wins his Heroic Combat, and then fails to wound the Galadhrim, so nothing happens. Two of the Ferals fall, as did the shield and the archer at the center, leaving me with one man standing, keeping Tiberius from obtaining total domination of the objective ("For all of your mistakes this game, Ugluk, thanks for refusing to die," :) ).

Near the bridge, Legolas amazingly fails to wound the immobilized shield, and my 2Her Cap wins his fight against the Galadhrim Archer and wounds him on 3s. But perhaps most surprising of all...

Near the trees, Vrasku kills the Wood Elf Sentinel, and the Captain wins his fight against the elf spearman, resulting in both of us having only 2 guys in scoring range (touching the base plate for the trees), giving us a tied objective, granting 0 points to either team. I...did not even consider that a possibility, and in all fairness it should not have ended that way, as we realized right after this that the two leftmost elves did not move/attack this turn. But he decided that since he did not move them in the Move Phase, he was not going to press it now, which deserves to be mentioned and praised in a blog post, :) (Um...don't reward someone for forgetting to do something and he won't do it in a tournament game)
Final Casualty Count: 35/41 Uruks (game over), 13 Elves (4 from break)
The final breakdown was that there were 3 objectives that did not give points to either side, the center objective gave 1 point to Tiberius, and the bridge objective gave 3 points to Tiberius. We awarded 3 points to Tiberius because he broke my army and was not broken, and no one received additional points for killing the enemy army leader, resulting in a 7-0 Major Victory for the Wood Elves.
Glenstorm's Thoughts: Well, did I call it when I said I was going to get a pounding in this game? :) Honestly, I didn't think it was going to be that bad of a pounding. My list got schooled against this team, and not just on archery and magic (though both played major roles in why I lost the game): the Elves proved to be very deft and clever in close combat, and he made a number of brilliant tactical moves throughout the game. For all the flak that Wood Elves may get for not being as heavy as their Galadhrim or Rivendell counterparts, these guys proved their metal and then some tonight. You've got to hand it to them.
Tiberius's Thoughts: I found Glenstorm's article on the Grey Company tactics (linked to above) very intriguing and tried it out here. And boy did it work! I've spent quite some time working out how to keep my army together so that they benefit from both Blinding Light and Aura of Dismay/Nature's Wrath, and I'm glad to see that it worked in a Domination game. I'm very happy with the addition of a Sentinel, as it's another great way of dealing with Trolls (and other low-Courage, non-Fury benefiting monsters) without having to struggle for archery wounds. I was impressed with the list and am curious how my Dwarves would fare against them...but that for another day.
Stellar Unit for Glenstorm: I don't really know that I have one. The Ferals were okay, but nothing exceptional. The shields did their usual grunt work of holding the line until the heavy units came through, but nothing exceptional. So...I guess I found the 2Her Captain fun to use against D3 units?!?!?! It was just one of those games, :)
Stellar Unit for Tiberius: Mirkwood Guard with Elf bow
For 11 points a piece, Mirkwood Guard are a bargain. Yes, they're expensive compared to my other units, but rarely missing your archery shots and wounding your average Joe on 5s is incredible. Having five of them (with Thranduil bringing their number to six), you should get 5 hits on your enemy each turn with just these guys and that means leveling 1-2 guys each round (likely 1 kill if they're Defense 6-7). A few rounds of archery, and you can pay for them very quickly. I do need to hand it to the Sentinel as well, whose contribution to the army not only included a few kills with archery, but also set up archery targets (via the Madrigal) for my Mirkwood Guard and kept other units from participating in combats.
Over the next few weeks, I'll be out and about all over the country for work and vacation, so I'll be taking a short sabbatical from battle reports. When I return, though, I'm looking forward to giving my Easterlings a test drive, and my way of playing Easterlings will differ substantially from the lists you've seen on this blog, so follow this space for further info on that!
Until our paths cross again, you know where I'll be,
Watching the stars,
Centaur
"I know that you have learned the names of the planets and their moons in Astronomy...and that you have mapped the stars' progress through the heavens. Centaurs have unraveled the mysteries of these movements over centuries. Our findings teach us that the future may be glimpsed in the sky above us." ~ Firenze, Harry Potter and the Order of the Phoenix
Greetings from the Forge! Tiberius and I finally had a chance to get together to test drive my uruk force after his papers and exams from class disappeared and I stopped traveling for work, :) In this match, we will be playing a Domination Game between my Rager's Raiders list (which I have come to love very much, by the way, for all the junk I get from other uruk players about it being too squishy) and Tiberius's Might of Lorien list, which is a slight variation from what you've seen on this blog before. I was excited about this match, in part because playing against Elves always gives me an adrenaline rush (plus my boys love elf flesh), and because this is a new list involving proxy units: I'm looking forward to seeing what Tiberius does with the list following his assessment of this game. The team lists are below:
Rager's Raiders (Isengard Raiders, LOME)
-Ugluk (60) (Army Leader)
-Vrasku (60)
-Uruk-Hai Scout Captain w/ 2Her (55)
-Uruk-Hai Scout Captain (50)
-6 Feral Uruk-Hai (72)
-1 Uruk-Hai Scout w/ banner (33)
-20 Uruk-Hai Scouts w/ shields (180)
-10 Uruk-Hai Scouts w/ bows (90)
TOTAL: 600 pts, 41 units, 10 Might
Might of Lorien (Lothlorien & Mirkwood, Warbands)
-Galadriel (130) (Army Leader)
-8 Wood Elf Warriors with throwing daggers (72)
-2 Wood Elf Warriors with Wood Elf spears (16)
-Thranduil (90)
-9 Wood Elf Warriors with Wood Elf spears (72)
-2 Galadhrim Warriors with shields (18) - proxied by Galadhrim Warriors with Elven blades
-Legolas w/ armor (95)
-5 Mirkwood Guard with Elf bows (55)
-3 Galadhrim Warriors with Elf bows (30)
-1 Wood Elf Sentinel (25) - proxied by Haldir
TOTAL: 603 points, 33 units, 9 Might
This will be an interesting match, as I'll get another round of S3 archery at me (with little cover to protect me to boot) with a new twist: Tiberius is testing out Mirkwood Guard for the first time, who will be landing hits on a 2+, giving him 6 shots (including Thranduil) that are almost guaranteed scored to-hit rolls, wounding on 5s. This will be the hardest archer-based civ I've faced yet, so we'll really see how much of a pounding my list can take.
On top of the archery Tiberius is fielding, he is also running a lighter civ than I'm used to facing (wound on 4s instead of 5s in close combat) that hits me at a higher Fight Value (so almost no roll-offs). As you can tell from the listings on the right sidebar of the blog, though, Tiberius is 11-8-1 with his Elves, with a good number of the wins being against his uruk force which sports D6, so this will be an interesting match for my new uruk list. His force is light, but quite capable, and thus a worthy opponent for the Raiders.
Strategy for Glenstorm: In this light, here's my plan for this battle. I'm going to quickly take the closer two objectives, and then march toward the middle as a concentrated force. I'll then peel off two battle groups toward Tiberius's back objectives before breaking, use a captain in each force to keep my men from running, and then quickly fall to 25% when Tiberius reaches the center objective. So, to call the ball: take the two back objectives (so that if my guys run from my starting objectives, we're okay), and funnel him into the middle with an irresistible target: Ugluk standing front and center, winning the game 6-3, or having majority control over the other two objectives and contesting the center one, winning the game 2-1.
Strategy for Tiberius: This will be the first time I face Glenstorm's Uruk-Hai without Orcs filling their ranks with cheap spearmen and arrow-absorbing swordsmen. I'm hoping that my archery nails a good few before battle is waged, so I can benefit from spears (and having a few very useful heroes). I talked with Glenstorm before the game began about testing out the magic rules from the new Hobbit rulebook - we decided it would probably be good to prove that the Uruks could defeat the Wood Elves without having to take a Courage test each time they want to charge before we experiment with the new rules. :)
Scoring
Today we will be playing a Domination game, with the following rules:
- Game ends at the end of a turn when one side reaches 25% or less of its starting number of models
- 3 Victory Points are awarded for each objective marker that has at least one of your models, and no enemy models within 3"
- 1 Victory Point is awarded for each objective marker that has both friendly and enemy models, but more friendly than enemy models, within 3"
- 2 Victory Points are awarded for killing the enemy Army Leader
- 1 Victory Point is awarded if the enemy force is broken at the end of the game. If the enemy force is broken and your force is unbroken, you instead score 3 Victory Points
After agreeing to the terrain, we setup the board (which includes a few of my new pieces! :D ) and rolled for placement. I won the roll off, and with that... (for death and glory!!!) (for the Lady and apple-pie-flavored Lembas!!!)
Turn 1 (P: Uruks)
 |
| Heads up: something was off with my auto-focus, so some of pictures are really blurry. I'm really sorry about that! |
Turn 2 (P: Elves)

The Elves keep up the 3" boogie (*sing-songy* bah-dee-ah, tell me you remember...), and my uruks make a mad dash toward the middle of the map. Not having any protection for my main force was really beginning to dawn on me as my archers moved up 3" to form a volley line.

In the Shoot Phase, Tiberius successfully landed two hits, one with a Mirkwood Guard, and one with Legolas, on two of my swordsmen. I returned fire with a volley line, and landed a bunch of nothing - what you get when you face Galadriel, I guess, :) I treated this as my token volley round to attempt to get a shot through the shield; my plan from hereon out is to just charge his ranks and force him into close combat.
Turn 3 (P: Uruks)

Here you can see my army advance across the open plains, and we are now in control of three objectives! Tiberius sends a spearman off from the main body to claim the objective, and moves his force 3" further toward the other objective. Vrasku moves up toward the log on the far side, and is now in range to cover my approach of the top-left objective.

In the Shoot Phase, Tiberius found himself within 24" of me, and he got a wide spread of archery against my lines. The Wood Elf Sentinel, a Mirkwood Guard, Legolas, and one of the Galadhrim archers each killed a swordsman, and Thranduil killed one of the Ferals (off-screen). As we end Turn 3, I've now lost 7 units to archery - exactly 1/3 of the way to my break point. At this point, my forces are about 17" away from him, and am hoping to be in close combat with him in two turns.
Turn 4 (P: Uruks)

My forces claim the center objective, and my two fire teams head toward the top objectives. My archers come up behind my right flanker squadron, and prepare to support my force as I approach the elven battle line. Tiberius begins to divide his forces, moving three of his elves beyond the range of Galadriel's Blinding Light (Vrasku: "Target spotted!") (Thranduil: "You there, defend the bridge - everyone else, protect the woods!").

In the Shoot Phase, Vrasku managed to pick off one of the Elf Swordsmen (1/3M). I was hoping to kill the guy below him as well, as it would guarantee that I'd have a straight shot for the bridge, and would force him to send part of his battle line to assist in holding the objective.

Tiberius paid back my intended mischief with interest, picking off one of the swordsmen from the fire team he's been drilling into with a Mirkwood Guard, and then...

...He wracks up two more swordsmen with one of his Mirkwood Guard and Thranduil, and then followed up with a shot to my banner from Legolas. This was poor planning on my part: in my desire to shield Ugluk and my Ferals from archery fire, I placed my banner in such a way that no one next to him could pick it up once he fell, thus losing the banner. This...would come back to bite me later in the game, :)
You'll notice that Tiberius did not continue to drill into my flanker squadron like he has been for the last few rounds - after reducing my right attack team to just a captain, a feral, and 4 shields, he commented to me (as he started rolling 2s and 5s to kill my guys on the mound) that he was taking a note from my Dunedain playbook, using his archery to weaken my elements, not outright destroy them. When he said this, I was elated: someone else was using my strategy, and it was working! Then the reality sunk in: my strategy was working... :-/ As we headed into Turn 5, I was confronted with the reality that I'd need to divert part of my archer corps to helping me secure the top objective, meaning that I'd really only have a handful of archers and the remnant of Ugluk's force to hold the line against Tiberius's main force. While my plan was to quickly fall to 25%, I may hit 25% well before I break him and secure the top two objectives. I need to make quick work of these Elves in close combat.
Casualty Count: 11 Uruks (10 from break point), 1 Elf (16 from break point)
Turn 5 (P: Elves)
Sorry, no picture here (we got carried away, :) ). Tiberius continues to amaze me at how well he braces for close combat with a D3 civ, and most of this is due to his heroes. He continues to move up 3", while diverting forces to protect his objectives from the coming horde. Thranduil automatically casts Aura of Dismay on all Elves within 6" of him, which I'd argue is his most effective spell: not only is it an Augment spell (which means that, unlike Warhammer Fantasy, there is no way to dispel it), but it makes all of his men cause terror, which means my C3 force - everyone that is not a Feral or a Captain - will likely fail the charge (well, two out of every five will...). This means that I'll have a harder time breaking into his front line.
Galadriel then cast Command on my Uruk Captain (1/6W + free, 1/3M), who resisted it (1/1W, 1/2M) (With no more Will points, I think I can safely keep him from doing anything while I punish him for being only Defense 5). His Wood Elf Sentinel then attempted to move one of my Uruk swordsmen with his Madrigal, forcing me to take a Courage Test. I passed the test (13), and thus will be able to move on my turn. In a force like this, Sentinels are very useful: the three song options you have to choose from give you a lot of versatility to either defend yourself (causing terror, for example) or support the rest of the team (passing courage tests or keeping enemy units away from the main fight). When combined with support-role heroes like Thranduil and Galadriel, he has a wide range of options to unleash on an unsuspecting team.
I focus my attention on charging the flank of his main formation, and pushing up against the treeline objective, bringing Vrasku over to help me with his S5 and 2 remaining Might Points. One of my ferals successfully charges (Test: 13), one of my shields charges with my Captain (Test: 13 and 12 respectively), and one of my other shield warriors passes (Test: 12). My fire team on the far left makes its way toward the bridge objective, and Ugluk and his force stand their ground to force Tiberius to charge us next turn.

In the Shoot Phase, we get mauled: 2 of the Wood Elf Swordsmen use their throwing weapons to pick off two of my archers, while two of the Mirkwood Guard kill another two archers, and Legolas finishes off yet another archer. Yes, you read that correctly: half of my archers are now dead. On the slightly brighter side, Thranduil spent a Might point (1/3M) to promote his to-hit roll (he finally rolls a 1!), and failed the wound roll. The happy moment disappeared quickly when I realized that I was 5 models from breaking as we head into melee combat.

In the Fight Phase, I called a heroic combat with my Uruk Captain (2/2M), who wins the fight and slays his shielding opponent. The Captain and shield then engage the only sworsman who was out of range of Thranduil's Aura of Dismay.
In the rest of the Fight Phase, the uruk swordsman wins by shielding, and the Wood Elf spearman successfully shields against the Feral. The Captain and the swordsman roll off against the Wood Elf Swordsman, win the roll off, and wound him.
Casualty Count: 16 Uruks (5 from break point), 3 Elves (13 from break point)
Turn 6 (P: Elves)

Of all of the turns for the Elves to get priority, this was the wrong turn: Tiberius uses throwing daggers with his swordsmen, and this makes an already capable melee warrior much more devastating on the charge. On the far side, he charged a shield, killed it, and then engaged my Captain, followed up by another swordsman charging a Feral, killing it, and then engaging my swordsman, bringing me to 3 units from my break point (and with a score of 21 points, the throwing daggers have now been paid for). The Sentinel then targeted one of my shields with his Madrigal, and after my shield failed his courage test (Test: 9), he moved him 6" back from the fight.

Then things went from bad to worse: Thranduil moved up and automatically cast Nature's Wrath on the center of my army. Ugluk opted to resist (1/1W), and rolled a 2 - which, since he used his only Will point to attempt to resist the spell, meant that even his 3 Might Points could not promote the dice to the needed 6. That...bites... :) Needless to say, Tiberius was really happy about how his magic was working this game (kind of important to this list, no? :) ).
Galadriel then cast Immobilize on the Uruk Captain on a 6 (2/6W + free), bringing his Attacks and Fight values to 1, and prohibiting him from striking to wound in the highly unlikely scenario that he wins the fight (which is really bad, because I as counting on him to kill someone this round, as I'm 3 away from breaking). When I finally got a chance to move (couldn't come quickly enough... :P ), I stood up Ugluk and a few others and desperately attempted to push back the bulk of Tiberius's force from the center objective. I also moved my left fire team toward the bridge, and overwhelmed the elves he sent to deter me.
Glenstorm strategy: I measured the distance between my Uruk 2Her Captain and the elf he's using to hold the bridge while Tiberius stooped to pick up his 11-month old son who was crawling around on the floor, and found that I could attack one of the Elves in the forward unit and then swing over to the other elf after the Heroic Combat. I'm setting up my Feral and my 2Her Cap to attack him, so that I can leave the Feral to hold the ground, and can use the 2H to keep my men from running when we break test next round.

In the Shoot Phase, most everyone is already involved in combat, though two Mirkwood Guard (top-center of the picture) still managed to take shots at one of my shields (the one entranced by the Madrigal) and brought him to the ground. Bummer...

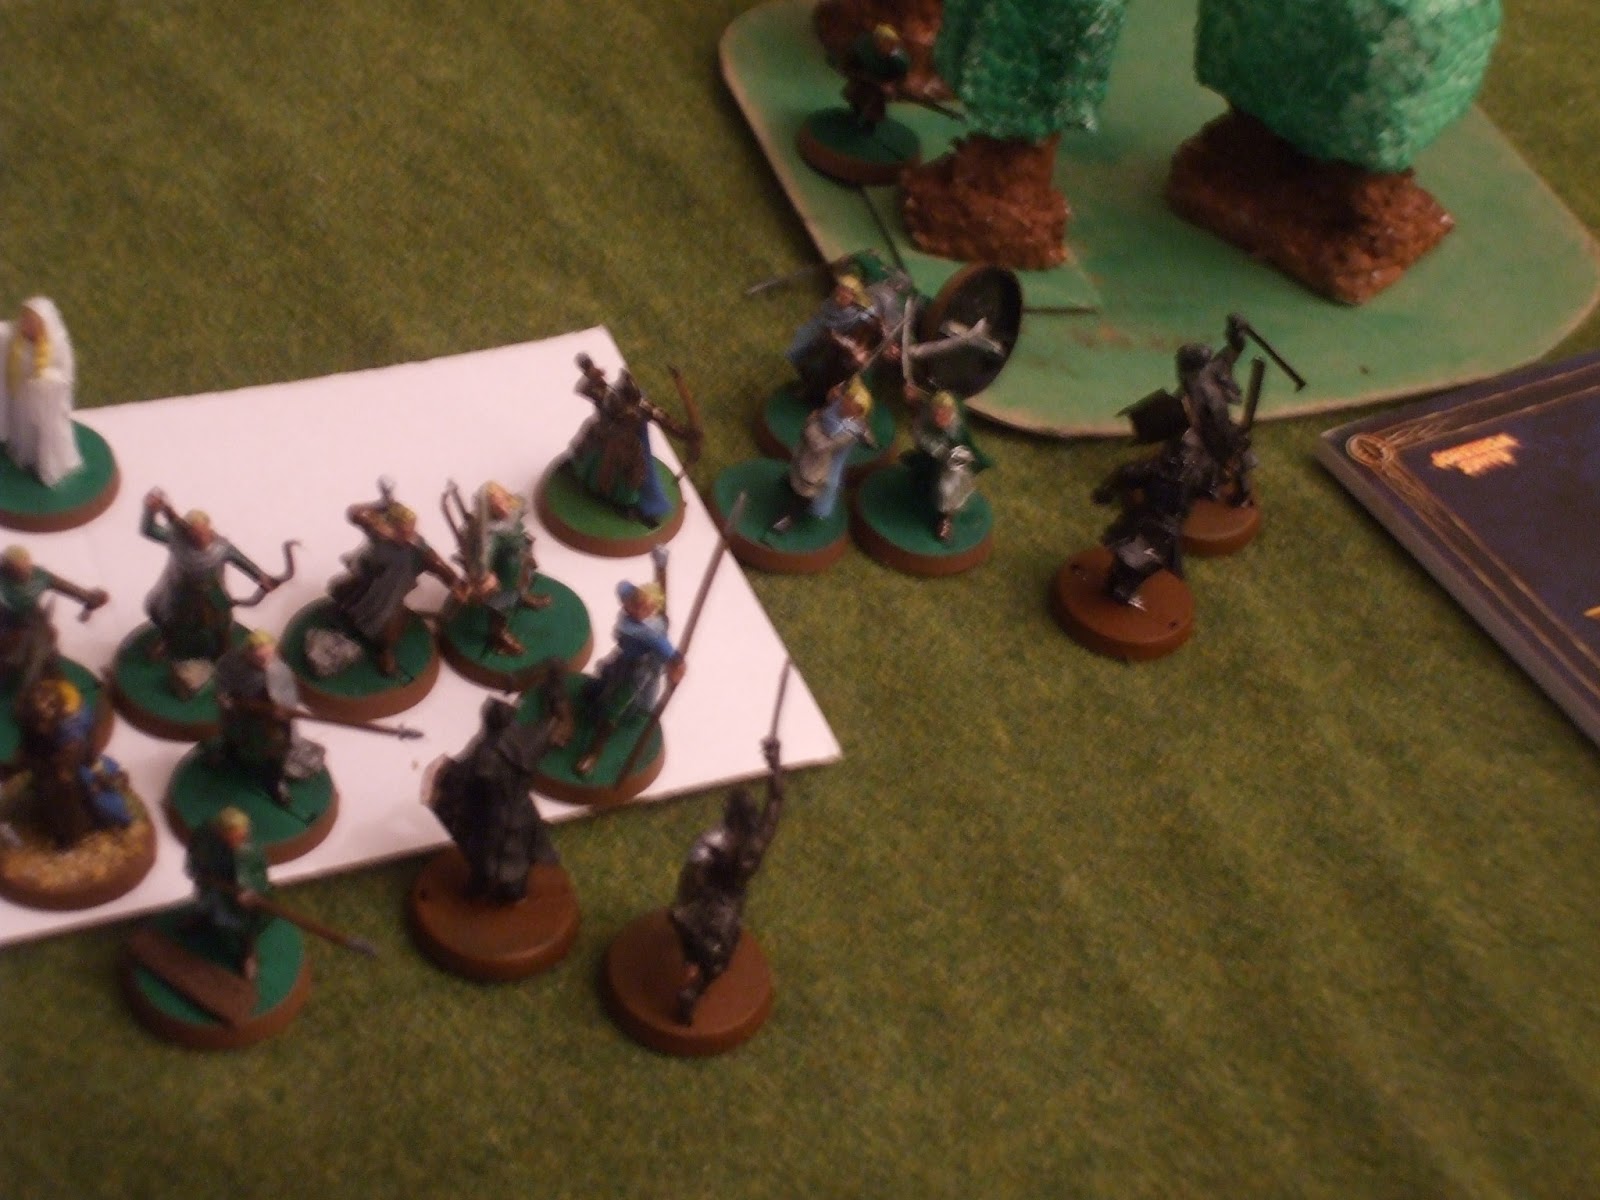
In the Fight Phase, 5 Heroic Combats were called, and after we rolled off, they went in this order: Vrasku, Thranduil, Ugluk, Legolas, and 2Her Captain (they are marked by the dice, as shown). We both agreed to be gentlemen and not rush a hero into another Heroic Combat, so the combats went down like this:

Vrasku and the archer with him win their fight against an elf, kill him (Yay for wounding on 3s with this hero!), and jump into the Uruk Captain's fight to give him a chance at survival.

Thranduil wins his fight with an Elf Blade, kills the archer he was fighting (3/3M), and takes on an archer while the Galadhrim who was spear supported in the fight breaks one of my Ferals off of a fight involving a trapped shield.

Ugluk wins his fight, kills the elf spearman, and engages the spearman who was supporting the original elf in the fight, while the Feral in his fight joins in the combats near the bridge objective.
 |
| And front and center, a blurry picture of Tiberius, ;) |

And finally, the 2Her Captain, shield, and Feral win their fight against the elf spearman, kill him (wounding on 2s!!! Gotta love that! :) ), and the shield helps the main body while the 2Her and Feral engage the elf holding the objective.


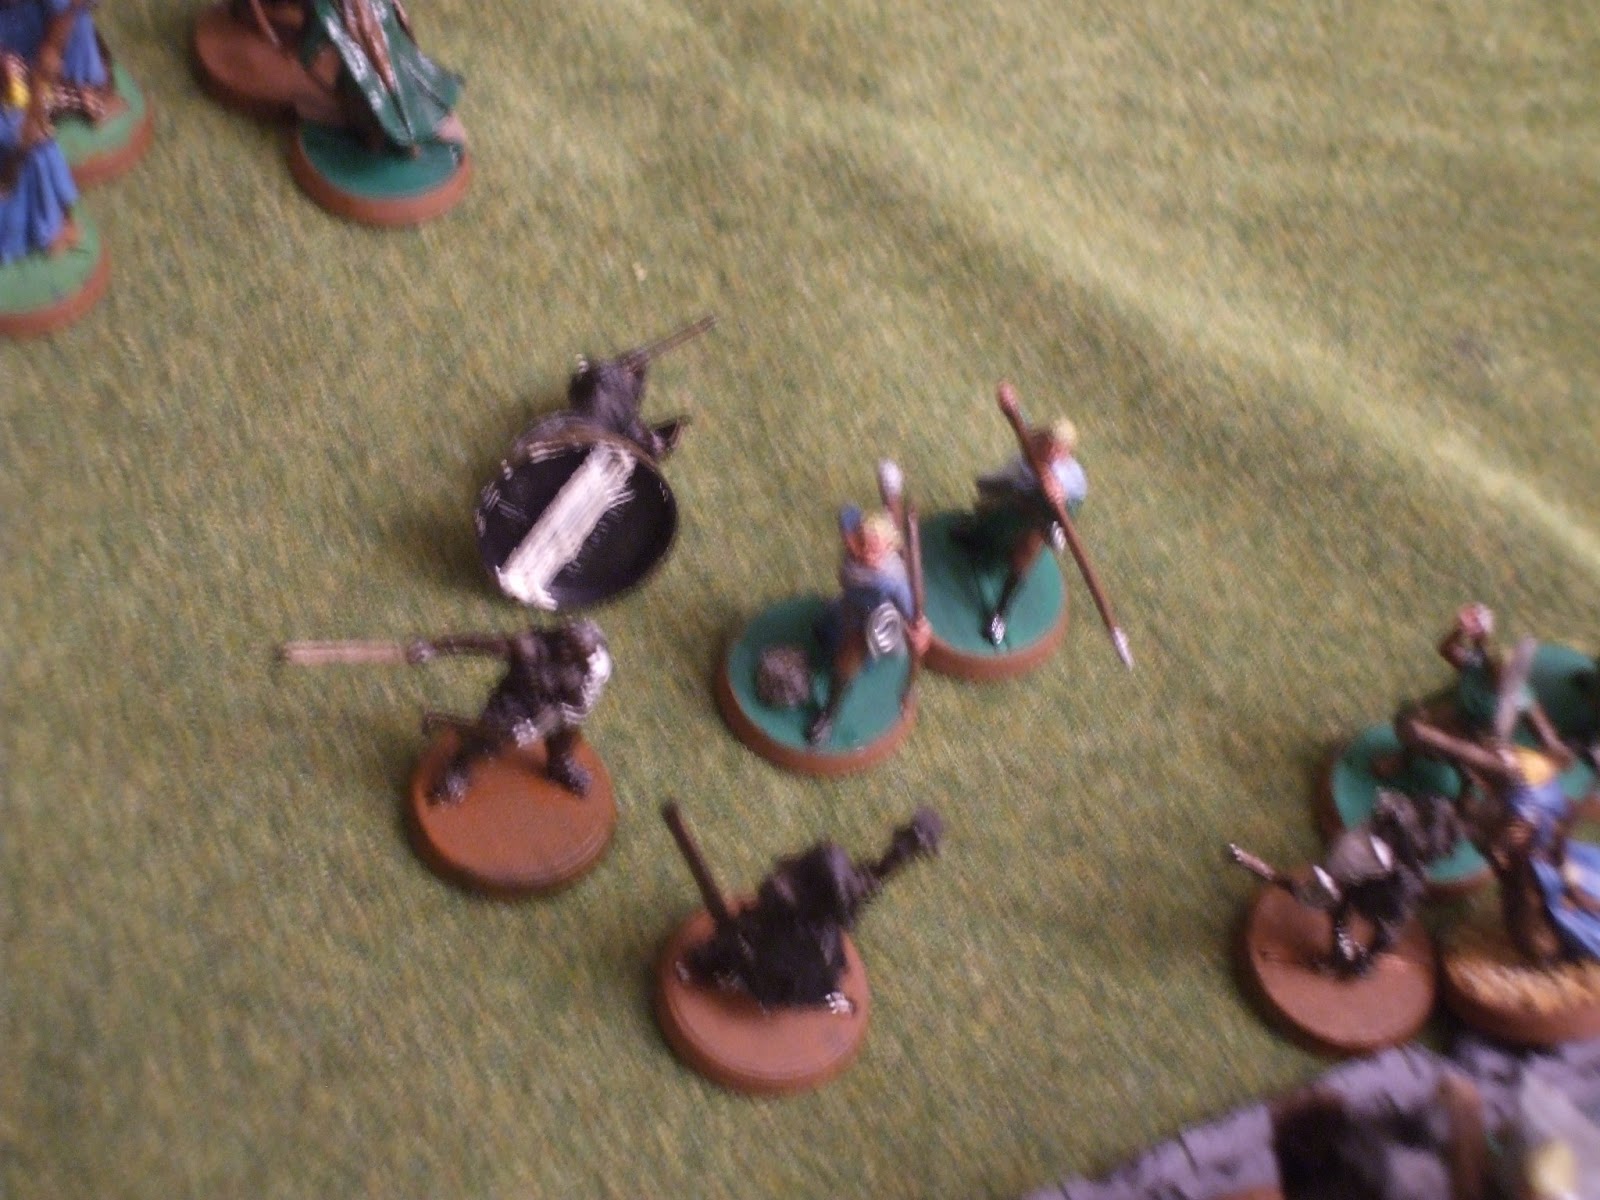
Near the bridge, one of the uruk shields killed one of the elf swordsmen, and one of the elf spearmen fell to a gang fight against a Feral and a shield. Two of the uruks went down, and (perhaps most disappointing of all), the elf spearman holding the bridge successfully shielded against the Uruk 2Her captain and the Feral. This brings the casualty count to...
Casualty Count: 24 Uruks (broken, 7 from game), 10 Elves (7 from break)
Turn 7 (P: Uruks)

In an effort to make my army disperse on its own, Galadriel called a Heroic Move (2/3M), which I didn't want to challenge (as only Ugluk has Might points left), and then immobilized my Captain again (3/6M + free on a 6). The Sentinel then cast his Madrigal on an uruk archer who failed to pass the Courage Test, and was promptly moved 6" away from the combats.
I tested for my 2Her Captain (Test: 11), and moved him to the base of the bridge so that he could call a "Stand Fast!" to keep my men on the far side of the field. We then swarmed all of the elves near the bridge, and the Feral moved in for a desperate attempt to clear the bridge. After courage testing for my soldiers, I lost none of my frontline fighters, but both of the uruks that manned the back objectives ran ("GUYS!!!").
Strategy for Glenstorm: Okay, this complicates things: since I will likely only have 1-2 turns left in the game, I can't actually take the tree objective, nor can I swing men back to reclaim the far objectives. The center objective will definitely be dominantly controlled if not completely controlled by Tiberius on this turn or the next, if there is a next, and if the elf spear wins, he'll tie me on the bridge objective. I can still win, oddly enough: if I keep one guy alive at the center and tree objectives, completely control the bridge, and break his army, I'll win the game 4-3. We'll shoot for that.
In the Shoot Phase, Legolas attempts to shoot at my uruks, and spends his last Might point (3/3M) attempting to place a hit on a soldier, but all of the shots fail to wound.
At the start of the Fight Phase, Ugluk spends his last Might point calling a Heroic Combat, and he loses the combat to an elf, who wounds the uruk shield in the Heroic Combat (there goes my three-man rush off of the Heroic Combat - any chance I had of breaking his force is pretty much gone).

In the rest of the Fight Phase, the Feral manages to finish off the elf spearman, giving me full control of the bridge.

In the center, there were a ton of defensive victories, and the elves managed to kill another shield. At this point. I'm still holding onto partial control of the dais, but once Thranduil and Legolas get in here, that will quickly change.

Near the trees, Vrasku loses his combat but is not wounded, and the archer falls. This leaves me with two guys on the far side, which means I cannot take the tree objective. My only hope is to reduce the points he receives off of it from 3 to 1. As we head into Turn 8, the casualty count remains grim at...
Casualty Count: 30 Uruks (1 from game), 11 Elves (6 from break)
Turn 8 (P: Uruks)

I start by testing for all of my heroes, and thankfully they all passed. Ugluk (Test: 10) holds the line in the center, and my men madly begin tagging elves in the hope of getting 6 kills. Vrasku passes (Test: 10, 1/1W), and moves into scoring range at the tree objective, and is joined by the Captain (Test: 10). The 2Her Captain (Test: 13) moves toward my remaining uruks and calls "Stand Fast!" as he engages the elves near the bridge, and my Feral moves to the other side of the bridge to stay close to the 2Her Captain. In retrospect, this was a very bad move, as it allowed Tiberius on his turn to rush his Elf Swordsman with throwing daggers toward him, and...

POW!!! (or whatever sound an elf throwing dagger should make) (Whirr-whirr-whirr-thud!) This was not only a pity because it was a Feral that does not get to attack this round (and would have a good chance of getting one of those kills), but also simultaneously costs me my only objective, and guarantees that the battle ends after this round is completed. With no hope of totally controlling or even dominating any of the objectives, this game is over.

Galadriel cast immobilize on the uruk shield that had tagged Legolas, and Thranduil and the Galadhrim joined the melee at the dais, with the Galadhrim breaking Ugluk off of his combat with the elf swordsman (which is a shame, since it means I now wound on 4s instead of 3s for my Heroic Combat this turn). There were no shots in the Shoot Phase, so we moved into the Fight Phase.

In the Fight Phase, Ugluk wins his Heroic Combat, and then fails to wound the Galadhrim, so nothing happens. Two of the Ferals fall, as did the shield and the archer at the center, leaving me with one man standing, keeping Tiberius from obtaining total domination of the objective ("For all of your mistakes this game, Ugluk, thanks for refusing to die," :) ).

Near the bridge, Legolas amazingly fails to wound the immobilized shield, and my 2Her Cap wins his fight against the Galadhrim Archer and wounds him on 3s. But perhaps most surprising of all...

Near the trees, Vrasku kills the Wood Elf Sentinel, and the Captain wins his fight against the elf spearman, resulting in both of us having only 2 guys in scoring range (touching the base plate for the trees), giving us a tied objective, granting 0 points to either team. I...did not even consider that a possibility, and in all fairness it should not have ended that way, as we realized right after this that the two leftmost elves did not move/attack this turn. But he decided that since he did not move them in the Move Phase, he was not going to press it now, which deserves to be mentioned and praised in a blog post, :) (Um...don't reward someone for forgetting to do something and he won't do it in a tournament game)
Final Casualty Count: 35/41 Uruks (game over), 13 Elves (4 from break)
The final breakdown was that there were 3 objectives that did not give points to either side, the center objective gave 1 point to Tiberius, and the bridge objective gave 3 points to Tiberius. We awarded 3 points to Tiberius because he broke my army and was not broken, and no one received additional points for killing the enemy army leader, resulting in a 7-0 Major Victory for the Wood Elves.
Conclusion
Glenstorm's Thoughts: Well, did I call it when I said I was going to get a pounding in this game? :) Honestly, I didn't think it was going to be that bad of a pounding. My list got schooled against this team, and not just on archery and magic (though both played major roles in why I lost the game): the Elves proved to be very deft and clever in close combat, and he made a number of brilliant tactical moves throughout the game. For all the flak that Wood Elves may get for not being as heavy as their Galadhrim or Rivendell counterparts, these guys proved their metal and then some tonight. You've got to hand it to them.
Tiberius's Thoughts: I found Glenstorm's article on the Grey Company tactics (linked to above) very intriguing and tried it out here. And boy did it work! I've spent quite some time working out how to keep my army together so that they benefit from both Blinding Light and Aura of Dismay/Nature's Wrath, and I'm glad to see that it worked in a Domination game. I'm very happy with the addition of a Sentinel, as it's another great way of dealing with Trolls (and other low-Courage, non-Fury benefiting monsters) without having to struggle for archery wounds. I was impressed with the list and am curious how my Dwarves would fare against them...but that for another day.
Stellar Unit for Glenstorm: I don't really know that I have one. The Ferals were okay, but nothing exceptional. The shields did their usual grunt work of holding the line until the heavy units came through, but nothing exceptional. So...I guess I found the 2Her Captain fun to use against D3 units?!?!?! It was just one of those games, :)
Stellar Unit for Tiberius: Mirkwood Guard with Elf bow
For 11 points a piece, Mirkwood Guard are a bargain. Yes, they're expensive compared to my other units, but rarely missing your archery shots and wounding your average Joe on 5s is incredible. Having five of them (with Thranduil bringing their number to six), you should get 5 hits on your enemy each turn with just these guys and that means leveling 1-2 guys each round (likely 1 kill if they're Defense 6-7). A few rounds of archery, and you can pay for them very quickly. I do need to hand it to the Sentinel as well, whose contribution to the army not only included a few kills with archery, but also set up archery targets (via the Madrigal) for my Mirkwood Guard and kept other units from participating in combats.
Over the next few weeks, I'll be out and about all over the country for work and vacation, so I'll be taking a short sabbatical from battle reports. When I return, though, I'm looking forward to giving my Easterlings a test drive, and my way of playing Easterlings will differ substantially from the lists you've seen on this blog, so follow this space for further info on that!
Until our paths cross again, you know where I'll be,
Watching the stars,
Centaur
"I know that you have learned the names of the planets and their moons in Astronomy...and that you have mapped the stars' progress through the heavens. Centaurs have unraveled the mysteries of these movements over centuries. Our findings teach us that the future may be glimpsed in the sky above us." ~ Firenze, Harry Potter and the Order of the Phoenix
No comments:
Post a Comment