Featured Post

Nemesis: How to Fight Against Isildur

Good morning gamers, This year in this series, we've looked at Gil-Galad, Elendil, and Elrond as the major heroes from the Last Alliance...

Tuesday, July 19, 2011

To Kill a King: Uruk-Hai vs. Goblins

This will be the close-out game of Uruk-Hai Month and it is a battle of epically Evil proportions. Today my Uruks will face my worthy friend Gaius, who will be controlling my Goblin force. Before we begin though, update on the scenery challenge:
You can see here the beginnings of the inside arrangements: a furnace/fire place for the metal work. I'm hoping to get some of that refinished before the paint goes on...and to get something to patch up that triangle of open space under the roof on the left of the photo. So we'll see when that happens. Anyway, here are the forces for today:
Fist of Isengard: 260 points

Uruk Captain with crossbow and heavy armor - 60 points
12 Uruk-Hai Warriors with shields - 120 points
8 Uruk-Hai Warriors with pikes - 80 points

21 units, 1 crossbow, 1 hero

The Denizens of Moria: 260 points

Durburz, Goblin King of Moria - 60 points
7 Goblin Warriors with Orc Bows - 35 points
8 Goblin Warriors with spears - 40 points
8 Goblin Warriors with shields - 40 points
1 Cave Troll with troll chain - 85 points

25 units, 7 bows + troll chain, 1 hero

The scenario we will be playing is a To Kill a King game. The armies will set up their units within 6" of a corner of the board and will fight until the opposing leader (the hero of each force) is slain. The winner will receive a major victory if their force is not broken when the enemy leader is slain, while a minor victory will be awarded if the force is broken. If both leaders are slain in the same turn, the game is a draw.
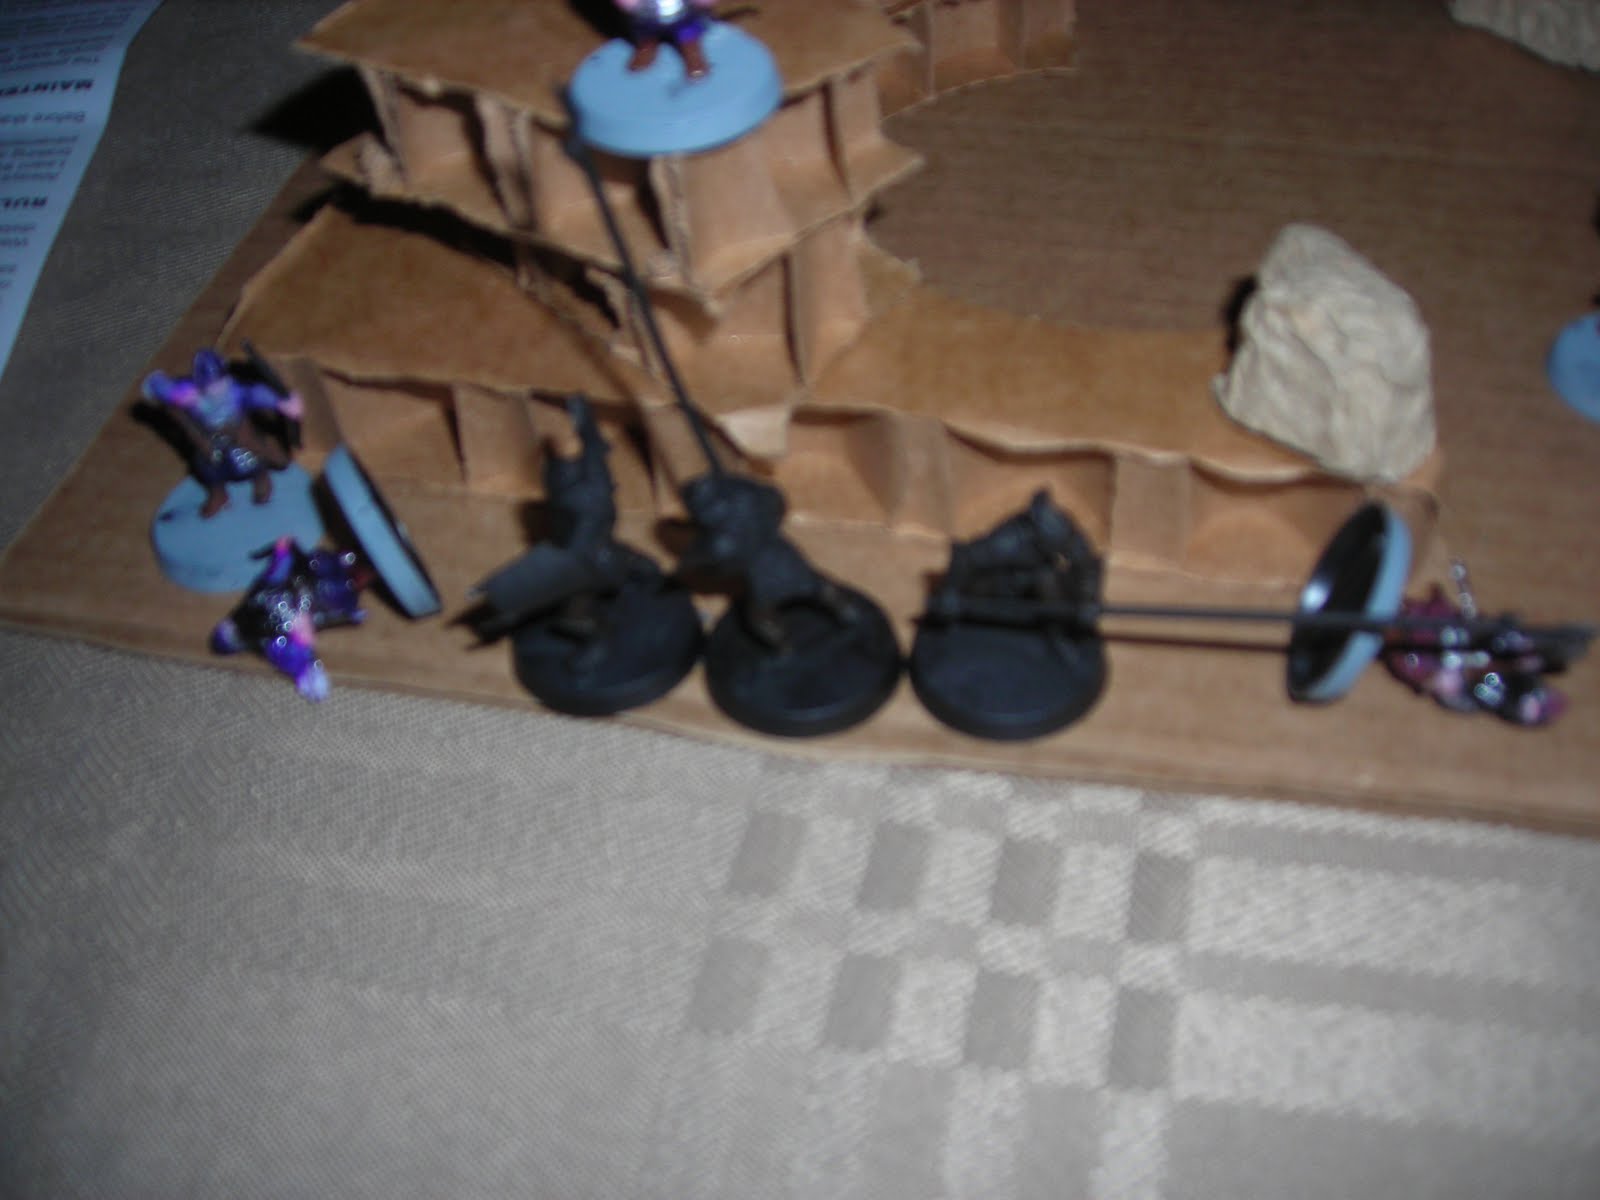
The board has been given the following features: a (new!) hill and a building (the smithy) with 1 fence piece in the north quadrants and one hill and a bunch of rocks in the southern quadrants. To determine placement, the Goblins have won the roll and will select the northeast corner and have given the Uruk-Hai priority on the first round.


Turn 1: Taking Ground (Priority - Uruks)
The entire turn was spent moving towards one another...nothing interesting.


Turn 2: The Heat of the Moment (P - Goblins)
The armies charge towards each other and prepare for a bloody slaughter during the next round. During the Shoot phase, three Goblins and the Uruk Captain fired and none hit their marks...next turn.


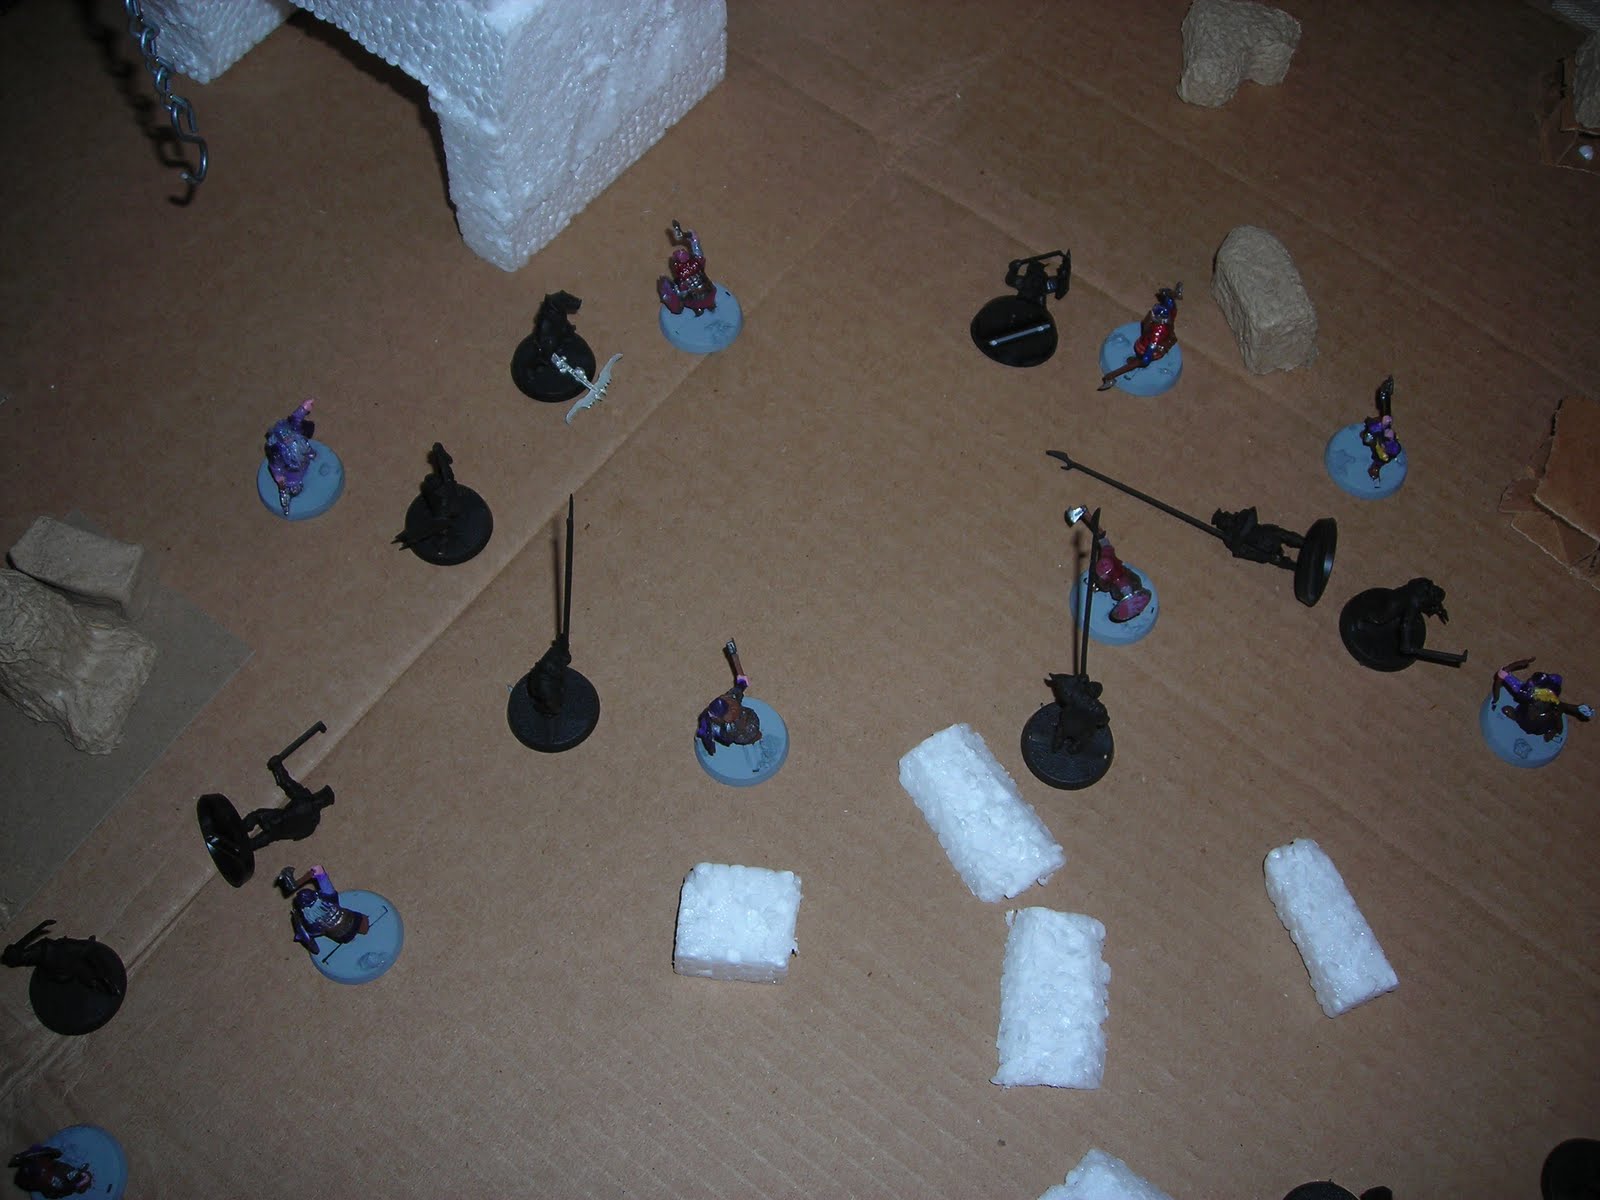
Turn 3: Crash! (P - Uruks)
The battle is now raging and the Uruks have claimed critical ground, bringing the fight right to the Goblin defenses. The Troll stooped to pick up a rock and will be firing it during his turn (as the two Uruks who tried to charge him were rooted on the spot). 
Pardon the blurry shot. During the Shoot phase, the Uruk Captain killed a Goblin spearman, but nothing else happened (the Troll missed, btw).
During the Fight phase, the Uruks dominate by killing 4 Goblins and not losing a single warrior (only losing 2 fights).
Kill count: Uruks 5/25, Goblins 0/21.


Turn 4: Between a Rock and a Hard Place(P - Uruk-Hai)
The Uruks have again received the advantage of picking the fights and have attacked most of the Goblins. While they press their advantage on the hill from last turn, they also have engaged the archers at the wall, hoping to displace them.
In the Shoot phase, the Uruk Captain nails a Goblin archer, but his Goblin friends sends an angry arrow back at the Uruk Captain and rolls the required 6 to wound (saved by his Fate point). Gaius is constantly telling me he counts on the lucky shots of the Goblins...and after playing him this long, I'm not surprised at all.
In the Fight phase, the Uruks again dominated, though they lost two units to the Troll and an angry Goblin. The other fights they won (but failed to wound the Goblin behind the wall, thanks to the barrier) and killed a total of 6 Goblins.
Kill count: Uruks 12/25, Goblins 2/21. The Goblin force is going to need to bank on the tactical advantages of the Goblin King...and the strength of the troll.


Turn 5: Storming Forward (P - Uruk-Hai!)
The weight of the battle is heavily slanted against the Goblins, who are again faced with Uruk-Hai priority. The Uruks have now raced behind the Goblin ranks and even managed to engage the Cave Troll, keeping him from wrecking their ranks. Only time will see if the Goblins are utterly routed in this match.

During the Fight phase, the Uruk who charged the Troll managed to beat him (shielding on the charge). On that side of the fights, that's the only thing that went well for the Uruks, as the lone pikeman was killed by the two angry Goblins and the men assaulting the fence were beaten back. In the other fights, the battle clearly went to the Uruks, as they add 3 more Goblins to their kills.

Kill count: Uruks 15/25, Goblins 3/21. The Goblins are broken now.


Turn 6: A Slow Recovery (P - GOBLINS!)
The Goblin King easily passes his Courage test and rallies his remaining followers (all of which can see him and are definitely in range of his Stand Fast!). They engage a few critical junctures and the Cave Troll comes down heavily on an Uruk pikeman's head with his troll chain. The Uruks engage what units they can, in the hopes of crushing the small resistance force. Their captain remains out of charge range of the troll, hoping to bring him down with strength of arms.
In the Fight phase, Durburz paid a Might point to win the fight, but failed to wound his opponents. The other fights divided pretty evenly between Uruks and Goblins, but the Uruks managed to kill 3 Goblins, while the Goblins killed 1 Uruk. Bummer for the Goblins...major bummer.
Kill Count: Uruks 18/25, Goblins 5/21.


Turn 7: The End Approaches (P - Goblins)
The Goblin King keeps his men in check for another turn and leads his men to engage critical Uruks. The enemy are too thick though, and Durburz soon has 4 Uruks fighting him. Hopefully his strength will hold...(or so Gaius hopes...I must confess, my hopes are a bit different).
In the Fight phase, the two Uruks fighting the Troll win their fight and manage to wound the Troll once - wow! The other fights flow in favor of the Uruks, winning every fight except one and sustaining now casualties. The Goblins lost 3 units and Durburz lost his fight on a roll-off, sustaining 1 wound after both Fate saves (1 successful).
Kill Count: Uruks 21/25, Goblins 5/21.


Turn 8: Utterly Overwhelmed (P - tied, Uruk-Hai!)
This is the beginning of the end of the Goblins, I think. With their leader having a single wound remaining, he faces 8 Uruk-Hai and he is most definitely trapped. You will also notice that the Troll is no longer on the board...he failed his Courage test by 1 point, which is a bummer.
In the Fight phase, there were three fights: in one fight, the angry Goblin shielded off two Uruks. In the other two fights, the Goblins were mercilessly slaughtered. Without checking to see if the archer was trapped, the three Uruks landed 3 wounds on the wretch. The Goblin King would have lost his fight by 2 points if he used his 2 Might points...and every Uruk hit him once. Ouch...major victory for the Uruk-Hai!


Assessment by Gaius:

The Goblins basically hit self-destruct this game: by only slightly outnumbering the Uruk-Hai, they lost their typical advantage: numbers. I also tried to send the Troll on to fight Uruk Captain at first and probably should have stuck with that plan...instead, my troll got caught in a protracted war (eventually fleeing) against the aggressors, while leaving their commander free to pot-shot my own men. Oh well...next time, things will be different.

Assessment by Tiberius:

The Uruks finally won a fight by a respectable lead - yaye! I've reached the decision that an Uruk-Hai force like mine needs to fight foes with a lower Fight value (and preferably not Strength 3 bows). That's not much good for my own armies, but against some of my friends, it may work just fine. We'll see what happens as they improve. I noticed today that Warg Riders are not actually in the "Legions of the White Hand" tech tree, so I'll need to ally them in via Sharku...so should I get the riders, you'll see a conversion attempt at Sharku. In the mean time, I've now considered adding to the ranks of these Uruks the Shadow Lord at the suggestion of one of my viewers, but since the monetary cost between these units currently slants in favor of the Wargs, I'm thinking about that one as the primary idea - no decisions made until I can play-test Warg Riders.

Stellar unit for Goblins: Goblin Warrior with shield

Though these guys didn't do much in today's fight, they did more than the other warriors. One Goblin with shield managed to kill 2 Uruks and tied down several others during the latter turns of the game (not to mention, these were the only basic Goblin troops to not be wounded on a 4+ by the Uruks). Not much glory or anything to speak of, but still a valuable unit. The archers ran a tight race by ticking off the Fate point of the Uruk Captain, but that was all they did...

Stellar unit for Uruk-Hai: Uruk-Hai Warrior with shield

These guys, as always, amaze me. They can hold their ground well against Strength 3 troops and provide a strong fight when outnumbered via shielding. They're great for pushing through arrow fire and even managed to wound the Cave Troll in today's game. I love these guys...

Sunday, July 17, 2011

Reconnoitre: Uruk-Hai vs. Dwarves

This is game #2 in Uruk-Hai Month, and I will be playing with my Uruk-Hai against my Dwarves (played by my friend Gaius). But before we begin, I have an update on two terrain pieces:
The one on the left is a rocky staircase that you will see in today's combat and in future tunnel fighting scenarios, since it allows units to get better vantage points and even have some coverage. The second is the smithy from last game, now with roof complete. Some internal improvements (and some exterior) will be made shortly. In the m eantimie, here are today's armies:
Fist of Isengard: 499 points

Uruk Captain with shield and heavy armor - 60 points
Uruk Captain with crossbow and heavy armor - 60 points
18 Uruk-Hai Warriors with shields - 180 points
16 Uruk-Hai Warriors with pikes - 160 points
1 Uruk-Hai Warrior with banner - 39 points

37 units, 1 crossbow, 2 heroes

The Host of Erebor: 496 points

Gimli, Son of Gloin - 90 point
Balin, Son of Fundin - 95 points
8 Dwarf Warriors with shields - 72 points
7 Dwarf Warriors with two-handed weapons - 56 points
8 Dwarf Warriors with Dwarf bows - 72 points
1 Khazad Guard - 11 points
Ally: Legolas, Prince of Mirkwood with Elven cloak - 100 points

27 units, 8 bows + 2 thrown weapons + Legolas, 3 heroes

The scenario we will be playing is a Reconnoitre game. All units will begin within 3" of their board edge and will fight until one side is reduced to 25% (by death, flight, or escape). The winner of the game is decided by the side which side had more models escape of the opposing player's board edge during the game.
The board has been given the following features: a mining complex and a rocky mound in the north quadrants and some difficult rocky terrain and a small rock formation in the southern quadrants. To determine placement, the Uruks have won the roll and have elected to choose the Eastern board edge and cede the priority for the first round to the Dwarves. Unfortunately, in this shot, you can't see all of the deployed Uruk-Hai, but they'll make their presence know in the next few photos.


Turn 1: Rushing the Foes (Priority - Dwarves)
Both armies charge towards each other. The Uruk-Hai charge from their mining complex and the Dwarves cut quickly across the rocky outcrops towards the center.
Sorry, blurry shot. In the Shoot phase, the only kill is an Uruk-Hai Warrior with shield, not killed by Legolas, but by one of his assigned bodyguards.
Force Strength: Dwarves +20, Uruk-Hai +27. The Dwarves must be reduced to 7 units, while the Uruk-Hai must be reduced to 9 units.


Turn 2: Meet In The Middle (P - Dwarves)
The armies have met in an interesting clash on the battlefield. Gaius has formed up his Dwarves in an "English" medieval formation, which prevents an army from engaging the whole battleline at one time (which is particularly good if you don't have spear support). The only units you can't see in this shot is one Uruk Warrior who is defending the mining complex and two Dwarf archers behind the rock formation on the north side.
In the Shoot phase, the only wound was again from one of Legolas' bodyguards (Legolas tried to shoot an Uruk who was fighting at the top of this shot.
In the Fight phase, Balin called a heroic combat. Balin wins the fight and wounds his trapped opponent (he wounds all the enemy units on 4s, except the Captain with shield, who he wounds on 5s).
A little blurry, but Balin pays another Might point to win his next fight and slays his opponent. The other Uruks won their fight, wounding one combatant and narrowly not killing the other one.
Force Strength: Dwarves +19, Uruk-Hai +24. In case you couldn't tell from the last turn, these "+X" totals indicate how many units they need to lose before their side is reduced to 25%. They can be lost to death, fleeing, or escaping off the board as scouts.


Turn 3: The Hammer Falls (P - Dwarves...again?)
In the Move phase, Balin killed an Uruk pikeman with his throwing axe and then joined another fight. Most of the Dwarves are now engaged in combat, but the pikes of the Uruk-Hai are supporting their comrades evenly across the battlelines. Let's see if they're still there after the Shoot phase.
During the Shoot phase, none of the pikes died (a couple of close calls, but after the arrows stopped flying, they were fine). The unit who didn't survive was the banner-bearer, who died to a sleek Elven arrow...bummer.
During the Fight phase, Balin pays his last Might point to call a final heroic combat against the Uruks he's fighting. He kills him and he and his comrade advance towards the other fights in the area.
Blurriness, you're hurting my blog again. In other news, Gimli wins his fight and manages to roll 2 6s, which will be good enough to kill the Captain he's facing. Unfortunately, the Captain rolls a 2 on his Fate save, and so must pay both Might points he has to stay alive. Ouch...
In the rest of the Fight phase, Balin won his fight but failed to get the 4s he needed to kill any of the pikes he was fighting. The Uruks wona  good deal of the fights near Balin, but could only wound 1 Dwarf. The archer down near Legolas killed his man after a roll-off (which made me unhappy). But what made me even more unhappy was that one of the Dwarf two-handed axemen near Gimli won his fight against pike-support on the roll-off of 1s...what? Thankfully, he didn't wound my Uruk.
Force Strength: Dwarves +18, Uruk-Hai +20. Remember, however, that one side can win if they lose 25% of their units, just so long as they get more units across the enemy board edge...that's kind of what I'm hoping for here.


Turn 4: Drilling The Front Lines (P - Yet another Dwarf priority round)
During the Move phase, my Uruks who were attempting to cross over the other board edge have been trapped, so we'll see what happens to them. Besides that, the Uruk lines are thin and I think I may just have to run for it.
During the Shoot phase, Legolas nailed an Uruk pikeman (paying 1 Might point), while the Crossbow captain finally lands a kill (at the price of 2 Might points, so my units will have an escape route...risky, I know).
In the Fight phase, Gimli calls a heroic combat, hoping to finish off the Captain. He is forced to pay a second Might point to win the fight, and FAILS to get a 6 on his dice (or even a 5). YAYE! In the other fights (not by the rock formation), three Dwarves were killed, while only one Uruk-Hai was killed (finally something good). Several of these kills happened where the Uruks can quickly make a break for it, if we can get priority.
By the rock, the Uruks clearly dominated. Not only did they survive the archery round, but they killed both of their Dwarf assailants, paving the way to a swift victory (or so I hope).
Force Strength: Dwarves +12, Uruk-Hai +18. One consideration that I need to face is that my force is 9 units away from breaking (with units who escape off the board contributing to that), while the Dwarves are 6 units away. Time is running out...


Turn 5: Unleash The Charge (P - Uruk-Hai)
With my first turn of priority in the whole game, I charged as many units as I could towards the exit, tying up a ton of Dwarves in the front lines and essentially sacrificing my captain to Gimli. The critical issue will be getting priority during these rounds, as I'm running out of Uruks to keep the Dwarves from running off my board edge.
During the Shoot phase, Legolas found his stride and slew not one but two pikemen...come on, man...
In the Fight phase, Gimli uses his last Might point to call a heroic combat and slays the Uruk captain. He then rushes towards the escaping Uruks and engages them (later losing that fight and managing to not be wounded).
In the other fights, the Uruks won almost every fight, including a fight against Balin, which resulted in the hero evading a wound with a Fate point. 3 Dwarves were killed (including a Khazad guard, but not including the archer near the mound). Oh well, can't ask for everything. NOTE: after taking this picture, I noticed a Dwarf with white hair and shield who I didn't resolve the combat for. He lost his fight and was killed, adding yet another kill to the Uruk total.
Force Strength: Dwarves +9, Uruk-Hai +16. The Dwarves are 2 units away from breaking, while the Uruks are 7 units away.


Turn 6: The Battle Rages (P - tied, Dwarves)
So here the Dwarves have one last ditch effort to stop the Uruks from escaping. Some of my units are breaking away, but none in very good positions.
In the Shoot phase, a Dwarf archer snipes my break-away pikeman in the back, while Legolas targets my break-away swordsman (above the purple archer at the top of the frame). In his auto-shot, he rolls a 1 to wound, which is not a kill. :)
In the Fight phase, Gimli slew 1 Uruk, while another Dwarf with two-handed axe slew his opponent. The Uruks managed to kill 2 Dwarves, which breaks their force. In the fight by the mound, the Dwarf archer actually won the fight, but failed to wound the trapped Uruk he was facing. Oh well...
Force Strength: Dwarves +7, Uruks +12. The Dwarves are broken, but the Uruks are 4 away from breaking, so it's still close.


Turn 7: Forcing A Retreat (P - Uruk-Hai!)
So, one of the Uruks managed to get off the board. Right now, none of the Dwarves are set to escape, as they've been tied up (or beaten down) by the Uruks. Things are looking pretty good, except that none of the Dwarves fled. Oh well.
In the Shoot phase, the keen Dwarf archer near Legolas nailed the Uruk with shield that ran past him, while Legolas shot down the next two closest escapees (no Might used...just skill).
In the Fight phase, the Uruks and Dwarves didn't kill a single person, though some of those rolls were very close. Here's the fights as the board sees them (note that both Gimli and Balin lost their fights this round).
Force Strength: Dwarves +7, Uruks +8. The Uruks are 1 unit away from breaking.


Turn 8: Racing Across The Plains (P - Uruks!)
So, the Uruks won priority again and this time and got 2 more units off the board. Things are looking pretty good right now and I hope it stays that way.
In the Shoot phase, Legolas kills 1 Uruk who was trying to flee, but can't kill any of the others. This kill, however, breaks the Uruk force.
In the Fight phase, the Dwarves added insult to injury by killing 3 more Uruks, further reducing the strength of the force. They will, however need to get some of their units across the enemy board edge, which may prove difficult.
Force Strength: Dwarves +7, Uruks +4. Both sides are broken.

On Turn 9, we rolled to see who got priority and it went to the Uruk-Hai. Five units fled the field, which ended the game, with one additional unit crossing the board edge. With 4 Uruks scoring points for the Uruk-Hai and none for the Dwarves, the victory belongs to the Uruk-Hai.


Assessment by Gaius:

With this being my first game of Reconnoitre, I was a bit surprised at how a slow civilization can hurt you. Once the Uruks broke past my units on Turn 7, I had to catch them (I couldn't shake his men from mine, so my best bet was to make it a draw) and he kept getting priority, so I couldn't move my own units out of the fight. Oh well, I'll do better next time...Elves perhaps?

Assessment by Tiberius:

This game I took my knowledge of my army to its logical conclusion: if I get into a slugging match, I'll probably lose because my units are more expensive than his basic troops and have problems winning against his strong troops. So, my hope was I could sneak a few troops off and then lose the rest of my force, thereby winning the game. More or less, that's how it happened. I was also struck with an ill-tide of priority rolls early, and so winning most of the closing ones really helped (and the one closing round I didn't win left only Balin in a good racing position towards the finish).

Stellar unit for Dwarves: Dwarves with two-handed weapons

I was thinking about giving it to two of the archers: the one who killed at least 3 Uruks and the one who fended off 3 Uruks for 4 rounds. But, the two-handed axes did more damage and were cheaper. On the whole, they did great today, though all of the Dwarves fought well. Still, it is great when two-handed axemen are able to win fights on their own and smash the enemies they face.

Stellar unit for Uruk-Hai: Uruk-Hai Warriors with shields

These guys almost always win the award, particularly when they are facing Strength 3 bows. It is truly remarkable how much of a difference a 6 to wound makes (as I figured out pretty quick with my crossbow captain), and these guys are great at tying down heroes and leading charges. I love having these guys in my army, though their cost (and that of the pikes) is often wasted, so sometimes I wonder how I'm going to fix this.

Final Note: the point of these games is to see what my next investment in Uruk-Hai is going to be. My conclusion, after a game against the Dwarves and Elves (and playing with Rohan cavalry against my friends) is that Warg riders would be a valuable addition to the force (not using the crossbow Uruk as a captain, but just as a warrior with crossbow). The only problem with this, of course, is that the Legions of the White Hand army list doesn't have Warg riders in its troop choices, so I'll have to convert one of my Warg riders into Sharku...which will be fun and challenging. Adding him and 3 Warg riders to the army will only require removing the banner, which I tend to not use effectively anyway since my banner keeps dying to enemy archer fire. So, we'll see what the future holds.

Friday, July 15, 2011

Contest of Champions: Uruk-Hai vs. Wood Elves


So after tallying how many games I've played with each civilization, I've noticed that my Uruk-Hai are woefully behind in their practice (and it's showing). So, the rest of July is going to be declared "Uruk-Hai Month." Hence, I'm going to play as my Uruk-Hai against all of my other civilizations (excluding the fellowship, since that one just happened), and will be randomly generating both terrain and missions. All missions and terrain will be set for a 24" by 24" map.

Fist of Isengard: 499 points

Uruk Captain with shield and heavy armor - 60 points
Uruk Captain with crossbow and heavy armor - 60 points
18 Uruk-Hai Warriors with shields - 180 points
16 Uruk-Hai Warriors with pikes - 160 points
1 Uruk-Hai Warrior with banner - 39 points

37 units, 1 crossbow, 2 heroes

The Might of Mirkwood: 500 points

Legolas, Prince of Mirkwood with Elven Cloak - 100 points
7 Wood Elf Warriors with Elven blades and thrown daggers - 70points
8 Wood Elf Warriors with Wood Elf spears and thrown daggers - 80 points
8 Wood Elf Warriors with Elf bows - 72 points
1 Wood Elf Warrior with Elven blade - 8 points
Ally: Gandalf the Grey - 170 points

26 units, 8 bows + 15 throwing weapons + Legolas, 2 heroes

The scenario we will be playing is a Contest of Champions game. All units will begin within 3" of their board edge and will fight until one side is destroyed (killed or fled). The winner of the game is decided by the side whose "Champion" (one hero chosen at the beginning of the game) kills the most units. In the case of a tie in kills, the game is a draw.
The board has been given the following features: two woods in the north quadrants and one river (with ford in the middle) and a building with 3 fence pieces in the southern quadrants. To determine placement, the Elves have won the roll and will select the Eastern board edge and have given the Uruk-Hai priority on the first round.


Turn 1: The Arrows Fly (Priority - Uruks)
Both armies move towards each other. Gandalf attempts to cast "Blinding Light" with his free Will point for the turn, but rolls a 1...so he fails. The building you see here is a new terrain piece, which when completed will be a forge/smithy...it's missing its shingles.
In the Shoot phase, an Elven archer nails an Uruk Pikeman and Legolas nails one pikeman (not seen in this shot).
Kill count: Legolas 1, Crossbow Captain 0.


Turn 2: Flurry of Blades (P - Uruks)
The Uruks form a strong line. Gandalf casts "Blinding Light" and leads his men into the Uruk ranks. The Elves kill 2 Uruks with shields in the Move phase.
In the Shoot phase, the Elven spearmen use their throwing weapons to kill 2 Uruk pikemen, while their archer companions snipe another Uruk with shield (this one directly in the head). Legolas went to then kill 2 more Uruks (one with shield).
In the Fight phase, the Elves weren't as devastating as they were at range, but they were still pretty good. The Elves, as you can see, killed 2 Uruks, but lost 3 in the process (including 1 to the Uruk Captain). The Uruks won a few other fights, but managed to not kill the agile Elves.
Kill count: Legolas 3, Crossbow Captain 0.


Turn 3: Ka-Boom! (P - Elves)
Gandalf now leads the Elves onward to victory, by casting "Sorcerous Blast," using his free Will point and 2 others. He sent the poor Uruk 3" through the air, hitting two of his buddies in the process. Though none of them died, they will fight on the ground against their Elven assailants. Fortunately for them, only one could be reached this round. 
The Uruks then assail their Elven foes quickly, hoping to gain an advantage against them in combat (several of which feature 2 pikes supporting the forward lines).
During the Shoot phase, Legolas pays 2 Might points to shoot an Uruk who was engaged by an Elf with Elven blade. This not only protects his ally, but opens up the supporting pikeman to the bows of the the Elven archers. The archers then promptly kill him. Besides one other pikeman, they fail to kill any other Uruks this round.
During the Fight phase, the fights were won fairly evenly between both sides, but the Uruks killed 3 Elves, while the Elves only killed 2 (including the Uruk on the ground).
Kill count: Legolas 4, Crossbow Captain 0. It's looking pretty bleak for my guys right about now, unless we can kill a lot of guys and my captain starts shooting people. BUT, the Uruks are 2 units away from breaking.


Turn 4: Again...and Again... (P - Elves)
Gandalf calls yet another charge after yet another Sorcerous Blast. With 1 Will point and his free one, he successfully casts the spell and pays a Might point to ensure that 2 of the 3 Uruks die (not the one with the dice by him).
The rest of the movements indicate that the Elves have the advantage, in part because this Sorcerous Blast killed the Uruks necessary to cause the Uruk force to break. As a result, the Uruk Captain with shield was engaged by Gandalf and kept from calling a Stand Fast! One Uruk was killed with a throwing dagger, but most of the other Uruks were kept in line by the Crossbow Captain racing towards the front ranks and calling them to stand together (two fled).
In the Shoot phase, Legolas pays his last Might point to kill an Uruk with pike. Besides that, nothing happened.
In the Fight phase, both Gandalf and the Uruk Captain pay a Might point (one left each) to tie the fight at 6. The random dice roll favors Gandalf, who immediately takes a swing at the Uruk who assisted in the fight and misses. Whew... In the other fights, one Uruk died and one Elf died. 
Kill count: Legolas 5, Crossbow Captain 0.


Turn 5: The Not-So-Great Escape (P - Elves...again? Seriously?)
In the Move phase, Gandalf casts "Immobilize" with his free Will dice on the Uruk Captain, but rolls a 2. He chooses not to use his last Might point to save it and calls a tactical withdrawal. They form a nice wall with most of their troops, but one daring Elf charges the Uruk Captain to keep him from calling a Stand Fast! Other Elves (the ones who were in the belly of the beast, so to speak and not shown here) retreat to the river, where they are aided by their archer comrades.
As it turns out, these maneuvers are not needed because the Crossbow Captain rolled "snake eyes" on his dice roll, which meant that he couldn't pass his courage test (even with a full store of Might and Will) and promptly fled the field...without a single kill to his name. How embarrassing. We could have kept playing, but since the game is a "Contest of Champions," I can only win if my scoreless-now-fled hero killed 6 or more units before Legolas killed any. So...the game was over and I was a little unhappy.
Kill count: Legolas 5, Crossbow Captain 0.


Conclusion:

Assessment by Gaius: Wow...just...wow. I've never seen the Uruks cleaned up so quickly. Part of the problem was their captains couldn't always call their Stand Fasts, but the Elves were also just cleaning them up with their thrown daggers and their bows (and a bit in close combat too, come to think about it). For the same cost (or cheaper), the Wood Elves are great against these Uruks...maybe the Uruks need more/different units if they're going to compete with these guys. I'll leave that decision to Tiberius.

Assessment by Tiberius: All told, I'm a bit disappointed. I knew from the get-go that the Uruks would have trouble getting through the woods that were before them, but I didn't want to just go around them (leaving the woods open for the Elves to enter and use). On the whole, I think that may have been a serious problem. The other problem was that no matter where I positioned my troops, I couldn't get my pikes safe from archery (between the daggers and the two squads of archers, there was simply no protection). I'm looking into adding Berserkers to my line-up, which should help me clear out more Elves, but even in a game like today's, I don't think they would have made the difference (they would have only allowed my units to not have to take a broken test in the 4th round. Still, this game isn't about utter domination (just like the Uruks last game against the Elves), so we'll see what's needed in a different style of mission at a later date.

Stellar unit for Wood Elves: Wood Elf Warrior with Wood Elf Spear and thrown daggers

Along with the archers, these guys are absolute marvels. Not only do their spears allow them to use the shielding ability (which gives them 2 dice at Fight 5), but they also allow them to support fellow Elves and throw their throwing daggers in the Shoot phase. That led to some epic kills and really evened out the playing field for me against the Uruks by removing the advantage of their pikes. Once I believe, their thrown daggers would also allow them to kill a unit in the Move phase and then move on to attack another unit...in a game like this, these guys make up their points with only one kill, so I think it's worth it.

Stellar unit for Uruk-Hai: Uruk-Hai Warrior with shields

There's always something to be said about Defense 6 units. Against armies with Strength 3 bows, this really comes into the foreground, since your Defense 5 units (usually a bastion of strength against archers with Strength 2 weapons) suddenly become weak and exposed. I love how these guys can absorb the Elven archery (and melee damage that doesn't involve Elven blades as two-handed weapons), since they force the enemy to wound them on 6s. Their ability to survive makes them essential to the army, not to mention well-worth the 10 points I'm spending to retain them. Now to find a way to kill more Elves with them...