Pages

Thursday, September 19, 2024

New Scenario Idea for MESBG: Surrounded!

Hey Reader!

What this scenario looks like in
Middle-Earth: don't arrive too late!
So, I was preparing for a Bolt Action tournament at the end of April, and was switching gears to new win conditions for scenarios, moving models as part of a unit instead of loose and free like in MESBG, getting used to having like no rerolls and zero Might Points to fix problems - you know, all the good stuff you miss when you are not playing MESBG - and in the process I decided to play a quick game from a different scenario pool than will be at the tournament, because I enjoyed it. And that got me thinking about porting that scenario over to MESBG, because that's just who I am, :P

And technically aspects of this scenario exist in Battle Companies and the Doubles scenarios, though the structure for that scenario doesn't port over well to general gameplay because of the nature of battle companies. 

So for those of you who are familiar with Bolt Action, this is the Attacker-Defender scenario "Surrounded" (Scenario 11 in the 2nd Edition Core Rulebook), and we're going to first walk through what the scenario is supposed to be thematically for a World War 2 game, and then we'll talk about the very few fixes we'd need to make to bring it over to MESBG. If you like it, feel free to use it at your events! If you think it's trash, well, they're different games, so adaptations aren't easy, and I respect your opinion if you disagree.

So with no further ado, let's get surrounded.


I.  Original Design: Enemies All Around

This scenario is introduced with the words of then-Major Dick Winters of the 101st Airborne from the TV show, Band of Brothers, where he says: "We are paratroopers, sir. We are meant to be surrounded." Which is true, and awesome, and everything we love about Band of Brothers.

It then goes on to give the setting: a portion of the army is embedded in a specific position (part of a town, a critical railway line, a fuel depot, etc.), and they are being surrounded by the enemy, so it falls to the rest of the platoon, company, etc., to get them out of trouble.

And this is a cool setting: it's an Attacker-Defender scenario, so one side is trying to overrun a set of positions while the other is trying to hold them back, and this is something you could totally see happening naturally in a war. Which makes for a great scenario for a wargame, because we can visualize why we are doing what we are doing.

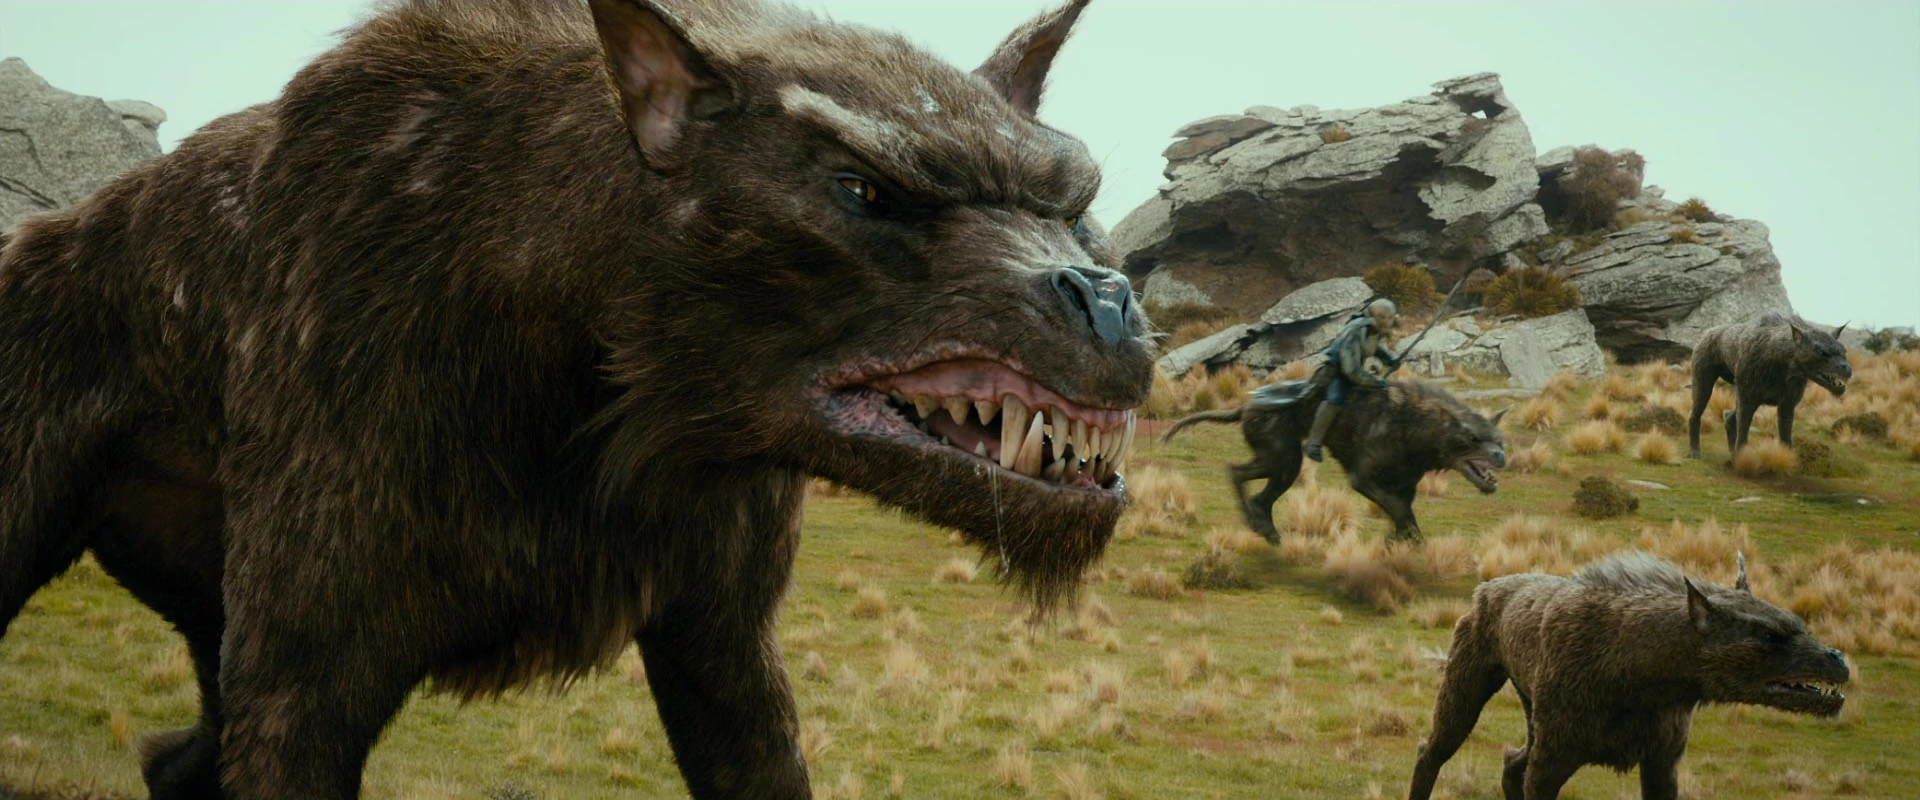
And it really works for MESBG as well, because we have some examples of this from Tolkien's stories. Whether it's the Men of the West on the hills of Cormallen Field before the Black Gate of Mordor, Theodred and his Eored holding out against orcs awaiting the arrival of Elfhelm, Isildur on his way home through the Gladden Fields, Thorin's Company in the fir trees surrounded by orcs and wargs, or even Ugluk and his raiding party on their way back to Isengard as they are ambushed near the edges of Fangorn, small detachments that are surrounded and in need of relief are present all over our source material.

Board setup in Bolt Action
Setup is simple: half of the defending force is setup within 12" of the center of the board, allowing them to take advantage of cover as best they can, and the rest of the defending force is left in reserve (so can't come onto the board until at least Turn 2). The attackers, meanwhile, nominates half of his units to arrive on the first turn (which Bolt Action refers to as the First Wave), and then the other half are also held in reserve, with the ability to come on as early as Turn 2. Units when they arrive can arrive from any table edge, so long as it's not the same table edge that the most recent enemy unit arrived from.

And the aim of the scenario is simple: remove as many units as possible. You score points for each unit you remove (remember: Bolt Action is a unit-based game, not a model-based game, so when we say "unit" remember that a single unit could be a squad of infantry, an artillery piece and its crew, a tank, etc.), with no other points available (no need to control an objective, destroy an objective, etc.).

And this is great for Bolt Action, but naturally we will need to make a few changes for an individual model game compared to a squad-based game. There are also some things we just need to omit; preparatory bombardment doesn't really have a correlary in MESBG, so we won't be bringing that over (but I personally would change how that whole mechanic works in Bolt Action anyway, so there's that). And that's where we turn next.


II.  The MESBG Version

To start off, the good news is that MESBG actually has rules for basically all of these aspects, so that makes it easier to move over to the game! There are a few changes we should make, so we'll walk through it following the format we're familiar with from MESBG.

SCENARIO: SURROUNDED

Part of the army has become separated from the main body during the fighting. As the fighting closes around them, they must be rescued or risk the battle turning in favor of the enemy.

SCENARIO OUTLINE

A portion of the defending force has been separated from the rest of the army and is in the process of being surrounded! Save the detachment, or crush it to bring the balance of power in the region toward your force.


THE ARMIES

Players choose their forces, as described on Page 130 of the Middle-earth Strategy Battle Game rules manual, to an equal points value before the game.


LAYOUT

Set up terrain as described on Page 136 of the Middle-earth Strategy Battle Game rules manual. Once the battlefield has been set up, place a marker on the center point to determine the deployment area of the surrounded forces. Players must also agree on which direction is north - this is important for determining where and when Reinforcements arrive from.


STARTING POSITIONS

The defender selects half of their warbands (to a maximum of 2) to make up the surrounded force. These two warbands deploy within 12" of the center of the board. The rest of the warbands for both sides are yet to arrive - their models are not deployed at the start of the game, but will enter as the game continues (see Special Rules later). The attacker nominates up to 2 of their warbands to serve as the Forward Scouts of the army, which benefits their deployment later.

(Centaur's Note: In Bolt Action there is a benefit for the attacker's First Wave to arrive on the board; we have given that bonus in a small form, but I think it will at least make getting your troops onto the board a bit more reliable and improve your odds that you actually feel like you're surrounding the enemy instead of just spotting your opponent two free units arriving at a useful point on the map.)


INITIAL PRIORITY

Both players roll a D6. The player with the highest score has Priority in the first turn.


OBJECTIVES

The game lasts until the end of a turn when one force has been reduced to a quarter (25%) of its starting number of models or below, at which point the force that has scored the most Victory Points wins the game. If both players have the same number of Victory Points, the game is a draw.


SCORING VICTORY POINTS
  • You score 1 Victory Point for causing one or more wounds on the enemy leader (Wounds prevented by a successful Fate roll do not count). If you kill the enemy leader, you instead score 2 Victory Points.
  • You score 1 Victory Point for causing one or more wounds on each of the enemy heroes (Wounds prevented by a successful Fate roll do not count) that led the warbands in the surrounded detachment or the Forward Scouts (so a maximum of 2 Victory Points for each side). If you kill up to 2 of the enemy heroes that led those warbands, you instead score 2 Victory Points for each hero you kill (so a maximum of 4 Victory Points for each side). If the enemy army leader is one of the two heroes in the surrounded force or the forward scouts, you score points twice: once for the victory condition above, and once for this one.
  •  You score 3 Victory Points if the enemy force is Broken at the end of the game. If the enemy force is Broken and your force is unbroken, you instead score 5 Victory Points.
  • You score 1 Victory Point if the enemy force is reduced to 25% of its starting models at the end of the game.
(Centaur's Note: In Bolt Action you just get VPs for removing enemy units, so we've kept that theme by every VP being tied to removing enemy units. Unlike Bolt Action we also reward you for going after the warbands that were surrounded (or forward scouting), which you don't technically have to do to win in Bolt Action's scenario. And I think that's thematically cool.)


SPECIAL RULES

Maelstrom of Battle: At the end of the Move phase, roll a D6 for each of your warbands not on the battlefield and consult the chart below (the warband's captain can use Might to alter the roll either up or down). Models can't charge in the turn taht they arrive but otherwise at normally. Roll for each warband separately (adding a +1 or -1 to the result of the Forward Scout warbands for the attacking force), deploy the models in the warband (if the D6 allows) then roll for the next. Warbands yet to arrive count as being on the battlefield for the purposes of determining if your force is Broken.
  1. The Warband does not arrive.
  2. Your opponent chooses a point on either the north or south board edges at least 6" from a corner - all models in the warband move onto the battlefield from this point.
  3. Your opponent chooses a point on either the east or west board edges at least 6" from a corner - all models in the warband move onto the battlefield from this point.
  4. You choose a point on either the north or south board edges at least 6" from a corner - all models in the warband move onto the battlefield from this point.
  5. You choose a point on either the east or west board edges at least 6" from a corner - all models in the warband move onto the battlefield from this point.
  6. You choose a point on any board edge at least 6" from a corner - all models in the warband move onto the battlefield from this point.

Conclusion

Most scenarios for most games are pretty similar, and we're really blessed with the range of scenarios we have for MESBG. If I was putting this in a pool (for those who like doing Veto system for tournaments), I'd put it in Pool 1 with the rest of the maelstrom missions, and I think it fits nicely there, though I could also see people using it as an alternative to, say, Lords of Battle or Contest of Champions, as those are also kill-centric missions. 

What do you think: interesting concept? Worth trying with your group? Overly complicated? Let us know in the comments below!

Watching the stars,

Centaur

"Firenze!  What are you doing?  You have a human on your back!  Have you no shame?  Are you a common mule?" ~ Bane, Harry Potter and the Philosopher's Stone

Monday, September 16, 2024

The Board Is Set: How to Play Reconnoitre

Good morning gamers,

We're wrapping up the discussion of Pool 5 today - and it involves more walking than any other scenario in the game: Reconnoitre. The idea of this scenario is simple - but there are a LOT of complications from how you "deploy" to the incentive to actually score the main point of the scenario that make a lot of players shy away from it. So, as we've been doing, we're going to unpack what Pool 5 is all about (which you can skip by clicking here if you've already read this part) and then we'll dive into Reconnoitre and how to actually have a good time playing it (and possibly even win it).

Pool 5: Going Places (And Usually Far-Off Places)

Pool 1 scenarios have odd deployment rules which can make your army show up all over the board (sometimes that's good and sometimes that's bad). Pool 2 requires you to control (or at least contest the control of) 4-5 different objectives. Pool 3 involves reaching one or more objects somewhere on the board (and in two of those scenarios, there's some element of offense and defense that needs to be played). Pool 4 scenarios are about how much killing your army (or your army leader) can do.

Pool 5 is about getting places, which means that it's very similar to Pools 1, 2, and 3. In Pool 1, most models will be walking onto the board from the board edges and will need to make their way to some part of the board (the center of the board in Hold Ground or to various quadrants/objective markers in the other two scenarios). Pool 2 doesn't need to require traveling far if you start on the center, but depending on your army's play style, you might be walking a lot (usually to play keep-away from an enemy shieldwall or spam horde). Pool 3 has all kinds of things that require you to travel a quarter of the board length or half of the length of the board.

Thursday, September 12, 2024

The Scouring of the Shire, Part 11: The Bounders Strike Back

Good morning gamers,

This scenario is OLD - back when Centaur and I got into the game in the Fall of 2010, this scenario was available for download from the GW website, with directions on how to adjust the game for alternative participants. With very few models in our collections - and none of them from the Scouring of the Shire - we had a lot of fun seeing if Merry and Pippin from the Fellowship (20pts) could beat up 10 Orcs (60pts) . . . the game was a lark, but we also learned how limited Merry and Pippin are as characters.

Today's scenario features 5 Tookish Hunters and 12 Ruffians (standard load-out of 6 vanilla, 2 whips, and 4 bows) and we're basically doing a deja vu scenario to the Maggot's Farm scenario where about half the Ruffians we have here try to get across a similiarly-sized board with only Maggot and his dogs to stop them (mostly his dogs, though). Oh, and Centaur gets 20 traps in this scenario . . . lovely.

The Bounders Strike Back

The Ruffians start 12" up the board and as such, they started as far up as they can. To win, I need to get 5+ Ruffians off the far board edge. Centaur wins if he can kill 8 of them - he started with his Hunters as far forward as they could go and scattered the traps as a way to hem me in. The raised portions with the trees are all woodland terrain and we have some trees for cover . . . but not much. Critique us if you want to, but I'll tell you now that adding slower terrain cover would have both advantages and disadvantages for the Ruffians - more on that later, though.


With Centaur automatically claiming priority on the first turn, we began the grind fest!

Monday, September 9, 2024

The Board Is Set: How to Play Storm the Camp

Good morning gamers,

Today we're viewing the second scenario in Pool 5 - and it's an old one: Storm the Camp. So far in this series, we've seen scenarios that are pretty fun (like Hold Ground, Domination, or Destroy the Supplies) and scenarios that can be very one-sided (like Seize the Prize, Contest of Champions, and Heirlooms of Ages Past). Today's scenario is commonly seen as the hardest scenario to not get a draw in . . . and it also involves a lot of walking (Pool 5 scenarios generally do). As a result, it's not hard to chalk this scenario up as an "unfun" scenario for many lists . . .

. . . but the scenario is actually quite interesting and while draws can easily be a thing, it's a good "gatekeeper" scenario for helping novice players become expert players - and to keep us long-time players constantly thinking and re-thinking about our army strategies. We're going to review first what Pool 5 is all about (if you've already read this, you can skip it by clicking here) and then we'll get into the specifics of Storm the Camp (and the strategies you can employ to win the scenario).

Pool 5: Going Places (And Usually Far-Off Places)

Pool 1 scenarios have odd deployment rules which can make your army show up all over the board (sometimes that's good and sometimes that's bad). Pool 2 requires you to control (or at least contest the control of) 4-5 different objectives. Pool 3 involves reaching one or more objects somewhere on the board (and in two of those scenarios, there's some element of offense and defense that needs to be played). Pool 4 scenarios are about how much killing your army (or your army leader) can do.

Pool 5 is about getting places, which means that it's very similar to Pools 1, 2, and 3. In Pool 1, most models will be walking onto the board from the board edges and will need to make their way to some part of the board (the center of the board in Hold Ground or to various quadrants/objective markers in the other two scenarios). Pool 2 doesn't need to require traveling far if you start on the center, but depending on your army's play style, you might be walking a lot (usually to play keep-away from an enemy shieldwall or spam horde). Pool 3 has all kinds of things that require you to travel a quarter of the board length or half of the length of the board.

Thursday, September 5, 2024

Top 10 Series: Top 10 Shock Cavalry

Hey Reader!

We're back! Who doesn't love another Centaur rankings post (except Sharbie, ;P ) - and with the release of the Rise of Angmar supplement coming soon, now is as great a time as ever to do our review of the best shock cavalry in the Middle Earth Strategy Battle Game. As I always do with this series, I need to make some caveats first.

So first, we're combining evil and good in this list, which means that, in general, you're likely to see a greater weight toward Evil because 1) they are far more likely to get S4 on mounted models, and 2) they get easier access to war spears and lances in general, and +1 to wound is really, really good for shock cavalry.

Second caveat: we're looking at shock cavalry, not cavalry generally. So while skirmish capabilities are really good, and can make the difference between cavalry making it to the enemy mounted or not, we're not ranking skirmish and harassing cavalry here: we're purely ranking cavalry on their aptitude on the charge. This also means we will be assuming that the model is charging when assessed, though we will weigh their effectiveness against both infantry and cavalry models.

Third caveat: I'm only looking at warrior models for this comparison, mostly because we already reviewed the heroes in a previous podcast (and if you're wondering, I think the best shock cavalryman in the game is Radagast on a Great Eagle for oh so many reasons, most notably his ability to charge into enemy cavalry, cast Panic Steed on a 2+ on models all around him, turn those cavalry into infantry, and then finish the charge, which feels really strong for me even if he doesn't get the benefits of his Staff of Power), but also because some of the special rules/Might point discrepancies make them hard to compare to each other, so I figured warrior profiles were closer in value and form to each other (and a LOT closer in points cost).

Fourth caveat: while we will be considering the ability to charge in difficult terrain, we are assuming open ground for these assessments because, well, that's kinda necessary to get the benefits of the cavalry charging rules. So I know this puts Lorien Cavalry at a disadvantage, and I'm sorry, but it would skew the results pretty heavily if we did, so there.

Monday, September 2, 2024

The Board Is Set: How to Play Divide and Conquer

Good morning gamers,

We're kicking off our fifth part in this series on how to play the various scenarios in MESBG and Pool 5 brings us some of the LEAST loved scenarios in the game (even more unloved than Heirlooms of Ages Past, Seize the Prize, and Contest of Champions). We'll be tackling the newest (and most beloved) of these scenarios today, Divide and Conquer. This scenario, introduced with the Matched Play guide, has one of the oddest deployment configurations you'll find - but I at least think the scenario itself is not only the best scenario in the pool for a fair game, but it's also an interesting improvement over other scenarios we've already viewed in this series.

As we've done previously, let's begin with an overview of what the scenarios in Pool 5 are all about (and per the usual, if you'd like to skip this and go straight to the scenario specifics, you can click here).

Pool 5: Going Places (And Usually Far-Off Places)

Pool 1 scenarios have odd deployment rules which can make your army show up all over the board (sometimes that's good and sometimes that's bad). Pool 2 requires you to control (or at least contest the control of) 4-5 different objectives. Pool 3 involves reaching one or more objects somewhere on the board (and in two of those scenarios, there's some element of offense and defense that needs to be played). Pool 4 scenarios are about how much killing your army (or your army leader) can do.

Pool 5 is about getting places, which means that it's very similar to Pools 1, 2, and 3. In Pool 1, most models will be walking onto the board from the board edges and will need to make their way to some part of the board (the center of the board in Hold Ground or to various quadrants/objective markers in the other two scenarios). Pool 2 doesn't need to require traveling far if you start on the center, but depending on your army's play style, you might be walking a lot (usually to play keep-away from an enemy shieldwall or spam horde). Pool 3 has all kinds of things that require you to travel a quarter of the board length or half of the length of the board.

Thursday, August 29, 2024

The Scouring of the Shire, Part 10: The Old Storehouse

Good morning gamers,

The scenario we've got lined up for today is the Old Storehouse, which will involve Hobbit Militia backed by Hobbit Archers, Fatty, and Baldo trying to steal stuff from "the storehouse" (in the form of a pig, some ducks, and two sheep). My Ruffians will start as sentries in this game (we LOVE sentries), and the entire board has the "nighttime conditions" in effect (can't shoot beyond 12", +1 To Wound with your shooting attacks). I've faced Centaur's Hobbits in nighttime conditions one too many times (and an unfortunate number of those times has been with D3 Wood Elves), so I know that his shooting attacks are going to be deadly. If any Shirriffs are killed in melee, they'll instead be Paralyzed.

The Old Storehouse


Baldo got three extra traps for this scenario for winning a previous scenario, so Centaur got to put out a few extra traps in addition to the eight that were already there. Centaur had to split up his models between the two opposing board corners, so he put all four archers on one side with Baldo and two Militia near the bottom-right corner and then put Fatty and the other six Militia at the top-left corner. I spread my guys out at the top-left and bottom-right of the storehouse because . . . you know, I've got sentries and don't want them spread out in a useless position. With the board set, Good claimed priority on Turn 1 and we got stuck in!

Monday, August 26, 2024

Top 5 Profile Changes - Minas Tirith Edition!

Good morning gamers,

So apparently, we have a new edition ahead of us - and while I originally mocked up some thoughts for this mini-series to be posted next year, it seems like it would be good to get ahead of the "eight ball" as it were and get these ideas into the cyberspace and see what you all are thinking. One of the things GW has said about the new edition is that profiles are being reworked to better reflect what they did in the films (and I assume this also applies to the books), so I figured Minas Tirith would be a good faction to begin with a face-lift. I'll do a few more of these before the new edition releases (I hope I get all these through before the deadline!), so if you have thoughts on other factions that you'd like to see, drop a note in the comments!

For the sake of this series, I'm going to assume that GW is going to perform minor surgery on most of the profiles (and I expect some profiles will get by with little to no changes), so for my purposes in this post, I'm going to limit myself to a SINGLE change per profile that I think would bring the model from its current place of obscurity into a place all its own. When the last edition change hit, some profiles (like Theoden and the Balrog - both of whom had a renaissance in this edition of the game) got massive reworks, but for the most part, the profiles got minor edits across the board (like Warriors/Knights of Minas Tirith getting shieldwall or Riders of Rohan/Rohan Royal Guards getting Arise, Riders of Theoden). This is what we're going to do today. Let's start with one of my favorite Gondor heroes in the books/films . . .

Profile #1: Faramir, Captain of Gondor

Photo Credit: The Armies of the Lord of the Rings

In some respects, the current profile for Faramir is fine - if equipped with a horse, lance, heavy armor, and shield (a standard kit-out for a hard-hitting hero), he costs 35 points more than a Captain of Minas Tirith with a similar loadout and has +1 FV, +2 Courage, +1 Might, +2 Will, +1 Fate, has a different array of Heroic Actions (Strike/Defence/Accuracy/Resolve instead of March), Woodland Creature (which doesn't matter when he's on a horse), a slightly better shoot value (if you want him to be using his bow - definitely the case in his Legion, probably not in a normal Minas Tirith list), and a special rule that makes him charge things if Denethor is also in his army (could be a problem, but only if you take Denethor). All told, getting +1 FV, +4 heroic resources, some extra Courage, and more heroic actions is probably worth 35pts, but only barely.

However, Faramir isn't the only Hero of Valour or hard-hitting hero in the Minas Tirith list. For 15 fewer points, you can get Hurin the Tall on a horse and most players agree that he hits as hard if not harder than Faramir does, all while potentially denying VPs for killing your army leader if you can keep him alive (which matters more in some scenario pools than others). Additionally, you could just NOT get Faramir and ally in any number of sub-100-point heroes from the Fiefdoms or Rohan to get similar or better damage output than Faramir (all while keeping your army bonus). If you throw in the convenient alliance Heroes of Valour/Legend (like Gwaihir, Galadriel, and Haldir if you were looking for a bow-armed Faramir), the reason to take Faramir just kind of patters out. OH, and there are Minas Tirith Fortitude heroes who are threatening his place for far cheaper price points as well (admittedly, all of them are on foot, but they're also a ton cheaper, so there's that).

Saturday, August 24, 2024

Announcing the TMAT THRO Tournament 2024!

Good morning gamers,


It's that time of year - The Hunter's Red October will be hitting the TMAT community again (but in December this time, not in October). The tournament will be held in Berryville, VA on December 14, 2024. We're trying our hand at a doubles tournament this year - bring a buddy for the first round, but then be ready to rotate partners as the tournament progresses! Without further ado, here are (in my typical style) the Ten Commandments of the Tournament (Rules):

1) Thou Shalt Understand The Canon

Regardless of whether we have a new edition by mid-December, the ruleset we will be using is from the updated Middle-Earth Strategy Battle Game Rules Manual (the Sauron one). The Armies of the Lord of the Rings supplement will govern the rules for armies from the Lord of the Rings, while the Armies of the Hobbit supplement will govern the rules for armies from the Hobbit. Legendary Legions and profiles from any of the GW supplements released between Gondor at War and the Rise of Angmar (inclusive) may be used, provided that the army building requirements for the Legendary Legion are followed. Any GW errata for these books will take precedent over the printed text of these documents.

2) Thou Shalt Honor Thy Alliance

This tournament follows the alliance "restrictions" provided in the Armies of the Lord of the Rings and Armies of the Hobbit supplements - players are allowed to have "pure" armies or Legendary Legions (no alliances). Unlike the stated rules for doubles events in the Matched Play Guide, the players who arrive as a team for the first round may not take the same Legendary Legion (as we will be rotating partners).

Thursday, August 22, 2024

FAQ Time: Reviewing the August 2024 FAQs

Good morning gamers,

Well, a lot has happened in the MESBG community since Aradcon a few weeks ago - and it's got us here at the TMAT blog excited on a number of levels. February and August have been the FAQ drop months, which have been good for shaking up the meta a bit (sometimes more drastically than other times) and as usual, as July turned to August, I was anxious to see what was new for the game (especially with a new edition coming out and a new sourcebook to boot)!


Photo Credit: Reddit 
I didn't submit anything this time . . . they have my previous correspondence if they wish to know my thoughts on certain Legendary Legion fixes and scenario quandaries for the new edition . . .

Then the GW team threw us a curve ball - in their August 15th Warhammer Community post talking about the new edition, they wrapped up a smashing article with the following:

With the next edition so close, we have made the decision not to release our usual FAQ and Designer’s Commentary document in August. Don’t worry, we will be back on schedule in February with our usual updates – the first of the new edition!

So . . . that makes summarizing the FAQ for August easy, right? Not exactly . . .

Monday, August 19, 2024

The Board Is Set: How to Play Contest of Champions

Good morning gamers,

Author's Note: with a new edition looming ahead of us, it's unclear how the scenarios are going to change . . . so since we're nearly done with the series, we're going to press on and hope that the changes that we see don't invalidate all of our work. Even if the scenarios get reworked, hopefully the principles found in these articles will give you a starting point for how to play the scenarios. If they all change . . . we'll write more articles next year. :)

This is our third and final scenario in Pool 4 - and alongside Heirlooms of Ages Past, this scenario is a polarizing one for many players: Contest of Champions. This scenario is, on its face, about how many models your army leader can kill in melee. For some armies, this is fine - if I'm running Aragorn, Azog, or Boromir, I'm probably able to kill enemy models pretty well (and for a long time). If your army leader is Treebeard or the Balrog, you can probably kill models AFTER you catch them. However, if your army leader is someone like Galadriel or Saruman . . . well, that's likely going to be harder.

Well, today, we're looking to see what kinds of strategies we can use to play this scenario - and we'll approach the topic first by recapping what Pool 4 is all about and then identify the options that are available to you depending on the kind of army you're running. Let's take a look (though you can skip the recap, once again, by clicking here).

Pool 4: Killing Lots of Models

The previous three pools have mostly involved controlling certain points on the map (Pools 1-2) and having enough speed to get to an object or set of objects (Pool 3). While your killing power has value in these scenarios (either for holding or securing objectives - or for punching a hole through the enemy to get to their objectives), there is no pool where your killing power is more important than in Pool 4.

In two of the scenarios (Lords of Battle and Contest of Champions), players have to do a bit more recordkeeping than normal and have to keep track of the wounds they deal to their opponent and the Fate points that are spent by their opponent's heroes (Lords of Battle) or the number of kills their army leader gets in melee (Contest of Champions). Both of these scenarios also allow the armies to start up close to each other if they want to, so things can very quickly become a blood bath . . . which some armies welcome gladly.

Thursday, August 15, 2024

Top 10 Changes for the New Edition: Centaur Edition

Hey Reader!

So as you probably have heard, there's a new edition of the Middle Earth Strategy Battle Game coming down the pike. We don't know when it will arrive (I assume the preorders will arrive in November so that people can order Christmas presents in time for December) but I suspect that an edition is never late, nor is it early, it arrives precisely when it means to, :P 

I wasn't crying out for a new edition (and certainly didn't have this on my 2024 Bingo Card), but in light of the fact that the team behind it has loved the game for over 20 years, I'm not afraid of a massive overhaul or "40kization" of the game. Call me naive, because maybe I am.

So whether you think that a new edition is needed or not, I took a moment to think about the top 10 changes I'd love to see in the new edition, and how these changes can make the game better (and by this exercise, came to the conclusion that perhaps a new edition could be justified after all). Plus who doesn't love a good ol' Top 10 post (that may make people angry, as apparently mine do? :P )!

So with no further ado, if I was king for a day, here's the top 10 things I'd change about the game.


Monday, August 12, 2024

The Board Is Set: How to Play Lords of Battle

Good morning gamers,

Today brings us to my favorite scenario from Pool 4: Lords of Battle. Last time, we saw how To the Death slants most of the scenario VPs into breaking and quartering the enemy - which means that if neither force can break each other, the game is going to end in a really low score (or if one side is quite likely to break the other in an open fight, the other side is disincentivised to actually come out and make a game of it). Lords is different as we'll see shortly - but before we do, let's go over the general principles of this pool of scenarios (which you can skip by clicking here if you've read it in one of the other posts in this series) . . .

Pool 4: Killing Lots of Models

The previous three pools have mostly involved controlling certain points on the map (Pools 1-2) and having enough speed to get to an object or set of objects (Pool 3). While your killing power has value in these scenarios (either for holding or securing objectives - or for punching a hole through the enemy to get to their objectives), there is no pool where your killing power is more important than in Pool 4.

In two of the scenarios (Lords of Battle and Contest of Champions), players have to do a bit more recordkeeping than normal and have to keep track of the wounds they deal to their opponent and the Fate points that are spent by their opponent's heroes (Lords of Battle) or the number of kills their army leader gets in melee (Contest of Champions). Both of these scenarios also allow the armies to start up close to each other if they want to, so things can very quickly become a blood bath . . . which some armies welcome gladly.

Both of these scenarios also give 1-3 VPs for breaking the enemy army, but To the Death gives a whopping 3-5 VPs for breaking the enemy - and an extra 2 VPs if you quarter the enemy! If your army isn't able to break the enemy in any of these scenarios, you're going to be hurting . . . and particularly so in To the Death.

Saturday, August 10, 2024

THE SUN IS RISING! THE SKY IS FALLING!!!!!!!!!!

Author's note: To the extent you can decipher them, all thoughts contained herein are completely my own, and may not reflect the views of the TMAT team as a whole, its individual contributors, or its esteemed readers.

Welp. It finally. Happened.

Photo credit: Warhammer Community

After a year of patiently silently watching trolling our blogs, YouTube channels, Facebook groups, and tournament hallways while we endlessly wishlisted complained about what we wanted next what we hadn't gotten, we finally got what we deserved:

A brand new sourcebook, ten new models spoiled, and a ton more content on the horizon. A brand new sourcebook and collection of models that are about to be rendered obsolete by a completely new edition. This is totally what we've been begging for the last thing we wanted or needed!

Allow me to elaborate on behalf of the collective (which of course agrees with me--after all, I have a platform!).

Photo credit: Warhammer Community

Well, we wanted Rhudaur and it looks like we're gonna get it! we got Hyboria instead. Look at those muscle tones--these guys look ripped! don't the developers know it's cold up north? The horns, the cloak, it's all so wild and feral 40K crossed with Thor Odin-son. And the fluff description describes him as the "leader of the Warriors of Carn Dum," so either there's a repurposed Dunlending profile in the works, or there's something more they're holding back this is lazy writing, or we're about to have yet another profile without models, like Reavers and Gundabad Catapult Trolls and Azog's Signal Tower.

Thursday, August 8, 2024

The Scouring of the Shire, Part 9: Arrest of Falco Boffin

Good morning gamers,

It's scenario NINE and we have one of the oddest scenarios to date - Folco Boffin (one of the WORST heroes in the game) and eight Hobbit Militia (one of the WORST warrior profiles in the game) are going up against a bunch of Shirriffs . . . is it even possible for them to win?

The Arrest of Folco Boffin


The board has three Hobbit smials on it - the 12 Hobbit Shirriffs and two heroes deployed within 3" of the southern board edge and Folco and his friends deployed within 3" of the northern board edge. The Shirriffs can Paralyze and carry Falco and the Militia, but they can't kill them - if Centaur's Militia can win fights, they could gain the upper hand quickly. There will be no Thrown Stones this game ("we don't want hurt you guys") - it's basically a bar fight on a roadside, so let's see how it goes!

Monday, August 5, 2024

The Board Is Set: How to Play To the Death

Good morning gamers,

We're starting our fourth round of scenario analysis posts and we're tackling Pool 4 for the next three weeks. When I got started playing MESBG (LOTR SBG back then), the scenarios that eventually made up Pool 4 (the precursors for To the Death, Lords of Battle, and Contest of Champions) were the most straight-forward and our gaming group played them a lot. We also learned a lot about how powerful archers could be (especially back when volley fire was a thing), how great being D6 was, and how important the amount of terrain on the board was. These are all good things for new players to learn . . .

. . . but it can also be unfun if you don't know how important all of these things are and your opponent does know. So today, we're going to begin by looking at what the distinctives of Pool 4 are (you can skip this summary section by clicking here if you want) and then get into what I consider to be the least fun of the three scenarios: To the Death.

Pool 4: Killing Lots of Models

The previous three pools have mostly involved controlling certain points on the map (Pools 1-2) and having enough speed to get to an object or set of objects (Pool 3). While your killing power has value in these scenarios (either for holding or securing objectives - or for punching a hole through the enemy to get to their objectives), there is no pool where your killing power is more important than in Pool 4.

In two of the scenarios (Lords of Battle and Contest of Champions), players have to do a bit more recordkeeping than normal and have to keep track of the wounds they deal to their opponent and the Fate points that are spent by their opponent's heroes (Lords of Battle) or the number of kills their army leader gets in melee (Contest of Champions). Both of these scenarios also allow the armies to start up close to each other if they want to, so things can very quickly become a blood bath . . . which some armies welcome gladly.

Thursday, August 1, 2024

The Scouring of the Shire, Part 8: Uprooting Bagshot Row

Good morning gamers,

We're back with another Scouring of the Shire scenario, and this time we have The Gaffer and some angry Hobbit Militia trying to keep Bill Ferny and a squad of Ruffians from tearing trees on Bagshot Row. The scenario rules might look a bit like deja vu, but I think this scenario was better than its predecessor. Let's dig into it!

Uprooting of Bagshot Row

The rules for this scenario are simple: the Ruffians need to quarter the Hobbits (there are 13 of them, so three remaining) and the Hobbits need to kill Bill Ferny (if both happen on the same turn, it's a draw). This is . . . exactly the same scoring conditions as we had in the first scenario (Skirmish in Bree - though if Bill Ferny doesn't kill 2 models in that scenario, it's also a draw), but there are some really key differences in the supporting rules.

First, all the Hobbits and Bill Ferny must charge if they can - this makes it so Bill Ferny has to either stay completely out of the fighting (which could slow down the speed at which the Hobbits are quartered) or he needs to get stuck in (possibly without support). This you-gotta-charge rule is absent from the Skirmish in Bree scenario and makes the game more exciting if you want to use Bill's Might point to help you kill stuff faster - though Bill Ferny does have to do some fighting in the Bree scenario or the game is a draw - but in this scenario, he at least has the option to stand back if he wants to.

Second, the Gaffer gets +1 FV when fighting Bill Ferny (which means they'll both be F3 and neither has Heroic Strike). The Gaffer also rerolls failed To Wound rolls in combat against Bill (or rerolling 1s/rerolling all faileds with his stones if Bill Ferny is within 4" of a flower or has removed one or more of his flowers respectively). This gives the Good side a hero who's not particularly good, but is also not bad - and last time, they didn't have a hero to fight the Ruffians at all.

Third, last time, the Ruffians walked on from one board edge while the Good models started in the middle of the board. This time, the Ruffians start on one side and the Hobbits start on the other - that allows the Hobbits a bit more choice on how they want to play, though the bows on the Ruffian side do make it so they can't just sit and wait for the Ruffians to charge.


Okay, so with all that in mind, we set up as you see above - Centaur got his Hobbits as far up as he could and I deployed my Ruffians as close to 3" away from the smial as I could. Bill Ferny is touching the chimney and feels very exposed at the moment. Centaur then placed his flowers and decided to use them to make a "no man's land" across the center, undoubtedly to either make a kill zone for his stones or to force me to go around, which will limit my application of numbers. Let's start round one!

Monday, July 29, 2024

Nemesis: How to Fight Against Mordor Troll Chieftains

Good morning gamers,

Earlier this year, we were asked if we could write Nemesis articles for the Witch-King of Angmar and Mordor Troll Chieftains. A few weeks ago, we covered the Witch-King (as an extended discussion of Ringwraiths, who have already shown up generally in this series). Today, we're tackling Mordor Troll Chieftains who . . . get a bit of a bad wrap in competitive circles.

Back when I started playing MESBG (back when it was LOTR SBG and Heroic Strike wasn't a thing), Mordor Troll Chieftains were scary - they were generic heroes who had base F7, giving them an edge over basically any hero in the game. After the rise of Heroic Strike (and its proliferation on a ton of units), having a base F7 stat doesn't usually matter until those "Strike heroes" are out of Might. F7 just isn't what it used to be . . .

. . . but Troll Chieftains are still F7/S7 monsters and if you find yourself across the table from one, you could be in for it. As a result, we're going to discuss today how to beat these guys - and while we're at it, we're going to look at an interesting corollary set of units you can beat with similar strategies: most Dwarf Infantry heroes.

What Makes Mordor Troll Chieftains So Hated?

Photo Credit: Warhammer Community (and a really great article, despite its age)

While Mordor Troll Chieftains receive some censure from competitive players, a LOT of Dwarf heroes are touted as being excellent profile-for-cost units and while you may not see these guys crushing all of the top tables, a solid Dwarf list is a good gatekeeper list that will separate the "bad" lists from the "good" lists. A lot of that is tied to how points efficient their heroes (and most of their warriors) are - and if we understand what makes Dwarf heroes so good (and what they lack), we'll learn a lot about what makes Mordor Troll Chieftains good as well.

Regardless of the Dwarf list you're fielding (except Thorin's Company), it's not hard to find at least one named hero profile and at least one generic hero profile that's F5-6, effectively S6 with/without a dueling penalty (and if that's from the Khazad-Dum/Moria army list, you probably have access to Piercing Strike as well), D8-9, 2-3 Attacks, 2-3 Wounds, and either 2-Might-and-Strike or 3-Might-and-Strike (generic heroes from the Hobbit have 2-Might-and-March, but the Master of Battle (5+) on Iron Hills Captains means they CAN call Heroic Strike for free if an enemy hero nearby calls a Heroic Strike). If you went looking for this in other factions (we'll look at "the big four" of Minas Tirith, Rohan, Mordor, and Isengard), you'd be hard-pressed to find any models that meet this description at the 65-120 price point of most Dwarf heroes - even if you drop the D8 requirement that basically no one outside of Dwarves/monsters can reach (Knights of the White Tower check most of those boxes at 60pts each and add Mighty Blow to the mix - but they are quite a bit squishier than Dwarf heroes).

Monday, July 22, 2024

The Board Is Set: How to Play Destroy the Supplies

Good morning gamers,

Today is our last post in Pool 3 of the Matched Play Guide and we're looking at my personal favorite scenario from that pool: Destroy the Supplies. Games of Seize the Prize can be massively mismatched and games of Retrieval can end in a grinding draw, but every game of Destroy the Supplies has been a harrowing experience for me - and they're always a lot of fun (unless camels are involved - I hate Mahud-ridden camels so much).

So what is it about this scenario that makes it so different from those other ones? And how do you need to change your game plan if you happen to play it? Well, let's look at some general principles for Pool 3 and then we'll see how they apply to Destroy the Supplies specifically (and as we've done throughout this series, you can skip ahead to the Destroy the Supplies section by clicking here).

Pool 3: Coveting Precious Things

When I looked at the scenario pools when they were first presented in the Matched Play Guide, I was like, "Pool 6 is the the eclectic pool that the oddballs go in." Months later, Evan Iverson from the Unexpected Podcast summarized that pool of scenarios as the "hero killing" scenarios - which is an accurate way of summing up the VPs you can get from Assassination, Fog of War, and Clash by Moonlight.

The actual "oddball" pool is Pool 3 - the unifying factor of these three scenarios is that the scenarios listed here have "objects" in them, but this summary is both broadly vague as well as unexclusive. We've talked previously about Heirlooms of Ages Past (from Pool 1), which clearly has an "object" in it that contains half of the VPs available in the game to one player, which would make it a good candidate for Pool 3 . . . if it weren't for the maelstrom of battle deployment rule (which is why it's in Pool 1).

Thursday, July 18, 2024

The Scouring of the Shire, Part 7: The Burning of Woody End

Good morning gamers,

It's scenario seven, baby, and we've got a flash-back to the War in Rohan village scenario today (which was actually based on the mechanics in this book because . . . you know . . . Scouring came first). We've got a 4'x4' board with over 20 Hobbits and slightly more Ruffians and it's all about setting things on fire! Also, for the 20+ viewers who saw the article without the photos in it last Thursday before I reverted/rescheduled it . . . my apologies - I was camping and forgot. Let's see how the scenario went . . .

The Burning of Woody End


The board has five Hobbit smials on it (the one in the center is a "great smial" - not a good smial, but a great smial) - the Hobbits deployed within 2" of a smial and the Ruffians deployed within 3" of any board edge. The Ruffians are trying to burn the smials by being in base contact during the End Phase of each round without shooting/fighting that round. On a 5+, the smial burns. Unlike the War in Rohan village scenario, the Ruffians can also set the smials alight with flaming arrows (needs to wound against D6 - that's 6s To Wound with the bows and 6/4+ with the whips). Hobbits can then attempt to put out the fires at the end of their Move (NOT during the End Phase), giving up their opportunity to shoot to roll a D6 and put it out on a 6 (or set it hopelessly ablaze on a 1). The game lasts for 10 turns - and with some very interesting heroes in Baldo Tulpenny and Rowan Thistlewood, we've got a great game ahead of us!

Monday, July 15, 2024

The Board Is Set: How to Play Retrieval

Good morning gamers,

Last time, we looked at Seize the Prize - a scenario that I and a lot of other players don't like playing. Today, we're still in Pool 3, but we're turning to a newer (and in my opinion, far more fun) scenario: Retrieval. This scenario still requires you to get places and it has many of the same themes as Seize the Prize, but it's very much a game of capture of the flag, where you're incentivized to play both defense and offense (instead of just offense). Let's get a quick reminder of what this pool is all about (or you can skip that by clicking here) and then we'll dig into the specifics of this scenario.

Pool 3: Coveting Precious Things

When I looked at the scenario pools when they were first presented in the Matched Play Guide, I was like, "Pool 6 is the the eclectic pool that the oddballs go in." Months later, Evan Iverson from the Unexpected Podcast summarized that pool of scenarios as the "hero killing" scenarios - which is an accurate way of summing up the VPs you can get from Assassination, Fog of War, and Clash by Moonlight.

The actual "oddball" pool is Pool 3 - the unifying factor of these three scenarios is that the scenarios listed here have "objects" in them, but this summary is both broadly vague as well as unexclusive. We've talked previously about Heirlooms of Ages Past (from Pool 1), which clearly has an "object" in it that contains half of the VPs available in the game to one player, which would make it a good candidate for Pool 3 . . . if it weren't for the maelstrom of battle deployment rule (which is why it's in Pool 1).

Monday, July 8, 2024

The Board Is Set: How to Play Seize the Prize

Good morning gamers,

We're kicking off our deep-dive into the scenarios from Pool 3, which includes one of the most polarizing scenarios in the MESBG line (and that happens to be the scenario we're looking at today). As we'll see in the overview section below, Pool 3 is a hodge-podge of different scenarios which are loosely joined together in a common theme. These scenarios have elements of other scenario pools and really test what an army can do. Let's look at the pool as a whole before we get into today's scenario (though if you're reading this after the other posts come out, you can skip ahead by clicking here).

Pool 3: Coveting Precious Things

When I looked at the scenario pools when they were first presented in the Matched Play Guide, I was like, "Pool 6 is the the eclectic pool that the oddballs go in." Months later, Evan Iverson from the Unexpected Podcast summarized that pool of scenarios as the "hero killing" scenarios - which is an accurate way of summing up the VPs you can get from Assassination, Fog of War, and Clash by Moonlight.

The actual "oddball" pool is Pool 3 - the unifying factor of these three scenarios is that the scenarios listed here have "objects" in them, but this summary is both broadly vague as well as unexclusive. We've talked previously about Heirlooms of Ages Past (from Pool 1), which clearly has an "object" in it that contains half of the VPs available in the game to one player, which would make it a good candidate for Pool 3 . . . if it weren't for the maelstrom of battle deployment rule (which is why it's in Pool 1).

Similarly, the "objects" in the Pool 3 scenarios differ in VP weight as well as in number. Seize the Prize has only one object that gives 3-7 VPs to the player that has it at the end of the game, giving more VPs based on whether the objective is on the controlling player's side of the board, on the opposing player's side of the board, or gets off the opposing player's board edge. Retrieval has not one but two objectives - one held by each player - and like Seize the Prize, you're trying to get VPs by moving it (but it's 1-7 VPs in this case - and these points are available to both players, not just one). Destroy the Supplies has three objectives for each side, each worth 2VPs if the other player can touch it without fighting/shooting/doing anything. While this means 6-7VPs in any game are tied to the object/objects, how you get these VPs differs greatly from scenario to scenario.

Monday, July 1, 2024

Nemesis: How to Fight Against the Witch-King of Angmar

Good morning gamers,

I wasn't planning on writing this article this year, but a reader asked if we could do an article on the Witch-King of Angmar. Instead of waiting until next year to do that, I decided to write this one early and delay some content I had planned instead - so if you have questions or thoughts on articles we should write, take this as your cue to tell us in the comments. :)

Photo Credit: Warhammer Community

The Witch-King of Angmar is a really powerful piece - and he's probably the most flexible hero you can take in the game with lots of options for his mount, war gear, and his heroic resources (Might, Will, and Fate). With several builds that have been deemed competitive options over the years and an ever-emerging meta surrounding this guy, it makes sense that we'd want to talk about how to beat him. So join in as we pile on my favorite Ringwraith and learn how to fight this fearsome foe!

What Makes The Witch-King of Angmar So Hated?

I have to start off by pointing out that we had an in-depth article on how to beat Ringwraiths at a high level already in this series - many of the principles we talked about at length in that article apply to the Witch-King, but since releasing the article, we've had some FAQs that directly affect him and some build styles that used to be very common have gone out of vogue. As a result . . . go read the previous article if you haven't already, then come back to this one . . . I'll wait.

Dum, dum, carn-dum-dum-dum . . . bam-bam . . . ba-da-bam-bam . . . random screech . . . flappity-flap-flappy-flap . . . crownity-crown-crown . . . dramatic pause​​​ . . . KNIFE! . . . another dramatic pause​ . . . Oh, you're back? Great - let's talk about the Witch-King. :)