Good morning gamers,
Both sets of heroes are Fight 5 (except for Gamling and the
Dunlending Chieftain, who are Fight 4) and two on each side can call Heroic
Strike (Theoden and Eomer; Ugluk and Thrydan). This leads to a few ways that
the players could look to employ the “More Teeth” principle to take down the opposing
force.
The Isengard list has changed dramatically: all of the
heroes are new, with the inclusion of Saruman (for magic, particularly Sorcerous
Blast), Grima (to neutralize Theoden and make Heroic Moves much more expensive once
battle is joined), Lurtz (S3 bow hitting on a 3+ and the ability to deploy his
warband wherever he likes in Maelstrom fights), and Vrasku (S4 crossbow hitting
on a 3+ twice each turn). We’ve also upped the number of ranged weapons the
list has from 3 Uruk-Hai bows to 9 Uruk-Hai bows and 3 crossbows (besides
Vrasku and Lurtz), giving them far more archery presence in this list than they
had before.
In our previous three posts, we’ve gone over three of the
five important parts to building a list with an eye towards being able to score
maximum victory points in a scenario (fast models, banners, and numbers). As a reminder, the five principles we’ll
be covering in this series are:
- Fast troops who can claim objectives or exit the opposing board edge;
- At least one banner;
- Ways of delaying/avoiding being broken (often in the form of large numbers);
- Means of killing/inhibiting enemy heroes; and
- Means of keeping your own heroes alive/augmenting their damage.
Approach #1: Head-On
(or the “More Teeth” Principle)
There are some lists that bring really powerful heroes (you
should ALWAYS bring the Dark Lord Sauron if you’re playing Barad-Dur, bringing Dain in an Iron Hills list is a really good idea, and you
are likely to bring Azog or Bolg if you’re playing Azog’s Legion). When this
happens, you might find yourself with a really powerful hero that you want to
make sure pays for himself by the end of the game. To that end, a common
strategy is to direct these heroes towards enemy heroes (not only to make life
easier for the rest of your army, but because your hero was born to do this
kind of thing). As they say in Jurassic World, “We need more teeth.”
This strategy of sending your strongest piece against your opponent's strongest piece is a very
common strategy for new players – give me a powerful piece and let me find the
biggest piece on the other side and see if I can crush it. This strategy, while
legitimate, does tend to leave one side’s mega heroes dead by the end of the
game (which could be good for you or very, VERY bad for you).
This is also a very common strategy when you don’t diversify
your list with archery, cavalry, or magic (since your only response to a big
threat is to direct something really big at it and hope it works). While Elven
heroes are famous for being skilled fighters, there are time when these heroes
find themselves in a match-up that will be hard to win (and when that happens,
you don’t want to have your beautifully-painted Elven lord turned into a bloody
smear – so for goodness sake, diversify your list!).
Note: it’s not wrong to employ this strategy – it works
really well sometimes. However, some lists have a hard time making it work
because their heroes are “good,” but not on par with a hero/some heroes their
opponent brought. Consider the following case study to showcase what I’m
saying.
Case Study: Theoden
and Eomer vs. Thrydan and Ugluk
To illustrate this approach, let’s assume the following
forces are in play:
ROHAN
|
ISENGARD
|
Theoden,
King of Rohan (Armored Horse, Heavy Armor, Shield)
|
Ugluk
|
Eomer,
Marshal of the Riddermark (Armored Horse, Shield)
|
Mauhur
|
Gamling,
Captain of Rohan (Horse, Royal Standard of Rohan)
|
Thrydan
Wolfsbane (Horse)
|
17 Rohan Royal Guards (Horse)
|
Dunlending
Chieftain (Shield)
|
4 Rohan Royal Guards (Horse, Throwing
Spears)
|
5 Orc Warriors (Shield, Spear)
|
1 Rohan Royal Guard (Horse, Throwing
Spears, Banner)
|
5 Uruk-Hai Scouts (Shield)
|
3 Uruk-Hai Scouts (Uruk-Hai Bow)
|
|
12 Uruk-Hai Marauders (Shield)
|
|
11 Uruk-Hai Warriors (Pike)
|
|
11 Dunlending Warriors (Shield)
|
Apart from the gross disproportion of models on each side
(25 vs. 51), both sides have chosen to favor melee-heavy armies and only have a
smattering of shooting options in their lists. The heroes for both sides have
foregone shooting attacks entirely (only Eomer and the Dunlending Chieftain had
any choice in the matter), which means that the only way for either side to
deal with the nasty heroes of the other side is to take them head-on. So that’s
exactly what they do.
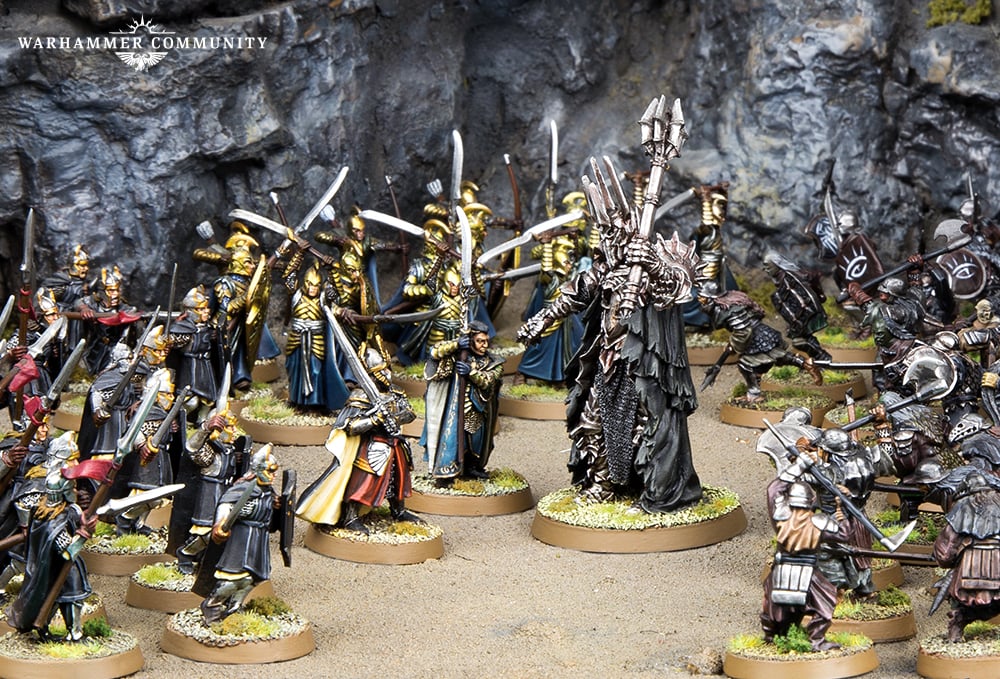
 |
| Theoden and Thrydan: two heroes who have to rely on the Head-On Approach... |
If the Rohan player is worried about Mauhur raging through
the Rohan Royal Guards (higher Fight, 3 Attacks, wounds the riders on 5s and
the horses on 4s), he could send either Eomer or Theoden to kill Mauhur
quickly, since their access to Heroic Strike (and Mauhur’s lack of Heroic
Strike) might give them a distinct advantage.
The Uruk-Hai Heroes, on the other hand, see the possible
regeneration of Might by Gamling to be a late-game nightmare, so they want to
use their faster units (Mauhur and his Marauders) to cage in the Royal Guards
and get around their flanks. Despite having Heroic Defense, Gamling is pretty
easy to beat in combat and bringing down his horse will make the banner much
less useful.
Of course, both sides could say “To heck with the enemy
heroes” and use their heroes to just carve up enemy warriors. Theoden and Eomer
are both very good at killing Uruk-Hai units, since F5 will win ties and their
mounts give them bonus attack dice which will be doubled when they knock down
their foes. While Rohan Royal Guards are incredible fighters (F5/S4 on the
charge when “near” Theoden), their D6 isn’t very strong against the
overwhelmingly S4+ Uruks and Dunlendings they’re fighting. With both Thrydan
and the Dunlending Chieftain having axes, these two heroes can get up to S6 as
well, which could spell certain doom for the Royal Guards (who are wounded on
4s) or the mounts of the Royal Guards (who are wounded on 3s).
While the “more teeth” principle often means using your own
strength to overwhelm an opponent’s strength, this often incurs great risk:
what if your hero flubs a roll and gets overwhelmed? What if you don’t get
priority when it counts and get surrounded? What if your units are just not
better than your opponent’s units? When you find yourself asking these kinds of
questions, you need to turn to our second principle which is . . .
Approach #2:
Asymmetry (or the “Sun Tzu” Principle)
Unlike the Head-On approach that we just discussed, this
method look to hinder enemy heroes by striking at their weaknesses. Sun Tzu
said that "the way is to avoid what is strong, and strike at what is weak" - and
the best way to do this in MESBG is to bring a diversified toolkit to the field
so you can exploit weaknesses wherever they appear.
The most common approach to this is to find heroes who have
low Defense (Azog from the Azog’s Hunters list is capped at D5, for example)
and shoot them to pieces. Most armies can take archery, so this is often an
easy element to incorporate into your army (perhaps a handful of archers only vs. maxing out the archers you can bring). It also serves a double-purpose of
being easily redirected to clear out enemy warriors if your opponent is running
a spam list instead of one anchored around one or more big heroes/monsters.
A less common approach is employing the use of magic. As I
discussed in my recent series on magic (specifically in reference to Combat Mages, Auxiliary Mages, and Multi-Purpose Will Mages), most casters are only active for a few
rounds (and only half of the armies in the LOTR and Hobbit collections innately have access to magical powers that can target enemy models) so depending on this
strategy isn’t a given for the army you’re using (unless you ally someone into your list). Still, if you have access to
an unlimited caster, you can cripple enemy heroes very, VERY easily.
Finally, an essential part of the toolkit is to have a
beat-stick hero around (one you might be able to use the Head-on approach with)
so you can pummel any hero that survives your arrow and magical barrages. While
I’m not a big fan of the Head-on approach as a default, it is a handy feature –
especially if you can use other means to get an enemy hero to spend Might
points or Fate points earlier in the battle. Since many power heroes begin with
“3s in all the right places,” getting those reduced before the brawl happens is
pretty useful.
To show you what this might look like, let’s look at the two
armies we looked at previously and change the lists a little . . .
Case Study: Theoden
and Eomer vs. Thrydan and Ugluk
To show how this might work, let’s change the armies in the
example a little bit:
ROHAN
|
ISENGARD
|
Theoden,
King of Rohan (Armored Horse, Heavy Armor, Shield)
|
Saruman
|
Eomer,
Marshal of the Riddermark (Armored Horse, Throwing
Spears, Shield)
|
Grima Wormtongue
|
Gamling,
Captain of Rohan (Horse, Royal Standard of Rohan)
|
Lurtz (Shield)
|
12 Rohan Royal Guards (Horse)
|
Vrasku
|
4 Rohan Royal Guards (Horse, Throwing
Spears)
|
1 Uruk-Hai
Scout
|
1 Rohan Royal Guard (Horse, Throwing
Spears, Banner)
|
12 Uruk-Hai
Scouts (Shield)
|
5 Riders of
Rohan
|
9 Uruk-Hai
Scouts (Uruk-Hai Bow)
|
11 Uruk-Hai Warriors (Pike)
|
|
3 Uruk-Hai
Warriors (Crossbow)
|
While the numbers have changed some (25 vs. 40), the Rohan
force has undergone far fewer changes than the Isengard army has. While we
could have added more Riders of Rohan, we’ve decided to just add a pocket of
bows to this list and give Eomer some throwing spears with the points we saved.
The list has 6 sets of throwing spears and 5 bows, which gives almost half of
the army the ability to shoot (which isn’t bad). Since the normal Rohan list
doesn’t have any magic options, we’ve left that out (though you can get magic
historically by allying in Gandalf the White from Minas Tirith or Galadriel/Celeborn/a
Galadhrim Stormcaller from Lothlorien).
 |
| Eomer with throwing spears is quite adept at fighting asymmetrically - though Saruman definitely does it better. |
With only one Isengard hero having Heroic Strike, it
would be tempting to count on Theoden/Eomer to Strike past the F5 of Lurtz/Vrasku/Saruman, but closing on these heroes is going to prove more problematic because
the chances that the horse of the Rohirrim are alive by the time the charge
occurs is much lower (due in part to the archery of the Uruks and because of the auto-dismount that occurs when you use Sorcerous Blast). In addition, if the Rohan units choose to shoot at the
Isengard models instead of engaging head-on, Grima will catch up to the Riders,
making late-game Heroic Moves much more expensive to pull off (and impossible
once a hero runs out of Might EVEN with the Royal Standard of Rohan nearby).
Add to this the presence of Saruman: while Heroic Strike is
basically non-existent in this list, Saruman’s Immobilize/Command spells can
keep heroes from calling Heroic Strikes, making them much more vulnerable to
attacks from the Isengard units (especially Lurtz). With 18” of range on this
and the ability to cast both spells reliably on his free die alone, Saruman poses a real
threat to the heroes of Rohan (especially Gamling – and Theoden if Grima is nearby).
Eomer has his work cut out for him, but even he is unlikely to weather the
barrage of long-range spells from Saruman for long. For more information on how to run Saruman in an Isengard list, read my in-depth review of him here.
When all of the Will of the Rohan heroes is spent, Sorcerous Blast
becomes a nightmare – though it can be cast against normal warriors who can be
flung into the heroes as well. By knocking the targets prone, the horses they
sit astride disappear (leaving their riders vulnerable for a turn and much
slower on later turns). While Rohan Royal Guards are a threat when mounted and
on the charge, take away their mounts (and claim priority on the right turn
with the Palantir), and you’ll see the noble riders of Theoden fall to pieces.
Fighting asymmetrically is hard to do with some factions
(like Goblin-town), but most factions can get some kind of
shooting/magic/beatstick combo that provide their general with a toolkit of
options to take down opposing heroes. When you’re in a pickle and you don’t see
any options in your toolkit that can deal with what your opponent has brought,
there’s always one last option . . .
Approach #3:
Avoidance (or the “Stay Away” Principle)
The Green Dragon podcast refers to this principle when
dealing with Shades (who can spend Will to create a 6” radius of -1 penalties
to enemy models trying to win duels). From experience, Shades are really nasty
to fight, but their 6” movement and 6” bubble mean that their ability to affect
the battlefield is predictable and limited. Other heroes, like the Dark Lord
Sauron or the Balrog, are limited to 6” movement but have other means of
getting extra worth (Chill Soul/Compel or the Fiery Lash for example). In these cases,
the radius of their influence grows, but can still be predicted.
The “Stay Away” principle is simple:
Don’t let anyone get inside the radius of the
hero you can’t beat.
While a Shade could spell certain doom for your heroes (not
to mention warriors), keeping 12” of distance can be done in many scenarios –
and even scenarios that require you to claim certain objectives only require
you to be on/near the objectives at the end of the game, not at the beginning
or middle. As a result, playing keep-away is a useful strategy to deny your
opponent the use of an important piece for the first chunk of the game.
Now some heroes are harder to keep away from than others –
Saruman’s 18” Command spell is particularly nasty against mounted heroes (as
the hero will be moved 5” or more by Saruman and the target can be placed in the path of friendly units who can shoot him or charge into him and slay him), but in general, enemy heroes can be predictable in where they’ll move
(and if you can force them to abandon their guards and come at you head-on
without support, you may get lucky against them later).
A parallel strategy to this involves “Suicide Bob,” a common
tactic that used to be employed in our gaming group against Cave Trolls before
the monstrous Brutal Power Attacks were introduced: using a single model to tie
down an important model so that it can only kill one model in the round (without calling a Heroic Combat). While
I don’t recommend this against units that can call lots of Heroic Combats (like
the Balrog - though if you're an Army of Evil, you can shoot at the hero and hope you wound your own model who tied him down "by accident"), using it to limit an enemy hero and deny them their full killing potential is
great. This strategy is also best employed when one unit (or a few) charges
into an enemy and the rest of your force moves away, as it prevents Heroic Combats from getting
extra kills.
The Core Principle:
What Do You Actually Have To Do?
All three of these strategies (Head-On, Asymmetry, and
Avoidance) rely on a common principle: what do I you actually have to do to win
the game? In some missions, your opponent’s power heroes will be focused on
clearing objectives. For these situations, avoidance works
well – let the hero have the objective and just stay out of reach (and if the
hero leaves an objective, float back to it). Some scenarios, however, encourage
enemy power heroes (especially army leaders) to kill as many models as they can
(dealing as many Wounds as possible, really). When this happens, asymmetric tactics work well (though you can default to
avoidance as well).
In other scenarios, your opponent’s power heroes will be
focused on killing your models (to break you and clear out your banners). When
this happens, avoidance isn’t a bad option, but either the head-on approach or the asymmetric approach works well too – since the strategy of the enemy heroes is the same as the
enemy warriors, it doesn’t really matter what you do.
I should mention one last thing: there are some heroes
(especially ones with ranged weapons or mounts) that can be very difficult to
restrain with these approaches. If you wait to think about this until you’re
committed to a list and playing the game, you may not have any of these options
available to you (not bringing asymmetric tools or all-mounted troops when
fighting Azog on the White Warg won’t give you any options). As a result, think
about what your toolkit needs before the game starts (all strategy begins long
before a game is actually played).
In our next post, we’ll close out our last element in our series on list
building and focus on ways you can augment your own heroes. Restraining the
other player’s heroes is important, but being able to augment your own (whether
it’s with additional protection or additional damage output) is a worthwhile
endeavor. We’ll be covering all sorts of topics in it – until then, happy
hobbying!
Another great post, thanks.
ReplyDeleteGlad you're enjoying it!
DeleteVery nice. The intersection of list-building and actual in-combat performance is a fascinating one. A few additional thoughts:
ReplyDelete1. While I am willing to concede that Dain isn't necessarily a "must-have" in an Erebor Reclaimed list, I do think he's a must-have in an Iron Hills list. Setting aside the fact that he's one of just two models who can Strike (Murin being the other), the buffs he provides to your troops (12" Fearless bubble) and general pressure he puts on your enemy (S5 with Burly, mounted, on a tough mount) means enemy heroes have to at least think about where he is at all times. Plus that Master of Battle 4+ (in a pure/Green force) can be a life-saver to help you get to the late game with some extra Might.
2. In addition to army list choices, another important consideration in the type of tactic you choose can be the mission objectives. Avoidance is a great tactic if your scenario is something like Contest of Champions (trying to deny your opponent's leader access to kills) or even a mission with far-flung objectives to capture (Domination); it's less ideal if the enemy's big hero is holding the central objective in Hold Ground, or is running away with the prize. With the new way tournament scenarios are being packaged in the matched play guide, I think there will be even more rewards for playing mixed-arms flexible forces.
3. One last time-tested approach to dealing with big heroes is the "feeder" approach. It's similar to the halo/stay-away approach in that you refuse to engage a big hero with lots of targets for them to fight, but you still tie them up by "feeding" them a single (hopefully expendable) model. It's not a great fit for either the Rohan or Isengard lists you highlighted, but any sort of swarm army (like Goblin Town, or even the Assault on Helm's Deep LL from War in Rohan) that doesn't have much Heroic Strike can use it to blunt the damage that even the most powerful enemy heroes can do. It's not 100% fool-proof (Monster heroes can hurl or barge, and any hero with Might can Heroic Combat to get more movement), but so long as they're spending actual resources to do it, you probably take the trade-off (yes, please spend 1 Might to kill a 4 point Goblin, so you can move again). As long as you have some way of tackling the mission objectives without engaging the hero (which won't always be the case), it can be another option available to you.
I'd forgotten about the feeder approach - it certainly works against a good many heroes. Ideally, you feed a model that can shield and have a few more models scattered behind to make sure the hero gets only a little more movement and only two more kills (vs. charging on their horse into the flank/rear of your shieldwall).
DeleteFor some heroes, of course, this is a horrible plan - particularly those who get free Might for Heroic Combats (Aragorn, Elendil, Mega-Thorin, Helm Hammerhand from the LL; situationally Sam, Deorwine, DSB) or those who can get free Might by killing things (Bolg). Still, if you can't take Bolg or Elendil head-on and you don't have the tools to fight him asymmetrically, this might be a better approach than trying to avoid them.
Thank you for this series, it has been really helpful so far!! What about a fourth approach: using a cheap captain-level hero to neutralize a much stronger and more expensive one. I can think of two different ways of doing this. The first would be to use a hero with heroic strike and high defense to eat up the bigger hero's might. Sure the big hero could theoretically squash him in a single turn, but he'd likely need to spend a point of might on the heroic strike-off and probably another point to pull off the kill. If the captain survives, then that's a third point of might the big hero needs to spend to strike, and now he's neutered. The second option would be to run a captain-level hero with heroic defense. This could potentially tie up the big hero for four turns or longer, but in the end the big man emerges with all of his might intact. I'm sure there are situations in which one approach is better than the other and vice-versa. What do you think?
ReplyDeleteOh wow I just read part 5 and you go over most of this stuff there...
DeleteBoth are great ideas, especially if you can get them on the cheap. While you usually take Striking heroes to kill things, tying up a mega-hero for a bit by striking can be worth it if it allows you to press your advantage elsewhere.
DeleteIf you’re good at peeling off combats, a Heroic Defense Hero can be a major obstacle. Minas Tirith, Rohan, and (ironically) Moria have a surprising number of cheap options, while Gorulf Ironskin in Isengard/Dunland seems tailor-made to play this role (if you can keep him safe from shooting). They will eventually go down (especially if they are trapped), so keeping them in one-on-one combats with enemy heroes (instead of being swarmed by a hero and troops) is really important.
Another good option for tying up heroes is a generic "bunker Captain" who is D7 (wounded by most heroes on 6s unless they two-hand or spend Might) and you just shield every turn - even if you have a lower FV, you may be rolling more dice than the opposing hero and if you lose, you're still hard to wound. While this doesn't work against Rend/Anduril/Azog/Burlies, it works well against other heroes (Boromir on foot, Glorfindel on foot, Thorin on foot - and can work against these heroes when they're mounted).
Delete